
Display Your Business Phone Number & Availability in the Customer Portal
Make it easy for customers to contact you by displaying a click-to-call business phone number and a short availability message (e.g., business hours / working days / support times) at the top of your OctopusPro Customer Portal. This reduces missed calls, improves customer experience, and helps customers reach you quickly when they need help with bookings, quotes, invoices, or urgent questions.
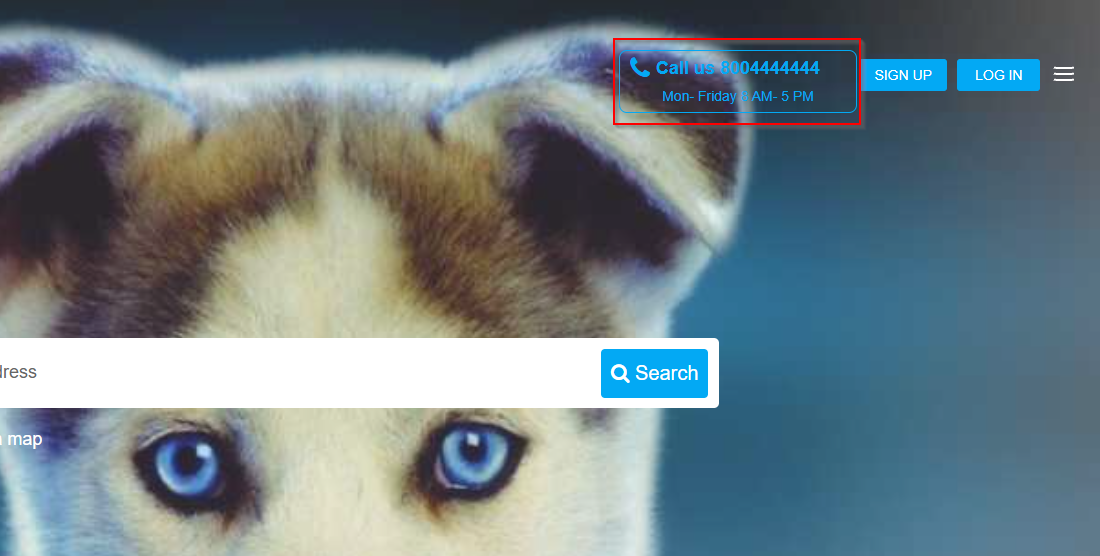
What customers will see
When enabled, customers will see a Call us section at the top of the customer portal that includes:
- Your business phone number (pulled from your Primary phone number in Business Details)
- Your availability message (the text you enter under the toggle — typically business hours, working days, and time windows)
Before you start
- Make sure your Customer Portal is enabled and accessible to customers.
- Have your Primary business phone number ready.
- Decide what availability message you want shown (hours, days, time zone, after-hours notes, etc.).
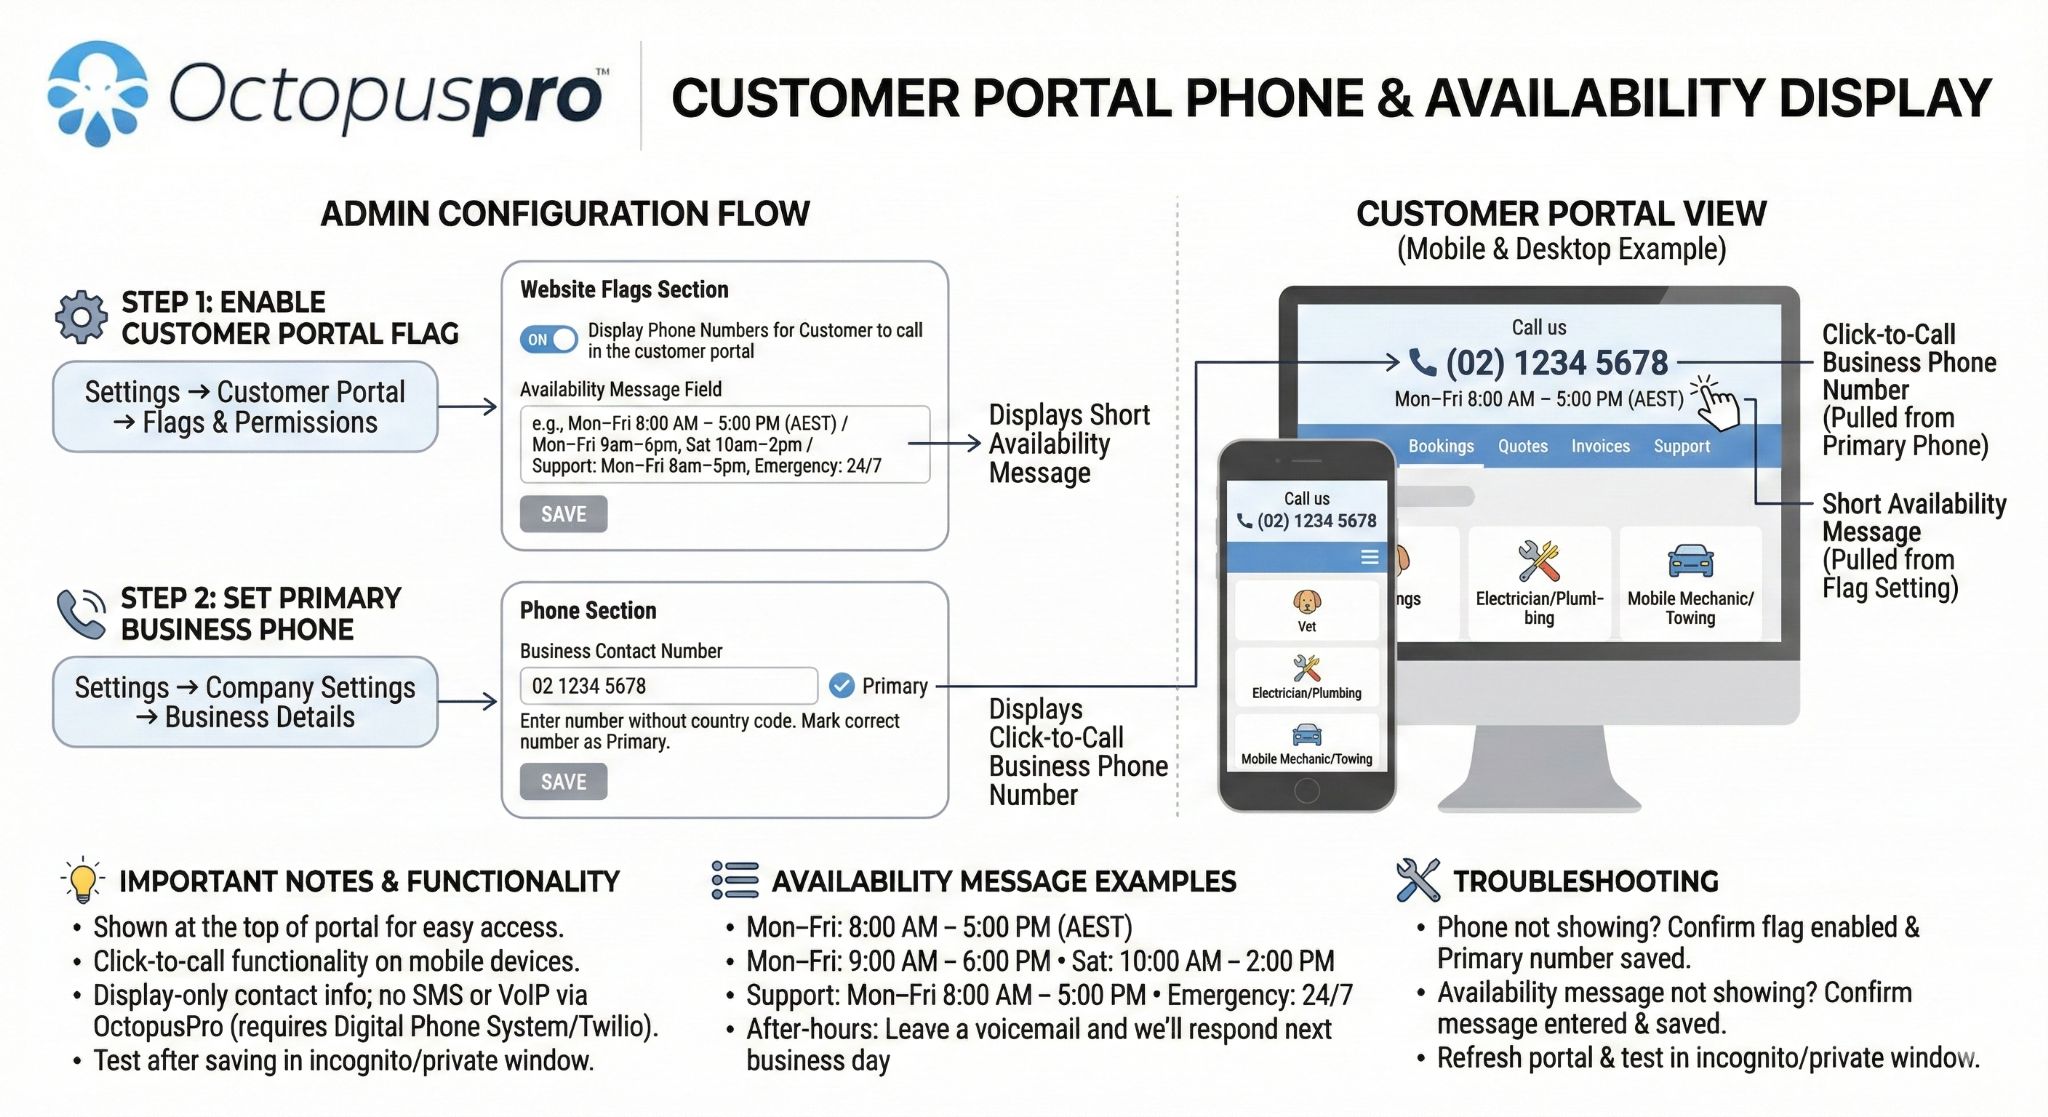
How to enable the phone number display
Step 1: Enable the Customer Portal flag
- Go to Settings → Customer Portal → Flags & Permissions.
- In the Website Flags section, enable: “Display Phone Numbers for Customer to call in the customer portal”.
- In the field under the toggle, enter your availability message (this is what appears under the number — e.g., business hours / working days / time slots).
- Click Save.

Availability message examples (copy/paste friendly)
This field is display-only. Keep it short and clear, and include a time zone if needed.
- Mon–Fri: 8:00 AM – 5:00 PM (AEST)
- Mon–Fri: 9:00 AM – 6:00 PM • Sat: 10:00 AM – 2:00 PM
- Support: Mon–Fri 8:00 AM – 5:00 PM • Emergency: 24/7
- After-hours: Leave a voicemail and we’ll respond next business day
Step 2: Set the phone number shown (Primary business phone)
- Go to Settings → Company Settings → Business Details.
- In the Phone section, enter/update your business contact number.
- Enter the number without the country code (as shown in the Business Details screen). If you have multiple numbers, make sure the correct one is marked as Primary.
- Click Save.

How it works (important notes)
- Shown at the top of the portal: Customers see your number and availability message when they access the customer portal.
- Click-to-call: On mobile devices, customers can usually tap the number to call.
- This is for displaying contact info only: If you want to send/receive SMS or place VoIP calls through OctopusPro, you’ll need to configure the Digital Phone System (Twilio).
- Test it: After saving, open your customer portal in an incognito/private window to confirm it appears as expected.
Troubleshooting
The phone number isn’t showing
- Confirm the flag is enabled in Settings → Customer Portal → Flags & Permissions.
- Confirm a Primary phone number is saved in Settings → Company Settings → Business Details.
- Refresh the portal page and test in a private/incognito window.
The availability message isn’t showing
- Make sure you entered the message in the field under the toggle and clicked Save.
- Keep formatting simple (short lines, clear days/hours, include time zone if needed).
Related guides
- Customer Portal Flags & Permissions
- Business Details Settings
- Set Up Digital Phone System (Twilio)
- Enable Online Bookings Through Your Website (Customer Portal Setup)
To stay updated, please subscribe to our YouTube channel.