Use Colour-Coded Labels to Track Invoices
In the intricate realm of financial management, clarity, and systematization are essential. OctopusPro’s state-of-the-art labeling system is crafted to optimize the handling of your invoices. By facilitating specific labels to invoices, you can elevate categorization, filtration, and tracking capabilities. This guide will walk you through the ins and outs of adding, managing, and deleting labels in the OctopusPro’s invoice interface.
Creating a New Label from Your Settings
Labels aren’t exclusive to inquiries. They can also be applied to bookings, quotes, customers, and especially invoices. Here’s how you can craft a new label from your settings:
- Navigate to Settings > General Settings > Labels.
- Click on the “New label” button.
- In the popup, type in the label title you desire.
- Assign a color to the label by selecting the color icon. Choose from preset colors or access advanced options for more variety.
- Click “Save”, A confirmation popup will be displayed.
Editing a Label
Need to tweak an existing label? Here’s how you do it:
- Choose the label you wish to modify or use the search function.
- Either click on the label “Name” or select “Edit”.
- In the popup, modify the label title or switch the label color.
- Click “Save”.
Assigning a Label from the Invoice Page
Boost your invoice management with labels. Here’s how:
- Go to Invoices > All Invoices.
- Choose the invoice you wish to label, then hit “Actions” button followed by “Add label”.
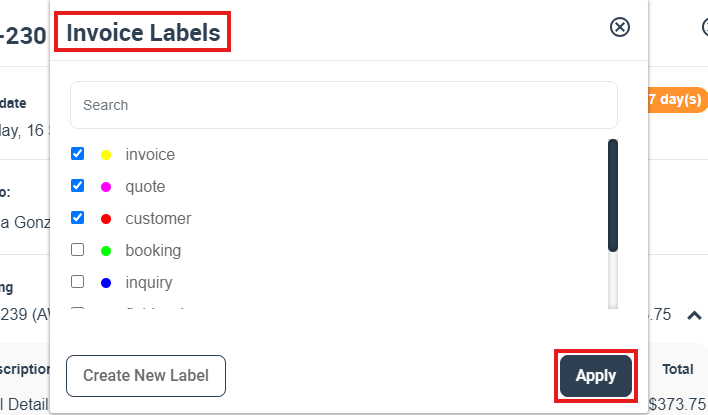
- In the appearing popup, you’ll see all your labels. Browse or use the search tool to find the label you want.
- Can’t find the right label? Click on “Create new label” to design one.
- Provide a title and a color for your new label.
- Click “Save”.
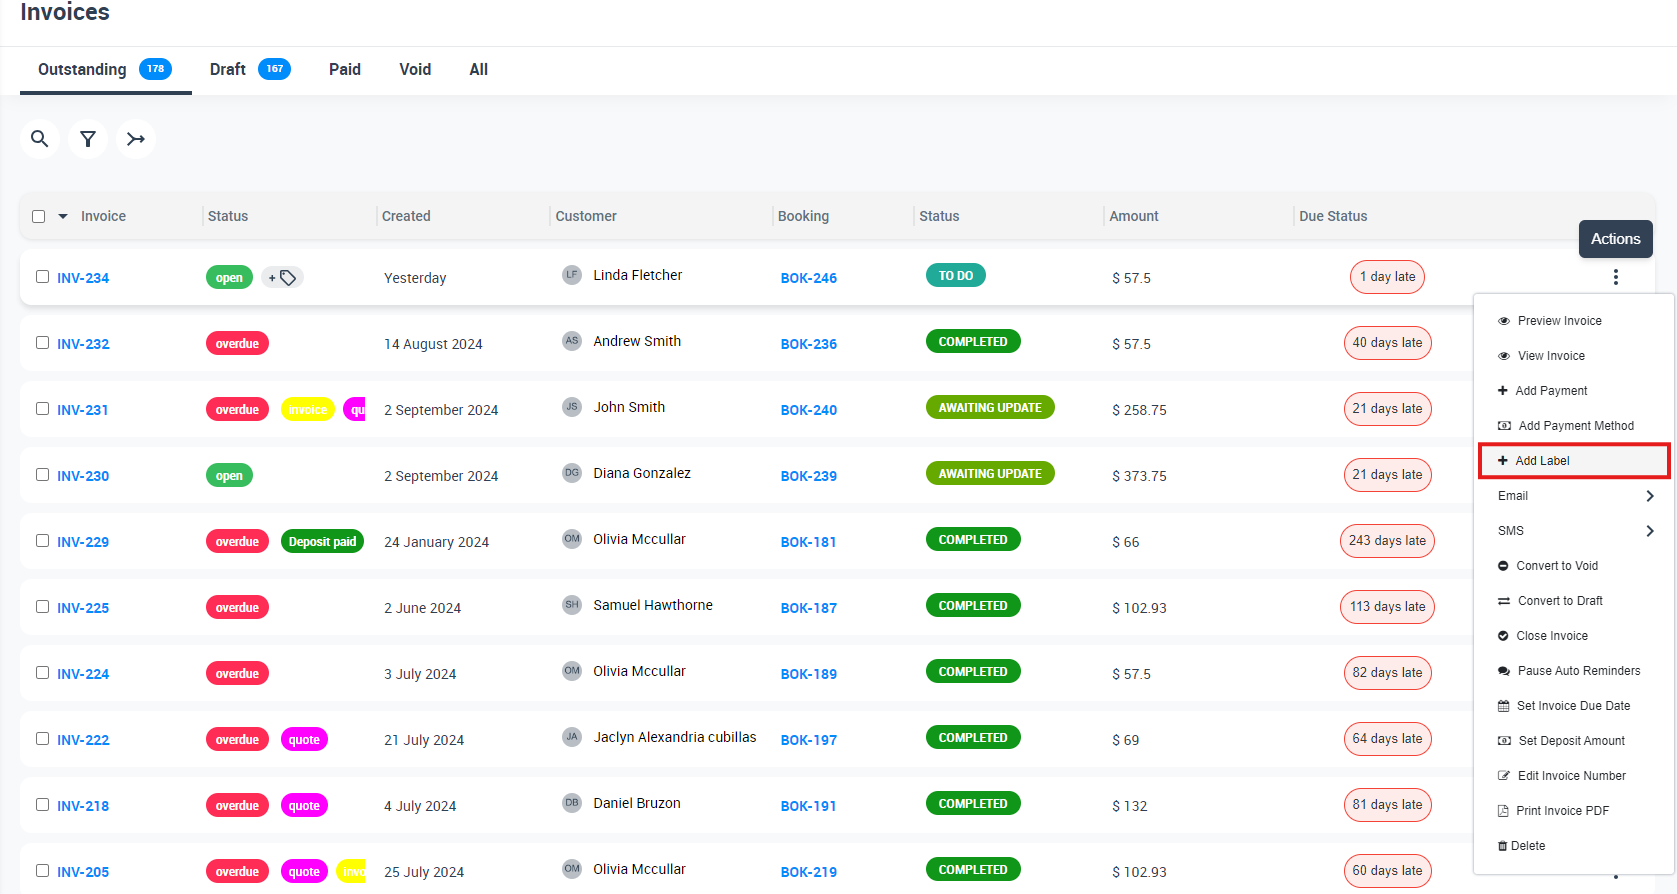
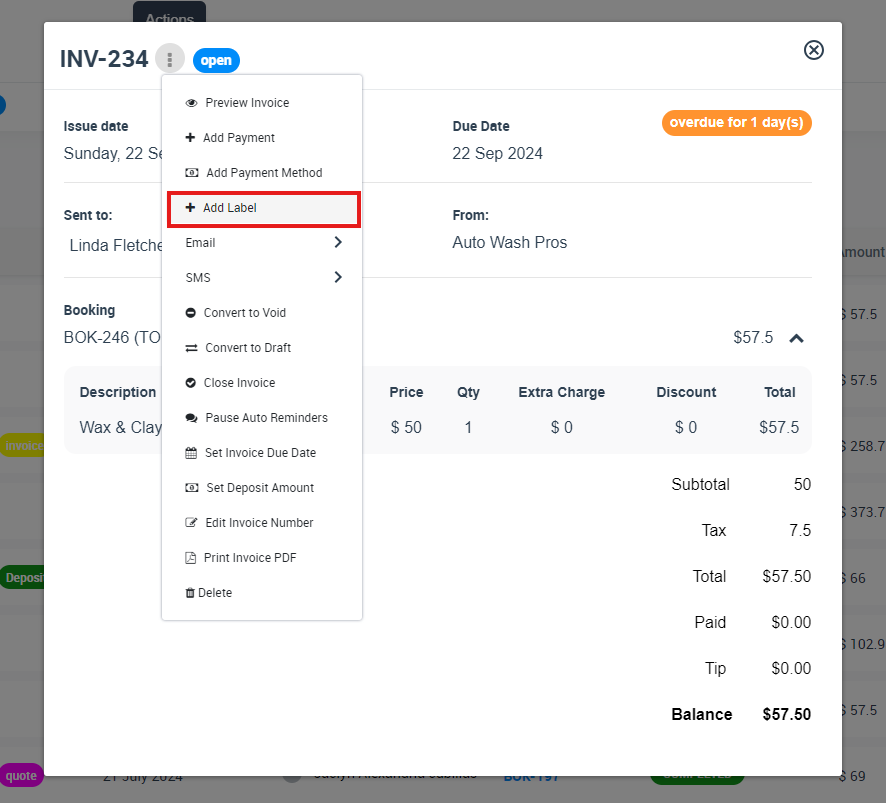
Also, when examining an invoice, you can swiftly add a label:
- Open the target invoice.
- Click on the “Actions” button then “Add label”.
- Follow the steps mentioned earlier to choose or create a label.
- Save your changes.
Applying Multiple Labels to an Invoice
An invoice can have several relevant labels. To apply multiple labels:
- Access the invoice in question.
- Click on the “Actions” button and opt for “Add label”.
- Choose the desired labels from the list.
- Click “Apply”.
Using Nested Labels for Invoices
Hierarchical labeling can be pivotal for intricate invoice management. OctopusPro provides nested labels for this purpose. Instructions are identical to the nested labeling in inquiries.
Filtering Invoices by Labels
Seeking specific invoices becomes a breeze with label filters:
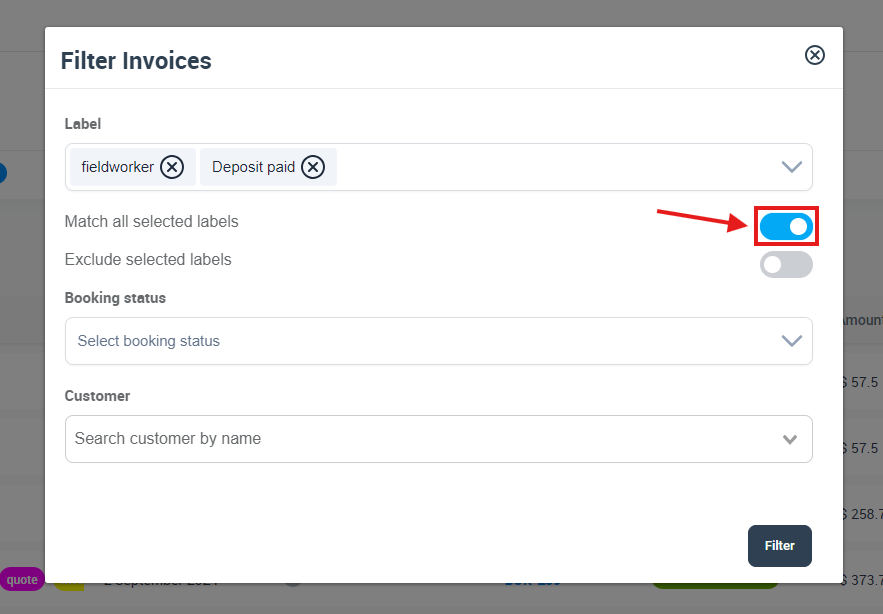
- Go to Invoices > All Invoices and hit the ‘Filter’ button.

2. In the filter popup, under labels, select your preferred labels.
3. By default, OctopusPro uses ‘OR’ logic. If you want ‘AND’ logic, activate the “Match All Selected Labels” switch.
4. Live count updates show real-time results.
5. To clear, deselect labels and toggle the “Match All Selected Labels” switch to ‘OFF’.
Excluding Labels from Invoice View
To focus on particular invoices, exclude certain labels:
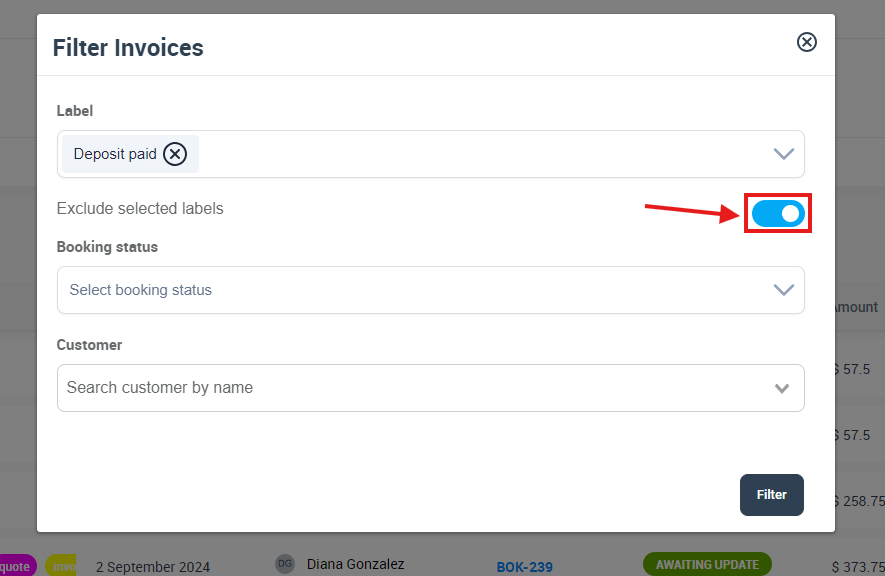
- In Invoices > All Invoices, tap the ‘Filter’ button.
- In the popup, choose the labels you want to omit.
- Toggle the “Exclude Selected Labels” switch to ‘ON’.
- Adjustments are reflected in the live count.
- To revert, deselect the labels and toggle ‘off’ the “Exclude Selected Labels”.
Refining Invoice Label Filtering
Utilize AND/OR logic to filter invoices. The procedure is the same as inquiries.
De-assigning Labels from an Invoice
To remove a label:
- In the invoice view, deselect the checked label.
- Click “apply”.
Deleting a Label
If a label becomes redundant:
- Access Settings > General Settings > Labels.
- Check the label you wish to remove.
- Click “Delete”. For deleting all labels, select all, then hit “Delete”.
FAQs
- Can’t find the label I made. What do I do? Labels are alphabetically arranged. Utilize the search bar.
- Is label deletion possible? Absolutely. Go to Settings > General Settings > Labels, select the label, and hit “Delete”.
- Can multiple invoices be labeled simultaneously? Definitely. Access Invoices > All Invoices, choose the target invoices, tap “Actions” and then “Add label”.
Alternatively,
- Go to Invoices
- Select the type of invoice you wish to view or select All Invoices
- On the invoice overview click the Actions button
- Select Label
- Select an existing label or click Add label
- Click Apply


