
Fieldworker App: Invoicing, Payments, Deposits & Refunds
OctopusPro’s Fieldworker App helps your team manage the full on-site billing workflow—so you can finish jobs, confirm totals, collect money, and keep accurate financial records without paperwork.

From the Fieldworker App, your team can (based on permissions):
- View invoices and check statuses (e.g., sent/viewed/paid) and outstanding balances.
- Record payments (full, partial, or deposits) using the payment methods your business enables (e.g., cash, card, bank transfer, other).
- Add tips/gratuities during payment collection (if enabled by your company).
- Email or SMS invoices to customers instantly.
- Capture a customer signature for job sign-off / proof of completion.
- Request refunds (full or partial) and submit them for office approval (if your workflow requires it).
On this page
- Key concepts (invoice vs booking billing)
- Before you start (permissions & access)
- View invoices in the Fieldworker App
- Open billing details from a booking
- Record payments (full, partial, deposits + tips)
- Email or SMS invoices to customers
- Capture customer signature (job sign-off)
- Refunds (view, request, submit for approval)
- Deposits (how they work)
- Best practices
- Troubleshooting
- Related user guide articles
Key concepts (invoice vs booking billing)
- Invoice: the financial document that records what was charged, what was paid, and what is still owing.
- Booking Billing tab: the in-app view where fieldworkers can review line items, totals, balance due, then record payments, send invoices, and (if allowed) request refunds.
- Payment: any amount recorded against the invoice (can be full, partial, or a deposit).
- Refund: money returned (or recorded as returned) against a previous payment—can be full or partial.
Before you start (permissions & access)
Access to invoices, payments, and refunds in the Fieldworker App is controlled by role permissions. Many businesses allow fieldworkers to record payments, but require office/admin approval for refunds to maintain financial control.
- If you can’t see “Invoices”, “Payment”, or “Add Refund”, it usually means your role permissions or company settings restrict access.
- Refund approvals: if your workflow is approval-based, the fieldworker submits a refund request and the office reviews/approves it before processing.
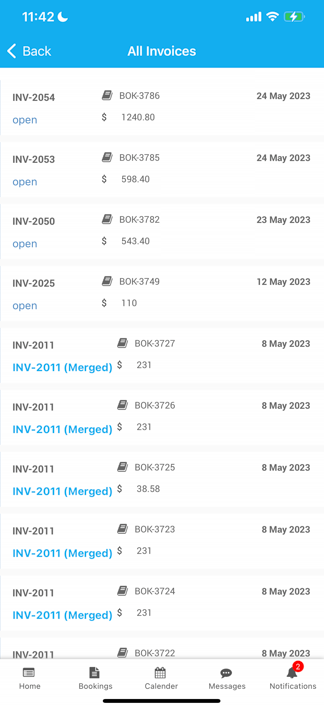
View invoices in the Fieldworker App
Use this when you need to quickly check invoice status, totals, and balances while on the go.
- Open the Main Menu.
- Tap Invoices.
- Browse the list and tap any invoice to open its details (what you see depends on your permissions).
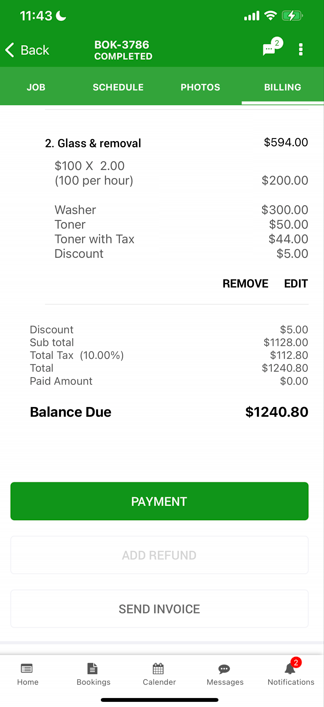
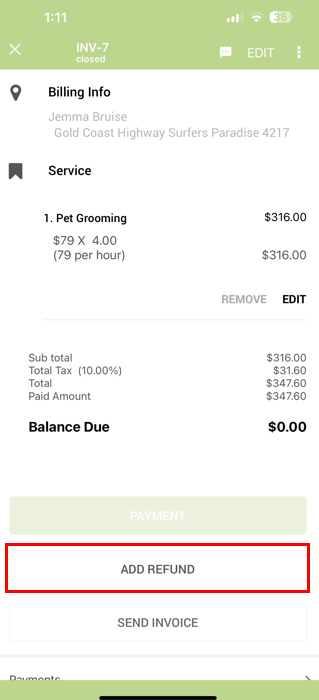
Open billing details from a booking
Most on-site payment and refund actions happen inside the booking’s Billing tab. This is where you can review invoice line items, totals, paid amount, and the remaining Balance Due.
- Open the relevant Booking.
- Tap the Billing tab.
- Review line items and totals, then use the available actions (Payment, Add Refund, Send Invoice).
Record payments (full, partial, deposits + tips)
Fieldworkers can record payments against the invoice—whether it’s the full amount, a partial payment, or a deposit. Recording payments in the app keeps your invoice balance accurate and improves reconciliation for the office.
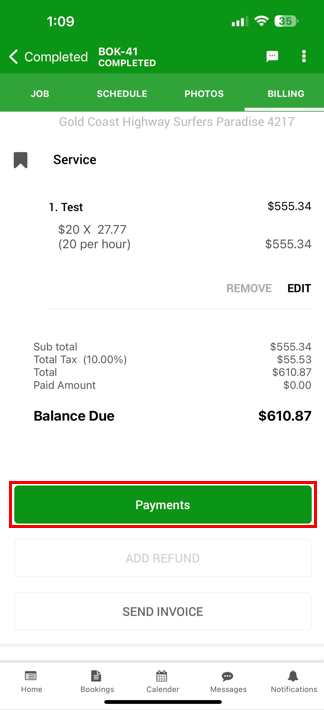
Record a payment from a booking
- Open the booking and go to the Billing tab.
- Scroll to the bottom and tap Payment / Payments.
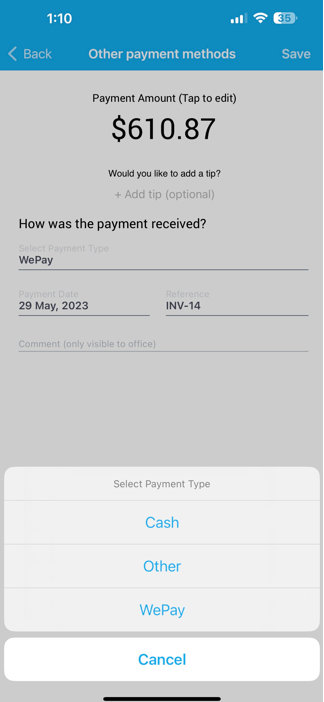
Confirm the payment details
- Payment amount: record the full balance, a partial amount, or a deposit amount.
- Payment type/method: choose the method your business enables (e.g., cash, card, bank transfer, other).
- Tip (optional): if tips are enabled, you can add a tip during payment collection.
- Reference & notes: add a transaction reference (receipt number, bank reference, gateway transaction ID) and any internal notes to support reconciliation.
About card payments & saved card details (if enabled)
- If your company has connected a payment gateway and enabled card payments, payments can be recorded consistently and securely.
- Some gateway setups also support saving a customer’s card details in a secure/tokenized form for future transactions (subject to your settings and permissions).
Email or SMS invoices to customers
Send invoices to customers instantly—useful when they need the invoice for approval, reimbursement, or to pay later.
- Open the booking and go to the Billing tab.
- Tap Send Invoice.
- Select Send via email or Send SMS (based on your setup).

Tip: If the customer didn’t receive it, verify the customer’s email/phone on the booking/customer record, ask them to check junk/spam (for email), then resend.
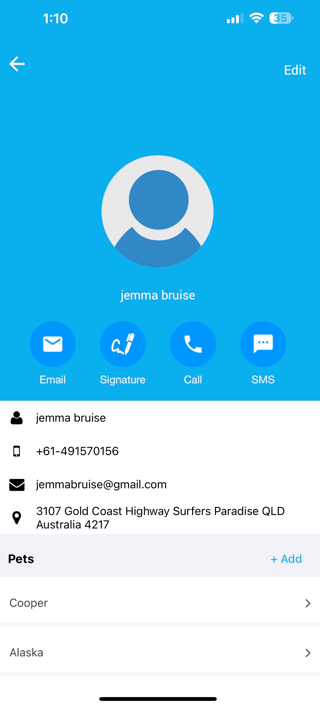
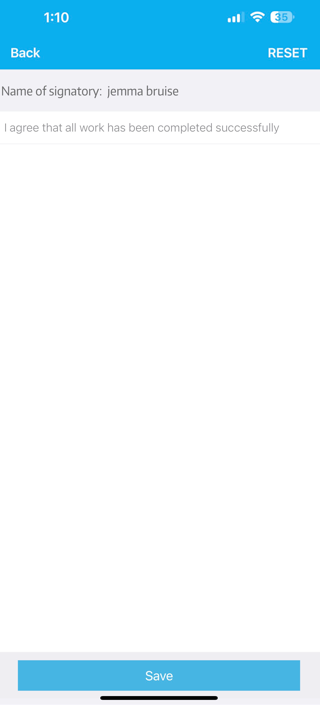
Capture customer signature (job sign-off)
Collect a digital signature as proof of completion/acceptance. This is helpful for compliance, dispute reduction, and confirming service delivery on-site.
- Open the booking.
- Tap the customer’s name to open customer details.
- Tap the Signature icon and hand the device to the customer.
- Tap Save to store the signature.
Refunds (view, request, submit for approval)
Refunds are typically controlled by your company’s financial policy. If enabled for your role, you can view refunds and submit refund requests (full or partial). Many businesses use an office approval workflow before processing refunds.
View refunds
- From the Main Menu, go to Invoices.
- Tap Refunds to view the refunds list (status may show as Pending, etc.).
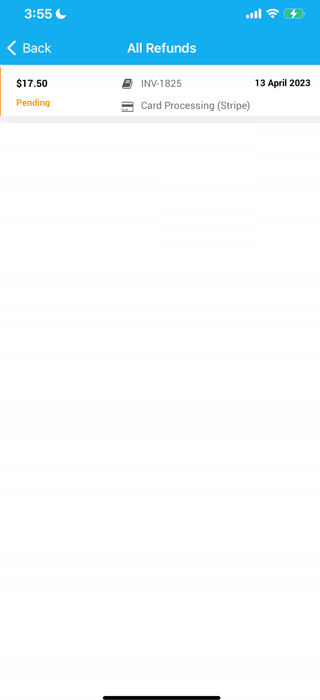
Open a refund for details
- Tap any refund to view details such as linked booking/invoice, refund amount, status, payment method, and reference.
- If your permissions allow, you may also see options to edit or cancel a refund request.

Request a refund from a booking
- Open the relevant Booking.
- Go to the Billing tab.
- Scroll down and tap Add Refund.
Enter refund details (accuracy matters)
- Refund amount: enter the full or partial refund amount.
- Refund type/method: choose how the money will be returned/recorded.
- Refund date: set the date of the refund transaction.
- Reference: add a transaction reference (gateway refund ID, bank reference, receipt number).
- Reason/notes: clearly explain the refund reason to speed up office review and improve reporting.
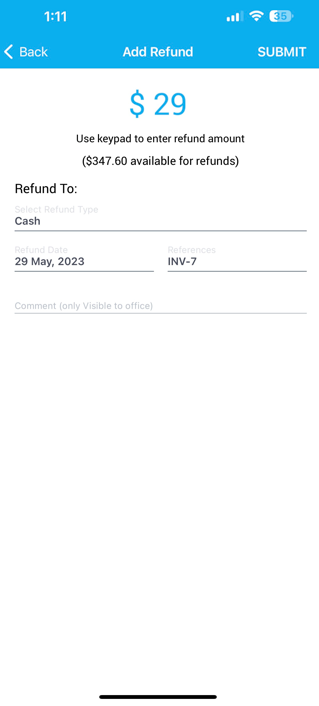
Submit for review/approval
- Tap Submit / Refund to send the refund request to the office for review (if approval is required).
- Once approved (based on your workflow), the refund can be processed and finalized according to your company policy.
Deposits (how they work)
A deposit is simply a partial payment recorded in advance (or before job completion). Deposits reduce the invoice balance due and help lock in bookings and cover upfront costs.
- Collecting a deposit: follow the same process as recording a payment—enter the deposit amount instead of the full balance.
- Returning a deposit: use the Add Refund workflow to record/submit the deposit return and include a clear reason and reference.

Best practices
- Always add a reference: include a receipt number, gateway transaction ID, or bank reference for clean reconciliation.
- Use clear refund reasons: e.g., “Duplicate payment”, “Job cancelled”, “Overcharge correction”, “Service not delivered”.
- Prefer recording payments immediately: it keeps invoice balances accurate and reduces end-of-day admin corrections.
- Capture signatures on completion: especially for high-value or dispute-prone jobs.
- Confirm customer contact details before sending invoices: email/SMS delivery depends on accurate customer information.
Troubleshooting
- I can’t see Invoices or Billing actions: your role permissions may restrict access. Ask your admin to review fieldworker permissions.
- “Add Refund” is missing/disabled: refunds are often permission-based and may require a prior recorded payment and/or office approval.
- Payment methods are missing: your company must enable payment types in system settings (and connect gateways if applicable).
- Customer didn’t receive the invoice: confirm customer email/phone, ask them to check spam/junk (email), then resend.
- Invoice balance looks wrong: confirm whether deposits/partial payments were recorded and whether any refunds exist against the invoice.
Related user guide articles
- Fieldworker Permissions & Access Control
- Invoice, Billing, Payment, and Refund Management (Overview)
- How to View and Manage an Invoice
- Send Invoices by Email or SMS
- Online & Offline Invoice Payments (Record Payments Against Bookings)
- Payment Methods Configuration (System-Wide)
- Service Payment Terms (Deposits, Payment Rules & Settings)
- Tips & Gratuities Management
- Refund Management & Approval Workflow
- Payment Tracking & Reconciliation
To stay updated, please subscribe to our YouTube channel.