
Custom Field Groups (Grouping Custom Fields)
Custom Field Groups let you organize custom fields into multiple steps in your Customer Portal and Branded App. Instead of showing customers a long, single-page form, you can split questions into a guided, multi-step booking flow—making it faster to complete, especially on mobile.
Important: Grouping only changes how fields appear to customers during online booking. Your admin dashboard and fieldworker app screens are not affected—admins and fieldworkers still see all fields together for quick review and data entry.

In this guide
- What are Custom Field Groups?
- Benefits
- When to use them (examples)
- How grouping works
- Create a Custom Field Group
- Edit a Custom Field Group
- Delete a Custom Field Group
- How it looks in the Portal/App, Admin, and Fieldworker app
- Best-practice tips
- Troubleshooting & FAQs
- Related guides
What are Custom Field Groups?
A Custom Field Group is a way to bundle multiple custom fields under one group label (step title), such as:
- Site Details
- Access Instructions
- Measurements
- Job Requirements
Each group becomes its own step during the customer booking flow, helping customers complete the form in smaller, more focused sections.
Benefits
- Higher completion rates: shorter steps feel easier than one long page.
- Better mobile experience: less scrolling and fewer missed fields.
- Clearer customer inputs: customers answer questions in context (grouped by topic).
- No disruption internally: admins and fieldworkers still see all fields together.
When to use Custom Field Groups (examples)
Custom Field Groups work best when your service has a long list of questions (typically 8+ custom fields) or when questions naturally fall into categories.
- Cleaning / Maintenance: “Property details” → “Access & parking” → “Special instructions”
- Trades / Installations: “Site measurements” → “Materials/options” → “Compliance & notes”
- Removals / Junk: “Items to remove” → “Stairs/lift access” → “Photos & pickup notes”
- Mobile services: “Address & access” → “Customer preferences” → “Before/after photos”
Tip: Only create groups if the form is long. Splitting into 2–3 themed steps usually delivers the best results.
How grouping works
- Customer Portal / Branded App: Each group becomes a separate step. Customers complete a group, tap Next, then move to the next group (or the final review page).
- Admin dashboard: All custom fields remain available together for fast data entry and review.
- Fieldworker app: Fieldworkers can still review all captured field values in one place while on-site.
Create a Custom Field Group
Before you start: Make sure the custom fields you want to group already exist and are used by the relevant service(s). If needed, see the related guides at the bottom of this page.
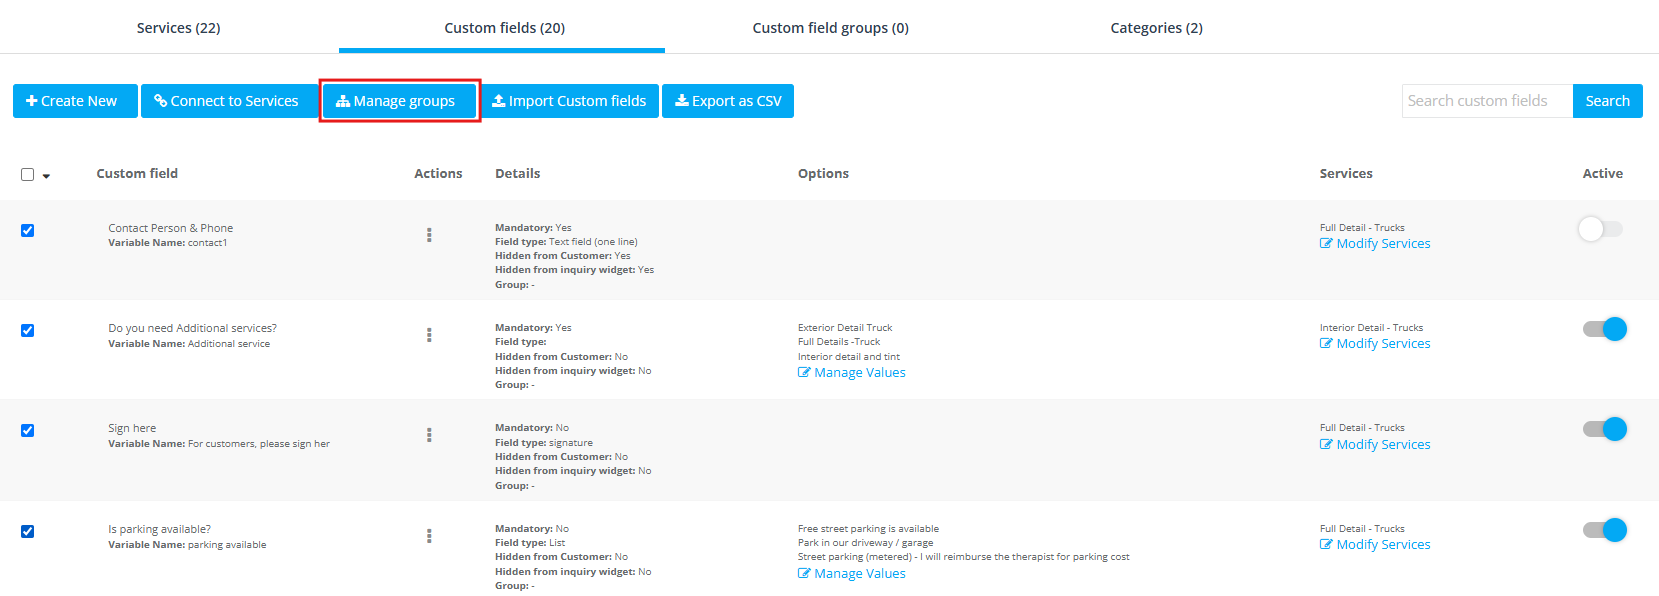
- Go to Settings → Service Settings → Custom Fields.
- Tick the custom fields you want to bundle into the same step.
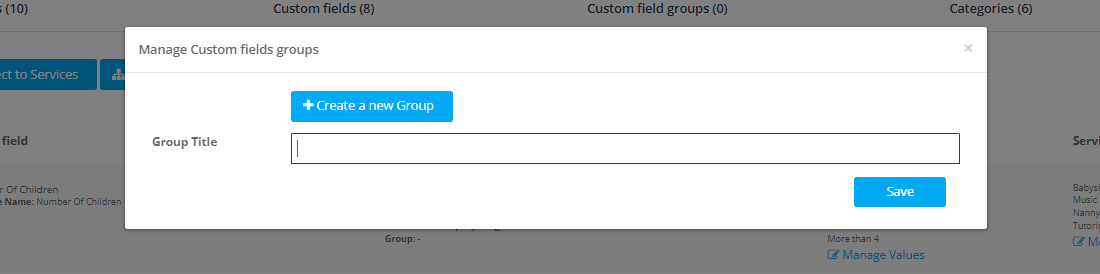
- Click Manage groups → Create a new Group.
- Complete the group form:
- Group label: the step title customers will see (e.g., “Floor details”).
- Helper text (optional): a short instruction line (e.g., “Answer a few quick questions so we can prepare”).
- Custom Fields: confirm the fields included in this group.
- Click Save.
Result: A new step is inserted into the online booking flow wherever those grouped fields appear for customers.
Edit a Custom Field Group
You can update a group’s label, helper text, and which fields are included at any time.
- Go to Settings → Service Settings → Services.
- Open the Custom Field Groups tab.
- Click Edit beside the group (or open the group’s actions menu and select Edit).
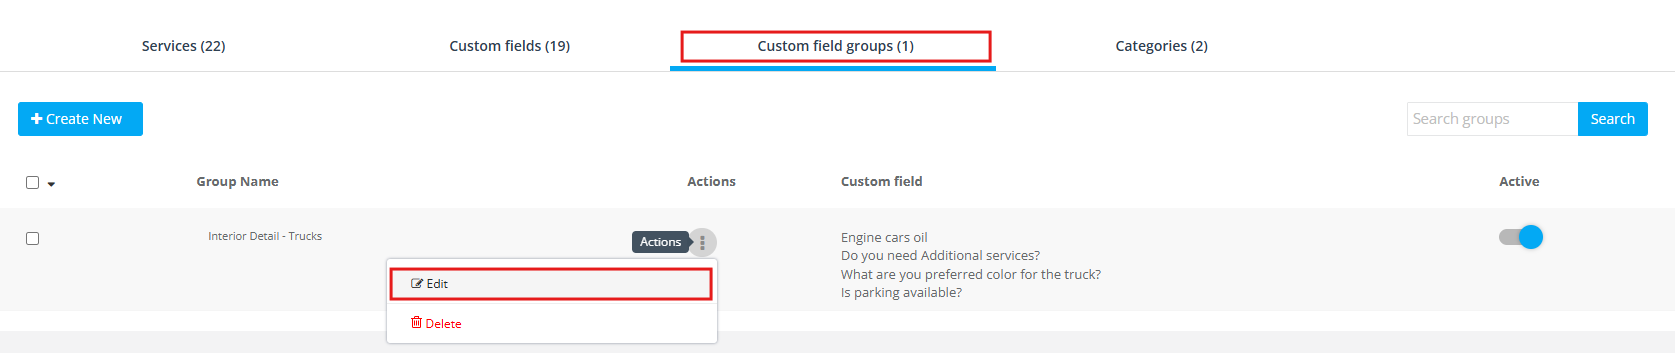
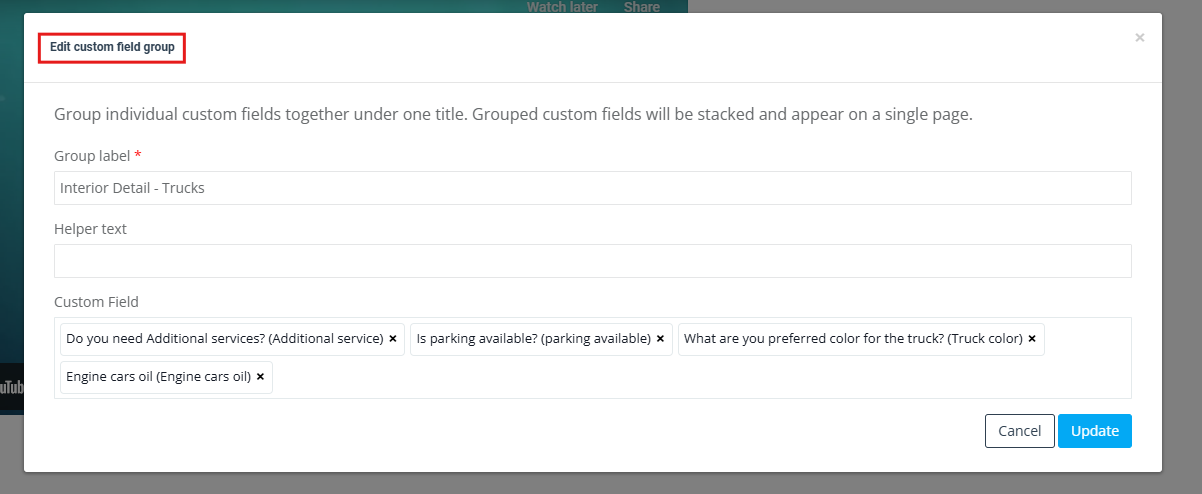
- Adjust the Group label, Helper text, and/or add/remove custom fields.
- Click Update to save.
Delete a Custom Field Group
If you no longer want customers to see grouped steps, you can delete the group.
- Deleting a group does not delete your custom fields. It only removes the grouping step from the customer booking flow.
- The fields can still be used normally (and can be regrouped later if needed).
To delete: Go to Settings → Service Settings → Services → Custom Field Groups, then open the group’s Actions menu and select Delete.
How it looks to each user
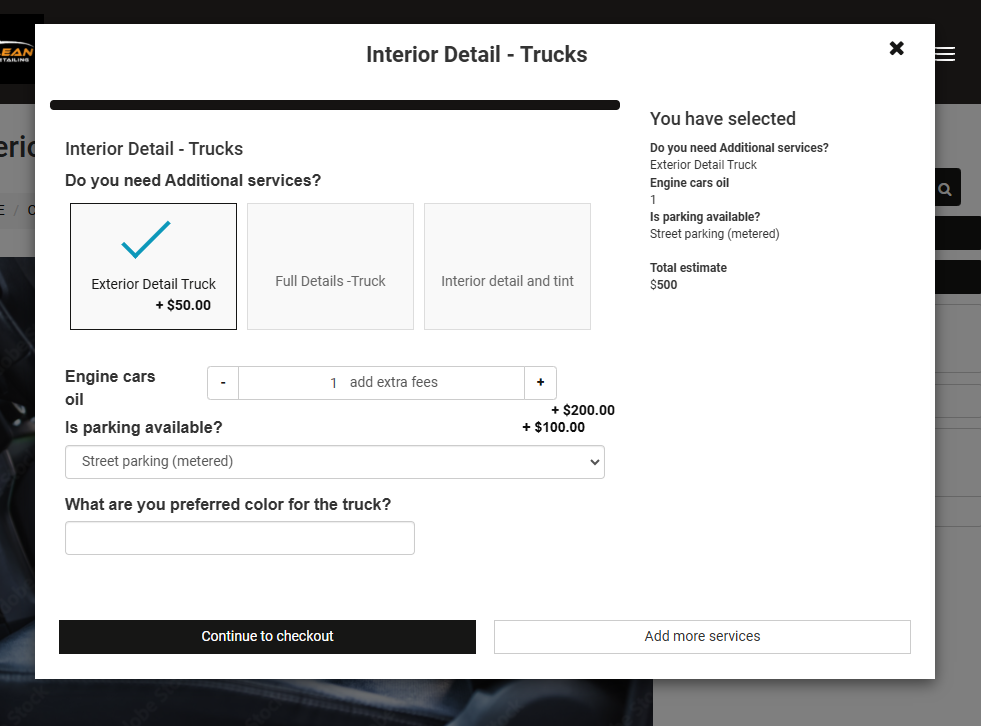
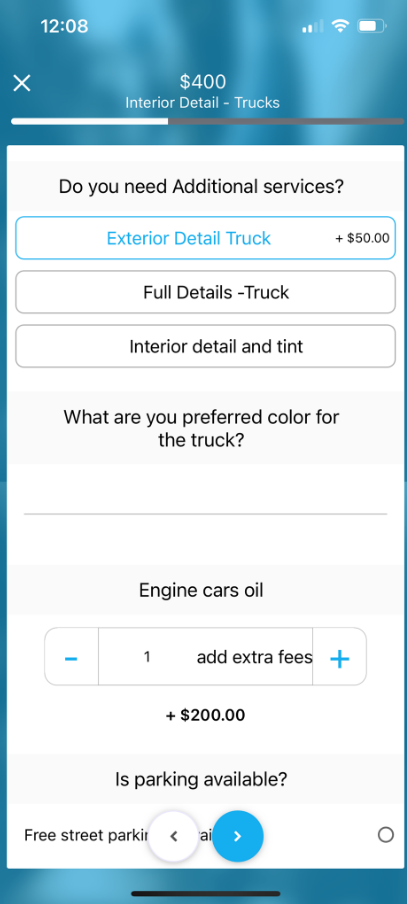
Customer Portal / Branded App
Customers see each group as a separate step with your Group label as the step title.
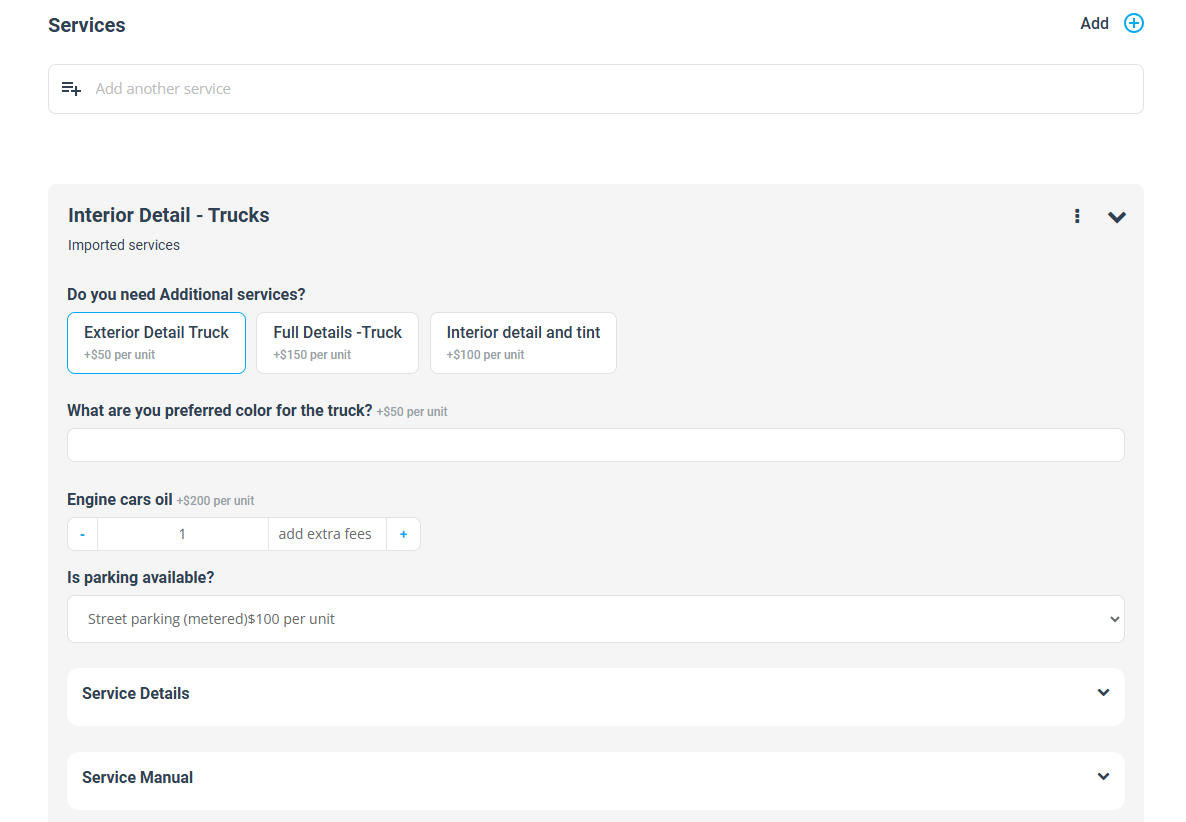
Admin dashboard
Admins still see all custom fields together when creating or editing a booking (grouping does not change the back-office view).
Fieldworker app
Fieldworkers also see field values in one place for quick review on-site.
Best-practice tips
- Keep steps thematic: group related questions together (e.g., Contact details, Site measurements, Access instructions).
- Limit to 3 steps max: too many steps can feel tedious.
- Use helper text: add a short instruction line to reduce confusion and incomplete submissions.
- Preview on mobile: confirm each step fits comfortably without unnecessary scrolling.
- Monitor results: if customer drop-off increases, merge or shorten groups to simplify the flow.
Troubleshooting & FAQs
My group isn’t showing in the Customer Portal/App
- Confirm the grouped custom fields are actually used for the service customers are booking.
- Check that the customer is booking via the correct channel (Customer Portal/Branded App) where grouping applies.
- If you recently changed groups, refresh and re-test the booking flow from a customer perspective.
Does grouping change pricing or time rules linked to custom fields?
No. Grouping only changes how questions are displayed to customers. Any pricing or duration rules you’ve configured for custom fields still apply.
How many groups should I create?
As a rule of thumb, keep it to 2–3 groups for most services. If you need more, consider reducing required fields and using conditional logic so customers only see follow-up questions when needed.
Related guides
- Custom Fields (overview): booking questions, lead capture, and CRM data
- Attach Custom Fields to Services (service-specific booking questions)
- Dependent Custom Fields (Conditional Logic): show follow-up questions only when needed
- Creating a New Service (service setup and configuration)
To stay updated, please subscribe to our YouTube channel.