
Inquiry Labels (Tags): Organize, Prioritize & Filter Leads

Inquiry Labels (also known as tags) help you categorize and track leads throughout your sales and follow-up process. By tagging inquiries with meaningful labels (e.g., “VIP”, “Quoted”, “Deposit Paid”, “Urgent”), your team can instantly identify lead priority, filter lists faster, and keep your workflow consistent—without relying on spreadsheets or manual notes.
Labels can be used across the platform (not just inquiries), including Bookings, Quotes, Invoices, and Customers, so you can keep a consistent tagging system across your entire operation.
What you can achieve with inquiry labels
- Segment and prioritize leads (hot/warm/cold, VIP, commercial, repeat customer).
- Improve follow-up execution by quickly finding leads that need action.
- Filter faster using multiple labels and AND/OR logic.
- Standardize team workflows with consistent “lead stages” and categories.
- Reduce admin time by eliminating manual tracking and messy notes.
Common label examples
- Lead stage: New Lead, Contacted, Quoted, Awaiting Customer, Won, Lost
- Priority: Urgent, High Priority, Low Priority
- Customer type: VIP, Commercial, Residential, Repeat Customer
- Payment: Deposit Paid, Payment Pending
- Internal routing: Needs Site Visit, Requires Approval, Callback Requested
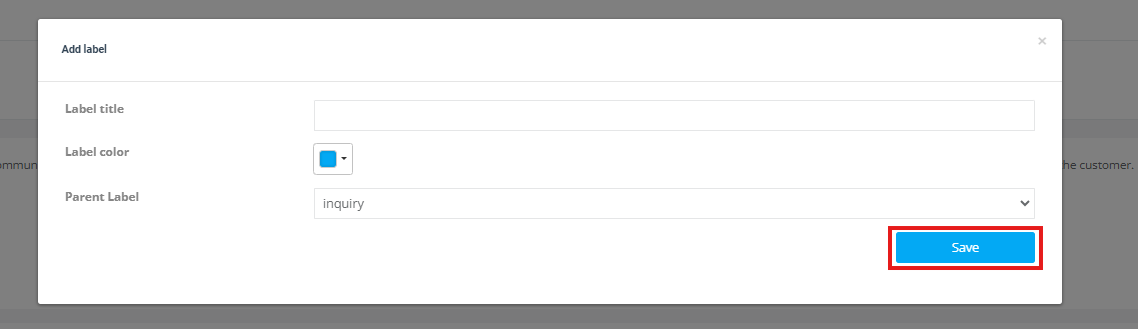
Create a new label from your settings
Create your label library first, so your team can apply consistent tags to inquiries and other records.
- Go to Settings > General Settings > Labels.
- Click New label.
- Enter the Label title (name).
- Select a Label color (choose from saved colors or use the advanced picker).
- Click Save.
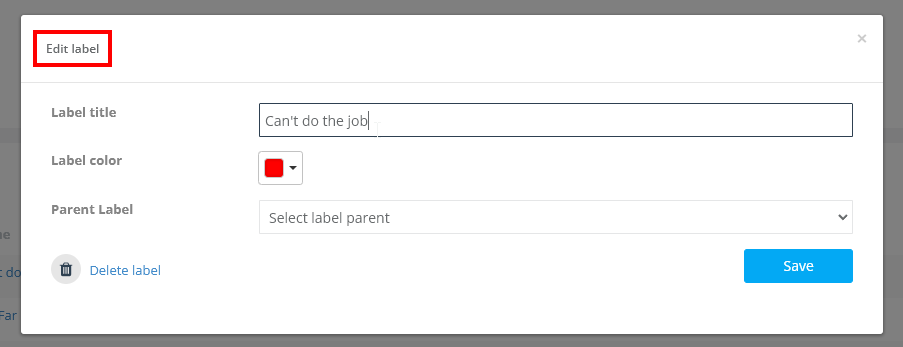
Edit an existing label
Labels aren’t permanent—you can rename them, change colors, or adjust their structure as your workflow evolves.
- Go to Settings > General Settings > Labels.
- Find the label you want (or use the search bar).
- Click the label name or click Edit.
- Update the label title and/or color, then click Save.

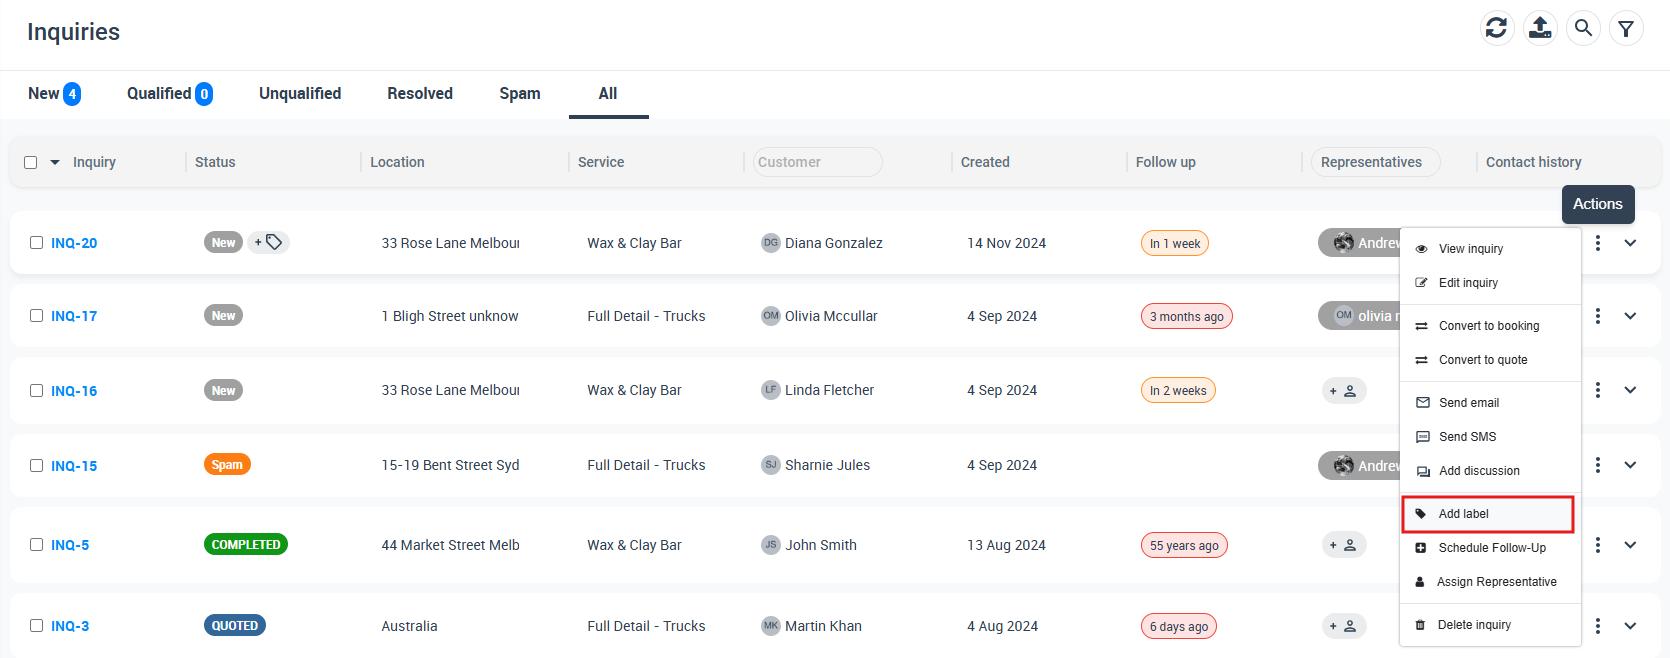
Assign a label from the inquiries list (All Inquiries)
Use this method when you’re working from the inquiry list and want to quickly tag leads.
- Go to Inquiries > All Inquiries.
- Locate the inquiry you want to label.
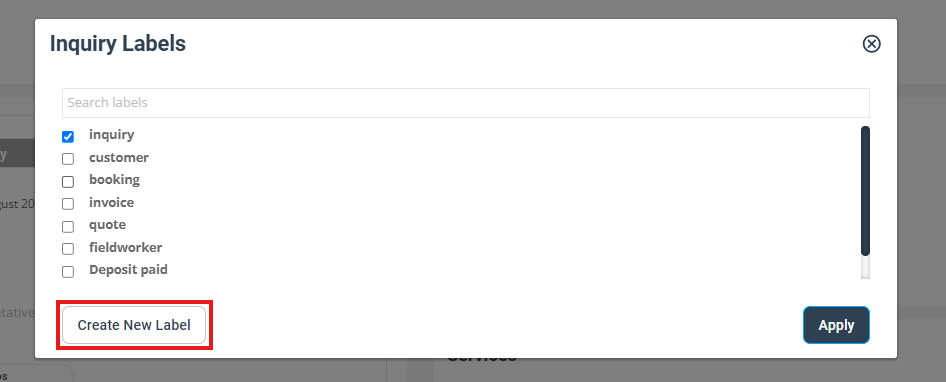
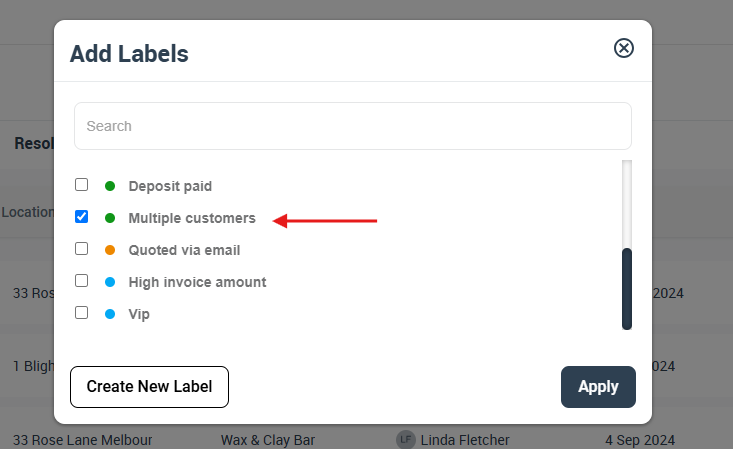
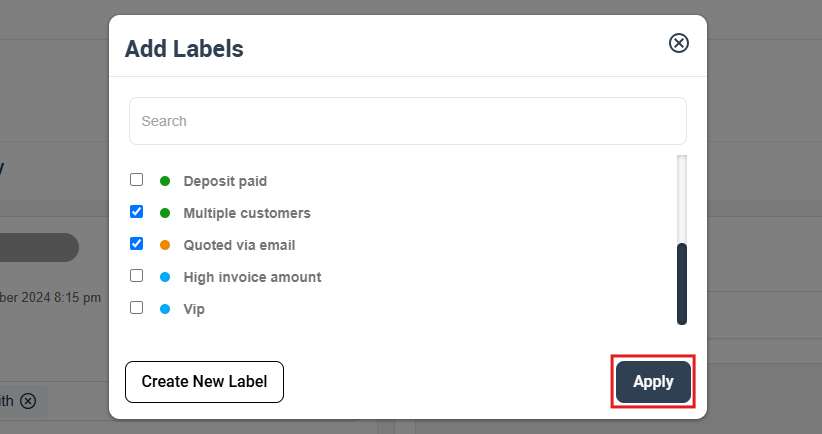
- Click Actions > Add label.
- Select one or more labels, then click Apply.
Need a new label while you’re here? In the labels popup, click Create New Label, enter the name, select a color, then save.

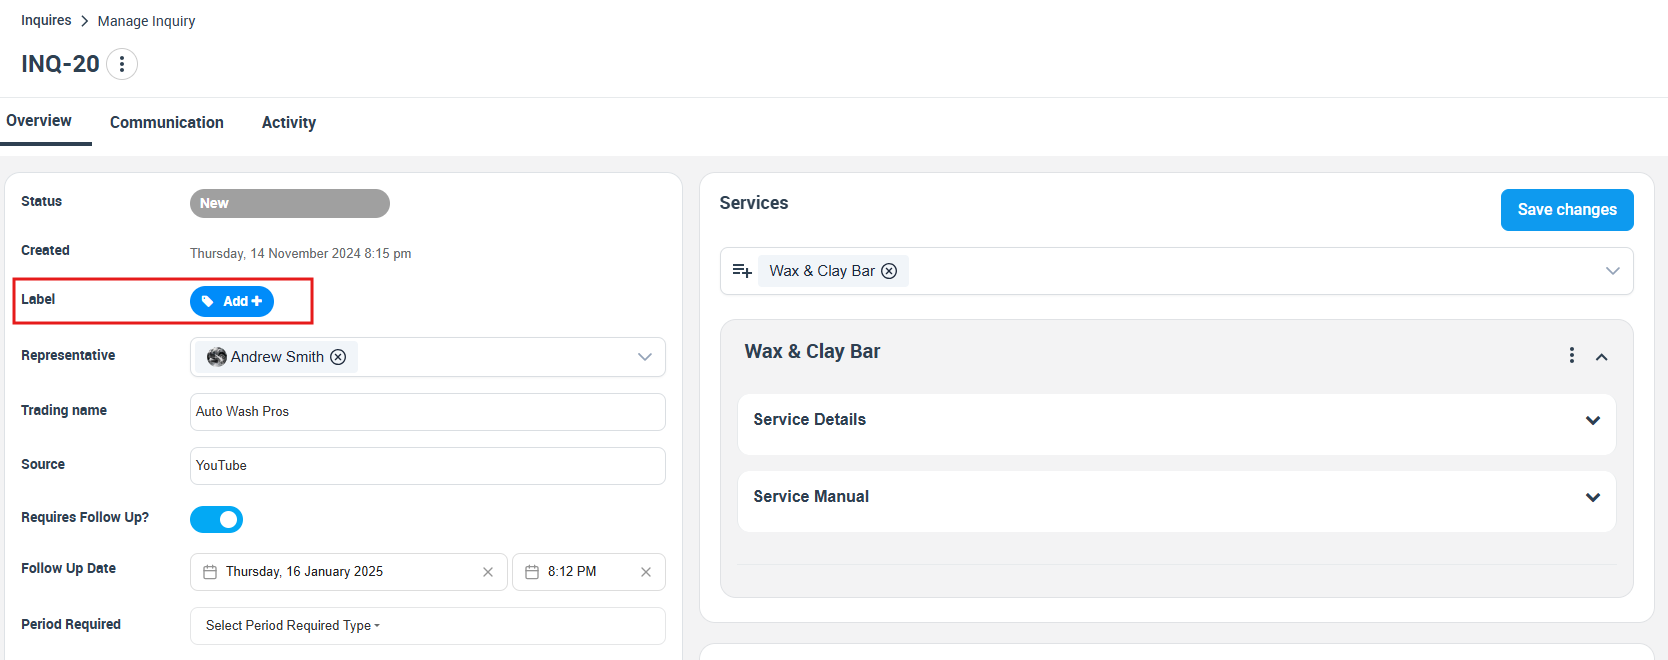
Assign a label from the inquiry details page
This is ideal when you’re already reviewing a lead and want to tag it without returning to the list.
- Open the inquiry you want to label.
- Click Add + next to Label.
- Select one or more labels, then click Apply.
If you need to create a new label from here, click Create New Label in the popup, then save.
Apply multiple labels to a single inquiry
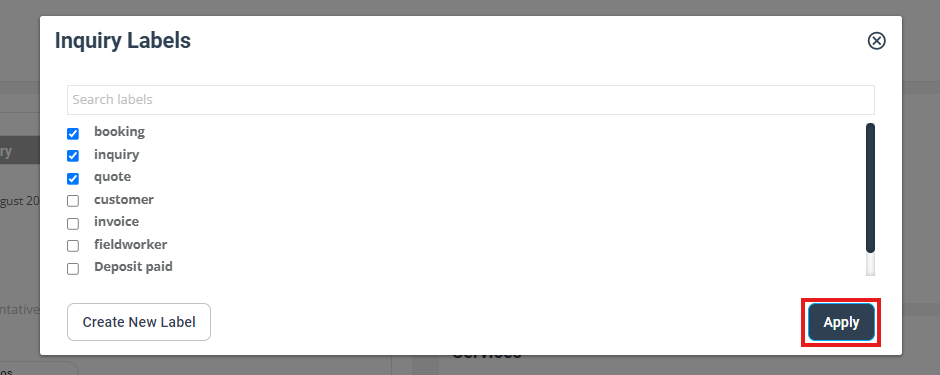
You can tag a single inquiry with multiple labels to reflect lead stage, priority, customer type, and payment status at the same time.
- Open the inquiry labels popup (from the list or the inquiry details page).
- Select multiple labels.
- Click Apply.
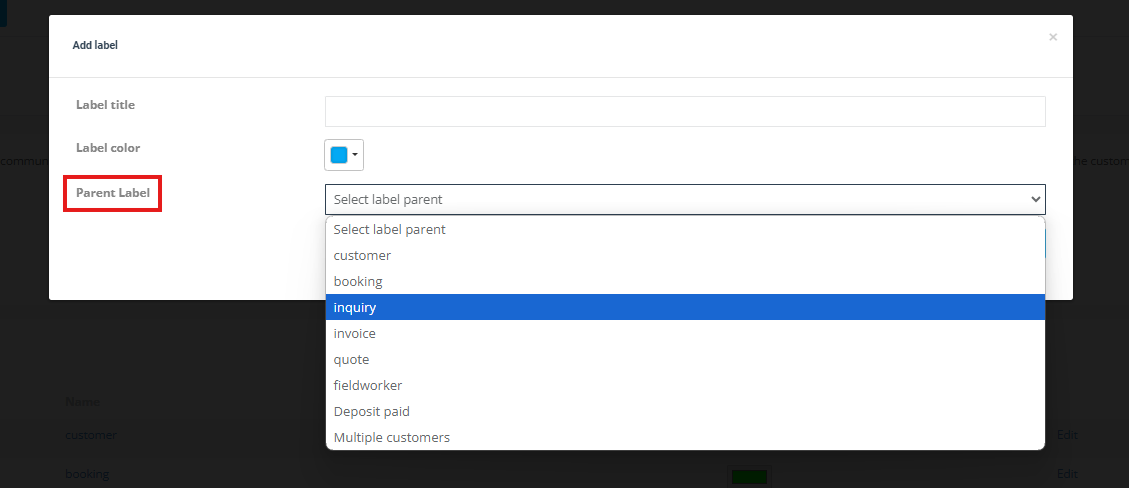
Use nested labels (parent/child) for a hierarchy
Nested labels let you build a label hierarchy (similar to Gmail labels). For example, you could create a parent label like Lead Stage, then add child labels such as New, Quoted, and Awaiting Customer. This keeps your label list cleaner and easier to manage.
Benefits of nested labels:
- More structured organization for large label libraries.
- Cleaner filtering and easier scanning across teams.
- Go to Settings > General Settings > Labels.
- Click New label.
- Enter the label title and choose a color.
- Use the Parent Label dropdown to nest it under a parent label.
- Click Save.
Filter inquiries by selected labels
Filter your inquiry list to show only the leads tagged with specific labels.
- Go to Inquiries > All Inquiries.
- Click Filter to open the filter popup.
- In the Labels section, select the labels you want to filter by.
- Click Filter to apply.
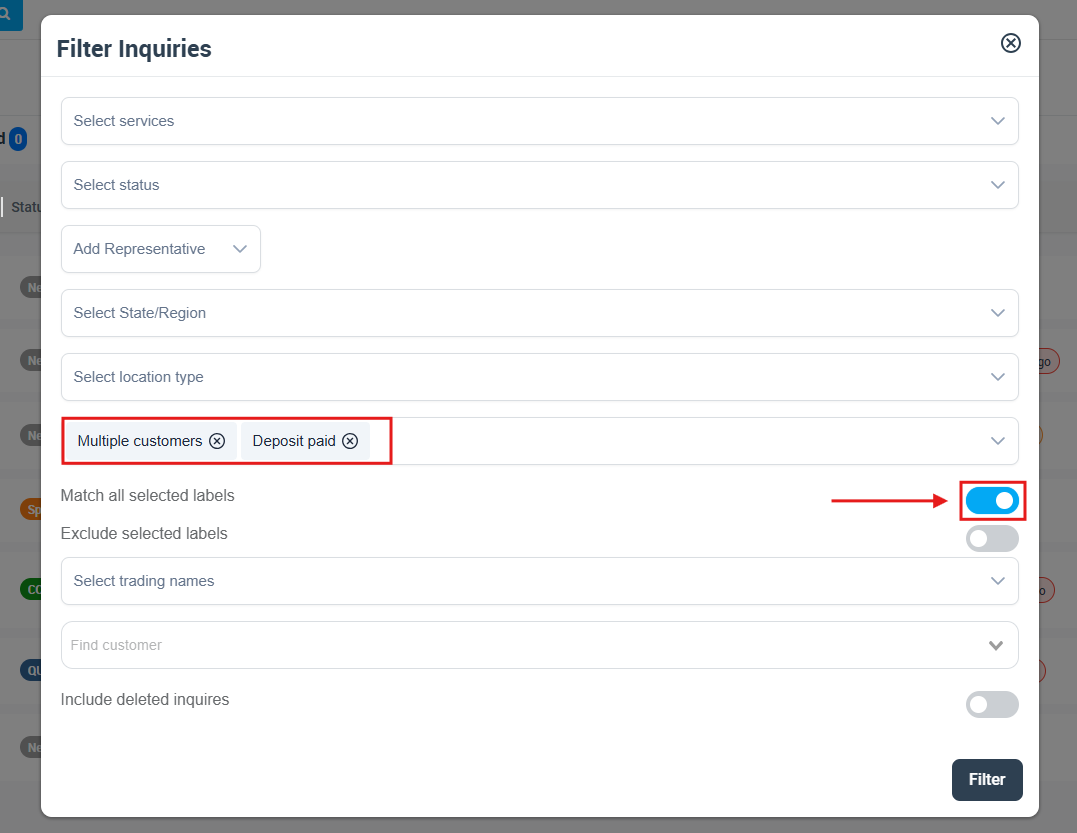
AND/OR logic (Match all selected labels):
- OR logic (default): shows inquiries that match any selected label.
- AND logic (Match all selected labels ON): shows inquiries that match all selected labels.
- Your selected labels and toggles can be remembered across sessions, helping you keep a consistent filtering workflow.
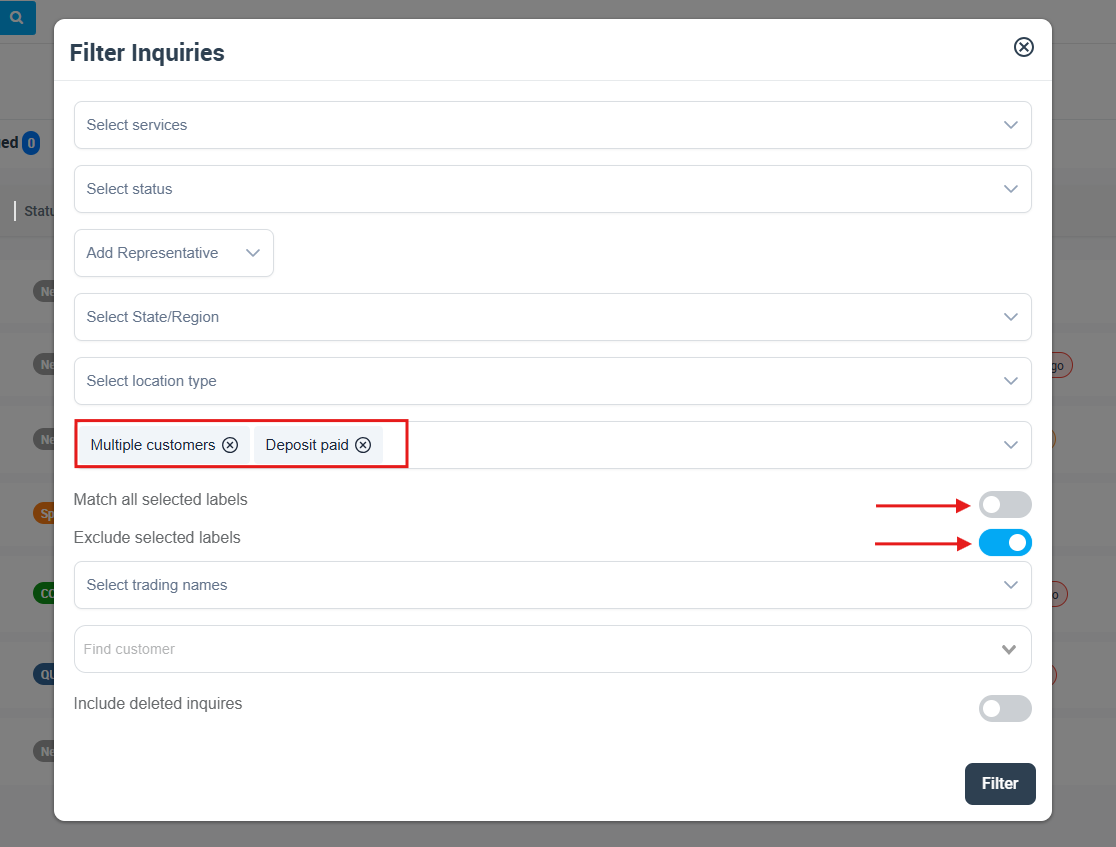
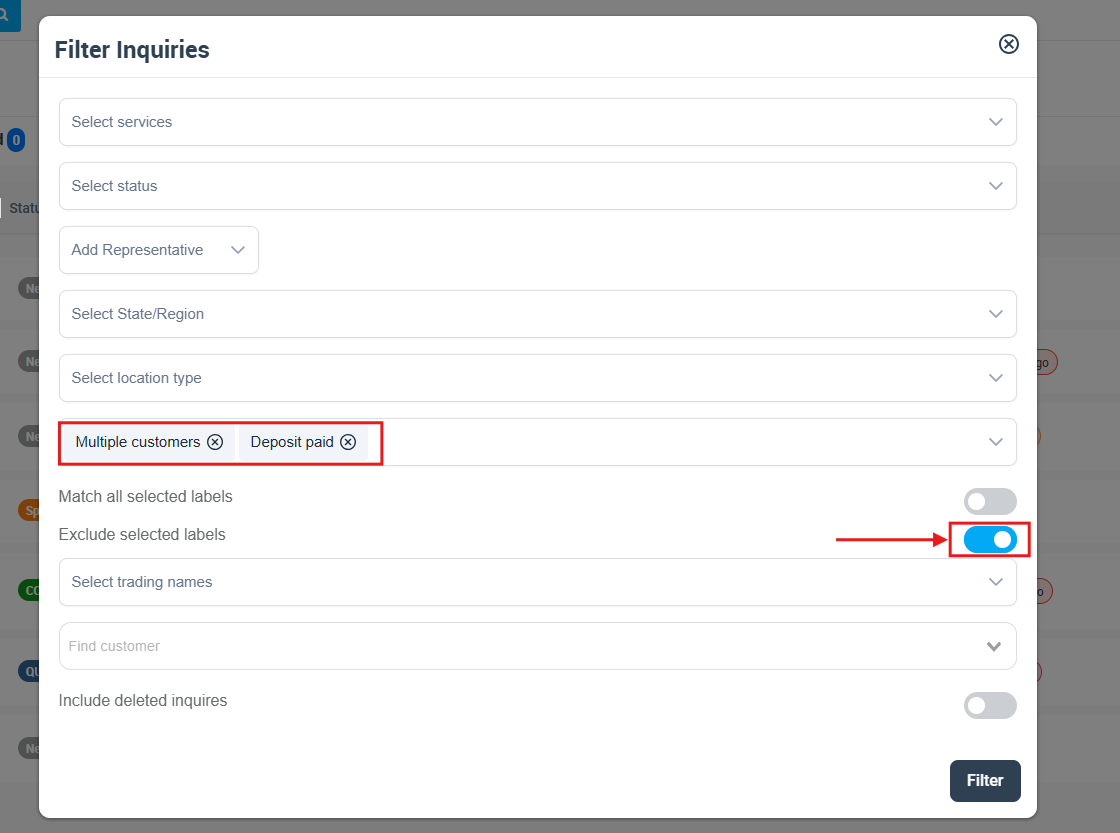
Filter inquiries by excluding selected labels
Use this option to hide inquiries that contain specific labels (e.g., exclude “Spam”, “Closed Lost”, or “Not Serviceable”).
- Open Inquiries > All Inquiries and click Filter.
- Select the labels you want to exclude.
- Toggle Exclude selected labels ON.
- Click Filter to apply.
Remove (de-assign) labels from an inquiry
To remove a label, open the labels popup and untick the label(s) you no longer want, then apply the update.
- Open the inquiry and click Add (or open labels from the inquiry list).
- Untick the label(s) you want to remove.
- Click Apply.
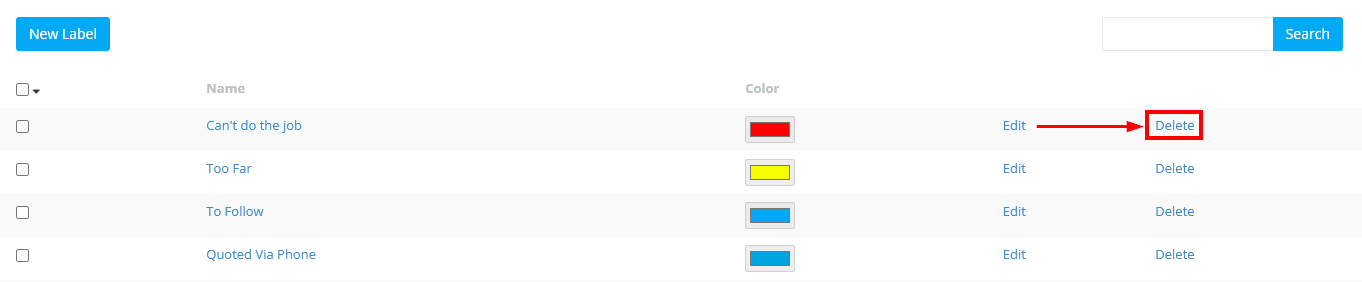
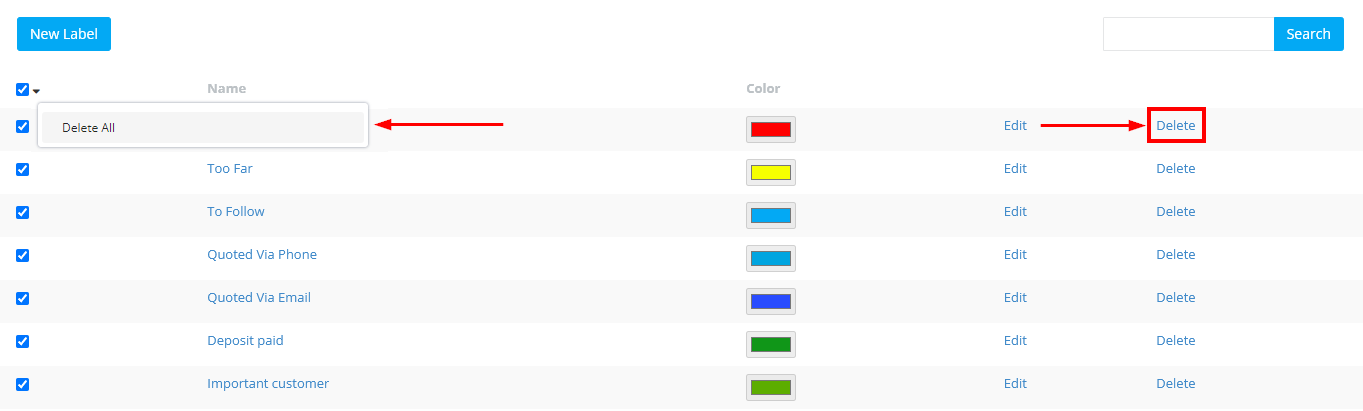
Delete labels (single or bulk)
If a label is no longer needed, you can delete it from your label settings. Deleting a label removes it from records—it does not delete your inquiries.
- Go to Settings > General Settings > Labels.
- To delete a single label, locate it and click Delete.
Delete multiple labels (bulk):
- Select multiple labels using the checkboxes.
- Use the checkbox dropdown to select all if needed.
- Click Delete or Delete All.
Best practices for labeling (recommended)
- Use inquiry status for lifecycle stages (New, Qualified, Resolved, Spam) and labels for flexible categorization (priority, customer type, source, internal routing).
- Keep labels consistent (avoid duplicates like “VIP” and “Vip”). Choose a naming convention and stick to it.
- Limit label sprawl: if the list becomes too long, introduce nested labels and consolidate rarely used tags.
- Color code with meaning (e.g., red = urgent, green = paid, blue = quoted).
FAQs
I can’t find the label I just created. What should I do?
Labels are typically listed alphabetically. Use the search box in the Labels page to find it quickly.

Can I assign a label to multiple inquiries at once?
Yes. In Inquiries > All Inquiries, select multiple inquiries, then use the top Actions menu and choose Add label. Select the label(s), then click Apply.
What happens if I delete a label?
Deleting a label removes it from your label library and from any records it was applied to. It does not delete inquiries, bookings, quotes, invoices, or customers.
Related lead management guides
- Inquiries & Lead Management (Overview)
- Adding Customer Inquiries
- View Inquiry Details
- Edit Inquiry Details
- Inquiry Contact Management (Email, SMS & Calling)
- Adding Attachments to Inquiries
- Follow-Up Reminders for Inquiries (Lead Follow-Up)
- Convert Inquiry to Booking
- Convert Inquiry to Quote / Estimate
- Mark an Inquiry as Spam
- Label Management (Create, Edit & Maintain Labels)
To stay updated, please subscribe to our YouTube channel.