
Invoice & Quote PDF Template Customization (Layout, Branding & Terms)
OctopusPro lets you customize the PDF templates your customers receive—such as Invoices, Quotes, and Booking PDFs. This helps you keep documents on-brand, improve readability, and meet compliance requirements (e.g., displaying the correct business/entity details and tax identifiers).

This guide covers:
- Showing or hiding itemized service cost breakdowns
- Showing or hiding scheduled appointment details
- Adjusting fonts, colors, and borders
- Uploading a dedicated invoice/quote logo
- Adding custom header and footer content
- Appending Terms & Payment Advice to PDFs
- Using Trading Name overrides for multi-brand businesses
- Choosing whether PDFs display your Business details or Individual fieldworker details (Invoice Entity Display)
Jump to a section
- Where to configure invoice/quote PDF template settings
- Show/Hide itemized service cost breakdown
- Show/Hide scheduled appointment details
- Text formatting (font size & font family)
- Logo alignment & branding options
- Font color & border color
- Upload an invoice/quote logo
- Invoice/Quote header & footer customization
- Add Terms & Payment Advice to PDFs
- Global defaults vs Trading Name overrides
- Invoice Entity Display: Business vs Individual
- Best practices & FAQs
Where to configure invoice/quote PDF template settings
Most PDF template options are configured from your admin settings area:
- Settings > Financial Settings > Invoice Settings (visibility/display options)
- Settings > Financial Settings > Invoice Template (styling & branding options)
If your business uses multiple brands or divisions, you can also override some template settings per Trading Name:

Manage Trading Names (Sub-brands) in OctopusPro
Tip: After making changes, preview a document to confirm the output (see the “Preview PDF” step in each section below). You can also export PDFs when needed: Export Invoice as PDF.

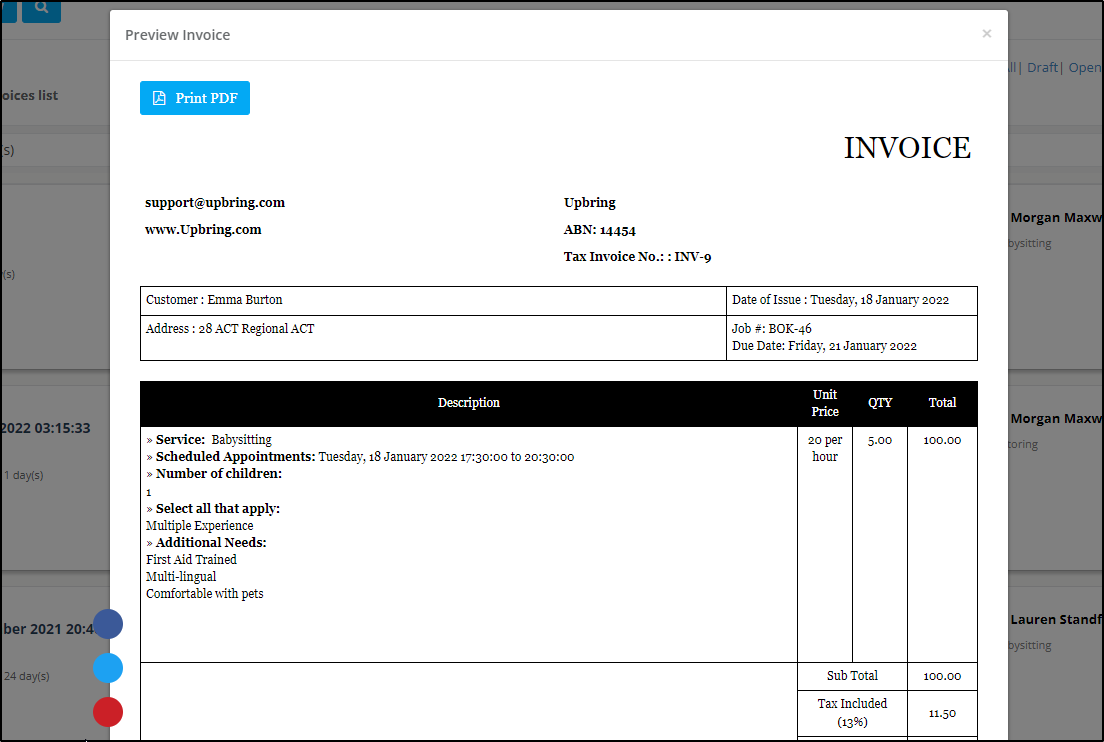
Show/Hide itemized service cost breakdown
Control whether customers see an itemized breakdown (unit price / line item charges) or a simpler total-only view on invoices, quotes, and booking PDFs.
- Go to Settings > Financial Settings > Invoice Settings.
- Find “Display service cost breakdown in quotes and invoices shared with clients?”
- Set it to Visible (show itemized lines) or disable it to simplify the PDF.

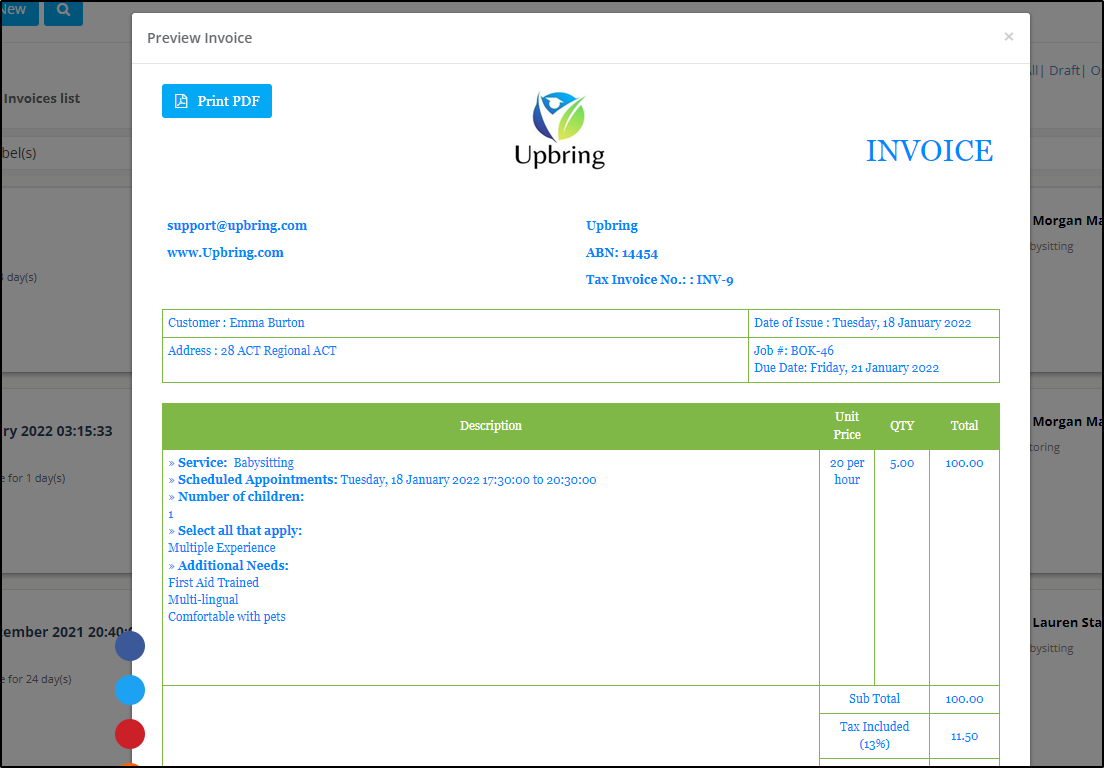
Example (Visible): customers can see unit prices and line item details.

Example (Hidden): show a simpler view focusing on totals/subtotals.

Preview your PDF output:
- Open Invoices > All Invoices (or Quotes > All Quotes).
- Click Actions next to a record.
- Select Preview PDF.

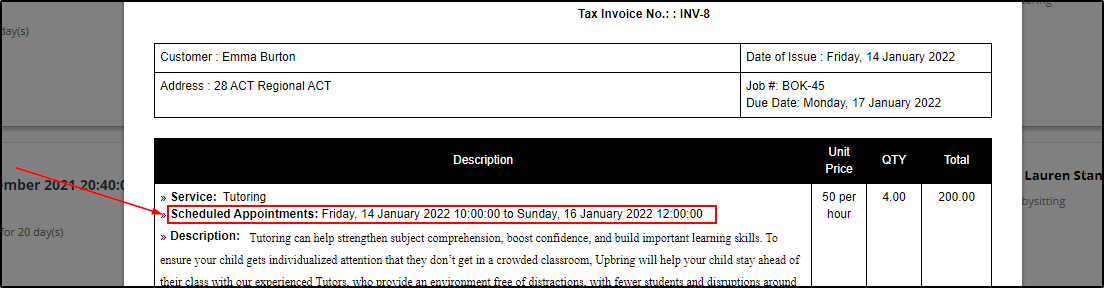
Show/Hide scheduled appointment details
Choose whether the PDF includes the scheduled appointment times (start/end) for services. This is useful when you want customers to clearly see service timing on the document, or hide it if you prefer a cleaner layout.
- Go to Settings > Financial Settings > Invoice Settings.
- Find “Display scheduled appointments in customer invoice PDF?”
- Set it to Visible or disable it.

Example (Visible): appointment date/time appears on the PDF.
Example (Hidden): appointment details are removed from the PDF.

Text formatting (font size & font family)
Improve readability and match your brand style by adjusting the font size and typeface used in PDFs.
Font size
- Go to Settings > Financial Settings > Invoice Template.
- Adjust Invoice font size (pixels).
- Save changes, then preview a PDF to confirm spacing and readability.

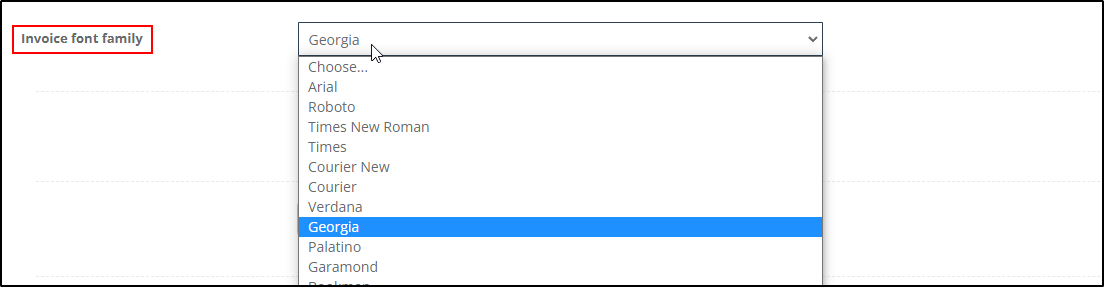
Font family
- In the same page, choose an Invoice font family from the dropdown.
- Save and preview the PDF output.
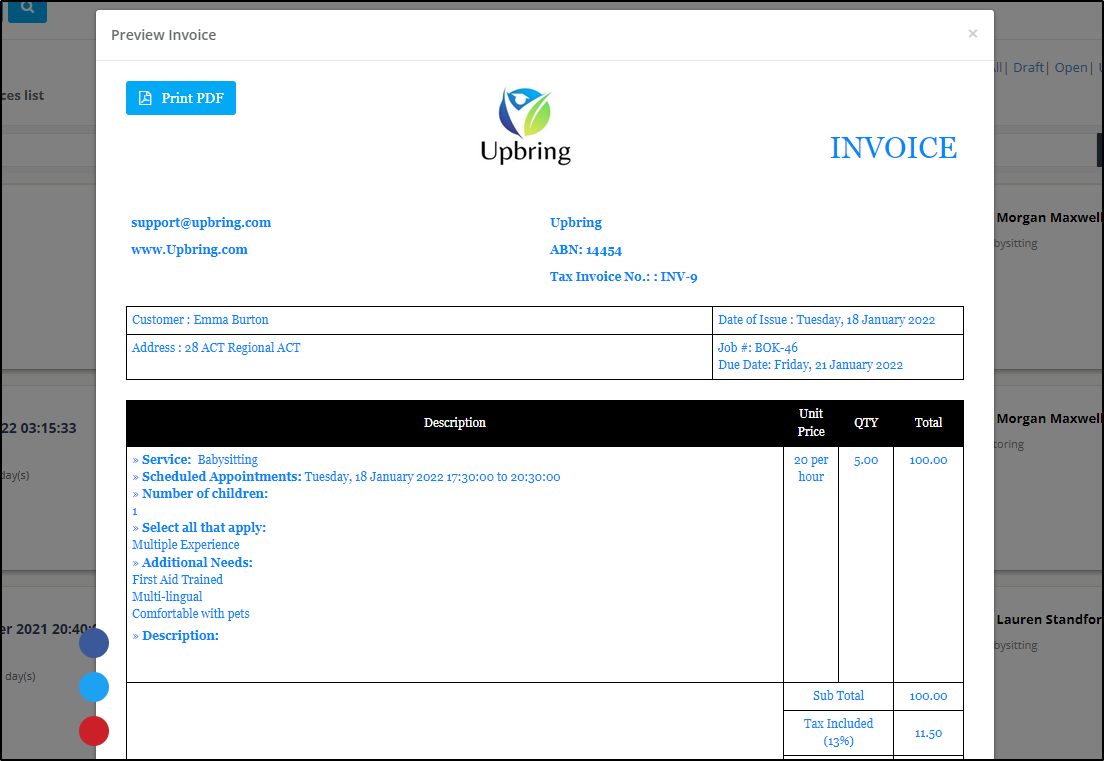
Logo alignment & branding options
Keep your documents consistent with your brand by setting logo placement and overall styling. Your main company branding can also be configured here:
![]()
Logo alignment
- Go to Settings > Financial Settings > Invoice Template.
- Choose the Invoice logo alignment (Left / Center / Right).
- Save, then preview a PDF.


Font color & border color
Use color controls to match your brand palette while maintaining strong readability (high contrast) in PDFs.
Font color
- Go to Settings > Financial Settings > Invoice Template.
- Select the Invoice font color.
- Save and preview the PDF.

Border color
- On the same page, choose the Invoice borders color.
- Save and preview the output.

Upload an invoice/quote logo
You can upload a dedicated logo that appears on the PDF header of invoices, quotes, and booking PDFs.
- Go to Settings > Financial Settings > Invoice Template.
- Upload your Invoice logo (recommended: a high-quality image sized for clear printing).
- Save and preview the PDF.

Invoice/Quote header & footer customization
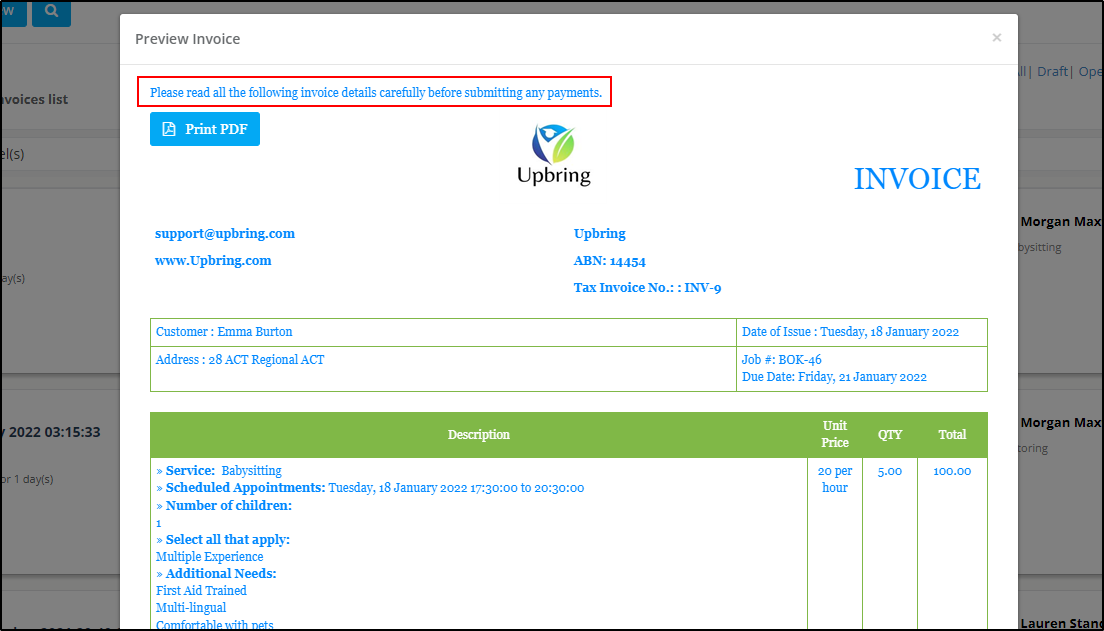
Use the Header and Footer editors to add brand messaging and important information—such as a tagline, contact details, licensing, warranty notes, or legal disclaimers.
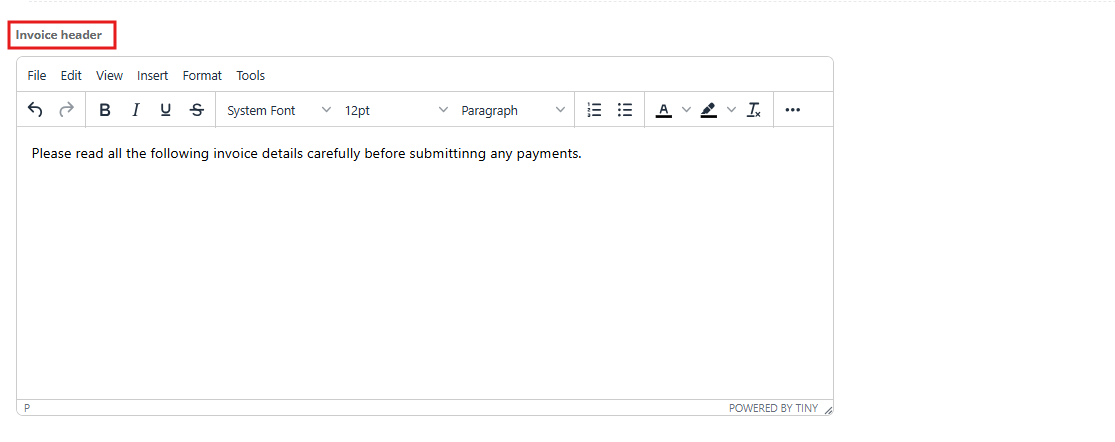
Invoice / Quote Header
- Go to Settings > Financial Settings > Invoice Template.
- In the Invoice header section, enter custom text and/or add an image as needed.
- Save changes, then preview the PDF.
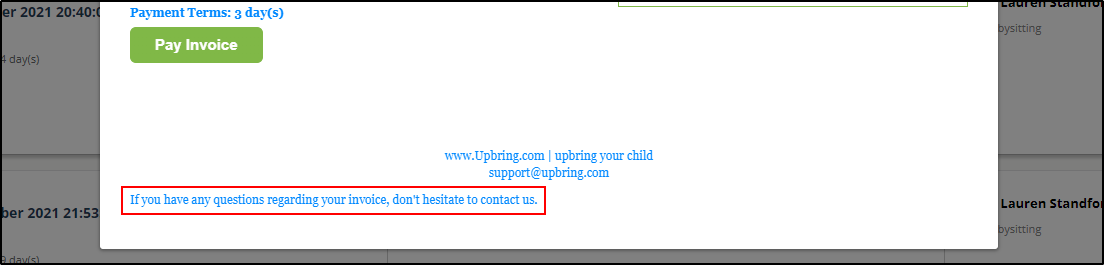
Invoice / Quote Footer
- In the same page, use the Invoice footer section to add text such as “Contact us” notes, aftercare instructions, or reminders.
- Save changes and preview the PDF output.

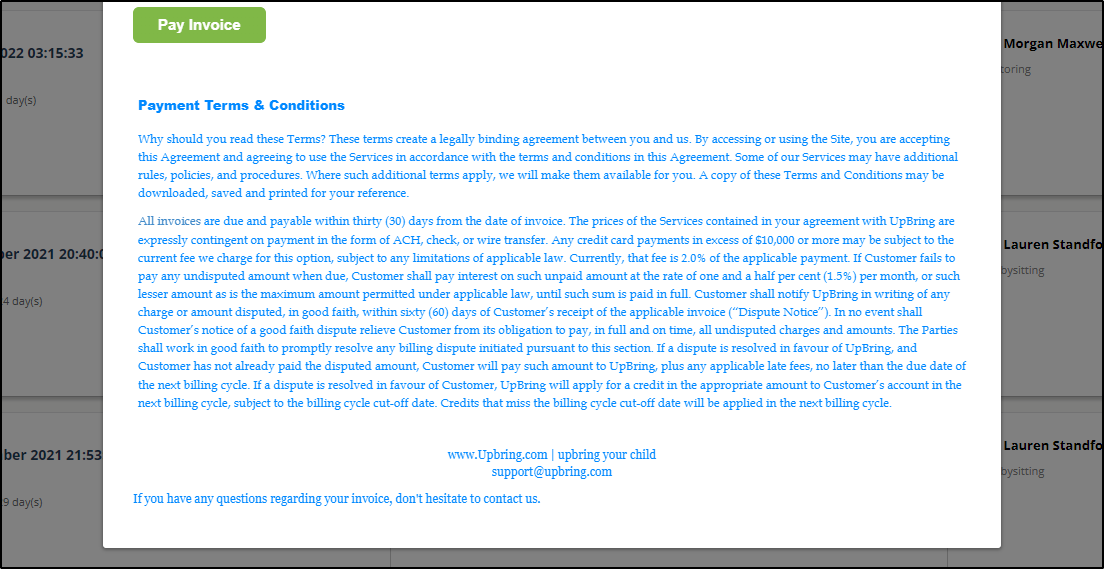
Add Terms & Payment Advice to PDFs
Ensure customers always receive clear payment instructions and policies by appending Terms & Payment Advice to invoices, quotes, and statements. You can type the terms directly or upload a PDF file.
Note: For guidance on payment terms and due dates, also see:


- Go to Settings > Financial Settings > Invoice Template.
- Find Terms & Payment Advice (Invoice, Quote and Statement).
- Select whether you want to Add Text or Upload pdf file.
- Save changes and preview a PDF.

Global defaults vs Trading Name overrides
Invoice template settings work as global defaults for your account. If you manage multiple brands (Trading Names), you can override branding details per Trading Name so each brand’s PDFs look correct and compliant.
Learn more: Trading Names (Sub-brands) in OctopusPro
Invoice Entity Display: Business vs Individual
The Invoice Entity Display setting controls whose details appear as the supplier/biller on the PDF invoice:
- Business: PDFs display your company’s business details (company name, address, and applicable tax/registration numbers).
- Individual: PDFs display the assigned fieldworker’s details as the supplier/biller (useful for contractor/marketplace models where each provider issues invoices under their own identity).
Why it matters: This impacts customer clarity and compliance—especially if you operate as an intermediary that connects customers with independent contractors. Choosing the correct display ensures the invoice reflects the right legal entity for tax and record-keeping purposes.
Best practices & FAQs
Best practices
- Preview before sending: After changes, always use Preview PDF from an invoice/quote to confirm spacing and readability.
- Keep it legible: Avoid very small fonts or low-contrast colors that reduce readability when printed.
- Be consistent: Use the same logo, font, and color palette across invoices, quotes, and booking PDFs for a professional brand experience.
- Include clear payment instructions: Use Terms & Payment Advice to reduce payment delays and disputes.
FAQ
- Does this affect invoices/quotes already created? When you generate or preview the PDF, it will reflect your current template settings at the time of export/preview.
- Can I customize the email that sends the invoice? Yes—PDF template customization is separate from email template customization. See: Email Templates and Template Placeholders.
- How do I send the invoice to the customer? See: Send Invoice to Customer.

- How do I change the invoice number format? See: Change / Edit Invoice Numbers and Set Starting Numbers.

To stay updated, please subscribe to our YouTube channel.