
Add a “Period Required” (Preferred Timeframe) Field to Your Inquiry / Lead Capture Form
The Period Required field (also known as a preferred timeframe or service timeframe) lets customers tell you when they want the service—without requiring an exact booking date/time. This helps your team qualify and prioritise leads, manage expectations, and plan scheduling and dispatch more efficiently.

On this page
- What this is for
- How it works
- Enable the Period Required field
- Configure visibility, label, placeholder & mandatory rules
- Customize the dropdown options
- Where you’ll see it (customer + admin)
- Best practices
- Troubleshooting
What this is for
Use Period Required to capture a customer’s requested service window at the moment they submit an inquiry (lead). For example:
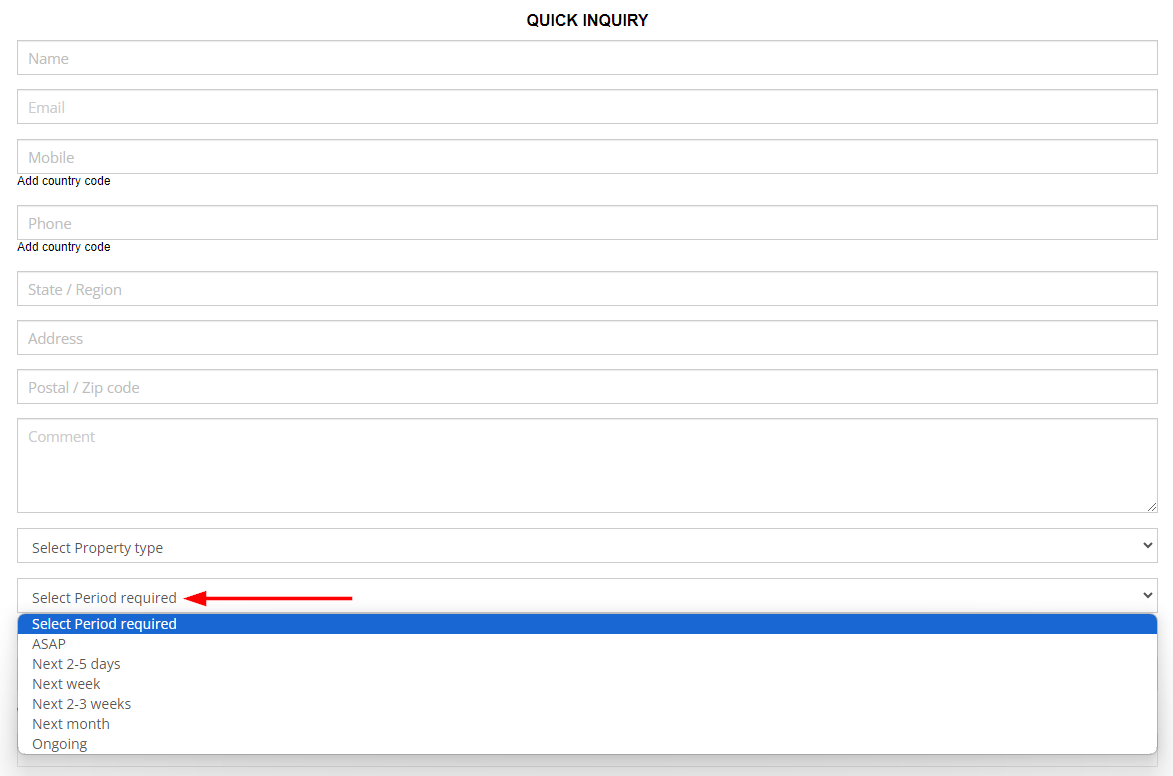
- ASAP (urgent)
- Next 2–5 days
- Next week
- Next month
- Ongoing (recurring / flexible timing)
Key benefits:
- Better lead qualification: quickly identify urgent vs. flexible inquiries.
- Faster scheduling decisions: reduce back-and-forth questions with customers.
- Improved planning: align staffing, capacity, and dispatch based on demand windows.
- Clearer expectations: your team can respond with realistic availability early.
How it works
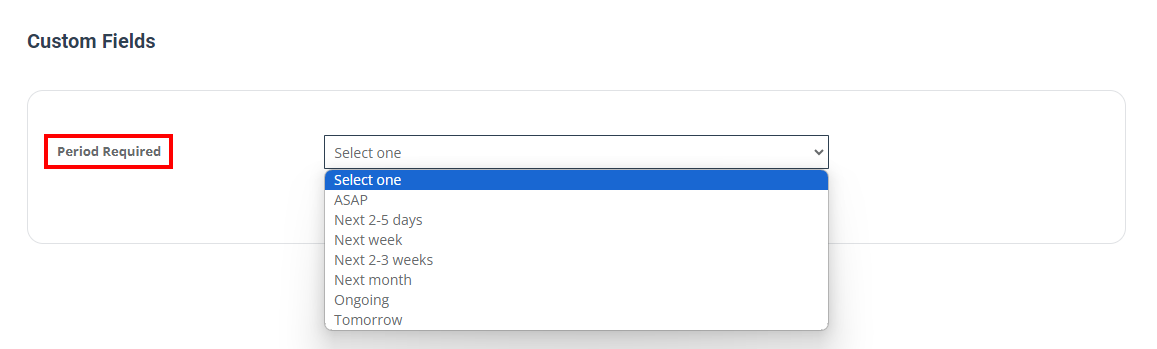
Once enabled, Period Required appears as a dropdown field on your inquiry/lead capture form. When the customer selects an option, that value is saved on the inquiry record so your office team can see it when reviewing, editing, and converting the inquiry.
If you choose to make the field mandatory, customers must pick a timeframe before submitting the inquiry.
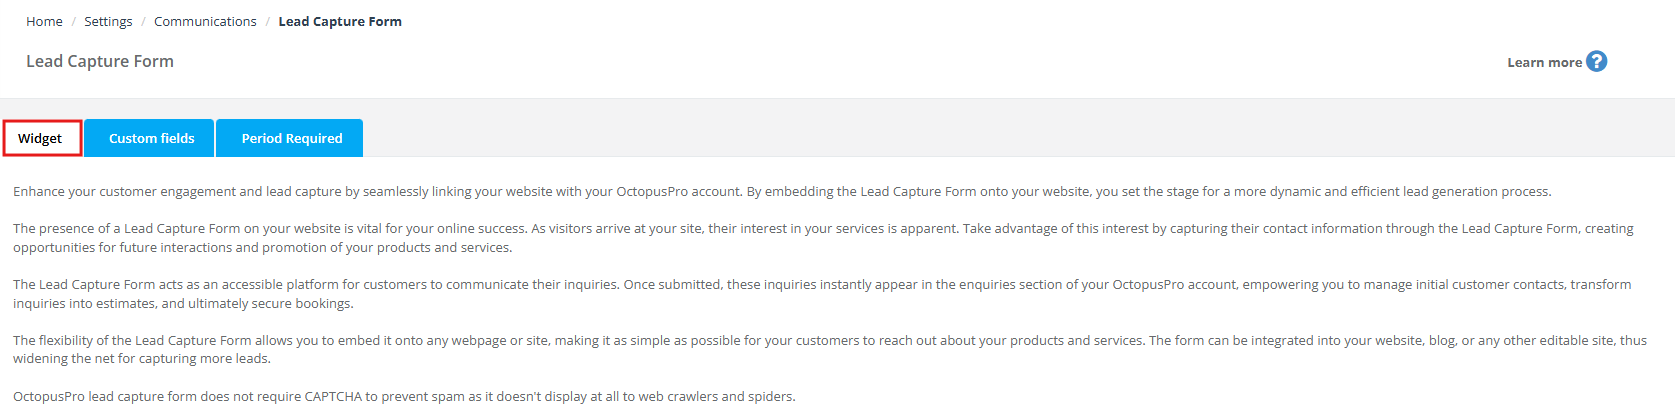
Enable the Period Required field
- Go to Settings > Communications > Lead Capture Form.
- Open the Widget tab.
- Enable the Period Required field toggle.
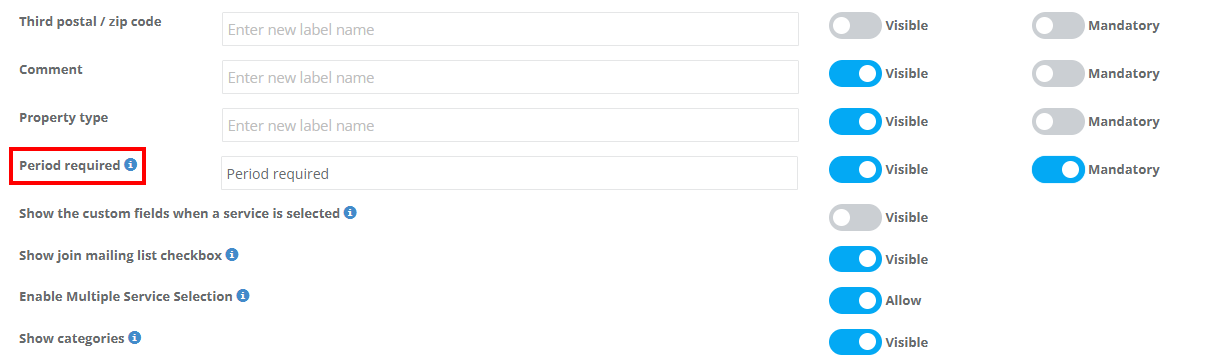
Configure visibility, label, placeholder & mandatory rules
After enabling the field, you can control how it appears to customers:
- Visible: show/hide the field on the inquiry form.
- Mandatory (Required): force customers to select a timeframe before they can submit the inquiry.
- Field label: the name shown next to the field (e.g., “Preferred timeframe”, “When do you need the service?”).
- Placeholder text: the default hint shown inside the field (e.g., “Select a timeframe”).
Customer view example: once enabled, customers can select an option from the dropdown while submitting the inquiry.
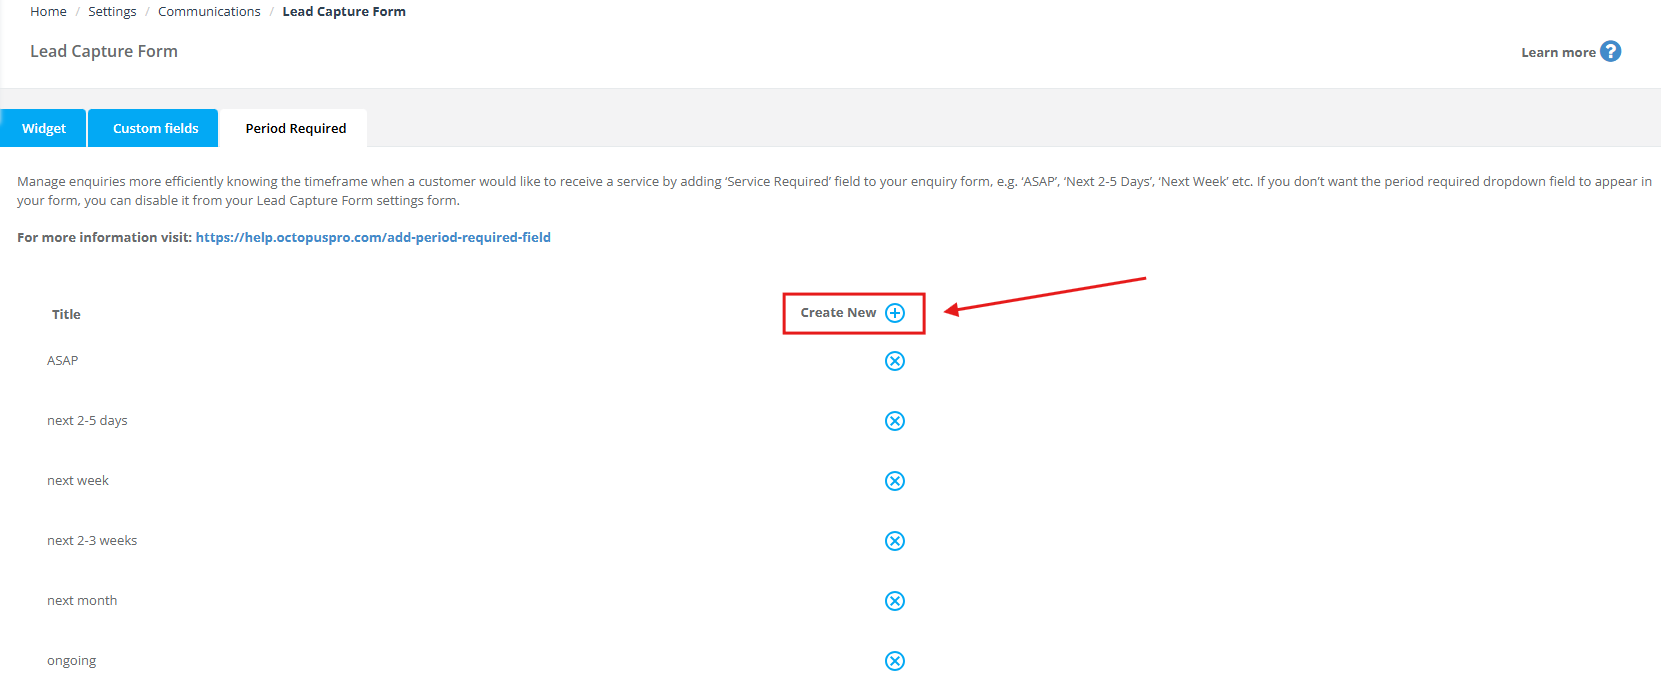
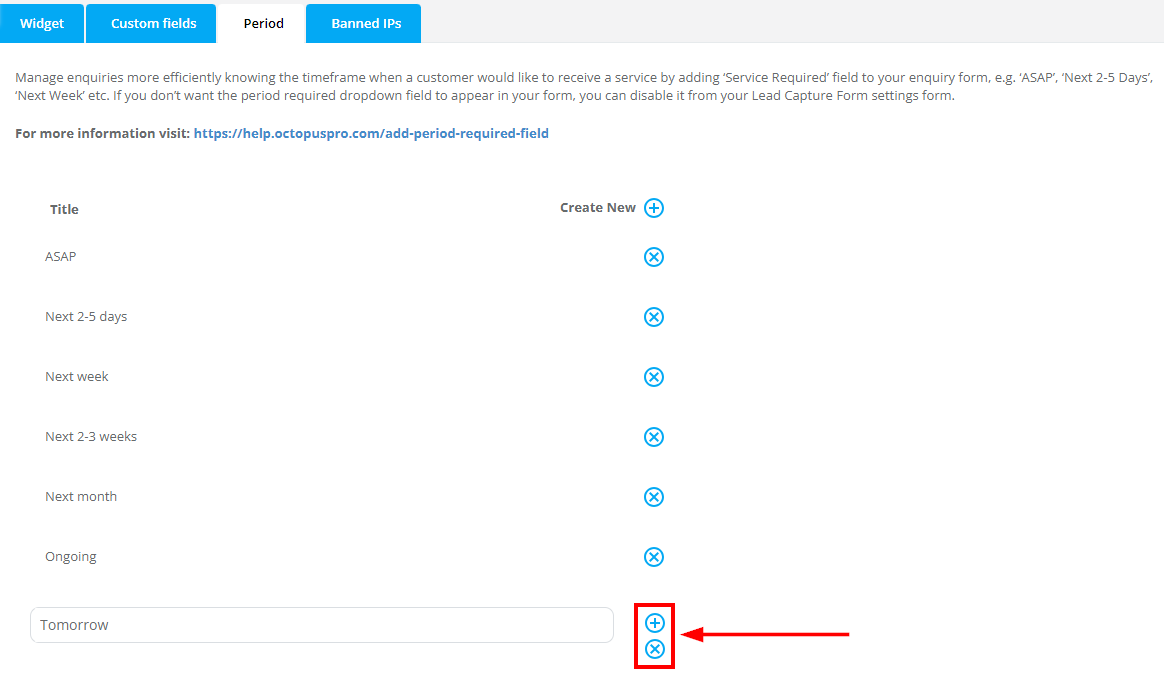
Customize the dropdown options
You can tailor the list of options to match your workflow (for example, shorter time windows for urgent services, or longer windows for renovations/projects).
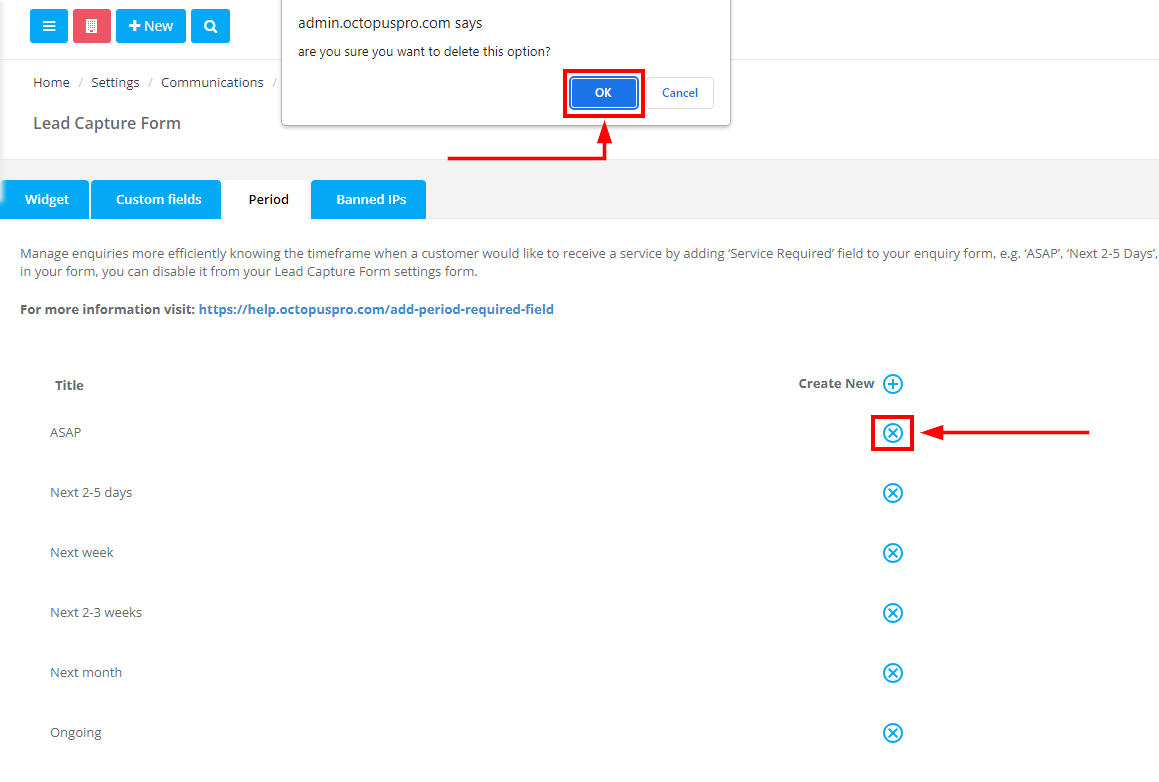
- Go to Settings > Communications > Lead Capture Form.
- Open the Period Required tab (in some accounts, this may appear as Period).

View existing options (the list shown here is what customers will see on the form):

Remove an option you don’t need:
- Click the X icon next to the option you want to delete, then confirm.
Add a new option (example: “Tomorrow”):
- Click Create New (plus icon).
- Enter the new option label.
- Click the + button to save (or X to cancel).
Where you’ll see it (customer + admin)
1) Admin creating a new inquiry manually
When an admin creates an inquiry in the back office, the Period Required field appears as a selectable dropdown (so staff can record the customer’s timeframe if it was provided by phone, email, etc.).
2) Viewing inquiry details
When you open an inquiry, the selected Period Required value is displayed in the inquiry details so your team can prioritise and plan accordingly. If needed, staff can update the selection while editing the inquiry.

Related guides (open in new tab):
- Website Lead Capture Form (Inquiry Widget)
- Customer Portal Contact Us Form & Lead Capture
- Creating a New Inquiry (Lead Management)
- View Inquiry Details & Manage Conversion
- Edit Inquiry Details
Best practices
- Keep options clear and non-overlapping: avoid having too many similar choices (e.g., “Next week” and “Within 7 days”) unless you truly need both.
- Order by urgency: put the most urgent options at the top (e.g., ASAP first).
- Use “Mandatory” when timeframe is critical: if scheduling depends heavily on urgency, require customers to pick an option.
- Review regularly: update options based on seasonal demand, capacity, and customer feedback.
Troubleshooting
- The field isn’t showing on the form: confirm it’s enabled in the Widget tab and set to Visible.
- Customers can submit without selecting a timeframe: enable the Mandatory toggle for the Period Required field.
- I can’t find the options list: look for a tab called Period Required (or Period) inside Settings > Communications > Lead Capture Form.
To stay updated, please subscribe to our YouTube channel.