
Square Payment Gateway & POS Integration

OctopusPro’s Square integration turns your booking platform into a full-service payment hub, unifying card-present, mobile, and online transactions in one automated workflow—so invoices close themselves and your team never has to chase paper or spreadsheets again.
Square currently processes payments in the United States, Canada, Australia, Japan, the United Kingdom, Ireland, France, Spain, and other countries, making it a solid choice for field-service businesses that operate or expand across these major markets.
From the pocket-sized Square Reader to the all-in-one Square Register, hardware options scale with your operation: tap-and-go readers charge a low fee per transaction, while built-in offline mode lets fieldworkers keep selling for up to 24 hours without signal before automatically syncing their takings.
Connect once and every sale—whether keyed in by the office, tapped on a phone in the field, or paid through the customer portal—lands in the same ledger, cuts processing fees, and future-proofs your payment stack.
Why Connect Square to OctopusPro?
| Benefit | What it means in the field |
|---|---|
| Omnichannel billing | Accept card, Apple Pay, Google Pay, or manually key-in payments in the web back office, the Fieldworker App, or the customer portal—all flowing into one invoice ledger. |
| Instant reconciliation | Every Square transaction pushes back to OctopusPro automatically, marking invoices “Paid” and updating dashboards in real time. |
| Lower card fees & surcharges | Square’s low tap-or-insert fee keeps margin predictable; OctopusPro can auto-apply surcharges on weekends or public holidays. |
| Offline mode | If field staff lose signal, Square Reader stores payments for up to one hour and syncs when they reconnect—no lost revenue. |
| PCI DSS coverage | Because the card data never touches OctopusPro servers, your PCI scope is dramatically reduced. |
Use-case snapshots
- HVAC technician: Collects a same-day call-out fee with Square Reader, invoice auto-updates, and the office sees funds cleared before the tech drives off.
- Mobile dog-groomer: Lets clients save a card on file via the Customer Portal, then charges automatically once the groom is marked “Finished.”
- Cleaning franchise: Pairs Square Terminal with a counter in each branch, while roaming cleaners use Readers paired to their phones—one Square account, multiple OctopusPro users.
Prerequisites
- Square seller account in a supported region (Australia, US, Canada, UK, Japan, Ireland, France, Spain).
- Square Developer account with at least one Production application.
- OctopusPro admin access (Settings › Financial Settings › Payment Integration).
- iOS 11+ or Android 8+ device for each fieldworker that will process in-person payments.
Step-by-Step Configuration
Follow every step in order—skipping any box is the #1 cause of payment failures.
Prerequisites
- Square Seller account in a supported region (US, Canada, Australia, Japan, the United Kingdom, Republic of Ireland, France and Spain)
- Square Developer Console access (for creating an application and generating API credentials)
- At least one active Location created in Square
- OctopusPro login with Financial Settings permission
Where to sign in (Square Dashboard vs Developer Console)
- Square Developer Console (create applications + get API keys): https://developer.squareup.com/apps
- Square Dashboard (manage your Square business/locations): https://squareup.com/dashboard
Tip: You typically use the same Square login for both.
Create —or select—your Square application
- Sign in to the Square Developer Console (not the Square Dashboard).
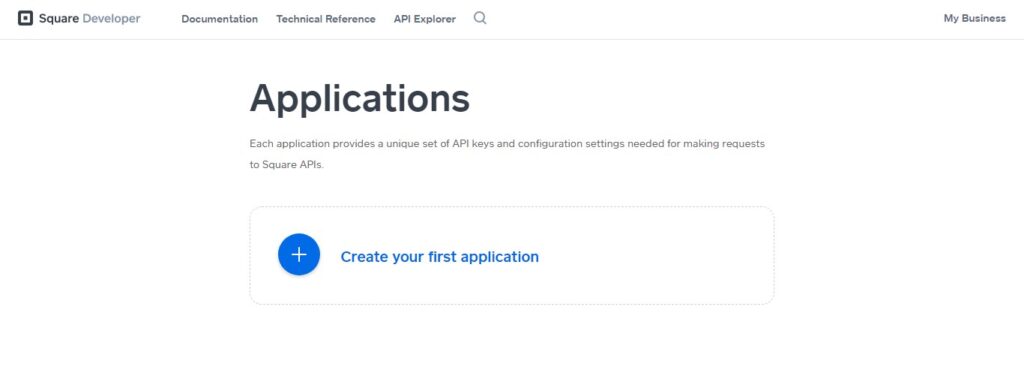
- Click Create Application (or open an existing application if you already created one).
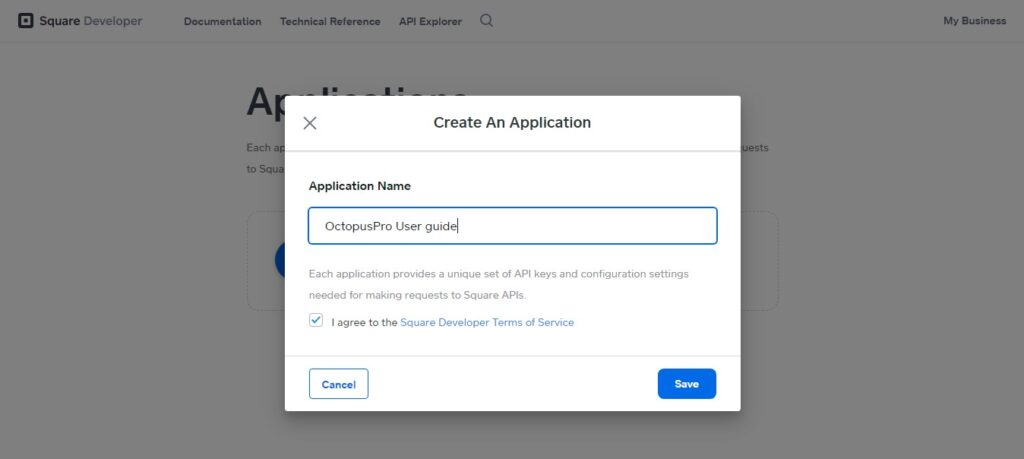
Application name (what to enter): this is simply a label to help you recognise the integration later (customers will not see it). Use a clear name such as:- OctopusPro – {Business Name} – {Region} – Production
- Example: OctopusPro – Tile & Grout Pro – AU – Production
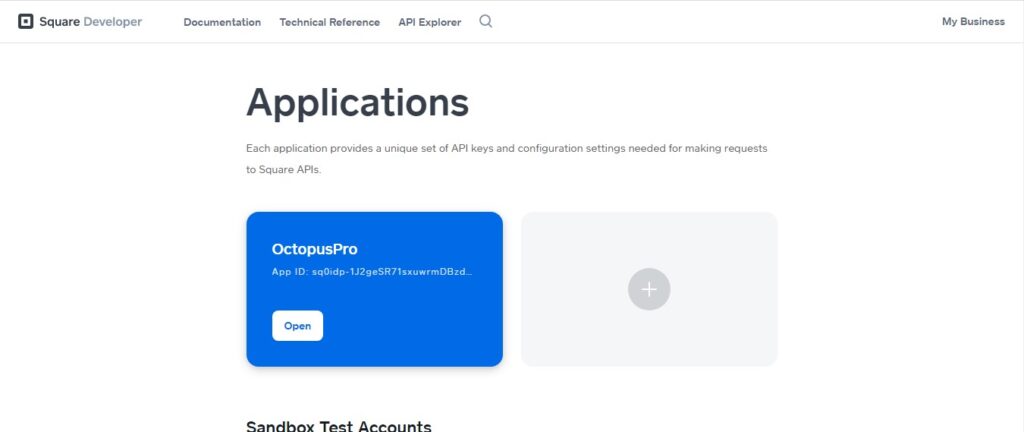
- Already using Square? You can reuse an existing application, but we recommend a dedicated “OctopusPro” app for cleaner reporting and easier key rotation (for example, if staff change).
- Switch to Production and copy the Application ID & Access Token.
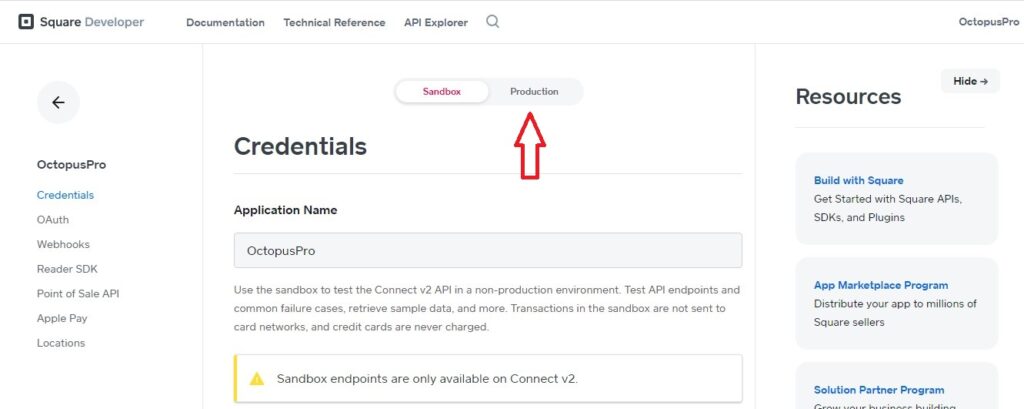

Sandbox vs Production IDs? They’re different. Use Sandbox IDs only while testing; swap in Production IDs before you take real payments.
Optional: Enable the Point-of-Sale (POS) API & register your mobile “code signatures”
This step is only required if you want to take in-person (card-present) payments from the OctopusPro mobile app (tap / insert / swipe using Square hardware).
If you only need online payments (Customer Portal checkout, invoice “Pay Now”, email/SMS pay links) or office payments from the web portal (Add Payment), you can skip this entire section and go straight to Copy your Location ID.
| Your workflow | Do you need POS API & code signatures? | What to do |
|---|---|---|
| Fieldworkers take payments on-site (tap/insert/swipe) | Yes | Complete the steps below and install the Square Point of Sale app on field devices. |
| Customers pay online (portal checkout, invoice pay link, Pay Now) | No | Skip this section. Configure Square in OctopusPro using Application ID + Access Token + Location ID. |
| Office charges cards (web portal Add Payment / card-on-file / keyed entry) | No | Skip this section. Square POS app is not required for office users. |
- Open the POS API panel
Developer Console → select your app → Point of Sale API in the left rail.

- Toggle “Enable Point-of-Sale API” → ON.
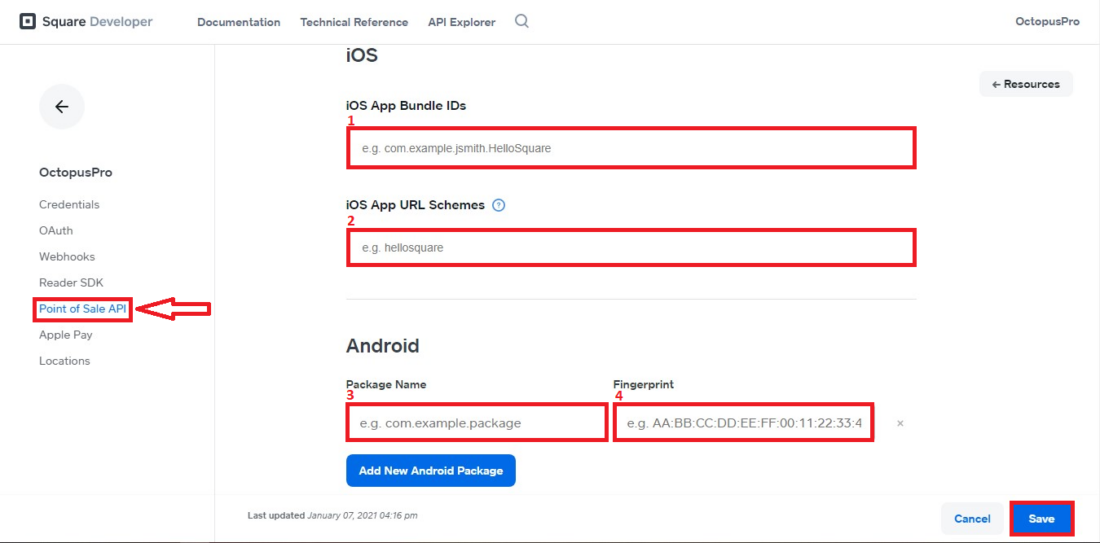
- Add your callback URL — this is the deep-link Square uses to switch back to the OctopusPro app after every payment.
- Default build: octopuspro://square-callback
- White-label builds: replace with the scheme supplied by OctopusPro.
- Register iOS identifiers (same screen, iOS section):
Field Value Bundle ID com.octopuspro URL Scheme OctopusPro Important: These values must match the ones hard-coded into the OctopusPro app—no spaces or typos.
- Register Android identifiers (Android section):
Field Value Package name au.octopuspro.app Signing-certificate fingerprint c6:27:ea:90:a9:f6:a2:1c:1f:e3:f4:73:30:cd:24:32:a8:07:6e:89 Square may display a warning if the fingerprint or package name doesn’t match the installed app at runtime.
- Save (or “Add Signature”) and you’re done.
Important: The bundle ID, URL scheme, package name, and fingerprint are hard-coded into the official OctopusPro mobile apps. If you distribute a custom-branded build, contact OctopusPro Support for the exact values to use.
Following this single screen completes Square’s mobile security handshake for in-person payments.
Copy your Location ID
Below is an up-to-date, two-path recipe for grabbing the Location ID that OctopusPro needs, plus a reminder of where to paste it once you have it. Follow the path that matches the Square screen you’re already in—both routes end with the same alphanumeric ID (format LXXXXXXXXXXXXXX).
Option A (Recommended): Get the Location ID from the Square Developer Console
| # | Action | Where you’ll see it |
|---|---|---|
| 1 | Sign in at developer.squareup.com/apps | Developer Console |
| 2 | Open your application (the one you created above) | App dashboard |
| 3 | Switch to Production (for live payments) | Environment toggle near the top |
| 4 | Click Locations in the left menu and copy the Location ID you will use in OctopusPro. |
Example: L9K8HF3J4Y2ZQ |
Option B: Create/confirm your Square Location in the Square Dashboard (if needed)
| # | Action | Where you’ll see it |
|---|---|---|
| 1 | Sign in as owner/admin at squareup.com/dashboard | Square Dashboard |
| 2 | Left menu → Settings › Account & Settings › My business › Locations | A list of your business locations |
| 3 | Create a location (if required) or select the location you will use for OctopusPro. |
Once created, return to Option A to copy the Location ID from the Developer Console. |
Tip — multiple branches: repeat the copy step for each branch and later assign the correct ID to each OctopusPro branch to avoid “Location mismatch” errors.
Enter credentials in OctopusPro
- OctopusPro › Settings › Financial Settings › Payment Integration.

- Choose Square, paste Application ID, Access Token, and Location ID, then Save.

- Multi-branch? Assign the correct Square Location for each branch under Settings › Company Settings › Trading Names (your branches).
With the correct Location ID in place, OctopusPro can post every payment to the right Square branch and reconcile invoices in real time.
Install the Square Point of Sale app on field devices
- Download Square Point of Sale from the App Store or Google Play and sign in with the same Seller credentials.
- Sign in with your Seller credentials
Log in with the same Square account you used in the Developer Console; the POS API checks this account against the Location ID you saved earlier. - Understand when the Square app is required
- Card-present payments (tap/insert/swipe) initiated from the OctopusPro mobile app hand off to Square Point of Sale; the payment button is hidden if the app isn’t installed.
- Card-on-file or web-portal payments use Square’s online payment flow and do not require the Square POS app for customers or office users.
- Enable offline resilience (optional but recommended)
Square POS can queue transactions for up to 24 hours without connectivity; reconnect and open the app to sync them. - Pair hardware & run a live test
In Square POS go to ≡ More → Settings → Hardware, connect your Reader or Terminal, then process a $1 test charge and void it to confirm OctopusPro marks the invoice Paid.
Tip for white-label builds: If you’re using a custom-branded OctopusPro app, contact OctopusPro Support for the correct bundle ID / URL scheme before testing.
Grant staff permission to charge cards
OctopusPro › Settings › Team › Roles & Permissions › enable Process Payments for each role that should accept card-present payments.
Pair hardware & run a test sale
- Square app › ≡ More › Settings › Hardware › connect Reader/Terminal/Register.
- Process a $1 test payment, then void it—confirm the OctopusPro invoice marks Paid.
(Optional) test online payments in Sandbox
Generate Sandbox credentials and use test card numbers for card-not-present transactions. Sandbox does not simulate card-present flows.
Offline-mode safety net
Square Readers/Terminals store payments offline for up to 24 hours; reconnect within that window or the charge expires. (squareup.com)
Mini-FAQ—embed right below the checklist
| Question | Answer |
|---|---|
| Do I need a brand-new Square account? | No. Sign in with your existing Seller account—just create (or reuse) an app inside the Developer Console for OctopusPro. |
| Do I need to enable POS API & code signatures? | Only if you want fieldworkers to take tap/insert/swipe payments on-site from the OctopusPro mobile app. If you only take online payments (portal/links) or office payments (web portal), you can skip it. |
| Can I skip the Square POS app? | Yes for web-portal or saved-card payments. No for tap/insert/swipe—POS API requires the Square app. (developer.squareup.com) |
This refreshed sequence covers every credential, toggle, permission, hardware step, and “what-if” scenario so users—new or existing Square sellers—get from zero to a live, reconciled test charge without detours.
Taking Payments in Day-to-Day Operations
OctopusPro pipes every Square payment path—tap-to-pay in the field, keyed in by the office, self-service checkout, or one-click invoice links—into the same ledger and flips the invoice to Paid the instant Square authorises the charge. Card-present transactions launch the Square Point of Sale app through the POS API; all browser-based or stored-card transactions post straight to Square’s Payments API, so no extra mobile app is required for back-office staff or customers. Returning portal users can even pay in one tap with a saved Card on File. Offline? Readers queue payments for up to 24 h and sync when signal returns.
| Scenario | Workflow |
|---|---|
| Fieldworker on-site (card-present) | 1 ) OctopusPro app → Booking › Billing › Payment. 2 ) Tap Submit; OctopusPro deep-links to Square POS. 3 ) Swipe / tap / insert card → choose Tender → tap Charge. 4 ) At the receipt screen pick No Receipt or enter email/SMS—this can also be sent later from OctopusPro. 5 ) Square shows Thank You then auto-redirects back; OctopusPro logs the payment and marks the invoice Paid. |
| Office staff (web portal) | Invoices list → Actions › Add Payment → select Square → charge stored card or key new details. No Square app needed; payment posts via Square Payments API and the invoice closes instantly. |
| Customer portal – checkout / open invoice | During online booking or when viewing Invoices › Pay Now, customers follow Square’s hosted form; if signed in they can pick a saved Card on File. Invoice or booking confirms on success. |
| Email / SMS pay-link | OctopusPro inserts a Pay Invoice link; customer taps it on any device, completes Square’s hosted checkout, and the invoice status updates in real time—no portal login required. |
Tip: If the Square POS app isn’t installed, the Payment button is hidden in the OctopusPro mobile app, preventing field errors.
Pairing Hardware (Reader, Terminal, Register)
Smooth hardware pairing means fewer “Why won’t it connect?” calls from field staff and faster check-outs on site. Follow the steps below for Square Reader, Square Terminal, and Square Register, then run the quick $1 test to confirm everything loops back into OctopusPro.
1 Square Reader (contactless & chip)
| Step | Action | Details |
|---|---|---|
| 1 | Open pairing menu | Square POS app → ≡ More › Settings › Hardware › Square Reader 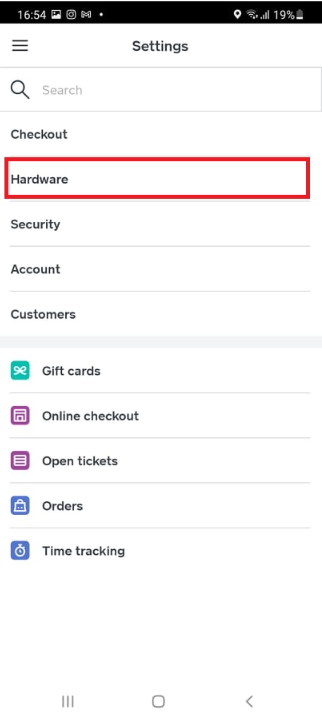 |
| 2 | Put Reader in pairing mode | Press and hold the Reader’s power button 3–5 s until four orange lights flash once. Release immediately; red lights mean you held too long and triggered a reset. |
| 3 | Connect | Tap Connect a Reader → select your Reader when it appears → confirm the Bluetooth prompt (Android may ask twice).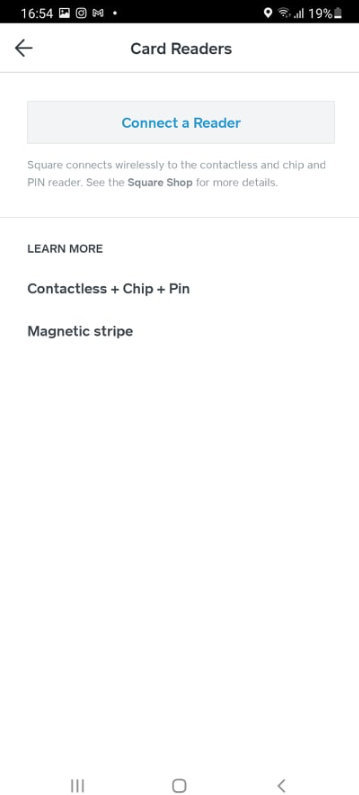 |
| 4 | Verify “Ready” status | The Reader shows as Ready in Hardware list and a green LED blinks once. |
| 5 | Run a $1 test sale | Charge $1, then immediately void/refund it via Transactions › Refund in the app to prove the round-trip. |
| 6 | Remember offline limits | Reader queues payments for up to 24 h; reconnect and open the POS app to upload or risk declines. |
2 Square Terminal
| Step | Action | Details |
|---|---|---|
| 1 | Power & network | Hold the side power button 3 s, then connect to Wi-Fi or Ethernet. |
| 2 | Pair to OctopusPro | On Terminal: Settings › Remote Pairing › Generate Device Code. In OctopusPro (web) choose Add Terminal and enter the code; the devices link in seconds. |
| 3 | Optional accessories | Plug USB receipt printer, cash drawer, or barcode scanner into the rear USB-C ports. |
| 4 | Test & void | Process a $1 chip or tap payment, print/email receipt, then void to confirm OctopusPro auto-marks the invoice Paid. |
| 5 | Offline buffer | Terminal stores payments offline for up to 24 h—reconnect within that window to capture funds. |
3 Square Register
| Step | Action | Details |
|---|---|---|
| 1 | Initial setup | Plug power and Ethernet (or join Wi-Fi), then sign in with your Seller credentials. |
| 2 | Cash drawer (optional) | Register → Settings › Hardware › Cash Drawers → follow prompts (USB or printer-driven drawers supported). |
| 3 | Pair barcode scanner or printer | Connect USB accessories; Register auto-detects compatible models. |
| 4 | Test sale & refund | Run and void a $1 sale as with Terminal to confirm OctopusPro sync. |
| 5 | Offline limits | Register follows the same 24 h offline grace as Terminal—reconnect or risk losing transactions. |
4 Troubleshooting Quick-List
- Reader won’t show in list → Reset by holding power 20 s until red lights stop, then repeat pairing.
- Flashing red after pairing attempt → Restart phone/tablet Bluetooth, “Forget” Reader in Settings, then re-pair.
- Pending offline payments → Open POS app while online; transactions upload automatically. Don’t sign out or factory-reset hardware until they clear.
With hardware paired, tested, and offline safeguards in place, your field team can tap, insert, or swipe with confidence—and every payment lands in OctopusPro in real time.
Security & Compliance
- Scope reduction: All card data stays within Square’s PCI-certified environment; OctopusPro only stores non-sensitive tokens.
- Device hygiene: Keep Square app versions < 90 days old to remain compliant.
- User permissions: In OctopusPro, restrict “Process Payments” permission to trained staff.
Troubleshooting FAQ
| Symptom | Fix |
|---|---|
| Reader won’t pair | Forget the reader in Bluetooth settings, reboot, then re-pair via Square app. (squareup.com) |
| Location ID invalid | Verify you’re using Production (not Sandbox) IDs and that the location is active. (developer.squareup.com) |
| App doesn’t hand back to OctopusPro | Confirm you entered the correct URL scheme (OctopusPro) in the POS API profile. (developer.squareup.com) |
| Customer can’t see Square option online | Ensure Square is toggled ON under Payment Integration and the service’s Payment Terms allow card payments. (help.octopuspro.com) |
Additional Resources
- Square Developer Docs – POS API (developer.squareup.com)
- Square Locations API (multi-branch setups) (developer.squareup.com)
- OctopusPro Invoice & Payment Guide (advanced workflows) (help.octopuspro.com)
Where and why the Square logo appears in your Customer Portal
The Square logo is shown any time a customer is about to enter, store, or use a card through Square’s secure, embedded Card-on-File checkout. It reassures customers that:
- their card data is handled only by Square’s PCI-DSS–certified platform
- cards can be un-linked at any time through the receipt or their customer-portal profile
1 Saving a new card for future bookings
| Step | What the customer sees | Why it matters |
|---|---|---|
| 1. Log in | Customer Portal › My Bookings | Only signed-in users can keep a card on file. |
| 2. Open Payment Methods | Payments tab → Payment Methods button | Lists any cards already stored. |
| 3. Add card | + Add New Payment Method → Square-hosted form (Square logo appears here) | Square encrypts the card details; OctopusPro receives only a non-sensitive token |
| 4. Confirm | Success screen + email receipt from Square | Receipt contains a one-click “Remove Card” link for customer control |
Guests cannot see “Payment Methods” until they create an account; instead they are offered the Save this card for next time checkbox during checkout.
2 Paying during a new booking or quote acceptance
When the booking form reaches Select Payment Method:
| Customer type | Payment-method list | Square logo location |
|---|---|---|
| Registered (card on file) | • Card ending 1234 (default)• Pay by New Card | Beside both the saved card and the “New Card” button |
| Registered (no card saved) | • Pay by Card | Beside the single card option |
| Guest checkout | • Pay by Card | Beside the single card option |
Selecting Pay by Card loads the same Square-hosted fields; if the customer ticks Save this card, the token is written back to their profile at completion.
3 Paying an open invoice from a link or the portal
- Email / SMS link → Square Checkout opens in the browser; the logo appears at the top of the hosted page.
- Portal › Invoices › Pay Now → Identical experience; saved cards listed first, followed by Pay by New Card with the Square logo.
4 What customers can do next
- View / remove saved cards at any time under Payments › Payment Methods; actions sync instantly to Square’s vault.
- Add multiple cards (e.g., personal vs business) and choose at checkout.
- Receive auto-emails whenever a new card is added or an existing one is deleted for transparency.
With these clarifications, customers always know where to click, why the Square logo is shown, and how their card data is protected—reducing support queries and abandoned payments.
To stay updated, please subscribe to our Youtube channel.