
How to Export an Invoice as PDF
For seamless financial transactions and transparent communication, providing your clients with clear invoices is essential. OctopusPro offers an easy way to export these invoices as PDFs, ensuring a professional look and simple distribution process.
Admin users can customize the automatic inclusion of these PDFs when emailing invoices to clients, providing adaptability to a range of situations. When dispatching invoices manually, a straightforward checkbox lets you control whether to attach the PDF, providing you full control over the details you share.
Fieldworkers also benefit from this feature, given they have the required permissions. Using their app, they can access and email these PDFs, strengthening team-wide access to vital details.
Steps to Export an Invoice as a PDF
- Navigate to the ‘Invoices’ section from the main menu.
- Select the “All Invoices” option or choose a specific type of invoice.
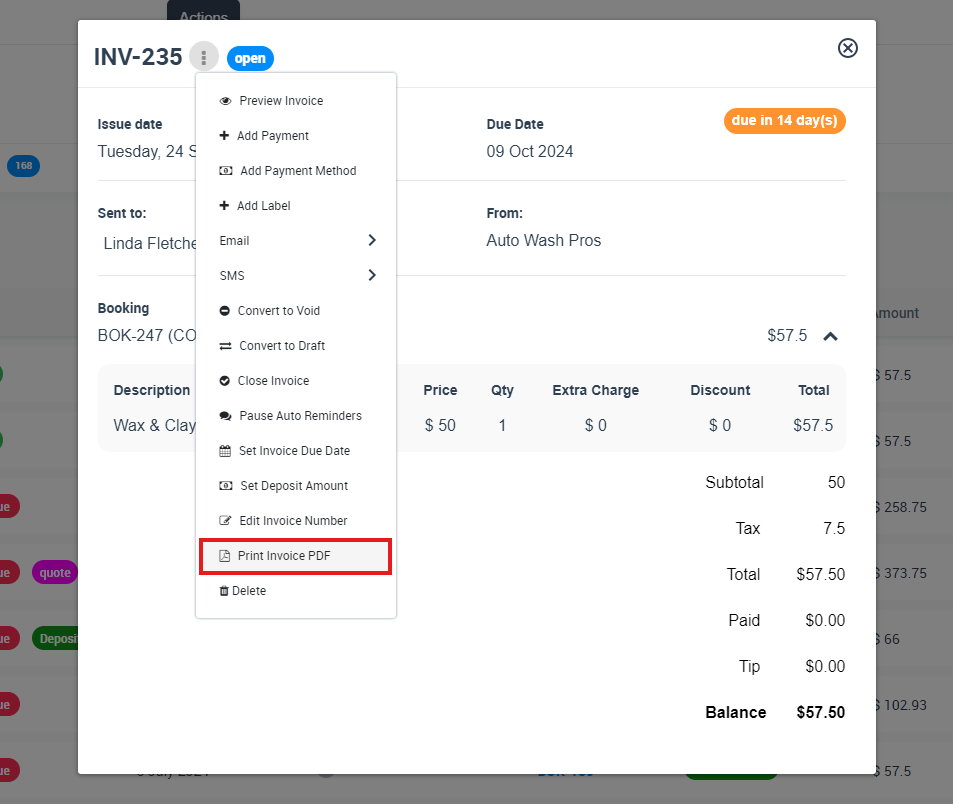
- Click on the invoice that you want to export as a PDF, opening the invoice details.
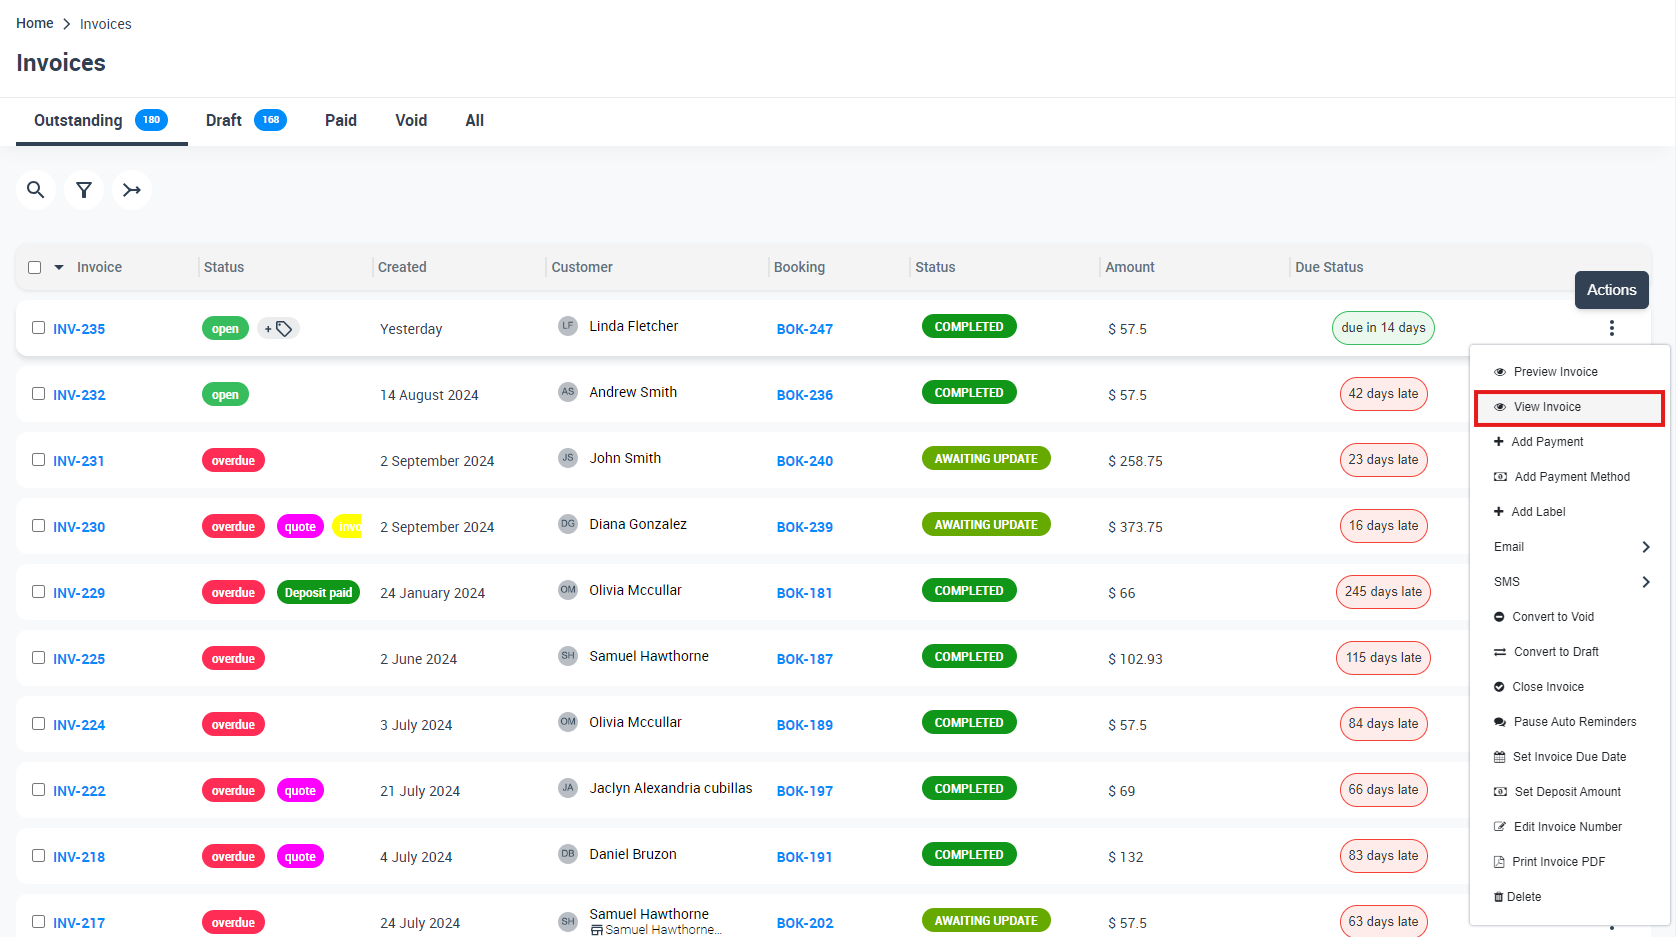
- In the invoice details page, click on the “Actions” button, then select “Print Invoice PDF”.
Alternatively,
- Go to Invoices> All invoices from the main menu.
- Select the type of invoice you want to export as a PDF
- Click on the actions button, then select “Print Invoice PDF”
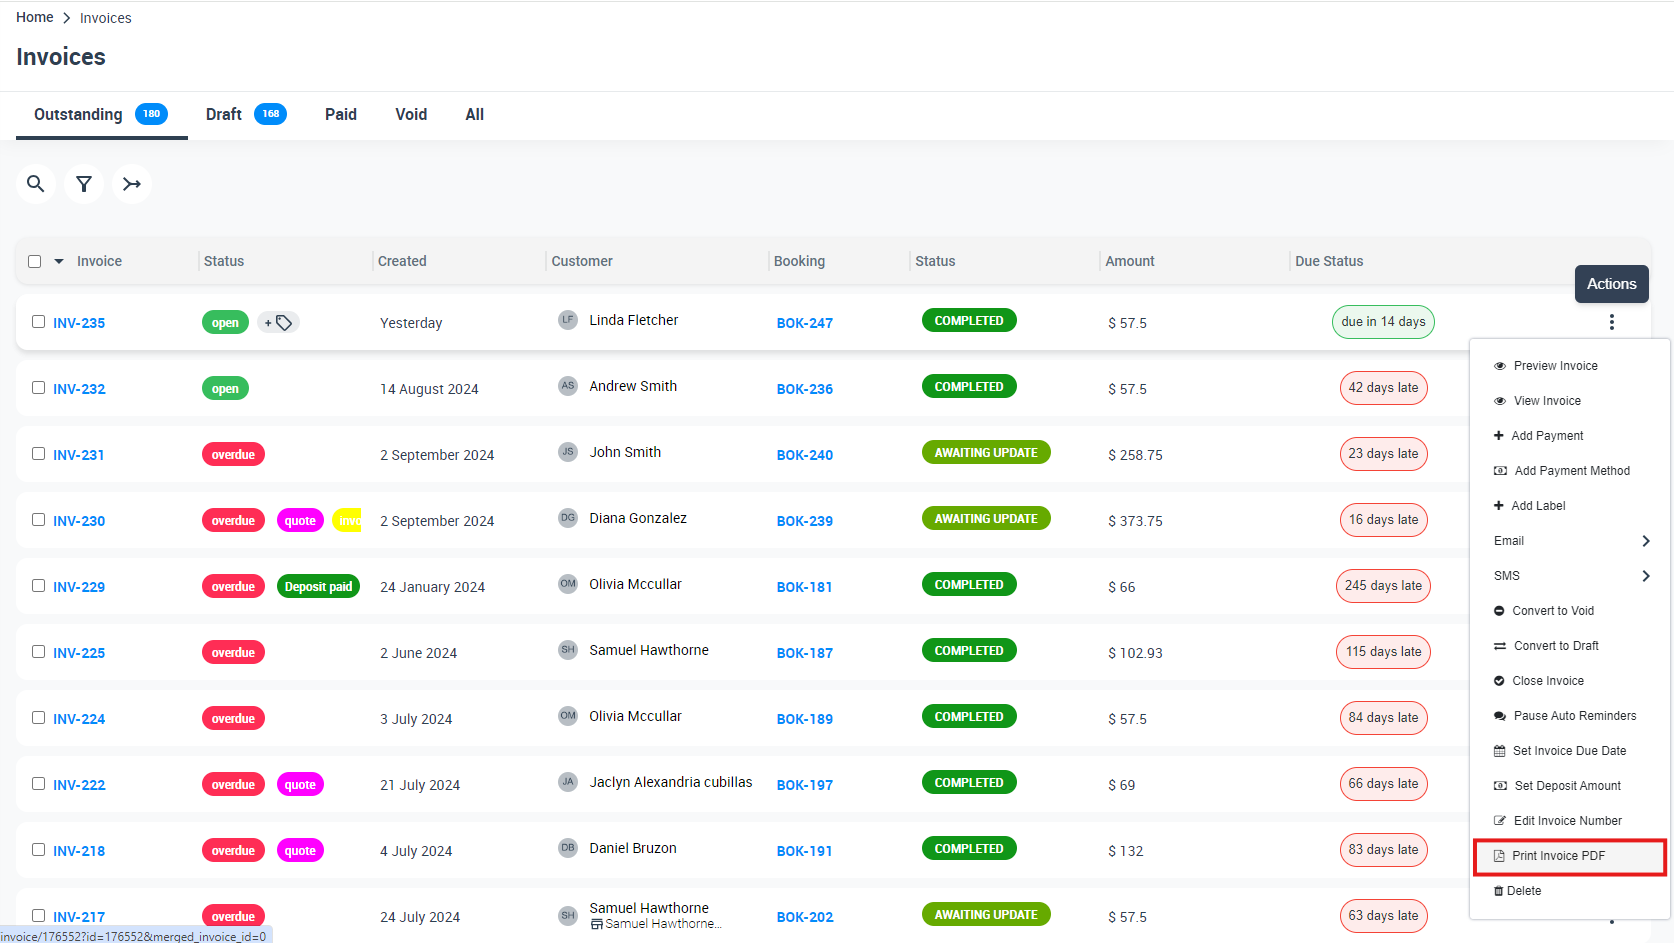
- The invoice will then be downloaded as a PDF file on your device. Remember, when you send an invoice to a client via email, OctopusPro automatically includes the invoice as a PDF attachment. This applies to both manual emails and those sent through account-enabled automations.
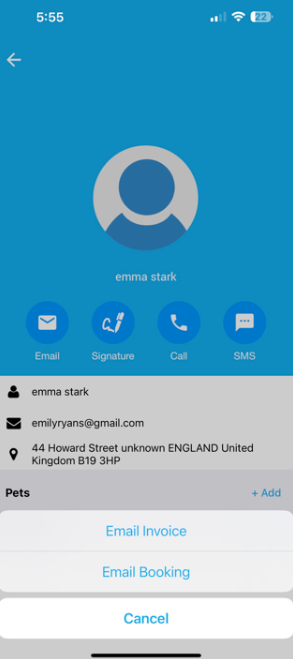
- Fieldworkers, provided they’ve been granted the necessary permissions by an admin, can view and email the invoice as a PDF directly from the OctopusPro app.
Invoice PDF Customization
- In business, consistency is a critical success factor, and OctopusPro’s PDF invoice customization feature helps enhance your brand identity and meet your specific business needs. This feature allows you to control and personalize the design, style, and information displayed on your invoice PDF attachments, offering a wide range of customization options.
- Whether you wish to adjust the font style, size, or color, insert your business logo and align it accordingly, or add additional information in your document header and footer, OctopusPro has got you covered. You can even set your own payment terms and regulations to be displayed on your invoices, ensuring your clients are well-informed at all times.
- From controlling the visibility of service cost breakdown and scheduled appointments in your invoices to customizing the color of your document borders and uploading your business logo, the power to shape your invoice PDF attachments to reflect your brand style is entirely in your hands.
- With OctopusPro’s invoice PDF customization, your invoices become more than just a payment request; they transform into an extension of your brand identity, creating a lasting impression on your clients.
- Navigate to Settings > Financial Settings > Invoice Template, and take control of how your invoice PDF attachments look, feel, and communicate. Leverage the potential of OctopusPro and turn your invoices into effective branding tools today.
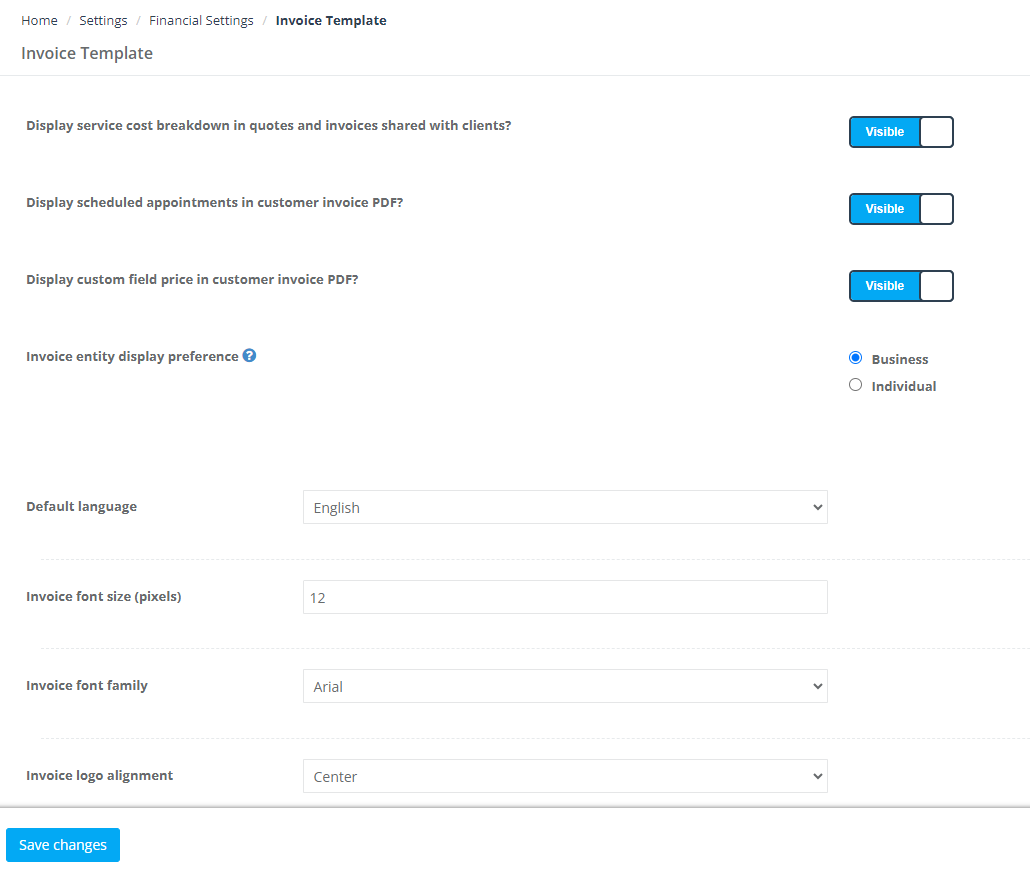
Display Service Cost Breakdown in Quotes and Invoices Shared with Clients
- Having a transparent and detailed breakdown of service costs can significantly boost client trust and understanding of your pricing. With OctopusPro, you can easily choose to display the service cost breakdown in quotes and invoices shared with your clients. This option is managed through a simple toggle button which is set to visible by default. Whether you wish to provide an itemized list of costs or present a simplified invoice, OctopusPro gives you the flexibility to meet your client’s expectations and maintain transparency in your business transactions.

Display Scheduled Appointments in Customer Invoice PDF
- Your clients appreciate being informed about their scheduled appointments, especially when these are tied to their invoices. OctopusPro allows you to display the date and time of scheduled bookings directly in your invoice PDF attachments. This can be controlled through a visibility toggle, providing a straightforward way for your clients to reference their appointments, leading to fewer reschedules and missed appointments. Enhance your customer service and streamline your booking process with this handy feature.

Configure Entity Details on Invoices Sent to Clients
- Different businesses have different requirements when it comes to the information displayed on their invoices. OctopusPro gives you the flexibility to customize your invoices to your business needs. You can choose to display your company’s primary business identifiers (such as ABN, EIN, or business registration name) when the ‘Business’ option is selected. Alternatively, opt for ‘Individual’ to use the assigned fieldworker’s business details. This feature is crucial in ensuring your invoices comply with varying accounting practices and regulatory requirements, providing an additional level of customization to suit your unique business model.

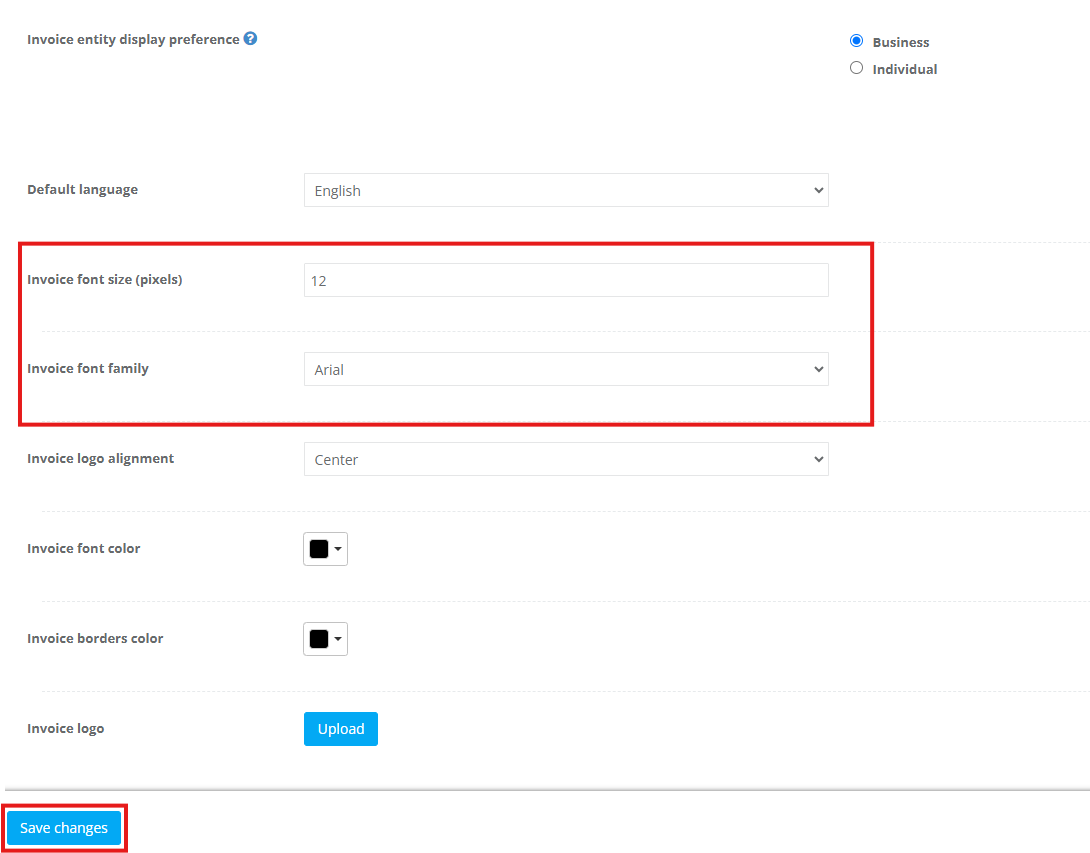
Invoice Font Size and Family
- The design and readability of your invoices can be significantly improved by choosing an appropriate font size and family. With OctopusPro, you can customize your invoice font size, set in pixels, for optimal visibility. The default setting is 12 pixels, a size that balances readability and space efficiency. You can also set the font family for your invoices, with Arial being the default option. These settings give you the flexibility to align your invoices with your brand identity while ensuring they remain legible and professional.
Invoice Logo and Alignment
- Branding your invoices can add a professional touch and reinforce your company’s image. OctopusPro allows you to upload your company’s logo to be displayed on your invoices. Moreover, you can also set the alignment of the logo according to your design preferences. The default setting aligns the logo to the left of the invoice, offering an eye-catching and professional start to your invoice presentation.
![]()
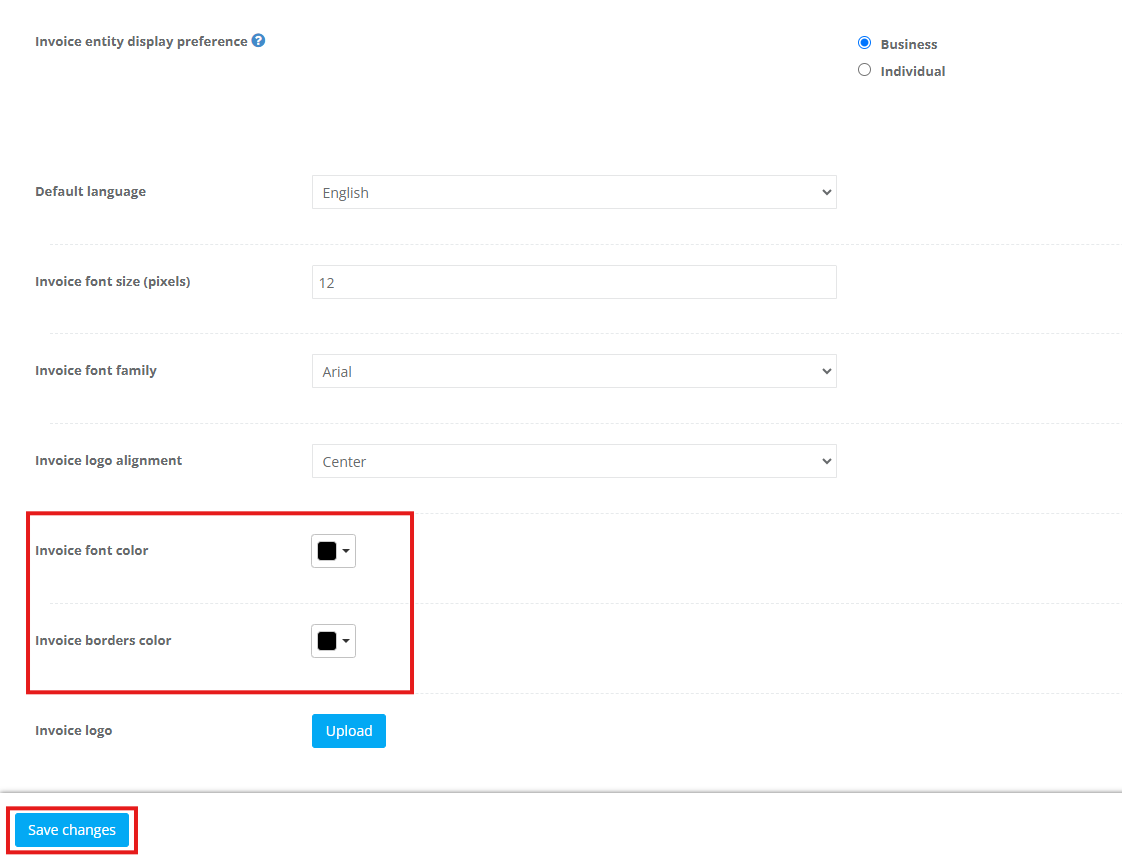
Invoice Font Color and Borders Color
- Color coordination can give your invoices a distinct look and make them instantly recognizable as your brand. OctopusPro offers options to customize the font color and the color of the borders on your invoices. Whether you want to match your brand colors or opt for a minimalistic design, you can ensure consistency and brand reinforcement through these settings.
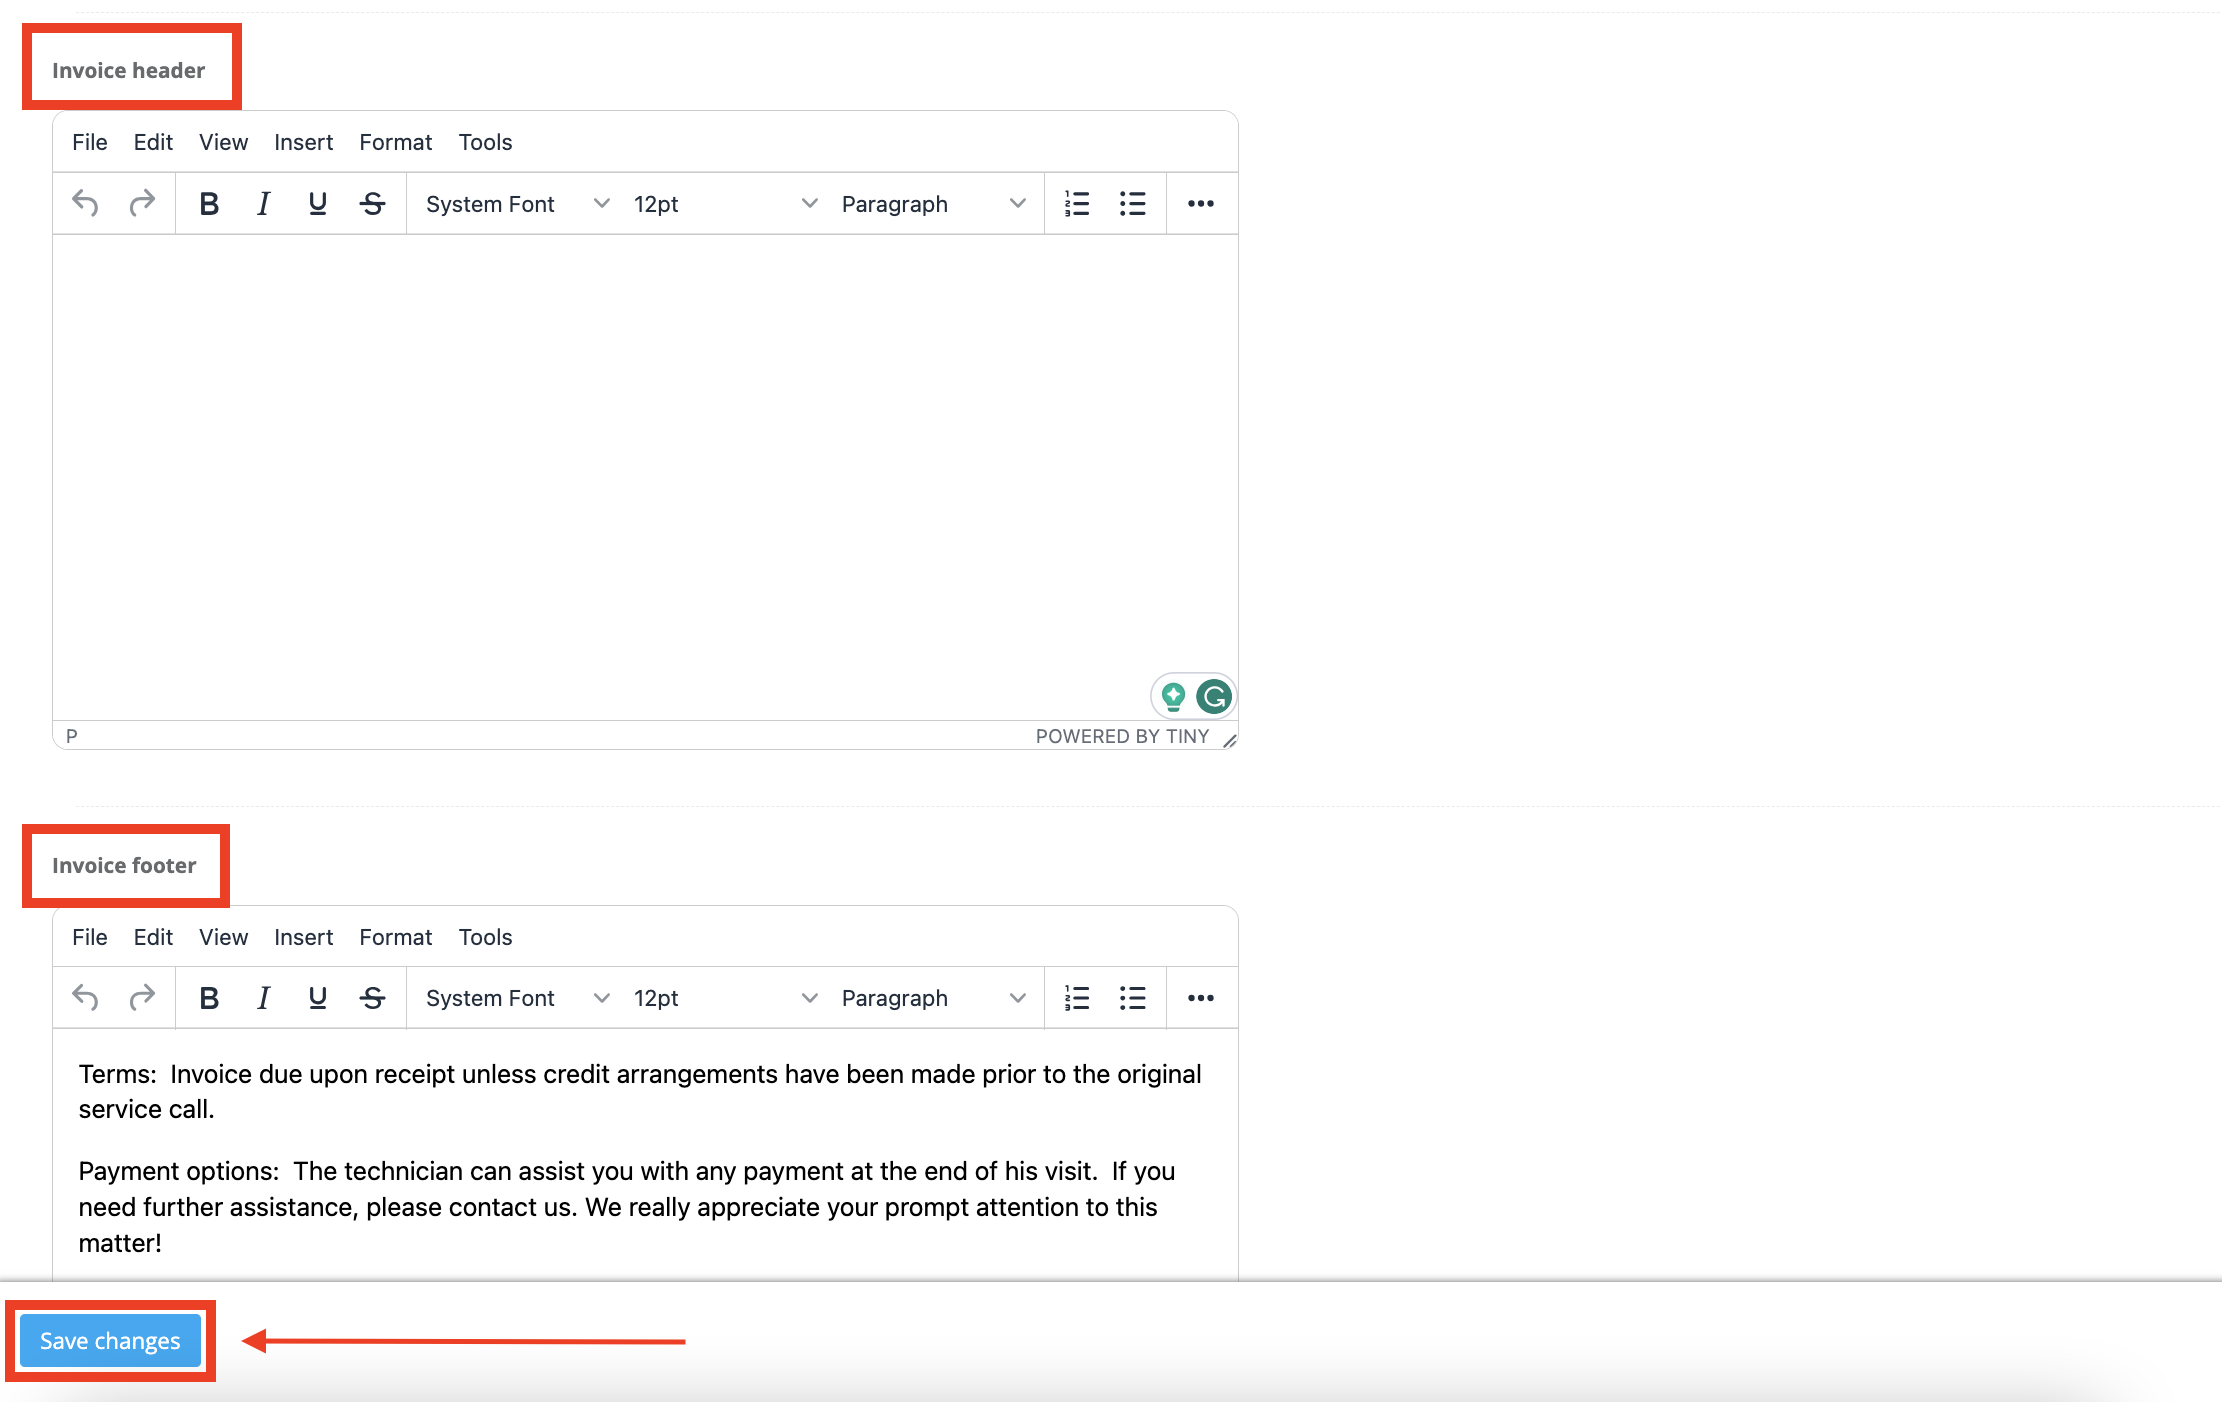
Invoice Header and Footer
- The invoice header and footer are essential spaces where you can insert additional company information, special notes, or even personalized messages to your clients. OctopusPro provides easy-to-use fields for both the header and footer of your invoices. Whether you want to include a heartfelt thank you message, a reminder about upcoming services, or your company’s contact information, these sections can be tailored to fit your needs.
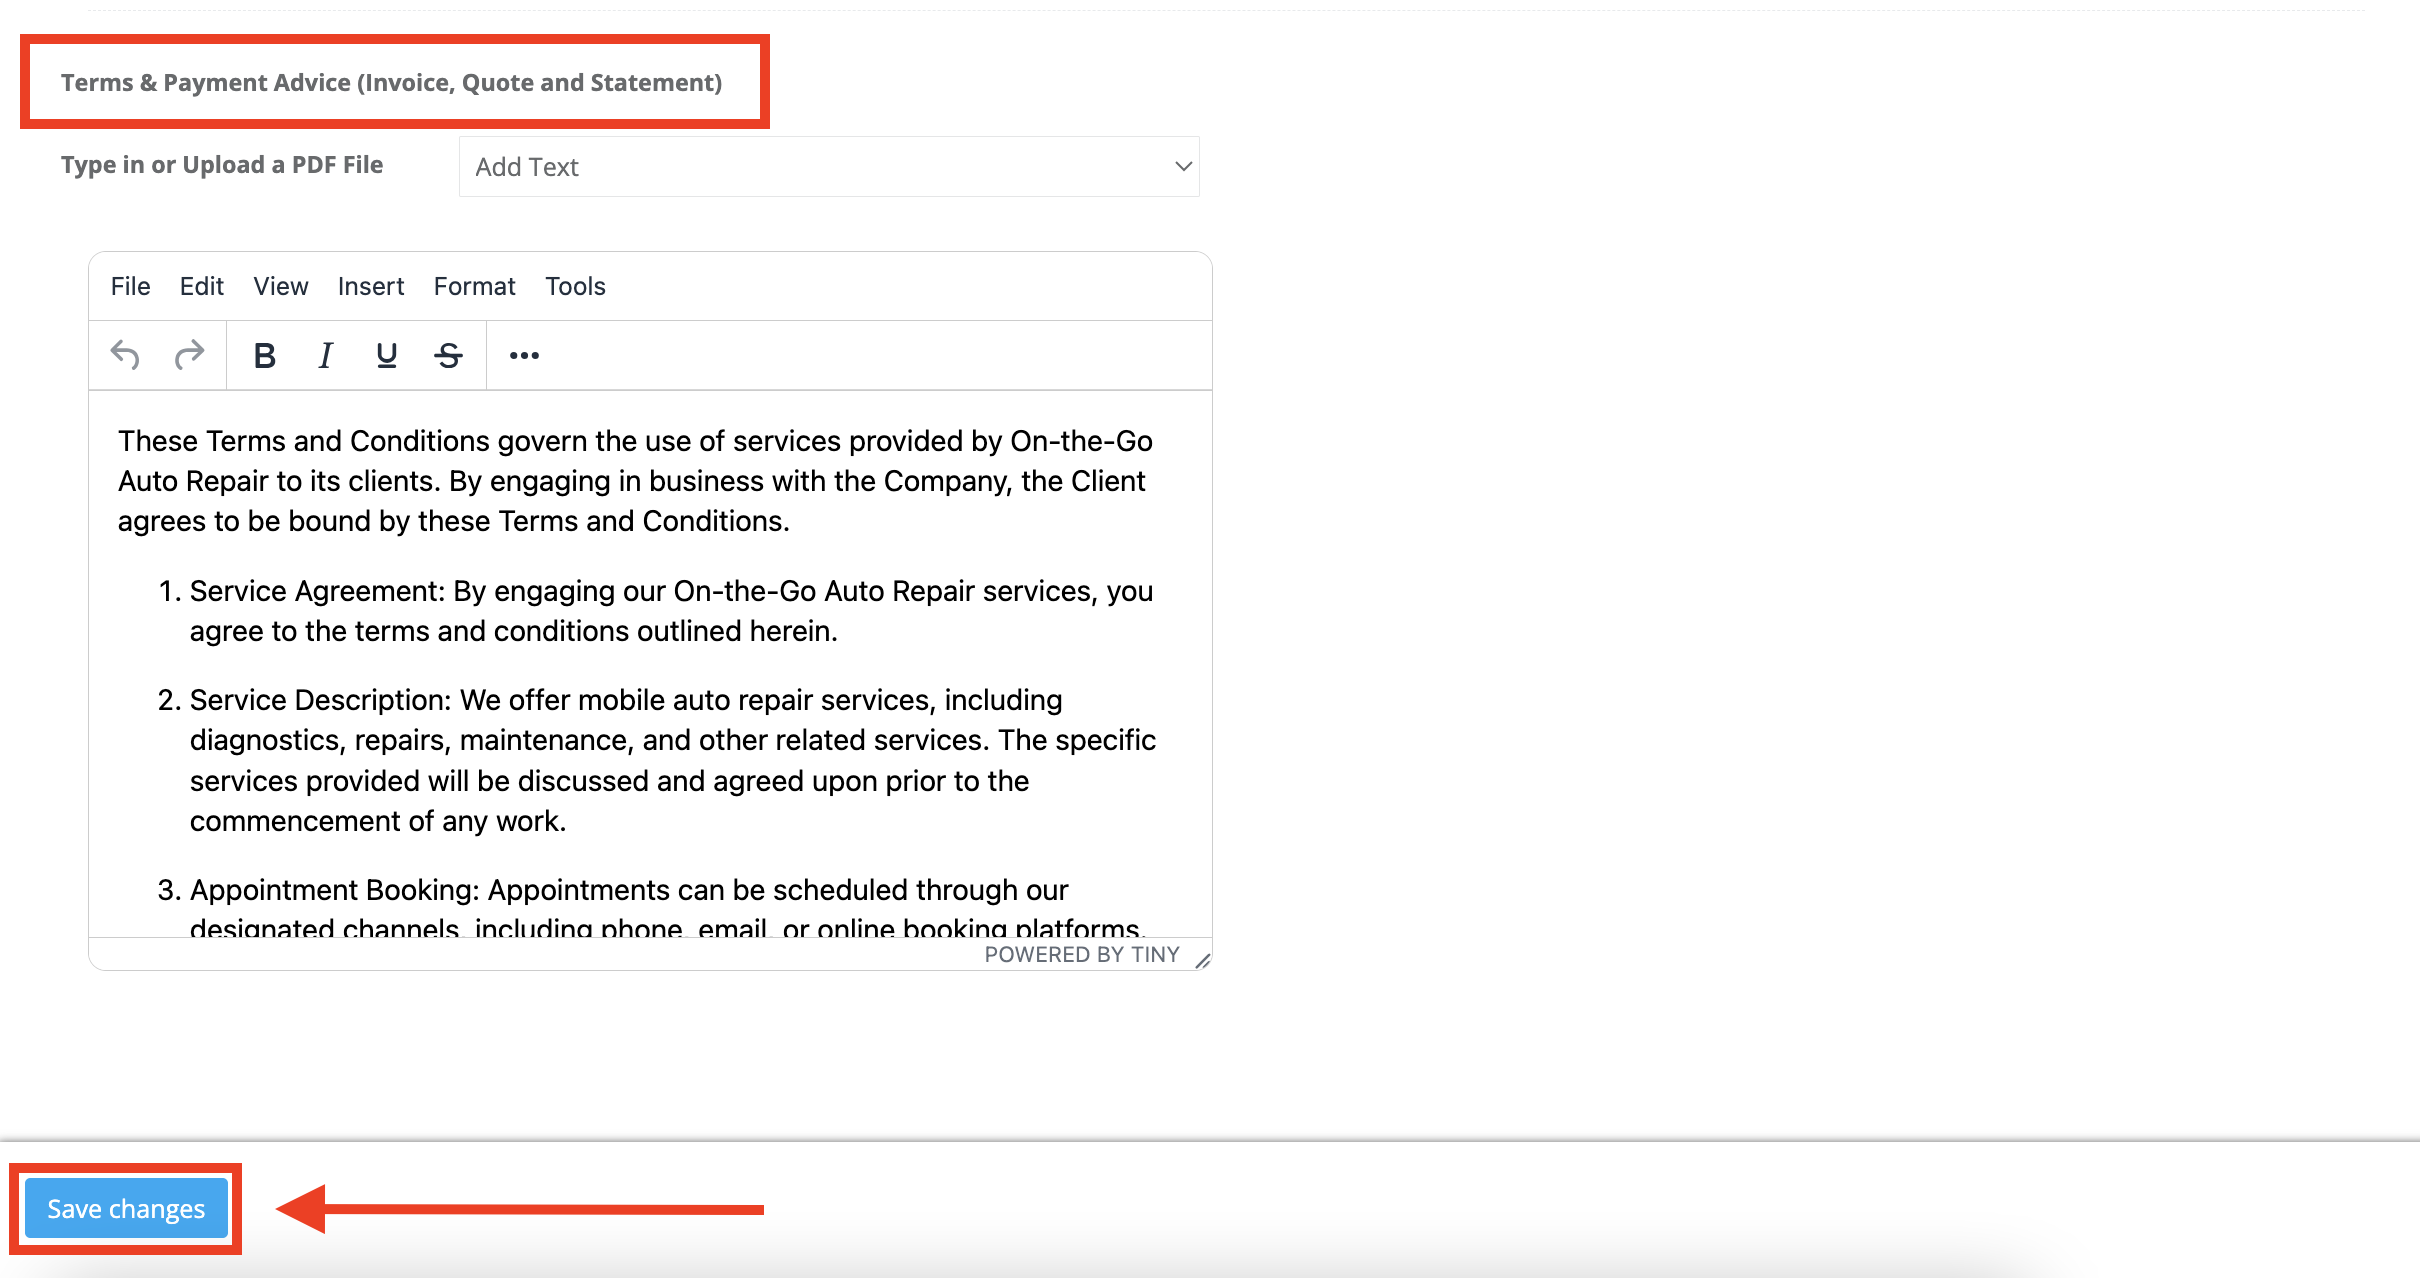
Terms & Payment Advice (Invoice, Quote, and Statement)
- Ensuring that your clients understand the terms of service and payment is crucial in maintaining clear communication and preventing potential misunderstandings. OctopusPro provides a dedicated section where you can type in or upload a PDF file containing your terms of service and payment advice. This information can be included in all outgoing invoices, quotes, and statements. This feature is particularly useful for setting expectations with clients and providing them with all the necessary information to complete their payments promptly.
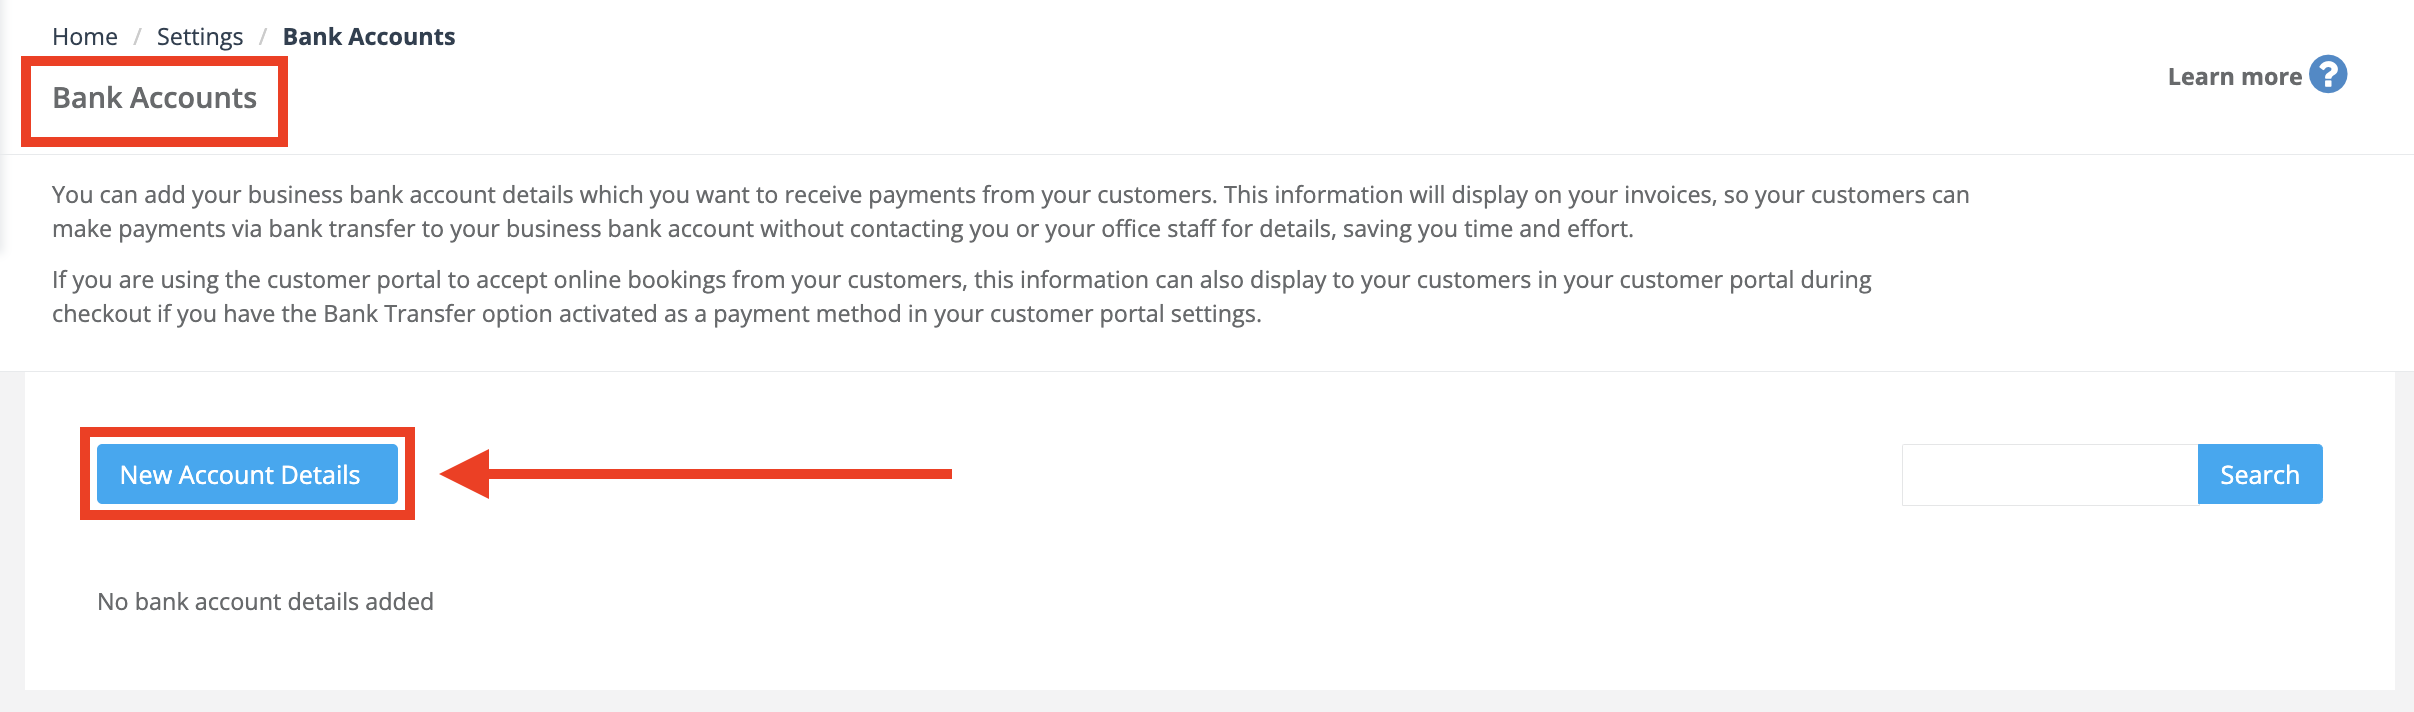
Displaying Bank Account Details on Invoices for Bank Transfers
OctopusPro allows you to add your business bank account details, which can be displayed on the invoices you send to your customers. This feature makes it easy for your customers to make payments via bank transfer directly to your business bank account without having to contact you or your office staff for the account details.
Add your Bank Account Details to your OctopusPro Account
To add your bank account details to your OctopusPro account, log in and go to Settings > Financial Settings > Payment Integration. Scroll down until you see the “Bank Details” box. Click on the pin icon next to it to open a popup requiring your bank account information.
The necessary details include:
- Account name: This is the business name associated with the bank account, or your full name if it’s a personal bank account.
- Bank Code: This is a unique code that identifies your bank branch. It can be referred to as a BSB, Sort Code, Routing Number, or Branch Code, depending on the country.
- Account Number: This is your unique bank account number associated with your account.
- Bank Branch address: The address of your bank branch where your account was set up.
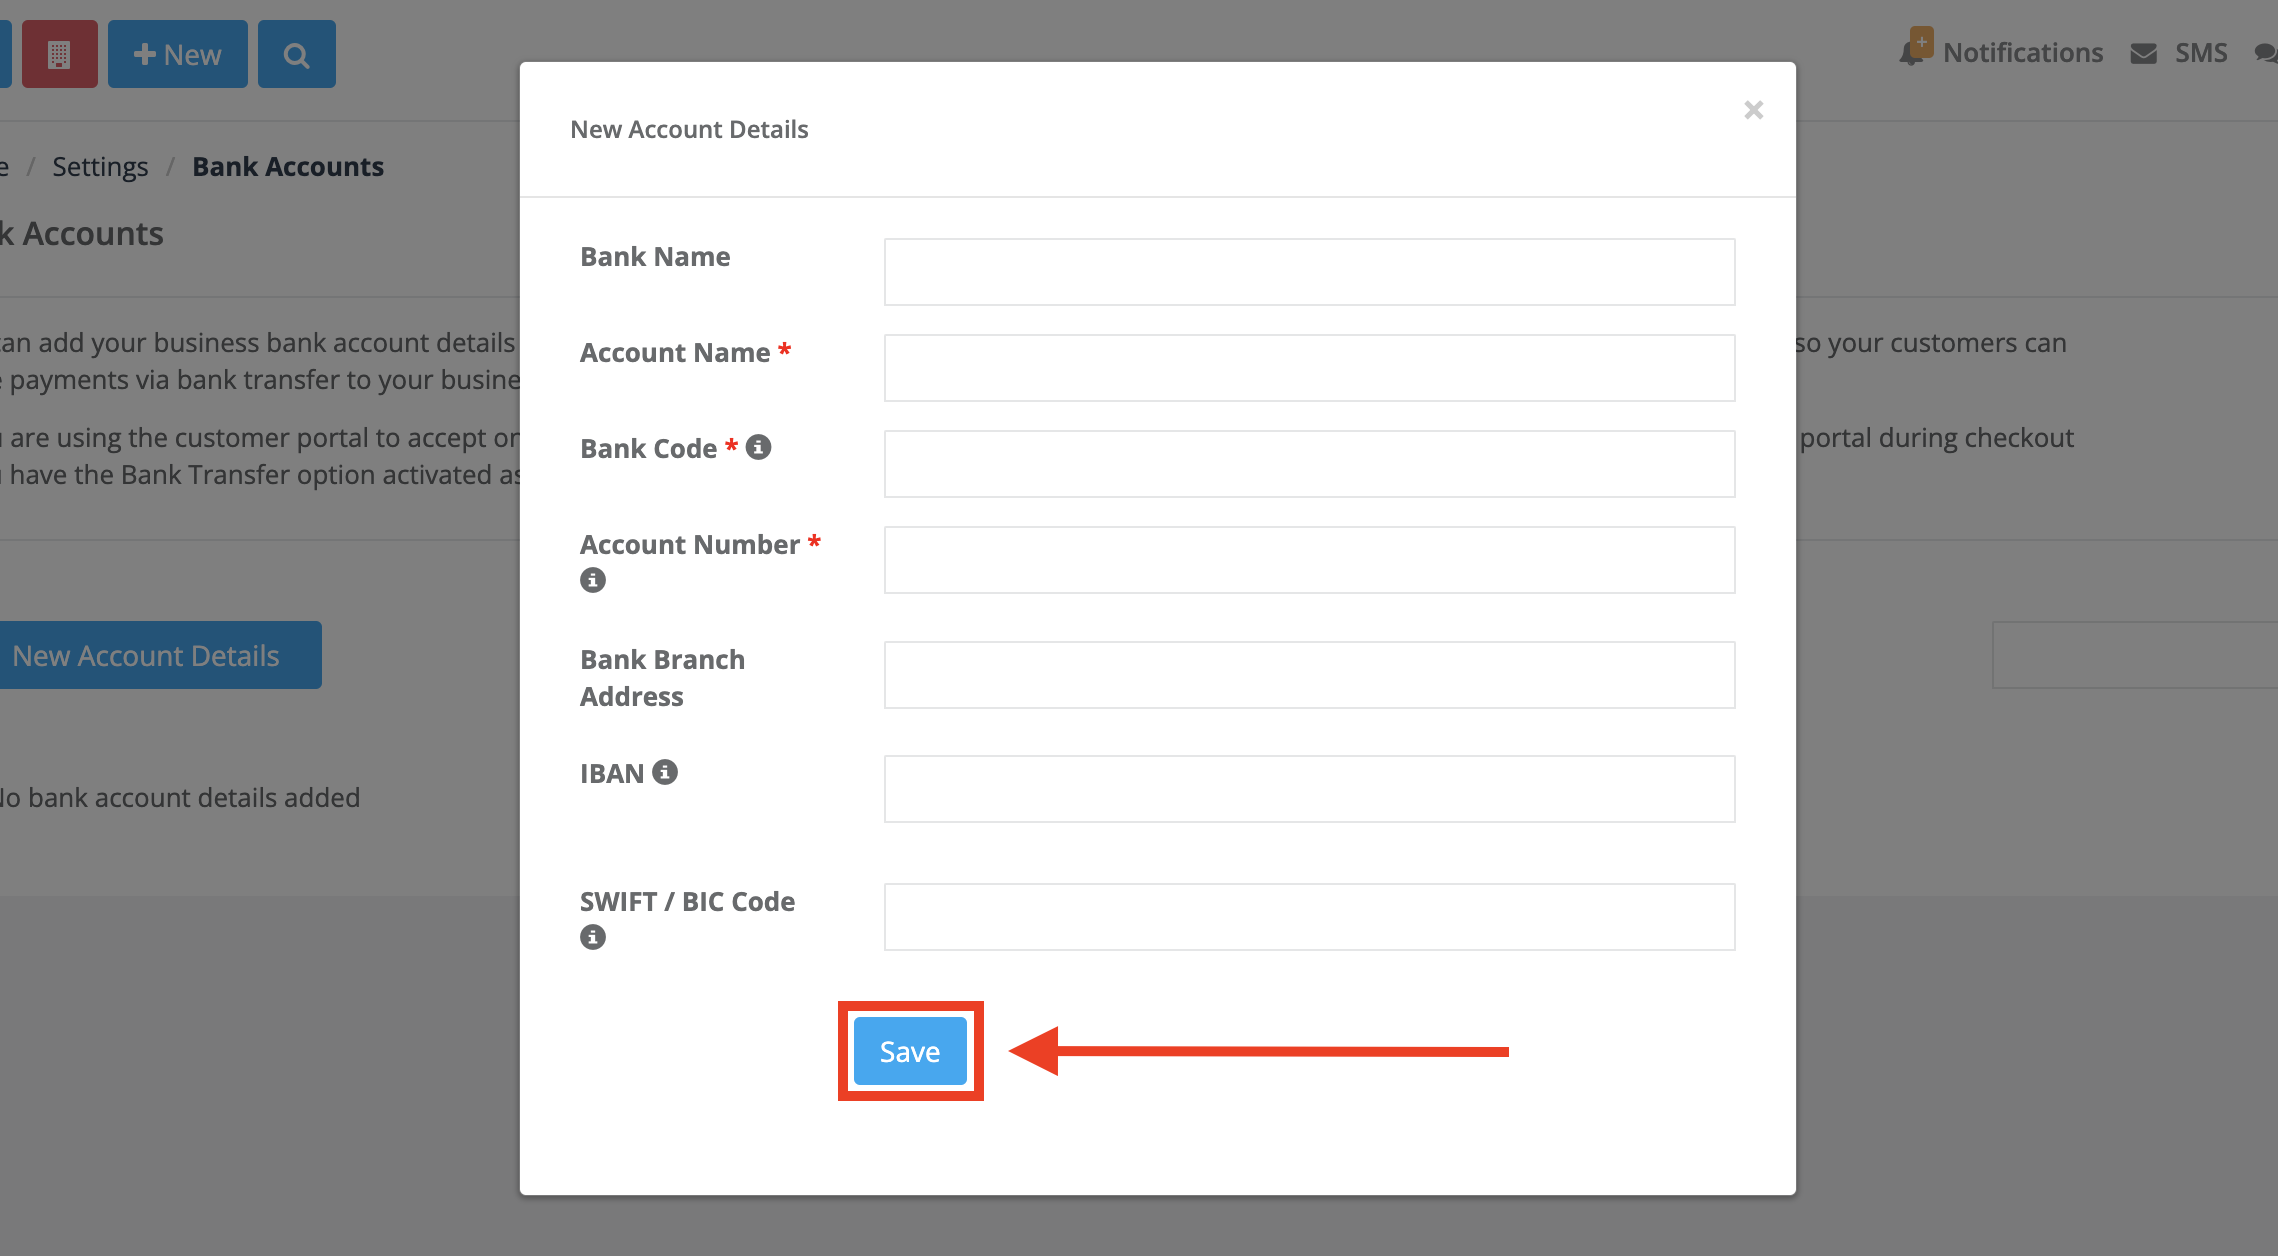
Remember to click “Save” to store these details in your account.
Sending your Account Details to Customers
Your customers will receive your bank account details in the PDF attachment of the invoice email. This enables them to make payments directly to your business bank account. If you’re using the customer portal for accepting online bookings, these details can also be displayed during checkout if you have the Bank Transfer option activated as a payment method in your customer portal settings.
Displaying Payment Options on Invoices
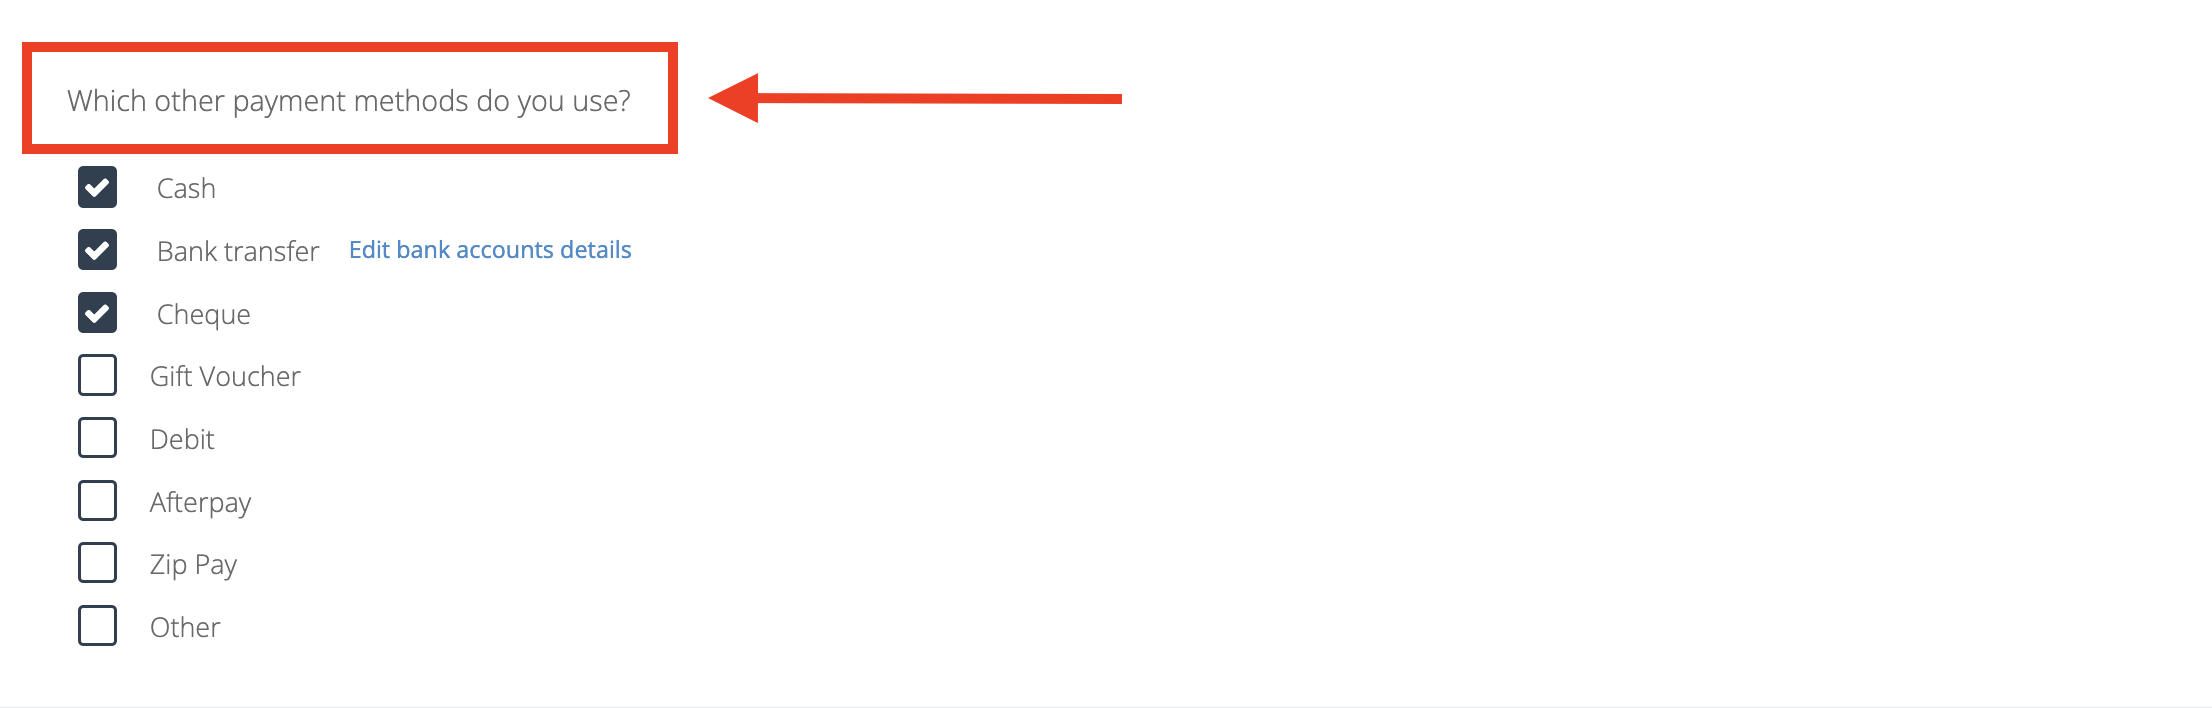
OctopusPro not only allows you to display your bank account details but also enables you to display your available payment options on your invoices. This is crucial in giving your customers the flexibility they need when making payments.
You can display payment options like Cash, Bank Transfer, Credit Card (with a button), Check, etc., on your invoices. This clear display of payment options provides convenience for your customers, letting them choose the payment method that works best for them.
Remember, transparency in payment methods can lead to faster payments and improved customer satisfaction, ultimately benefiting your business.
In summary, OctopusPro provides you with all the necessary tools to effectively manage the financial aspects of your business. The ability to display your bank account details and preferred payment methods on your invoices makes it easier for your customers to make prompt payments and facilitates smooth financial transactions.
To stay updated, please subscribe to our YouTube channel.