
Getting Started as a Fieldworker (Mobile App Guide)
OctopusPro’s Fieldworker App helps you manage your day-to-day work on the go—keep your profile up to date, control your availability, receive and action booking requests, navigate to jobs, communicate with customers, and provide real-time job updates (including photos and completion times).
In this guide, you’ll learn how to:
- Download the app and access your account
- Complete your profile (account details, services, and tools)
- Set your working hours, travel radius, and availability
- Receive notifications and respond to booking requests
- Start, update, and finish jobs with photo proof and statuses

Table of contents
- 1) Download the app & log in
- 2) Set up your account & profile
- 3) Choose services & set availability
- 4) Receive notifications
- 5) View bookings & respond to job requests
- 6) Contact customers (call/SMS/email)
- 7) “I’m on my way” / Running late
- 8) Start & finish jobs (statuses + photos)
- Next steps & related guides
1) Download the app & log in

To get started, install the OctopusPro Fieldworker App on your device, then log in using the email address linked to your fieldworker profile.
- iOS (Apple App Store): Download on iPhone/iPad
- Android (Google Play): Download on Android
How access typically works:
- Invite/activation: If your company created your account, you may receive an invitation or verification email to activate your access and/or set a password.
- Login: Enter your email and password in the app.
- Password help: If you forgot your password, use the reset option or ask your admin to help resend verification/access steps if needed.
Helpful guides:
2) Set up your account & profile
Once logged in, open your Profile to complete key details. A complete profile helps your team assign the right jobs to you and ensures smoother communication and scheduling.
In your profile, you can typically:
- Update personal/contact details
- Upload a profile photo
- Change your password
- Set your address and service areas
- Control which services you offer (and related options)
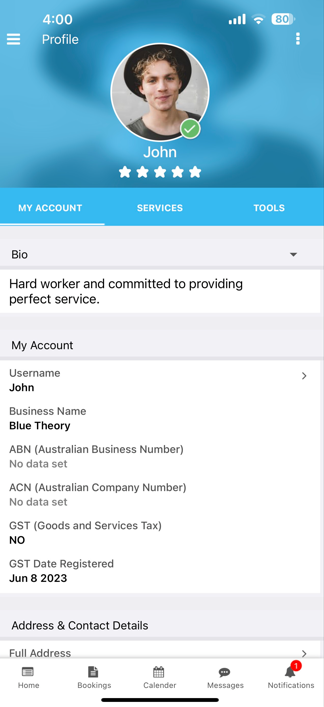
Best practice: Keep your phone number, email, and address accurate—this supports job routing, navigation, and customer contact when needed.
3) Choose services & set availability
To receive the right work, make sure your account reflects what you do, where you work, and when you’re available.

A) Enable/disable the services you provide
Use the Services tab to toggle which services you can take. Depending on your company’s configuration, you may also see service options or custom fields related to each service.
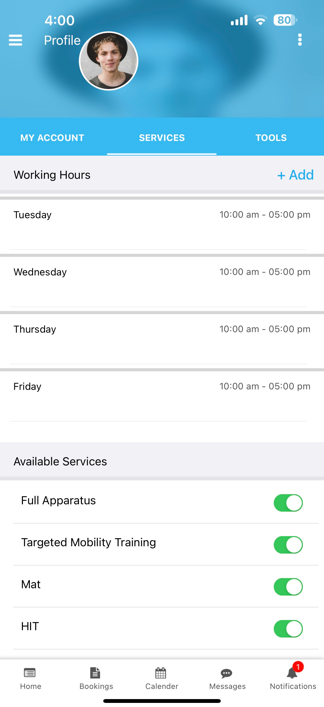
Learn more: Choose Service Preferences
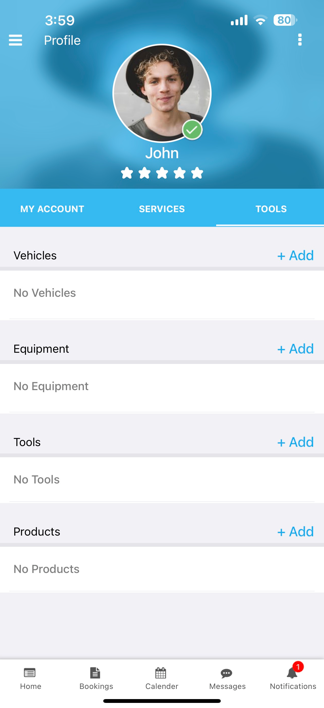
B) Add tools, equipment, or vehicles (if applicable)
Some businesses track what you carry (tools/equipment/vehicles/products) to improve job matching and onsite readiness. Add or update these under the Tools tab.
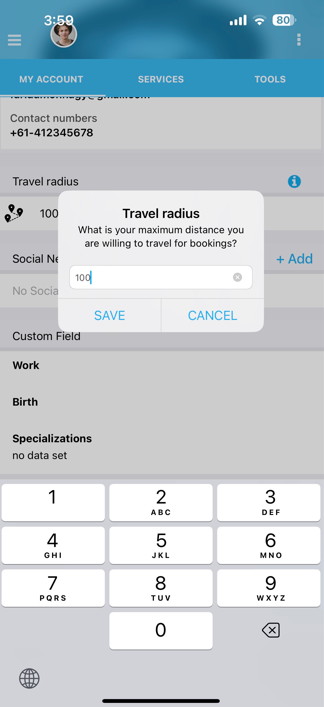
C) Set your travel radius
Your travel radius helps limit bookings to the distance you’re willing to travel. This improves scheduling accuracy and reduces long-distance assignments.
D) Set working hours, block unavailable time, and connect calendars

Availability is commonly managed through:
- Working hours: Set the days/times you can work.

- Unavailable blocks: Block time off (appointments, leave, training, etc.) so you don’t get scheduled.

- Calendar sync: If enabled, connect Google/Outlook calendars to keep availability accurate.
Helpful guides:
- Fieldworker Working Hours & Availability
- Fieldworker Calendar & Availability (Google/Outlook Sync)
- Manage Your Calendar (Fieldworker App)
Service areas & address: If your company uses service areas for dispatching nearby jobs, make sure these are set correctly.

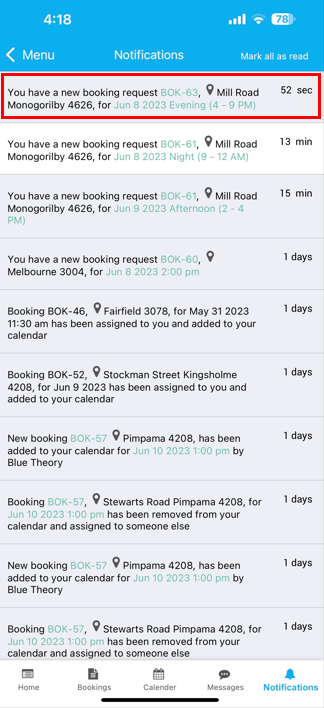
4) Receive notifications

OctopusPro can notify you about new job requests, schedule changes, messages, reminders, and updates. Notifications may include push notifications (mobile), and—depending on company settings—email alerts and SMS.
Helpful guides:

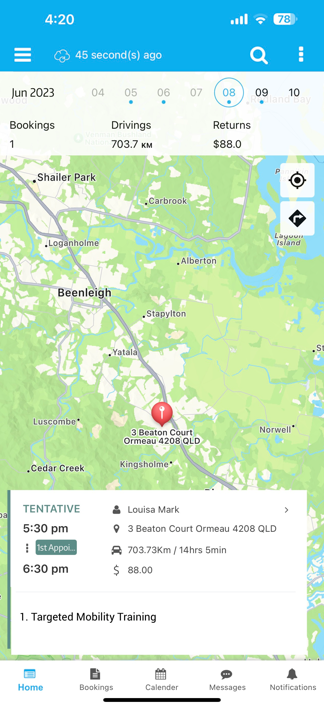
5) View bookings & respond to job requests

Your schedule and assigned work appear in the app’s Bookings area. You can open a booking to view customer details, job notes, schedule, photos, and billing (depending on what your business enables for fieldworkers).
Open a booking to view details:
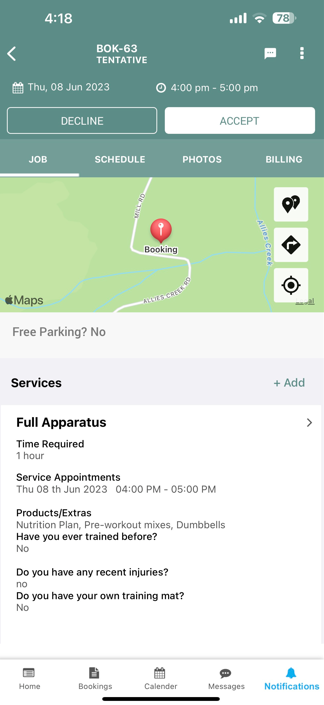
Job requests (Accept/Decline):
- Some companies allow fieldworkers to accept or decline requests.
- Other companies auto-assign jobs, or route jobs based on dispatch rules and permissions.
Helpful guides:
6) Contact customers (call/SMS/email)

When enabled, you can contact customers directly from their booking/contact screen. This reduces back-and-forth and helps keep customers informed.
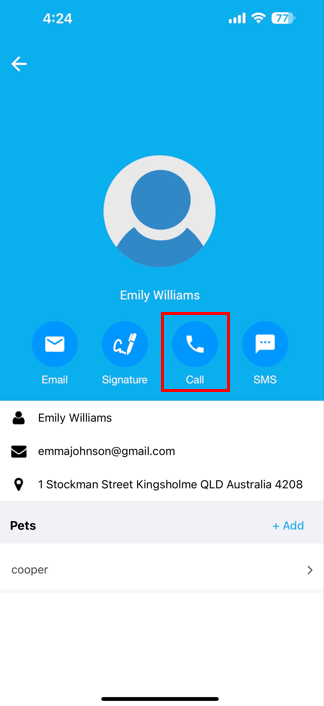
Typical communication options include:
- Call the customer
- Send an SMS (if enabled)
- Send an email (if enabled)
- Message your office/admin team (if enabled)
Learn more: Communicate with Office & Customers
7) “I’m on my way” / Running late
Use I’M ON MY WAY (and related options like RUNNING LATE, if enabled) to keep customers and office staff updated. These actions can help set expectations, update ETA, and reduce missed appointments.
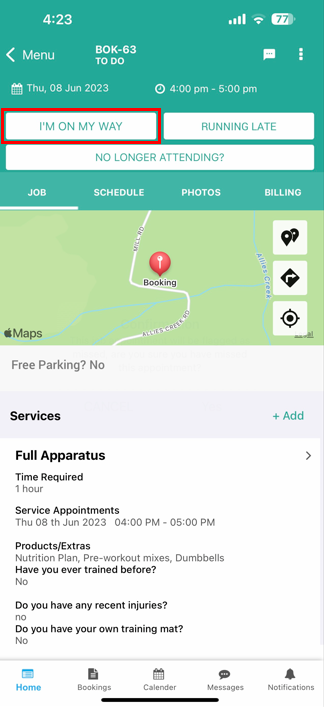
Navigation support: If enabled, you can launch directions to the job address and view estimated travel time.

![]()
Helpful guides:
- Navigate to a Job (Directions, ETA & Navigation)
- Fieldworker GPS Tracking & ETA
- Fieldworker Check-In / Check-Out
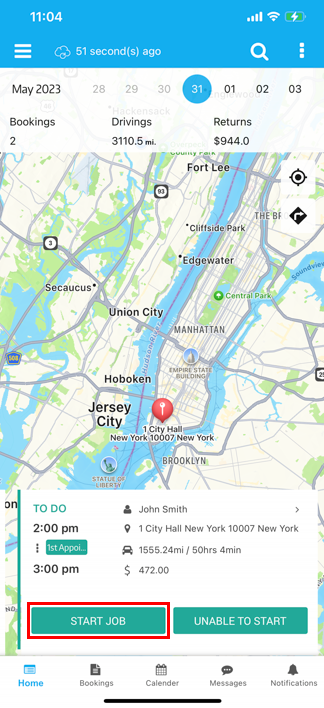
8) Start & finish jobs (statuses + photos)

OctopusPro supports a clear start-to-finish workflow so everyone stays aligned—fieldworkers, office staff, and customers (where applicable). This typically includes status updates, timestamps, notes, and photo proof.
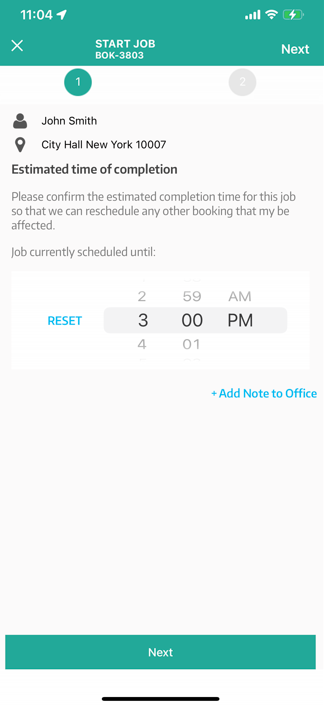
A) Start the job
Open the booking and tap START JOB when you begin.
In some workflows, you may be asked to confirm an estimated time of completion (and optionally add a note).
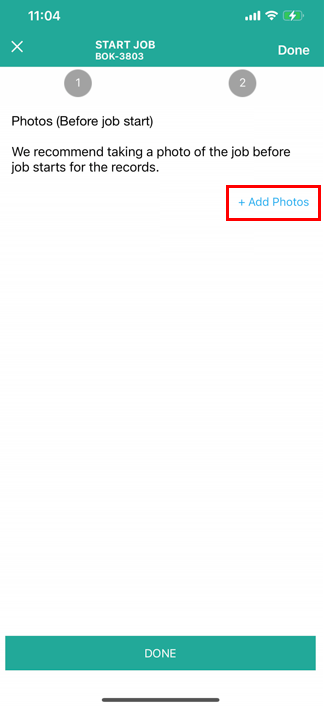
B) Upload before/after photos (proof of work)
If enabled by your company, upload photos before and/or after completing the job. This can help with quality assurance, reporting, and dispute protection.
C) Finish the job
When the work is complete, tap FINISH JOB.
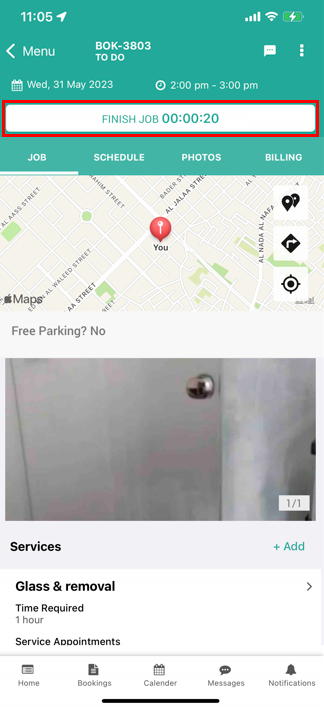
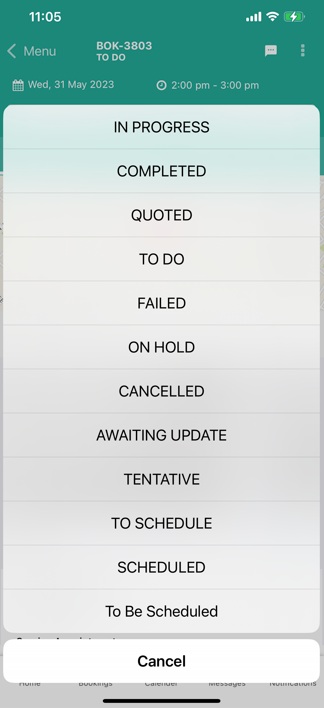
Depending on your setup, you may be asked to select a final job status (statuses can vary by business).
Then upload any final photos and confirm completion.

Learn more:
Next steps & related guides
Use the following guides to go deeper on each area of the Fieldworker App experience:
Account setup & profile
Service areas, services & preferences
Calendar, availability, and reminders
- Manage Your Calendar
- Fieldworker Working Hours & Availability
- Fieldworker Calendar & Availability (Google/Outlook Sync)
- Set Alarms & Reminders
Bookings, navigation, and job execution
- Review New Job Requests
- Search Jobs & Customers
- Navigate to a Job
- Use Real-Time Notifications
- Update Job Status
- Follow Start-to-Finish Workflow
- Collect Customer Signature
Communication, issues, and payments
- Communicate with Office & Customers
- Respond to Complaints
- Create Invoices & Take Payments
- View Earnings Dashboard
- Track Ratings & Rankings
Product updates
To stay updated, please subscribe to our YouTube channel.