
View Inquiry Details (Lead Management)
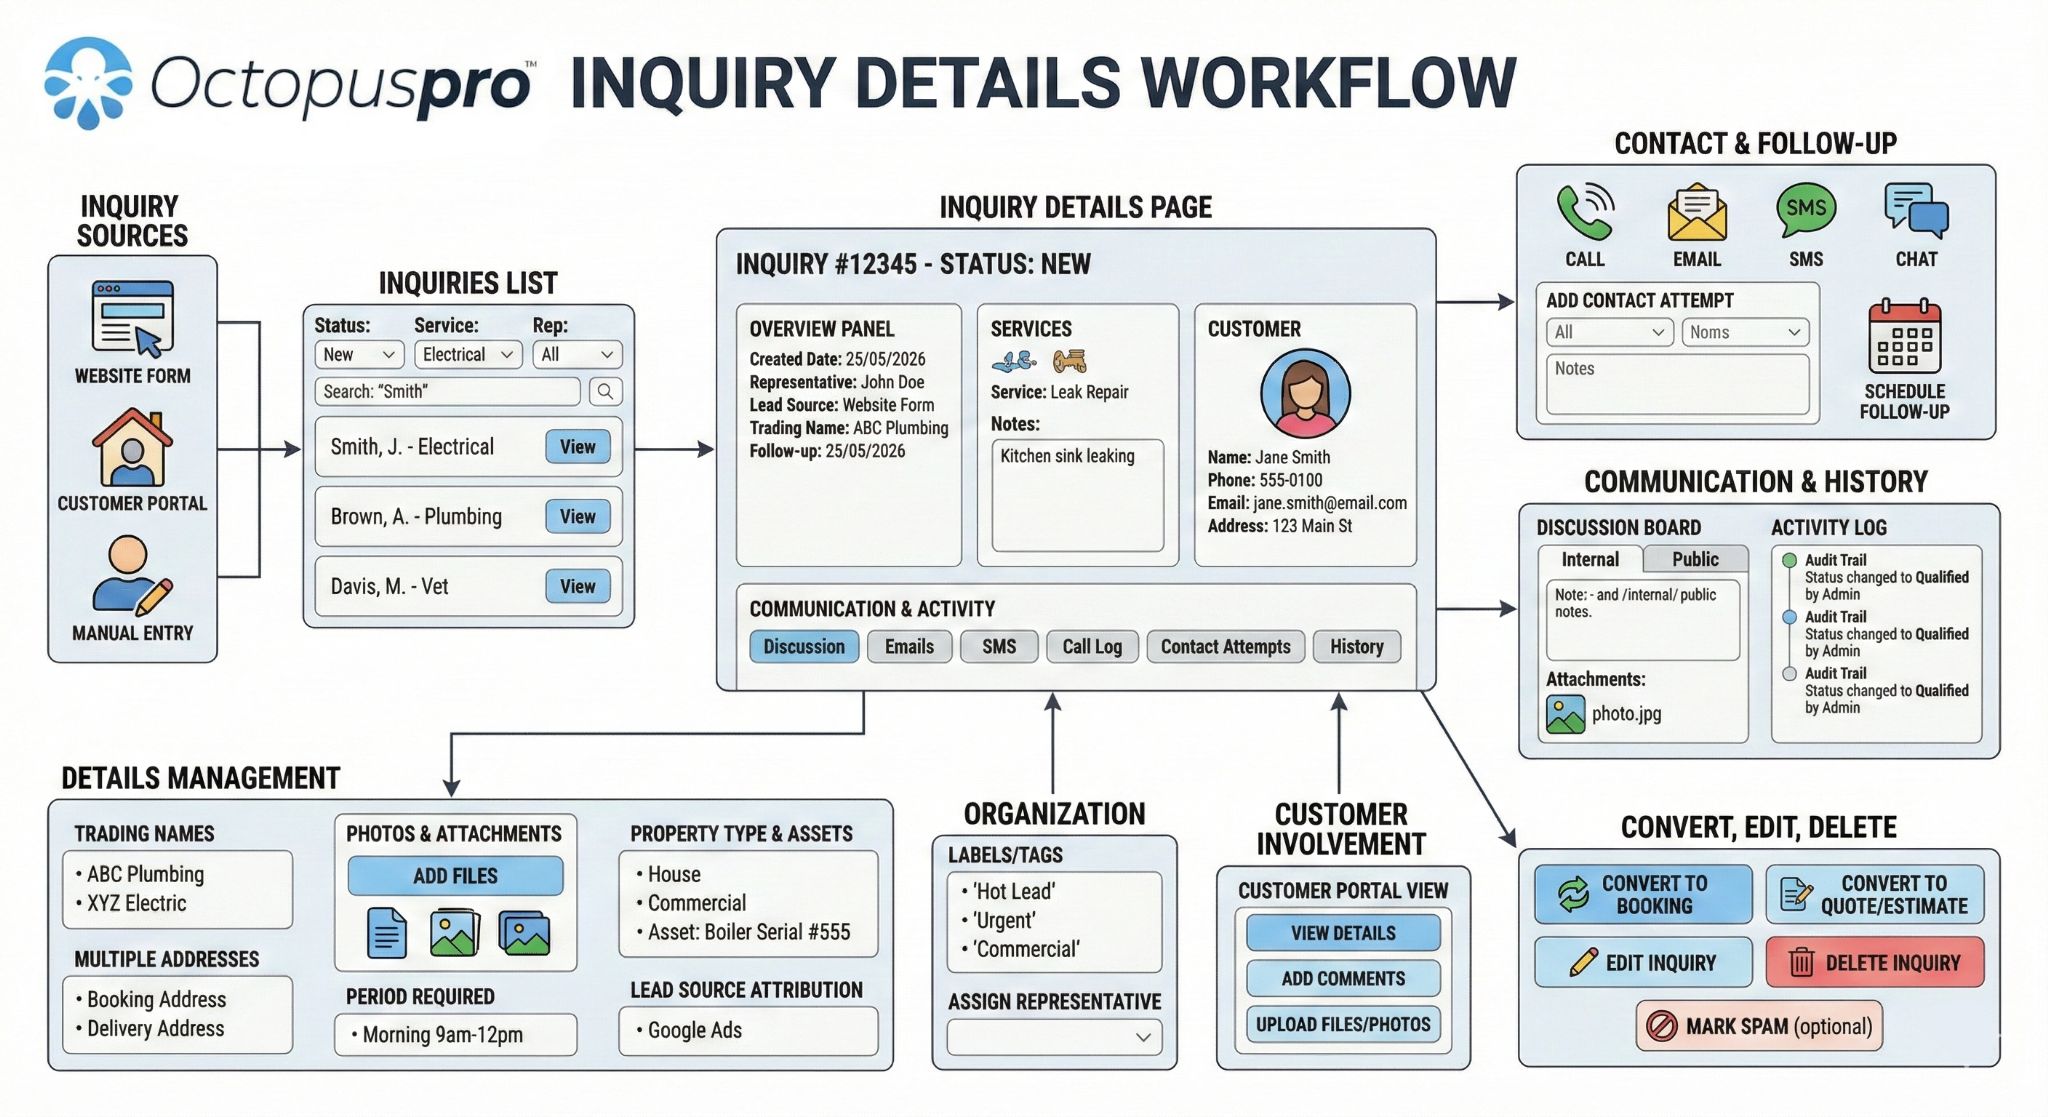
In OctopusPro, an Inquiry (also called a Lead) is a customer request submitted through your website form, customer portal, or entered manually by your team. The Inquiry Details page is where you qualify the lead, communicate with the customer, gather the missing information (photos, files, notes), and then convert the inquiry into a Quote/Estimate or a Booking.
What you can do from the Inquiry Details page
- View the full inquiry overview (status, services, representative, follow-up details, lead source, trading name, and more)
- Contact the customer by phone, email, SMS, or chat-style discussion
- Log contact attempts and schedule follow-ups (so no lead gets forgotten)
- Add labels/tags for fast filtering and better lead organization
- Collect and manage photos, files, and attachments (from your team or from the customer)
- Track inquiry history (audit trail) and lead source attribution
- Convert the inquiry into a Booking or Quote/Estimate
On this page
- Access and filter inquiries
- Open an inquiry and understand the layout
- View and edit customer details
- Contact the customer (email/SMS/calls)
- Contact attempts and follow-ups
- Inquiry discussion and communication history
- Customer involvement (inquiry page, uploads, updates)
- Trading names and multiple addresses
- Photos, files, and attachments
- Period Required (preferred time window)
- Property Type and Customer Properties
- Activity, history, and lead source tracking
- Labels and representative assignment
- Convert, edit, or delete an inquiry
- Related guides
1) Access and filter inquiries
To view all inquiries (leads):
- From the left sidebar menu, go to Inquiries.
- You’ll see the inquiries list in chronological order (most recent first).
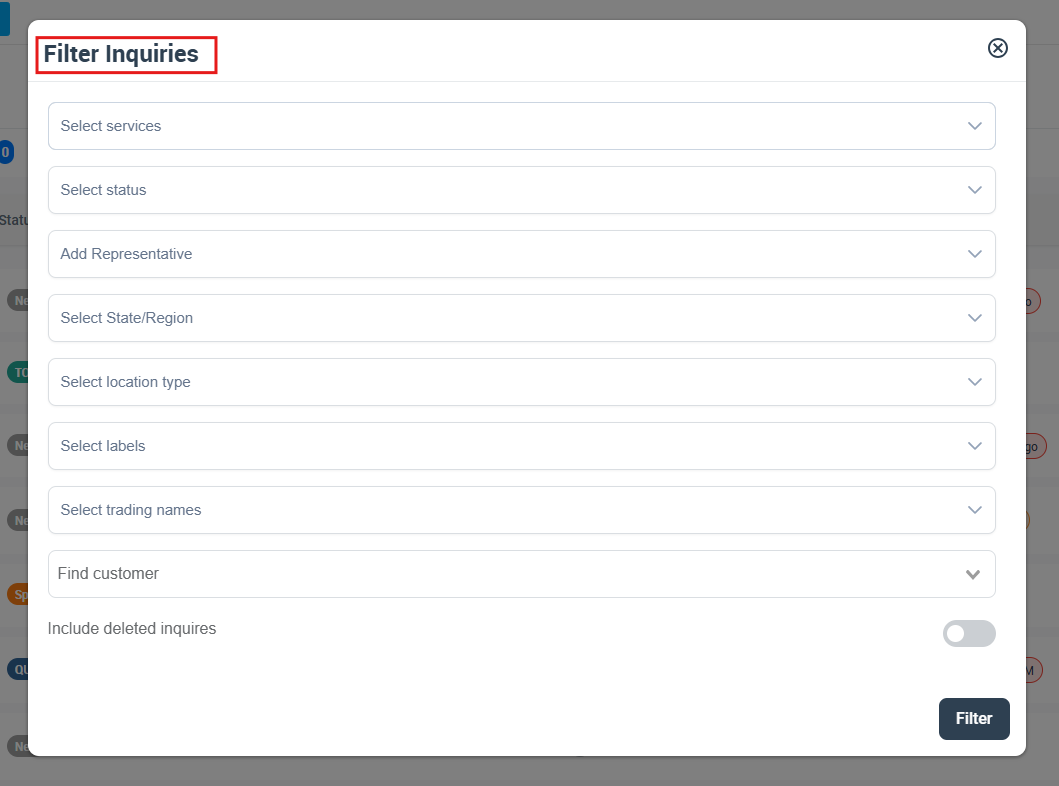
Filter and search to find the exact inquiries you need (for example: by service, status, representative, location type, labels, trading name, or customer):
- Click the Filter icon and apply the criteria you need.
- Use the search bar to quickly locate a customer, inquiry number, address, or keyword.
Tip: Many teams manage lead stages using statuses such as New, Qualified, Unqualified, Resolved, and Spam—so filtering by status is the fastest way to work your pipeline.
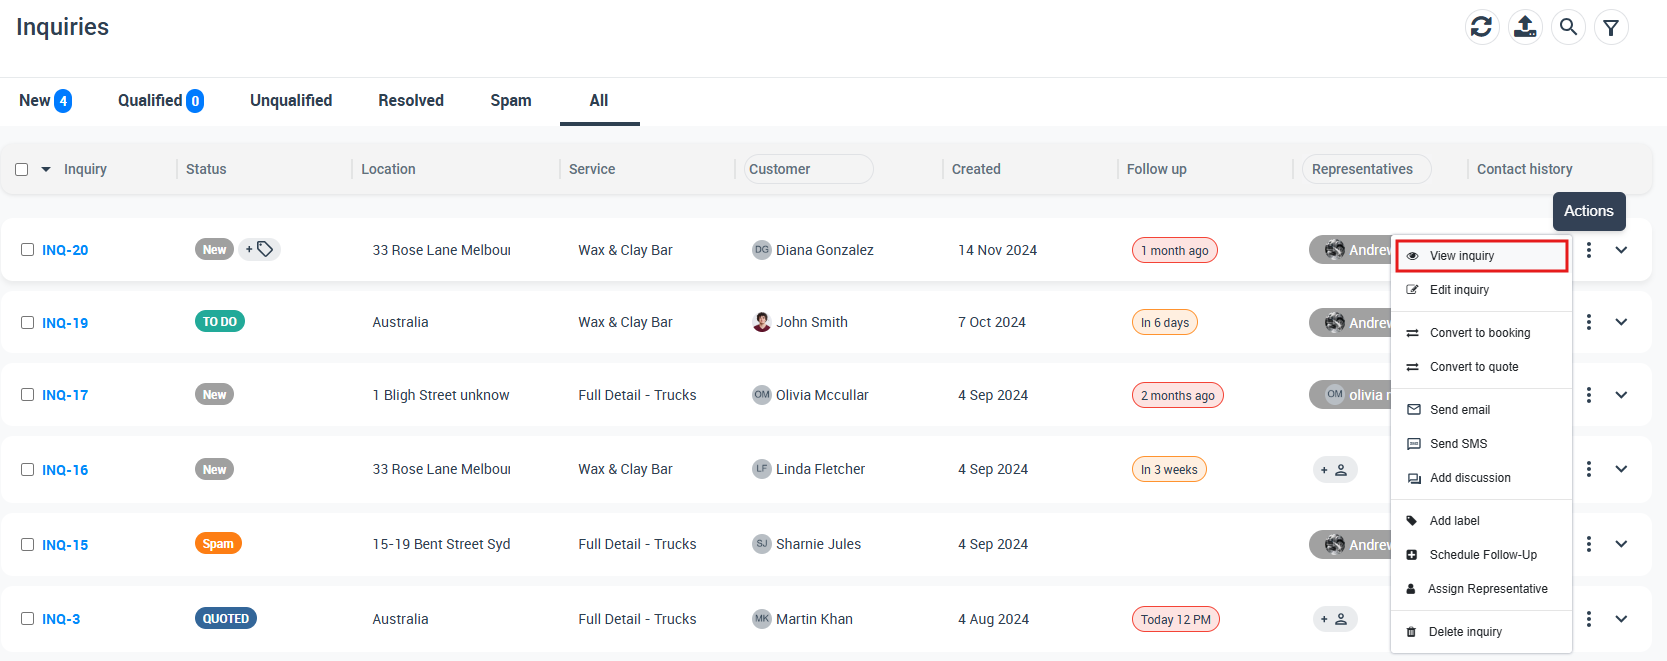
2) Open an inquiry and understand the layout
To open the inquiry details:
- From the inquiry list, click the Actions menu next to an inquiry.
- Select View inquiry.
What you’ll typically see on the Inquiry Details page:
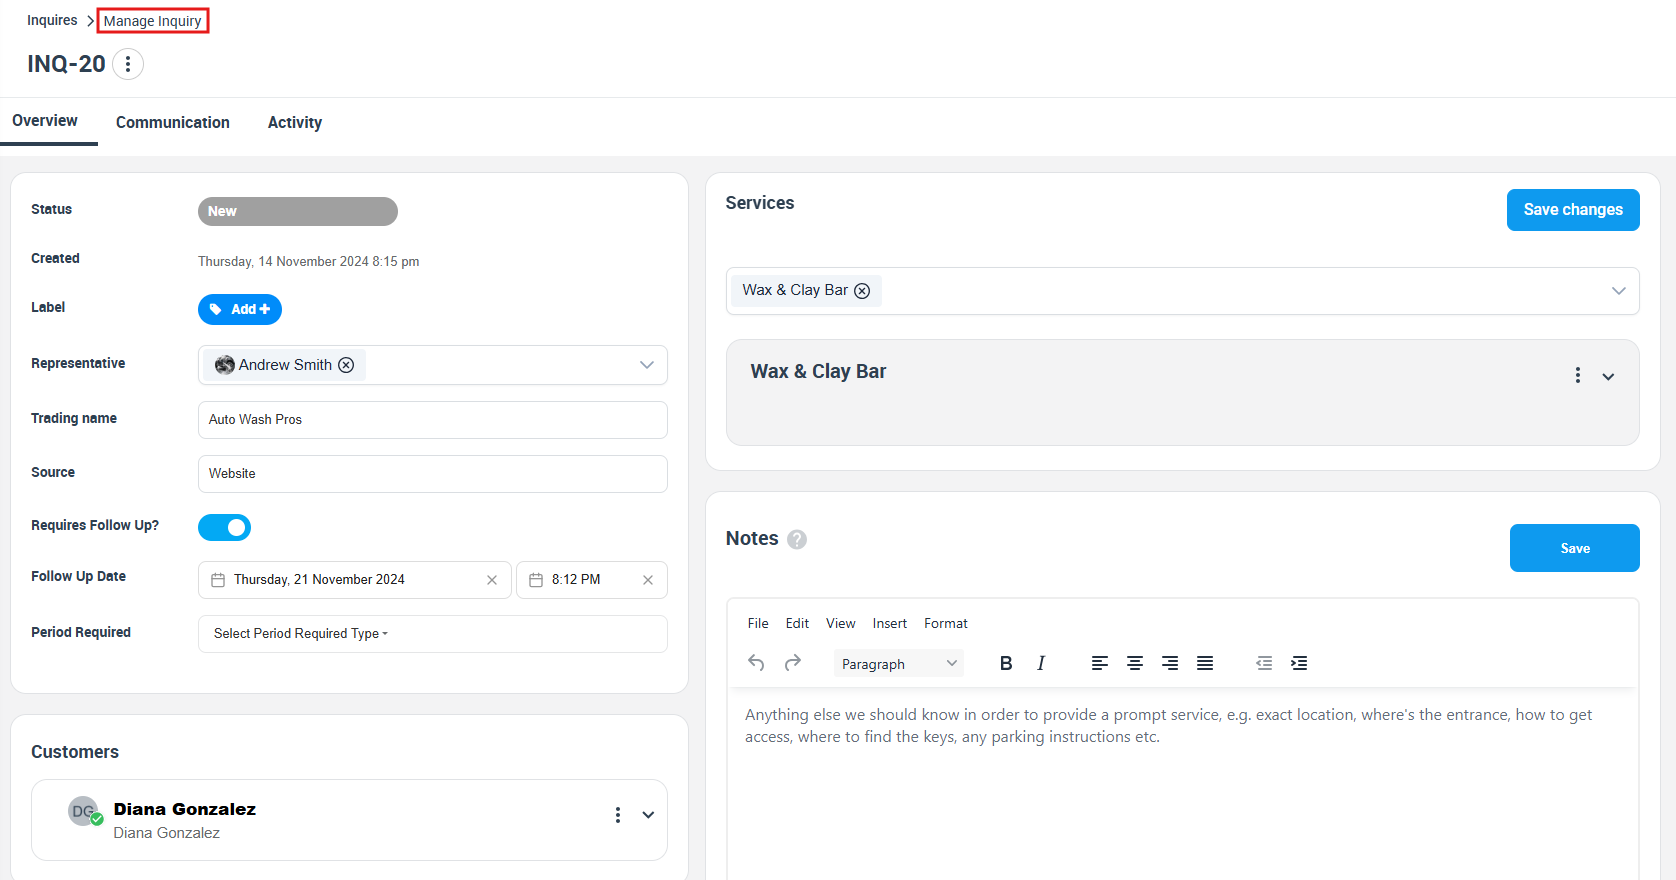
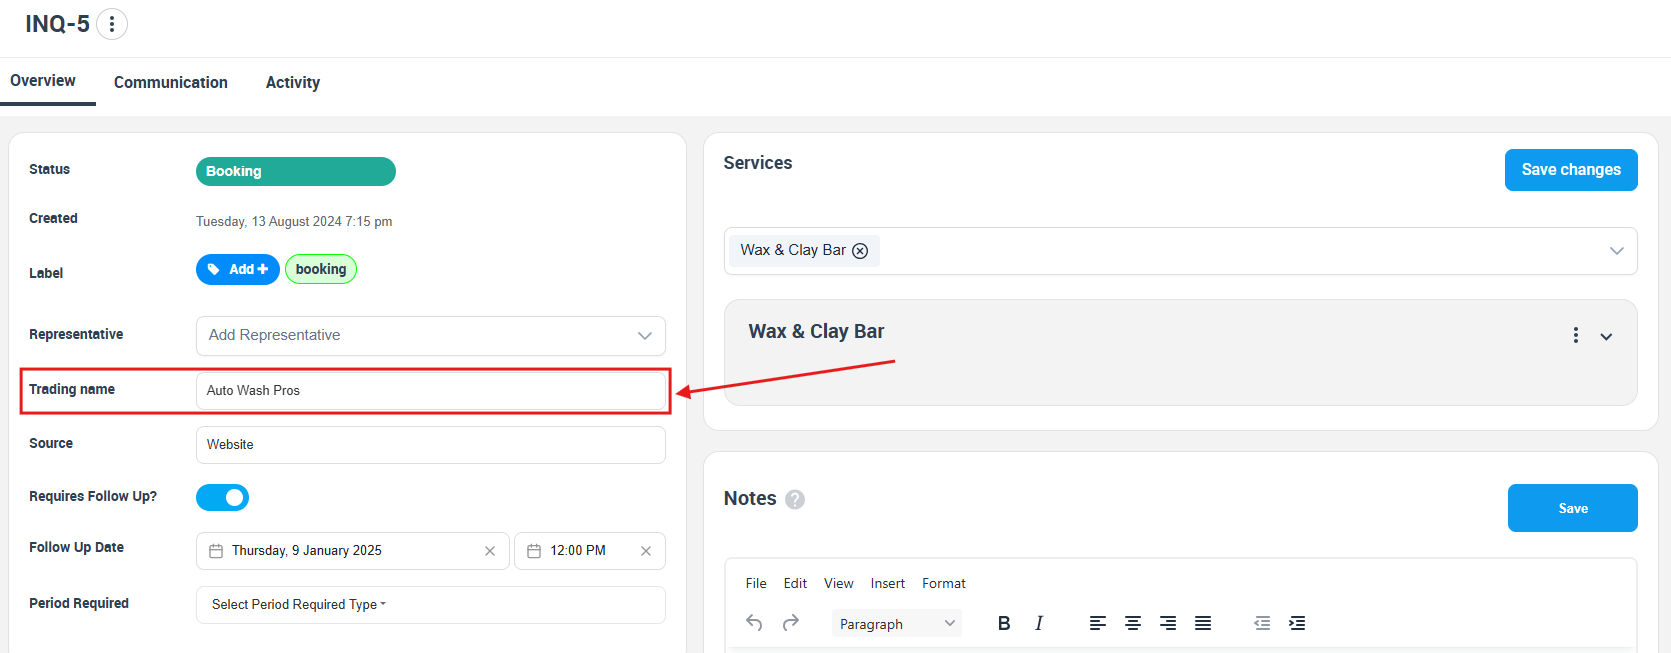
- Inquiry overview panel: status, created date, representative, labels, trading name, lead source, follow-up settings, and (if enabled) the customer’s preferred time window (Period Required).
- Services section: the requested service(s) and related service information.
- Notes: internal notes to capture site details, access instructions, special requirements, or qualification notes.
- Communication and Activity tabs: discussion, emails, SMS, call log, contact attempts, and full audit history.
Services added
Scroll to the Services area to review the services included in the inquiry and expand service details/manual as needed. If your workflow allows it, you can also add or adjust services and then click Save changes.

3) View and edit customer details
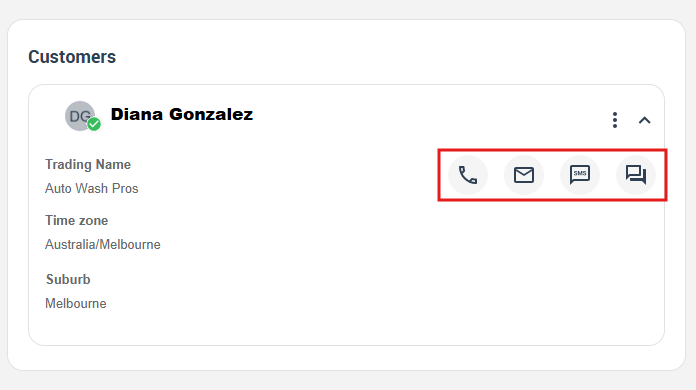
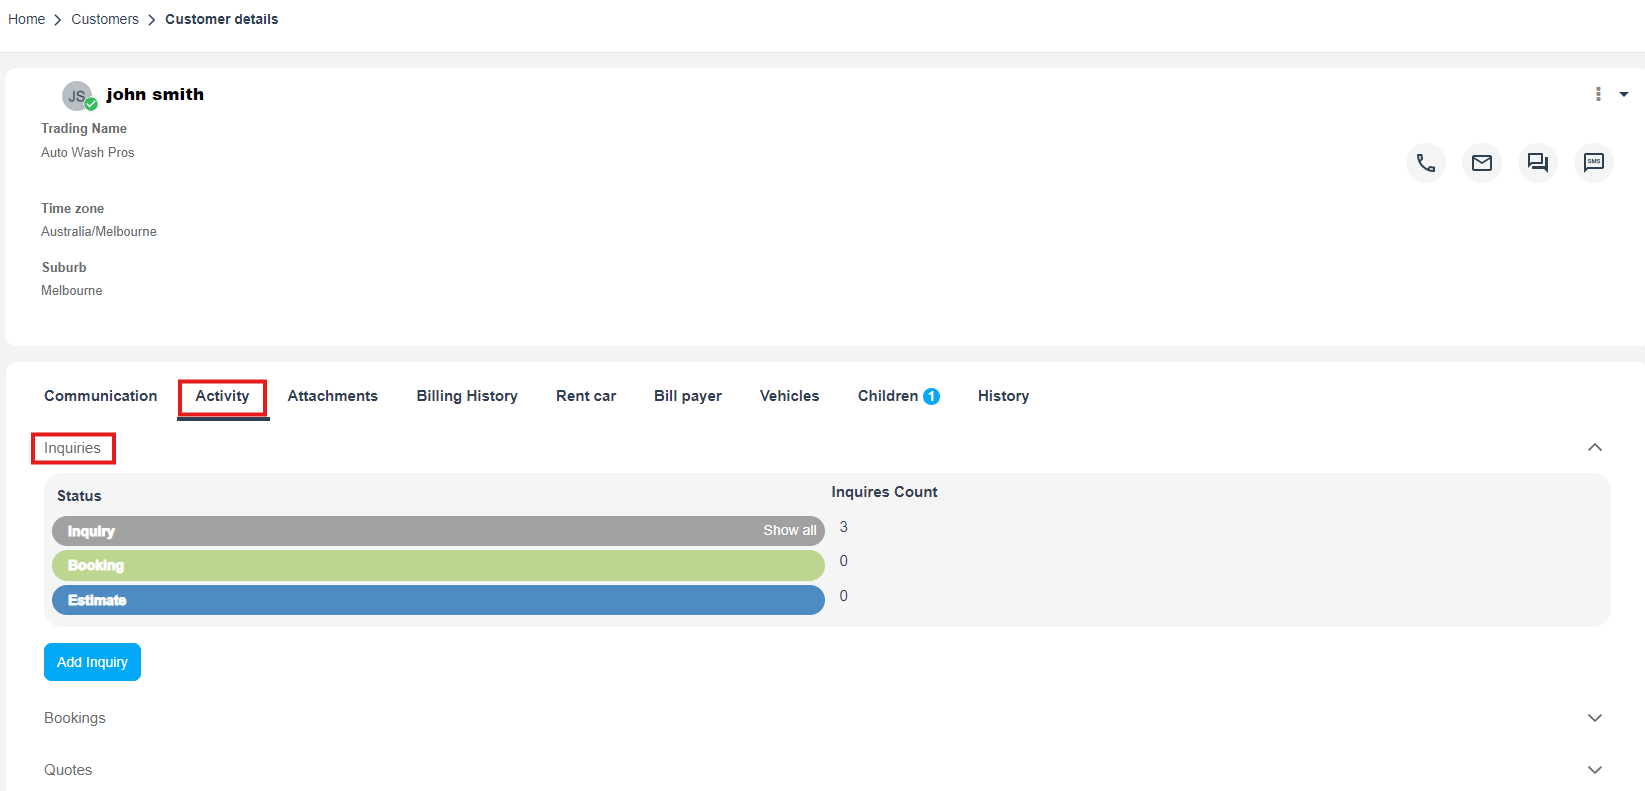
The Customers section shows the customer’s key details (name, trading name, suburb, time zone, etc.).

Quick contact icons
Use the icons to call, email, SMS, or message the customer (depending on what’s enabled in your account).
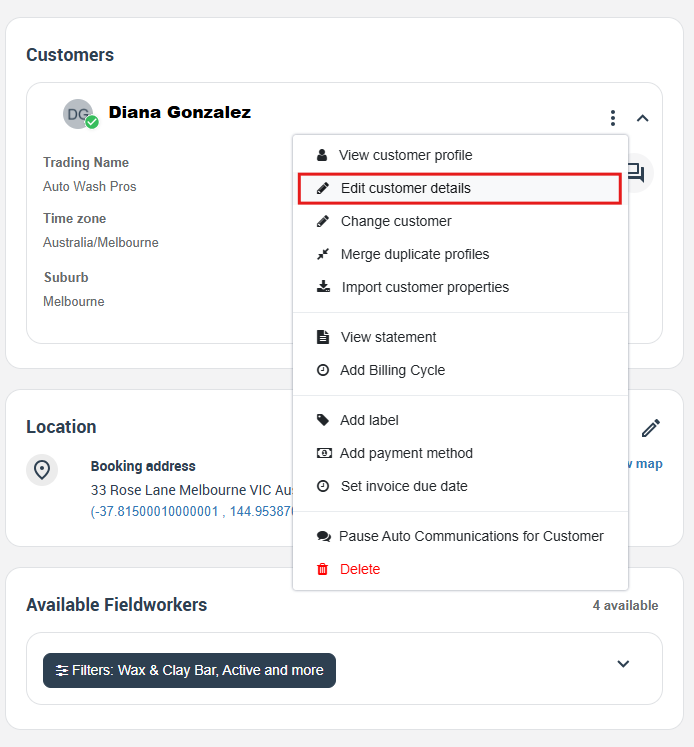
Edit customer details
If the customer’s details need correction (phone number, email, name, etc.):
- Open the menu in the customer section.
- Click Edit customer details.
- Update the information, then click Save.
Need a deeper walkthrough? See Edit Customer Details.
4) Contact the customer from the inquiry
You can contact customers directly from the inquiry list or from inside the inquiry details page.
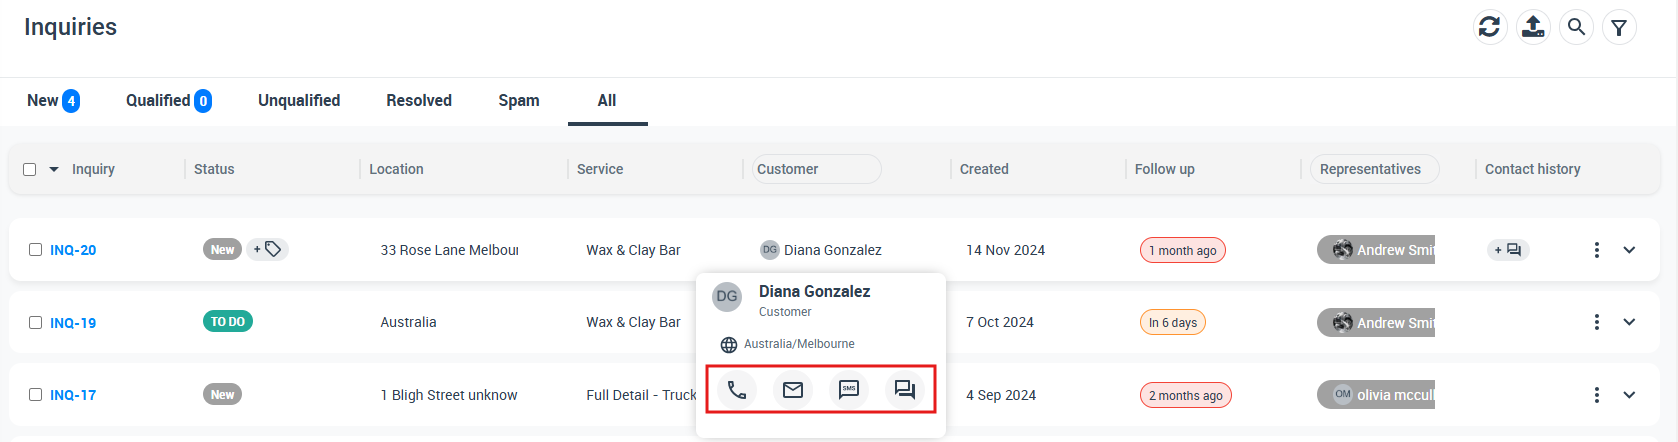
From the inquiries list
Hover over the customer’s name to display quick communication options (call, email, SMS, etc.).
For a dedicated guide, see Inquiry Contact Management (Email, SMS & Calling).

5) Contact attempts and follow-ups
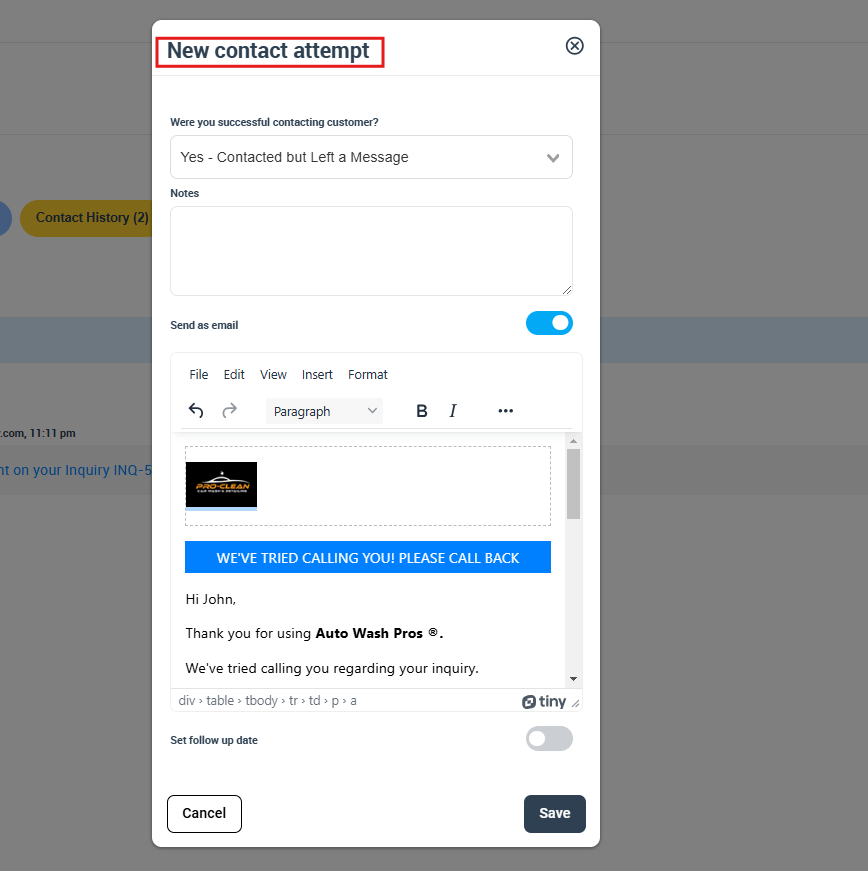
Contact attempts help your team document outreach when the customer doesn’t answer, and keep the inquiry progressing (instead of going cold). You can also trigger a templated email/SMS message and schedule a follow-up in the same flow.
Add a contact attempt
- Open the inquiry.
- Go to the Communication tab.
- Open the New menu and select Add Contact Attempt.
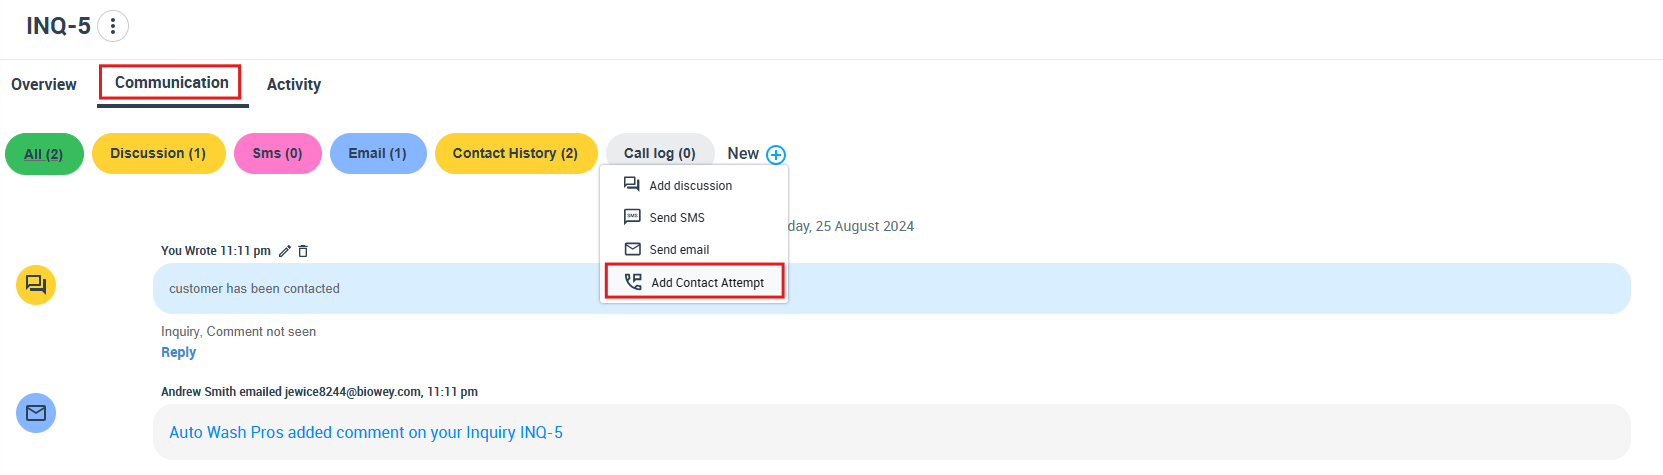
Complete the contact attempt form (success status, internal notes, optional message, follow-up date/time), then click Save.
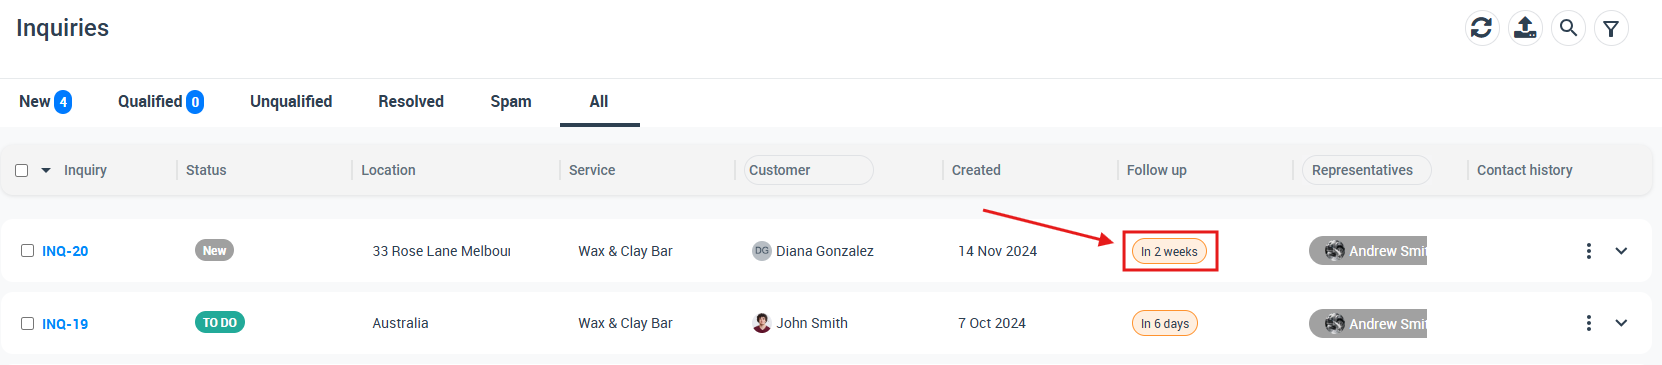
Follow-up scheduling
You can manage follow-ups from the inquiries list (using the follow-up column) to quickly plan your day and ensure no lead gets missed.
Learn more: Managing Follow-Up Reminders for Inquiries/Leads.
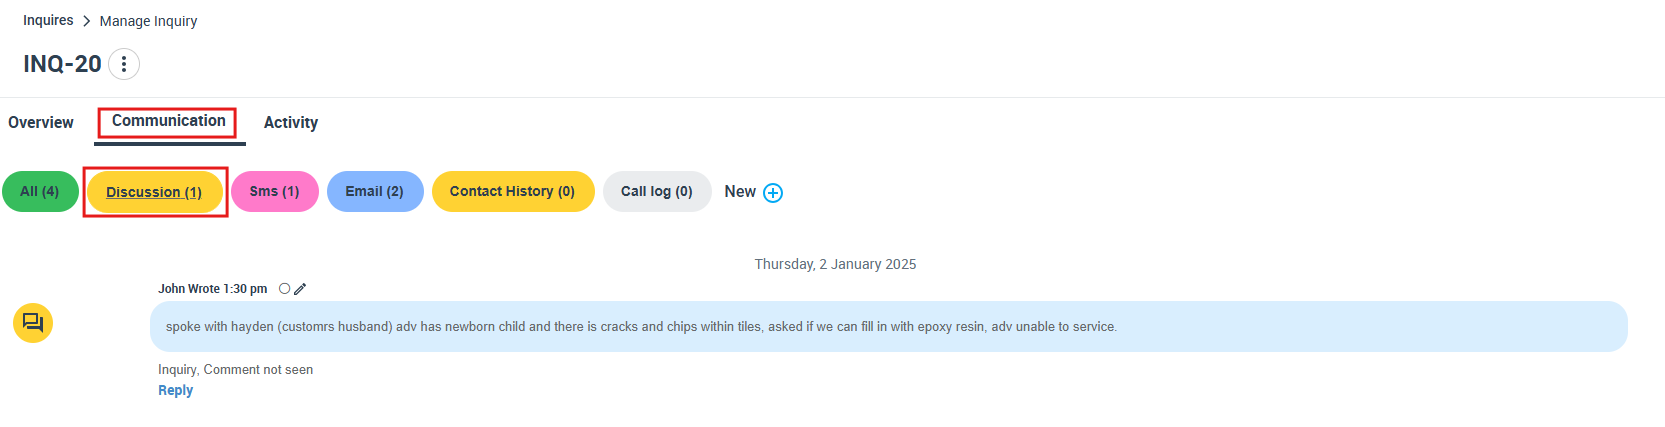
6) Inquiry discussion and communication history
OctopusPro can log inquiry-related communications in one place so your team always has context (especially when multiple staff members handle the same lead).
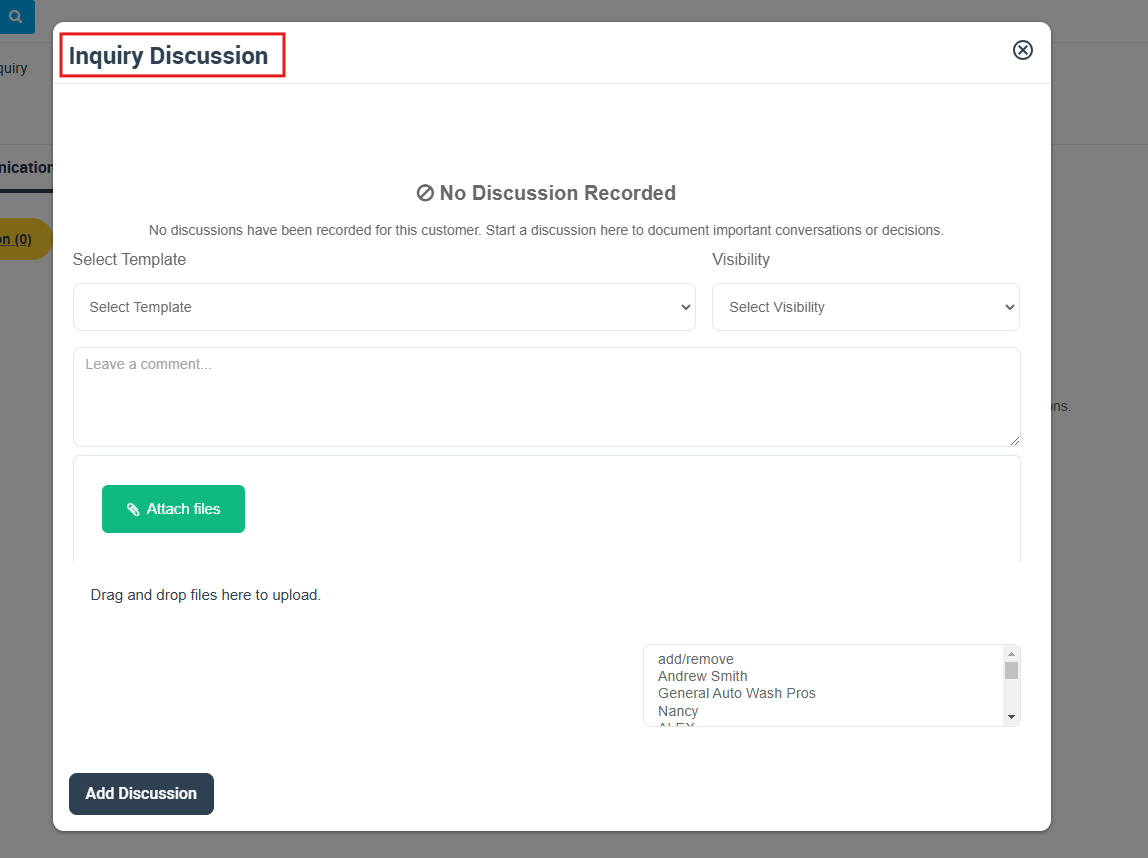
Discussion board
Use the discussion board to collaborate internally and/or communicate with the customer (depending on visibility settings).
When creating a discussion, you can:
- Select a template (optional)
- Choose visibility (e.g., internal only vs. visible to everyone)
- Attach files for context (photos, documents, etc.)
Full guide: Inquiry Discussion Management.
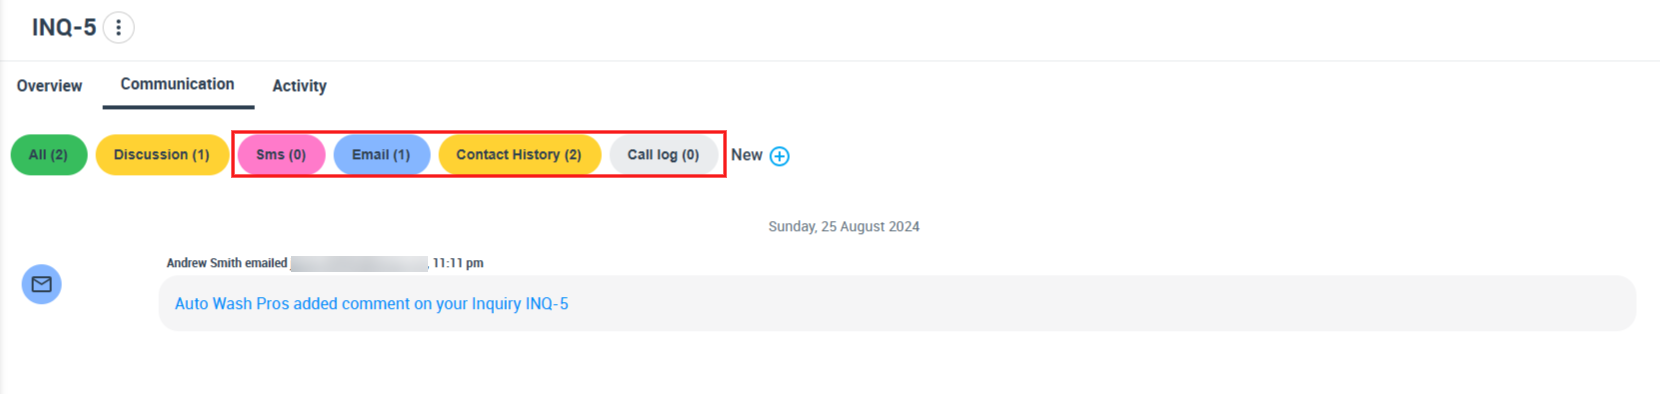
Email, SMS, call log, and contact history
On the Communication tab, you can review everything related to the inquiry—emails, SMS, contact attempts, and call log—so anyone on your team can pick up the conversation without guessing.
7) Customer involvement (inquiry page, uploads, updates)
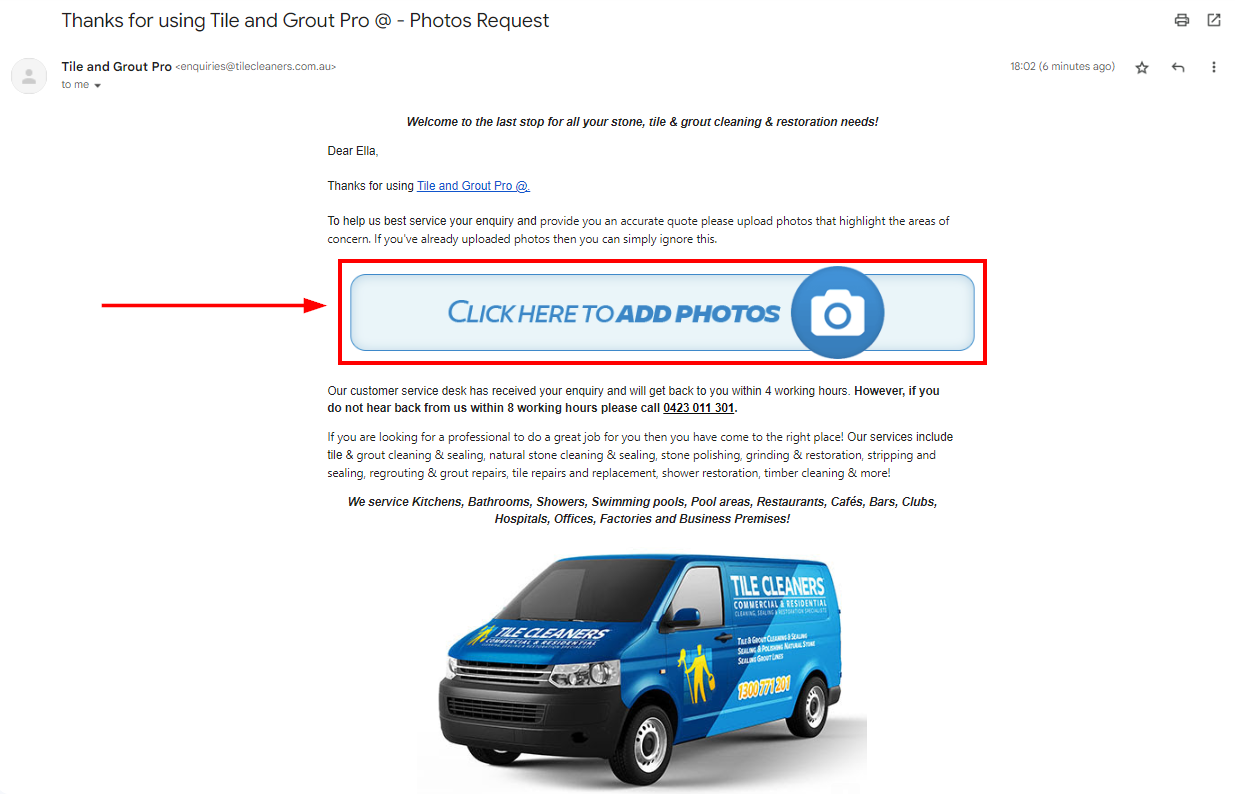
Customers can participate in their inquiry via the link they receive in the inquiry confirmation (receipt) email or SMS. This improves transparency and helps you collect the information you need to quote and schedule accurately.
What customers can do
- View inquiry status and details
- Add comments to the discussion (if enabled)
- Upload photos/files/attachments (for example: job site photos)
- Review inquiry activity/history (status changes, updates, comments)
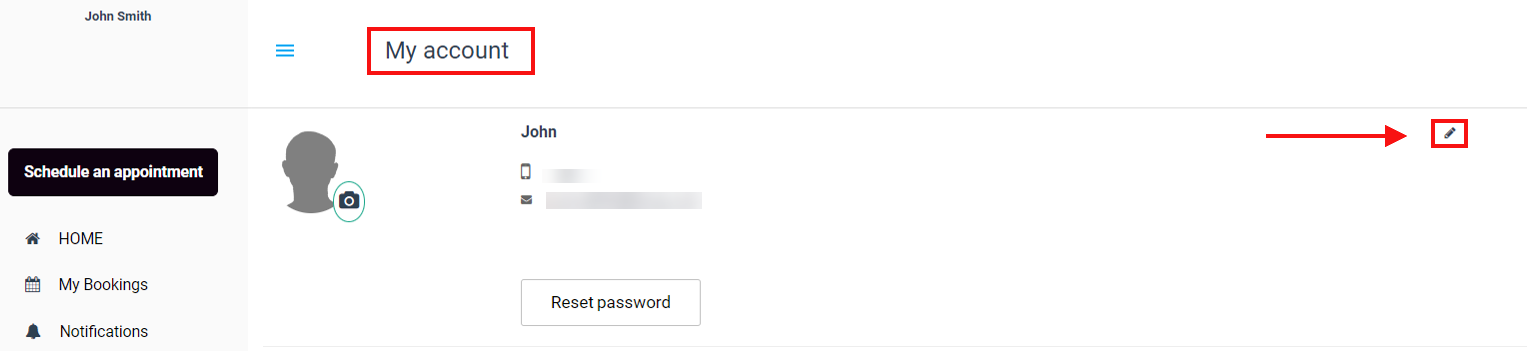
Customer updates to contact information
Keeping customer contact details accurate improves booking confirmations and reduces failed communications. Customers may be able to update their details via their portal (depending on your configuration).

8) Trading names and multiple addresses
Trading names (multi-brand accounts)
If your business operates multiple trading names (brands/sub-brands), each inquiry can be associated with a specific trading name—helping your team quickly identify which brand the lead belongs to.
Learn more: Manage Multiple Trading Names.
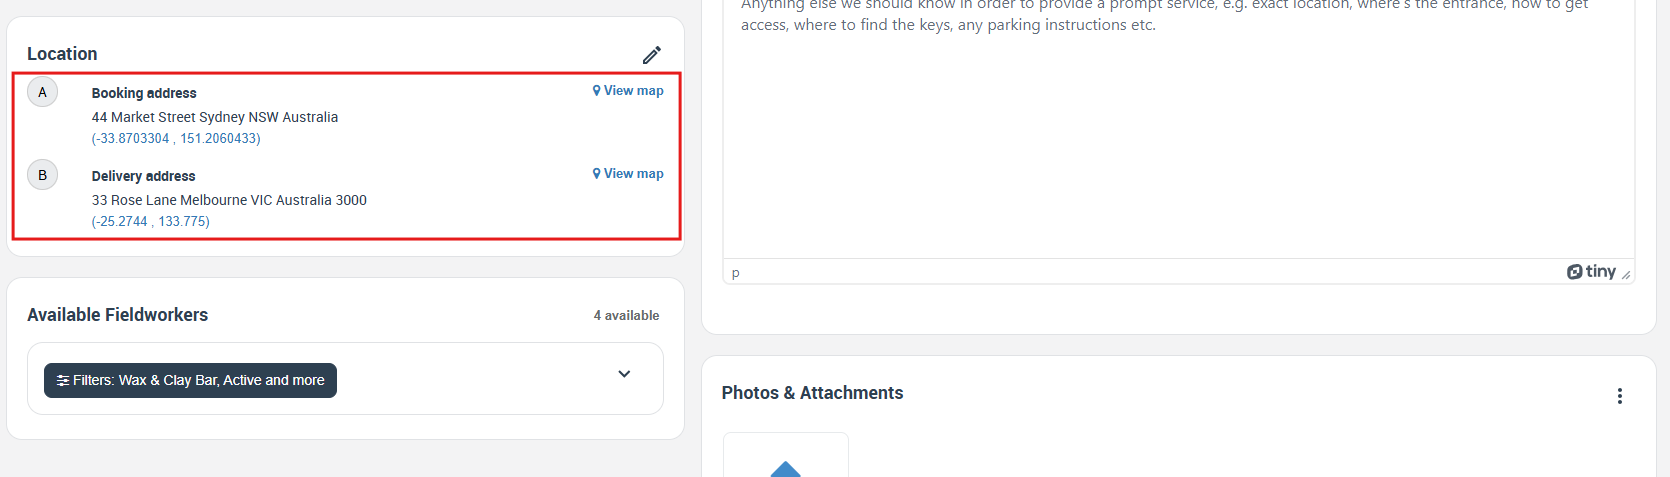
Multiple addresses
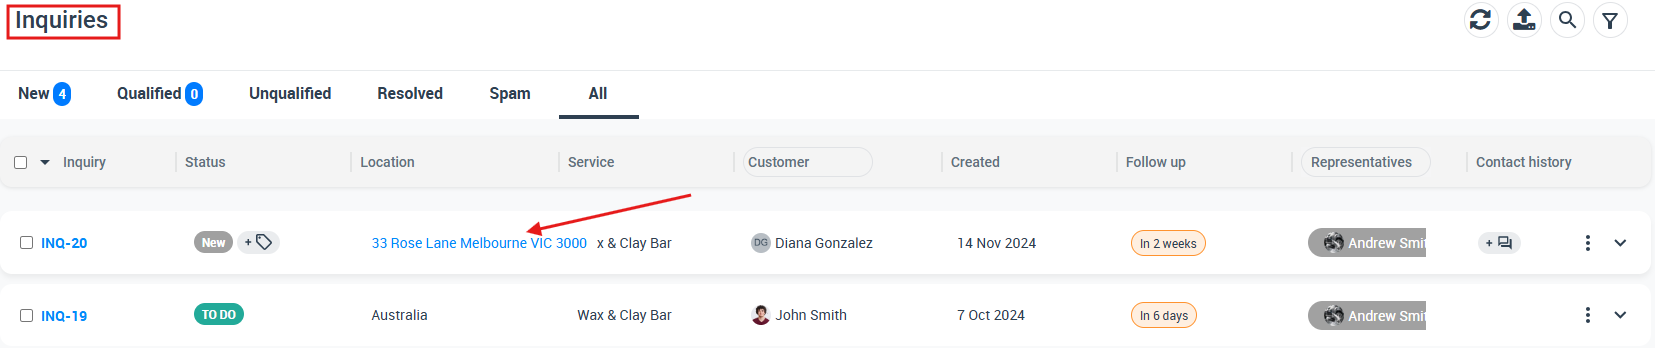
If your inquiry supports more than one address (for example: booking address + delivery address), you can view them in the inquiry details page and also from the inquiries list.
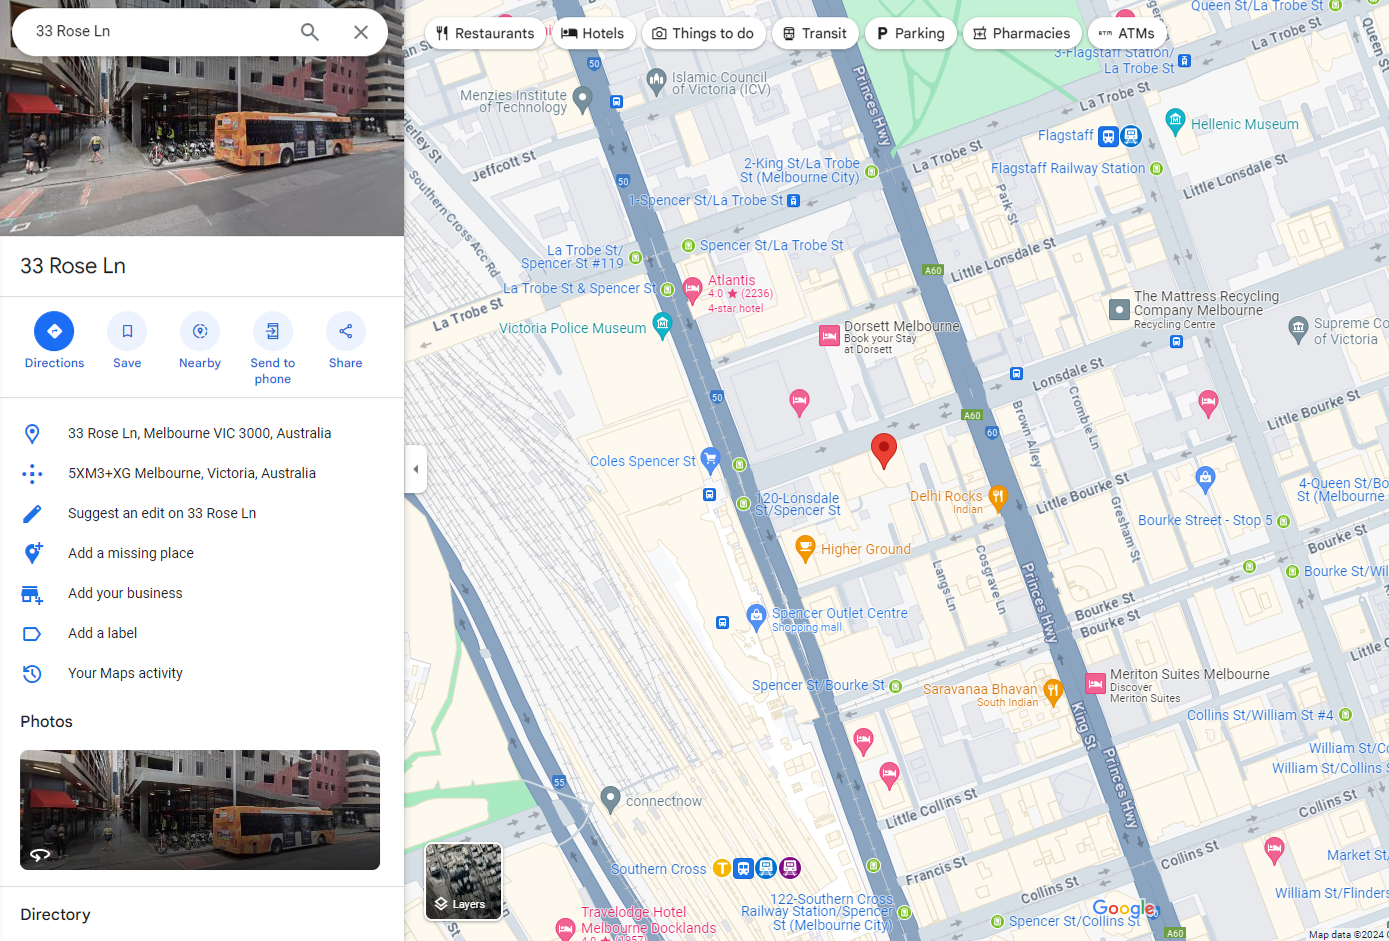
From the inquiries list, clicking the address hyperlink can open the location in Google Maps for quick navigation.

9) Photos, files, and attachments
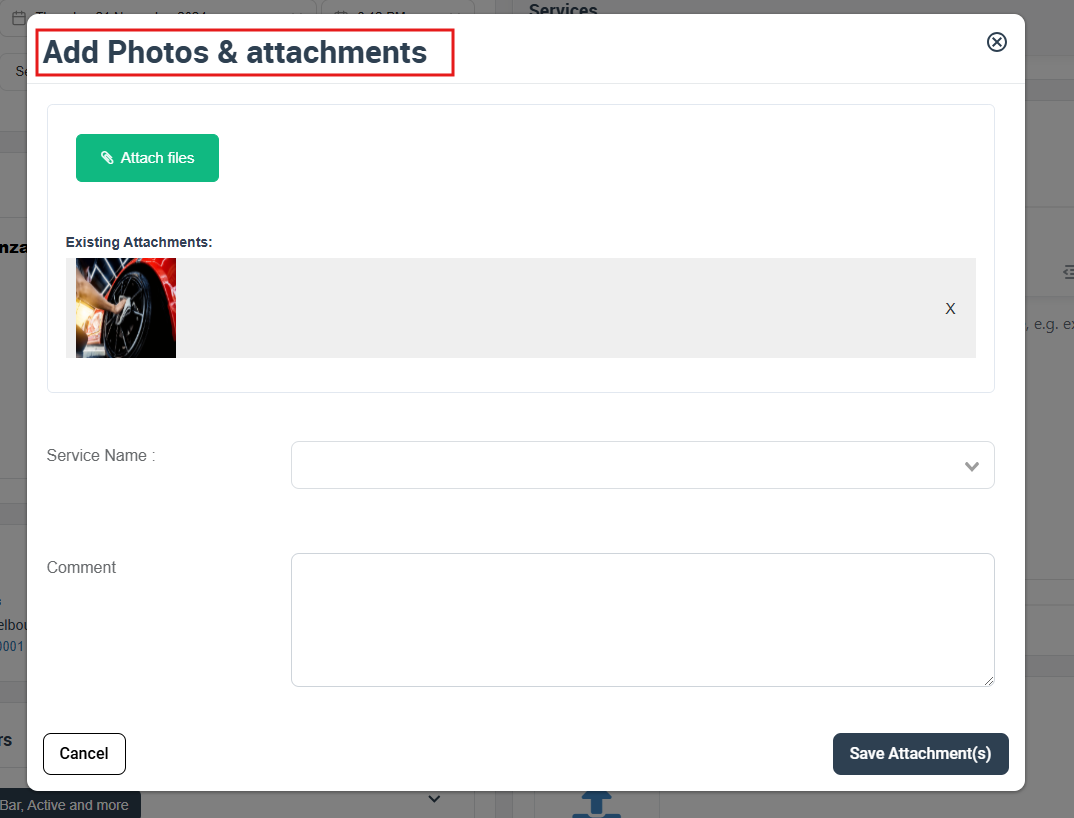
Use Photos & Attachments to store anything required to assess, quote, and deliver the job—photos, documents, specs, access notes, and customer-provided files.
Add files from the inquiry details page
- Scroll to Photos & Attachments.
- Click Add Files.
- Upload the file(s) and save.

Tip: Customers can also upload their own files/photos from their inquiry page, helping your team quote faster and more accurately.
Full guide: Adding Attachments to Inquiries.

10) Period Required (preferred time window)
The Period Required field captures your customer’s preferred service time window (for example: morning/afternoon/evening, or a specific period). This helps your schedulers align availability with customer expectations before you convert the inquiry to a booking.
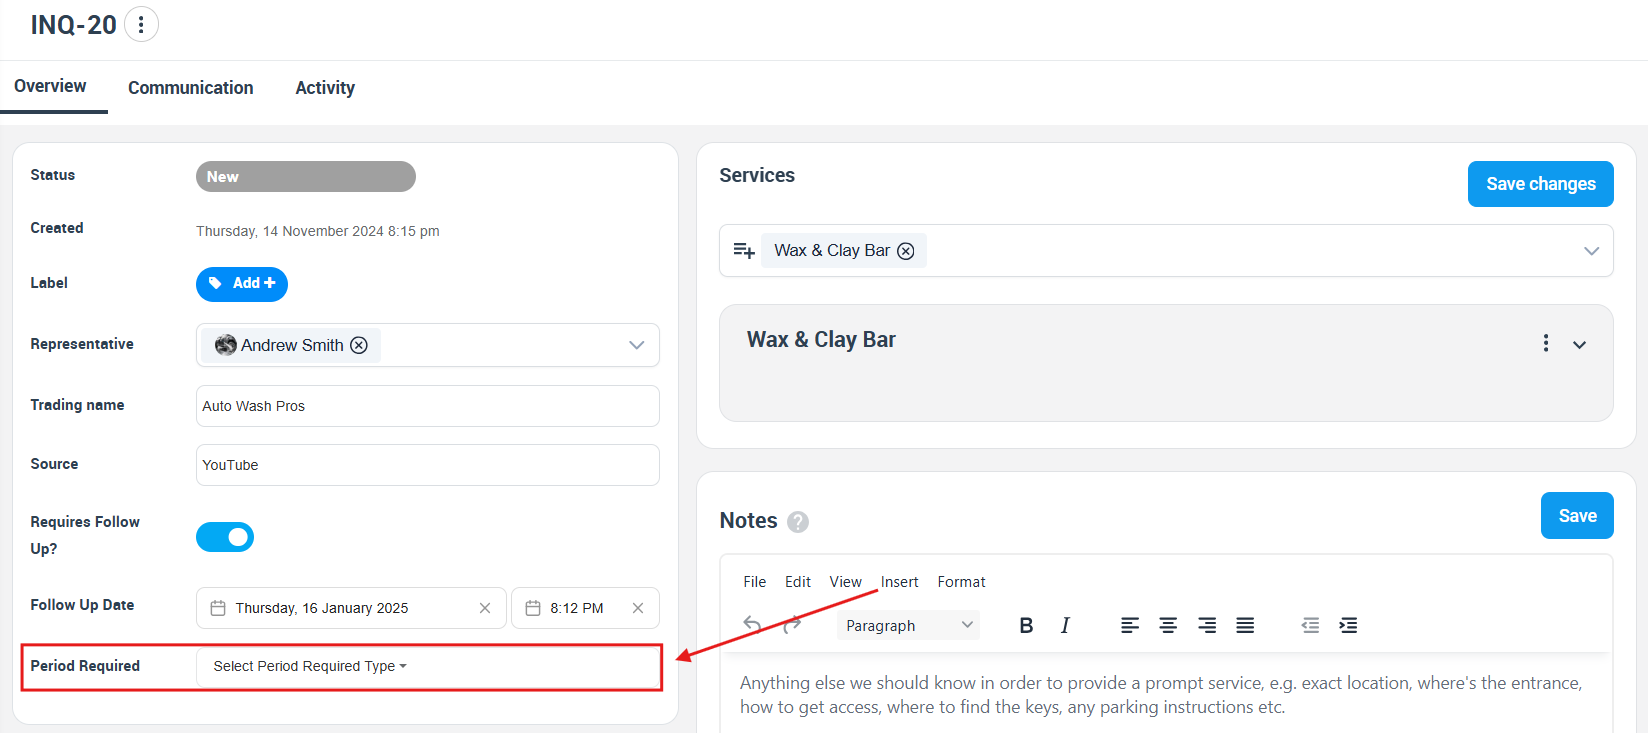
To enable and configure it, see Add “Period Required” Field to Your Inquiry Form.

11) Property Type and Customer Properties
Property Type
Property Types help your team understand the job site context (for example: house, apartment, commercial, office, etc.). This improves preparation, job planning, and service consistency.
To set up and manage property types, see Booking Property Types Setup.
Customer Properties (assets / dependents)
Customer Properties let you store “things related to the customer” (assets or dependents) such as properties, vehicles, pets, children, equipment, or any custom items relevant to your industry. This helps you deliver more personalized service and maintain better service history.
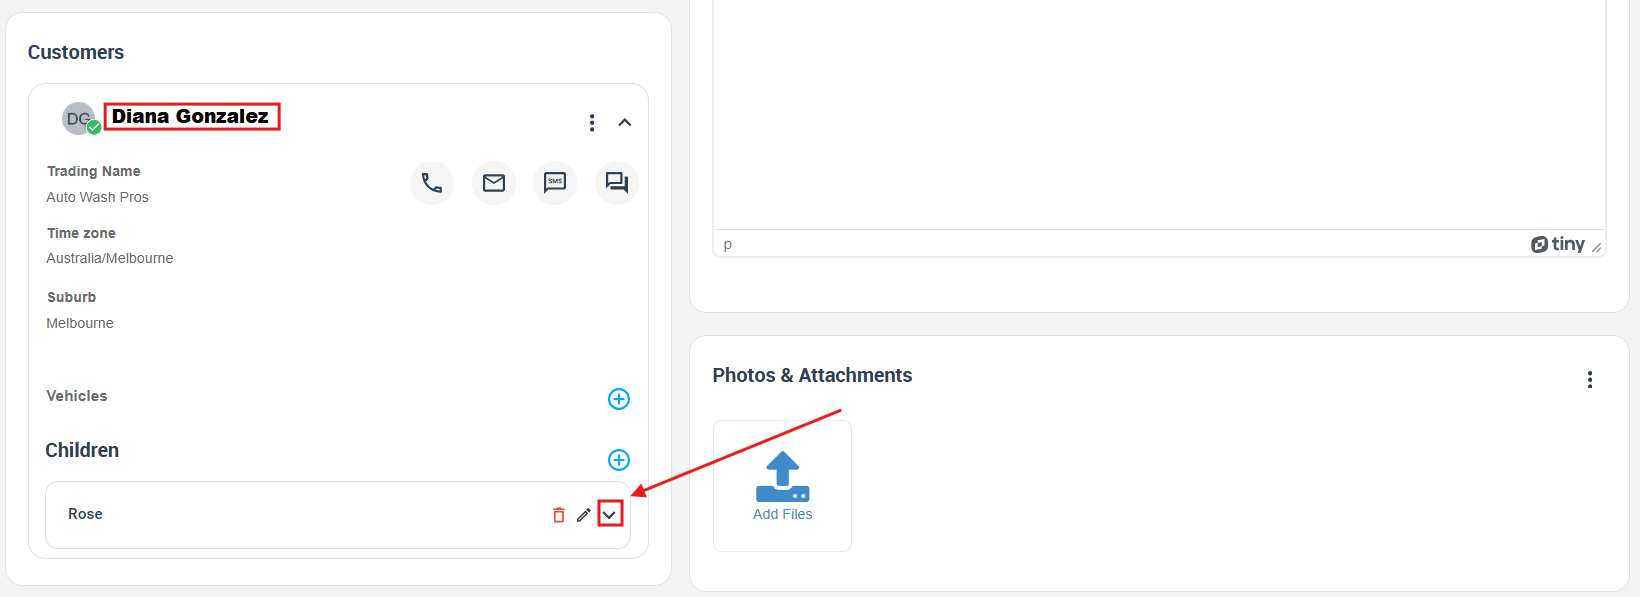
Learn more: Customer Properties (Dependents / Assets).
![]()
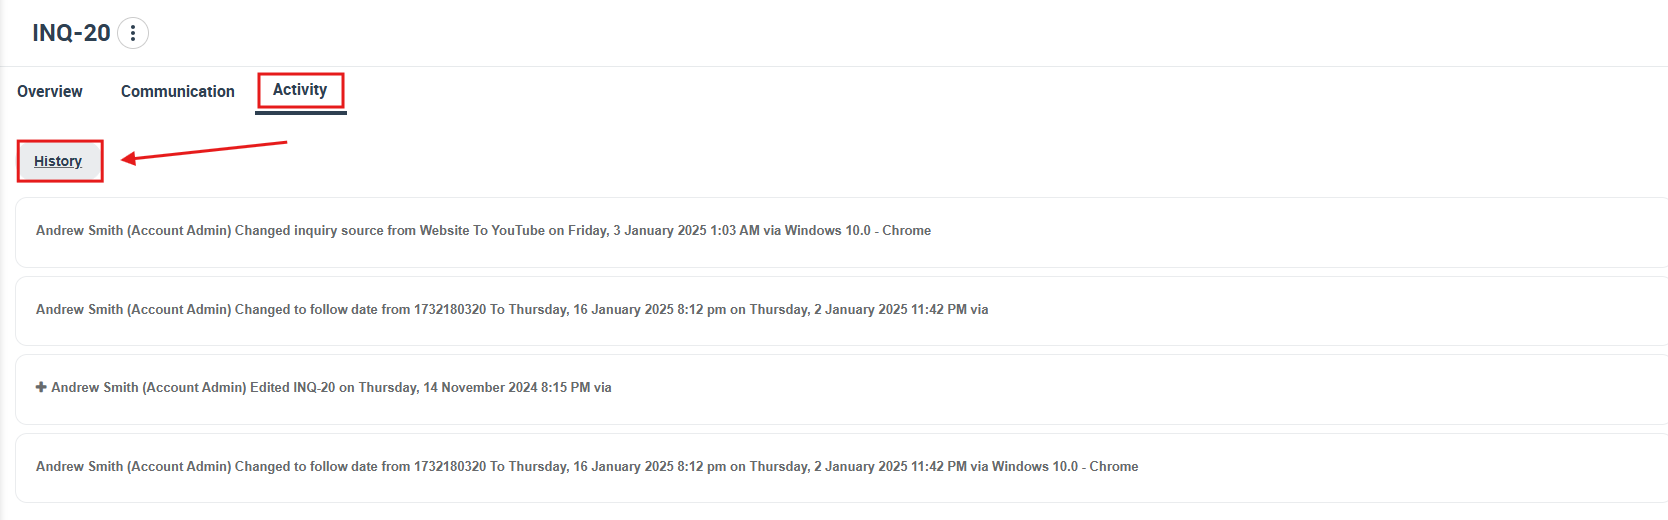
12) Activity, history, and lead source tracking
Inquiry history (audit trail)
The History area records key events and changes—such as updates made by admins, changes to follow-up scheduling, customer edits, and other inquiry activity.
Lead source attribution
The Source field helps you track where the inquiry came from (marketing channel, website source, campaign, etc.), allowing you to measure ROI and invest in the best channels. This is internal and not shown on your public inquiry form.
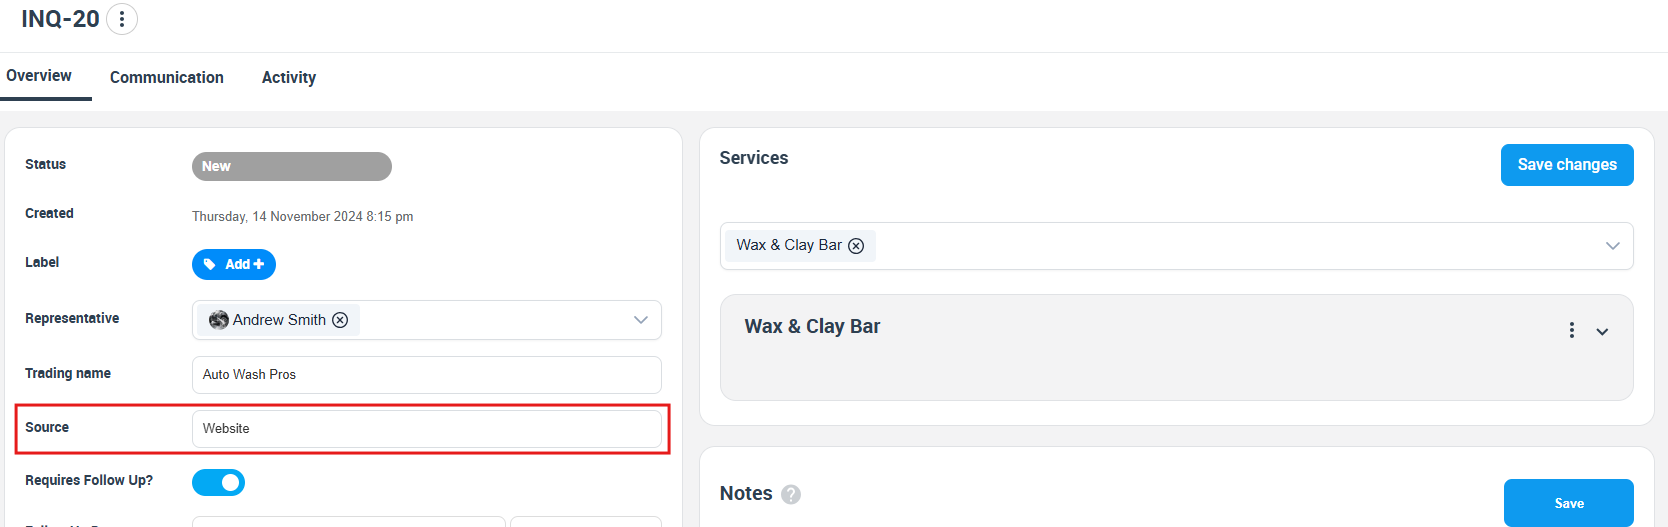
Learn more: How to Track and Manage Lead Sources.
Contacts history
Use the inquiry’s contact history to view logged contact attempts and outcomes (including who did it and when), which is especially helpful for teams.

View inquiries from the customer profile
You can also view inquiries associated with a customer from their profile (useful for reviewing the full relationship timeline).
13) Labels and representative assignment
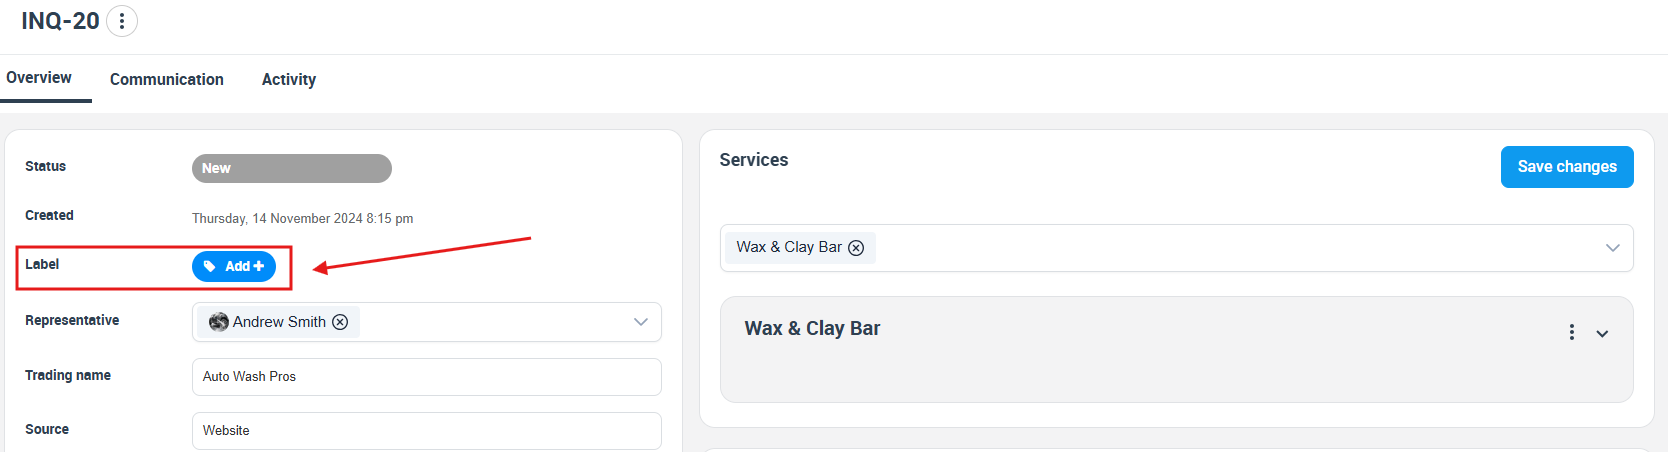
Labels (tags) help you categorize inquiries and build faster workflows (for example: “Hot lead”, “Needs photos”, “Urgent”, “Commercial”, “Follow-up required”).
Add a label to an inquiry
- Open the inquiry.
- Click Add + next to Label.
- Select the label and apply.
Full guide: Adding Labels to Inquiries.
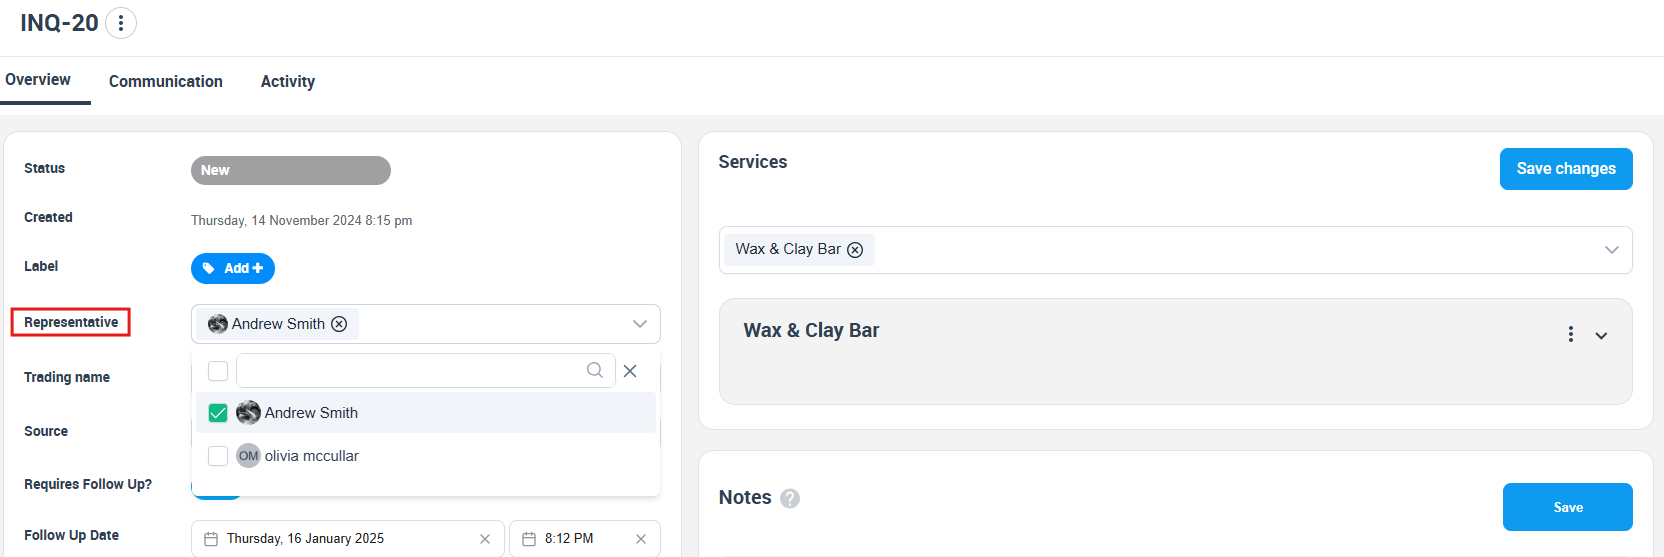
Assign a representative
Assigning a representative (sales/admin user) clarifies ownership and accountability—especially when multiple staff manage leads.
- Open the inquiry.
- In the overview panel, use the Representative field to search and select the user.
14) Convert, edit, or delete an inquiry
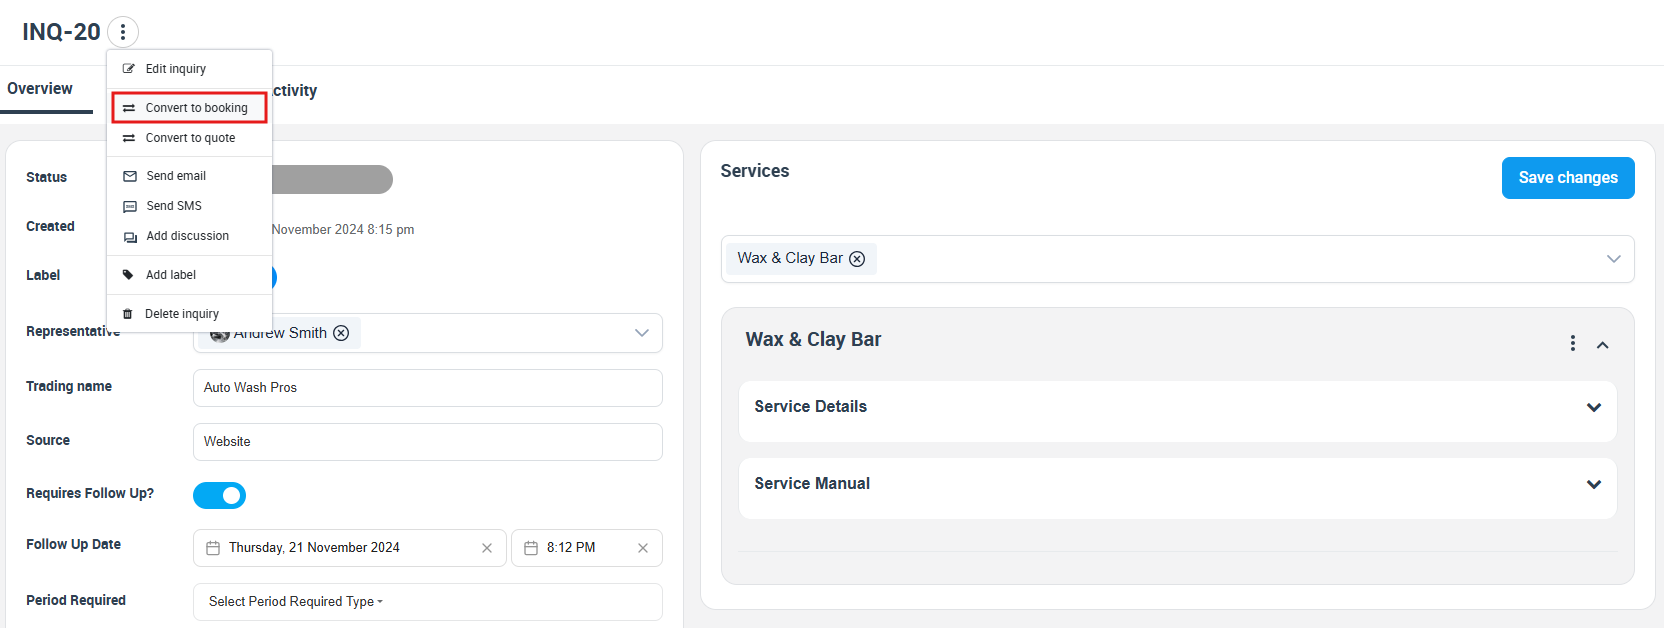
Once the inquiry is qualified (you have enough info to proceed), convert it into a Booking or a Quote/Estimate.

Convert to booking
- Open the inquiry.
- Click the Actions menu.
- Select Convert to booking.
Guides:
Edit inquiry
Use Edit inquiry when you need to update details (services, location info, requirements, etc.).
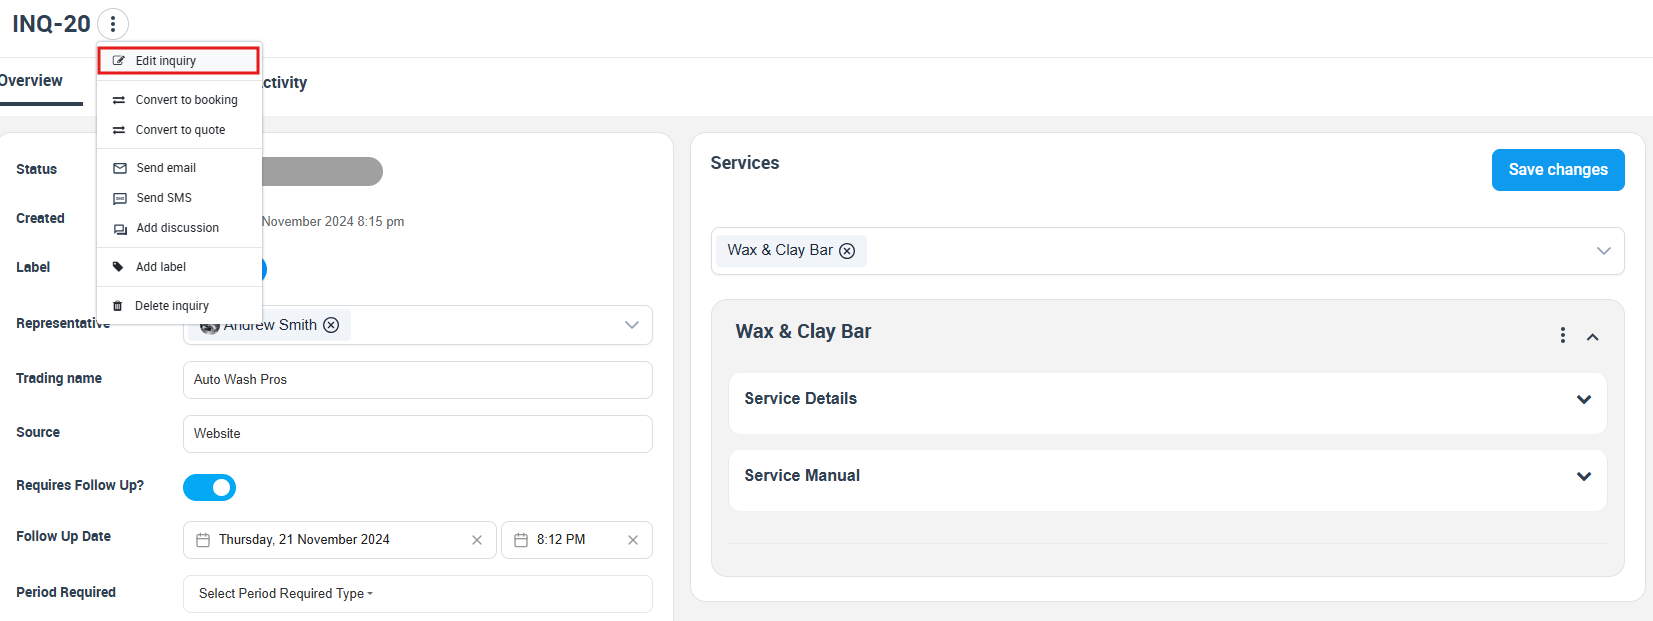
Full guide: Edit Inquiry Details.
Delete inquiry
If an inquiry is invalid, duplicated, or no longer required, you can delete it from the Actions menu. A confirmation prompt will appear before deletion.
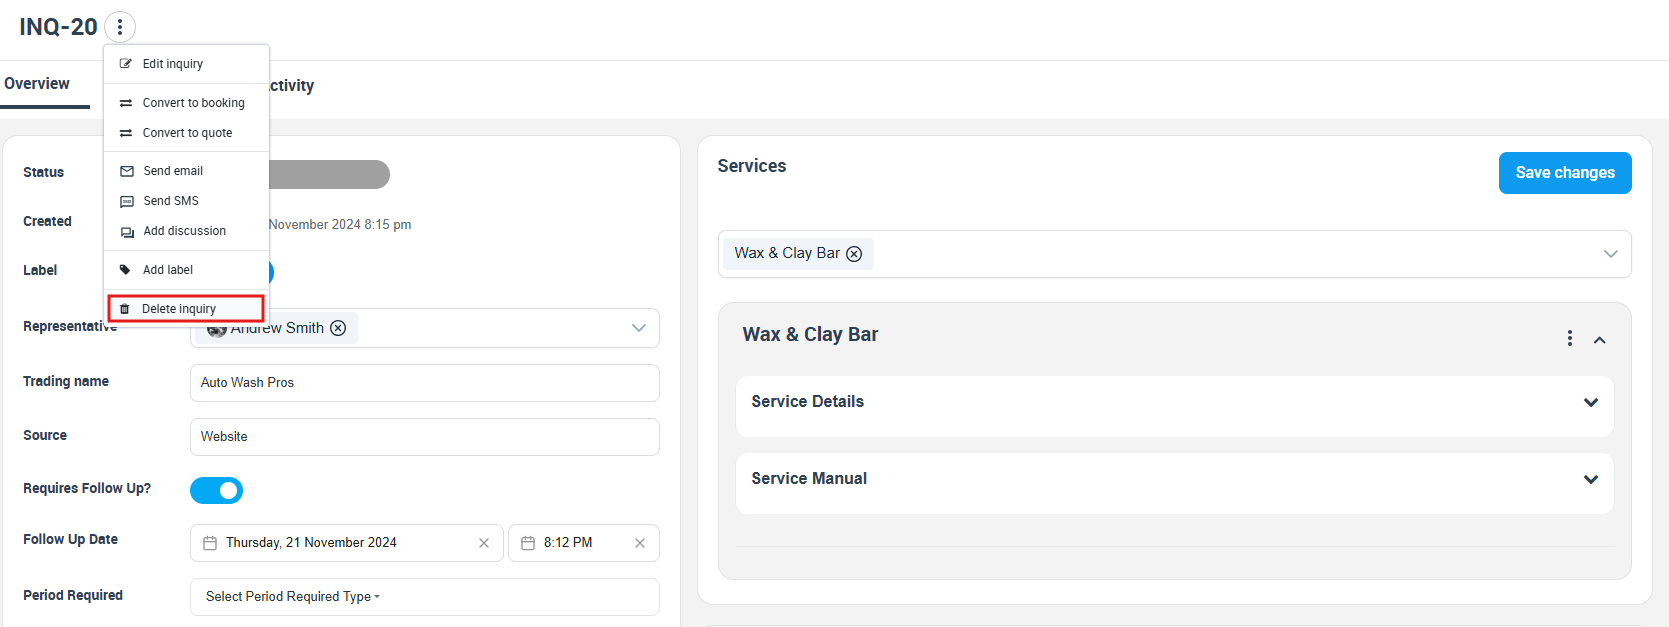
Full guide: Deleting Inquiries.
Optional: mark spam inquiries
If you receive spam leads, you can mark inquiries as spam to keep your pipeline clean.
Related guides
- Managing Leads & Inquiries
- Adding Customer Inquiries
- Inquiry Contact Management
- Inquiry Discussion Management
- Adding Attachments to Inquiries
- Adding Labels to Inquiries
- Managing Follow-Up Reminders
- Inquiries Statistics
To stay updated, please subscribe to our YouTube channel.