
Closing & Approving Issues & Complaints

OctopusPro offers a two-step complaint-completion workflow—Approve (when a fieldworker marks an issue “Resolved”) and Close (final shut-down by an authorised user). This structure mirrors ISO 10002 guidance on complaint-handling controls, ensures transparency for teams, and guards cash-flow by withholding contractor payments until the fix is verified. An automated, templated email keeps customers in the loop, boosting satisfaction scores when acknowledgements arrive promptly.
Closing vs Approving—What’s the Difference?
| Action | Who Triggers It | Typical Status Before | After-Action Status | When to Use |
|---|---|---|---|---|
| Approve Resolved Complaint | Admin/Supervisor | Awaiting Approval | Closed | Fieldworker tapped “Resolved” in the mobile app; admin confirms evidence, customer happy. |
| Close Complaint | Admin/Supervisor | New, In Progress, Awaiting Approval, or Re-opened | Closed | No further work required—e.g., customer withdraws issue, goodwill refund issued, or fix done by office staff. |
Regulators often recommend a two-tier check before final closure to guarantee fairness.
End-to-End Workflow in OctopusPro
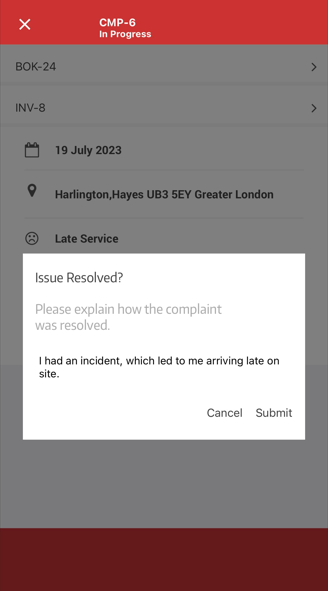
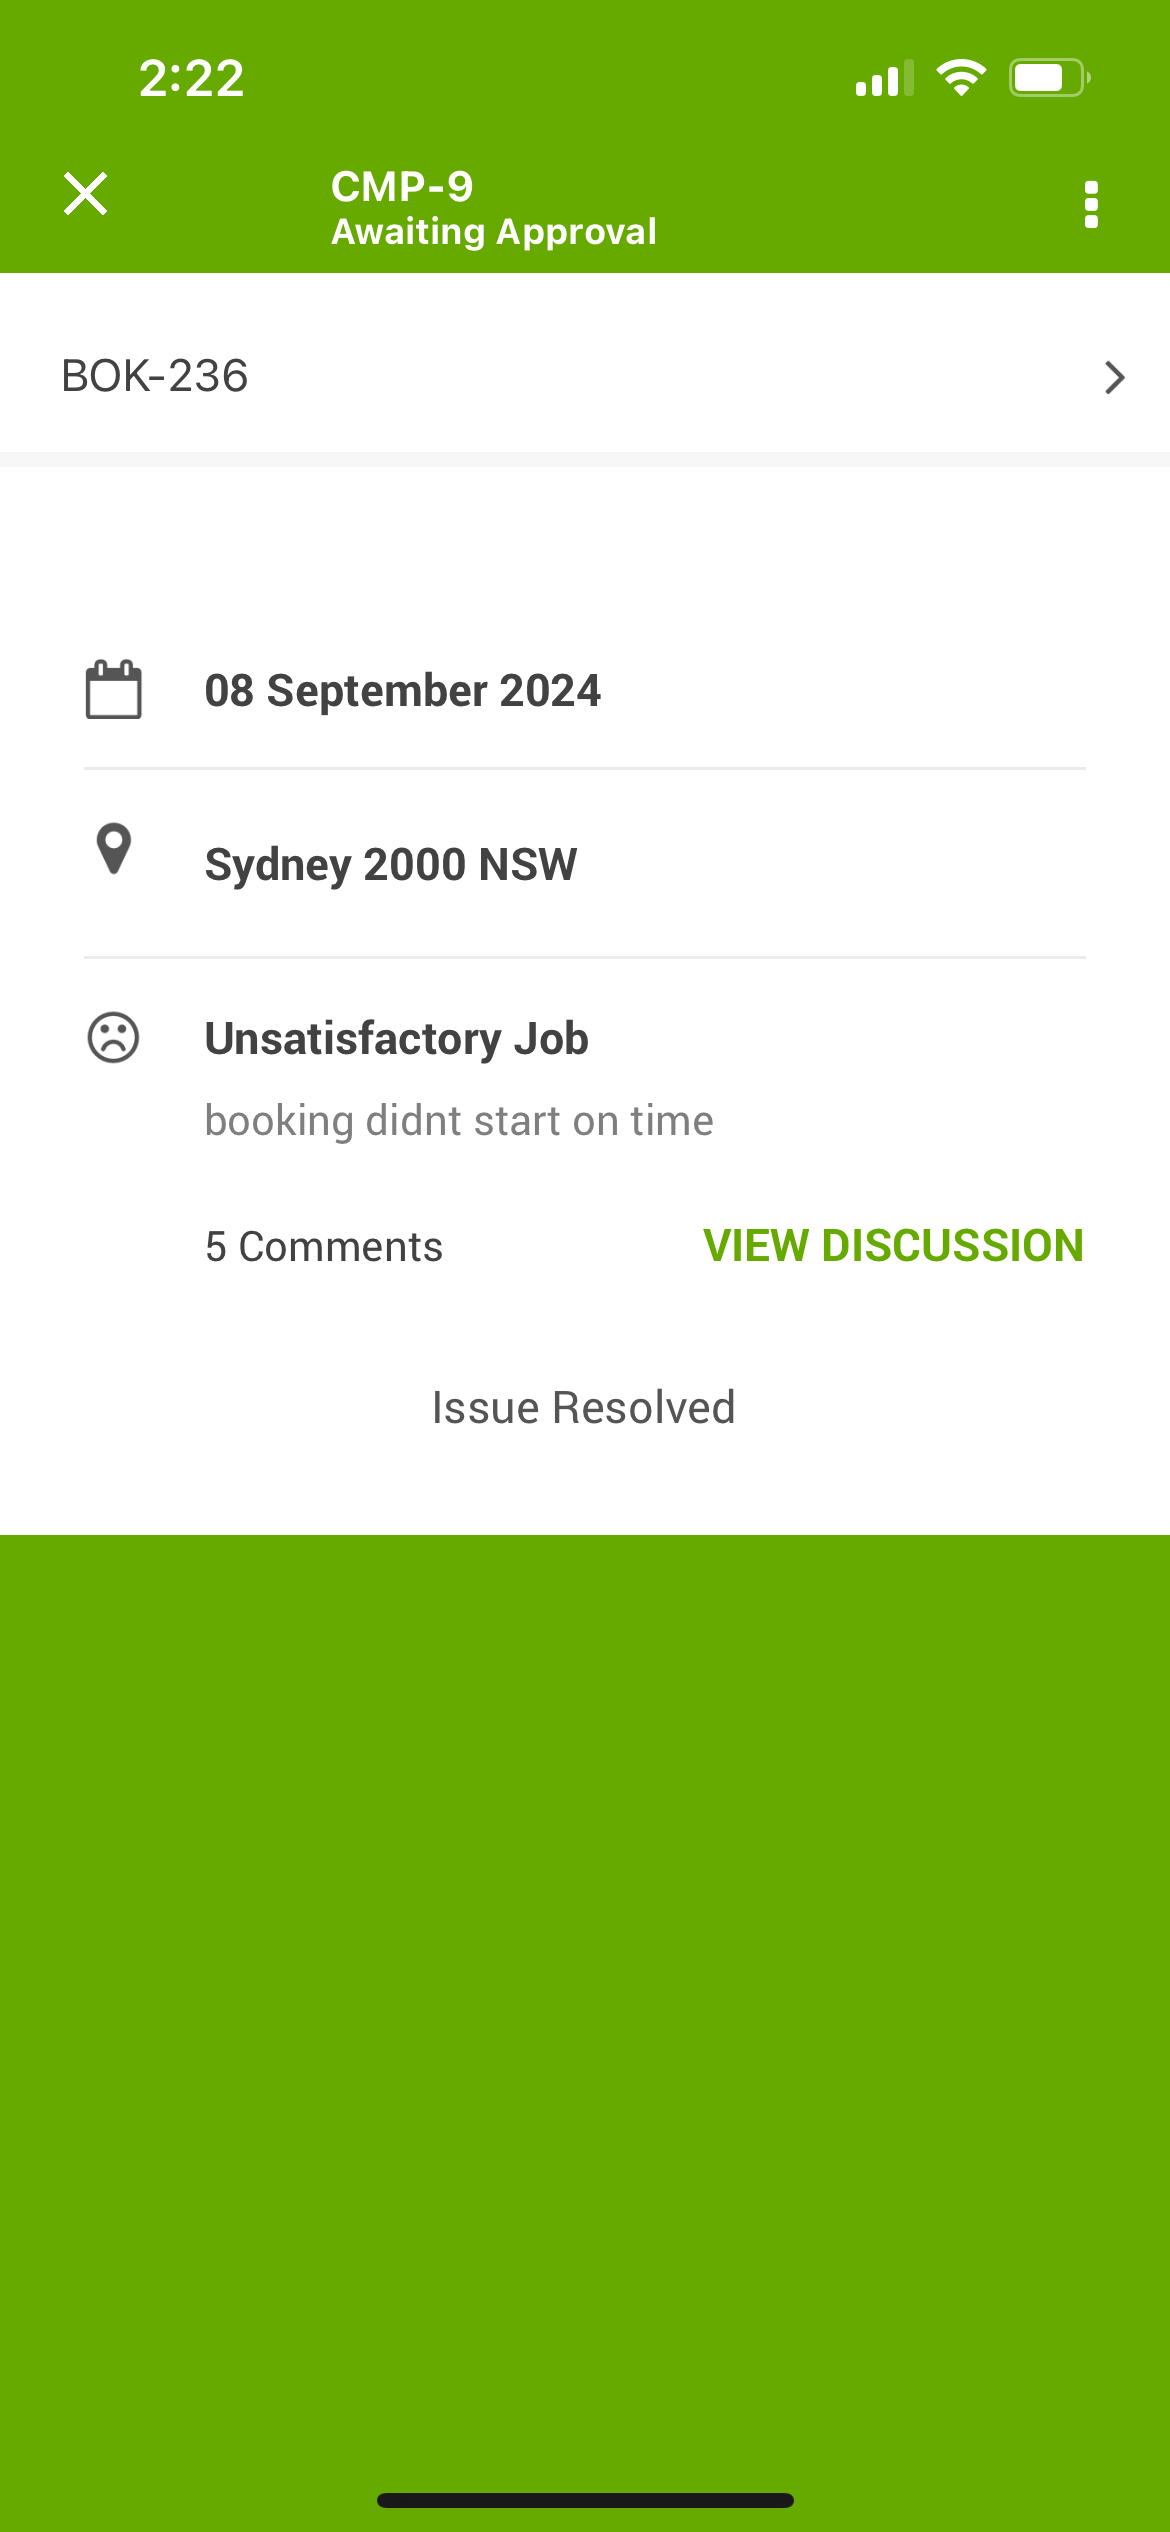
1. Fieldworker-Initiated Resolution (Awaiting Approval)
- Fieldworker documents the fix and taps Resolve in the app.
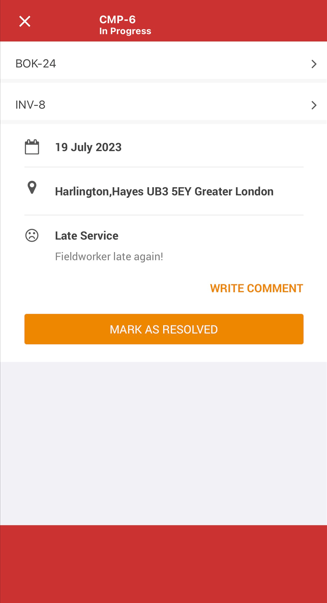
- Status flips to Awaiting Approval; payment flag stays Payment Withheld.
- Admin reviews photos, notes, or signatures; optionally calls the customer.
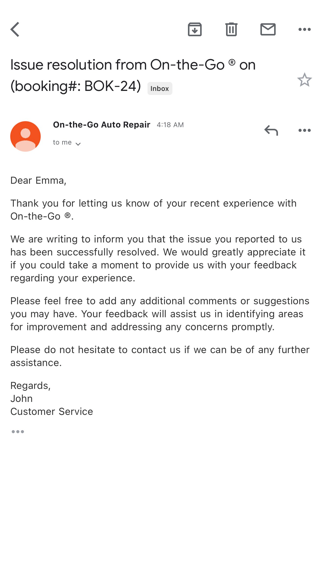
- If satisfied, admin chooses Approve & Close—one click updates status, releases payment flag, and triggers the “Issue Closed” email.
2. Admin-Initiated Closure
- Locate the issue (Issues › search ID).
- Actions › Close.

- Add internal comment or upload evidence for audit trail (optional).
- Decide whether to send the closure email immediately or later.
Both paths create a time-stamped entry in the complaint timeline for full traceability—vital if a dispute resurfaces months later.
Step-by-Step Instructions
1. Approving a Field-Resolved Complaint
- Go to Issues › Awaiting Approval tab.
- Open the record, press Actions › Approve.
- Verify New Status = Closed.
- Click Approved.
- Switch Payment Withheld → Payment Released if all contractual checks pass.
2. Closing a Complaint Directly
- Open the issue.
- Actions › Close.
- Add resolution comment or image (optional).
- Send closure email or skip as appropriate.
Key Considerations
- Payment Control – Holding funds until admin sign-off protects service quality and aligns with common retention clauses in trade contracts.
- Customer Communication – Use OctopusPro’s canned “Complaint Closed” email; personalising the sign-off nudges CSAT scores upward. You can customize this template from Settings > Communications > Templates & Canned Responses.
- Transparency for Teams – A visible Closed status prevents needless follow-ups and supports knowledge-sharing.
- Data & Reporting – Closed tickets feed KPI dashboards, helping you spot recurring root-causes and streamline processes.
Examples & Use Cases
| Industry | Scenario | How the Workflow Helps |
| HVAC | Technician replaces a faulty compressor under warranty. | Tech marks Resolved; office validates photos, approves, then releases payment. |
| Cleaning & FM | Client cancels complaint after goodwill credit. | Admin skips approval step, directly Closes issue, email confirms refund. |
| IT Managed Services | Remote patch fixes security bug. | Engineer resolves; supervisor approves only once vulnerability scan passes. |
Timely closure has been shown to reduce complaint escalations and negative social-media mentions in service industries, while empowering consumers to complain—and see rapid action—builds long-term loyalty.
Benefits at a Glance
- Enhanced Customer Trust – Quick, transparent resolutions boost confidence and NPS.
- Operational Efficiency – Staff spend less time “re-checking” solved tickets thanks to clear statuses.
- Quality Assurance – Two-tier sign-off guarantees fixes meet brand standards.
- Cash-Flow Integrity – Payment stays on hold until genuine resolution, minimising disputes.
Deleting Issues & Complaints
Use deletion sparingly—once removed, an issue and all its comments, attachments and history are gone for good. This feature is intended for clearing out test tickets, duplicate records or sensitive data you’re legally required to purge.
Who can delete:
Only users with the Admin role and the “Delete Issues” permission.
When to delete:
- Removing accidental or test issues
- Complying with data-removal requests (e.g. GDPR)
- Purging duplicates or obsolete complaints
How to delete:
- Go to Issues & Complaints > All Issues.
- Open the issue by clicking its CMP-##### code.
- Click Actions > Delete Forever.
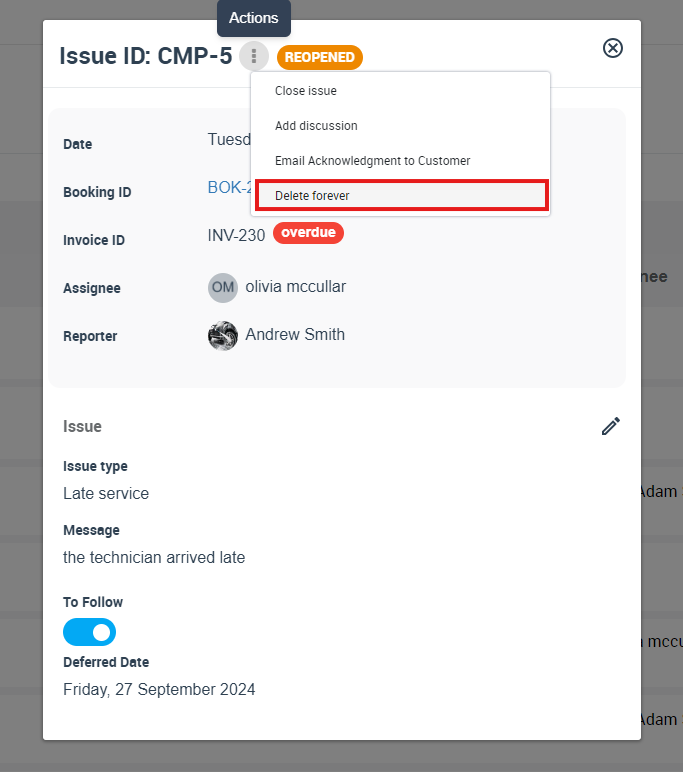
- Confirm the prompt—this action is irreversible.
What happens next:
- The record and all associated data are permanently erased.
- Assigned fieldworkers and watchers receive a notification (per their settings) that the issue was deleted.
- Deleted issues do not appear in reports or dashboards.
To stay updated, please subscribe to our YouTube channel.