Converting an Open Invoice to Draft
OctopusPro allows you to convert an open invoice to a draft status, providing flexibility in managing your invoices and a chance to review or modify them before finalization. This guide will delve into the process of converting an open invoice to a draft, the associated use cases, benefits, and potential restrictions. It will also explore how this feature impacts your integrations with accounting software like Xero and QuickBooks.
Use Cases
- Additional Information Required: If an open invoice needs additional information or adjustments, converting it to a draft allows these changes to be made.
- Error Correction: Converting an invoice to a draft provides an opportunity to correct any errors or inaccuracies.
- Delayed Finalization: In some cases, finalizing an invoice might be delayed due to various reasons like waiting for additional service completion, cost adjustments, etc.
Invoicing can be a complex process, but understanding the terminology and uses for different types of invoices can simplify it. Here are brief explanations for each term:
- Draft Invoices: A draft invoice is a preliminary bill, often used as a placeholder or proforma invoice, which is not yet finalized and sent to the client. This is used for internal purposes and allows you to make any necessary changes or additions before finalizing and sending it to the client. It does not have any impact on accounting until it is sent or marked as finalized.
- Sent Invoices: A sent invoice is a finalized invoice that has been sent to the client. It impacts the accounts receivable and reflects an amount that is expected to be paid by the client.
- Void Invoices: Voiding an invoice cancels it as if it was never issued but keeps a record in your system. It’s as if the invoice never affected your accounts. Voiding is used when an invoice is sent in error or needs to be cancelled but a record needs to be kept for tracking or auditing purposes.
- Deleted Invoices: Deleting an invoice removes it entirely from your records as if it never existed. This action should be used sparingly, as it disrupts the continuity of your invoice numbering and could complicate your audit trail.
In summary:
- Use a draft when you are preparing an invoice but it’s not ready to be sent to the client.
- Use sent when the invoice is finalized and you want to request payment from the client.
- Use void when you need to cancel an invoice but want to keep a record of it for your files.
- Use delete when you want to entirely remove an invoice that was created by mistake and has not been sent to the client or reported in any way.
Each of these has a different impact on your accounting and should be used in different scenarios, so understanding them is crucial for proper invoice management.
How to Convert an Invoice to a Draft
Convert an Invoice to a Draft from the Invoice List page:
- Log into your OctopusPro account.
- Navigate to the “Invoices” section.
- Select the type of invoice you wish to view or select “All Invoices”.
- Locate the invoice you want to convert to a draft.
- Click on the “Actions” button next to the relevant invoice.
- Select “Convert to Draft” from the dropdown list.
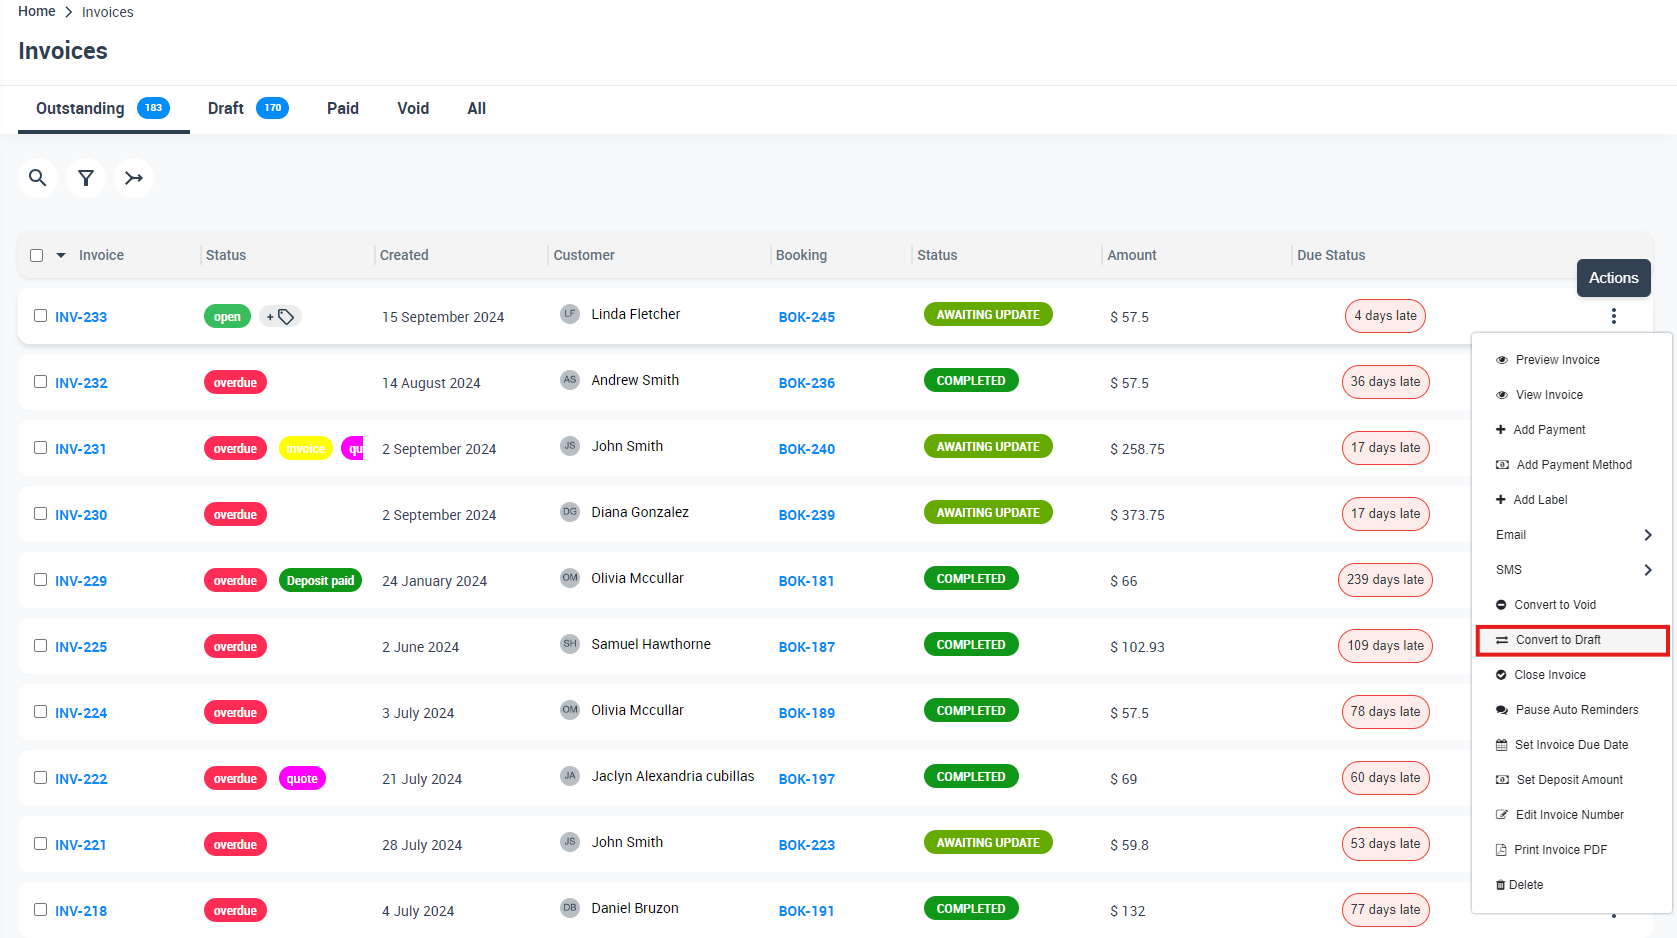
Once clicked, the invoice status will be converted to Draft.

Convert an Invoice to a Draft from the Invoice Details page:
- Go to the specific invoice you want to convert to draft.
- Click on the “Actions” button next to the invoice number.
- Select “Convert to Draft” from the dropdown menu.
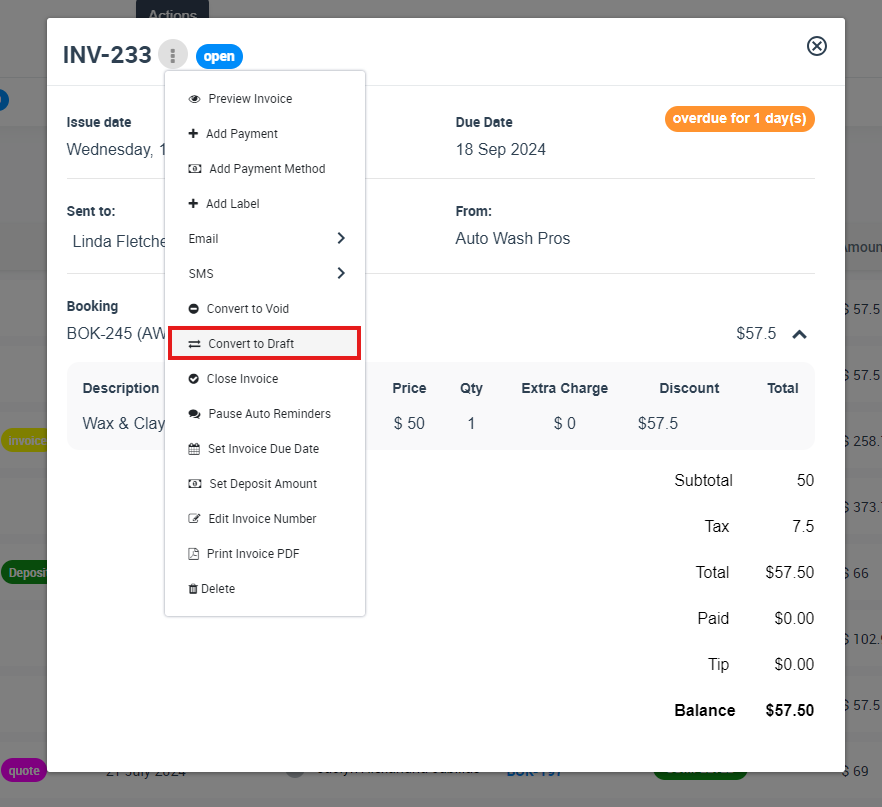
Once clicked, the invoice status will be converted to Draft.
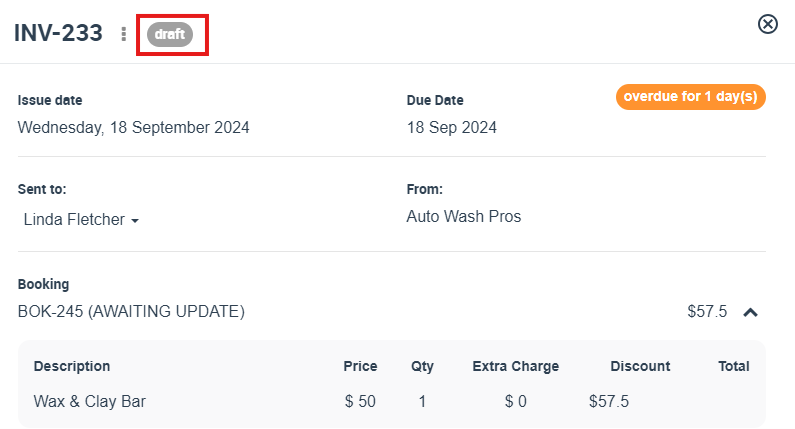
Please note that there might be some restrictions based on the status of the invoice and the invoice payments.
Convert a Draft Invoice to Open
When you initially create an invoice, it’s often in a draft status. This means it’s a provisional invoice that’s still subject to changes. Drafts are used to prepare and review the invoice before finalizing it.
When you’ve confirmed all the details in the draft invoice are accurate – including the products or services provided, their prices, the customer’s details, and the payment terms – you then convert the draft to an invoice. At this point, the invoice is considered finalized, and it should be sent to the customer for payment.
Here’s a simple process for converting a draft to an invoice in most invoicing systems:
- Navigate to your list of draft invoices.
- Select the draft invoice you want to convert.
- Review the draft invoice to confirm all details are correct.
- Click on the “Actions” button next to the invoice number.
- Look for an option such as “Convert to Open” from the dropdown menu.
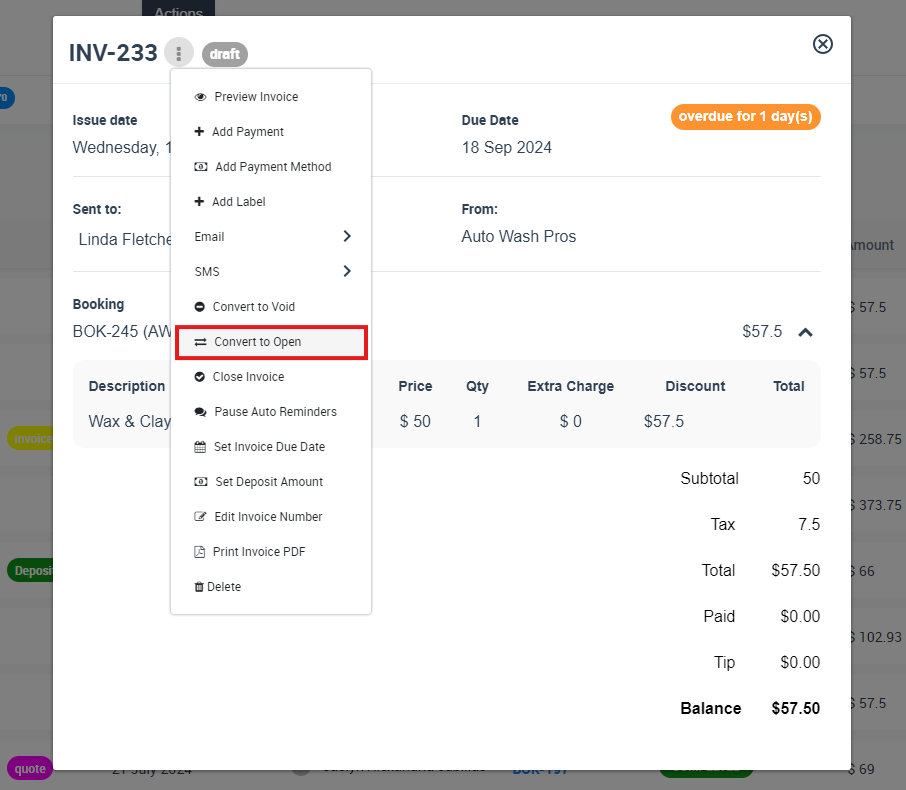
6. Your draft invoice should now be converted to a finalized invoice and be ready to send to the customer.
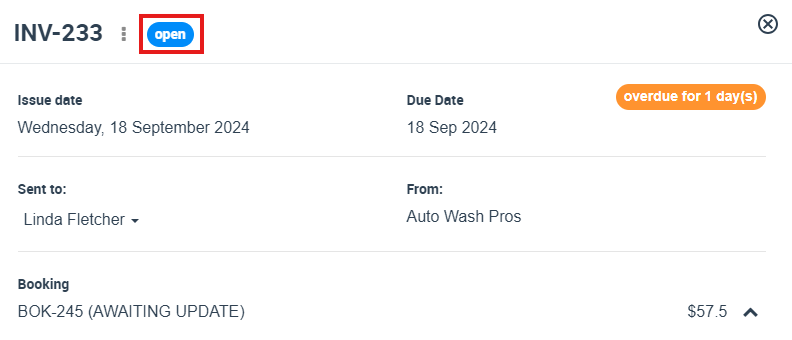
Remember, once a draft has been converted to a finalized invoice, you usually can’t revert it back to a draft status without voiding the invoice. So it’s important to ensure all details are correct before you convert the draft.
Limitations and Restrictions
Converting an invoice to a draft is a versatile feature but has some limitations:
- Payment Status: Open invoices that have approved payments cannot be converted to a draft status.
- Invoice Status: Only open invoices can be converted back to draft. Invoices with other statuses may not have this option.
Impact on Synced Items with Xero and QuickBooks
Converting an invoice to draft in OctopusPro will not be instantly reflected in your synced accounting systems such as Xero and QuickBooks. The changes are updated during the next sync process. To ensure consistent and accurate financial records, remember to initiate a new sync after performing this action.
In the accounting software industry, it’s a standard practice to allow invoices to be converted back to draft for further editing or adjustments. The record of the invoice is retained, but it’s marked as ‘draft’ until it’s finalized again.
Conclusion
Converting an open invoice to a draft in OctopusPro is a helpful feature for managing and adjusting your invoices. Be aware of the implications it has on your integrations with accounting software and the potential restrictions in performing this action. Always ensure your accounting systems are synced after making such changes to maintain consistency in your financial records.
To stay updated, please subscribe to our YouTube channel.
