Locking / Unlocking Merged Invoices to Manage Billing Cycles
Navigating through your invoicing and billing cycles just became more streamlined, thanks to OctopusPro’s innovative Lock/Unlock merged/group Invoice feature. Designed to provide ultimate control and flexibility, this feature boosts your ability to manage customized invoice cycles efficiently, ensuring your business runs smoothly and your customers remain satisfied.
Picture this: You have a client with a specific billing cycle – perhaps monthly, bi-monthly, or quarterly. With OctopusPro’s feature, you can lock an invoice to prevent any accidental changes, maintaining the integrity of the set billing cycle. This means you don’t need to worry about unexpected variations in the invoicing process, ensuring consistency, and precision.
But that’s not all. Suppose you need to incorporate an additional service or product into the billing cycle of an already locked invoice. No problem! With the Unlock Invoice feature, you can easily integrate additional invoices without disrupting the established cycle, providing a seamless customer experience.
But what if you are an admin user and need to make changes to a locked invoice? You have full authority to unlock the invoice, make the necessary alterations, and relock it, ensuring complete control over the invoicing and billing process.
In essence, the Lock / Unlock merged/group Invoice feature of OctopusPro provides the perfect solution for businesses seeking a powerful, efficient, and flexible way to manage their invoicing and billing processes. With clear benefits such as preventing unwanted changes, ensuring billing accuracy, and offering flexibility for customizing invoice cycles, this feature truly stands out as a key tool for modern business management.
Table of contents:
- Benefits of the “Lock Invoice” Feature
- How to Lock Invoice
- How to Unlock Invoice
- Streamlining the Billing Process with Customizable Invoice Cycles
Benefits of the “Lock Invoice” Feature
- Helps maintain customized invoice cycles
- Prevents changes to specific invoices
- Ensures accuracy and consistency of invoices
- Streamlines billing process
How to lock an invoice
- Navigate to Invoices > All Invoices from your sidebar menu
- Find the merged/group invoice that you want to lock and click on it
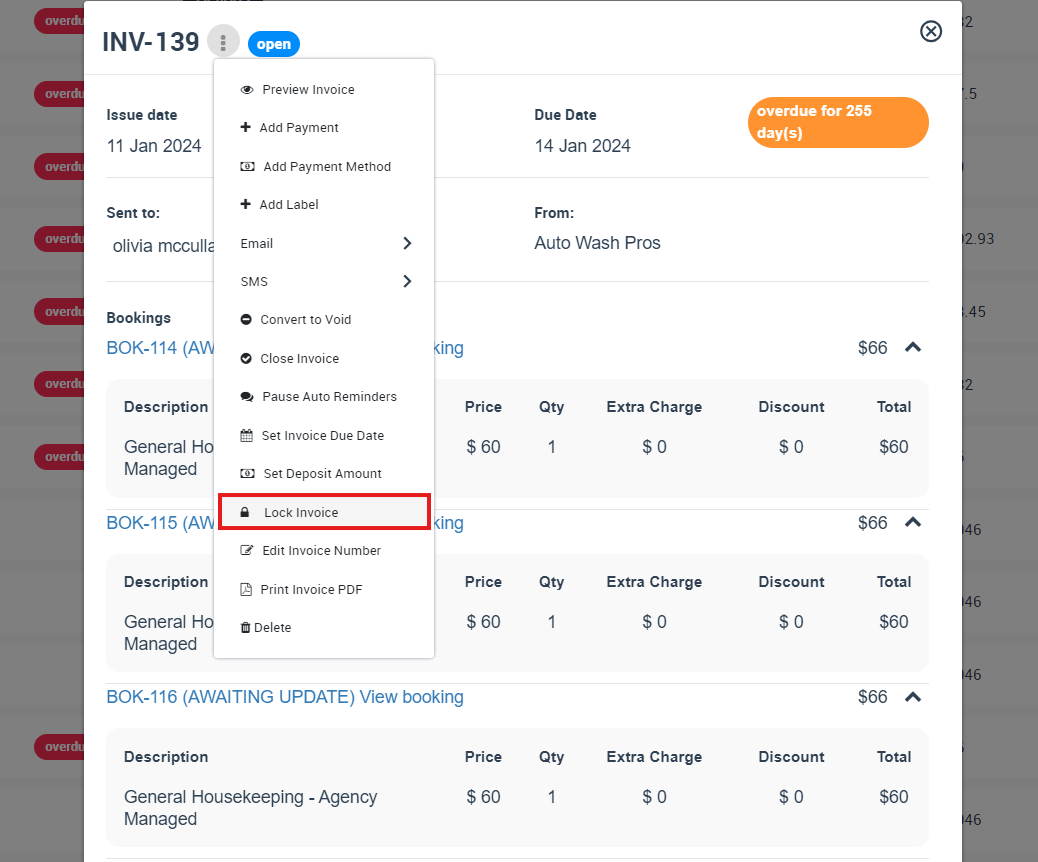
- Look for the “Actions” button and click on the “Lock Invoice” button
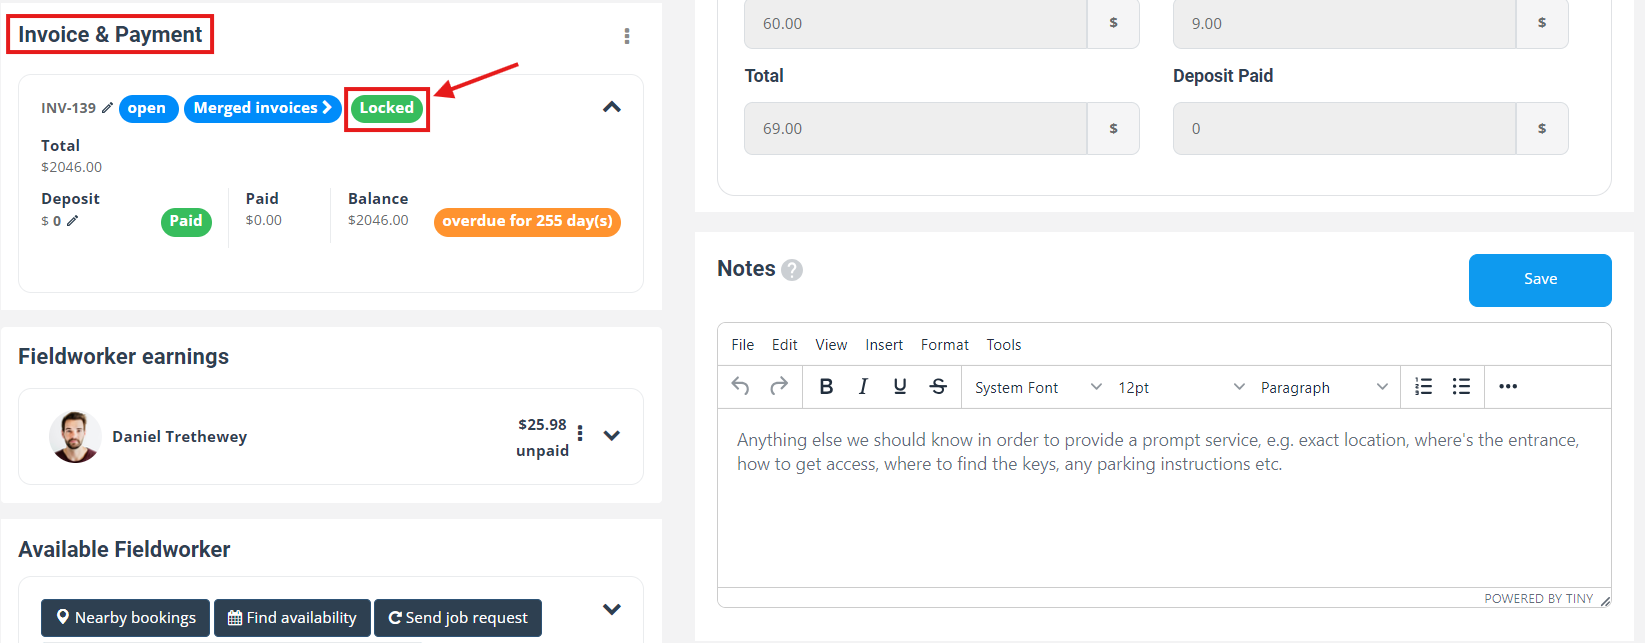
4. Verify the lock by checking the status field for the merged invoice, which should now show as “locked” on the booking overview page.
Note: Only admin users have the ability to unlock a locked merged invoice. If you need to unlock a merged invoice, please contact an administrator.
How to unlock an invoice
- Navigate to Invoices > All Invoices from your sidebar menu
- Find the merged/group invoice that you want to unlock and click on it
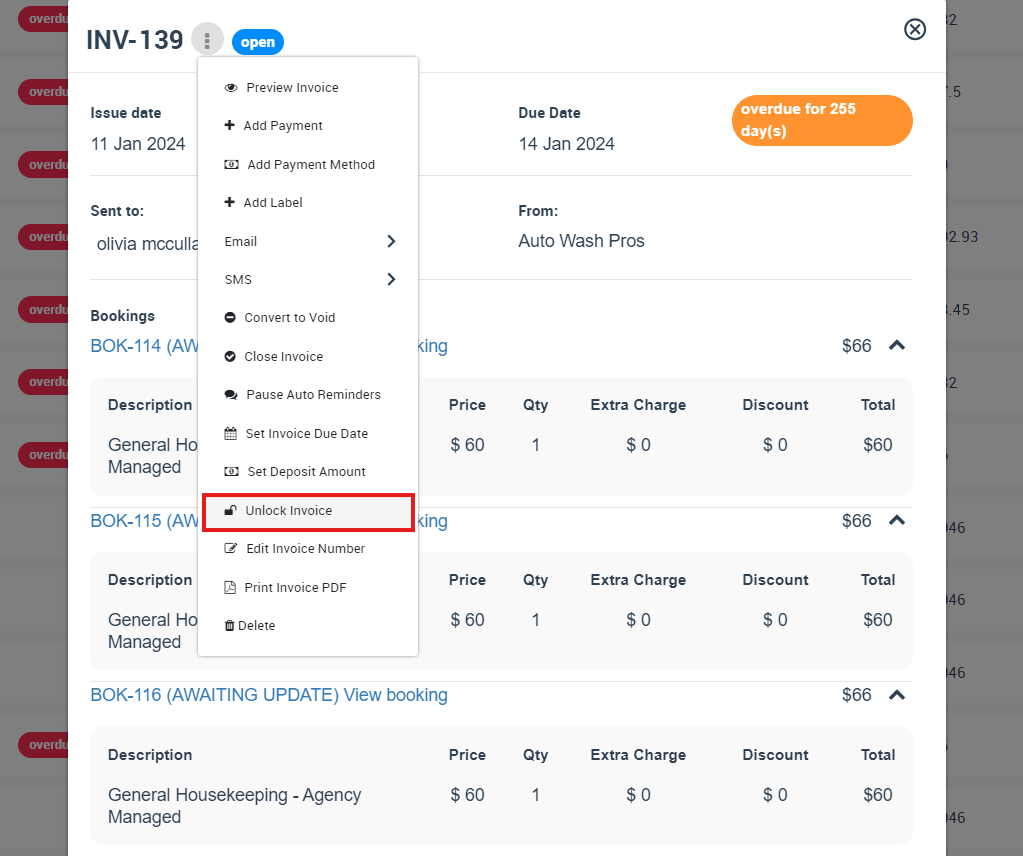
- Look for the “Actions” button, and click on the “Unlock Invoice” link

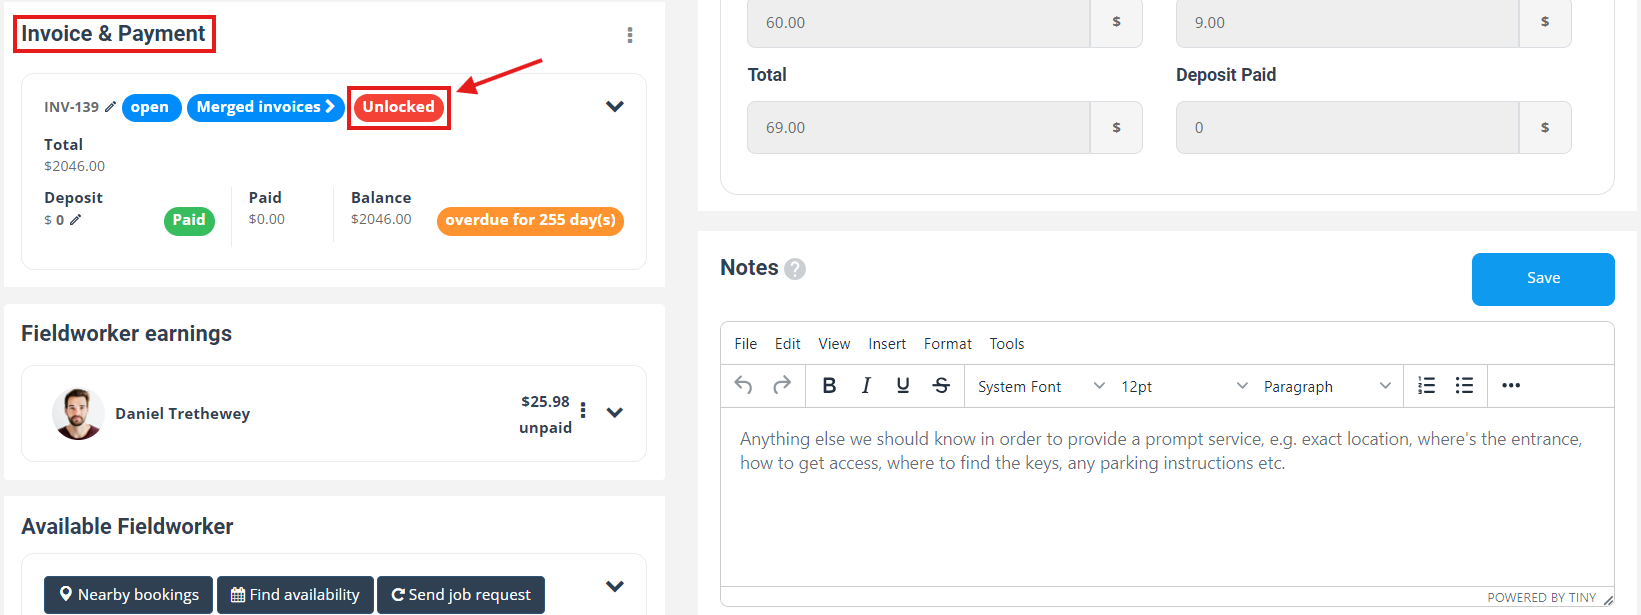
4. The merged/group invoice will now be unlocked, and you will be able to merge additional invoices with it.
Note: Only admin users are able to unlock merged/group invoices. If you are not an admin user, please contact your administrator for assistance.
In conclusion, the Lock / Unlock Invoice feature offered by OctopusPro is a valuable tool for managing your customized invoice cycles and ensuring the accuracy and consistency of your invoices. By following these simple steps, you can take control of your billing process and streamline your invoicing process.
Streamlining the Billing Process with Customizable Invoice Cycles
Streamlining the billing process is crucial for any business, as it helps to ensure that invoices are sent out accurately and on time. With customizable invoice cycles, you can take control of your billing process and streamline it even further.
By setting up custom invoice cycles for each of your customers, you can specify the frequency of invoicing that works best for their business needs. For example, if a customer has a monthly invoice cycle, their invoices will be grouped together and sent to them on a monthly basis. This means that you can manage your invoicing process more efficiently, without having to manually group invoices each time.
To get started with customizable invoice cycles, you need to follow these steps:
- Set up custom invoice cycles for each customer: Access the settings section of the software and set up custom invoice cycles for each customer.
- Group invoices automatically: The software will automatically group invoices based on the custom invoice cycles set up for each customer.
- View and manage grouped invoices: Go to the View Invoice page in the system, where you can see all the invoices that have been grouped together. You can also edit, add, or remove invoices from a group if necessary.
- Lock invoices: If necessary, you can also lock invoices on the View Invoice page. This will prevent any further changes to the invoice, which can help ensure that the correct invoices are being sent to each customer.
If you have any questions or concerns about this feature, please don’t hesitate to contact our support team for assistance.
To stay updated, please subscribe to our YouTube channel.


