
Calendar (Scheduling & Dispatch)
The Calendar is OctopusPro’s scheduling and dispatch board. It gives you a clear, real-time view of bookings, fieldworker availability, and workload—so you can quickly assign jobs, avoid clashes, and keep your team and customers on track.

Table of contents
- What the Calendar is used for
- How to open the Calendar
- Calendar toolbar (views, dates, timezone, filters)
- Calendar views: Month, Week, Day, List
- Add items from the Calendar (booking, unavailable time, notes)
- Block unavailable time (time off / breaks / non-working hours)
- View and manage bookings directly from the Calendar
- Filter your Calendar (services, status, location, labels, etc.)
- Fieldworker labels
- Sync OctopusPro Calendar with Google & Outlook Calendar
- Best-practice tips
- Related articles
What the Calendar is used for
- Schedule bookings across days/weeks/months and identify gaps or conflicts.
- Dispatch and assign fieldworkers (or review unassigned work) from one place.
- Block unavailable time (annual leave, breaks, training, travel blocks, etc.).
- Apply filters to focus on specific services, statuses, locations, labels, and more.
- Sync with Google / Outlook Calendar (optional) to keep schedules aligned.
How to open the Calendar
Go to Bookings > Calendar.
Calendar toolbar (views, dates, timezone, filters)
At the top of the Calendar, you’ll typically find:
- View selector (Month / Week / Day / List)
- Date navigation (Today + previous/next arrows + date picker)
- Timezone selector (useful if you operate across regions)
- Filter (to narrow down what appears on the Calendar)
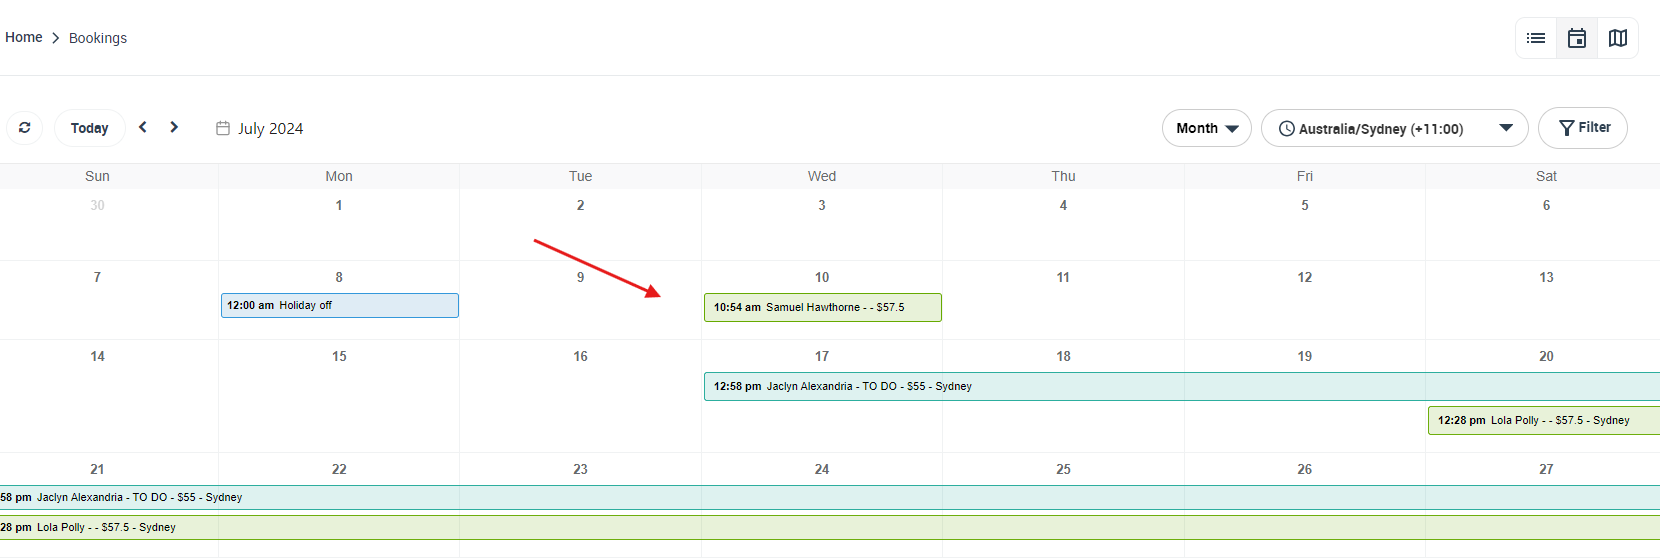
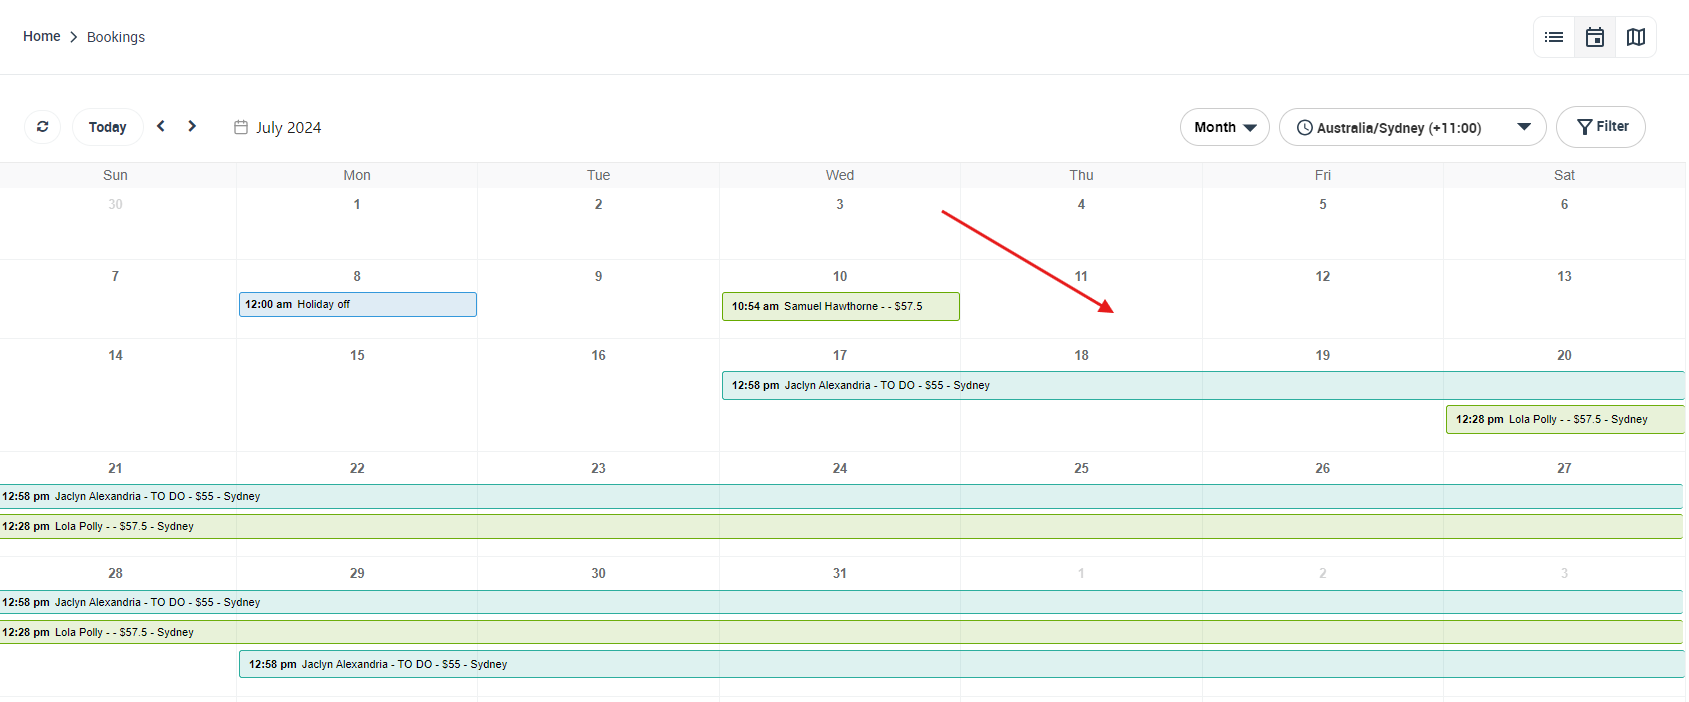
Calendar views: Month, Week, Day, List
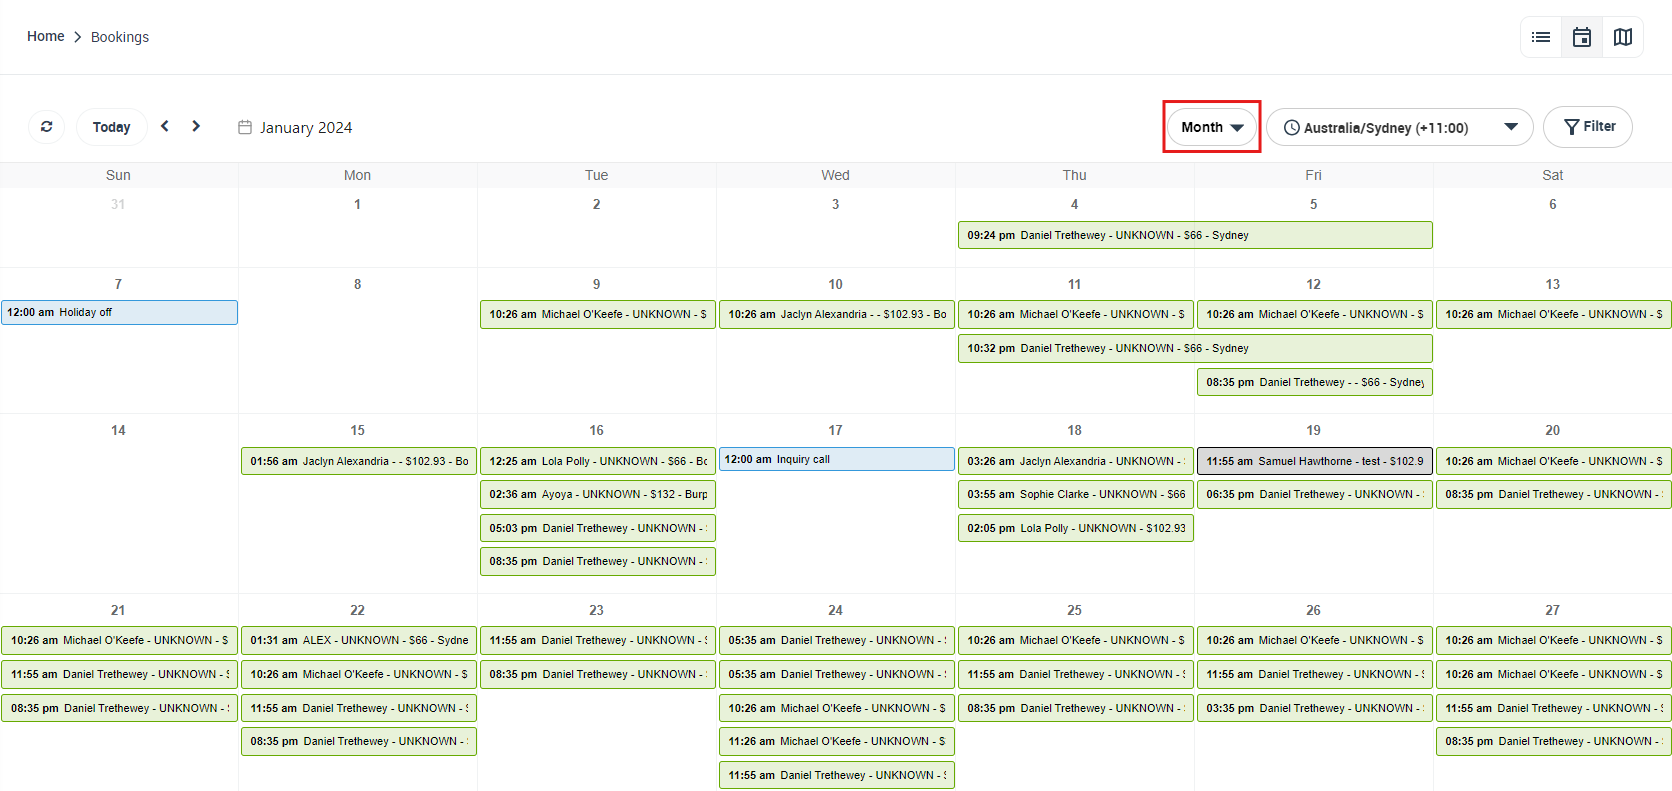
Month view
Use Month view for high-level planning, workload visibility, and spotting busy periods.
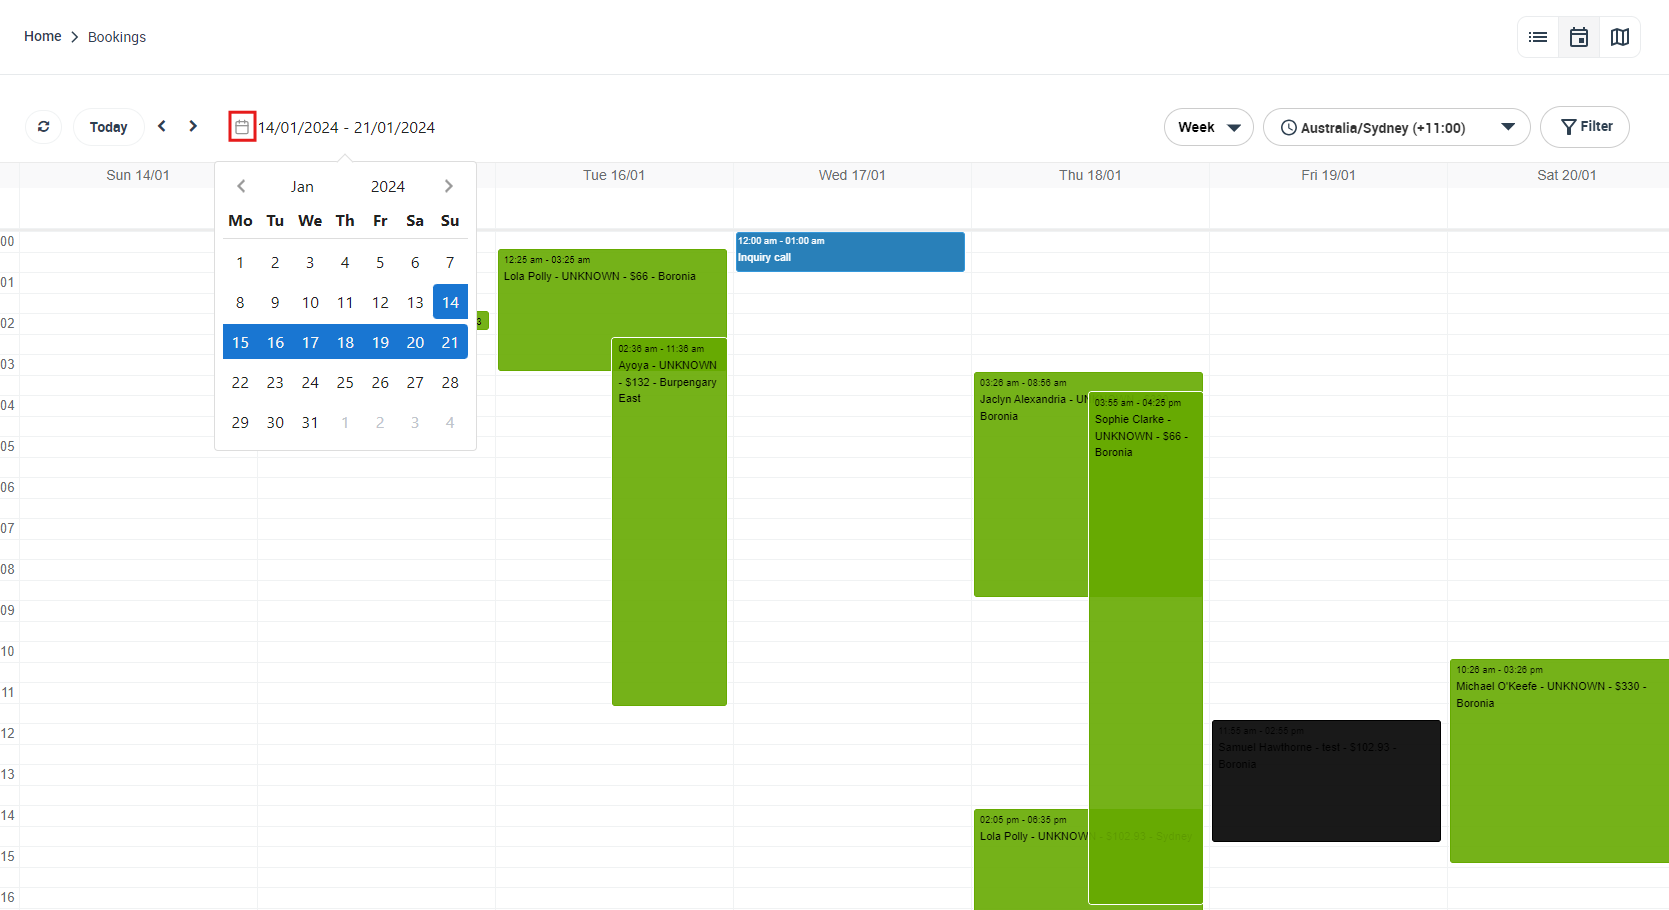
Week view
Use Week view for operational scheduling and dispatching across multiple days. It’s ideal for capacity planning and balancing work across the week.

You can also click the date range to open a date picker and jump to another week.
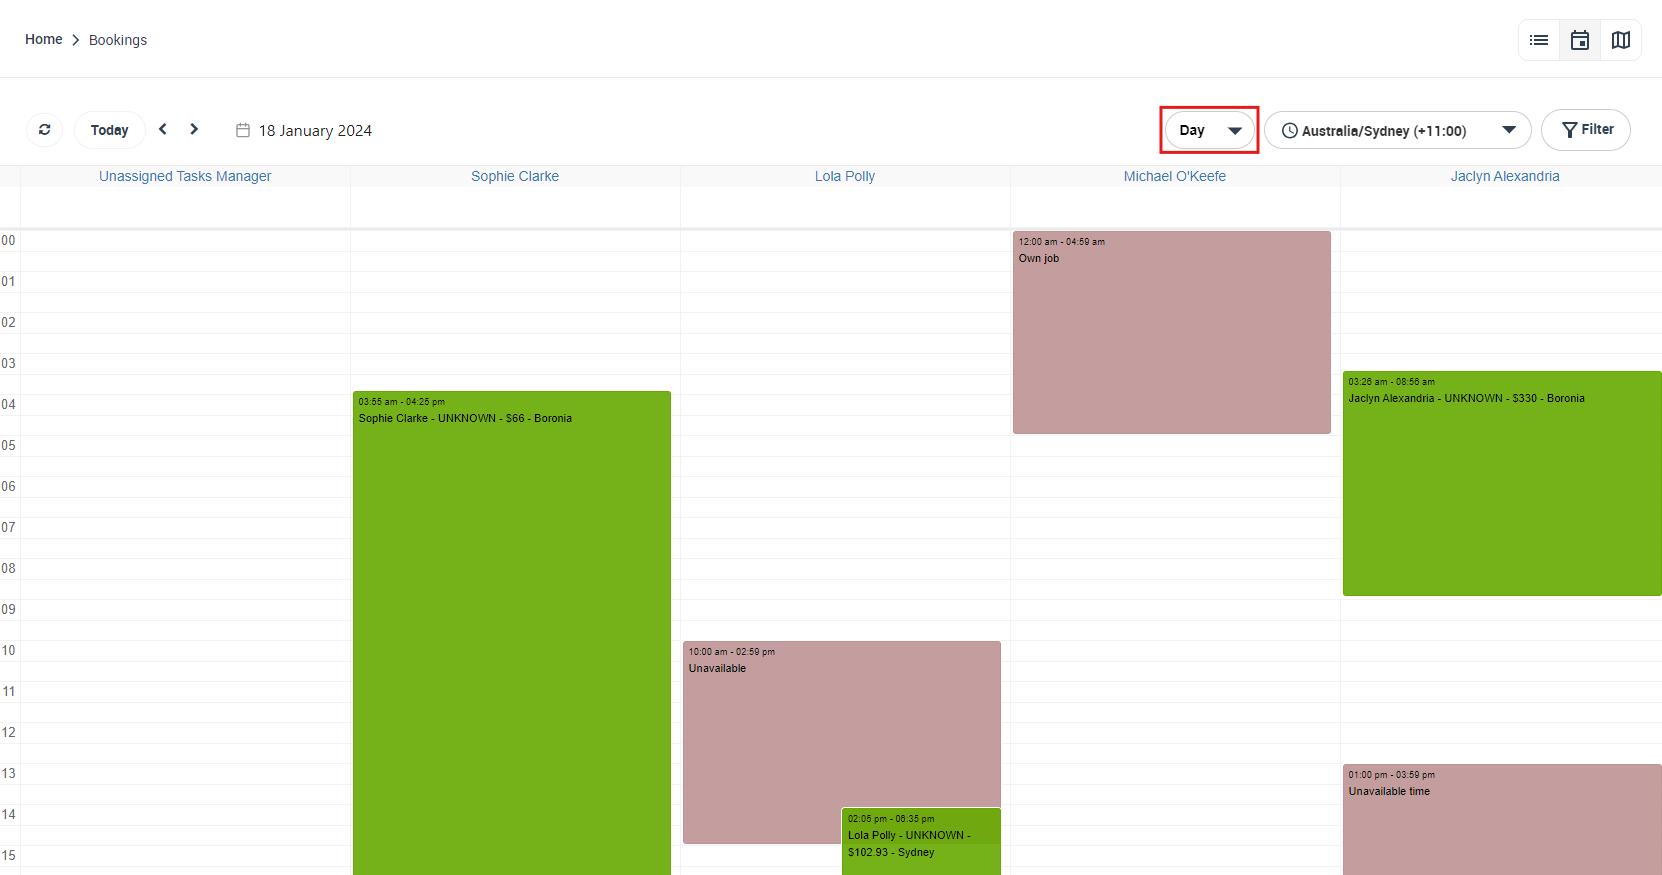
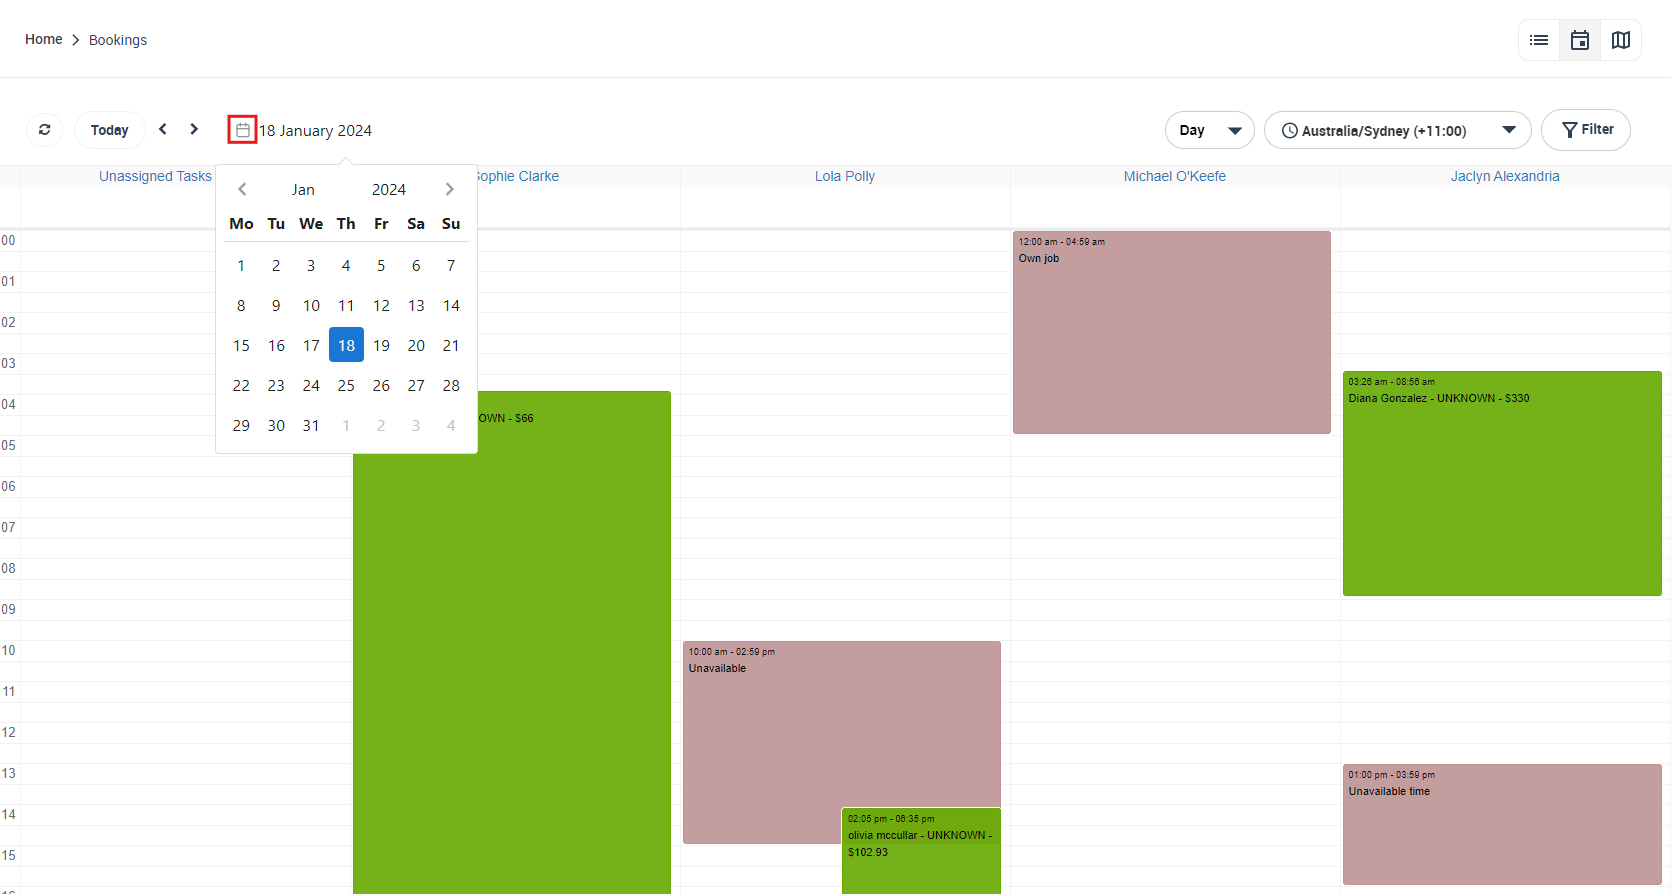
Day view
Use Day view for detailed dispatching and seeing time blocks (bookings and unavailable time) hour-by-hour.
Click the date to open a date picker and jump to a different day.
List view
List view shows bookings in a simple list format for a chosen period. It’s useful for admin teams that prefer a “run sheet” style view and quick scanning without time blocks.
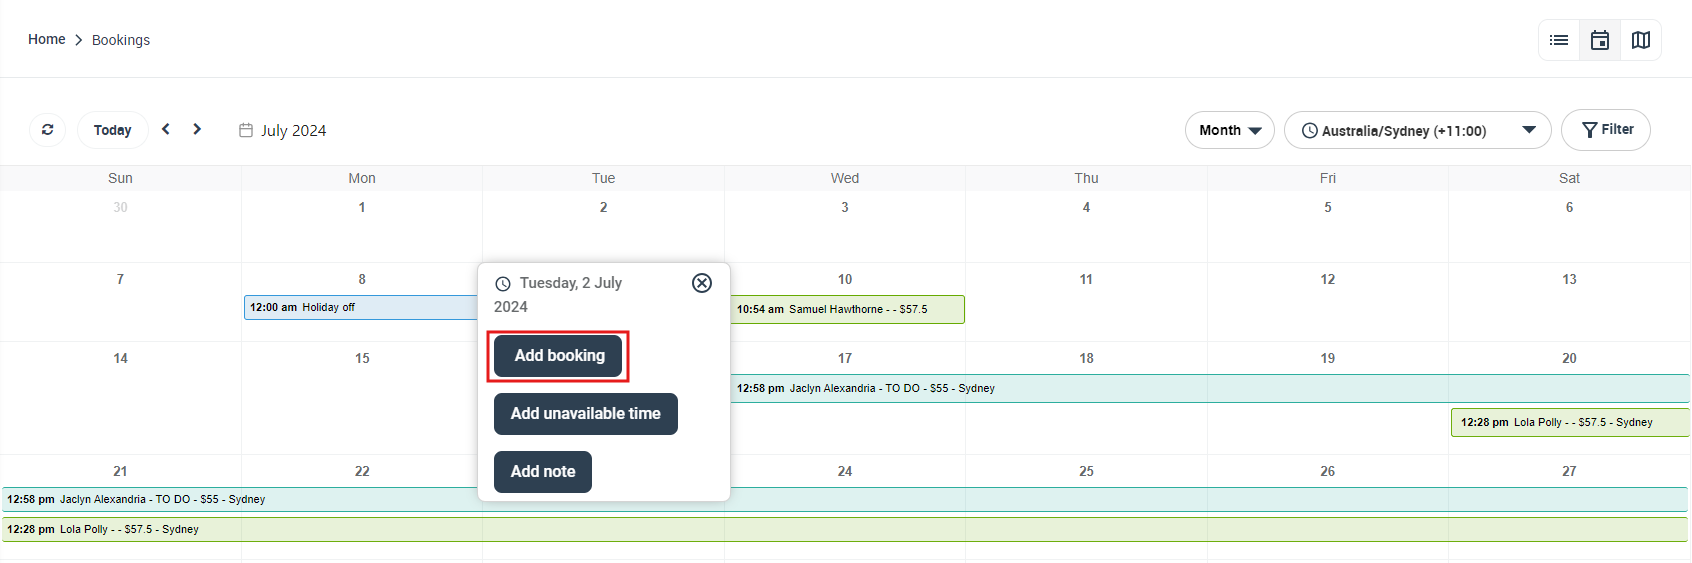
Add items from the Calendar (booking, unavailable time, notes)
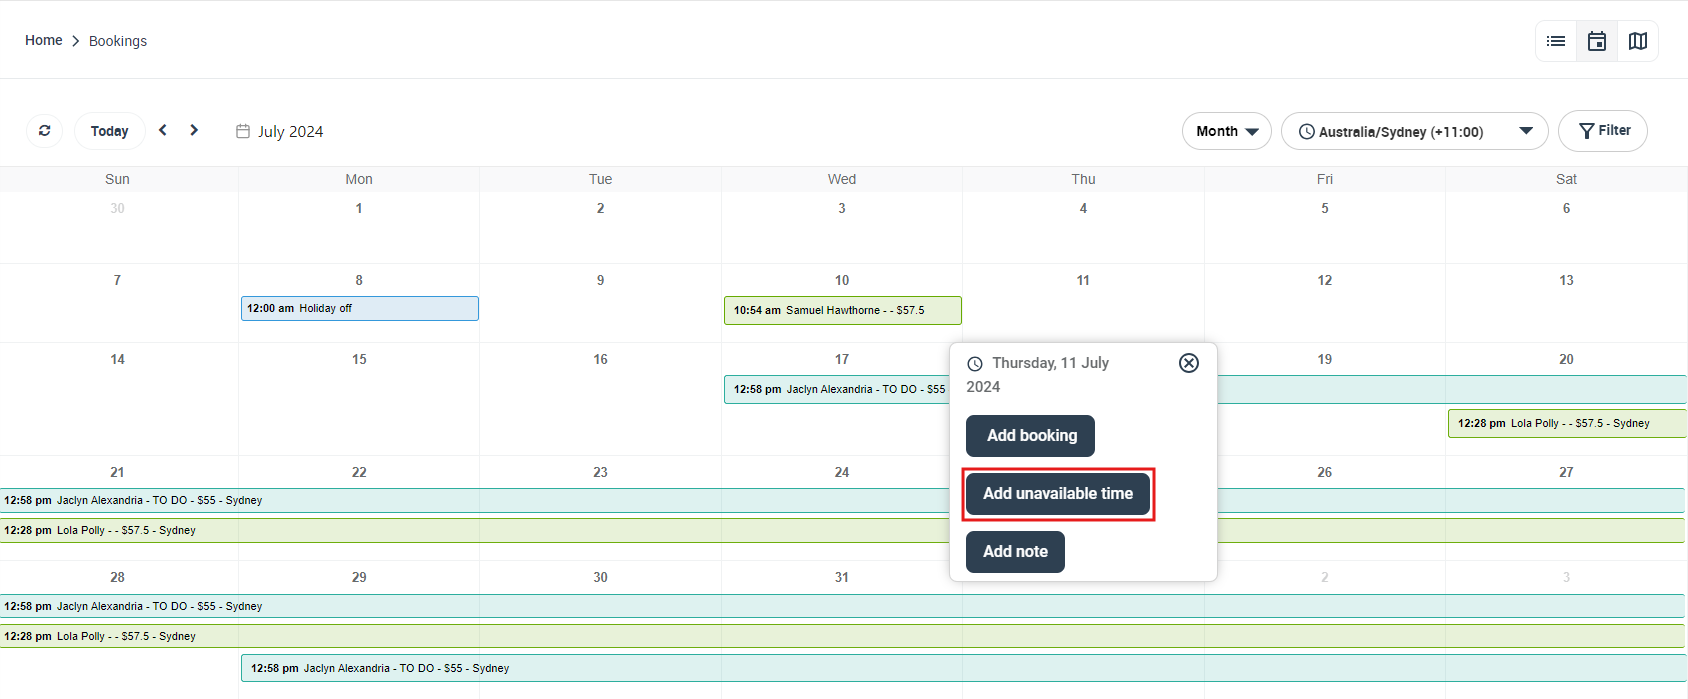
You can click a date (or a time slot, depending on the view) to create items directly from the Calendar.
Add a booking
- Click the date/time where you want to schedule the booking.
- Select Add booking.
- Complete the booking details and save.
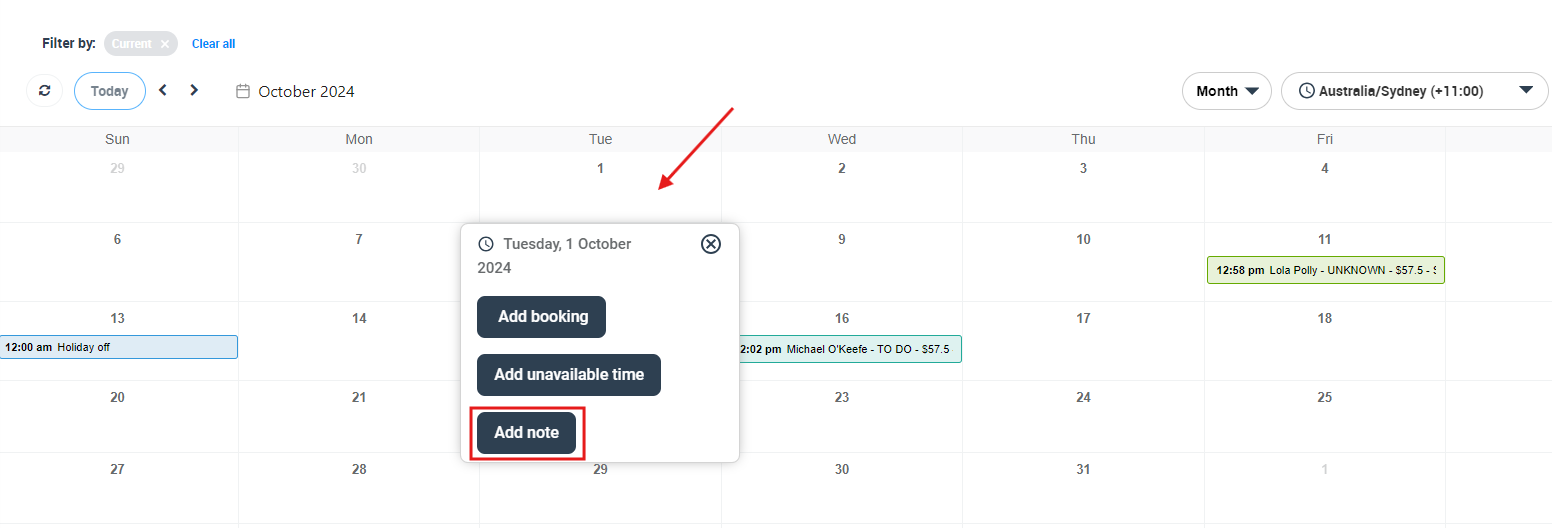
Add a note
Calendar notes are helpful for internal reminders (e.g., “Team meeting”, “Stock delivery”, “Office closed”).
- Click the relevant date.
- Select Add note.
- Enter your note and save.
Block unavailable time (time off / breaks / non-working hours)
Unavailable time blocks prevent accidental booking overlaps and help reflect real capacity. You can add unavailable time for:
- One fieldworker
- Multiple fieldworkers (e.g., team training)
- All fieldworkers (e.g., public holiday / company shutdown)
Add an unavailable time block
- Click the relevant date (or time slot).
- Select Add unavailable time.
- Choose the fieldworker(s) (or apply to all), set the time range (or all-day), and save.
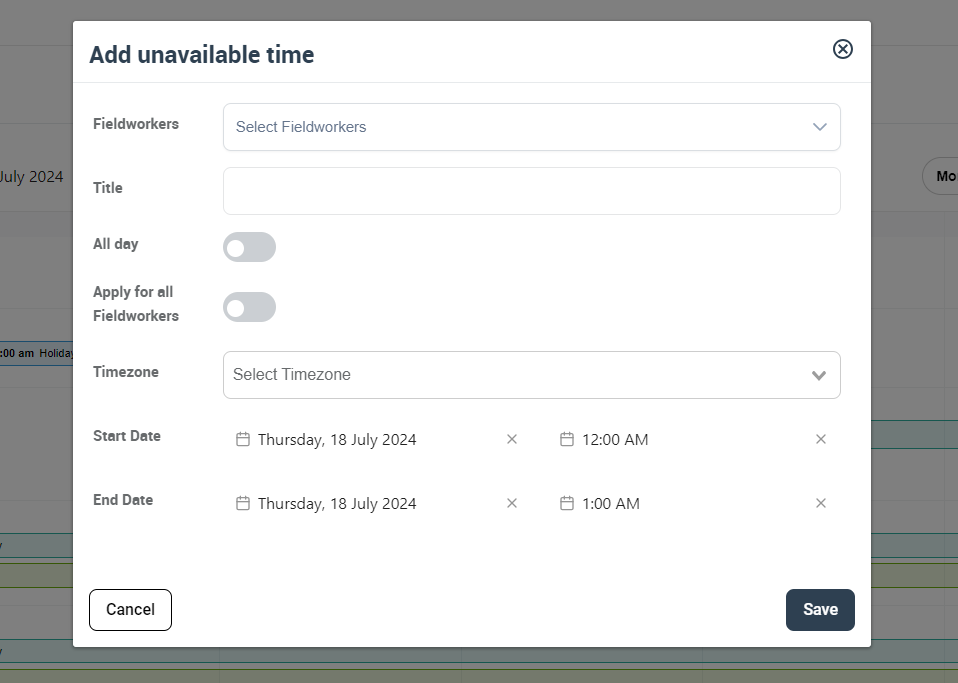
Unavailable time for multiple fieldworkers
Select multiple fieldworkers before saving (useful for team events, training, toolbox talks, etc.).

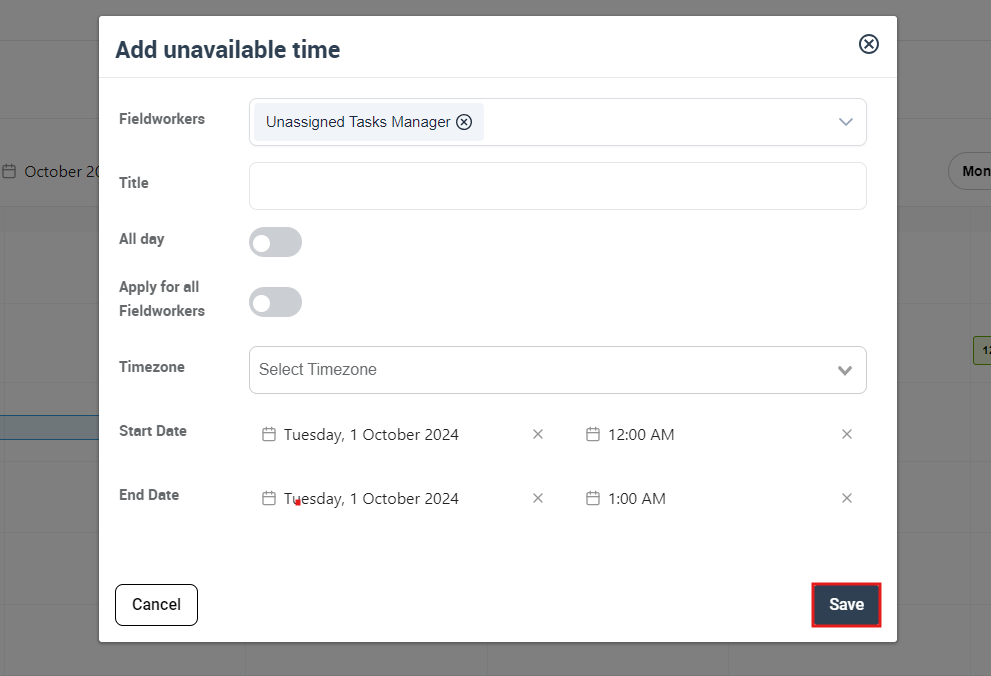
Company-wide unavailable time
Use this when your whole team is unavailable (e.g., office closed / public holiday). Depending on your setup, this may appear under an unassigned/manager column.
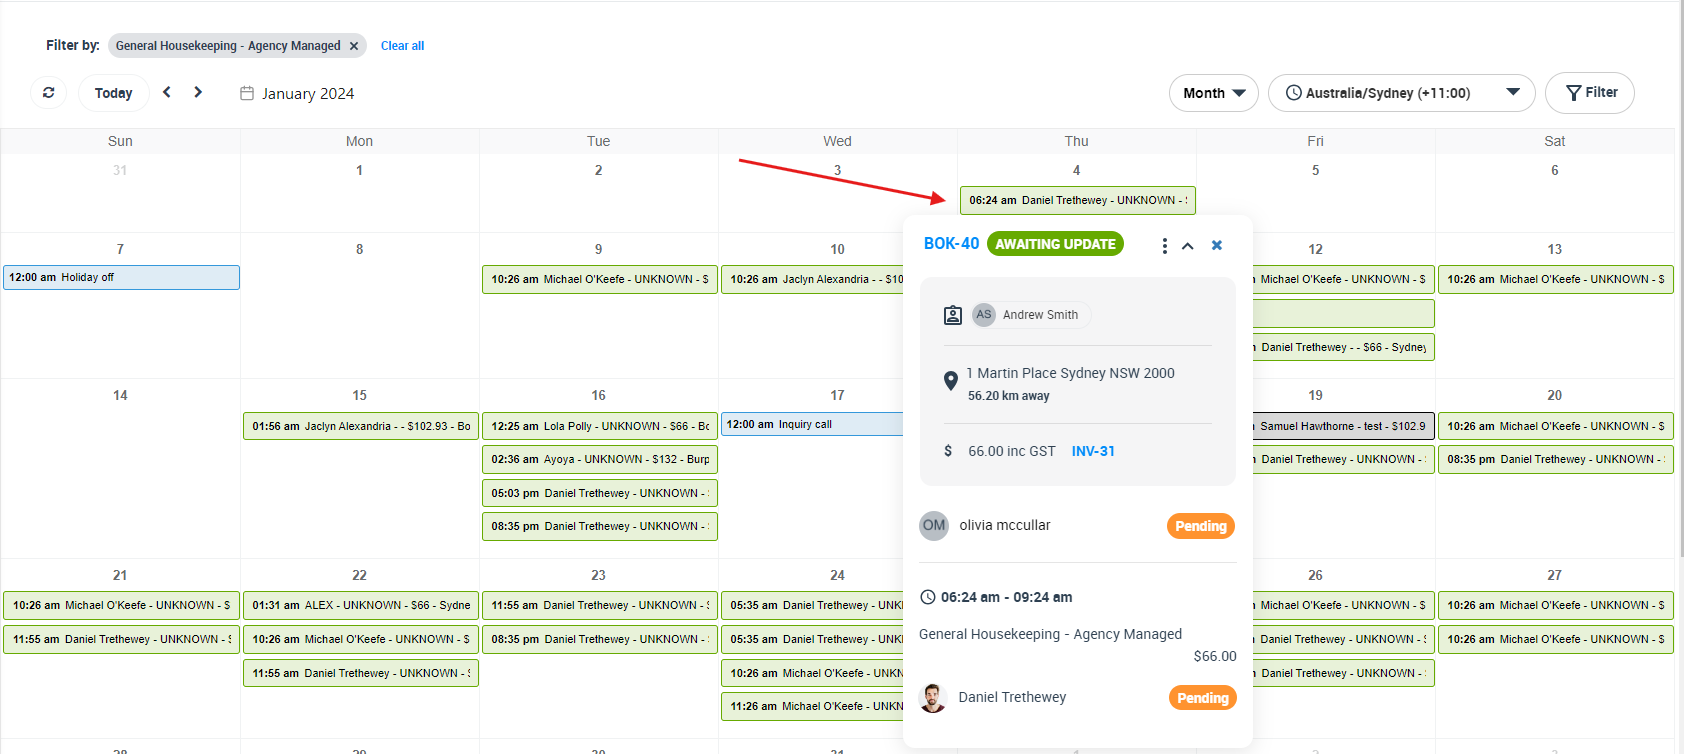
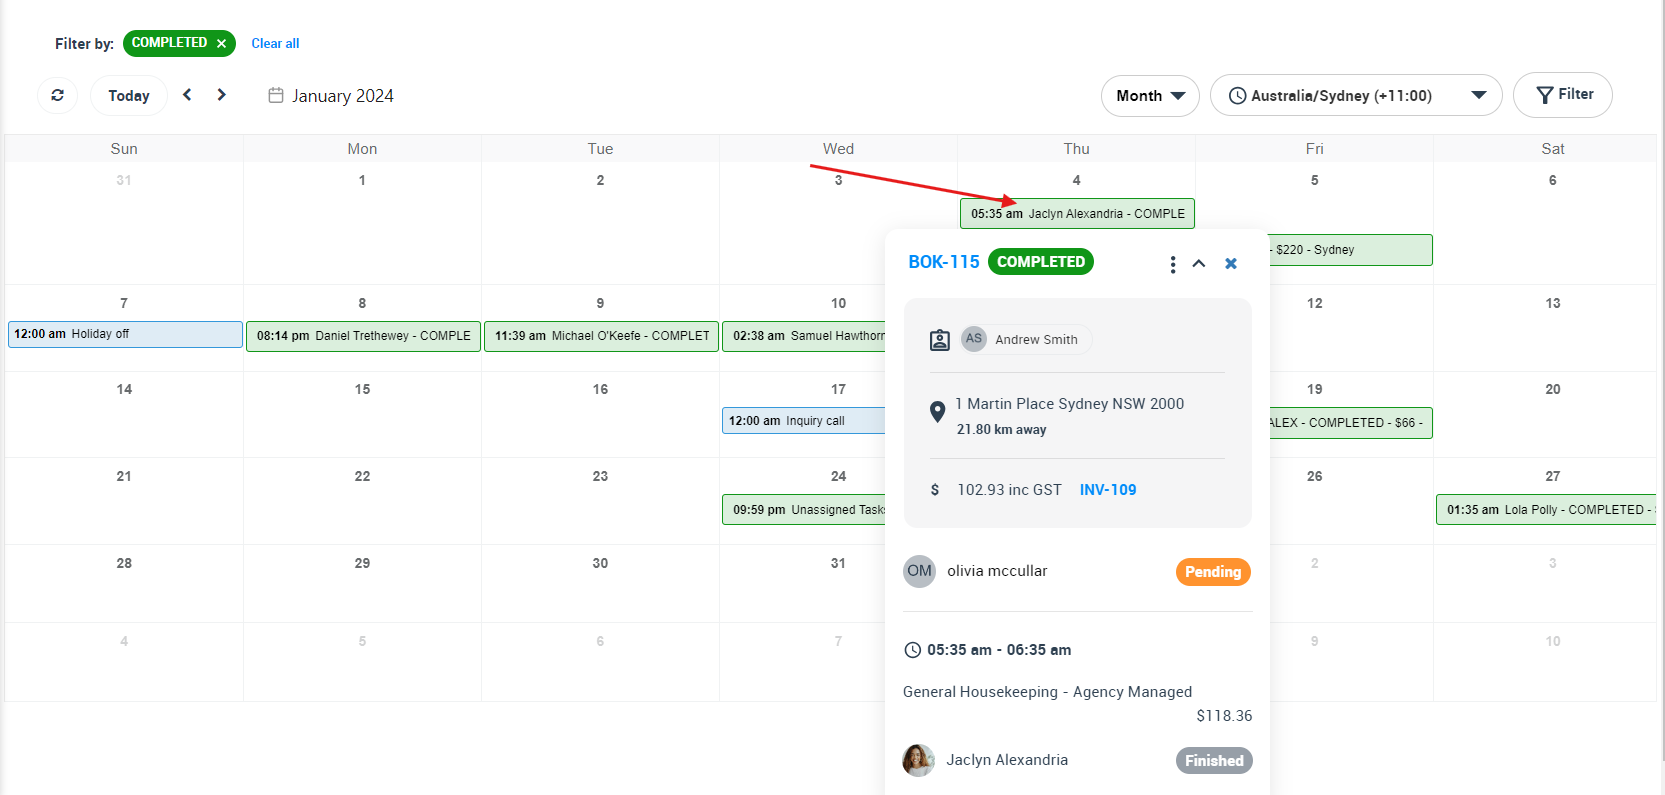
View and manage bookings directly from the Calendar
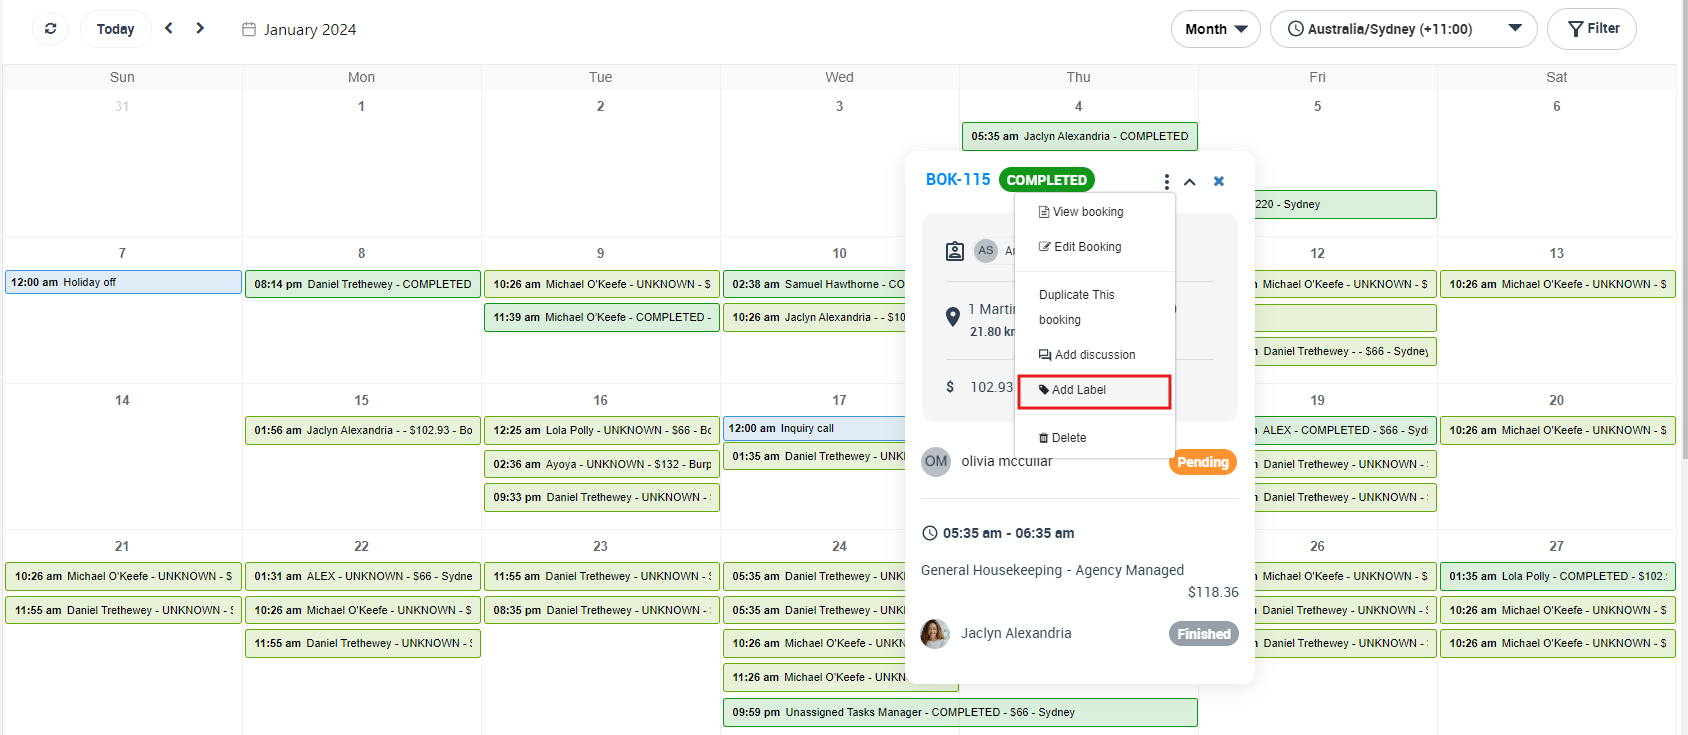
Click any booking on the Calendar to view key details such as:
- Booking number and status
- Customer name and address
- Service, duration/time window, and assigned fieldworker(s)
- Quick actions (examples may include view/edit, duplicate, add label, delete, etc.)
Common actions you can perform from the Calendar:
- Open booking details to view full information or make updates.
- Duplicate bookings (useful for repeating/near-identical jobs).
- Add labels to bookings to help categorize and filter your schedule.
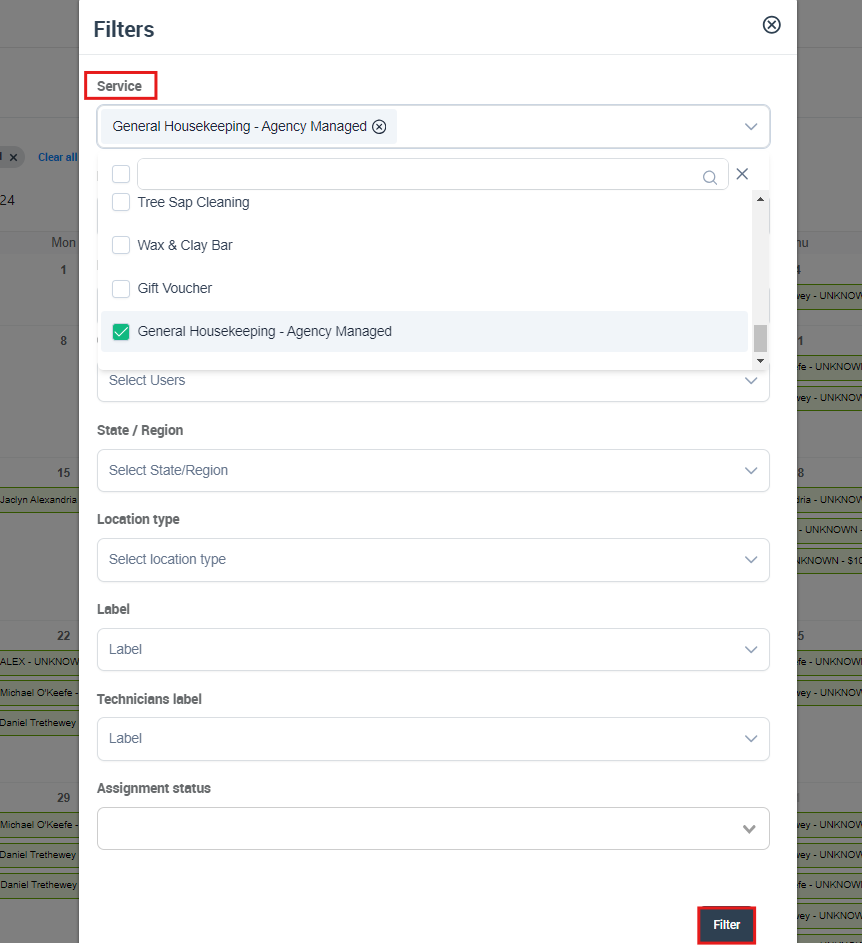
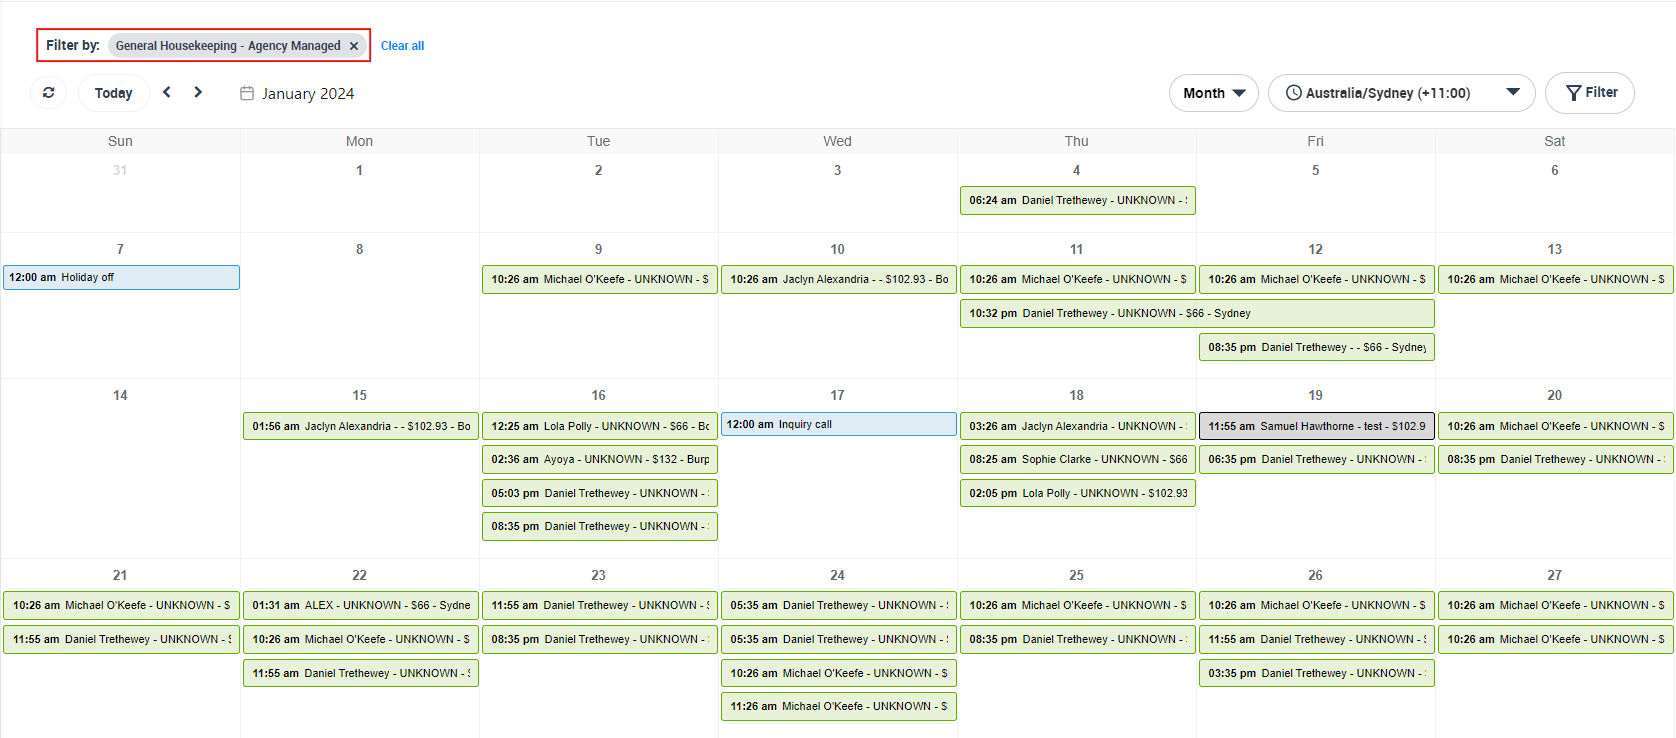
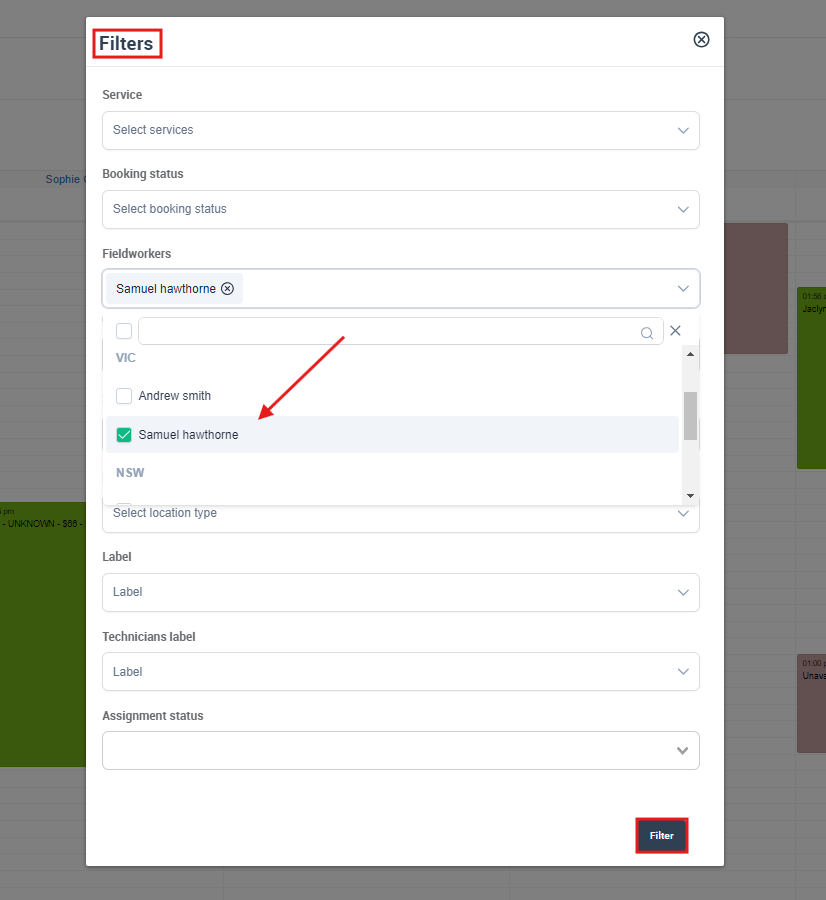
Filter your Calendar (services, status, location, labels, etc.)
Filters help you focus on exactly what you need to schedule and dispatch—without distractions. Click Filter and select one or more criteria (then click Filter to apply).
Filter by service
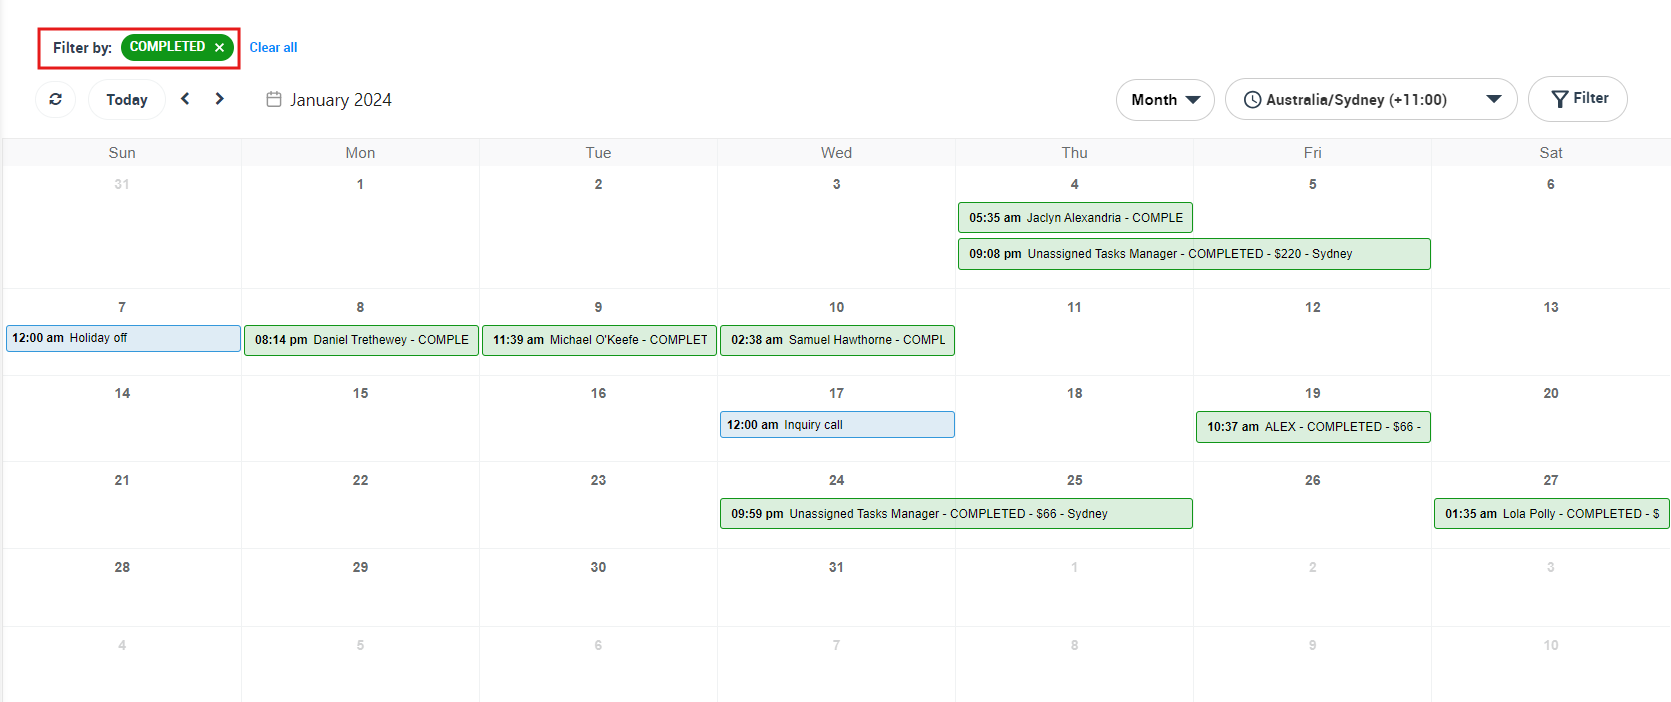
Filter by booking status
You can select one status or multiple statuses (e.g., Completed, To Do, Current) to view only relevant work.

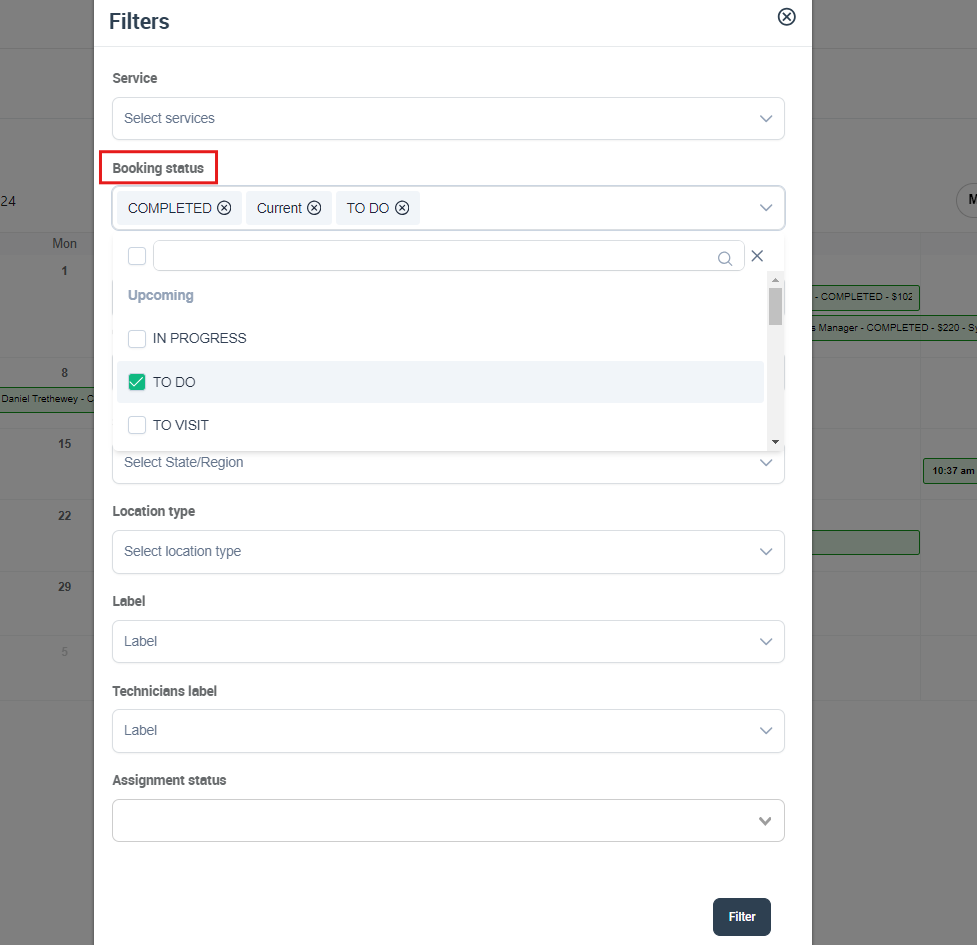
Other common filters you may see (depending on your account setup):
- State/Region and Location type (for multi-area operations)
- Fieldworkers (show bookings for selected team members)
- Labels and Technicians labels (segment work by category)
- Assignment status (e.g., assigned vs unassigned)
- Payment status (useful when coordinating jobs that require payment/deposit rules)
Fieldworker labels
Fieldworker labels help you categorize technicians (e.g., “Senior Tech”, “Tile Specialist”, “North Team”) and can be used for filtering and operational visibility.
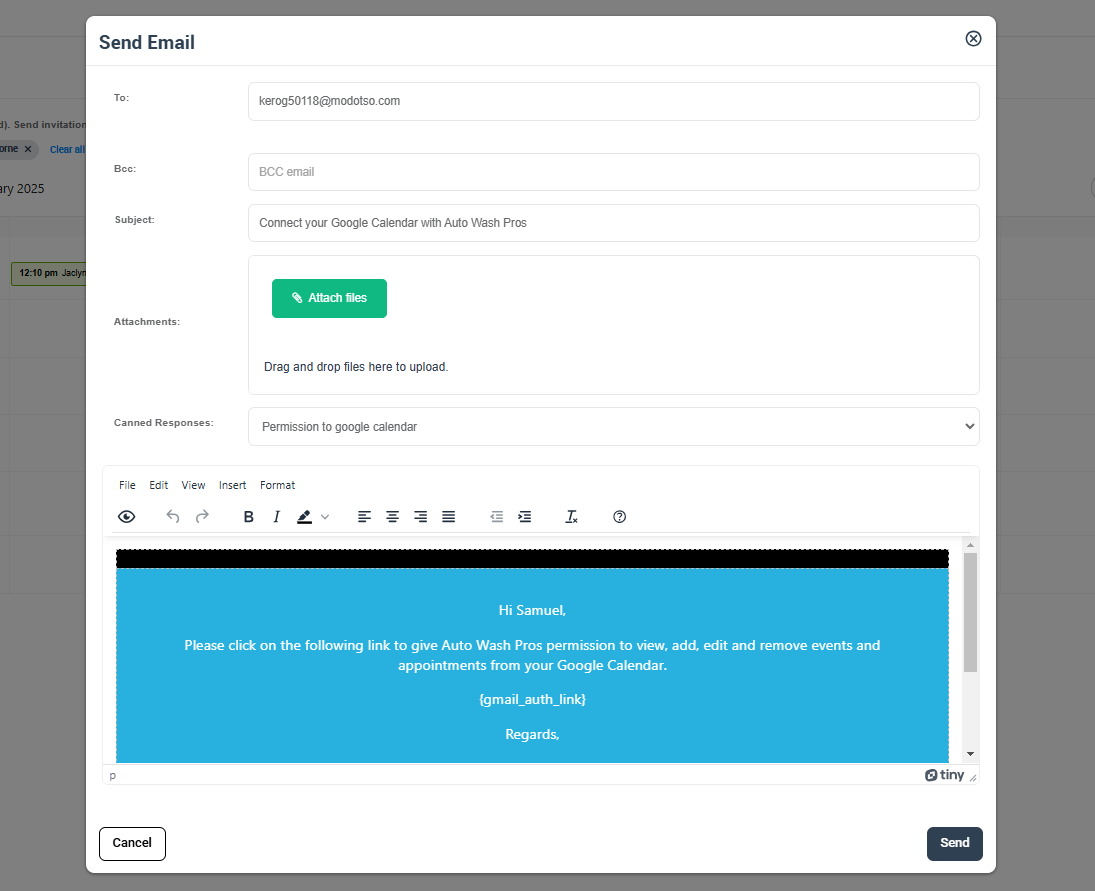
Sync OctopusPro Calendar with Google / Outlook Calendar
If you use Google Calendar, you can connect it so your schedule stays aligned across platforms.
- Open Bookings > Calendar and click Filter.
- Select the fieldworker you want to connect, then apply the filter.
- If the fieldworker’s calendar isn’t connected yet, you’ll see an option to send an invitation to connect Google or Outlook Calendar.
- Send the invitation, then follow the email link and grant permission.

Best-practice tips
- Block time off early: Add unavailable time for leave, breaks, training, and non-working hours so availability stays accurate.
- Use filters before dispatching: Filter by service, booking status, or fieldworker to reduce mistakes and speed up scheduling.
- Use labels consistently: Labels make your Calendar easier to manage at scale (especially for multiple teams/regions).
- Check timezone: If you operate across locations, confirm the Calendar timezone is set correctly before scheduling.
- Use Day view for dispatching: Day view is usually best for time-block scheduling and avoiding overlaps.
Related articles
Scheduling & Dispatching
Calendar views
Creating and managing time
Filtering and integrations
- Filter Calendar by Area
- Filter Calendar by Booking Status
- Filter Calendar by Fieldworker
- View Fieldworker Google Calendar
To stay updated, please subscribe to our YouTube channel.