
View & Manage Invoice Payments (Payment History, Receipts & Refunds)
Invoice Payments in OctopusPro give you a clear payment ledger for every invoice—so you can instantly see what was paid, when it was paid, how it was paid, and what actions (receipts/refunds/approvals) were taken. This is especially useful for businesses that accept multiple payment methods (cash, bank transfer, card/gateway payments) and need strong visibility for customer support, audits, and reconciliation.
On this page
- Benefits
- View payments from an invoice
- Open payment details (refunds, receipts, approvals)
- Email an invoice or payment receipt
- View payments from the invoices dashboard
- Admin role: refund approval & payment overview
- Role-based permissions
- Best-practice tips
- Related guides
Benefits
- Transparency: Quickly confirm payment status for customers and internal teams.
- Faster dispute resolution: See the exact payment method, date/time, and reference to resolve “I already paid” issues.
- Cleaner reconciliation: Review all payments and approvals in one place (Payment Reconciliation).
- Better customer experience: Send professional invoices/receipts immediately when requested.
- Stronger governance: Use approval workflows for offline payments and refunds (where enabled).
1) View payments from an invoice
To view an invoice’s payment history, open the invoice and scroll to the bottom to find the Payments received section. Each line shows a payment entry, and you can open it for full details.
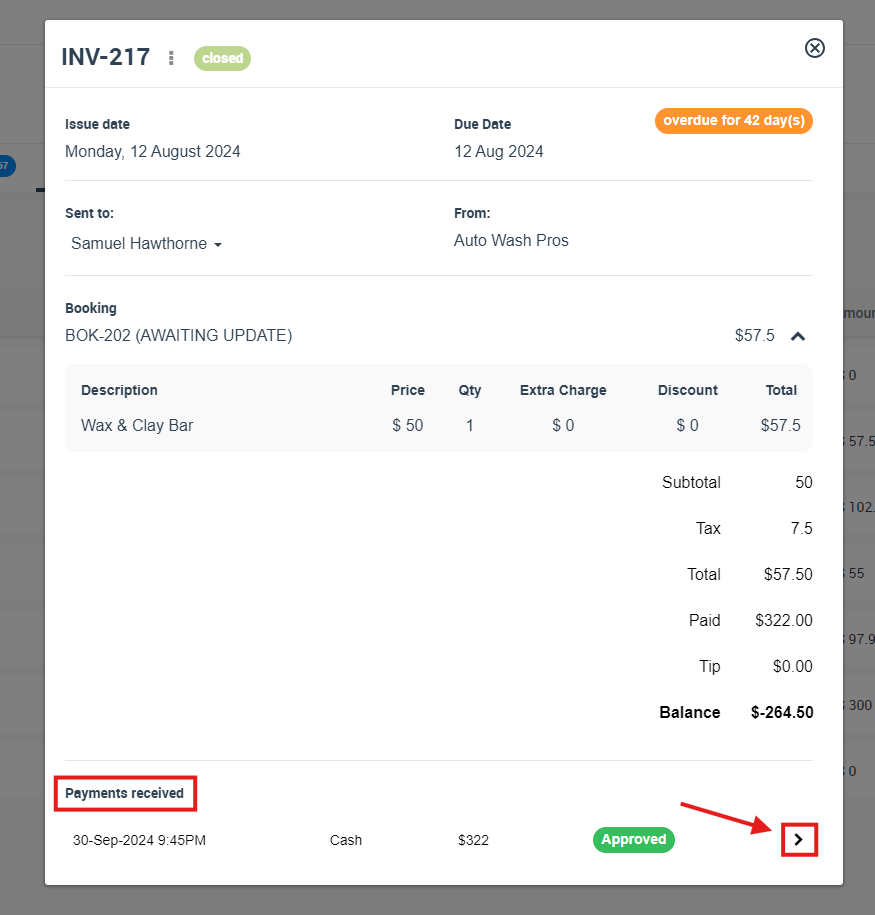
- Open the relevant invoice.
- Scroll to Payments received.
- Click the arrow on the payment line to open Payment details.
2) Open payment details (refunds, receipts, approvals)
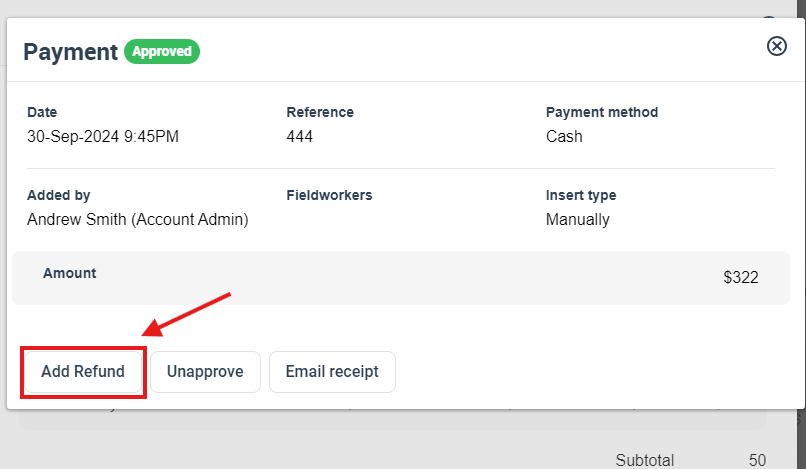
When you open a payment entry, OctopusPro displays a detailed transaction record and the available actions. This is where you can typically:
- View payment metadata (date/time, method, reference, who added it, insert type, amount, status).
- Email receipt for that specific payment.
- Add Refund (then follow your internal approval/process flow).
- Unapprove (available for workflows that require approval or verification).
3) Email an invoice or payment receipt
OctopusPro supports two common ways to send payment confirmation:
A) Email the invoice (as a receipt/statement)
From the invoice page, you can send the invoice to the customer via email. This is useful when you want the customer to see the full invoice summary (total, tax, paid-to-date, and balance).
- Open the invoice.
- Click Actions.
- Hover Email and select Email Invoice.

B) Email a receipt for a specific payment
If the customer needs proof of a particular payment (especially with partial payments), open the payment details and click Email receipt.
4) View payments from the invoices dashboard
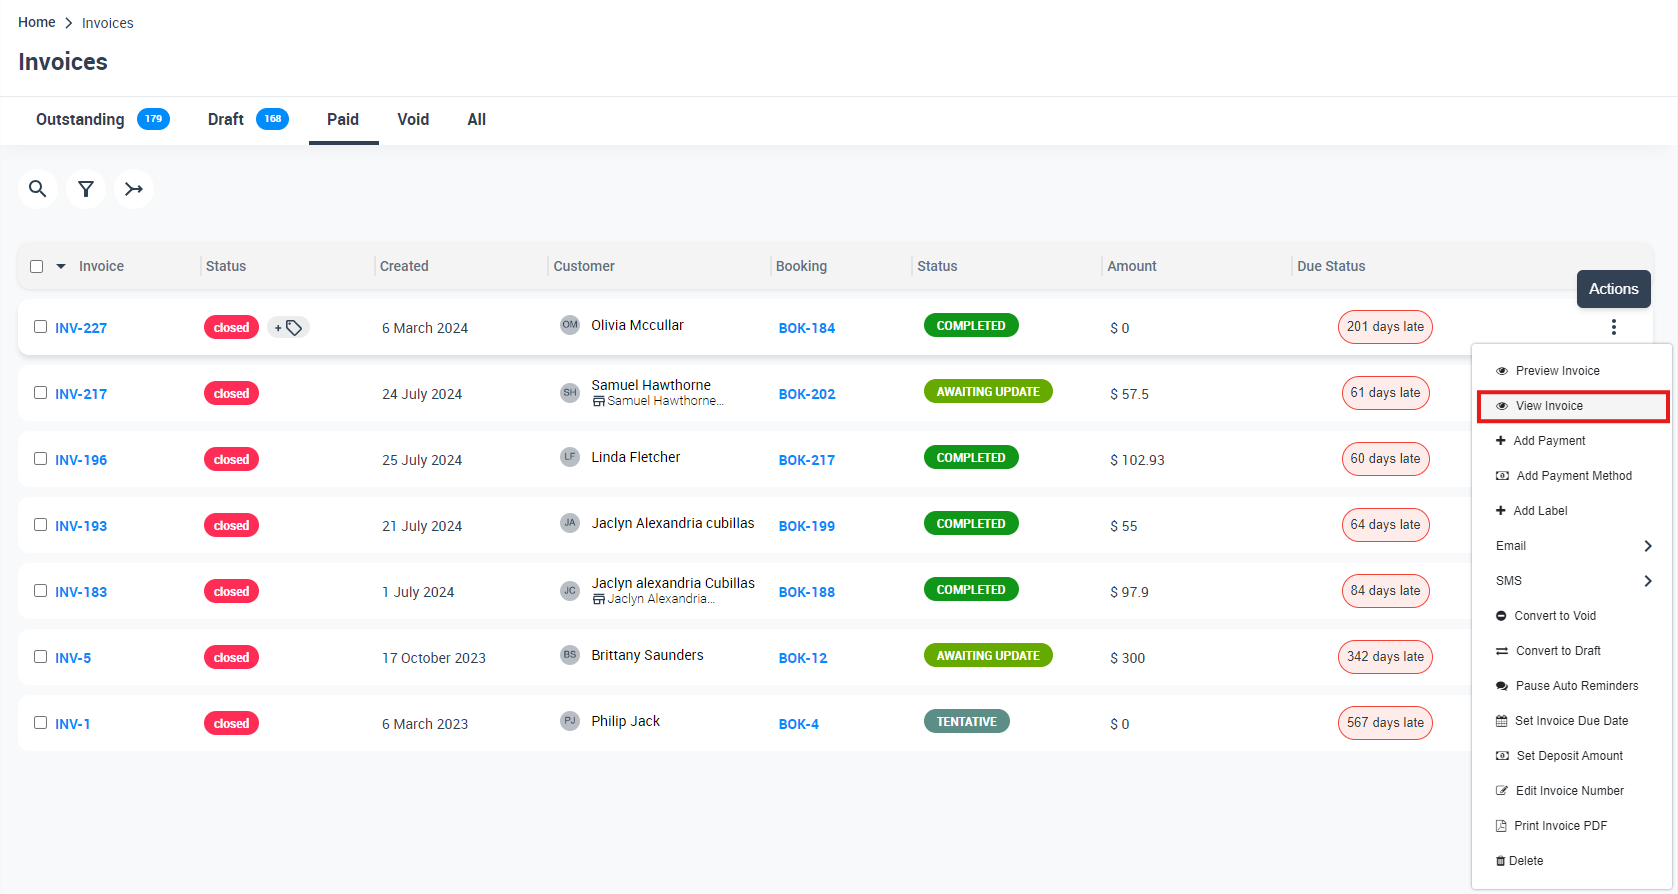
You can also reach the payment ledger from the Invoices dashboard:
- Go to Invoices.
- Use tabs/filters (e.g., Outstanding, Paid, All) to locate the invoice.
- Click Actions → View Invoice.
- Scroll to Payments received to review payments and open payment details.
Admin role: refund approval & payment overview
Refund approval (Invoices → Refunds)
If your account uses refund approvals, admins (or authorized users) can review refunds and approve/reject them to ensure refunds align with company policy.

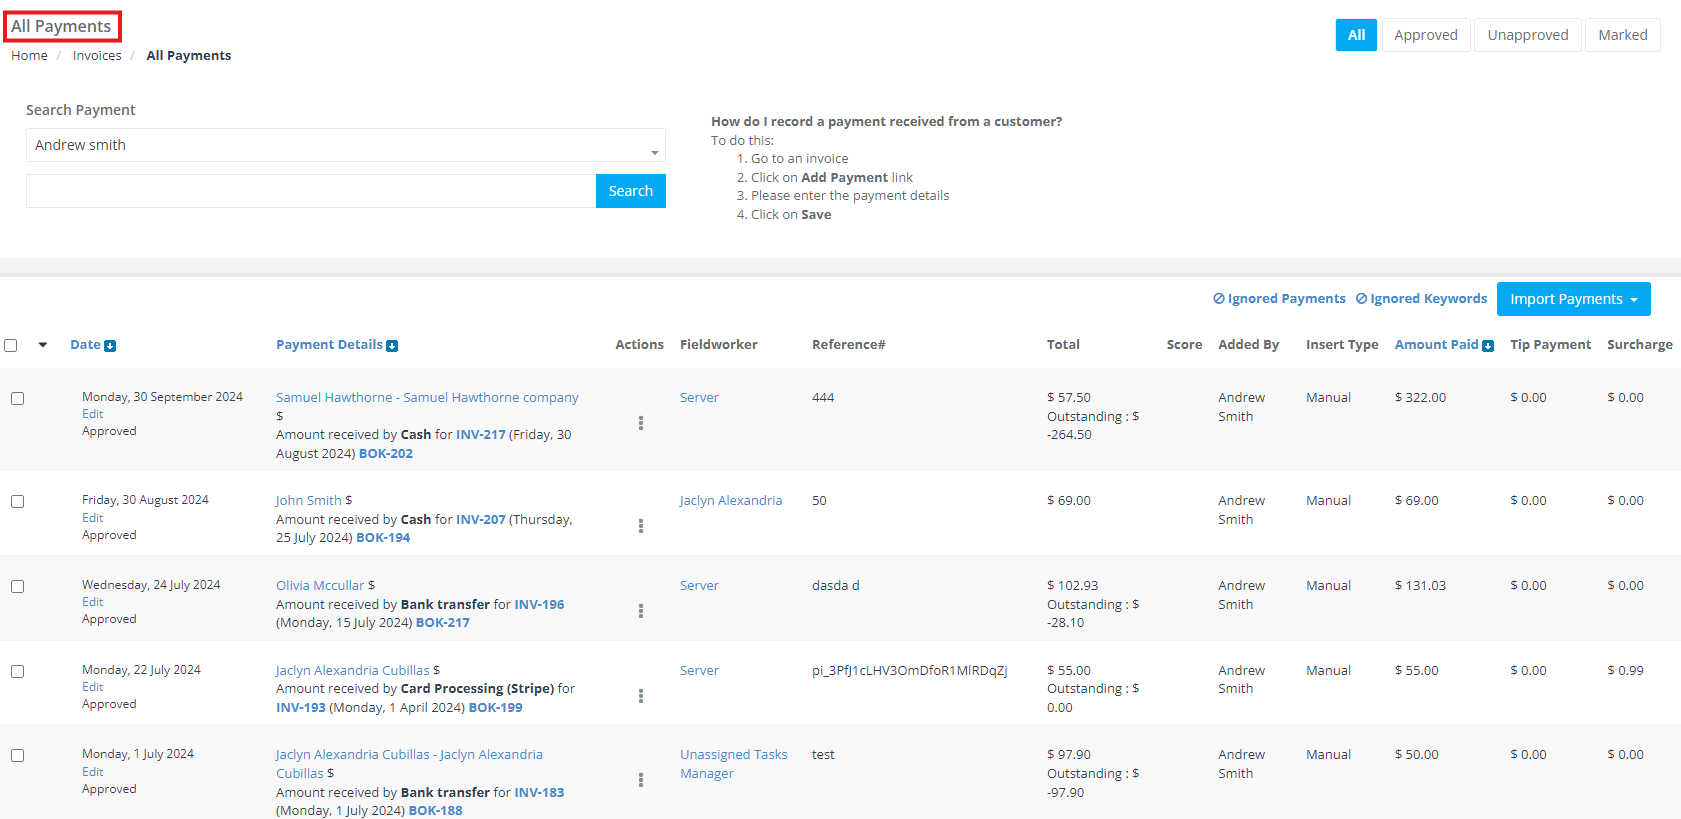
Payment overview (Invoices → Payment Reconciliation / All Payments)
Admins can also view and audit all payments across the system using Payment Reconciliation (often shown as All Payments). This is ideal for reconciliation and auditing, and commonly includes columns like payment method, reference, amount paid, and (if enabled) tips/surcharges.
Role-based permissions
- Administrators / Office users: Usually have full access to view payments, email invoices/receipts, and manage refunds (based on permissions).
- Fieldworkers: Can be allowed to view invoice payments related to their jobs and, depending on your configuration, may be able to email receipts.
- Customers: Can view invoice/payment history where the customer portal is configured to display it, and receive receipts/invoices via email.
To learn how to control what fieldworkers can see and do, visit: Fieldworker Permissions & Access Control.
Best-practice tips
- Always record every payment (including cash/bank transfer) so balances and reporting stay accurate.
- Use payment references (bank receipt ID, cheque number, gateway reference) for faster reconciliation.
- Enable approvals (where needed) for offline payments and refunds to reduce errors and fraud risk.
- Email confirmation immediately after payment to reduce inbound support requests.
- Reconcile regularly using All Payments / Payment Reconciliation to catch discrepancies early.
Related guides
- View & Manage an Invoice
- Adding and Processing Payments to Invoices
- Send Invoices to Customers (Email / SMS)
- Refund Management (Bookings & Invoices)
- Payment Import & Reconciliation
- Match / Reconcile Unknown Payments
- Keep Payments Pending Until Reconciled (Approval Workflow)
To stay updated, please subscribe to our YouTube channel.