
Date & Time Configuration (Time Zone, Date Format & Time Format)
The Date & Time Configuration settings let you standardize how dates and times appear across OctopusPro—so your team, customers, and fieldworkers all see clear, consistent scheduling information in:
- Bookings (calendar, booking creation/edit screens, booking details)
- Invoices (invoice list, invoice details, invoice emails/SMS)
- Quotes & inquiries
- Automated communications (confirmations, reminders, follow-ups, status updates)
- Calendar sync (e.g., Google Calendar integrations)
Correct configuration reduces misunderstandings (especially with AM/PM and regional date formats), helps prevent missed appointments, and keeps every customer-facing message professional.
Quick Navigation
- Where to find Date & Time Configuration
- How these settings work
- Time zone
- Date format
- Time format
- Examples (how it appears)
- Best practices
- Troubleshooting
- Related user guide articles
Where to find Date & Time Configuration
- Log in to the Admin Web View.
- Go to Settings → General Settings.
- Select Date & Time Configuration.
- Click Edit, choose your preferences from the drop-down menus, then click Save.

How these settings work
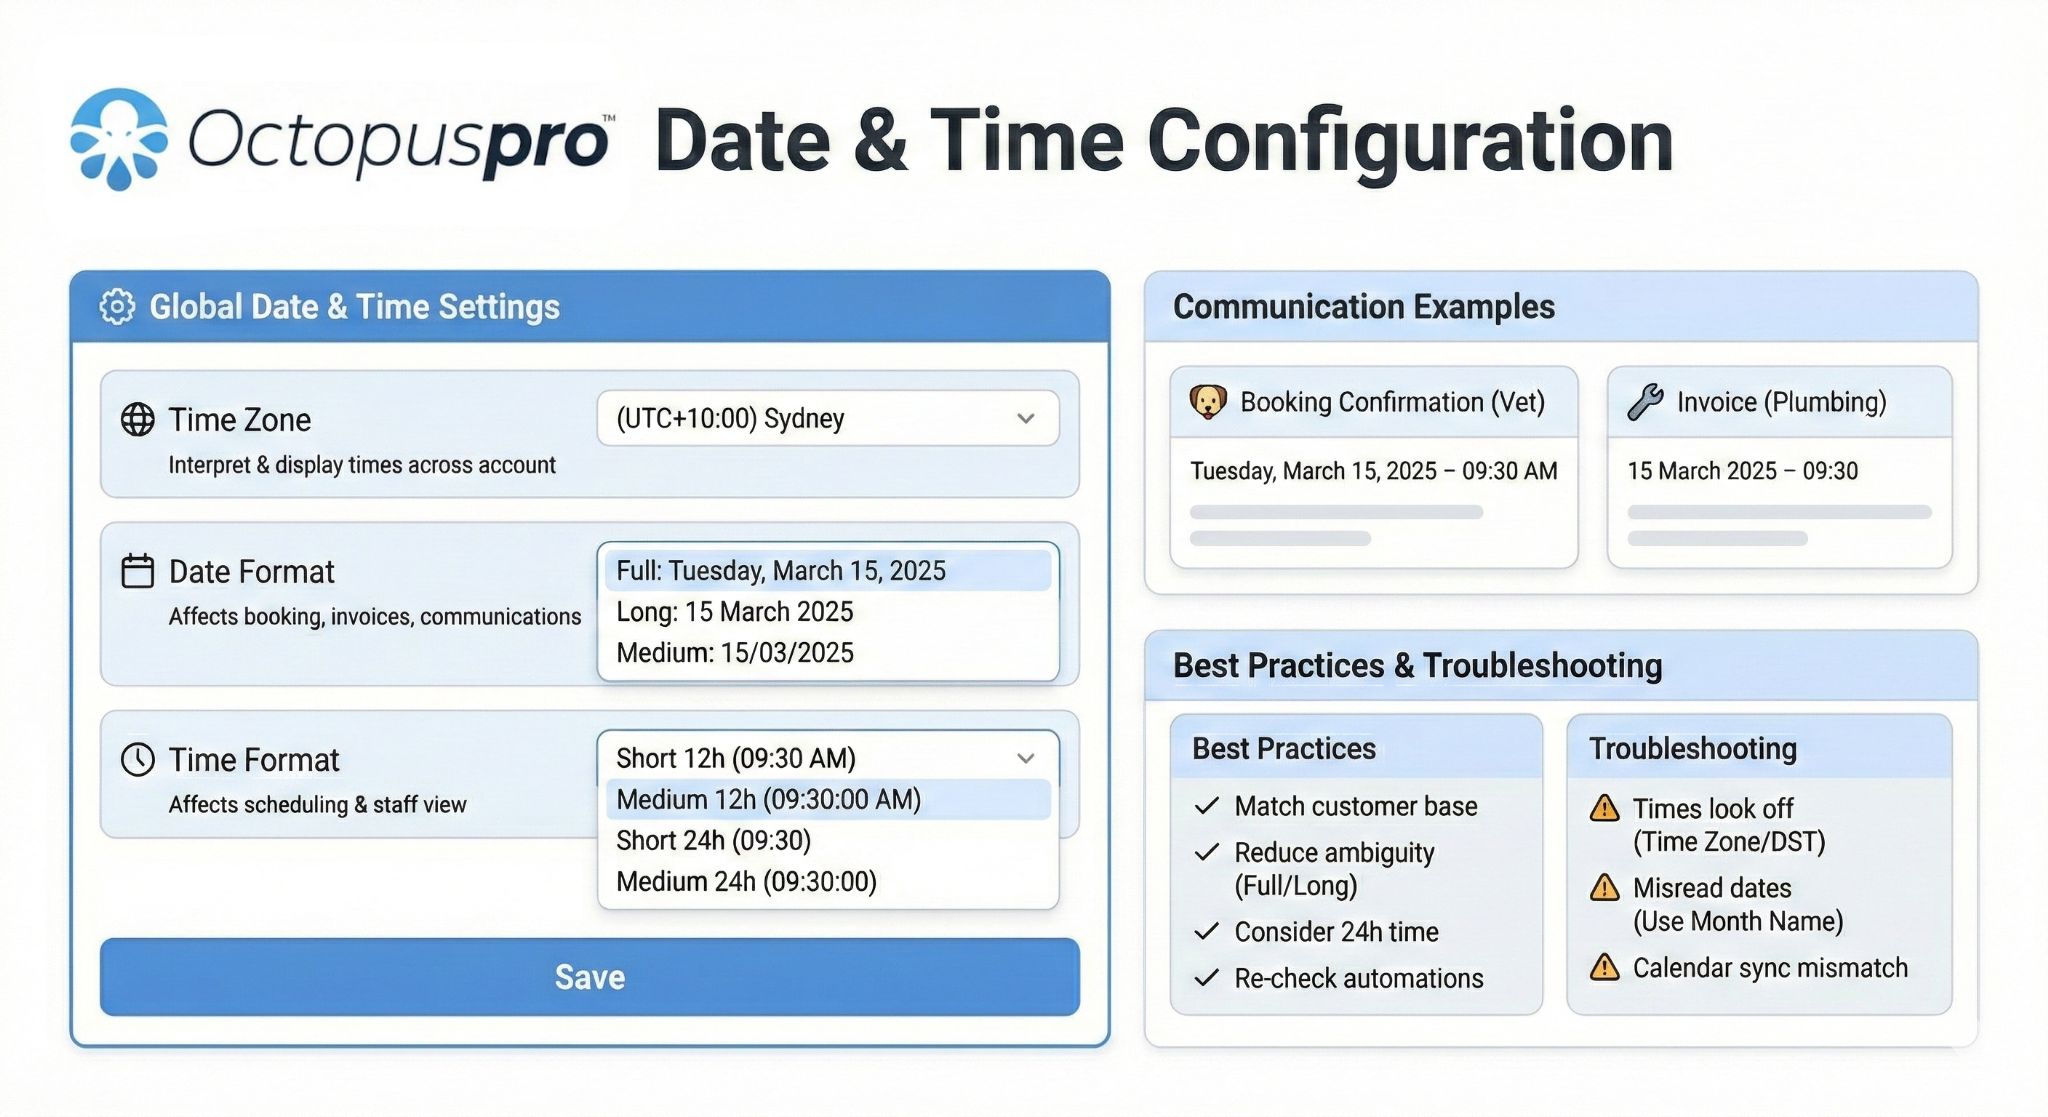
- Time zone sets the default time zone used when interpreting and displaying appointment times across your account.
- Date format and time format control how dates/times are displayed across screens, exports, and communications (e.g., invoices, confirmations, reminders, follow-ups).
- After saving changes, the updated format will be used throughout the platform (including newly sent emails/SMS and newly generated PDFs/exports).
Tip: If you make changes to time zone or formats, review a couple of upcoming bookings and send yourself a test booking confirmation to confirm everything displays exactly as expected.
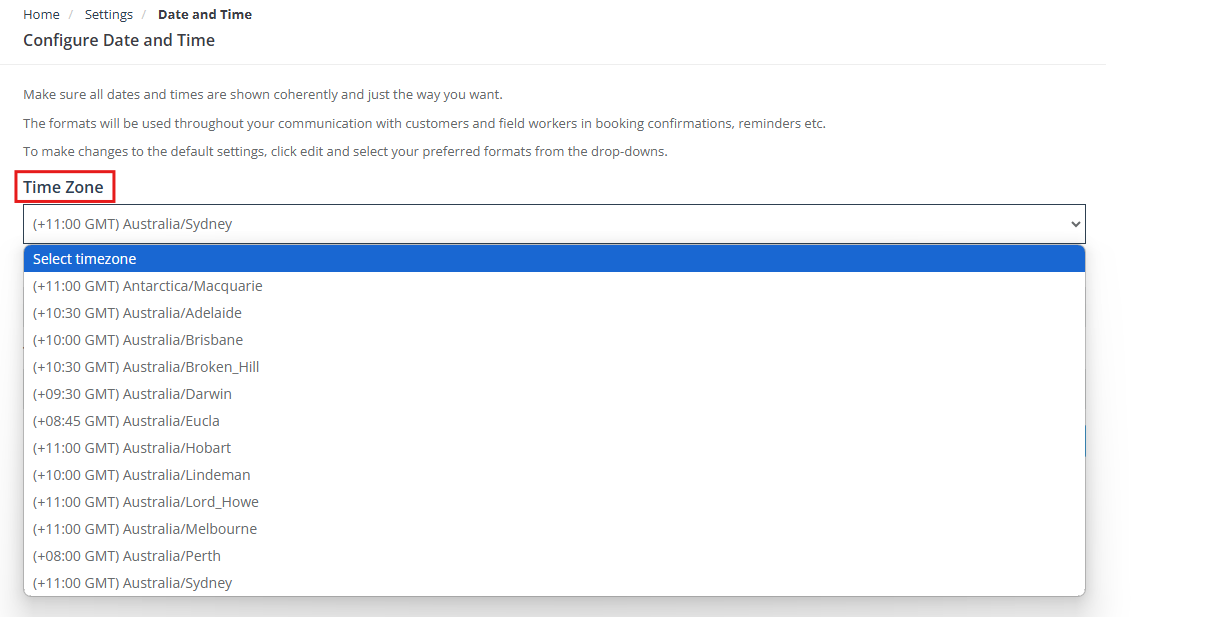
Time zone
Select your default time zone from the dropdown list. This helps ensure booking times, reminders, and automated messages display correctly for your business.
Notes:
- The available time zone options may depend on the country selected during your account setup.
- If your region observes daylight saving time, selecting the correct time zone helps reduce “one-hour off” issues during seasonal changes.
- If your team operates across multiple regions, you can also manage time-related behaviour using fieldworker and service/location settings (see related guides below).
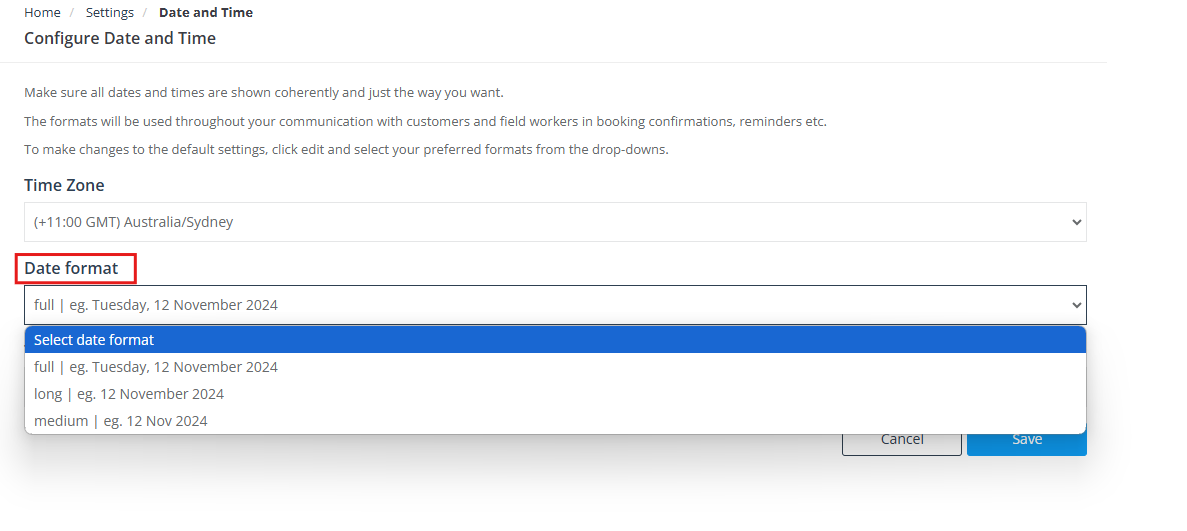
Date format
Choose how dates are displayed throughout the system. This affects booking screens, invoice screens, and customer/fieldworker communications.
Available options:
- Full: Day of week, day, full month name, year (maximum clarity)
- Long: Day, full month name, year
- Medium: Day, abbreviated month, year (more compact)
Time format
Select how time is displayed throughout your system. This helps keep scheduling consistent and reduces confusion for customers and staff.
Available options:
- Medium 24h: 24-hour time with hours, minutes, and seconds
- Short 24h: 24-hour time with hours and minutes
- Medium 12h: 12-hour time with hours, minutes, and seconds (AM/PM)
- Short 12h: 12-hour time with hours and minutes (AM/PM)

Examples (how it appears)
Example 1: If you select a Full date format and the Short 12h time format, bookings may appear as:
Tuesday, March 15, 2025 – 09:30 AM
Example 2: If you select a Long date format and the Short 24h time format, invoices may appear as:
15 March 2025 – 09:30
Bookings: The date/time format is applied when creating new bookings and viewing booking schedules.

Invoices: The same formatting is also used in invoices and invoice lists (and when invoices are emailed/SMS’d).

Best practices
- Match your customer base: Choose a date/time format that your customers immediately understand (to reduce no-shows and reschedule requests).
- Reduce ambiguity: If customers often confuse day/month order, use Full or Long formats (month name is clearer than numbers).
- Consider 24-hour time: If AM/PM confusion is common, switching to 24-hour time can reduce scheduling mistakes.
- International operations: If you serve multiple regions, consider a consistent standard format (e.g., an ISO-style date approach) and rely on location/service settings where applicable.
- Re-check automations/templates: After changes, review key templates (booking confirmation, reminders, invoice messages) to ensure the formatting and wording still read well.
Troubleshooting
- Times look “off” (e.g., 1 hour difference): Confirm your time zone is correct, then verify daylight saving behaviour for your region (and check any fieldworker or remote-service time zone settings if you operate across regions).
- Customers misread numeric dates: Switch to Full or Long date formats to display the month name (e.g., “15 March 2025”).
- Calendar sync doesn’t match: Confirm your time zone, then review your calendar integration settings and re-check how events display in your external calendar.
Related user guide articles
- Calendar (Scheduling Overview)
- Google Calendar Integration
- Fieldworker Calendar & Availability (Google/Outlook Sync)
- Send Booking Confirmations (Email, SMS, WhatsApp)
- Automated Reminders & Confirmations
- Workflow Automations Log (Audit Trail)
- Managing Email Templates & Canned Responses
- Template Placeholders (Merge Fields)
- Service Delivery Types (Storefront, Mobile & Remote)
To stay updated, please subscribe to our YouTube channel.