
Fieldworker Profile Customization Using Custom Fields

Fieldworker Custom Fields let you add extra information to fieldworker profiles that isn’t covered by OctopusPro’s standard profile sections. This helps you:
- Standardize important details across your team (so admin users aren’t chasing info in notes/messages).
- Improve internal operations (dispatch decisions, compliance tracking, quality control, payroll context, etc.).
- Build customer trust when fieldworker profiles are shown on the Customer Portal / Branded App (you can choose what is public vs private).
Important: OctopusPro already includes built-in areas for common compliance and admin items (e.g., Insurance, Trade Licences, Driver Licences, Bank Accounts, Payment Agreement, etc.). If you’re capturing those, use the existing profile sections instead of creating custom fields. See: How to View & Edit Fieldworker Profiles.
Good examples of Fieldworker Custom Fields (that typically aren’t standard fields):
- Skills & capabilities: languages spoken, specialist equipment, working-at-heights clearance, “pet-friendly”, “can lift heavy items”, etc.
- Preferences: preferred job types, preferred suburbs/areas (internal reference), availability preferences, preferred shift times.
- Uniform / operational info: uniform size, vehicle type, tools carried, emergency contact relationship (if required by your process).
- Internal notes that are structured: onboarding stage, training completion date, internal rating level, etc. (consider keeping sensitive data private).
Contents
- Create a new custom field (Admin Web)
- Choose the right field type
- Add options (Dropdown / Radio / Button Group / List / Checkbox)
- Edit/View fieldworker custom fields (Admin Web)
- Edit/View fieldworker custom fields (Admin Mobile App)
- Edit/View your own custom fields (Fieldworker Web)
- Edit/View your own custom fields (Fieldworker Mobile App)
- Where custom fields appear on the Customer Portal
- Manage (Activate/Deactivate + Portal Visibility)
- Edit an existing custom field
- Best practices (recommended)
- Related user guide articles
Create a New Custom Field for Fieldworker Profiles (Admin Web)
To create a fieldworker custom field from the Admin web app:
- Go to Settings > General Settings > Fieldworkers profile.
- Click + Create New.

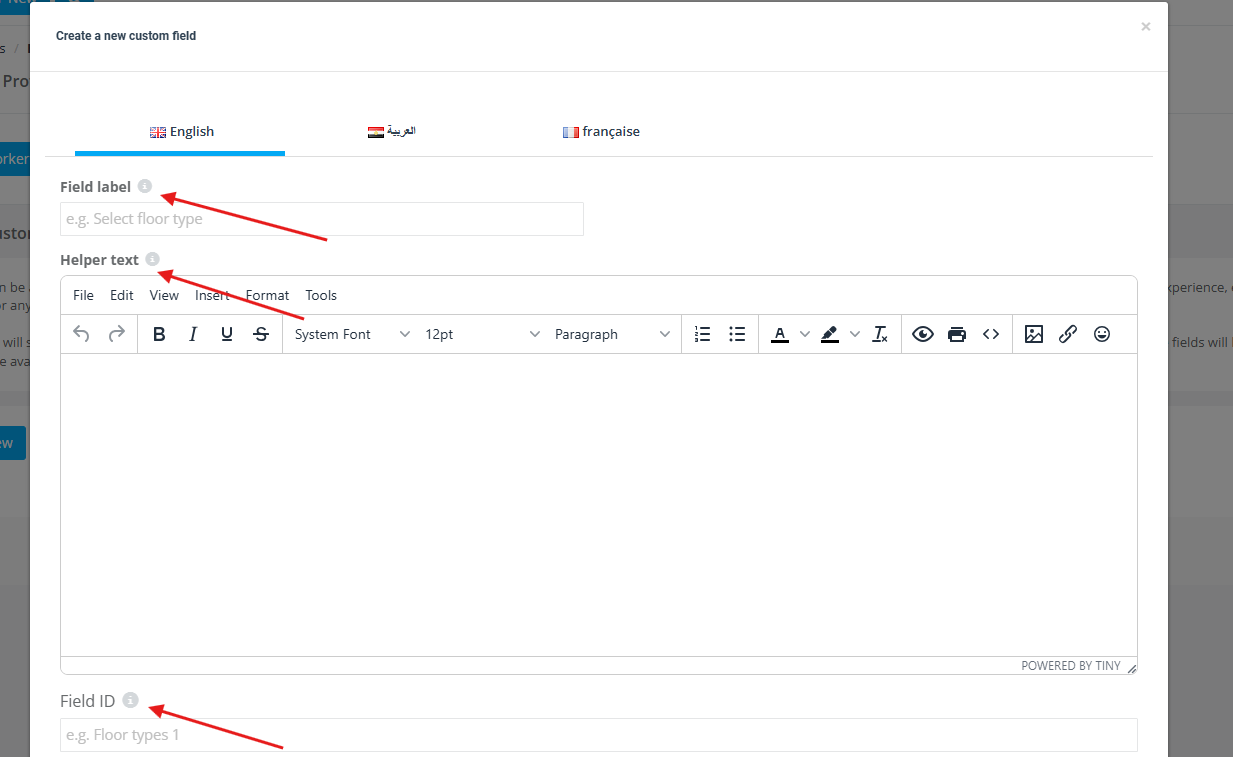
Complete the custom field details:
- Field Label (what users see): Use a clear, specific label (e.g., “Languages Spoken”, “Uniform Size”, “Special Equipment”).
- Helper Text (optional guidance): Use this to explain what to enter and the format you want (reduces inconsistent data).
- Field ID (internal key / variable name): A unique identifier used to distinguish this field from other fields—especially useful in exports, reporting, and integrations.
- Multi-language labels (optional): If you support multiple languages, you can add field labels in each language tab.
Configure field visibility and behavior:
- Active: If enabled, the field appears in the fieldworker profile. If disabled, it won’t appear in profiles, but it remains listed in your custom fields list.
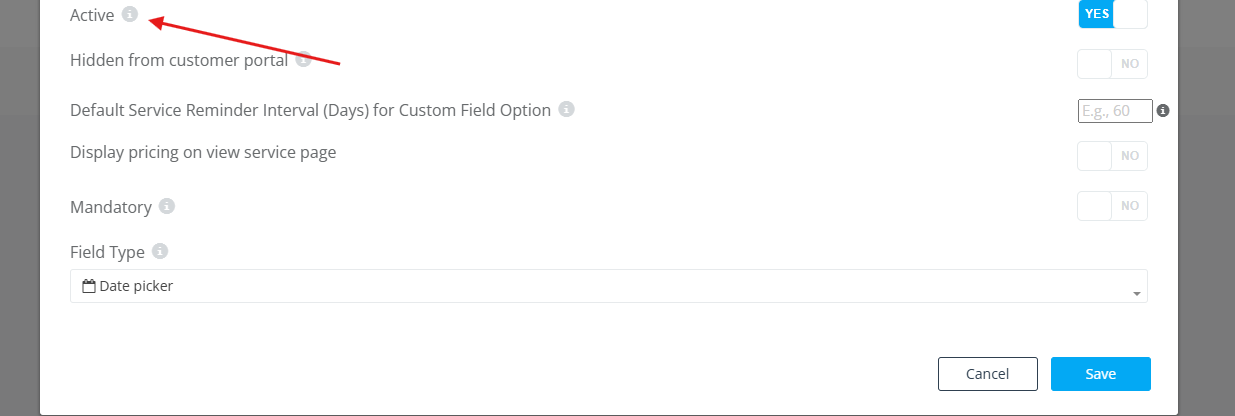
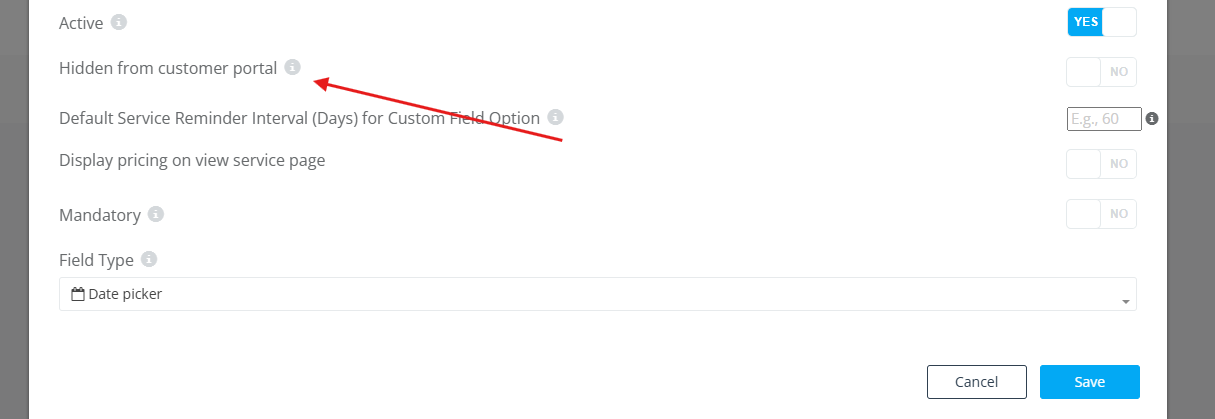
- Hidden from Customer Portal: If enabled, the field is for internal/back-office use only (not visible on Customer Portal / Branded App).
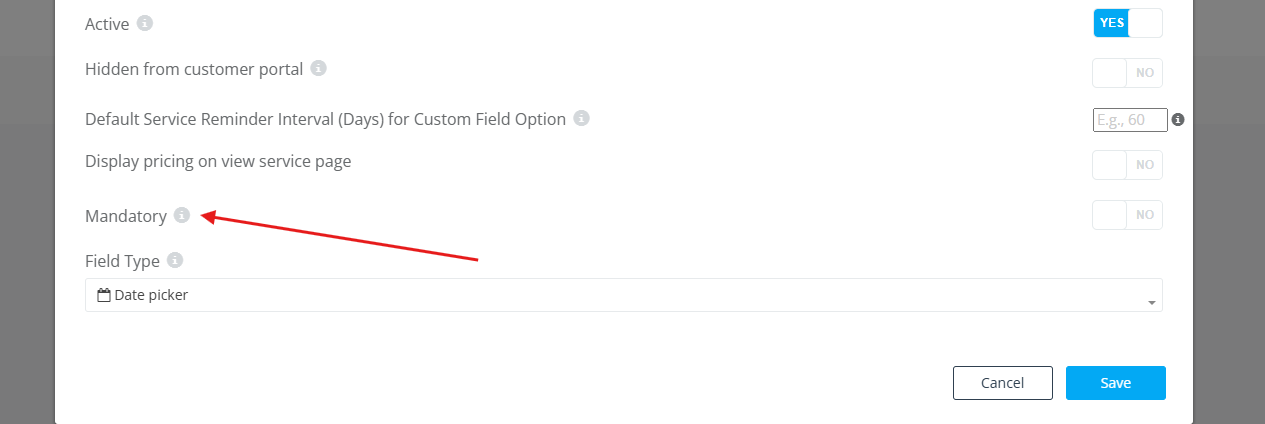
- Mandatory (Required): If enabled, users must fill this field (recommended only for truly essential info).
Then choose your Field Type (the input format):
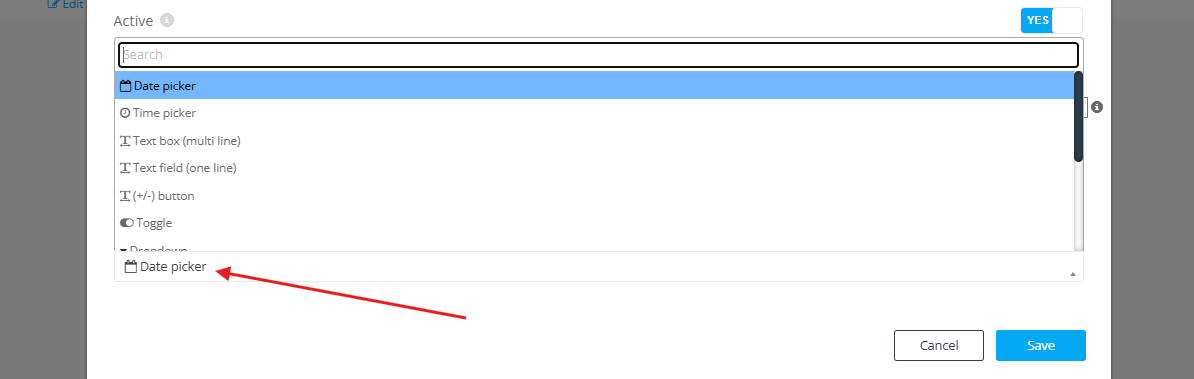
Choose the Right Field Type
Choosing the right field type improves data quality and makes profiles easier to maintain.
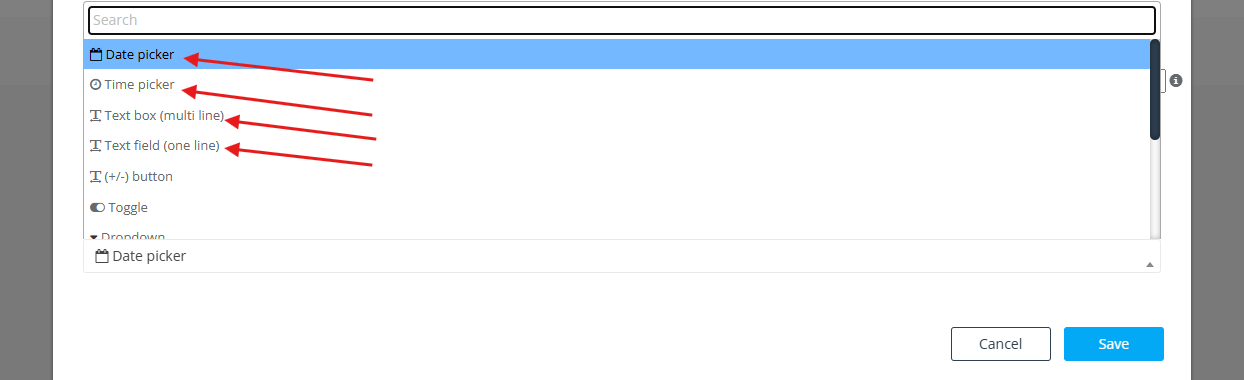
Common field types and when to use them:
- Date Picker: For dates like training completion date, start date, etc.
- Time Picker: For time-only values (rare for profiles; useful for “preferred start time”).
- Text Box (multi-line): For longer structured notes (e.g., “Special instructions for scheduling”).
- Text Field (single line): For short entries (e.g., “Uniform Size”, “Primary Language”).
- (+/-) Button: For numeric ranges (e.g., “Years of Experience”).
- Toggle (Yes/No): For simple yes/no questions (e.g., “Pet-friendly”).
- Dropdown / Radio Button / Button Group: For single-choice selection from a predefined list (best for standardization).
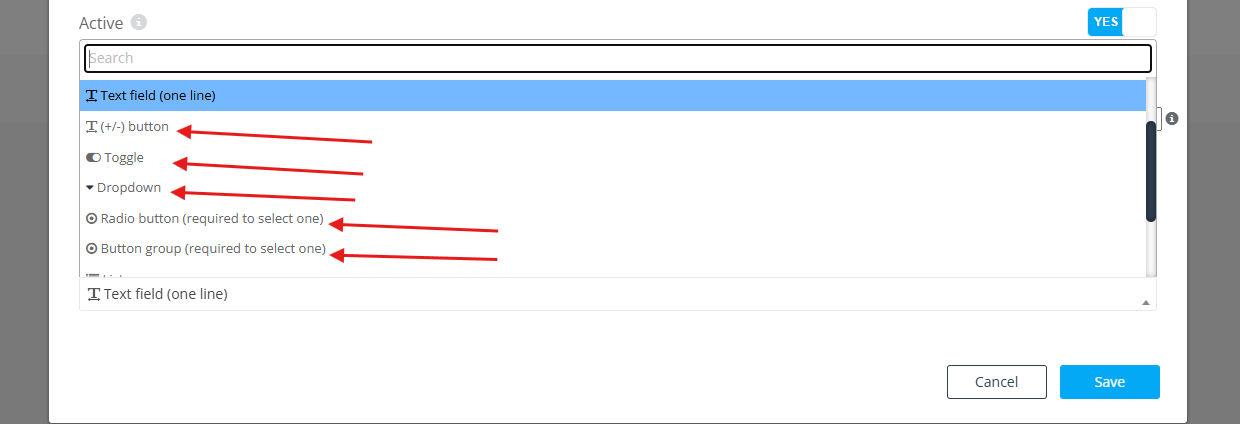
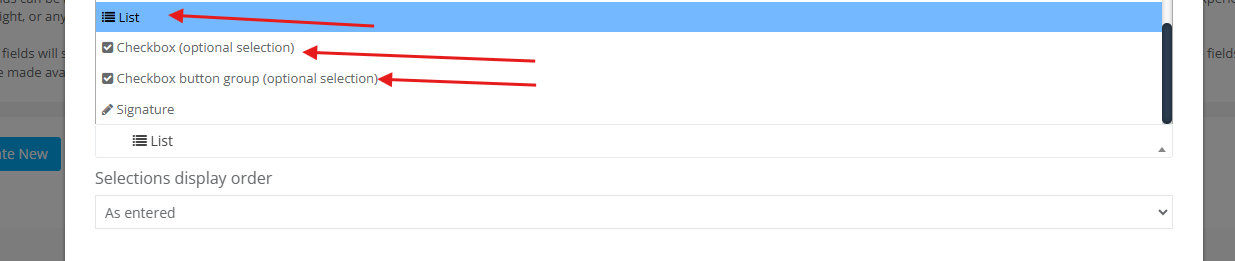
- List: Another single-choice selector (similar to dropdown, but displayed differently).
- Checkbox: Multi-select (users can choose more than one option).
- Checkbox Button Group: Multi-select with a button-style interface (can support images per option).
- Signature: If you require a fieldworker to sign/acknowledge something directly in their profile workflow.
Add Options for Selection-Based Fields
If you choose a field type that requires options (Dropdown / Radio / Button Group / List / Checkbox), add the selections you want users to choose from. This ensures consistent data across all fieldworkers.
Selections display order (how options appear):
- As Entered: options show in the exact order you create them.

- Alphabetical (A–Z): options sort automatically.

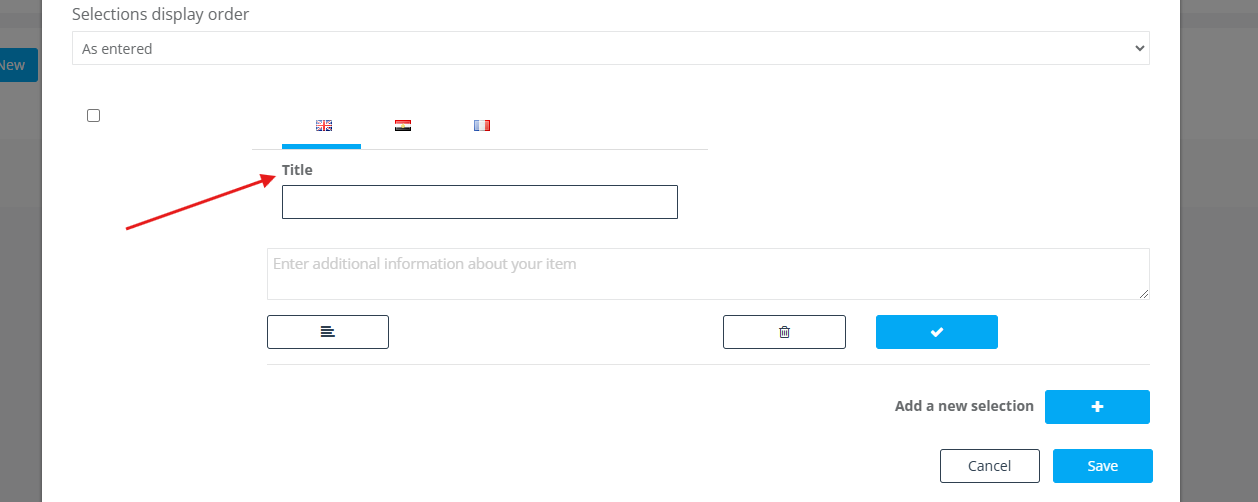
Add each option by entering the option title (and optional details/description):
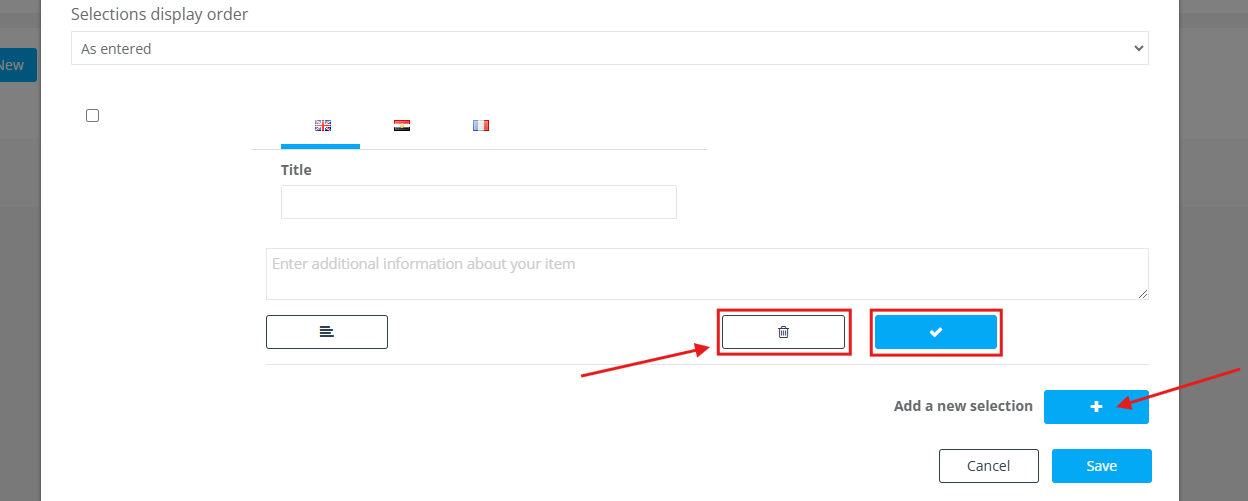
You can add or remove selections as needed:
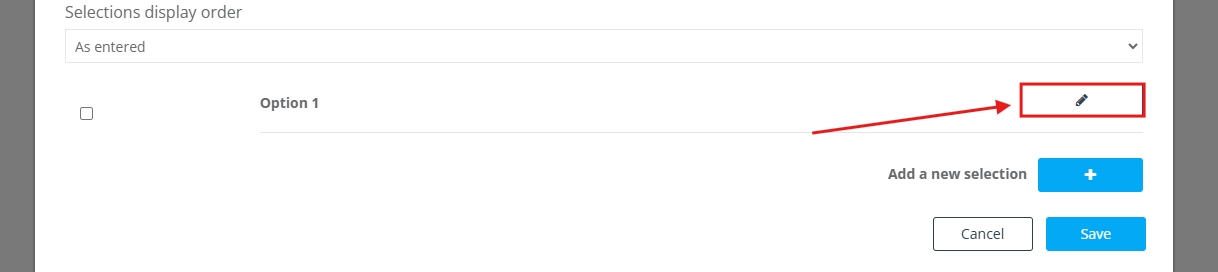
You can also edit any option after adding it:
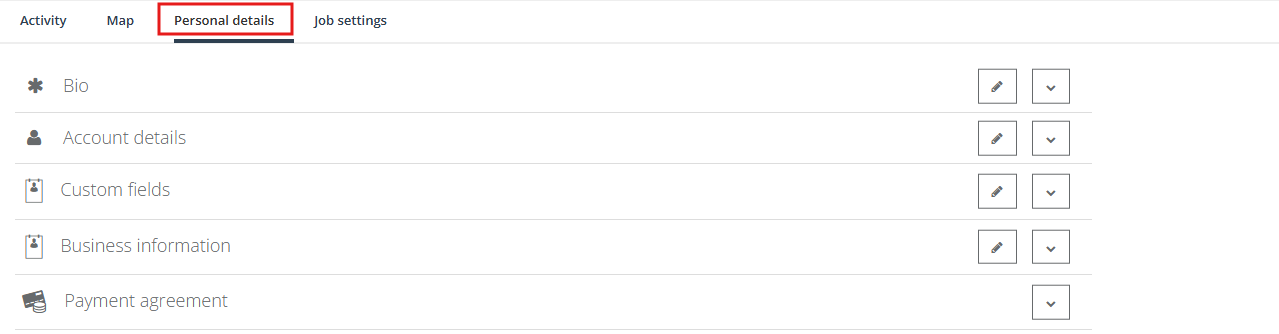
Edit/View Fieldworker Custom Fields (Admin Web)
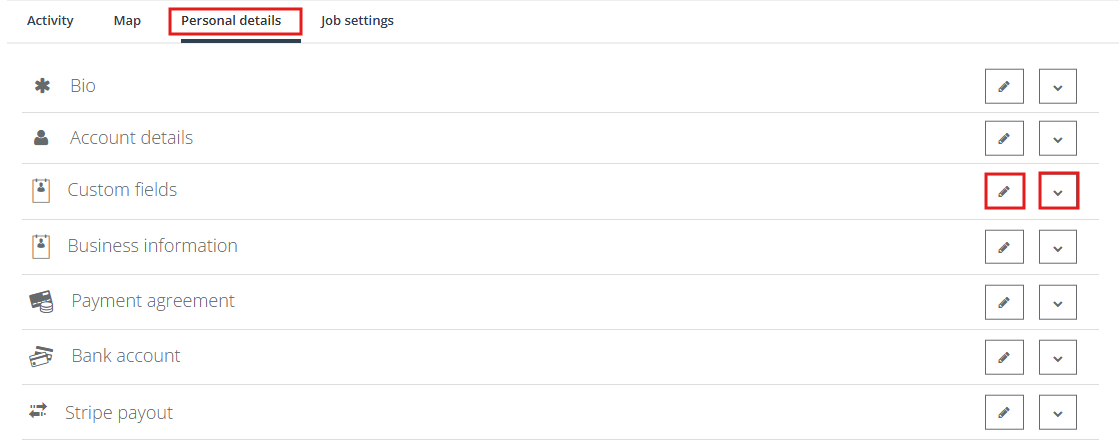
To view or update a specific fieldworker’s custom field values from the Admin web app:
- Go to Fieldworkers.
- Hover over the fieldworker name and click View profile.
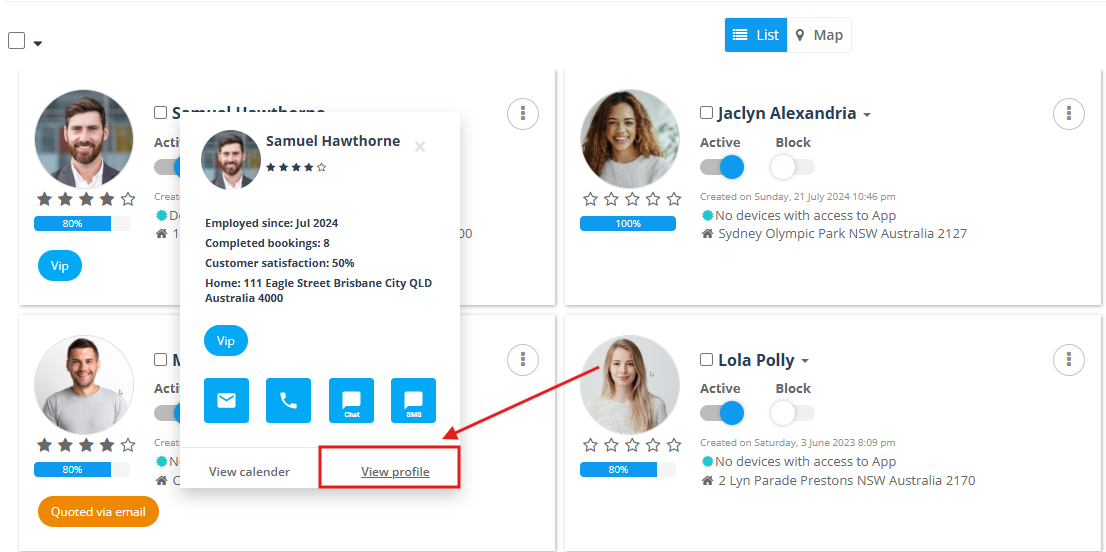
- Open Personal details, then scroll to Custom fields.
- Use the Edit (pencil) icon to update values, or the View icon to view details.
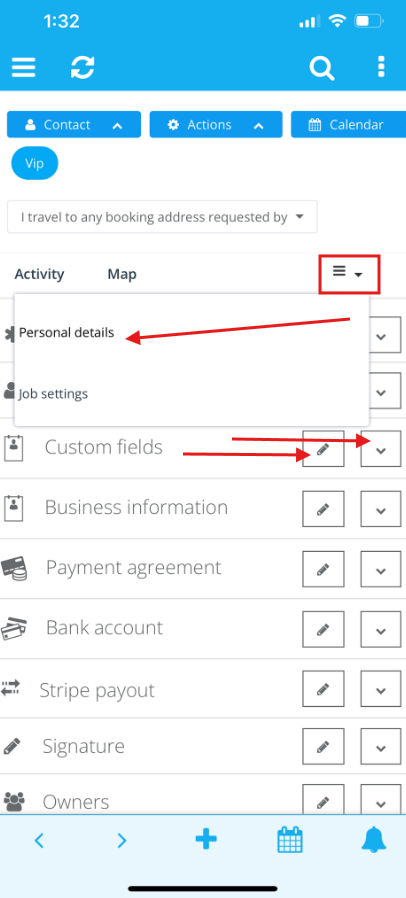
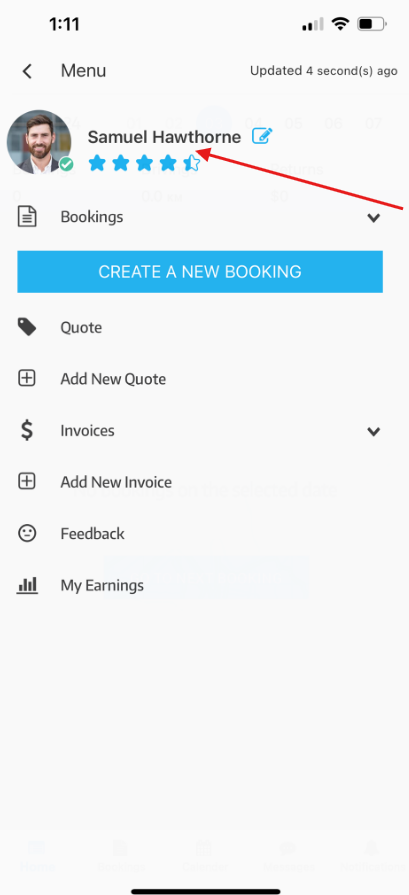
Edit/View Fieldworker Custom Fields (Admin Mobile App)
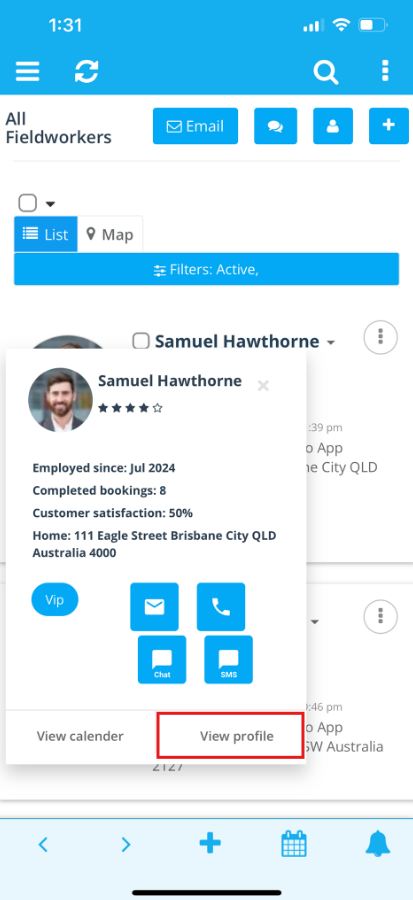
To view or update a fieldworker’s custom fields from the Admin mobile app:
- Open the menu and tap Fieldworkers.
- Select the fieldworker, then tap their name and choose View profile.
- From Actions, open Personal details, then scroll to Custom fields to view/edit the values.
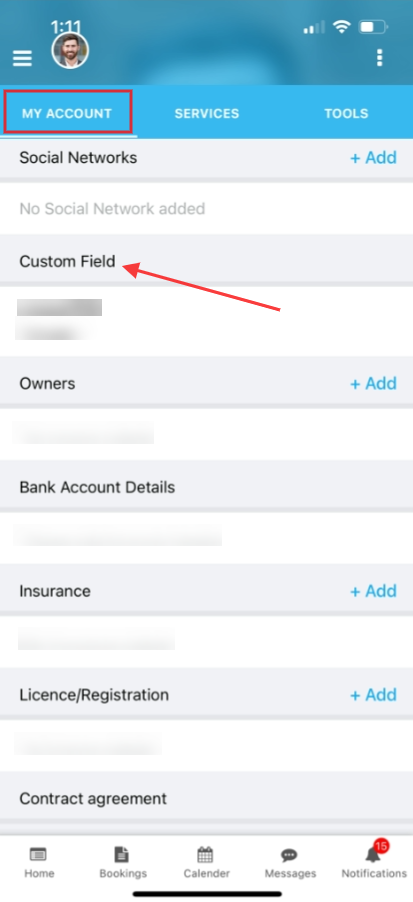
Edit/View Your Own Custom Fields (Fieldworker Web)
Fieldworkers can maintain their own custom fields from the Fieldworker web portal:
- Open the top-left menu and go to My Account.
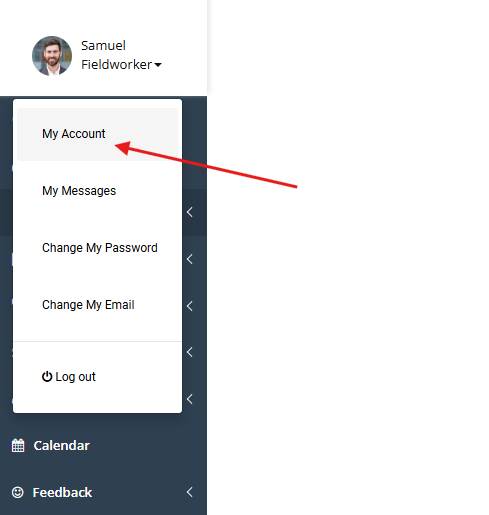
- Go to Personal details and scroll to Custom fields.
- Use the icons next to each custom field to View or Edit the values.
Edit/View Your Own Custom Fields (Fieldworker Mobile App)
Fieldworkers can also update their custom fields from the Fieldworker mobile app:
- Open the menu and tap your name/profile.
- Tap My Account, then scroll to Custom fields.
- Update values and save.
Where Custom Fields Appear on the Customer Portal
If your Customer Portal is configured to show fieldworker profiles, fieldworker custom fields can appear publicly unless they are set to Hidden from Customer Portal.
Customers typically see fieldworker profiles while booking (where they can browse or select a fieldworker for a service):
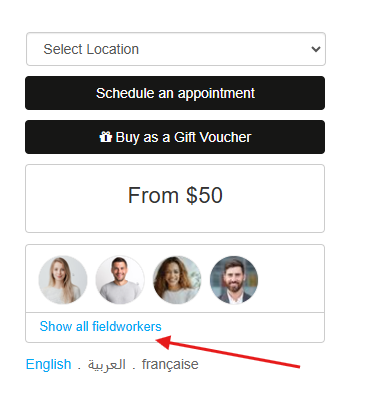
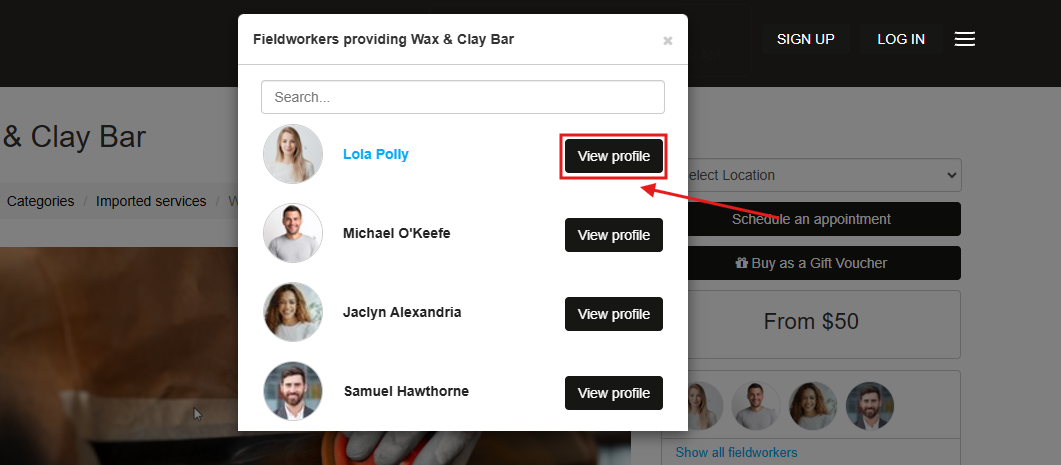
Tip: If your goal is to help customers choose the right person (skills, languages, specialties), keep those fields visible. If the information is internal (training status, internal notes), keep it hidden.
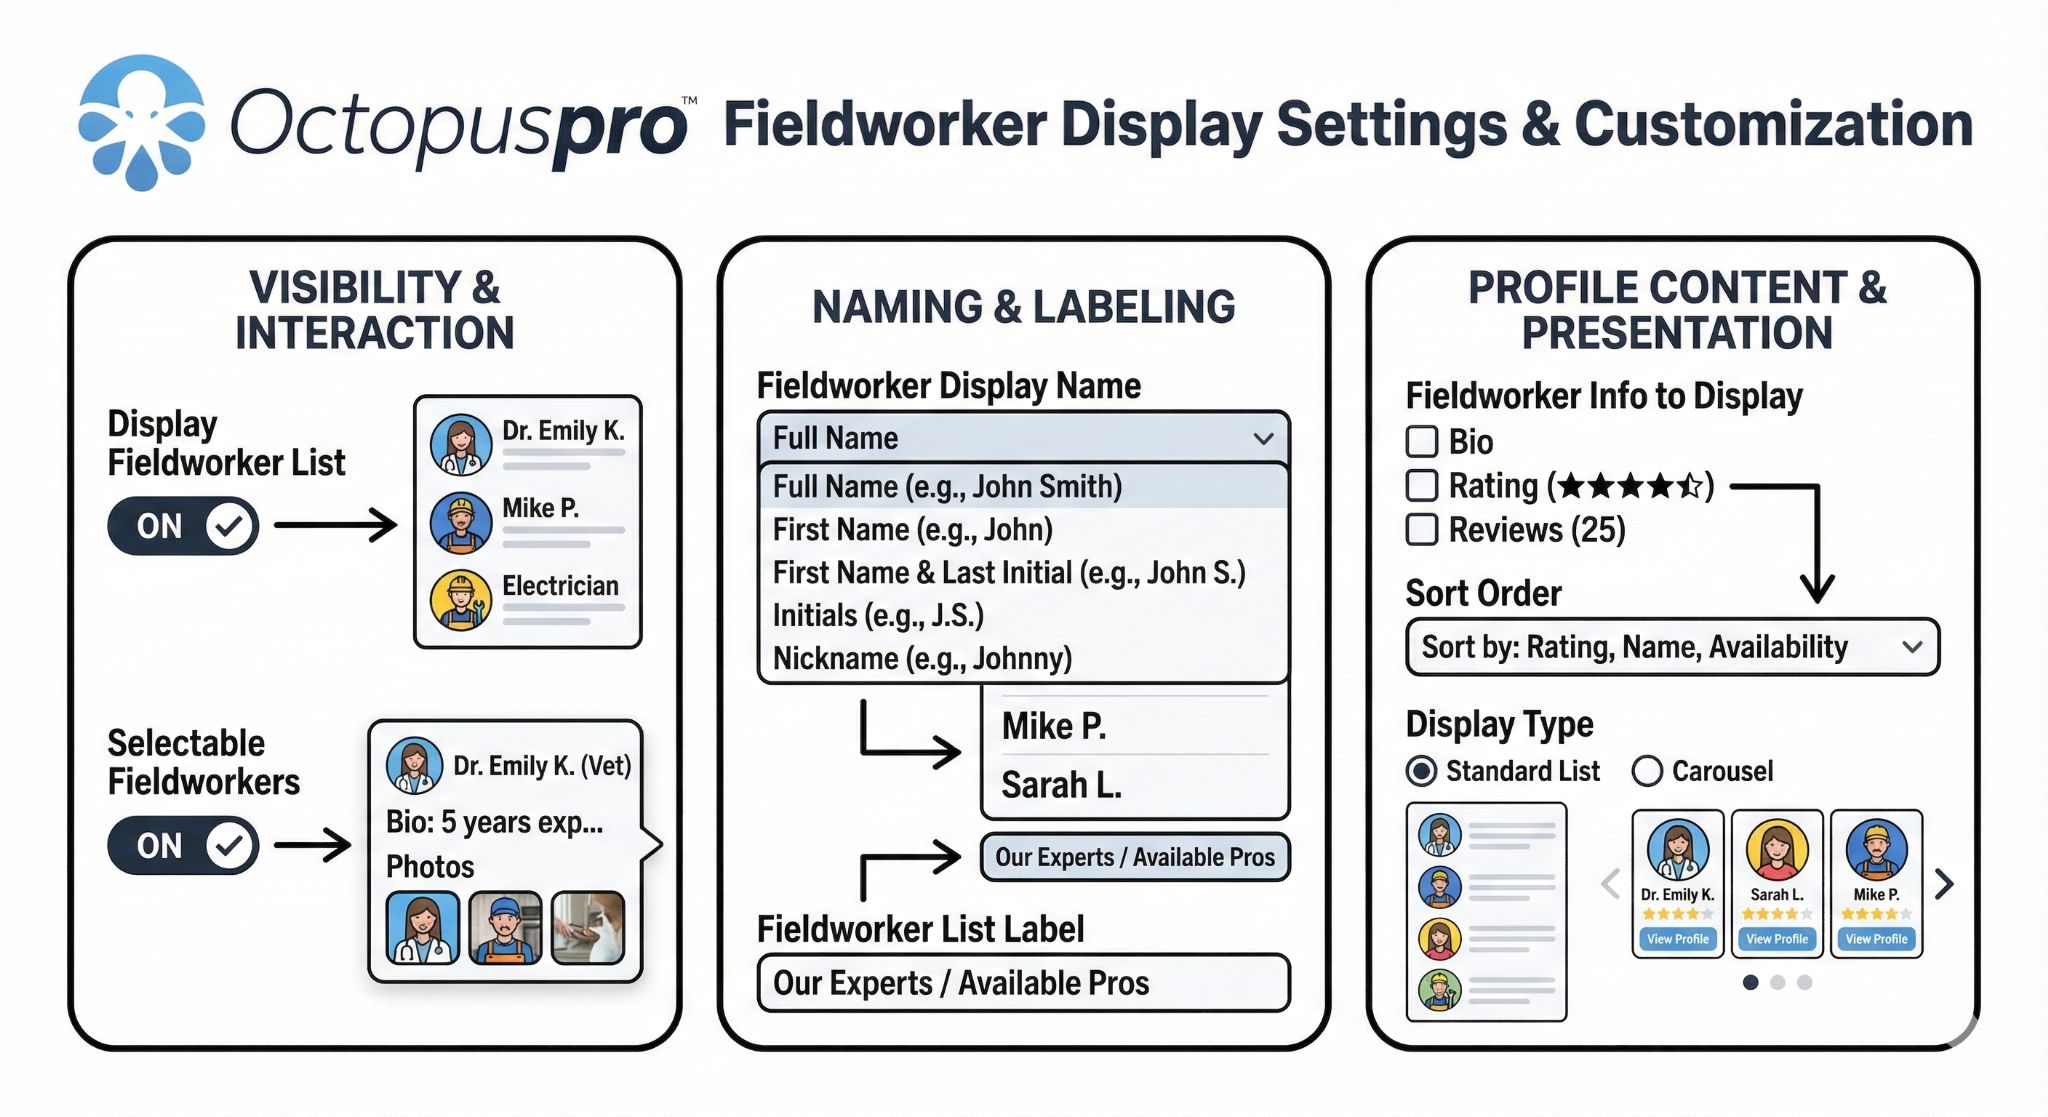
Related: Display Fieldworker List on Customer Portal.
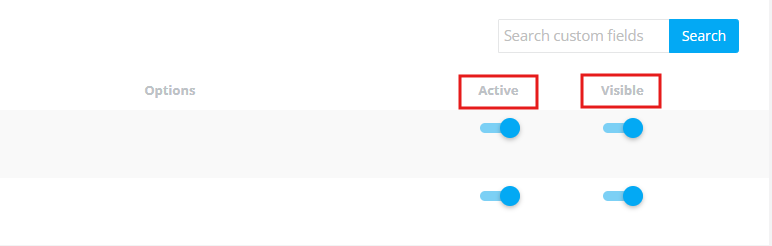
Manage Created Custom Fields (Activate/Deactivate + Portal Visibility)
After creating custom fields, you can manage them anytime from:
Settings > General Settings > Fieldworkers profile
From this list you can:
- Activate / Deactivate a custom field (whether it appears on profiles)
- Toggle visibility (whether it appears on Customer Portal / Branded App)
Edit an Existing Custom Field
To edit the custom field definition (label, helper text, field type, options, visibility rules):
- Go to Settings > General Settings > Fieldworkers profile.
- Find the custom field you want to update and click Edit.

Note: If you change a field type, it may affect how existing saved values are displayed. If you need a major change, it’s often best to create a new field and deactivate the old one (to preserve history).
Best Practices (Recommended)
- Use dropdowns/radios for standardization: structured options reduce messy data and improve reporting.
- Keep customer-visible fields “benefit-focused”: skills, languages, specialties—avoid internal or sensitive details.
- Use Helper Text: tell users exactly what you want (format, examples, requirements).
- Only make fields mandatory when truly required: too many required fields slows onboarding and causes incomplete profiles.
- Use a consistent Field ID naming convention: e.g., uniform_size, languages_spoken, equipment_owned.
- Use existing profile sections where available: insurance/licences/bank/pay rates already have dedicated areas (cleaner and more audit-friendly).
Related User Guide Articles
- How to View & Edit Fieldworker Profiles
- Fieldworker Permissions & Access Control
- Custom Fields Overview (Booking, Lead Capture, CRM)
- Customer Profile Customization Using Custom Fields
- Dependent Custom Fields (Conditional Logic)
- Button Group (Single-Select) Custom Field
- Radio Button (Single-Select) Custom Field
- Signature Custom Field (Digital eSign)
To stay updated, please subscribe to our YouTube channel.