
Multi-Address Bookings, Quotes & Inquiries (Multi-Stop Jobs)
OctopusPro’s Multi-Address feature lets you add two or more locations (stops) to a single record—ideal for pickup → drop-off, multi-site work, and multi-stop routes. Instead of creating separate jobs for each stop, you can keep everything together under one booking (or quote/invoice/inquiry) so office staff, fieldworkers (technicians/drivers), and customers stay aligned on where the job starts, continues, and ends.

Quick navigation
- When to use multi-address
- How it works (two required settings)
- Configuration steps
- Create multi-address bookings, quotes, invoices & inquiries
- View & navigate multi-address jobs
- Best-practice tips
- Troubleshooting
When to use multi-address
Use multi-address when a single job involves multiple service locations or multiple stops, such as:
- Removalists / movers: pickup home → destination home → storage
- Chauffeur / airport transfers: pickup → multiple drop-offs
- Courier & last-mile delivery: depot → multiple drops → returns
- Skip-bin & waste services: customer site → disposal facility
- Mobile repairs: customer home → workshop → return
- Vet & pet transport: home visit → clinic → return home
Benefits:
- Fewer duplicate jobs: one record holds all stops
- Clearer dispatching: everyone sees the full route
- Better customer experience: customers can enter additional stops (if enabled on the Customer Portal)
- More accurate planning: easier to account for travel between stops
How it works (two required settings)
Multi-address is controlled by two separate flags that work together:
| Flag (setting) | Where it’s configured | What it controls | Who it affects |
|---|---|---|---|
| Allow Multiple Addresses per Booking | Settings » Services » (open the service) | Turns multi-address on/off for that specific service (so users can add extra stops). | Admin/Office, Fieldworker App, and Customer Portal |
| Allow bookings to have a second address | Settings » Customer Portal » Flags & Permissions | Shows the extra address fields on the portal booking form and lets you set the default label (e.g., “Drop-off”). | Customer Portal only |
Quick rule of thumb
- Turn ON the service-level flag for every service that can involve multiple stops.
- Turn ON the portal-level flag only if you want customers to enter those stops during online booking.
Tip: Multi-address is typically used with Mobile/On-Site (not Virtual). If you’re unsure, review Service Delivery Types: Physical Storefront, Mobile/On-Site & Remote Services.
Configuration steps
1) Enable multi-address per service (required)
- Go to Settings » Services.
- Open the service that may involve multiple stops (e.g., transport, delivery, removals).
- Enable Allow Multiple Addresses per Booking.
- Click Save.
2) Enable multi-address on the Customer Portal (optional)
Enable this only if you want customers to enter the extra address while booking online.
- Go to Settings » Customer Portal » Flags & Permissions.
- Enable Allow bookings to have a second address.
- Set your preferred labels (long/short) for the second address (e.g., “Drop-off” / “Delivery address”).
Create multi-address bookings, quotes, invoices & inquiries
Admin / Office users (web app)
Once enabled on the service, you can add additional stops when creating or editing a record. You can add up to 4 addresses/stops.
- Go to Bookings, Quotes, Invoices, or Inquiries.
- Create a new record (or open an existing one).
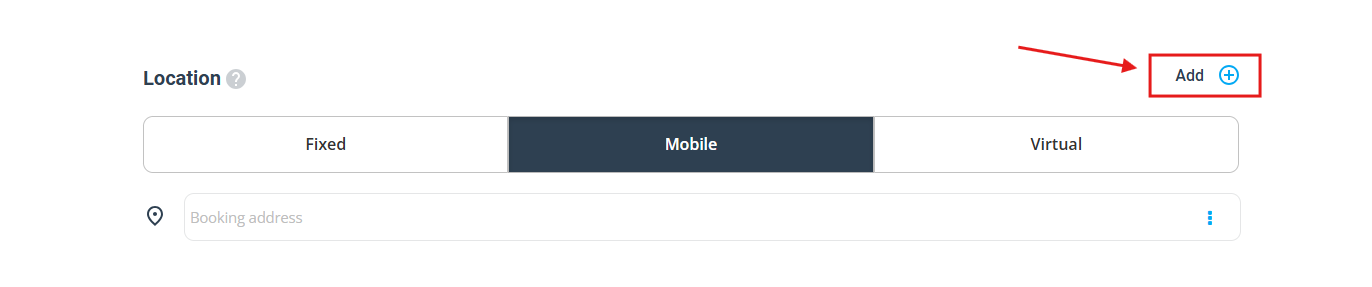
- In the Location section, select the appropriate location type (commonly Mobile), then enter Address 1.
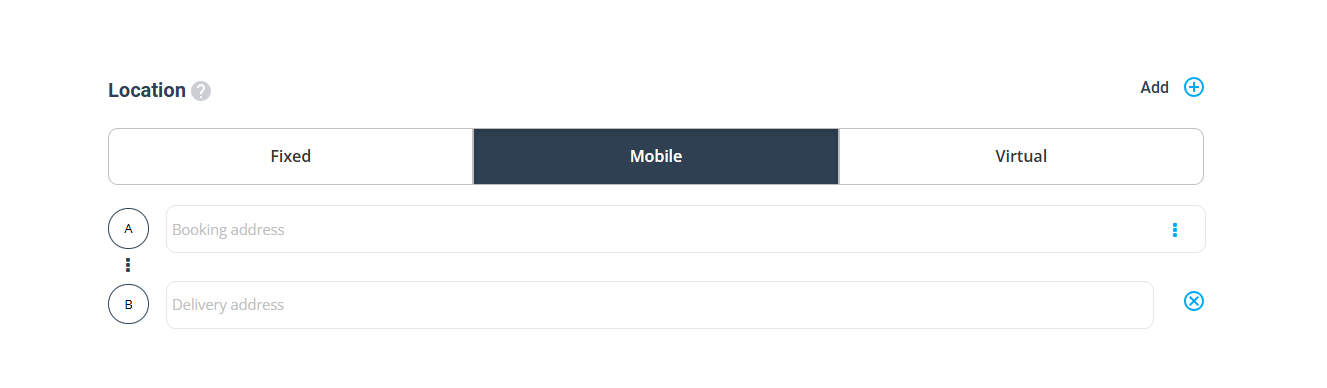
- Click Add (or + Add Address), then enter Address 2 and its label (e.g., “Drop-off”).
- Repeat as needed (up to 4 stops), then Save.
If you need a refresher on booking creation, see: Create & Edit Bookings.
Fieldworkers / Technicians (Fieldworker App)
- Open the Fieldworker App.
- Go to Menu » Create New Booking.
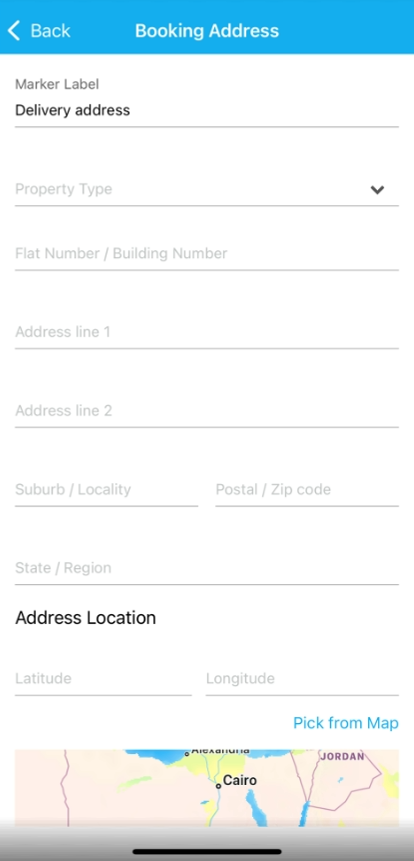
- Select the customer and service, set date/time, then enter Address 1.
- Tap + Add New Address, choose a label, then enter Address 2.
- Save the booking.
Customers (Customer Portal)
The “add another address” option is visible only when both flags are enabled:
- Service flag: Allow Multiple Addresses per Booking
- Portal flag: Allow bookings to have a second address
- Choose the service and date/time.
- Enter Address 1.
- Click + Add Another Address, enter/select the label (e.g., “Destination”), then enter Address 2.
- Submit the booking.
View & navigate multi-address jobs
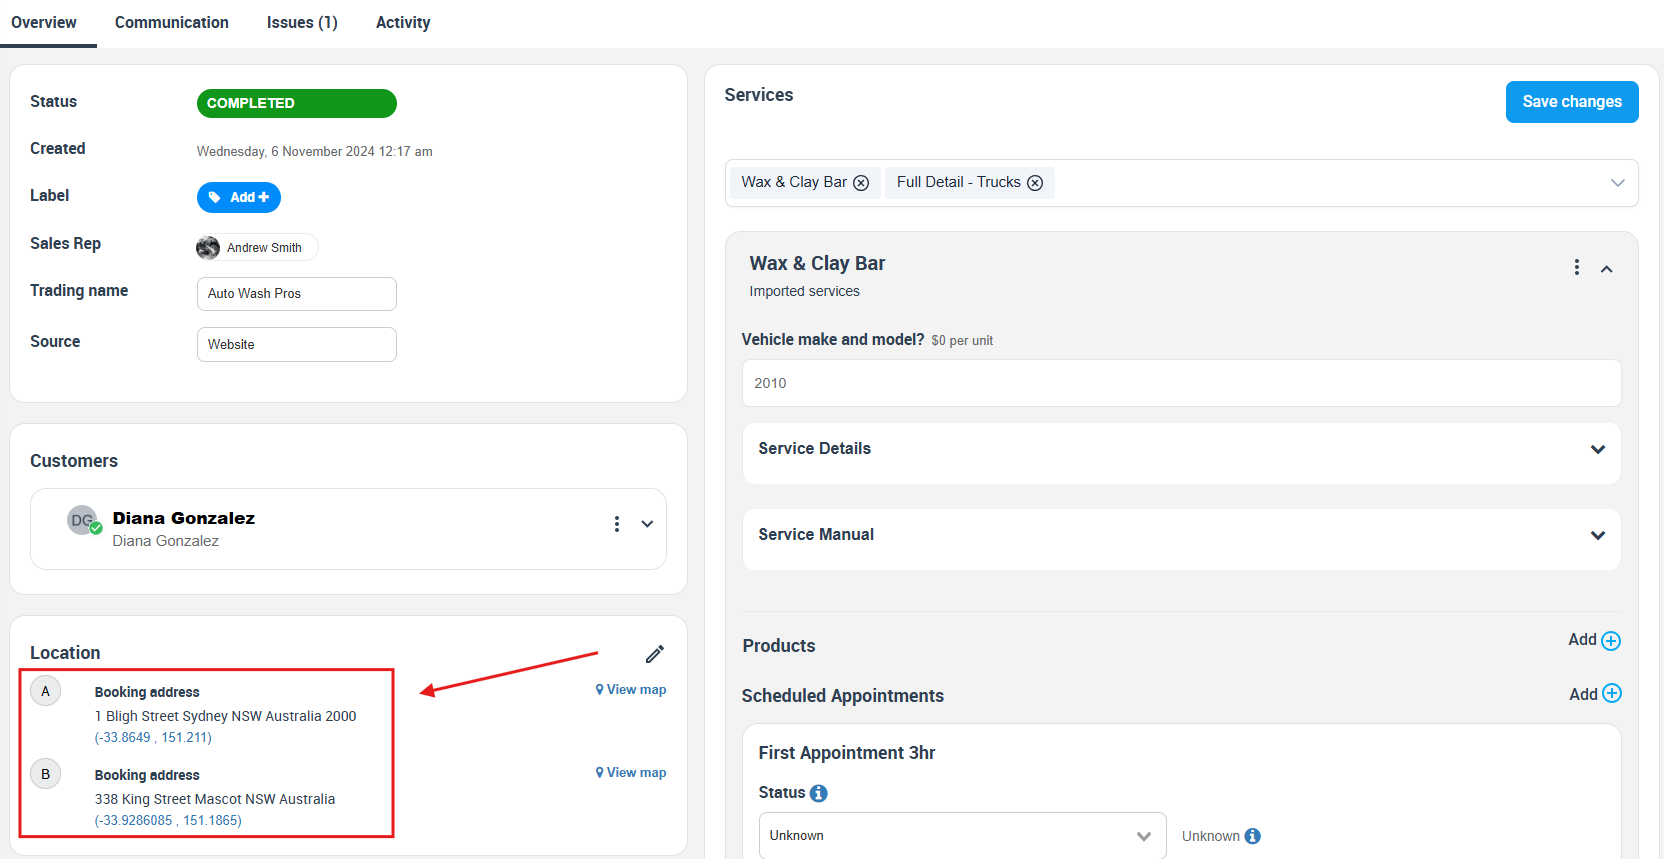
Admin / Office (web app)
Open the booking/quote/invoice and review the Location panel. Stops are listed in order (A, B, C, D). Use View map to open a stop in Google Maps.
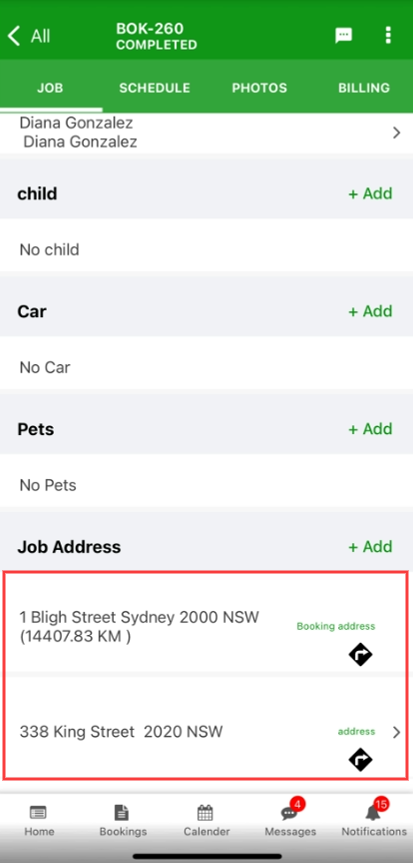
Fieldworkers / Technicians (Fieldworker App)
Open the job and scroll to the Job Address section. Each stop appears as a separate entry. Tap the navigation icon to launch turn-by-turn directions.
Optional: For more accurate map and address features, connect your API key using Google Maps API Integration.
Best-practice tips
- Use logical order: list stops in the same sequence the job will be performed (A → B → C).
- Use clear labels: “Pickup”, “Drop-off”, “Warehouse”, “Disposal” reduce confusion.
- Include travel time: add transit time between stops when estimating duration and booking windows.
- One record, many stops: keep a single booking and invoice when it’s one job workflow. If you need separate billing per stop, consider separate bookings/invoices.
- Route optimisation: high-volume courier businesses can integrate external routing tools via Open API, Webhooks & Integrations.
Troubleshooting
I can’t see “Add Address” (admin/fieldworker) or “Add Another Address” (portal)
- Confirm the service has Allow Multiple Addresses per Booking enabled under Settings » Services.
- If you’re testing the Customer Portal, confirm Allow bookings to have a second address is enabled under Settings » Customer Portal » Flags & Permissions.
- Confirm the booking location type is appropriate (multi-address is typically used for Mobile/On-Site, not Virtual). See Service Delivery Types.
We need more than 4 stops
Multi-address supports up to 4 stops per record. If you need more, split the route into multiple bookings (or use an external routing workflow and sync your jobs accordingly).
Navigation or mapping is inaccurate
- Ensure each address is complete (street number, street name, suburb/city, postcode/zip).
- Configure your key via Google Maps API Integration.
Summary
Multi-Address (multi-stop) records let you capture every stop inside one booking, quote, invoice, or inquiry—perfect for pickup/drop-off and multi-site workflows. Enable Allow Multiple Addresses per Booking on the relevant services for admin and fieldworker use, and enable the Customer Portal flag if you want customers to enter the second address during online booking.
To stay updated, please subscribe to our YouTube channel.