
Tap Payment Gateway Integration (API Setup)
Tap is a popular payment gateway in the Middle East that lets you accept secure online card payments through OctopusPro. Once connected, customers can pay online (and optionally save a card) when booking services or paying invoices and other charges via your Customer Portal.
On this page
- Overview
- Before you start
- Step 1: Get your Tap API keys
- Step 2: Connect Tap to OctopusPro
- Step 3: Customer Portal payment experience
- What Tap supports (key capabilities)
- Best practices
- Troubleshooting
- FAQs
- Related guides
Overview
OctopusPro supports three common ways to connect to external systems:
- Built-in integrations – connect supported platforms (like payment gateways) by entering credentials such as API keys.
- Open API (REST) – build custom integrations that securely read and write OctopusPro data from your own application or server.
- Webhooks – subscribe to events (for example, booking created, invoice updated) so OctopusPro can notify your system in real time.
Best practice: use the API for “pull/push” actions (fetch and update data), and webhooks for “event notifications” (OctopusPro tells you when something changes).
The Tap integration is a built-in payment gateway integration. It helps you:
- Get paid faster with online card payments
- Reduce no-shows by collecting deposits or upfront payments (if enabled in your settings)
- Improve customer experience with a simple checkout flow in the Customer Portal
- Keep records in one place with payment status and references logged against invoices/bookings
Before you start
- Active Tap account: You need an approved Tap merchant account (activated for live transactions).
- API keys: You’ll copy your Tap Secret Key and Publishable/Public Key into OctopusPro.
- Test vs Live: Tap typically provides separate test and live keys. Use test keys for testing and live keys for real payments.
- Security: Treat your Secret Key like a password. Only admins should have access.
Step 1: Get your Tap API keys
In your Tap dashboard, locate your API credentials and copy both keys:
- Secret Key (private) – used to authenticate server-side requests
- Publishable/Public Key – used for client-side identification
Tap’s dashboard UI may vary by region and account type, but you’ll typically find keys under a section like Developers, API, or API Credentials.
Tip: If you can’t find your keys, use Tap dashboard search for “API credentials”, “Secret key”, or “Publishable key”. Tap support can also confirm where these are located for your account.
Step 2: Connect Tap to OctopusPro
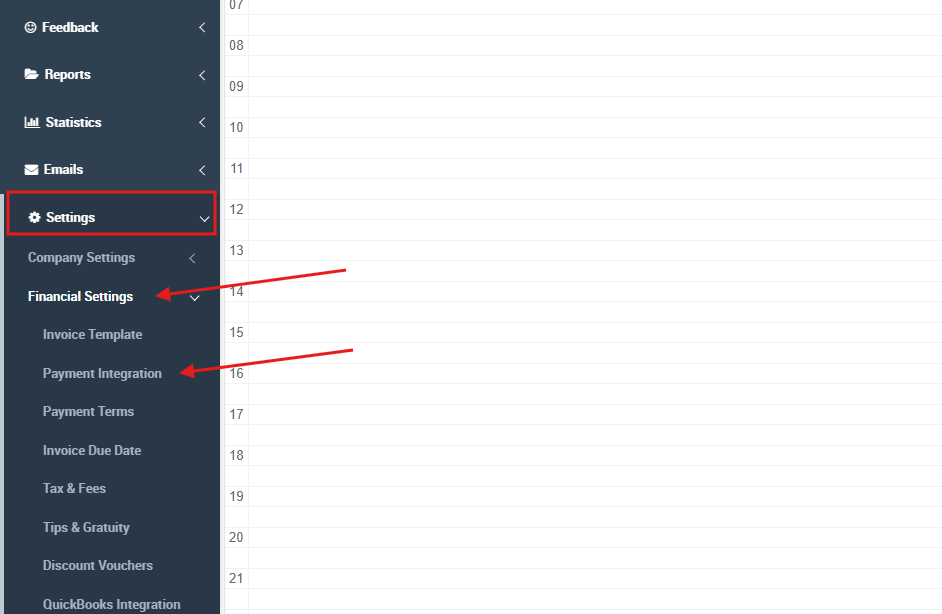
2.1 Open your Payment Integration settings
In OctopusPro, go to: Settings > Financial Settings > Payment Integration (menu names may vary slightly depending on your account configuration).
2.2 Select Tap as your payment gateway
Find Tap in the available gateways list and select it.

2.3 Enter your Tap API keys
A configuration pop-up will appear. Paste your Tap keys into the matching fields:
- Secret Key (private key)
- Publishable/Public Key
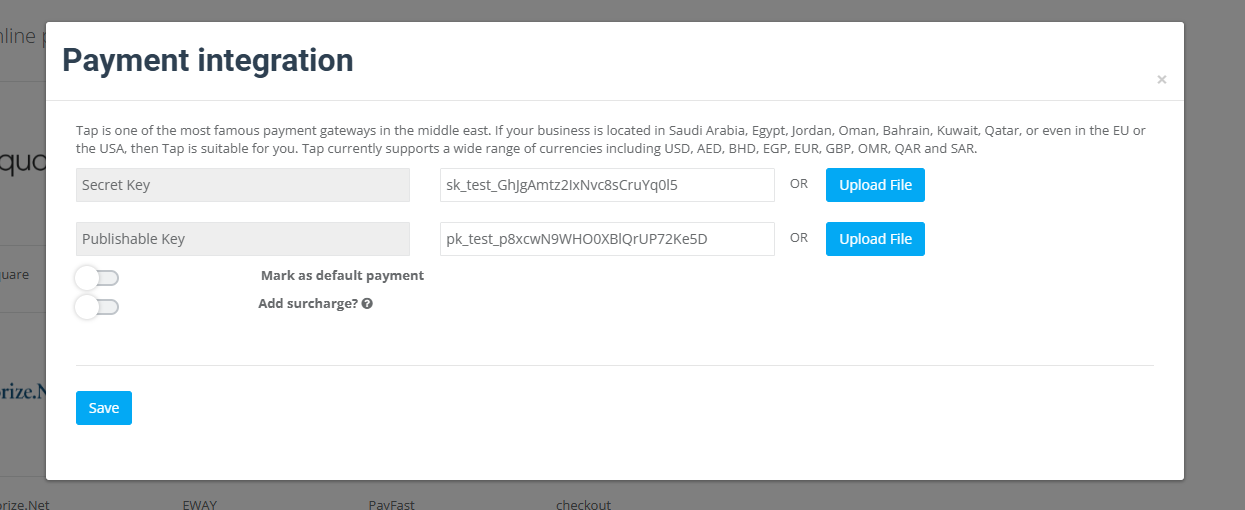
2.4 Configure key options
Depending on your account, you may see additional options such as:
- Active – enable/disable Tap (when inactive, it won’t be offered at checkout)
- Default gateway – set Tap as the default online payment method (useful if you have multiple gateways)
- Surcharge – optionally add a card surcharge for online payments (only if permitted by your local regulations and card scheme rules)
Click Save (or Add) to apply your changes.
Important: If you used test keys, payments will not settle as real transactions. Switch to live keys when you’re ready to go live.
Step 3: Customer Portal payment experience
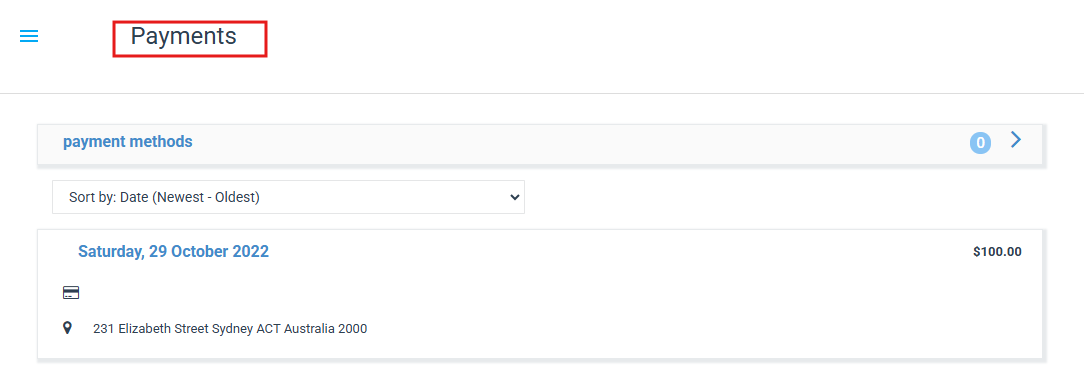
Once Tap is enabled, customers can manage payment methods and pay online from the Customer Portal (and in many cases, your mobile customer experience if enabled).
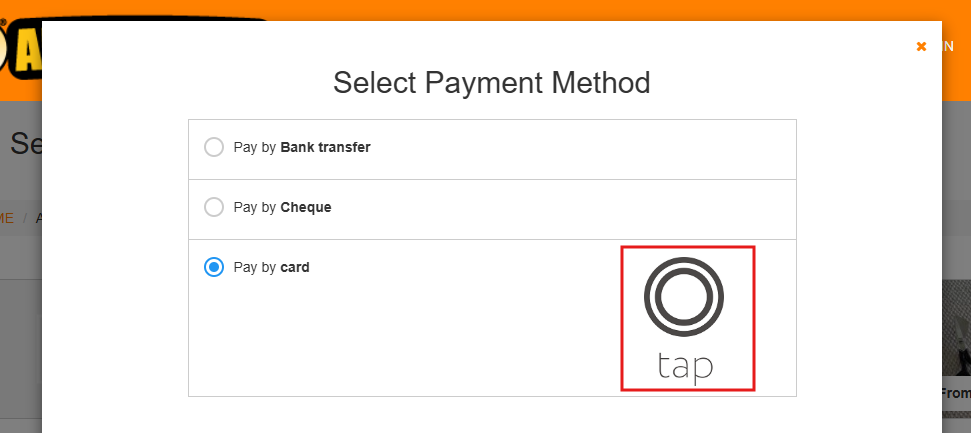
3.1 Customers can view payment options
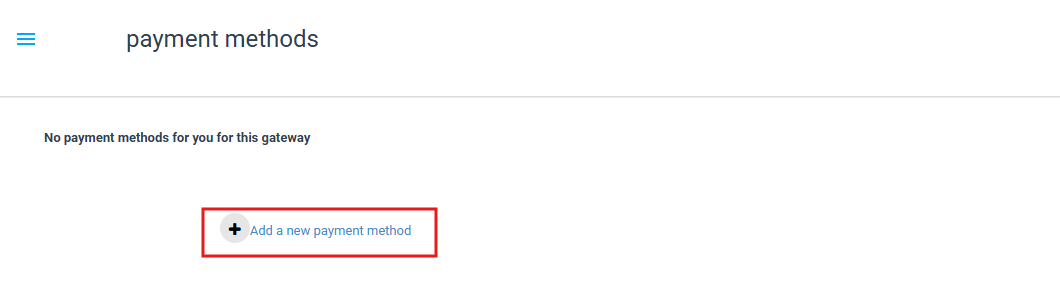
3.2 Customers can add a new payment method
If you allow saved payment methods, customers can add a card/payment method that can be used for future purchases.
3.3 Customers can pay by card at checkout
When paying an invoice (or during checkout, depending on your setup), customers can select Pay by Card. OctopusPro will route the payment through Tap.
What Tap supports (key capabilities)
Tap’s capabilities may vary by region and merchant configuration. Common capabilities include:
Authorizations (hold funds)
Some Tap configurations support payment authorization (placing a temporary hold) before capture/settlement. If your business needs authorization flows, confirm availability and requirements with Tap.

Multi-currency support
Tap supports a range of currencies. Your available settlement currencies depend on your Tap merchant setup and region.
Saved cards (where enabled)
If enabled in your portal settings, customers can store a payment method for faster future checkout. Payments are processed by the gateway; OctopusPro records transaction outcomes and references.

Best practices
- Start with test keys (if provided) to validate your workflow before going live.
- Use live keys for production so real transactions can be completed and settled.
- Limit key access to admins only, and rotate keys if you believe they were exposed.
- Validate your customer experience end-to-end (booking checkout, invoice payment, saved payment method).
- Surcharges: only enable if allowed in your jurisdiction and compliant with card scheme rules.
Troubleshooting
Tap is not showing as an option for customers
- Confirm the Tap integration is Active in your Payment Integration settings.
- If you have multiple gateways, confirm your portal/checkout is configured to allow card payments.
- Clear cache and re-test in an incognito/private window.
“Invalid key” / authentication errors
- Make sure you pasted the correct values into Secret Key and Publishable/Public Key (not swapped).
- Confirm you’re using the correct environment: test keys for testing, live keys for production.
- Check that your Tap account is fully activated for live processing.
Payments fail or remain pending
- Confirm the customer’s card and your Tap account support the selected currency/region.
- Review the transaction details in your Tap dashboard to identify rejection reasons.
- If the issue persists, contact Tap support and provide the transaction reference visible in your Tap dashboard.
FAQs
Does OctopusPro store customer card details?
Card processing is handled by the payment gateway. OctopusPro records payment results and references in your account. If your portal supports “saved payment methods,” customers can store a payment method for faster checkout, subject to your gateway configuration.
Can I use Tap alongside other gateways?
Yes. If your account supports multiple gateways, you can enable more than one and choose a default gateway, while still offering customers alternate methods where applicable.
Can I add a surcharge for card payments?
If the surcharge option is available in your Tap integration settings, you may enable it. Always ensure surcharges comply with your local laws and card scheme rules.
Can I disable Tap later?
Yes. You can set Tap to Inactive in your Payment Integration settings. Existing payment records remain in your account history.
Related guides
- Stripe API Integration
- Square API Integration
- PayPal API Integration
- Authorize.Net API Integration
- Checkout.com API Integration
- WePay API Integration
- eWAY API Integration
To stay updated, please subscribe to our YouTube channel.