
OctopusPro App Login & Access for Admins, Fieldworkers, and Customers
OctopusPro supports multiple user roles—admin/office users, fieldworkers (employees, contractors, or subcontractors), and customers—with role-based access to the mobile app and web portals.
In this guide, you’ll learn how to:
- Download and log in to the OctopusPro mobile app
- Switch between admin and fieldworker roles (when the same login has multiple roles)
- Create, invite, or register fieldworkers
- Complete a fieldworker profile (services, working hours, service areas, signature, etc.)
- Reset or change passwords
- Control what fieldworkers can view and do using permissions

Table of Contents
- 1. Download the OctopusPro App
- 2. Log In to the App
- 3. Switch Between Admin & Fieldworker Roles
- 4. Create or Invite Fieldworkers (Admin)
- 5. Fieldworker Sign-Up Options
- 6. Complete the Fieldworker Profile
- 7. Set Address, Service Areas & Business Locations
- 8. Reset or Change a Fieldworker Password
- 9. Manage Employee vs Contractor Fieldworkers
- 10. Add Custom Fields to Fieldworker Profiles
- 11. Fieldworker Contract Signing During Registration
- 12. Fieldworker Calendar & Availability
- 13. Control Fieldworker Access (Permissions)
- 14. Troubleshooting Login Issues
- Related Articles
1. Download the OctopusPro App
The OctopusPro mobile app is available for iOS and Android:
Tip: Ask fieldworkers to install the app before you create or invite them, so they can log in as soon as they receive their invitation or activation email.
2. Log In to the App
To log in on a mobile device:
- Open the OctopusPro app.
- Enter your email and password.
- Tap Login.
Single Sign-On (SSO): Depending on your setup/app configuration, you may also see options like Log in with Apple or Sign in with Google.
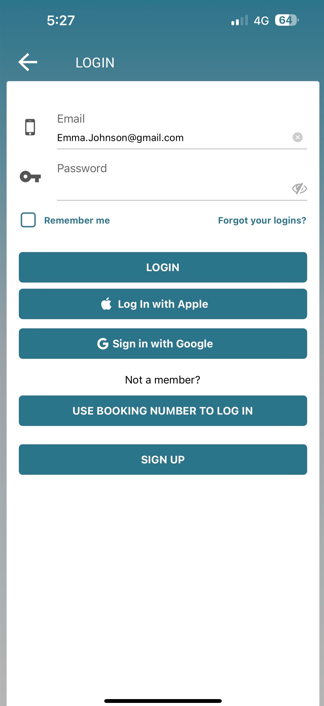
Note: Some branded app configurations may display additional access options (for example, “Use booking number to log in” for customer access). Available login methods depend on your company settings and the type of app you’re using.
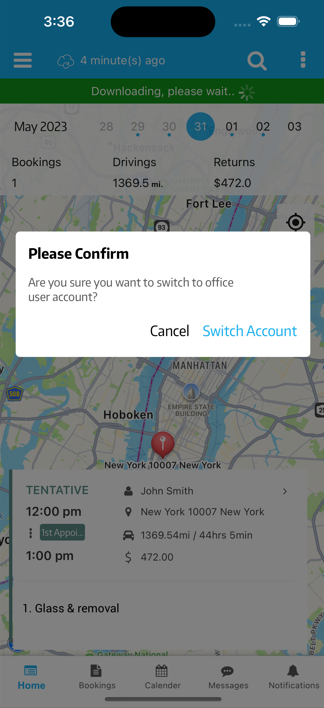
3. Switch Between Admin & Fieldworker Roles
If the same email/password is assigned to multiple roles (for example, an office user who is also a fieldworker), you can switch roles inside the app:
- Tap the three dots (top-right) in the app.
- Select Switch Account.
- Confirm the switch.

4. Create or Invite Fieldworkers (Admin)
Admins can add fieldworkers to the system so they can access the app and their web portal.
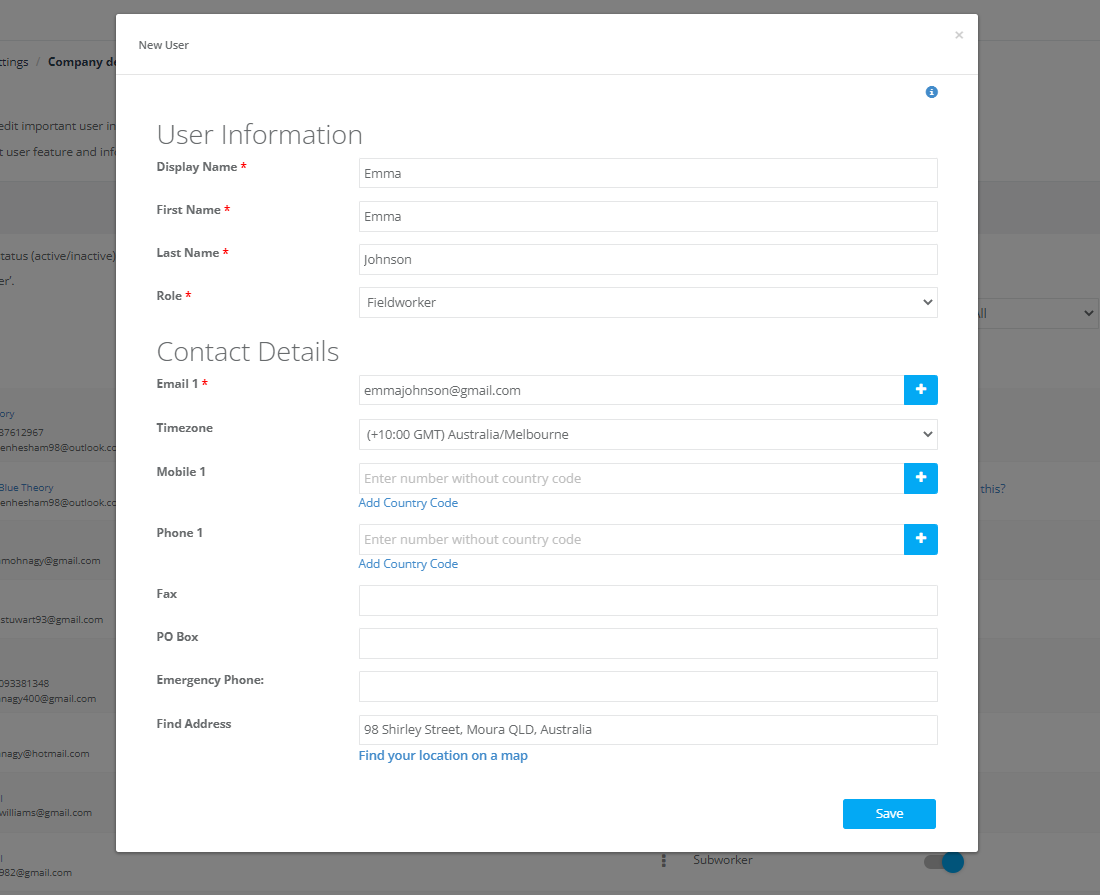
Option A: Create a fieldworker user (manual add)
- In the admin portal, go to Settings > Company Settings > Users.
- Click Add User.
- Choose the role Fieldworker.
- Complete the required details, then click Save.
What happens next?
The fieldworker typically receives an invitation/verification email to activate their account and set a password (depending on your configuration).
Option B: Add or invite fieldworkers using other methods
You can also invite or onboard fieldworkers using common methods such as:
- Sharing a sign-up link (from your portal/onboarding settings)
- Making a sign-up link visible on your website/customer portal
- Importing fieldworkers via CSV
- Syncing fieldworkers from supported accounting integrations (where applicable)
For a complete admin guide, see: Add, Invite, or Import Fieldworkers

5. Fieldworker Sign-Up Options
A) Fieldworker registration through your website or portal
If you enable a fieldworker sign-up/onboarding link, fieldworkers can register online and receive an activation email. They can then set a password and log in to the app or their web portal.
Guide: Fieldworker Sign-up & Onboarding

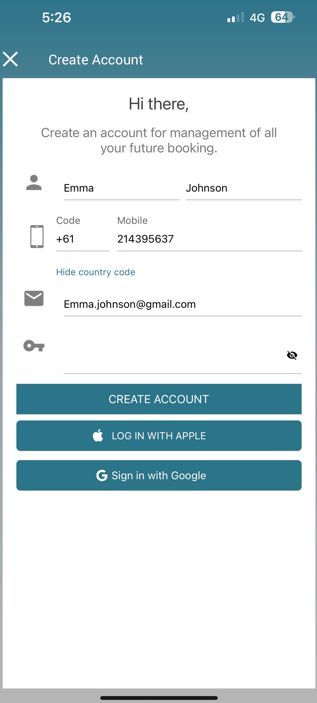
B) Fieldworker sign-up using a Branded App
If your company uses a branded app, fieldworkers may be able to sign up directly from the app:
- Open the app and tap Sign Up.
- Enter required details (name, mobile number with country code, email, etc.).
- Confirm and activate the account using the activation email.
- Return to the app and log in.
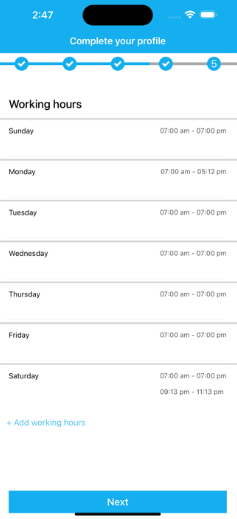
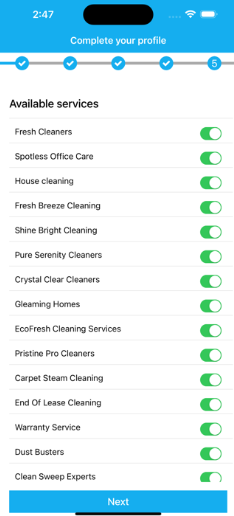
6. Complete the Fieldworker Profile
After logging in for the first time, fieldworkers should complete their profile to ensure they can receive and manage job assignments correctly.
Typical setup steps include:
- Working hours (availability window for scheduling)
- Available services (what the fieldworker can be assigned to)
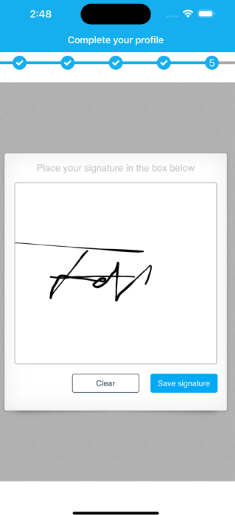
- Contract/signature (if enabled)
- Address and service areas (for location-based job assignment)
7. Set Address, Service Areas & Business Locations
Service areas help OctopusPro assign nearby work to the right fieldworker and improve scheduling accuracy.

Key concepts:
- Primary Address: the fieldworker’s base address (optional depending on your business model)
- Service Areas: where the fieldworker prefers to work (radius or polygon zones)
- Business Locations (fixed-location services): locations where services are delivered at a site

Learn more: Set Up Address & Service Areas
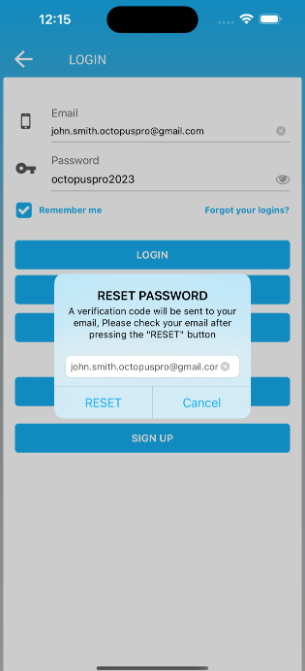
8. Reset or Change a Fieldworker Password
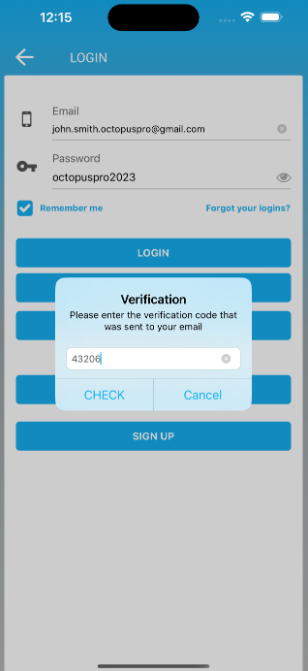
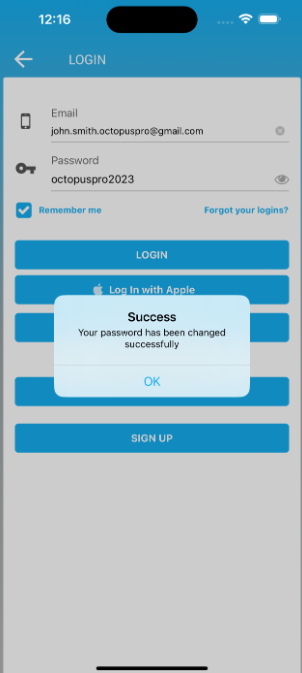
A) Reset password (Forgot password)
If a fieldworker forgets their password:
- Open the login screen in the app or web portal.
- Tap Forgot your logins? (or the equivalent “Forgot password” option).
- Follow the prompts to reset the password via email verification.
More details: Fieldworker Password Reset & Login
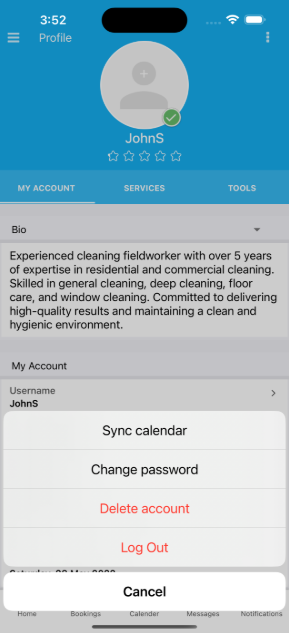
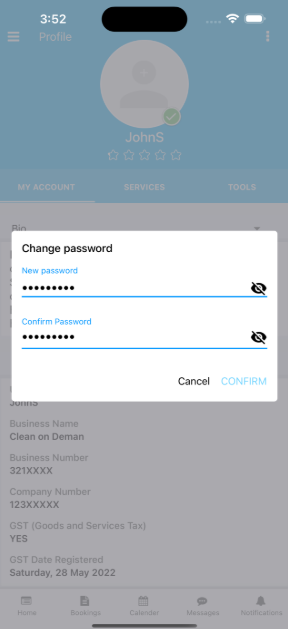
B) Change password (while logged in)
If the fieldworker is already logged in and wants to change their password:
- Open the actions menu (top-left).
- Select Change password.
- Enter the new password and confirm to save.
9. Manage Employee vs Contractor Fieldworkers
OctopusPro supports a mix of employees, contractors, and subcontractors. You can define the worker type at the fieldworker profile level, which helps with internal reporting and payroll workflows (depending on your setup).
Typical workflow:
- Open the fieldworker’s profile in the admin portal.
- Set the fieldworker type (employee/contractor/subcontractor).
- Configure pay structure if used by your team (hourly, commission, fixed rate, etc.).
Tip: If you calculate payouts based on completed work, use reporting tools (such as fieldworker booking summaries) to track amounts due.
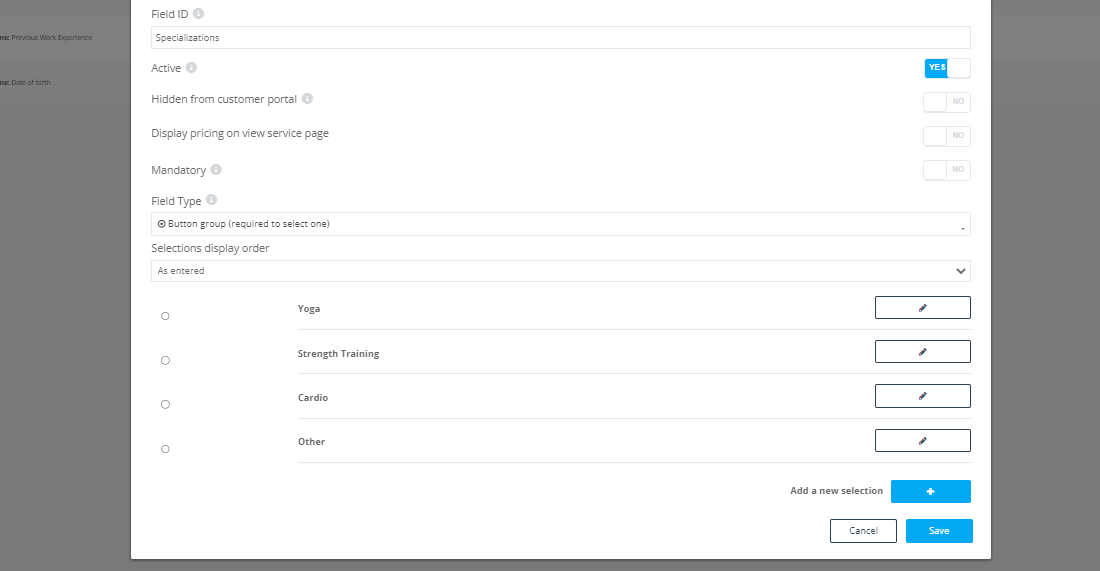
10. Add Custom Fields to Fieldworker Profiles
If you need to collect additional information from fieldworkers beyond the standard profile fields, you can add custom fields to the fieldworker profile form.

To create custom fields (admin):
- Go to Settings > General Settings > Fieldworker Profile.
- Create custom fields and configure field type, mandatory settings, and (optional) predefined selections.
- Save your changes.
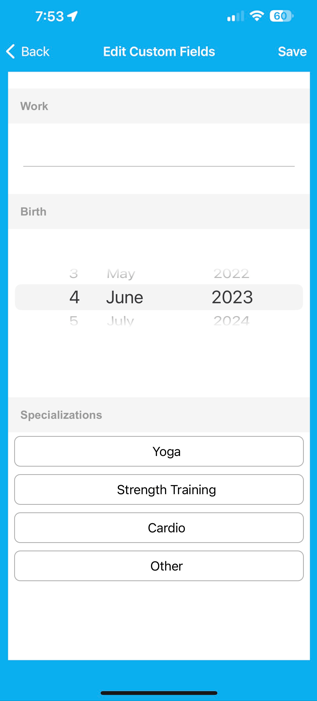
To fill custom fields (fieldworker):
- Go to My Account in the app.
- Scroll to Custom Fields.
- Enter or select the required values, then save.
Learn more: Fieldworker Profile Customization Using Custom Fields
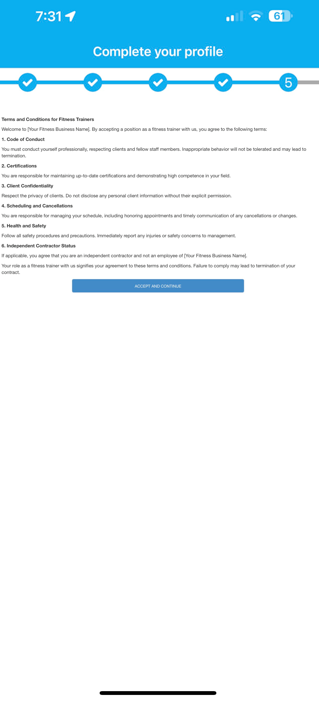
11. Fieldworker Contract Signing During Registration
You can require fieldworkers to review and accept a contract (and/or sign) during registration or onboarding.
Typical setup (admin):
- Add your contract under Settings > Company Settings > Contracts & Agreements.
- Enable contract capture for fieldworkers (where available in your configuration).
- Fieldworkers will review/accept the contract during onboarding, and the signed/accepted version is stored for future reference.

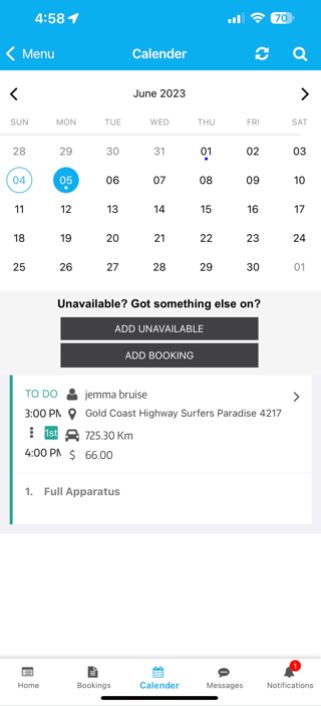
12. Fieldworker Calendar & Availability
Fieldworkers can manage availability so the office can schedule work accurately and avoid conflicts.
Fieldworker actions:
- Set working hours (days/times available for bookings)
- Add unavailable time blocks for personal commitments or other jobs
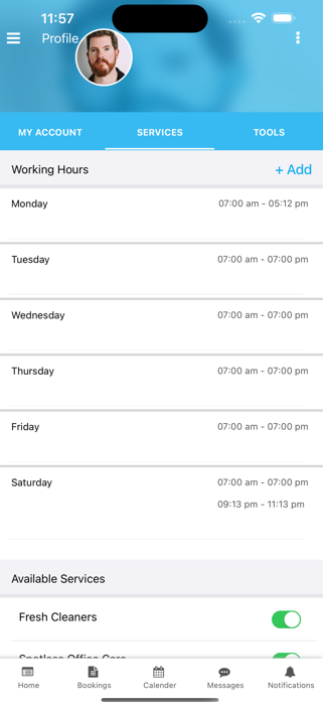
Office users: Depending on permissions, office staff can also adjust working hours and unavailable blocks on behalf of fieldworkers in the admin calendar tools.
13. Control Fieldworker Access (Permissions)
Fieldworker access is controlled through Fieldworker Permissions, allowing you to balance operational efficiency with privacy and security.

Common controls include:
- Customer contact visibility: show/hide phone/email details (and optionally reveal only after “On The Way” status, where applicable)
- Billing amount visibility: show/hide booking charges and invoice totals
- Earnings visibility: show/hide earnings per booking for fieldworkers
- Job request control: allow fieldworkers to accept/decline job requests
- Customer database access: allow/disallow fieldworkers from viewing the customer list when creating new bookings
Open Fieldworker Permissions: Fieldworker Permissions & Access Control
Specific permission guides:
- Display Customer Contact Details to Fieldworkers
- Show Booking Charges to Fieldworkers (Billing Amount)
- Display Fieldworker Earnings per Booking
- Allow Fieldworkers to Accept/Decline Job Requests
- Fieldworker Access to Customer Database
14. Troubleshooting Login Issues
If you or a fieldworker can’t log in, check the following:
- Wrong email/password: Confirm the email address is correct (no typos/spaces). If unsure, use Forgot password.
- Invitation not received: Check spam/junk folders. Admins can resend the invite/verification email if needed.
- Account not activated: Some setups require email verification before the account becomes active.
- User blocked/inactive: Admins can deactivate/block users; confirm the fieldworker profile is active.
- App permissions: For best results, allow app permissions (e.g., notifications/location) if your workflows use GPS, on-the-way status, ETA, or alarms.
If you need a deeper login guide (including admin impersonation/login-as features), see: Fieldworker Login, Impersonation & Password Reset
Related Articles
Getting Started & Onboarding
- Getting Started as a Fieldworker
- Add, Invite, or Import Fieldworkers
- Fieldworker Sign-up & Onboarding
- Set Up Address & Service Areas
Security, Access & Passwords
Profile Customization
To stay updated, please subscribe to our YouTube channel.