
Trading Names Management: Run Multiple Brands from One Account

Operate distinct sub-brands, service lines, or regional divisions without the chaos of managing multiple accounts.
Trading Names Management allows you to consolidate your entire business operation into a single OctopusPro account while presenting unique brand identities to your customers. Whether you are distinguishing between residential and commercial services, separating “budget” vs. “premium” offerings, or managing different regional divisions, you can maintain total brand separation on the front end while unifying your data and administration on the back end.
Key Benefits & Capabilities
🎨 Distinct Brand Identities
Give each trading name its own unique look and feel. You can customize the website URL, logo, color palette, and email settings for every division.
-
Example: A cleaning company can operate “Sparkle Homes” for residential clients and “Sparkle Biz” for commercial contracts, ensuring each market sees a brand tailored specifically to them.
💻 Customized Customer Portals
Ensure a consistent brand experience from inquiry to payment. You can assign unique customer portal URLs and specific inquiry widget styles to each trading name.
-
Example: A contractor might run “Plumbing Pros” for standard renovations and “Emergency Fix” for 24/7 urgent repairs. Each brand has a distinct portal, so the customer never feels like they are dealing with a generic parent company.
⭐ Independent Reputation Management
Build trust where it counts. You can link a unique Google Business Profile and review link to each trading name.
-
Why this matters: A 5-star review for your “Premium Spa” brand won’t get mixed up with reviews for your “Budget Express” service. Customers are directed to the correct Google listing for the specific brand they used, ensuring your review scores accurately reflect the service provided.
⚡ Smart Default Fallback Mechanism
Streamline your setup process with intelligent inheritance. Any field you leave blank for a new trading name (such as a phone number, address, or logo) will automatically inherit the value from your primary company settings. This prevents blank data fields and saves you from entering duplicate information if only minor changes are needed.
📂 Unified Account, Centralized Data
Stop toggling between different login credentials. Manage all inquiries, quotes, bookings, and invoices for every brand under one master account.
-
Example: An automotive center running “CarCare” (maintenance) and “TireTown” (tires) can view all financial transactions and customer history in one place, simplifying reporting and management.
📍 Designated Default Trading Name
Ensure no lead is left behind. You can designate a single “Default” trading name that automatically applies to any customer, job, or inquiry not explicitly linked to a specific sub-brand. This guarantees seamless operations and consistent branding for new or unassigned records.
Real-World Applications
-
Multi-Regional Expansion: Operate as distinct local entities (e.g., East Coast Cleaning vs. West Coast Cleaning) sharing the same user base and job records.
-
Service Segmentation & Reviews: A home services company can manage “HVAC Solutions” and “Plumbing Pros” from one dashboard. Crucially, they can send automated feedback requests that direct HVAC customers to the “HVAC Solutions” Google listing and plumbing customers to the “Plumbing Pros” listing, keeping their online reputations separate and relevant.
-
Franchise & Branches: A beauty salon chain can manage “Glow Spa” and “Nail Haven” with separate booking portal aesthetics while consolidating all appointments into a unified schedule.
Operational Efficiency
-
Invoice & Template Customization: Send quotes and invoices that feature the specific branding of the trading name used, boosting professional credibility.
-
Brand-Specific Automation: Automated booking confirmations and reminders match the branding of the service booked, preventing customer confusion.
-
Granular Reporting: Filter your reports by trading name to analyze the performance of specific divisions and identify individual areas for growth.
Table of Contents
- What is a Trading Name?
- Benefits of Using a Trading Name
- How to Create a New Trading Name
- Customizing Inquiry Forms for Each Trading Name
- Deleting Existing Trading Names
- Editing / Updating Existing Trading Names
- How to Switch Between Existing Trading Names
- The Effect on Customer Communications
- Related FAQs
What is a Trading Name?
A trading name—also known as a business name or fictitious name—is an alternate name under which your company operates, separate from its legally registered name. This allows you to adopt a more memorable, market-friendly brand that can better resonate with your target audience and differentiate your services.
Benefits of Using a Trading Name with OctopusPro
OctopusPro enables you to manage multiple trading names within one unified account, offering several advantages:
-
Operational Efficiency:
Manage various business segments on a single platform, reducing administrative overhead and streamlining operations. -
Enhanced Brand Identity:
Create distinct, recognizable brands for different service lines or markets to improve customer recognition and loyalty. -
Market Flexibility:
Tailor each trading name to specific customer groups or geographic areas, allowing you to adapt your offerings to local market needs. -
Cost Savings:
Consolidate multiple brands under one account, minimizing the expenses associated with running separate businesses.
By using Trading Names Management, you can maintain distinct brand identities while keeping all data and operations centralized—providing a strategic advantage and streamlined workflow.
How to Create a New Trading Name
With OctopusPro, creating a new trading name is as simple as filling in a form. Follow these steps to add a new trading name:
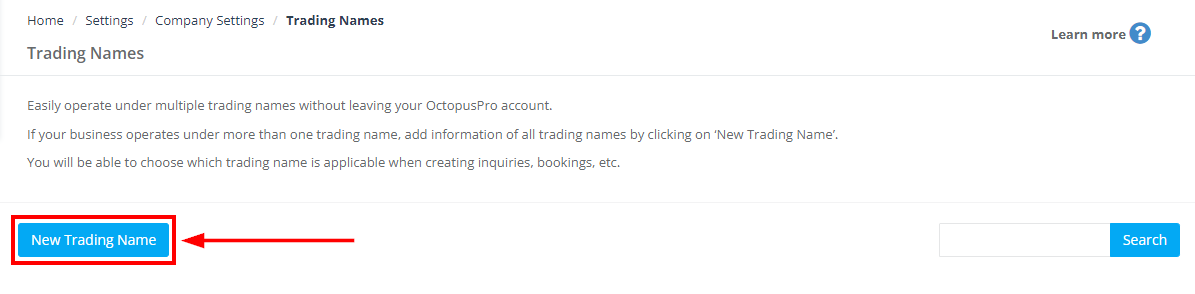
- Navigate to “Settings” from the admin user web view.
- Click on “Company Settings”.
- Select “Trading Names”.
- Click on “New Trading Name”.
 Fill in the necessary details: Trading Name, Promotional Text, Website URL, Phone, Email, Color, and Logo.
-
- Trading Name: Enter the desired trading name that your business will operate under. This should be unique and relevant to the services your business offers.
- Promotional Text: Craft a compelling message that encapsulates your business ethos related to the specific trading name. This text will represent your business and should be engaging to attract potential clients.
- Is Default: By checking this box, you establish the current trading name as your default. This means it will be automatically selected for all business operations unless you choose otherwise.
- Website URL: Input the specific URL of your business website associated with this trading name. This helps in directing your customers to the correct platform.
- Customer Portal URL: A dedicated domain or subdomain for booking pages specific to this brand. If left empty, the main company portal is used.
- Phone: Provide a phone number that corresponds to this particular trading name. It’s essential to ensure the contact details align with the respective trading name for seamless communication.
- Email: Type in the designated email address for this trading name. Upon clicking ‘authenticate email’, a verification email will be dispatched to your provided address. To complete the process, click the link within the verification email. Your status will show as ‘pending’ until the verification is complete.
- Color: Choose a color that will represent your trading name. OctopusPro offers a palette of options ranging from Basic Colors, Saved Colors, to Advanced Colors, ensuring you find the perfect hue to match your brand’s aesthetics.
- Logo: Upload the logo that corresponds to your trading name. Click on ‘Choose File’ to select an image or file from your device. Remember, the logo is a vital part of your brand identity; make sure it is distinctive and high-resolution.
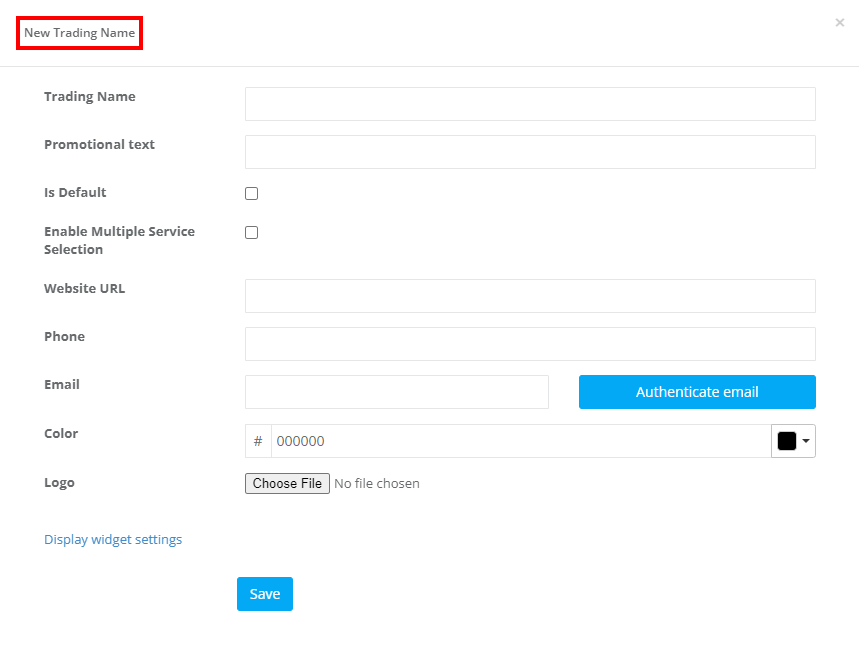
Click “Save” to complete the process.
Customizing Inquiry Forms for Each Trading Name
A major highlight of OctopusPro’s multiple trading names feature is the ability to personalize the customer interaction for each trading name with custom inquiry forms. Here is how you can harness this functionality to deliver an engaging customer experience:
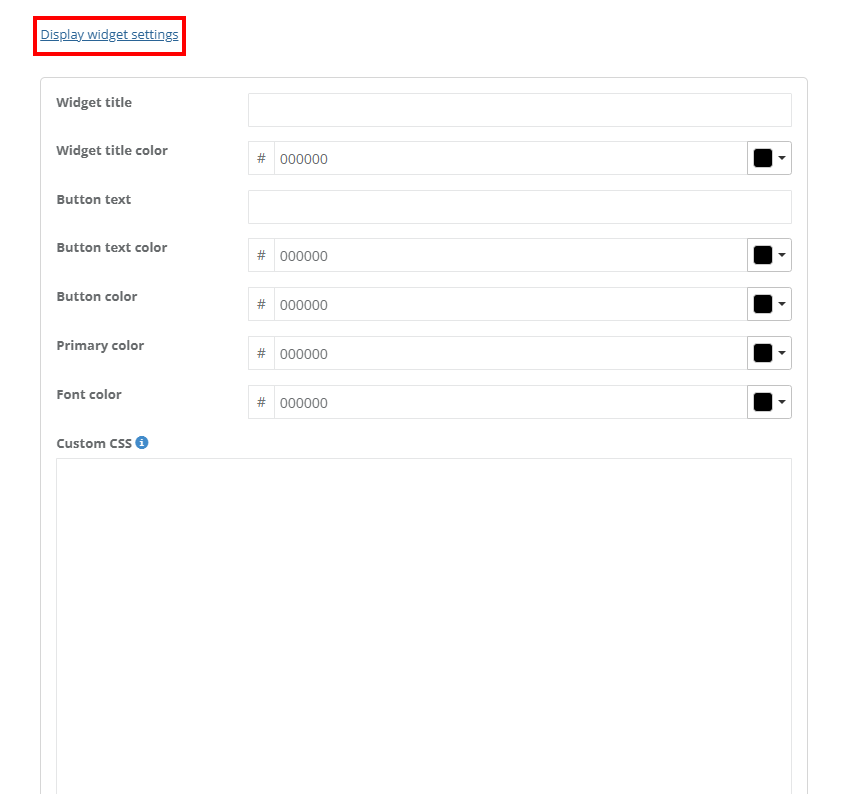
As you add a new trading name in OctopusPro, there’s an option to ‘Display widget settings’. This is where you can make changes to the style of your inquiry form and truly make it your own.
- Widget title: The inquiry form’s title is an important aspect of your customer interaction. It sets the tone and makes an instant impression. You can adjust this title from the first box, to reflect the specific trading name. For example, you might opt for ‘QUICK INQUIRY’ for your speedy cleaning services under ‘Sparkling Clean Homes’.
- Widget title color: OctopusPro provides a color picker tool, allowing you to select the color that matches your individual brand identity for each trading name.
- Button text: This is the text in the button that the customer clicks on to submit their inquiry. Personalize this, for example, to ‘GET QUOTE’ to enhance engagement.
- Button text color & Button Color: You have the freedom to change your button’s text color and the button’s color itself to align with your website’s theme and specific trading name’s aesthetics.
- Primary Color: Choosing a primary color establishes the color scheme for your specific trading name. This color will be used for the submit button background, title color, and border, helping to distinguish each trading name’s inquiry form from the others.
- Font Color: OctopusPro lets you select the font color for the text in your inquiry form, adding an extra layer of customization.
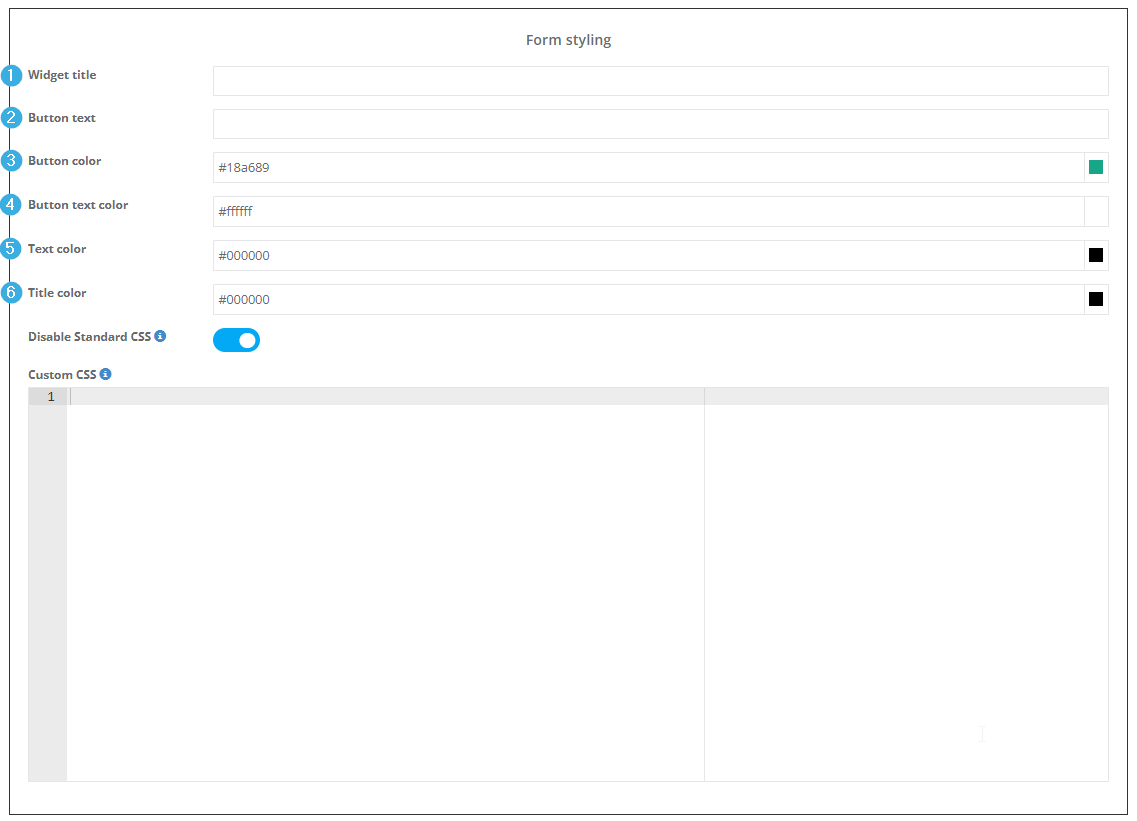
Custom CSS: For advanced customization, OctopusPro allows you to make changes to the theme features of your inquiry widget form using Custom CSS. This enables you to go beyond the basics and truly align the form’s layout and appearance with your brand style. You can modify elements like fonts, colors, and buttons to match your unique brand aesthetic.
To apply these changes, you just need to paste your CSS code in the designated box and click Save.
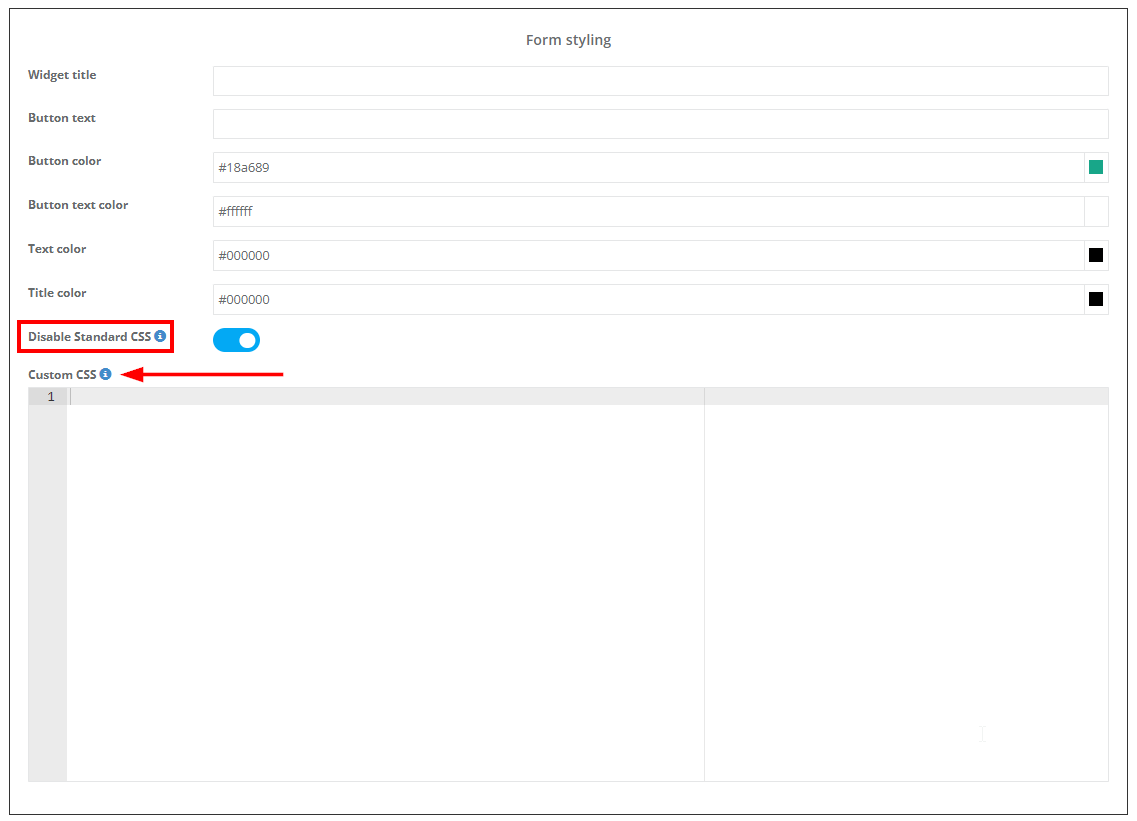
Please note that you should use standard CSS codes and OctopusPro’s pre-assigned classes to override the default style. For example, using .octopuspro_form.octopuspro_form_form-control {color:red; } will override the input text color.
By customizing inquiry forms for each trading name, you deliver a consistent brand experience that strengthens your business identity, boosts customer engagement, and paves the way for increased conversions.
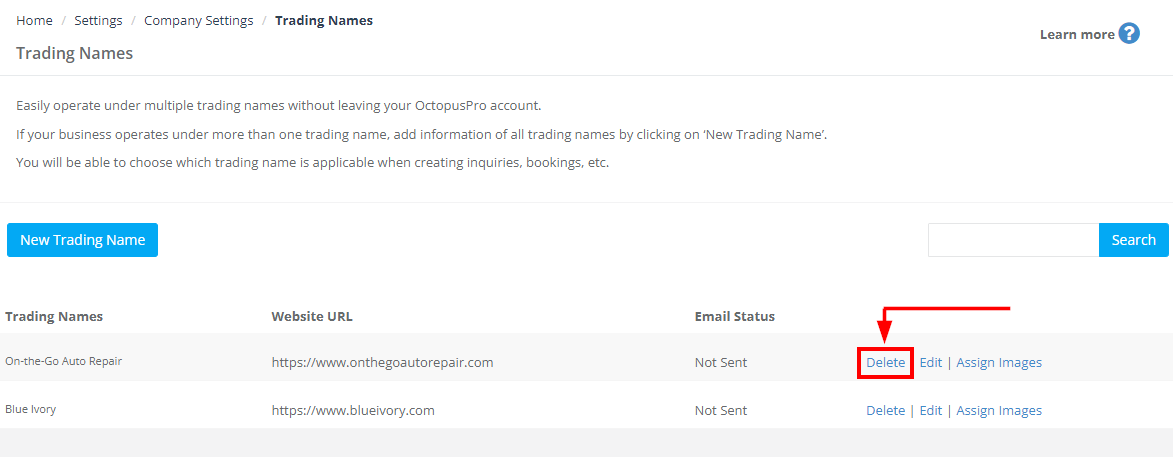
Deleting Existing Trading Names
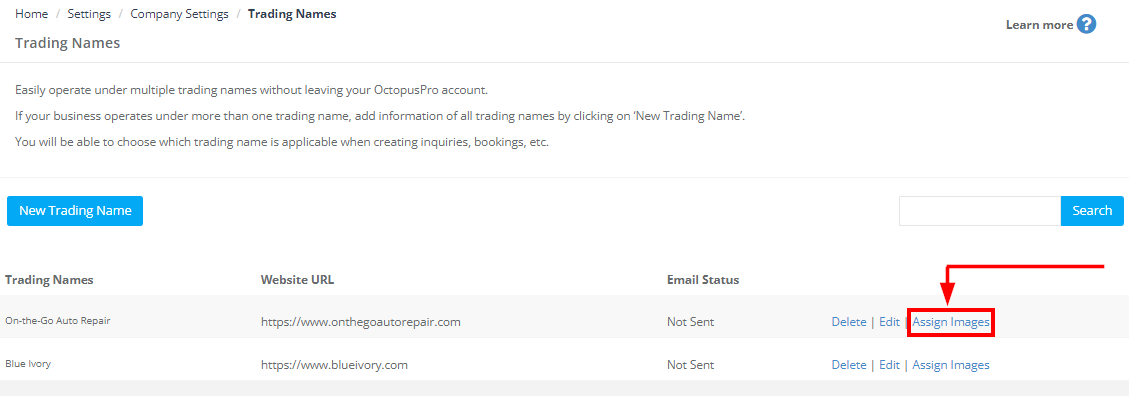
- Navigate to the trading names list from the “Trading Names” settings page.
- Click on “Delete” to remove it.
Editing and Updating Existing Trading Names
Once your trading names have been created in OctopusPro, you aren’t locked in – you have full control to edit and update them as your business evolves. Whether you need to modify the promotional text, adjust the website URL, or change the trading name altogether, OctopusPro makes it quick and easy. Here’s how:
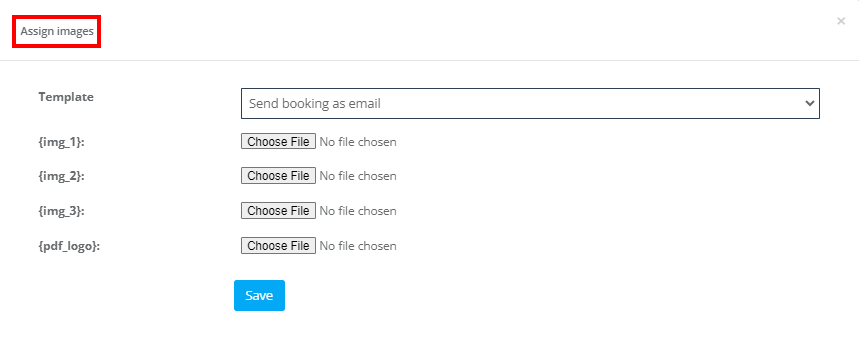
On the “Trading Names” settings page, you’ll see a list of all your established trading names. Alongside each name, there are options to “Edit”, “Delete”, or “Assign Images”.
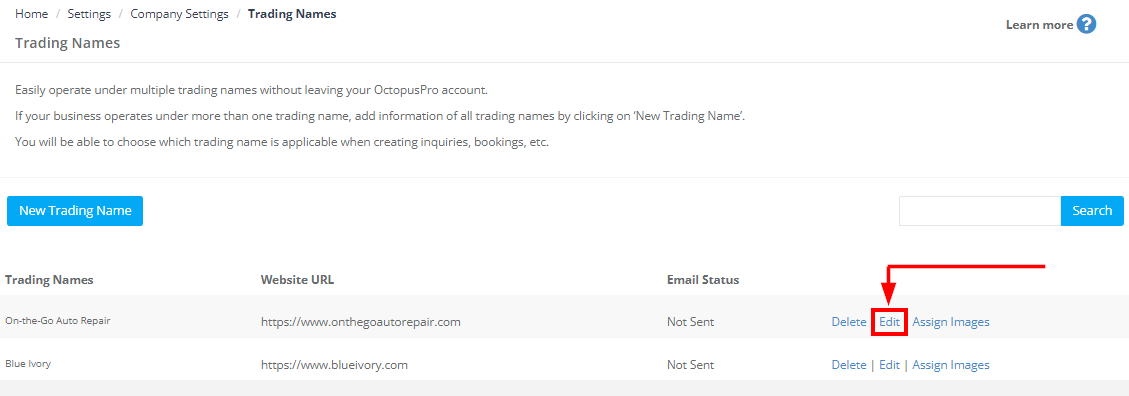
To make changes to a specific trading name, simply click on “Edit”. This will bring up the same form you filled out when you initially created the trading name. You can now adjust any of the details as required:

Aside from editing, you also have the option to delete a trading name that is no longer in use. Just hit the “Delete” button next to the relevant trading name.
Remember, with OctopusPro, you have the flexibility and control to adapt your trading names to meet your changing business needs. Managing your multiple trading names is seamless and efficient, allowing you to focus on what matters most – growing your business.
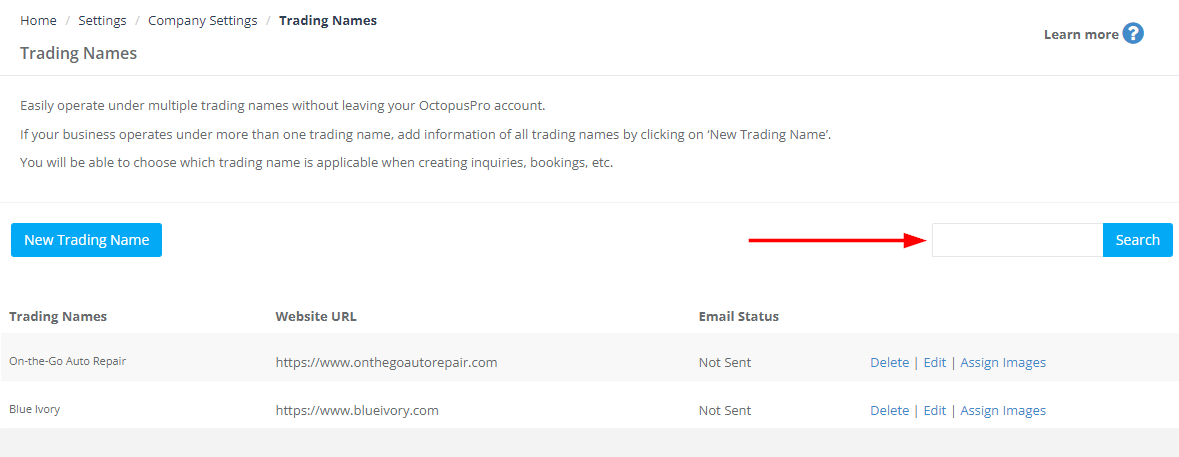
How to Switch Between Existing Trading Names
Switching between trading names is effortless with OctopusPro:
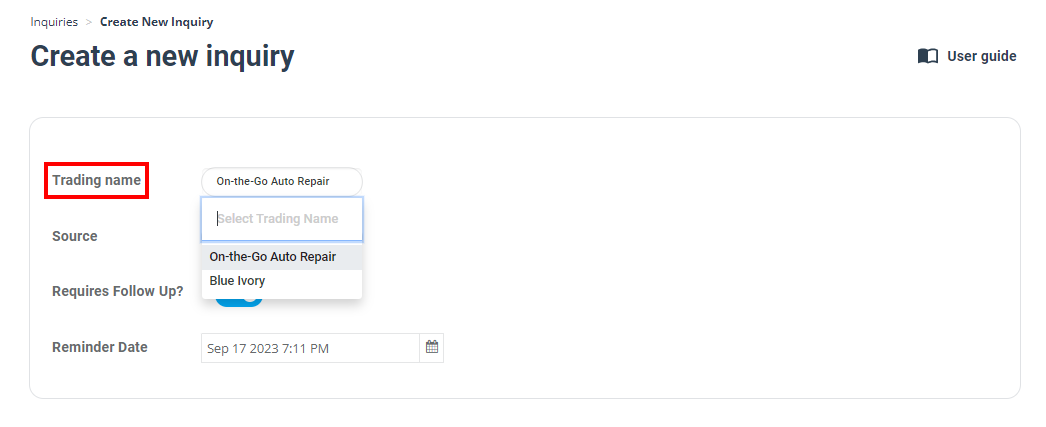
- When creating a new inquiry, booking, quote, invoice, customer, or gift card, simply select the desired trading name from the dropdown menu.
- If you do not select a trading name, the default trading name will be automatically used.
Impact on Customer Communications
Operating under multiple trading names in OctopusPro not only streamlines your business segmentation—it also tailors all customer communications to reflect each brand’s identity. Outgoing messages such as quotes, booking confirmations, invoices, and PDFs are automatically customized to match the trading name linked to the transaction, ensuring brand consistency without the need for separate templates.
Quotes, Booking Confirmations, and Invoices
When a customer receives a quote, confirmation, or invoice, the content dynamically adjusts to display the appropriate trading name. For example, if you operate a domestic cleaning service as “Sparkling Homes” and a corporate service as “Pristine Office Cleaners,” customers will receive communications that reflect the brand they engaged with. This automated branding enhances professionalism and builds customer trust.
Dynamic Templates, PDFs, and Placeholders
Your communication templates use dynamic placeholders to pull trading name–specific details—such as logos, contact information, and color schemes—directly from your settings. This approach eliminates the need for multiple templates while ensuring each message is fully branded for the specific trading name.
Branding and Visual Identity
Customize unique branding elements (logos, images, and color schemes) for each trading name. These visuals automatically appear in all customer communications, reinforcing your distinct brand identity and elevating your professional appeal.
Summary
By leveraging multiple trading names, you can provide personalized, brand-consistent communications across all channels—enhancing the customer experience and simplifying administrative processes through adaptable templates.
Related FAQs
Can I Create Distinct Customer Portals for Various Trading Names Within a Single Account?
Yes, you can configure unique customer portal URLs for different trading names within a single OctopusPro account—provided your DNS records are set up correctly. For example, you might have:
Each URL will direct customers to the same core customer portal, but with customized branding (such as logos, color schemes, and inquiry widget styles) specific to that trading name. This allows you to maintain distinct brand identities and deliver tailored customer experiences while managing everything centrally.
If you need assistance setting up separate customer portal URLs, please contact our support team for guidance on configuring your DNS records and ensuring the portals function as intended.
How Does My Customer Portal Handle Multiple Trading Names?
OctopusPro supports managing multiple trading names within a single account, allowing each sub-brand to maintain its own distinct identity. By default, the primary trading name is used if no custom portal URL is set. However, if you configure unique customer portal URLs for each trading name (with the necessary DNS settings and our support’s assistance), customers accessing those URLs will see the specific branding for that sub-brand. All outbound communications—such as booking confirmations, reminders, and invoices—will automatically reflect the branding (logo, colors, images, etc.) associated with the trading name in use. This ensures a consistent, personalized experience for customers across all your brands while keeping management centralized.
Can fieldworkers be assigned to specific trading names when multiple trading names are configured for my business?
While fieldworkers can be assigned to specific services and custom fields within your settings, they cannot be directly assigned to individual trading names set up for your company. However, you can manage your fieldworkers’ assignments indirectly by associating them with specific services or custom fields related to a particular trading name. This approach allows you to ensure that your fieldworkers are aligned with the appropriate trading names for your business operations.
To stay updated, please subscribe to our YouTube channel.