
Authorize.Net Payment Gateway Integration (API Setup)

Authorize.Net is a payment gateway (US-based) that enables businesses to accept credit card payments and eCheck (ACH) payments online and for card-not-present transactions. When connected to OctopusPro, you can accept payments through your Customer Portal checkout, invoice payment links, and when admins/fieldworkers process payments against invoices.
Table of contents
- Authorize.Net vs Stripe / Square and other gateways
- What you can do with Authorize.Net in OctopusPro
- Before you start (requirements)
- Step 1: Enable Authorize.Net in OctopusPro
- Step 2: Find your API Login ID
- Step 3: Generate a Transaction Key
- Step 4: Get your Public Client Key
- Step 5: Show card payments in the Customer Portal (two-step activation)
- Where Authorize.Net appears in OctopusPro
- Testing checklist (recommended)
- Troubleshooting
- Security and best practices
- FAQ
- Related guides
Authorize.Net vs Stripe / Square and other gateways

Many providers are casually called “payment gateways”, but there’s a key difference in how they’re typically structured:
Authorize.Net (gateway-first model)
Authorize.Net is primarily a payment gateway. A gateway securely transmits payment data and requests authorization from your payment processor / acquiring bank. In many setups, you’ll also need a merchant account (through a bank or merchant services provider) to settle funds.
Best when: you already have merchant services, want flexibility with processors, or prefer a classic gateway model.
Stripe and Square (all-in-one payments platforms)
Stripe and Square typically offer an all-in-one payments stack (gateway + processing + settlement) under one provider. This often means faster onboarding and fewer separate vendor relationships.
Best when: you want a simpler “plug in and go” setup with one provider handling most of the payments stack.
Quick rule of thumb:
If you want fast setup with one vendor, Stripe/Square often feel simpler.
If you want a gateway that can integrate into a broader merchant services arrangement, Authorize.Net is usually a better fit.

What you can do with Authorize.Net in OctopusPro
- Take payments online during booking checkout (Customer Portal)
- Collect payments on invoices via invoice payment links
- Record/process payments against invoices (admin/fieldworker workflows, depending on permissions)
- Saved cards (customers can store a payment method and reuse it for future bookings)
Before you start (requirements)
1) An Authorize.Net account
You’ll need access to your Authorize.Net Merchant Interface.
2) Merchant account requirement (important)
Depending on your setup, Authorize.Net may require you to have a merchant account. A merchant account is a banking arrangement that enables your business to accept card payments and settle funds.
3) Your Authorize.Net API credentials
OctopusPro requires the following values:
- API Login ID
- Transaction Key
- Public Client Key
Security note: Treat your API Login ID and Transaction Key like passwords. Only admins who manage payments should have access.
Step 1: Enable Authorize.Net in OctopusPro
- Log in to your OctopusPro admin account.
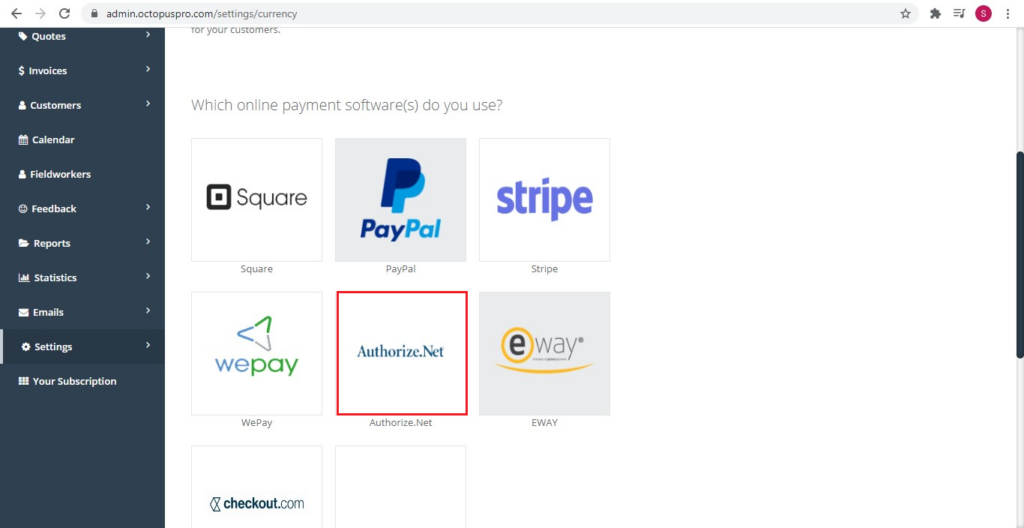
- Go to Settings → Financial Settings → Payment Integration.
- Select Authorize.Net from the list of online payment gateways.
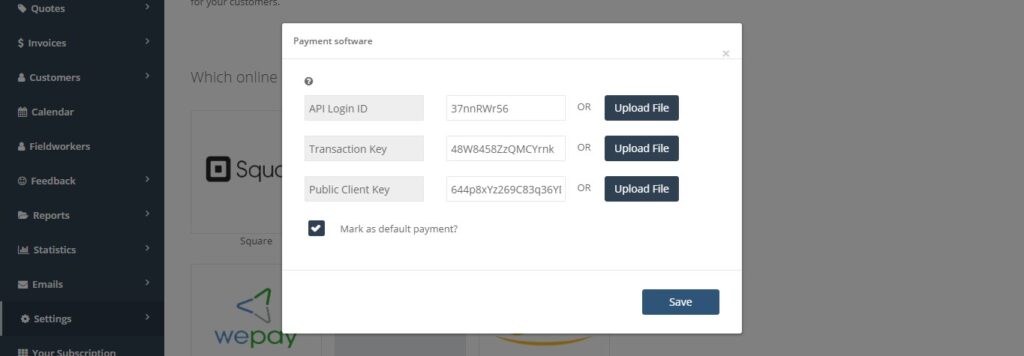
- When the setup pop-up appears, enter:
- API Login ID
- Transaction Key
- Public Client Key
- Click Save.
Screenshot reference: “Authorize.Net logo highlighted in Payment Integration” + “Authorize.Net integration pop-up with the 3 required fields and Save button”.
Step 2: Find your API Login ID (Authorize.Net)
- Sign in to your Authorize.Net account.
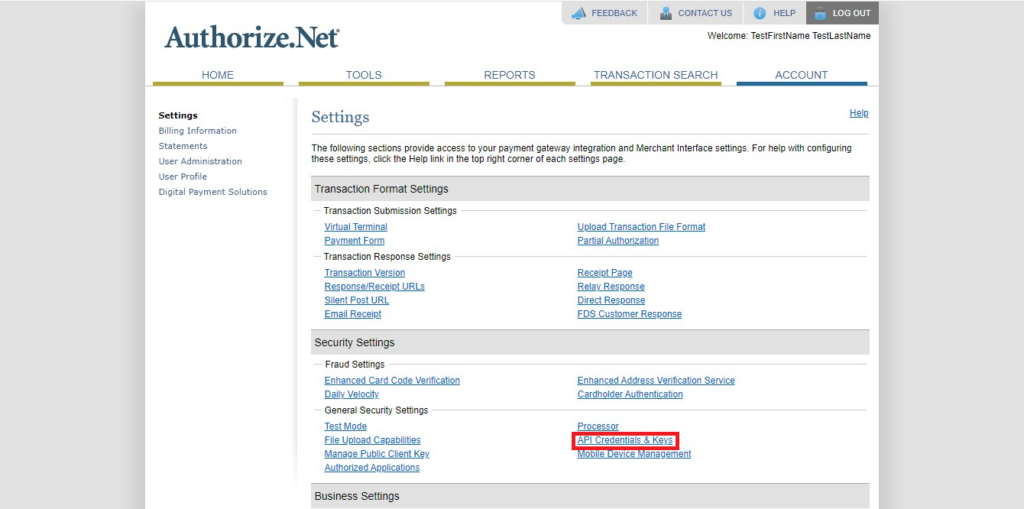
- Click Account (top navigation).
- Open API Credentials & Keys.
- Copy the API Login ID and paste it into the matching field in OctopusPro.

Step 3: Generate a Transaction Key (Authorize.Net)
- In Account → API Credentials & Keys, scroll to Create New Key(s).
- Click New Transaction Key.
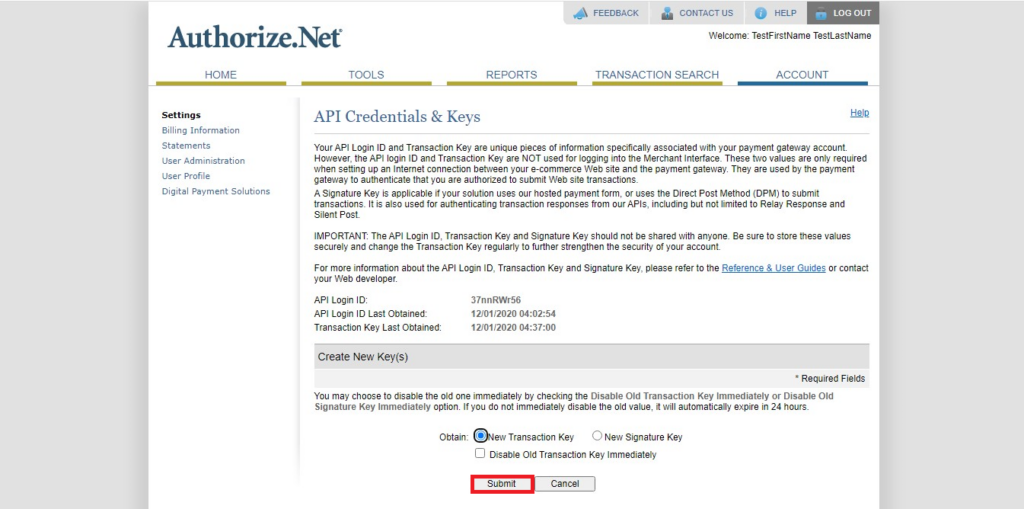
- Click Submit.
- Complete the verification step (PIN sent to your email).
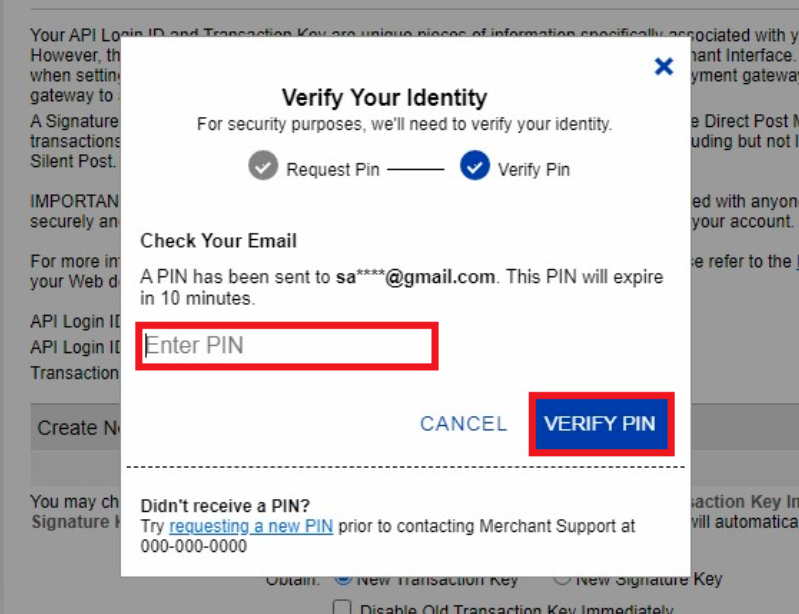
- Copy the generated Transaction Key and paste it into OctopusPro.

Tip: If you regenerate the Transaction Key later, you must update OctopusPro immediately—old keys will fail authentication.
Screenshot reference: “New Transaction Key + Submit button” + “Transaction Key page with Copy to Clipboard”.
Step 4: Get your Public Client Key (Authorize.Net)
The Public Client Key is used for secure client-side tokenization during checkout (so sensitive card data can be handled safely).
- In Authorize.Net, go to Account → Manage Public Client Key.
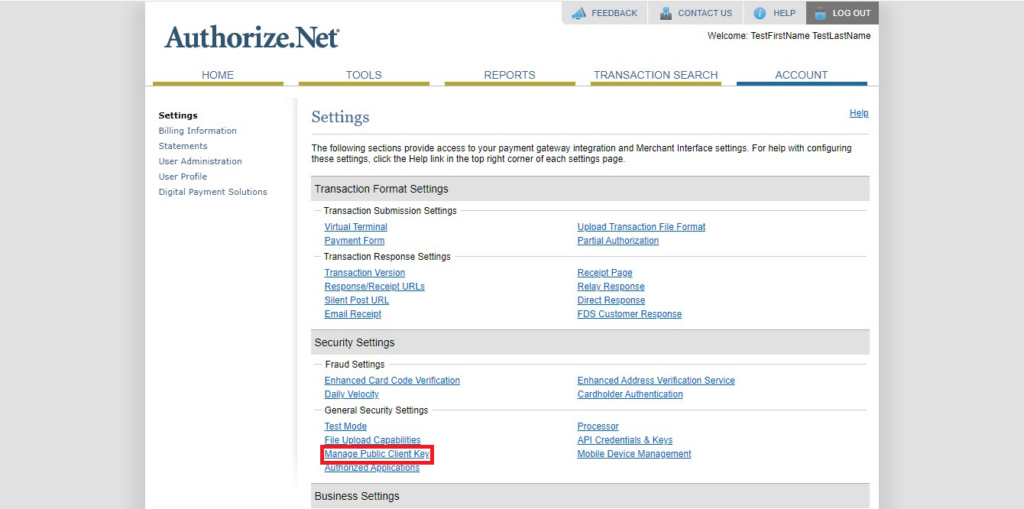
- Copy the Public Client Key shown on that page.
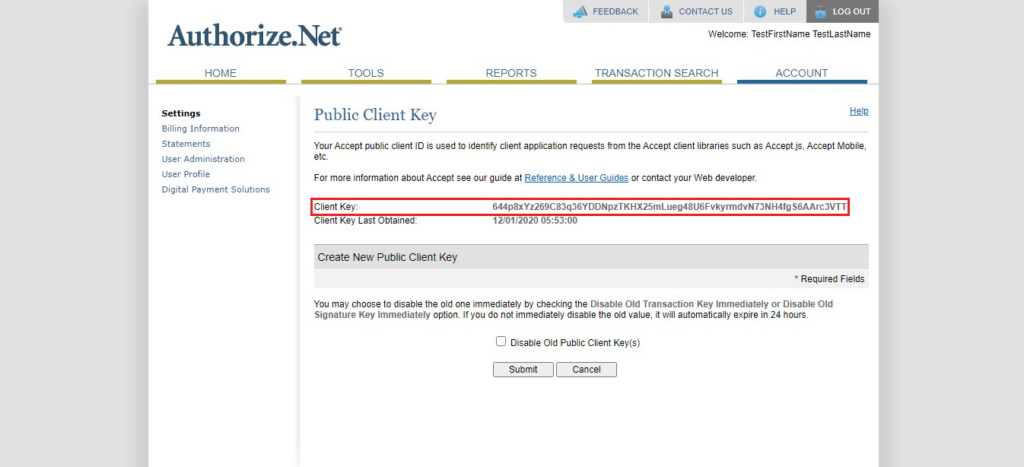
- Paste it into the matching field in OctopusPro and click Save.
Step 5: Show card payments in the Customer Portal (two-step activation)
Even after your gateway is connected, customers will only see the payment method at checkout if it’s enabled in two places:
A) Enable in Financial Settings
- Go to Settings → Financial Settings → Payment Integration.
- Ensure Card is enabled and Authorize.Net is configured.
- Click Save.
B) Enable in Customer Portal settings
- Go to Settings → Customer Portal → General Settings.
- Under Payment Methods, enable Card.
- Click Save and run a test booking to confirm checkout displays correctly.
Common issue: If card payments aren’t visible at checkout, it’s usually because “Card” is enabled in one place but not the other.
Where Authorize.Net appears in OctopusPro
Admin portal (Invoices)
After integration, the Authorize.Net logo appears when admins add/process payments against invoices.
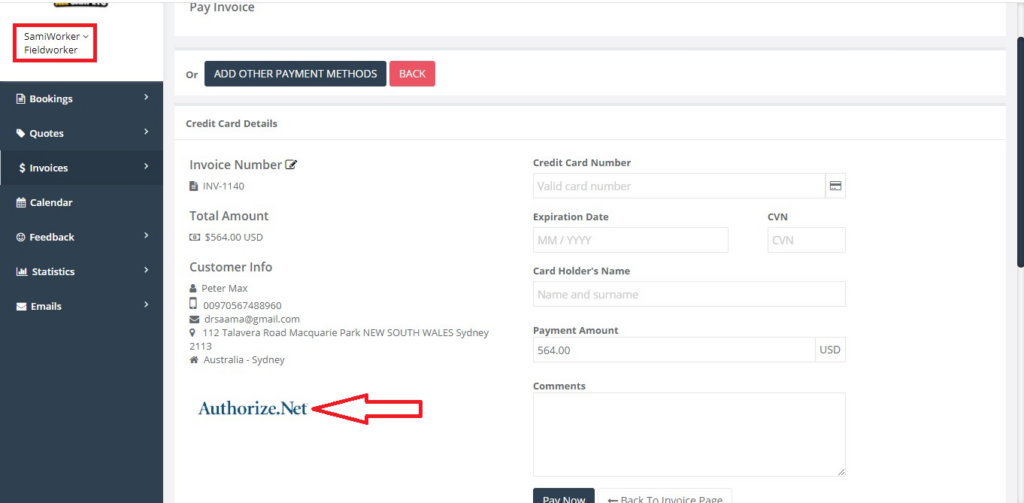
Fieldworker portal/app (if permitted)
Fieldworkers may see and process payments depending on your permissions and enabled payment methods.
Customer Portal: saved cards (Payment Methods)
Customers can save a card for faster future checkouts:
- Customer logs into the Customer Portal.
- Go to My Bookings → Payments.
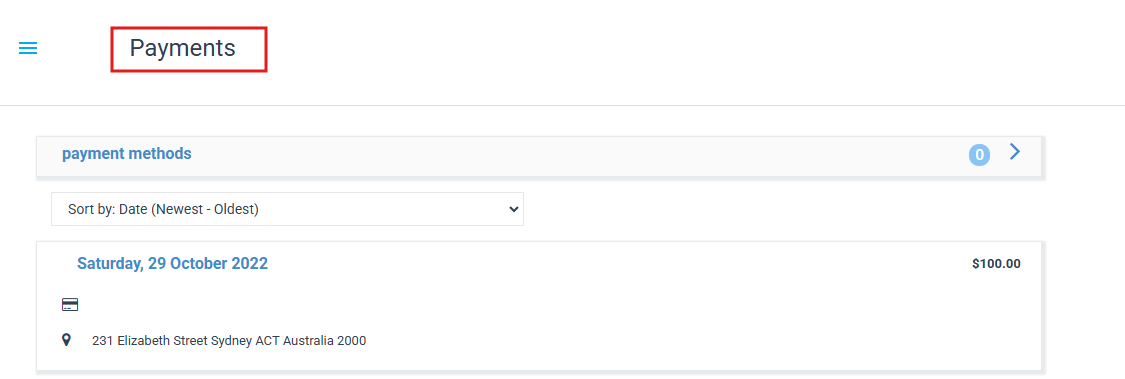
- Click Payment Methods.
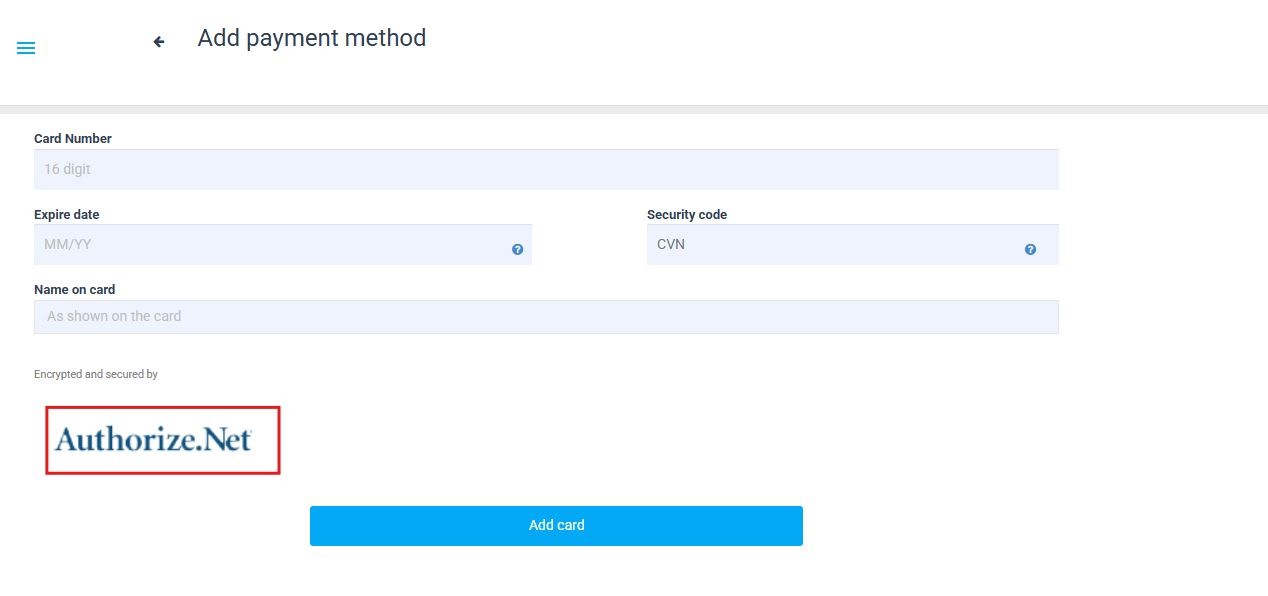
- Click + Add a new payment method.
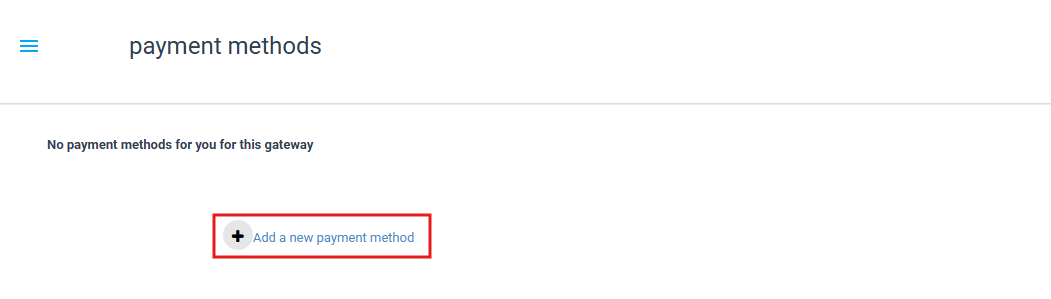
- The secure card entry page opens and the Authorize.Net logo is displayed.
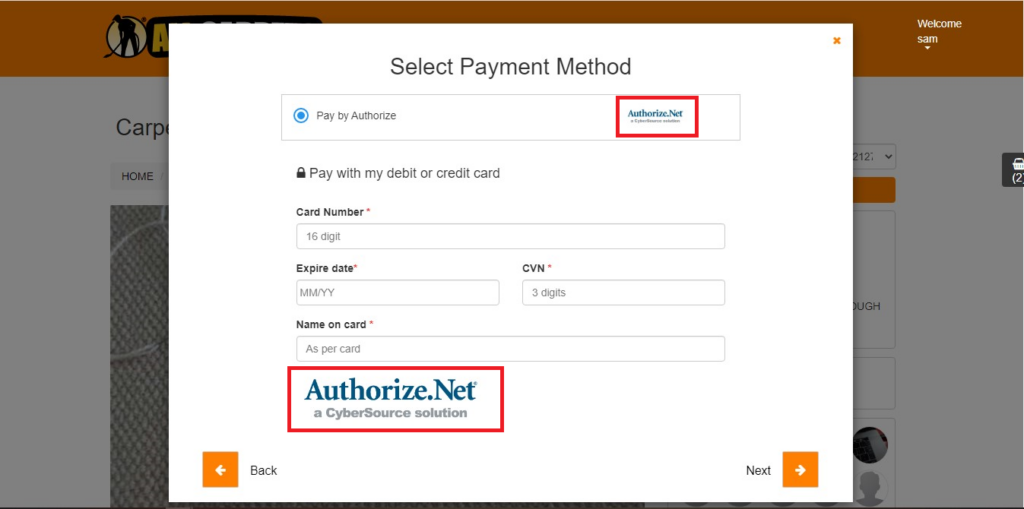
Customer Portal: booking checkout
During booking checkout (guest or logged-in), customers see Authorize.Net branding under Select Payment Method / Pay by Card.
Testing checklist (recommended)
- Confirm keys are saved correctly in Settings → Financial Settings → Payment Integration.
- Enable Card in both Financial Settings and Customer Portal settings.
- Create a test invoice or a test booking and attempt a small card payment.
- Confirm the payment:
- Is recorded against the invoice/booking
- Creates a payment record/reference
- Updates the outstanding balance correctly
Troubleshooting
Payment method not showing at checkout
- Confirm the two-step activation:
- Settings → Financial Settings → Payment Integration (Card enabled + gateway configured)
- Settings → Customer Portal → General Settings (Card enabled under Payment Methods)
Card payments failing / invalid credentials
- Re-check that each value is pasted into the correct field (no extra spaces):
- API Login ID
- Transaction Key
- Public Client Key
- If you regenerated the Transaction Key, update OctopusPro with the new one.
Can’t find the Public Client Key in Authorize.Net
- Go to Account → Manage Public Client Key.
Staff can’t take payments
- Check user role permissions for invoices/payments (admins vs fieldworkers).
- Confirm the payment method is enabled and available for that staff role.
Security and best practices
- Limit access to API credentials to trusted admins only.
- Rotate keys if credentials are exposed, and update OctopusPro immediately.
- Use strong admin passwords and enable 2FA where available.
- For testing, use a sandbox/test environment if your payment provider supports it (and switch to live keys for production).
FAQ
Do I need a merchant account for Authorize.Net?
Often yes. Many Authorize.Net configurations require a separate merchant account with a bank/processor. Your exact requirement depends on your plan and provider setup.
Why does OctopusPro need a Public Client Key?
The Public Client Key is typically used for secure client-side tokenization during checkout (reducing exposure of sensitive card data and supporting PCI-aligned payment flows).
Can customers save their card for faster checkout?
Yes, if saved payment methods are enabled in your Customer Portal experience. Customers can add a payment method under My Bookings → Payments → Payment Methods and reuse it for future bookings.
Related guides
- Payment methods (overview)
- Customer Portal payment methods
- Stripe API Integration
- Square API Integration
- PayPal API Integration
To stay updated, please subscribe to our YouTube channel.