
Customer Portal Profile Management
Your OctopusPro Customer Portal gives customers a secure, self-service space to manage their account, update their profile, store payment methods, and keep track of bookings—without needing to call or email your office. When customers keep their details up to date, it speeds up repeat bookings, reduces admin work, and helps you deliver a smoother customer experience.

Note: What customers can see and manage in the portal depends on what your business has enabled (e.g., payments, gift vouchers, messaging, profile fields, and permissions).
What customers can do from their profile
- Create an account & sign in securely using email/password, Google, Facebook, Apple ID (iOS app), or a booking number for guest access.
- Manage account details by updating name, phone and email, uploading a profile picture, and changing/resetting the password.
- Add and manage additional contacts (e.g., partner, assistant, receptionist, site contact) and choose which contact should be used for specific bookings and updates.
- Save addresses and locations (home, office, job sites) to reduce errors and auto-fill booking details during checkout.
- Capture custom fields (optional) such as dietary requirements, pool volume, gender, blood type, height, access instructions, or any other data your business needs—helping you quote accurately and deliver service without back-and-forth calls.
- Manage dependents / assets (optional) by storing linked profiles or service objects (kids, pets, boats, properties, repeat addresses, equipment like forklifts)—so one customer login can book and pay for multiple dependents/assets with cleaner billing.
- Create business profiles to book under different companies/branches and ensure invoices and billing details match the correct entity.
- Save payment methods (where enabled) for faster checkout, deposits, and repeat/recurring bookings—without re-entering card details each time.
- View bookings and documents including upcoming and past bookings, confirmations, invoices/receipts (if enabled), and portal notifications.
- Buy, view, and redeem gift vouchers/cards (if enabled), and track voucher status and usage history.
- Message your office via general chat or booking-specific chat to ask questions, share notes, and upload photos/attachments—keeping conversations linked to the job.
Table of contents
- Prerequisites & key settings
- Sign up & log in options
- Manage customer profile (My Account)
- Make a new booking
- View booking history
- Gift vouchers/cards
- Notifications
- Messaging (general + booking chat)
- Best practices & FAQs
Prerequisites & key settings
To use Customer Portal Profile Management, make sure your Customer Portal is enabled and configured for your business.
- Enable and set up your Customer Portal: Enable Online Bookings Through Your Website (Customer Portal Setup)
Tip: If you want customers to save payment methods, your payment configuration must support tokenised card storage and saving cards must be enabled (this is controlled by your payment gateway + your OctopusPro settings).
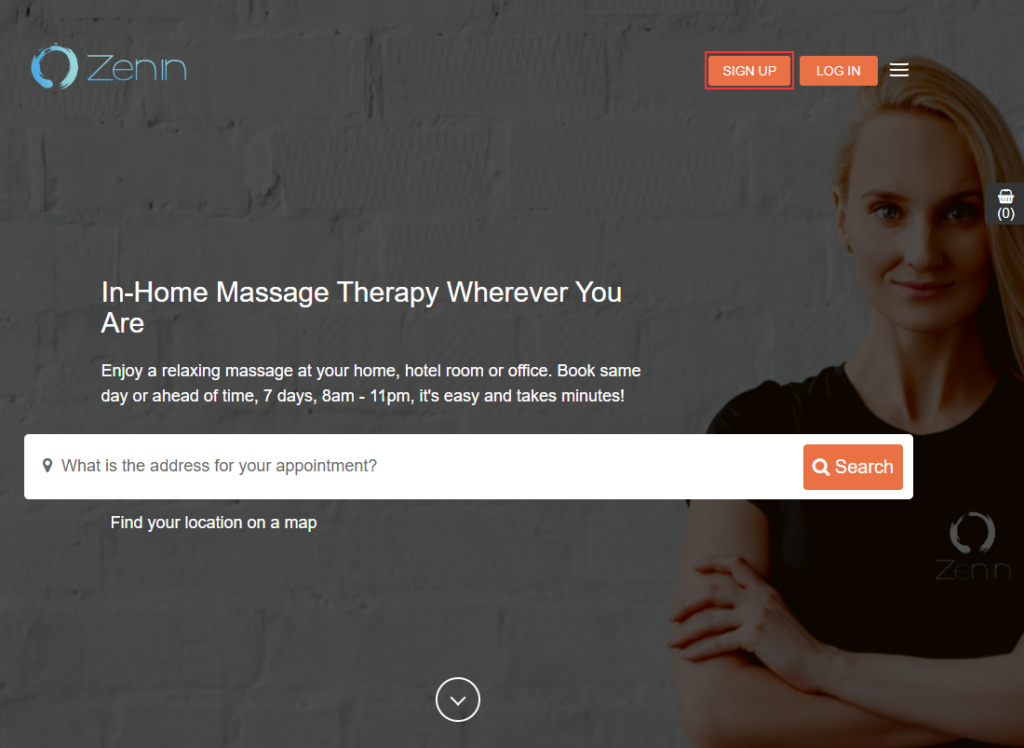
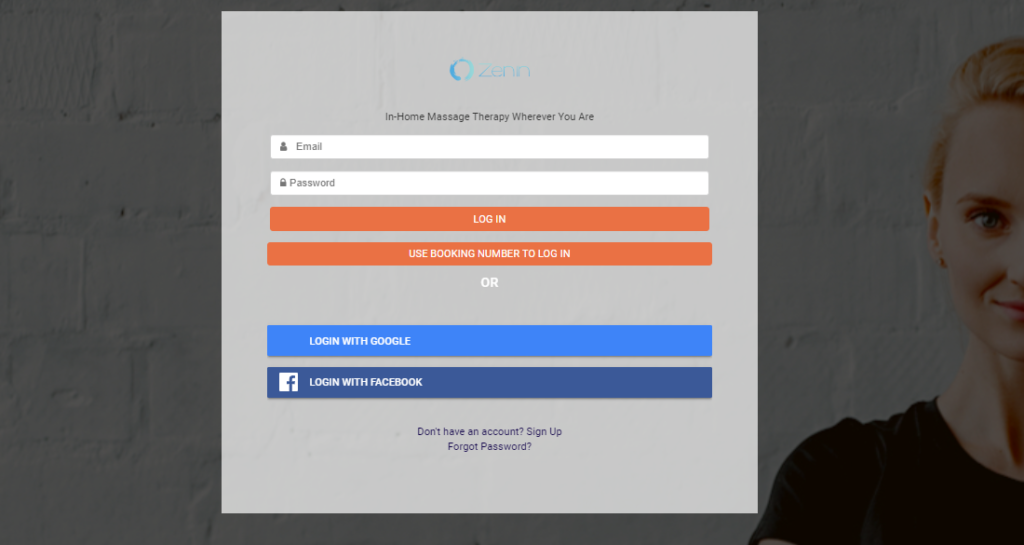
Sign up & log in options
Customers can access your Customer Portal using your portal URL. They can create an account (recommended) or, in some cases, access a booking using a booking number (guest access).
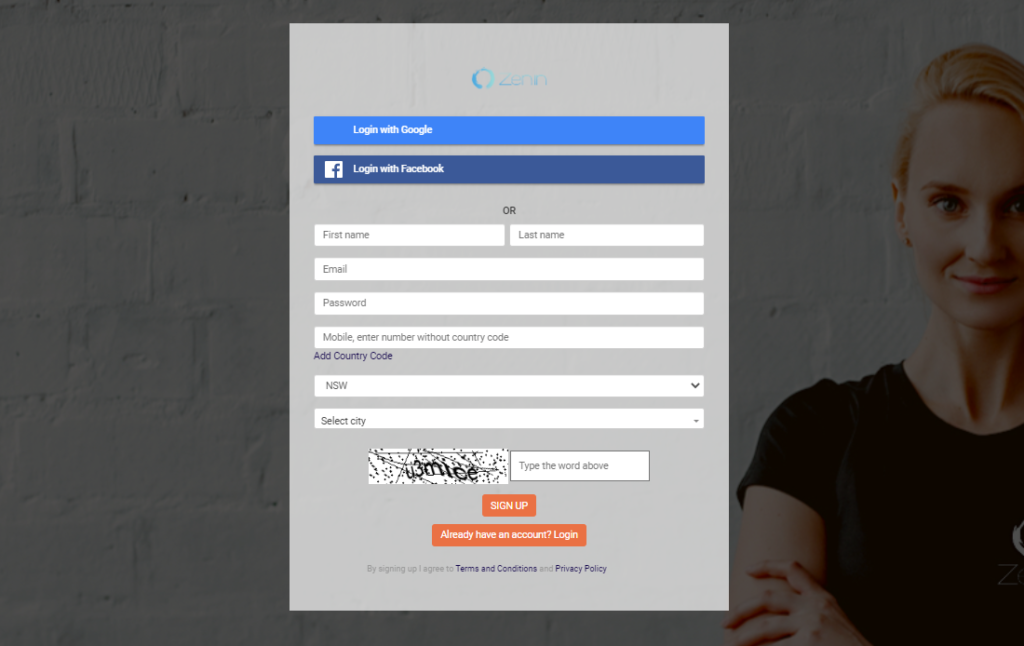
Sign up for a customer account
- Open your Customer Portal.
- Click Sign up.
- Enter the required details, then submit.
- If prompted, verify the account via email.
Log in using email
Customers can log in using the email address and password they used to sign up. If they forget their password, they can use the portal’s password reset option to regain access.
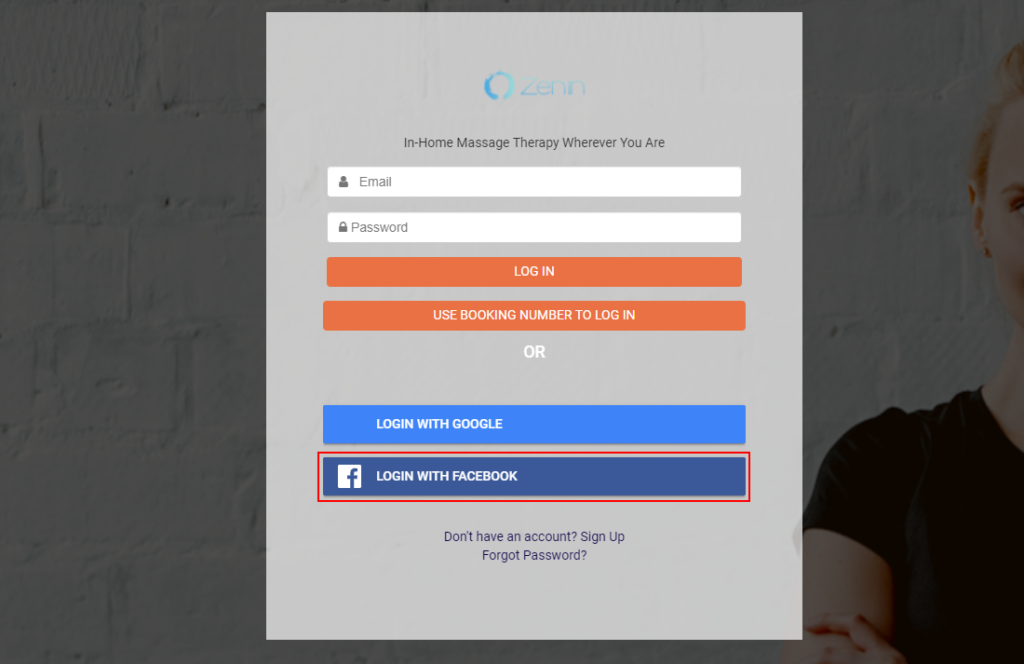
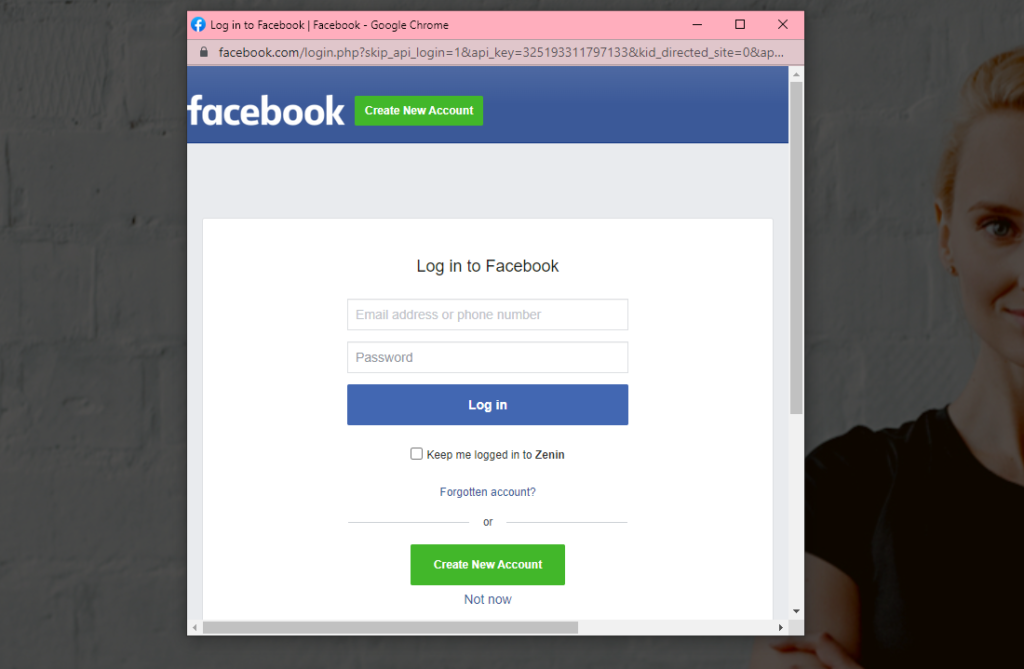
Log in using Google / Facebook
If enabled, customers can use social login options (Google / Facebook) from the login page.
Log in using Apple ID (iOS app only)
On the OctopusPro iOS app (iPhone/iPad), customers may be able to log in using Apple ID (depending on your app/portal configuration).
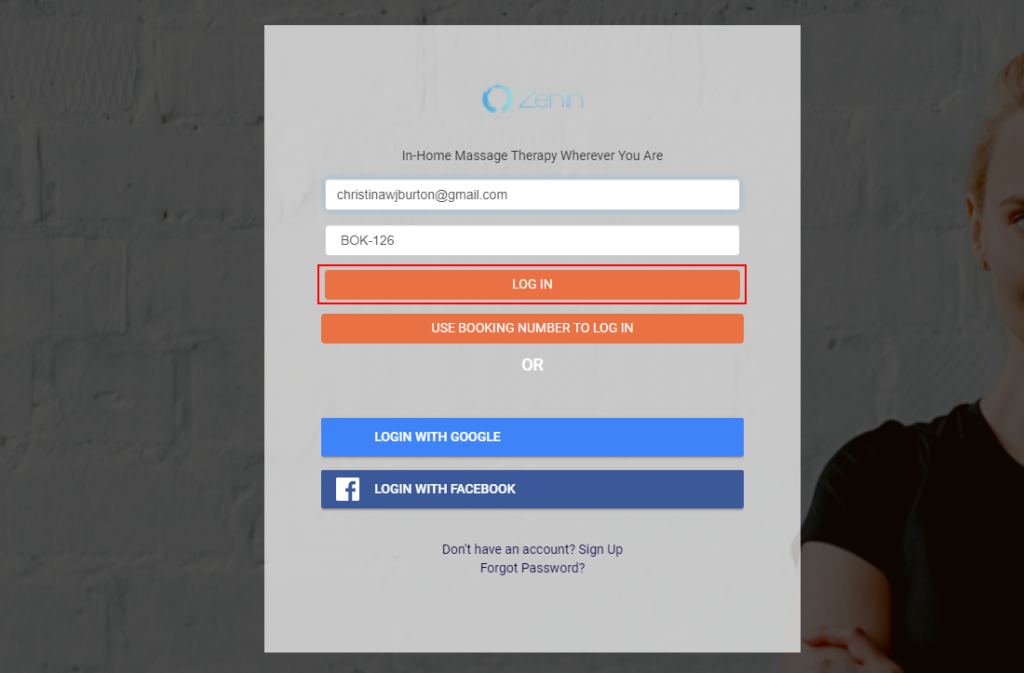
Log in using a booking number (guest access)
If a customer booked without creating an account, they can still access booking details using the booking number.
- Click Login from the Customer Portal homepage.
- Select Use booking number to log in.

Enter the email address used for the booking and the booking number, then click Log in.
Common use cases:
- Guest checkout / one-off customers
- Customers who need access to a single booking without creating an account
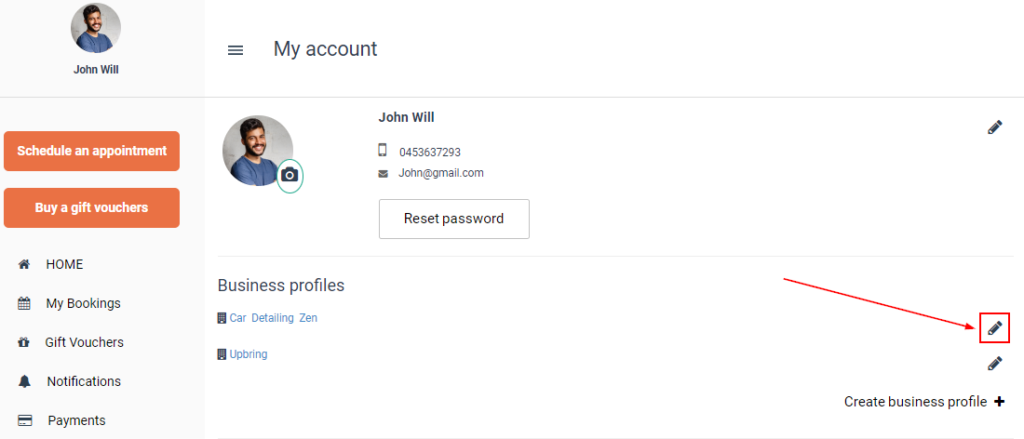
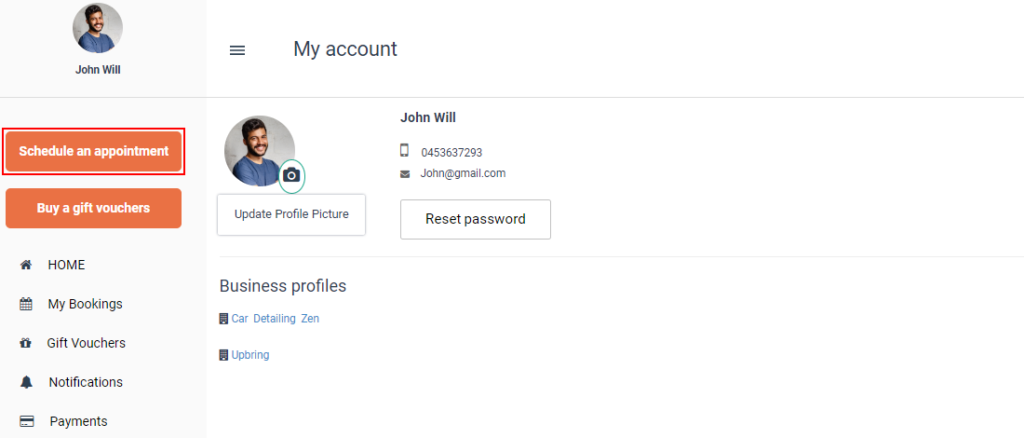
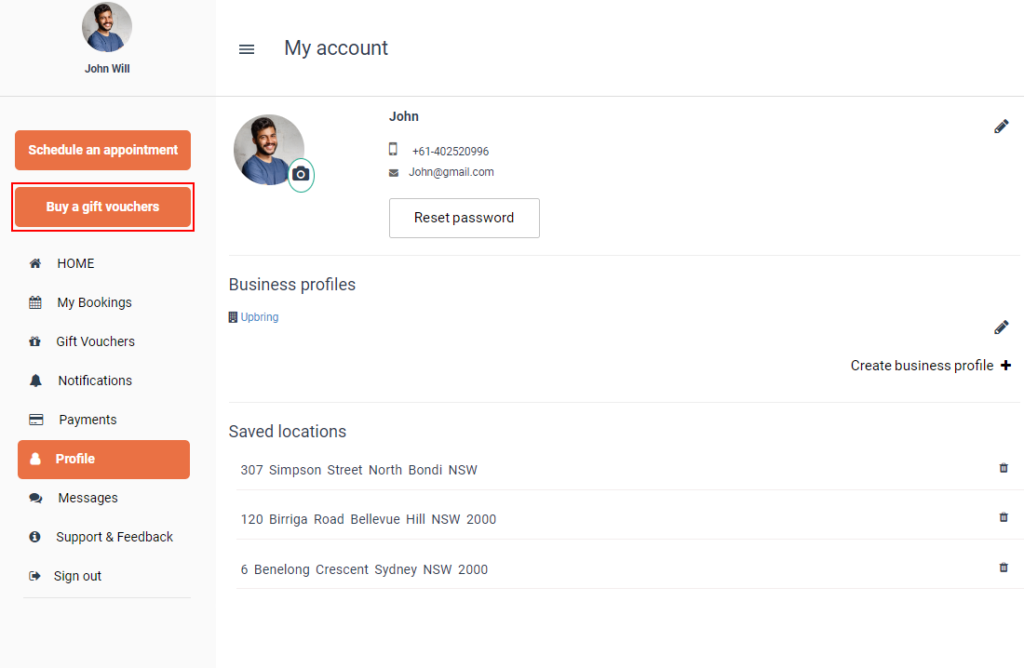
Manage customer profile (My Account)
After logging in, customers can manage their account via Profile (often labelled My Account). This is where customers update personal details, create business profiles, manage saved locations, and manage saved payment methods (where enabled).
Custom fields & dependents / assets (optional)
Depending on your configuration, the portal can collect extra customer data and manage linked profiles or assets. This helps your team quote accurately, deliver the right service, and keep billing clean—without extra calls or emails.
- Custom Fields: Capture any data point—dietary needs, pool volume, gender, blood type, —so you can assign the suitable fieldworker and avoid back-and-forth calls.
- Dependents / Assets: Store linked profiles (kids, pets, boats, forklifts, properties, assets, repeat addresses) under one customer login—making it easy to book services for multiple “service objects” and keep billing organised.
Example industries: Catering, pool care, auto detailing, vet clinics, childcare, kennels, equipment hire.
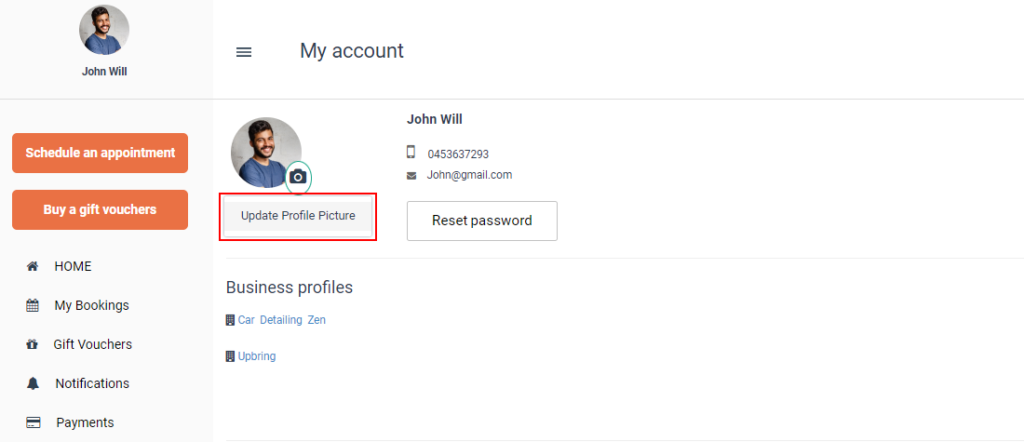
Update profile picture
- Go to Profile.
- Click the camera icon on the profile image (or the profile image area).
- Select Update Profile Picture and upload an image.
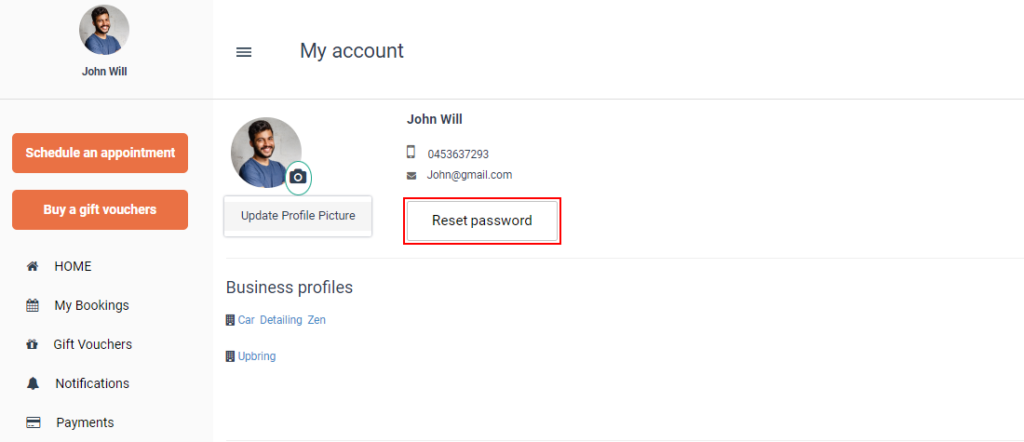
Reset password
Customers can reset their password from the My Account page by selecting Reset password and following the prompts.
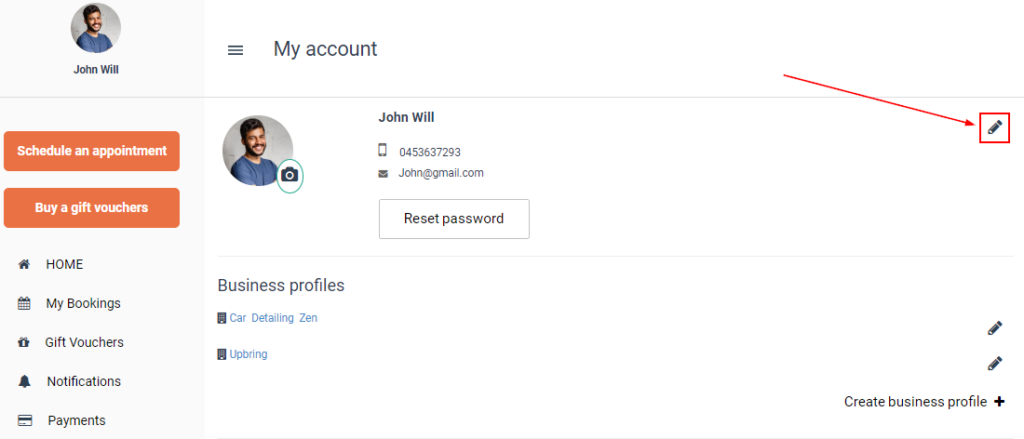
Edit personal details
Customers can update their personal information (name, phone, email) by clicking the edit icon.
- Go to Profile (My Account).
- Click the Edit (pencil) icon.
- Update the details, then click Save.
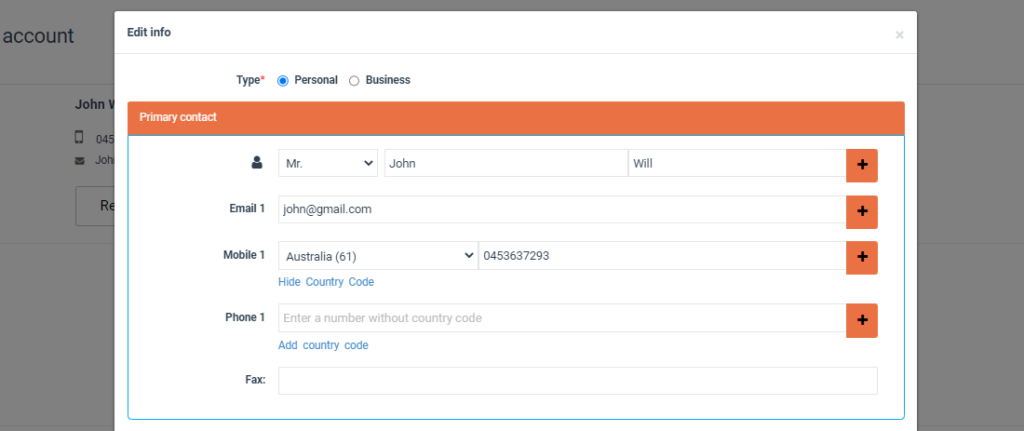
Tip: If your portal allows multiple emails/phone numbers, customers can add extra values using the + buttons (shown in the edit form).
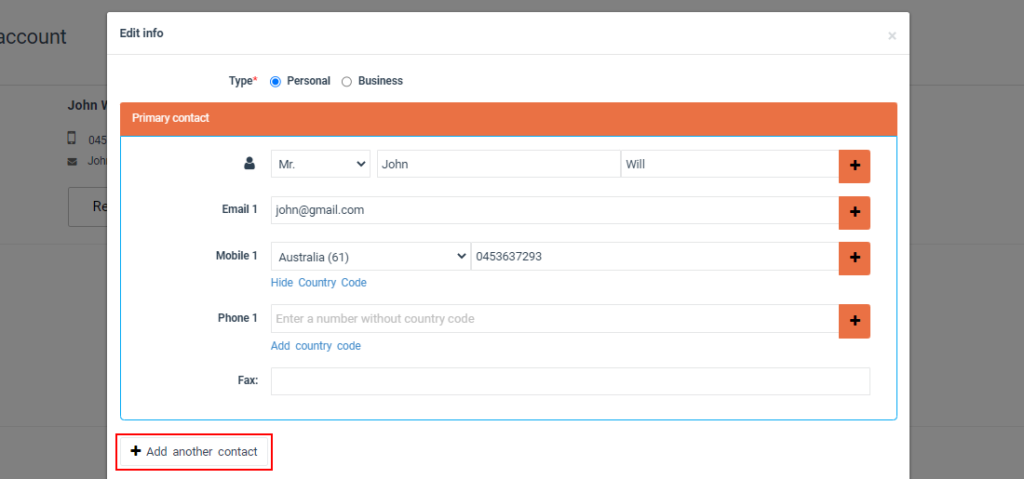
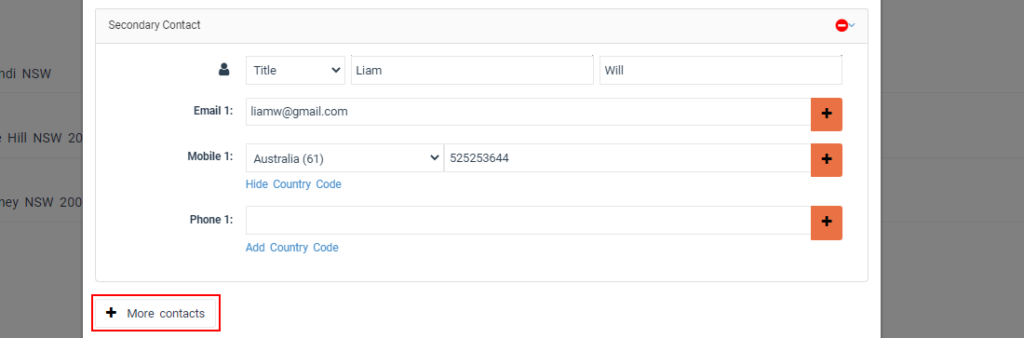
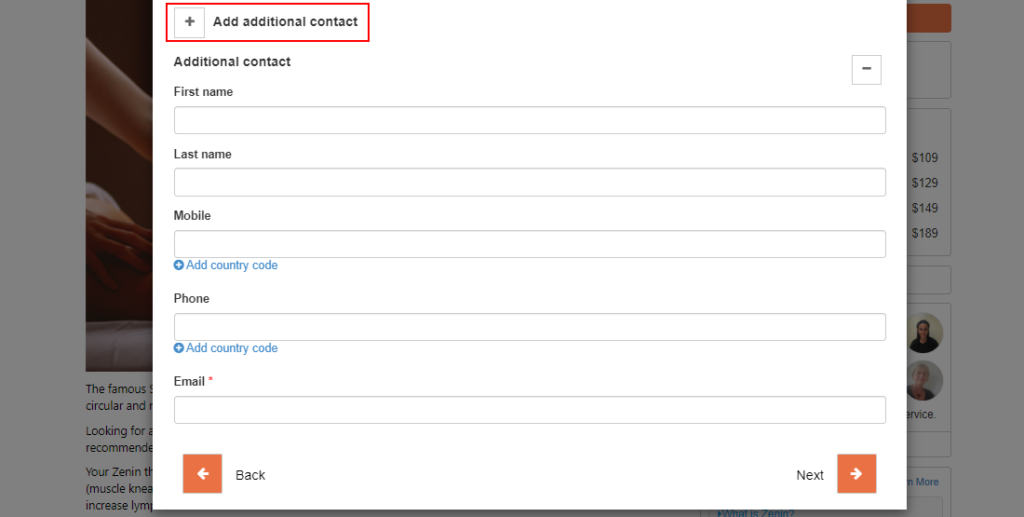
Add additional contacts
Additional contacts are useful when someone else needs to receive updates or coordinate access for the booking (e.g., receptionist, site manager, partner).
- Open the profile Edit info form.
- Click Add another contact.
- To add more contacts, click More contacts.
- Click Save.
Business profiles (multiple billing identities)
Business profiles let customers maintain multiple billing identities under one login (for example: a customer who books personally and for a company, or an office manager booking for multiple business entities).
Create a business profile:
- Go to Profile (My Account).
- Click Create business profile +.
- Enter business details and billing information, then click Save.
Manage multiple business profiles: Customers can add more business profiles and edit existing ones from the business profile area.
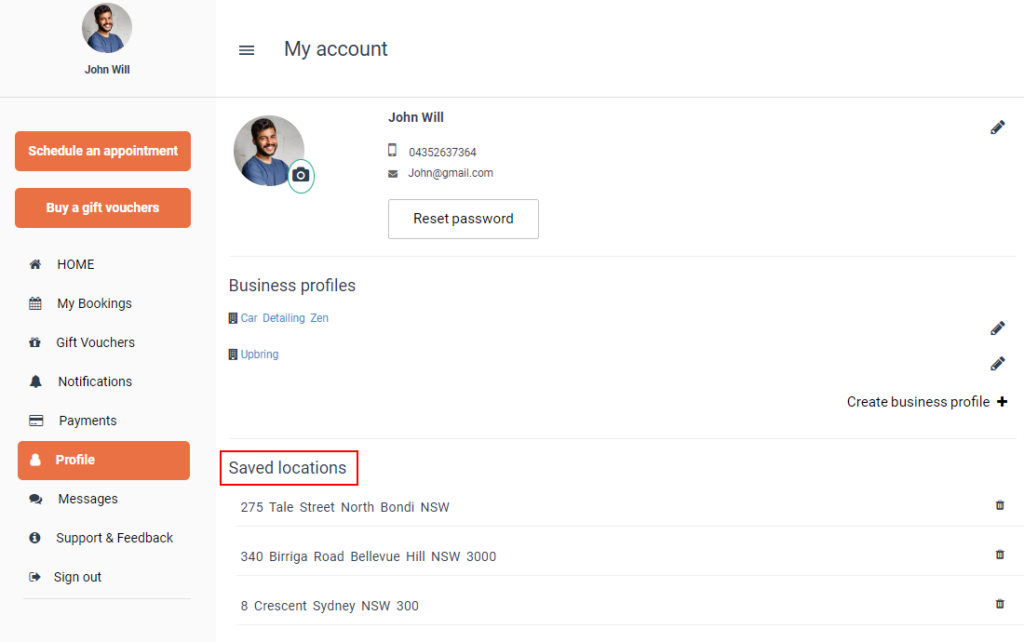
Saved locations
Saved locations (addresses) help customers re-book faster and reduce address entry errors. Depending on your portal setup, saved locations may appear automatically after customers make bookings, and customers can remove outdated locations if needed.
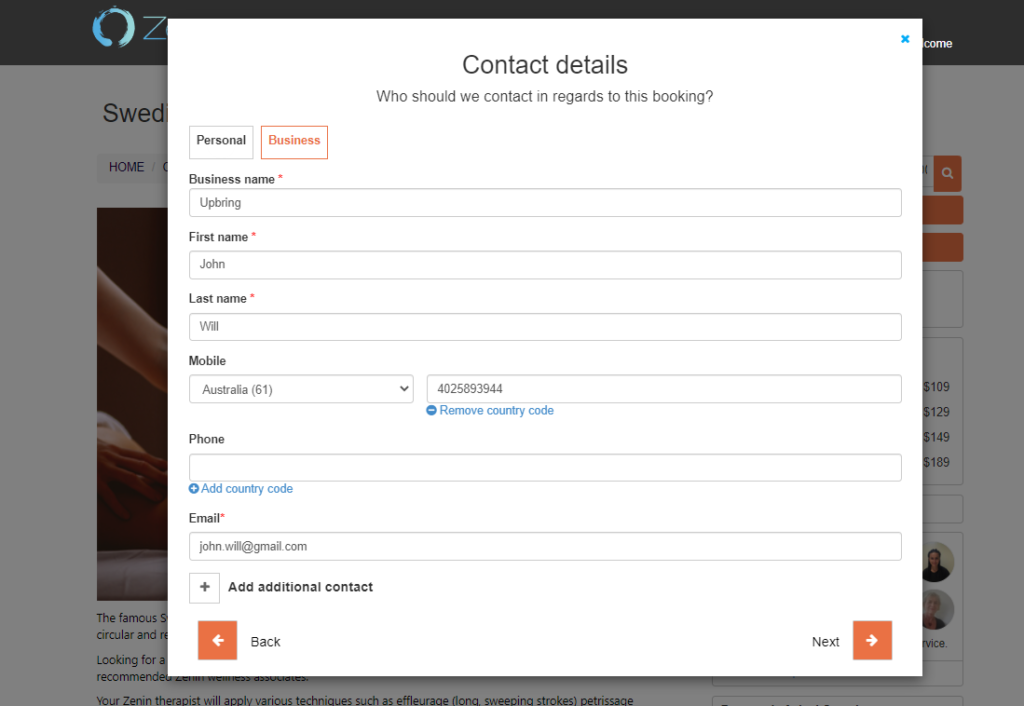
Select Personal vs Business when booking
If a customer has a Personal profile and one or more Business profiles, they can select which profile to use during the booking flow—so the right billing/contact details are applied for that booking.
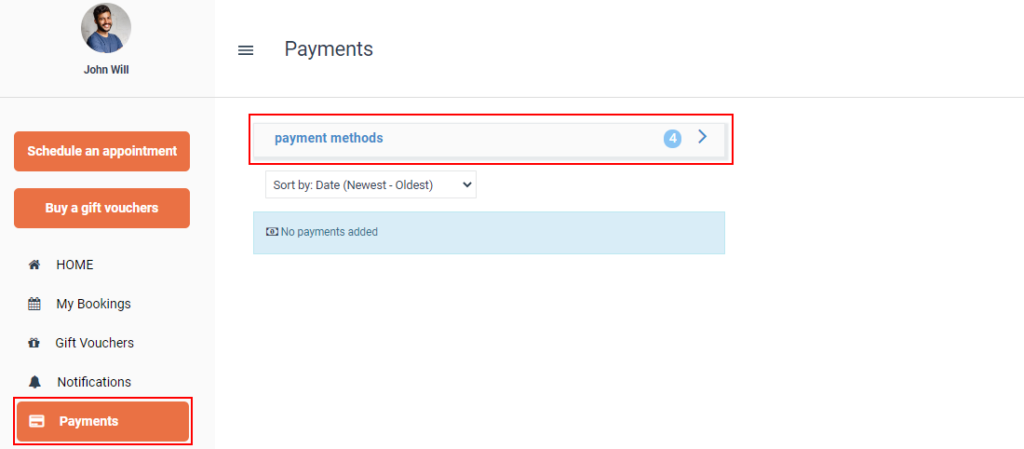
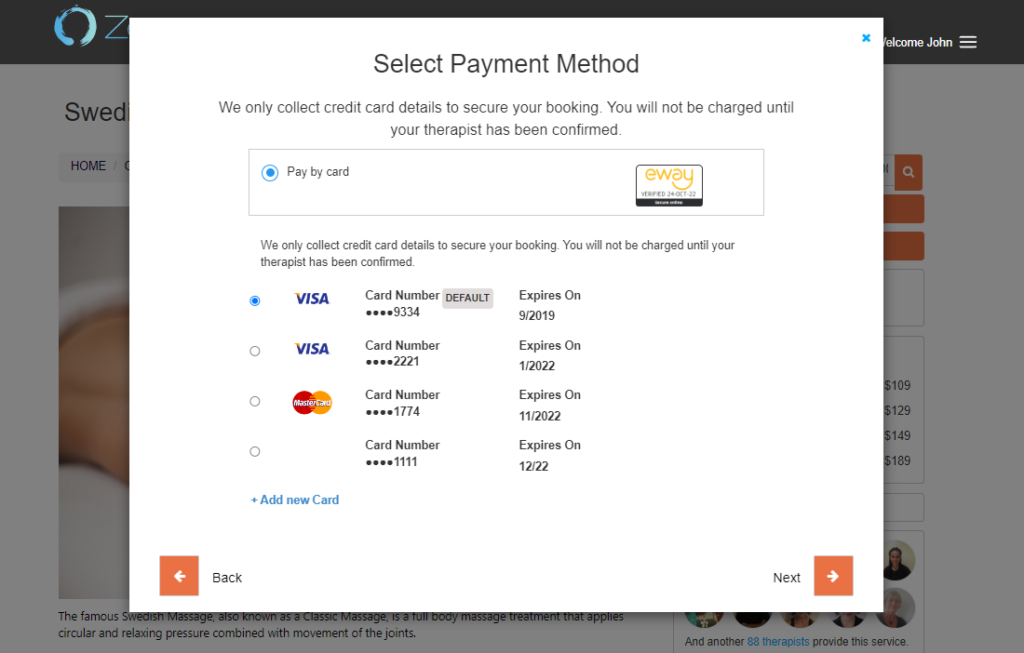
Saved payment methods
Customers can manage saved payment methods (where enabled) from the Payments menu. They can view saved cards, add a new card, and in some cases edit or remove cards.

Add a new payment method:
- Click Add a new payment method.
- Enter card details.
- Click Add card.
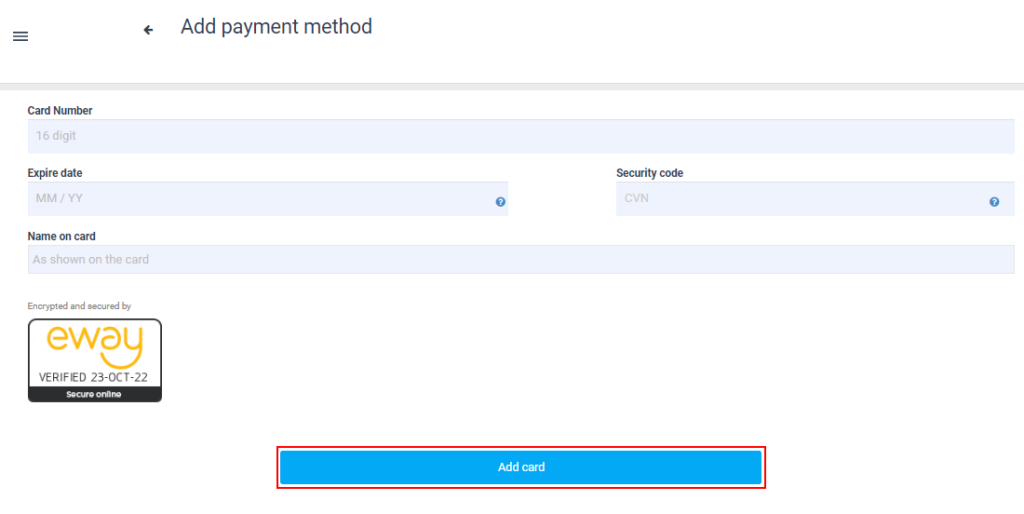
Checkout tip: If the customer has saved cards, they can usually choose one during checkout (depending on your payment configuration).
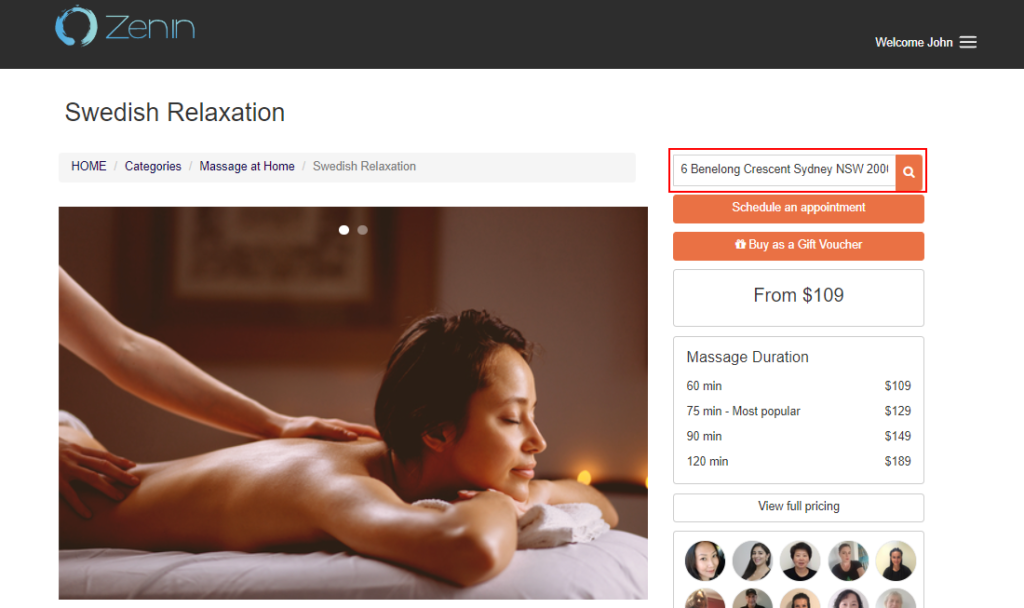
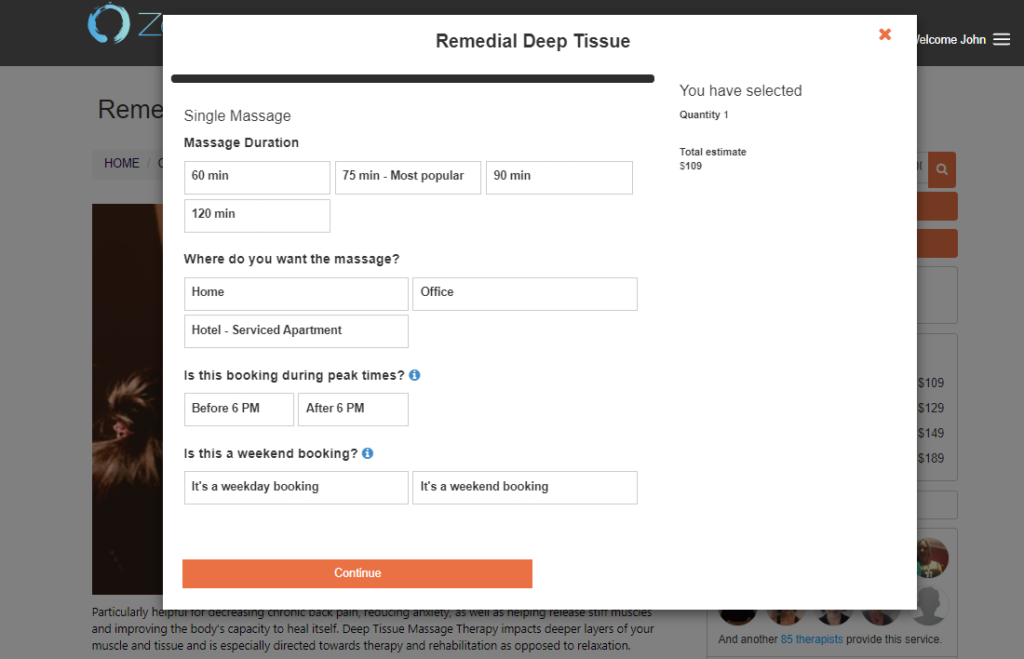
Make a new booking
Logged-in customers can book faster because their profile details and saved locations/payment methods can auto-fill during checkout.
- From the left menu, click Schedule an appointment.
Select a service: Customers browse available services, view pricing/description, then proceed to schedule.
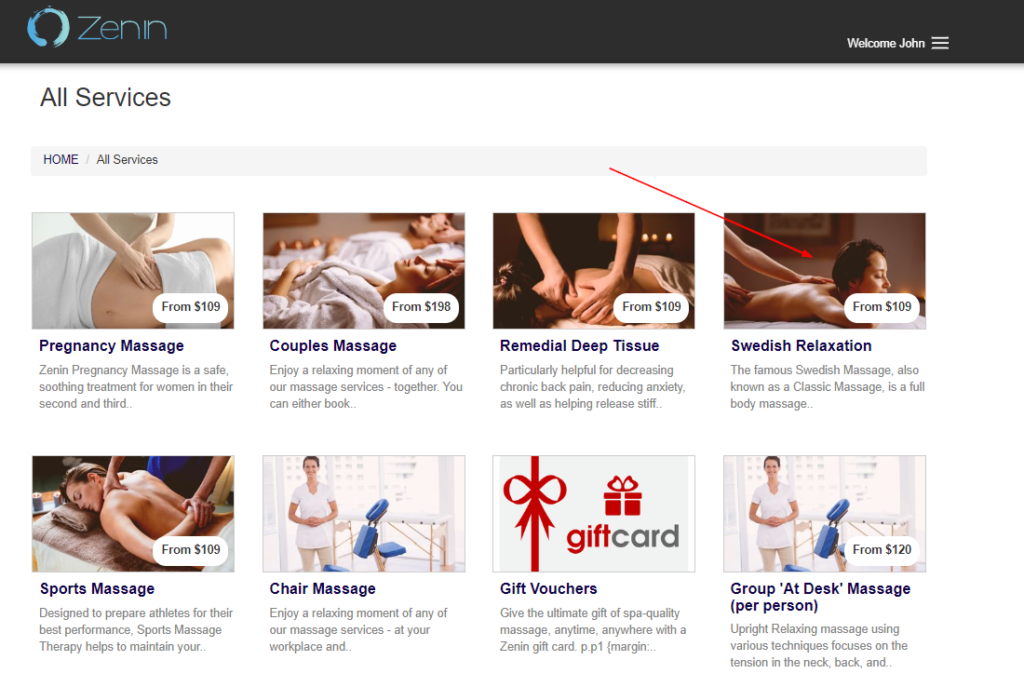
Service details: Customers review service details and continue to booking.

Address and details: Customers can enter or confirm the booking address and other details during the flow (saved locations can speed this up).
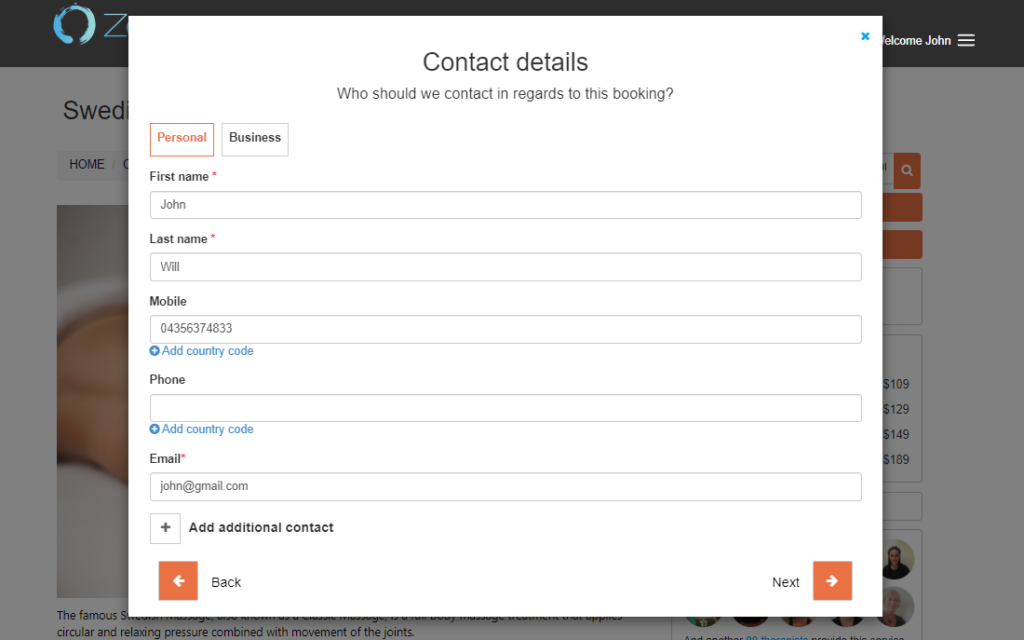
Contact details: Customer details can auto-fill from their profile. They can also add/choose a different contact for a booking.
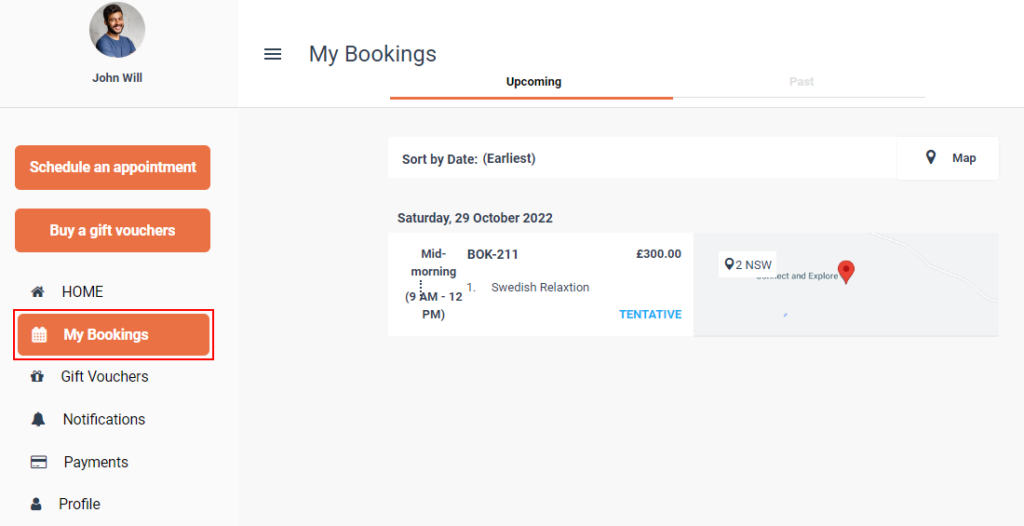
View booking history
Customers can open My Bookings to view upcoming and past bookings.
Upcoming bookings:
Past bookings:
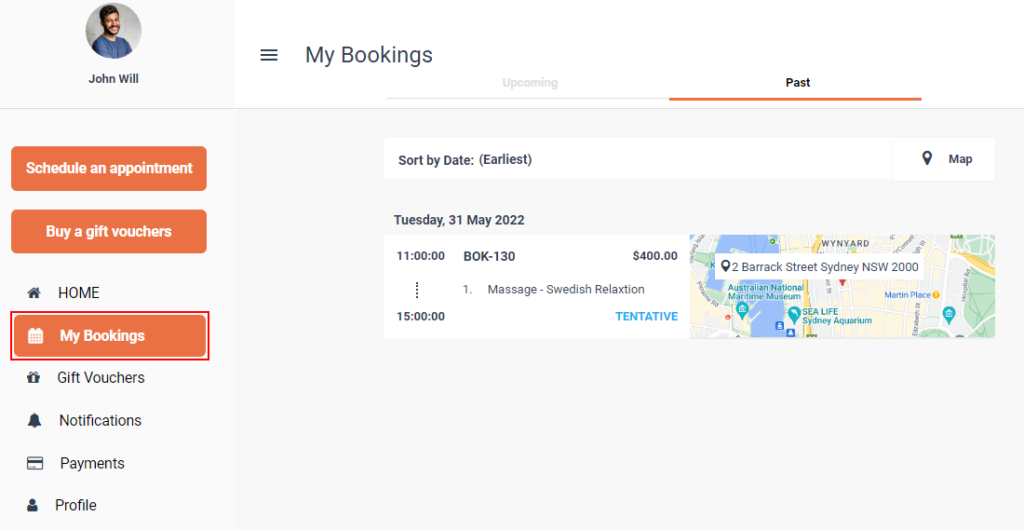
From booking details, customers may be able to (based on your portal permissions):
- View booking details and service information
- View invoices/receipts and make payments
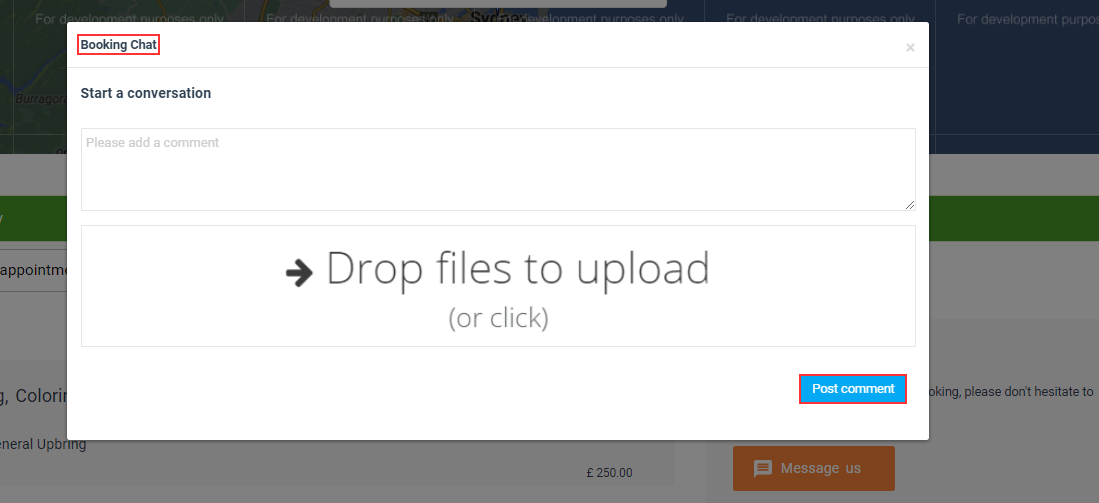
- Upload attachments or add notes
- Message your office about the booking
- Re-book (if enabled)
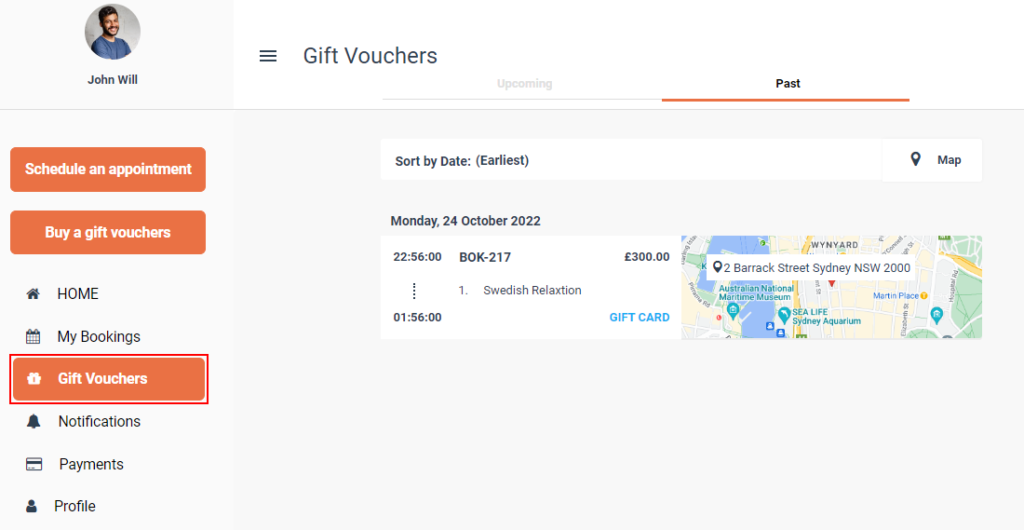
Gift vouchers/cards
If gift vouchers are enabled, customers can purchase them directly from the portal and view voucher history later.
Buy a gift voucher:
View gift vouchers:
Notifications
Customers can open Notifications to view portal alerts related to their bookings (confirmations, changes, updates, and messages). Clicking a notification typically opens the related booking.

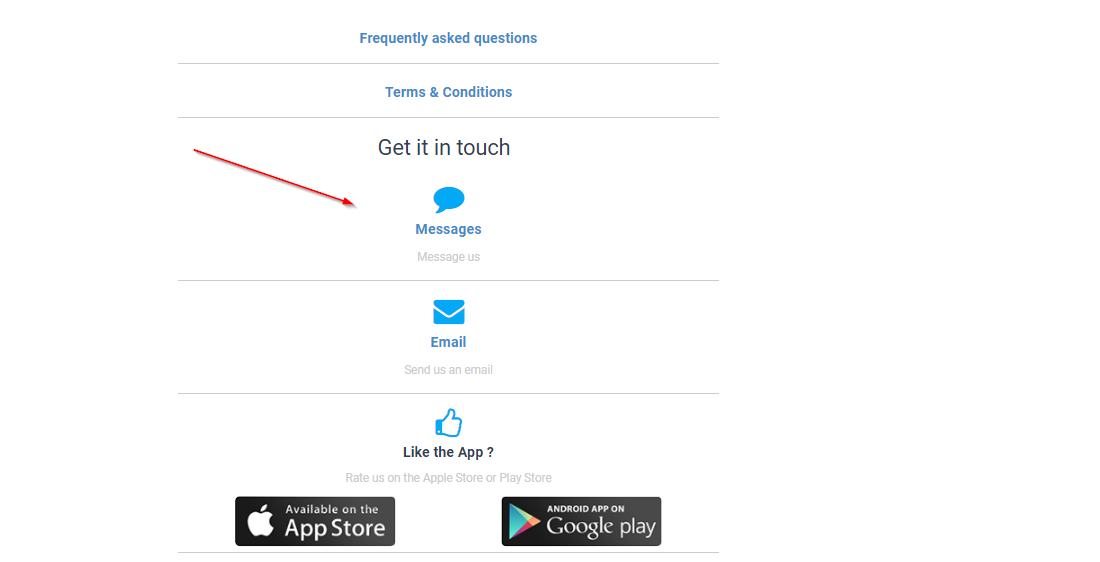
Messaging (general + booking chat)
Customer messaging keeps communication attached to the job and improves response times. Customers can message your office in two main ways:
- General office chat (messages not tied to one booking)
- Booking-specific chat (messages tied to a specific booking/quote/invoice)
General office chat
Customers can send a general message from the portal’s support/messages area (and attach files where enabled).

Optional: You can allow fieldworkers/technicians to be notified about customer discussions. Learn more: Notify Fieldworkers About Booking Discussions.
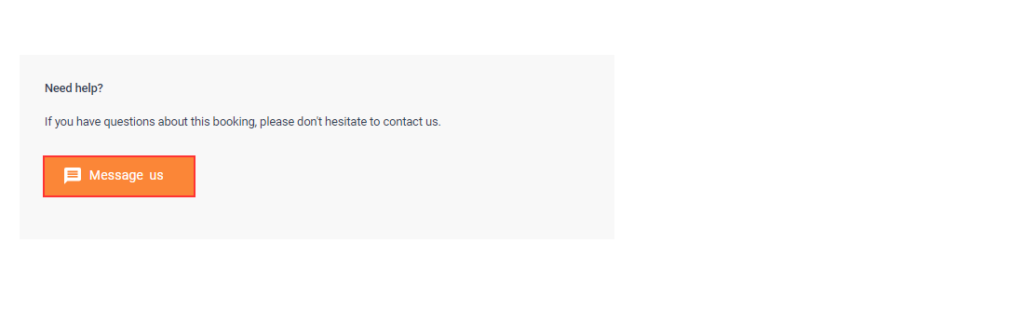
Booking-specific chat (Message us)
For questions about a specific booking, customers can open the booking and click Message us. This keeps the conversation and any attachments linked to the booking.
On the admin side, these messages appear under the booking discussion/communication area so your team can reply and keep a full conversation history attached to the job.

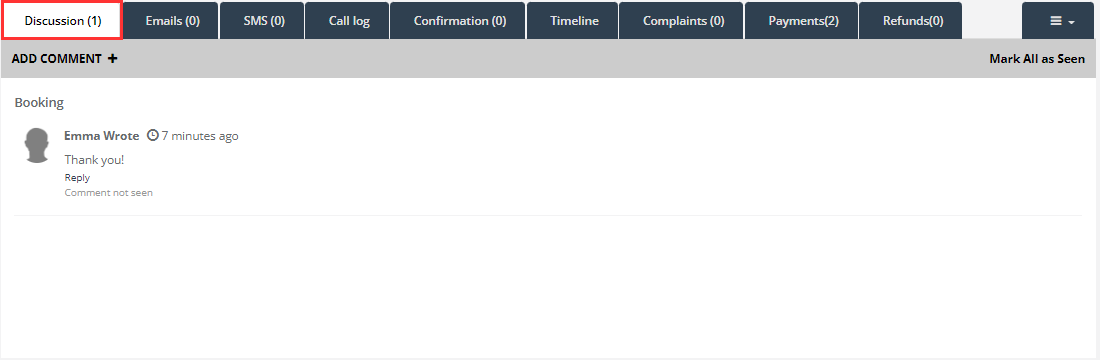
To learn how admins add replies to these discussions, see: Add a Comment to a Booking Discussion.
Best practices & FAQs
What should customers be allowed to edit?
Most businesses allow customers to update contact details, saved locations, and profile photos. For sensitive fields (e.g., billing entity details), decide based on your workflow and compliance needs.
How do I reduce booking mistakes?
- Encourage customers to keep saved locations up to date.
- Use additional contacts for access instructions or on-site coordination.
- Encourage customers to use booking chat for questions before the appointment.
Why don’t customers see the Payments section?
This is usually controlled by your portal configuration and payment gateway settings (including whether saving cards is enabled/supported).
To stay updated, please subscribe to our YouTube channel.