
Add a Payment to an Invoice (Process Credit Cards, Record Offline Payments & Import Bank Transfers)
OctopusPro makes it easy to collect, record, and reconcile invoice payments—whether you’re charging a customer’s credit card online, logging an offline payment (cash/cheque/bank transfer), or importing payments from your bank statement or accounting software.

This guide explains:
- How to process credit card payments using an integrated payment gateway
- How to record offline payments (cash, bank transfer, cheque, external POS terminal, etc.)
- How to approve pending payments (when manual verification is required)
- How to import bank transfers in bulk via CSV
- How to sync payments from QuickBooks/Xero
Quick navigation
- When to use “Add Payment”
- Credit card payments (integrated gateway)
- Offline payments (cash, bank transfer, cheque, etc.)
- Approving pending payments
- Import bank transfer payments (CSV)
- Sync payments from QuickBooks / Xero
- Add payment from the invoice list
- Tips, best practices & troubleshooting
- Related guides
When to use “Add Payment”
Use Add Payment when you need to apply money to an invoice and keep your financial records accurate. Common examples include:
- Taking a card payment from the office (card-not-present) using your connected payment gateway
- Recording an offline payment your business received outside OctopusPro (cash, bank transfer, cheque, external terminal)
- Applying a payment to the correct invoice after importing or syncing transactions
- Keeping invoice balances up to date for customer statements, aging, and reconciliation
- The payment is logged against the invoice with a date, amount, and method.
- The invoice balance updates immediately (e.g., unpaid → partially paid → paid).
- Depending on the payment method, it may be auto-approved or require manual approval.
Credit card payments (integrated gateway)
Prerequisite: connect a payment gateway
To process credit card payments inside OctopusPro, first connect a payment gateway in:
Settings > Financial Settings > Payment Integration

If no gateway is connected, OctopusPro will direct you to the offline payment form when you click Add Payment.
Automatic approval & payment reference
When a credit card payment is processed successfully through OctopusPro (using an integrated gateway), it is typically:
- Automatically approved
- Assigned a unique payment reference number for tracking and reconciliation

How to process a credit card payment on an invoice
- Open the invoice you want to collect payment for.
- Click Actions (top-right).
- Select Add Payment.
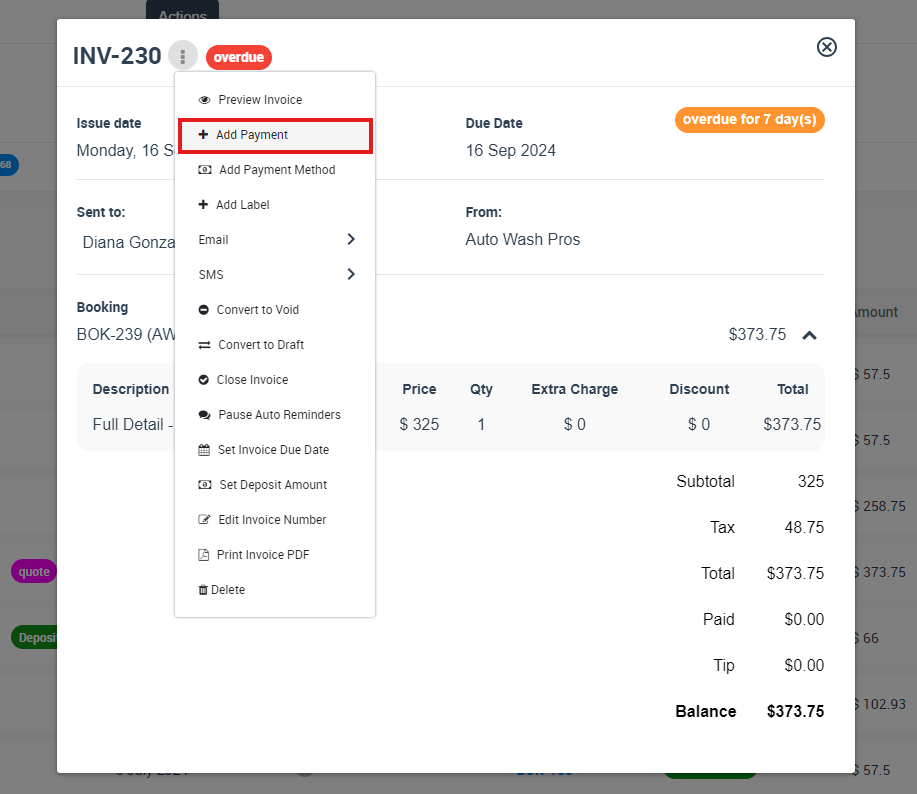
The credit card form opens by default when a payment gateway is connected. If your account supports stored cards, you may see saved cards linked to the customer/invoice for faster checkout. Otherwise, enter the card details and confirm the payment.
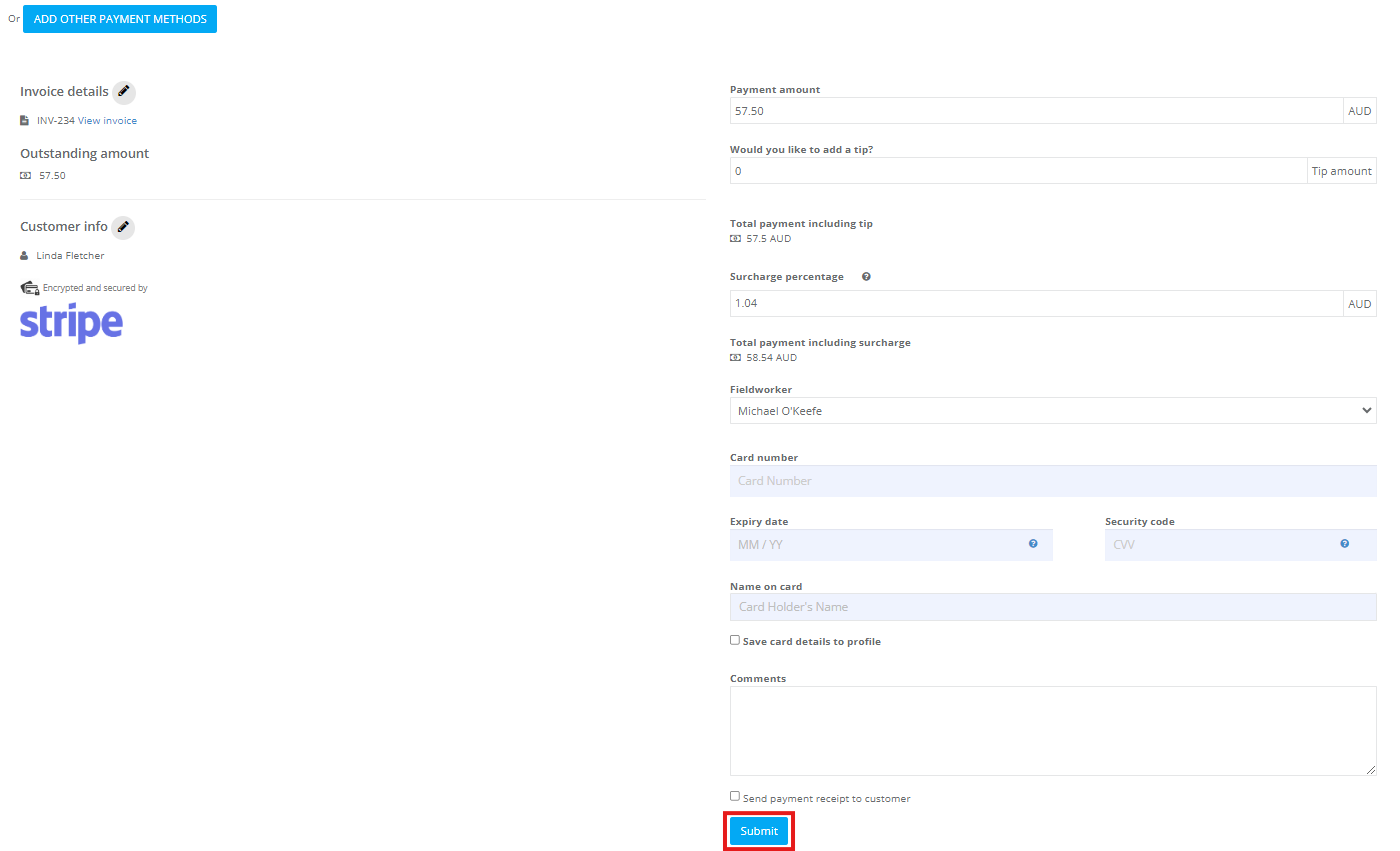
Once confirmed, the payment is validated, approved, and logged on the invoice with a reference number. The invoice balance updates immediately.
Offline payments (cash, bank transfer, cheque, etc.)
Offline payments are payments you receive outside OctopusPro (e.g., cash, bank transfer, cheque, or a payment taken via an external terminal) and want to record against an invoice.
Manual approval is usually required
Because these payments are not processed through OctopusPro’s payment gateway, they often require verification and manual approval by an authorized admin user.

How to record an offline payment on an invoice
- Open the invoice.
- Click Actions > Add Payment.
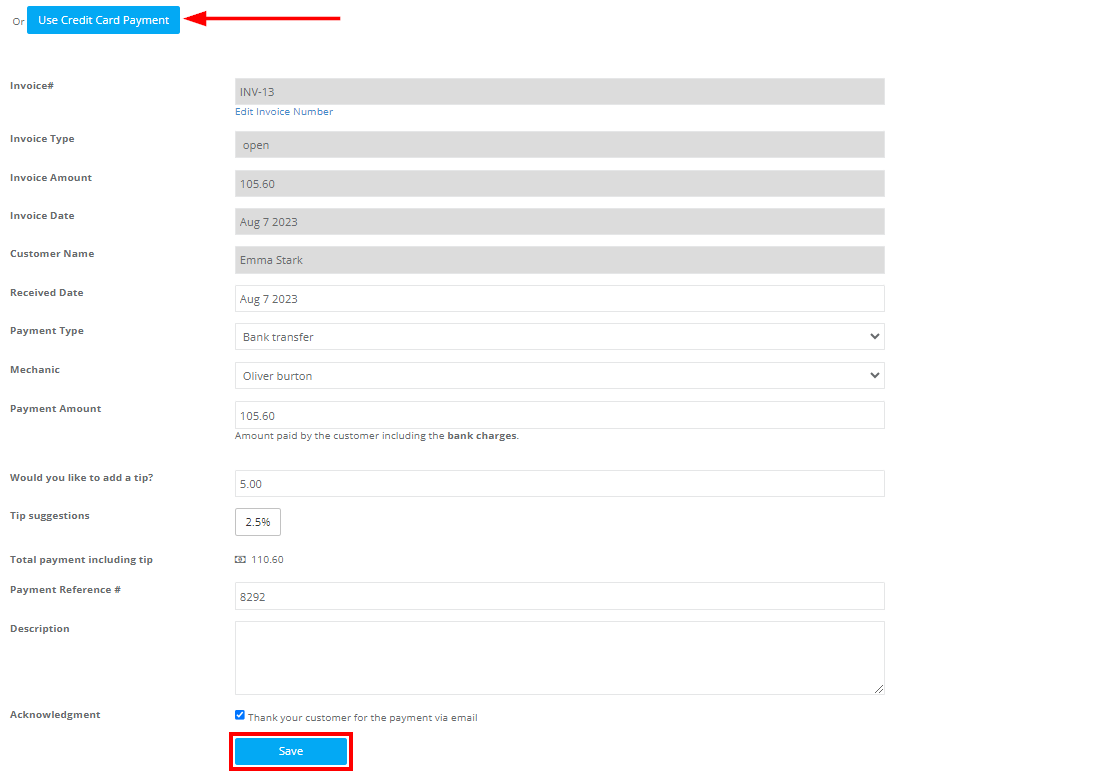
- If the credit card form opens, click Add other payment methods at the top.

- Select the payment type (e.g., Cash, Bank Transfer, Cheque).
- Enter the payment details (amount, date, notes/reference, and any optional fields shown).
- Save the payment to log it against the invoice.
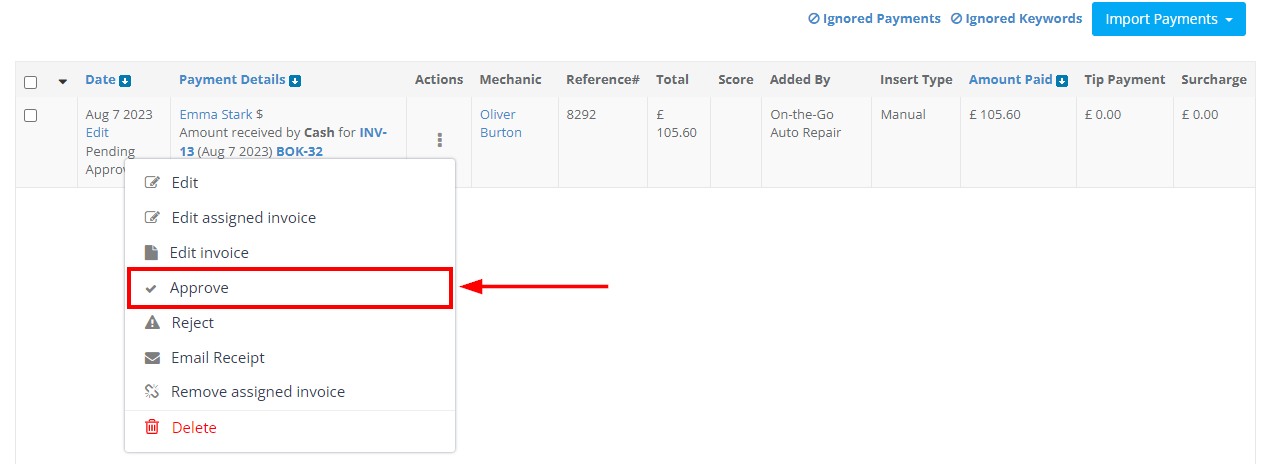
Approving pending payments
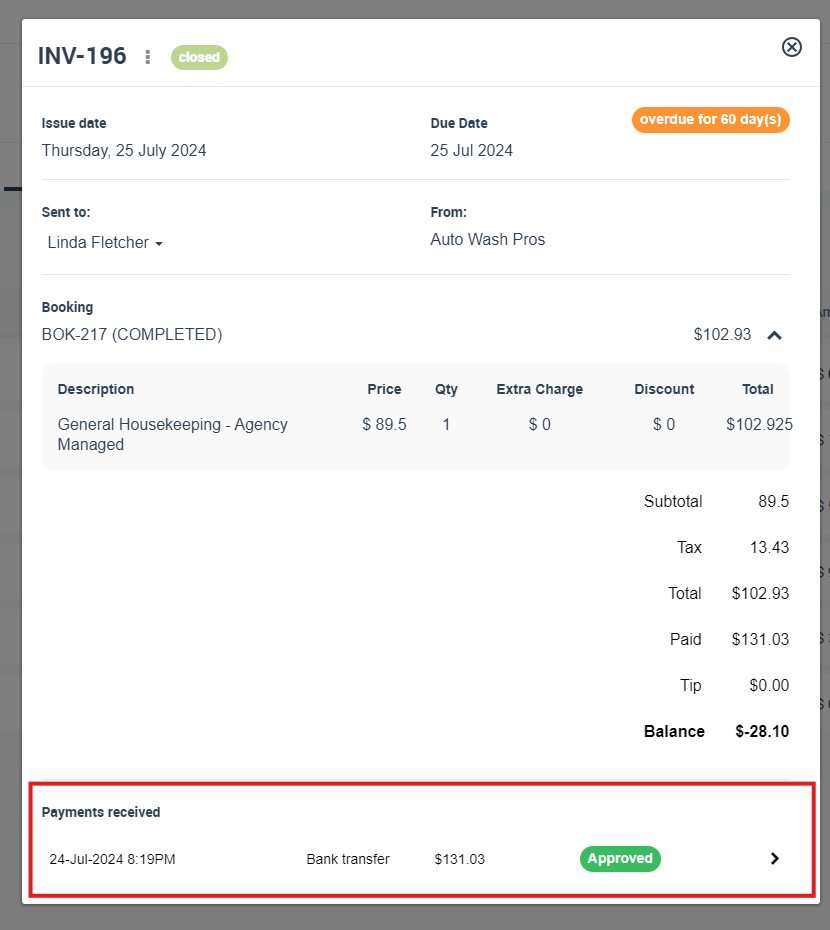
When an offline payment is saved, it can appear as Pending Approval until an authorized admin approves it. Approving ensures the payment is confirmed and applied correctly for reporting and reconciliation.
To review and approve pending payments:
- Go to Invoices > Payments Received.
- Locate the payment in the list (filter/search if needed).
- Use the Actions menu to approve the payment.
Import bank transfer payments (CSV)
If you receive many bank transfers, you can batch import transactions via CSV and then match/approve them in OctopusPro.
- Go to Invoices > Payments Received.
- Click Import Payments, then select Import Bank Transactions.
- Upload a CSV that matches the required format.
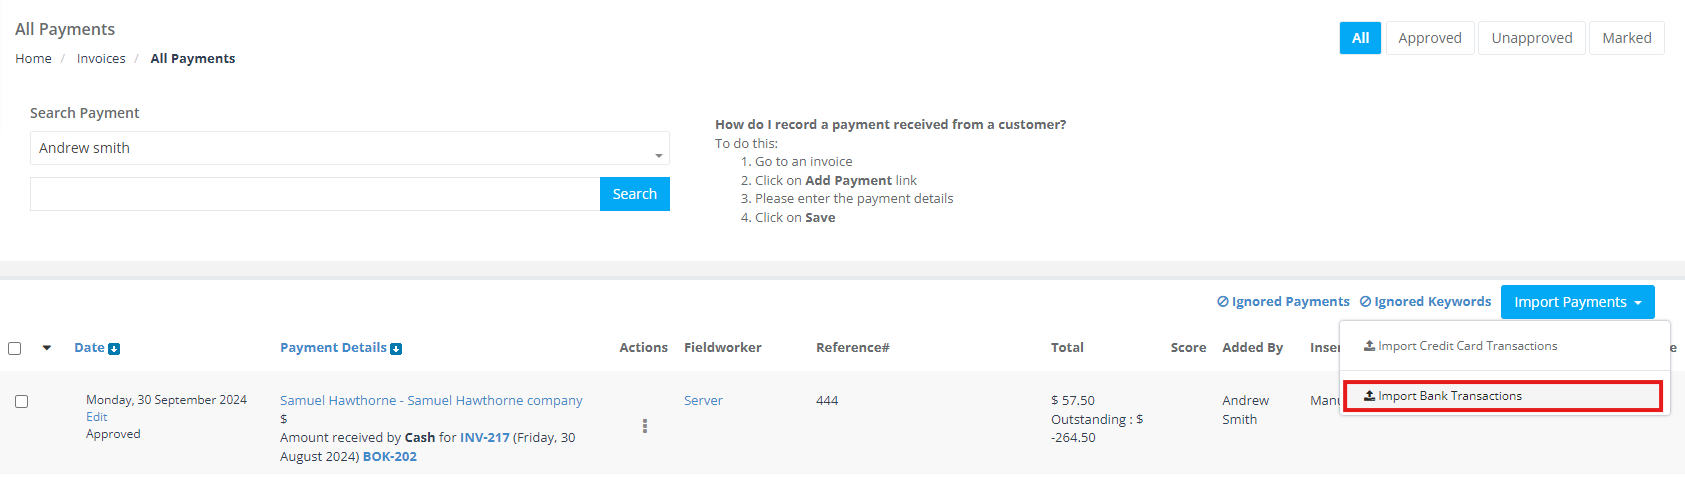
After import, transactions typically appear in a review/pending state so you can verify and approve them before they affect your invoice balances.
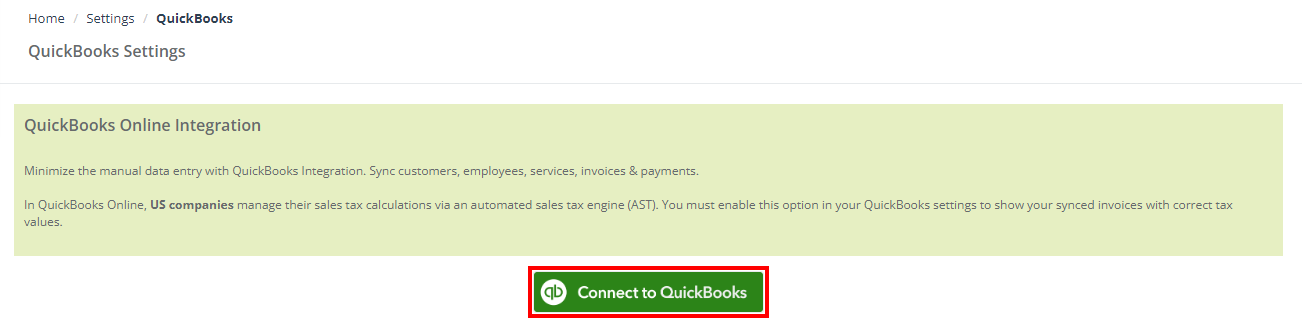
Sync payments from QuickBooks / Xero
If you manage payments in an accounting system, OctopusPro can help you bring those payments in so your invoices remain up to date.
- Go to Settings > Financial Settings.
- Select QuickBooks Integrations or Xero Integrations (depending on what you use).
- Follow the prompts to connect your accounting account.
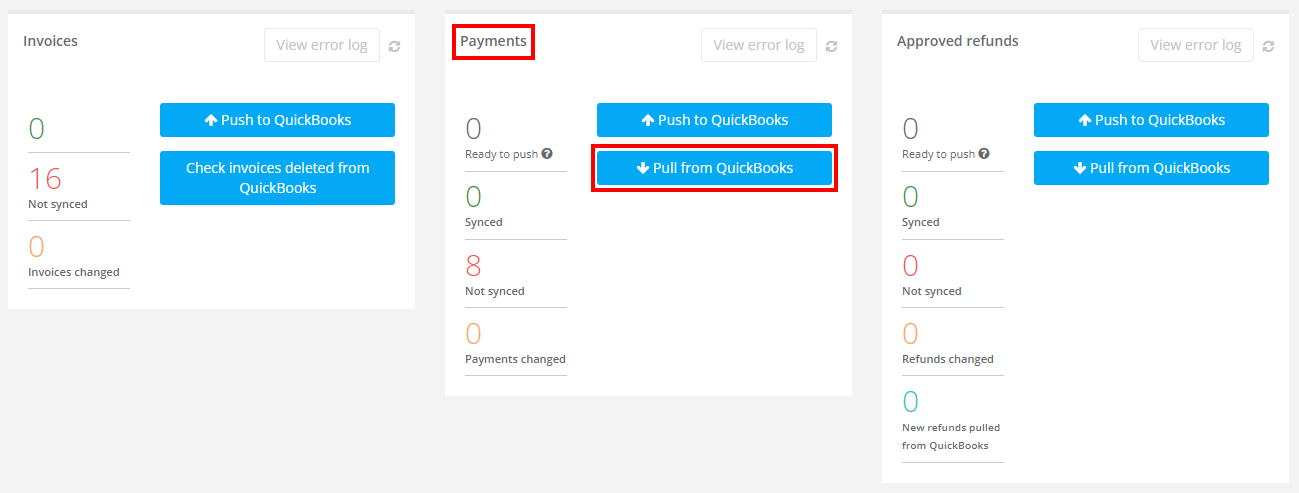
Once connected:
- Go to Payments.
- Select Pull from QuickBooks or Pull from Xero.
- Review imported payments and approve/decline as needed.
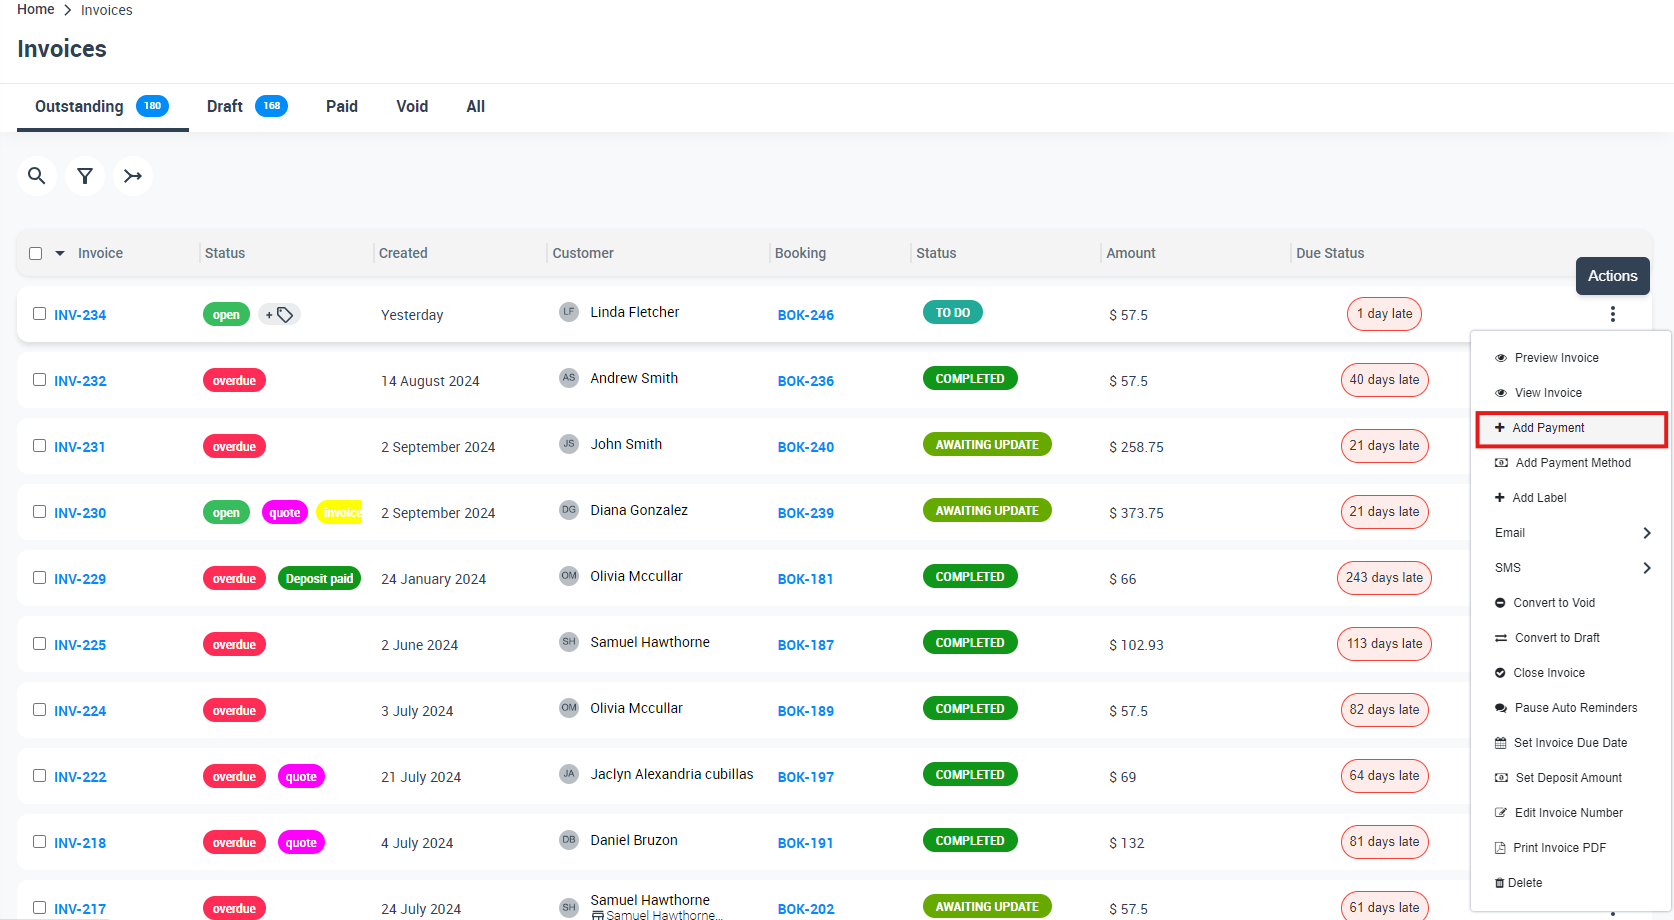
Add payment from the invoice list
You don’t have to open the invoice first. You can also add a payment directly from the invoice listing.
- Go to Invoices > All Invoices.
- Find the invoice you want to update.
- Click Actions next to that invoice.
- Select Add Payment.
Tips, best practices & troubleshooting
- Choose the right payment method: If you have a gateway connected, the credit card form opens by default—use Add other payment methods to record offline payments.
- Track partial payments: You can add multiple payments to the same invoice over time (e.g., deposit + final payment). The invoice balance updates after each payment.
- Handle overpayments: If a payment exceeds the invoice total, the invoice can show a negative balance. In most cases, you’ll either refund the excess or apply it according to your internal accounting process.
- Keep references consistent: Always add bank transfer references/receipt numbers in the notes so your team can reconcile faster.
- Approve offline payments promptly: Pending payments may not be counted in certain reports until they’re approved.
- Need to refund a payment? Use the refund workflow so the transaction is tracked properly and your records stay accurate.
Related guides
- Managing and Viewing Invoice Payments
- Refund Management (Bookings & Invoices)
- Payment Import & Reconciliation
- Match Unknown Payments
- Managing Payment Methods
- Service Payment Terms
- Credit Card Payments Surcharge
- Enabling Bank Transfer Payments (Bank Details Setup)
- Tips and Gratuities Management
- Activate Payment Methods for Customer Portal Checkout
- Stripe API Integration
- Square API Integration
- Checkout.com API Integration
- Authorize.Net API Integration
To stay updated, please subscribe to our YouTube channel.