
Label Management (Tags): Create, Color-Code, and Organize Records
Labels (also known as tags) are customizable, color-coded identifiers you can apply across OctopusPro to quickly categorize and track records—such as inquiries, bookings, quotes/estimates, invoices, customers, and fieldworkers. Labels help your team work faster by making priorities, internal status, and segmentation visible at a glance.

In this guide
- What labels are used for
- Create and manage labels
- Best practices and naming conventions
- Using nested labels (parent/child)
- Apply labels across modules
- Edit or delete labels
- Related guides
What labels are used for
Labels are designed for internal organization and fast filtering. They’re especially useful when your team needs to identify records that require action or belong to a specific category without changing the official status (e.g., booking status, invoice status).
Common examples
- Priority: Urgent, High value, Escalated
- Follow-up: Needs callback, Waiting on customer, Sent reminder
- Finance: Deposit paid, Manual payment required, Dispute initiated
- Operations: Needs special equipment, Multiple fieldworkers, After-hours
- Team segmentation: Specialist, Top performer, New starter
Note: Labels are primarily for your team’s internal workflow. They don’t automatically change system statuses or customer-facing messages unless you intentionally reference them in communications.
Create and manage labels
Option 1: Create labels from Settings (recommended for initial setup)
To create a label from your admin settings:
- Go to Settings > General Settings > Labels.
- Click New Label.
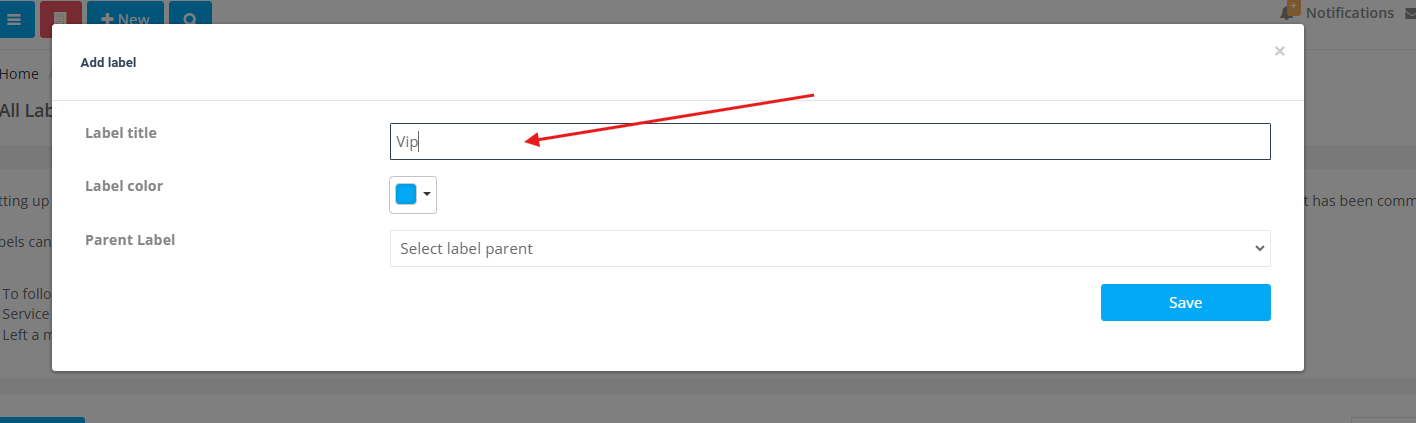
- Configure the label name, color, and optional parent label.
- Click Save.
Label title / name
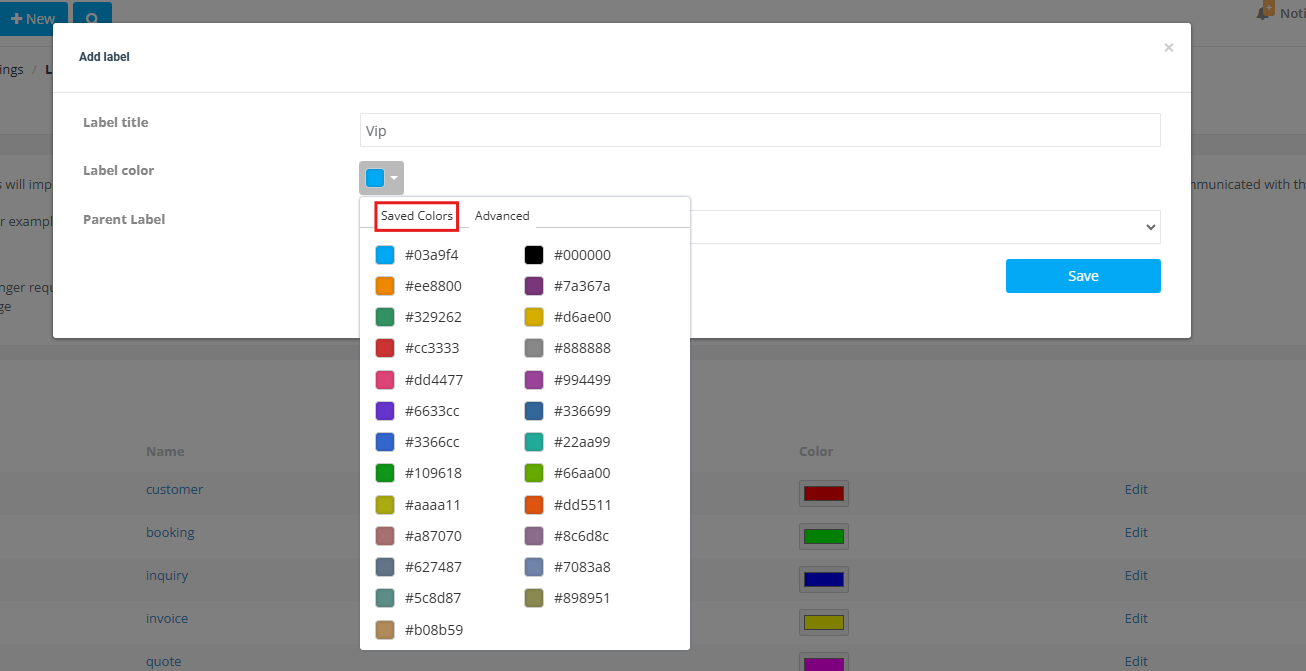
Choose a label color (Saved Colors)
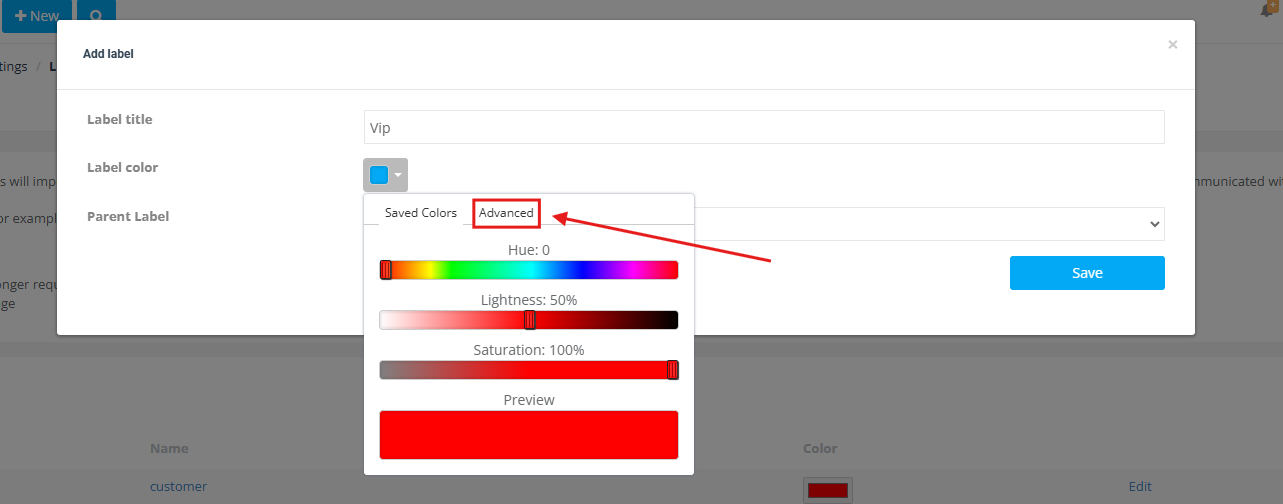
Choose a custom label color (Advanced)
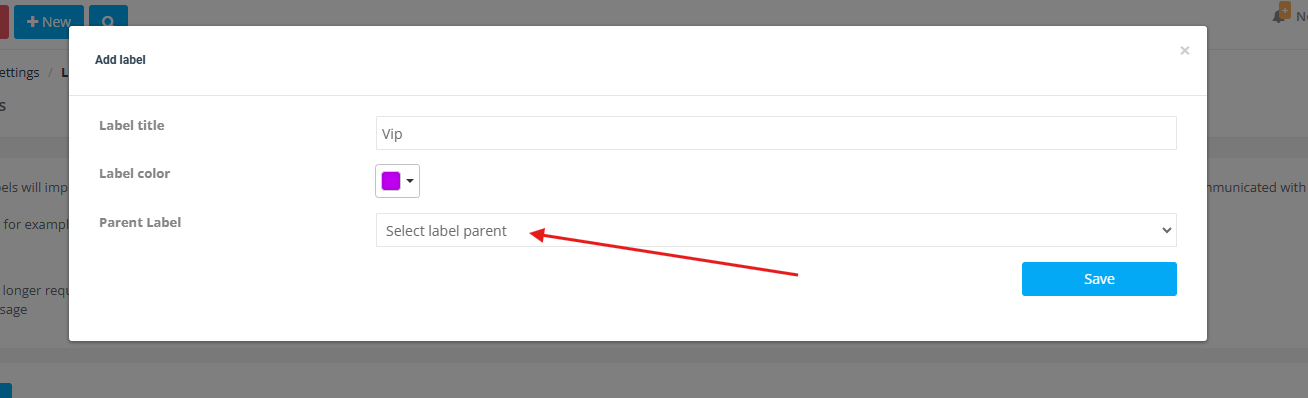
Optional: Assign a parent label (nested labels)
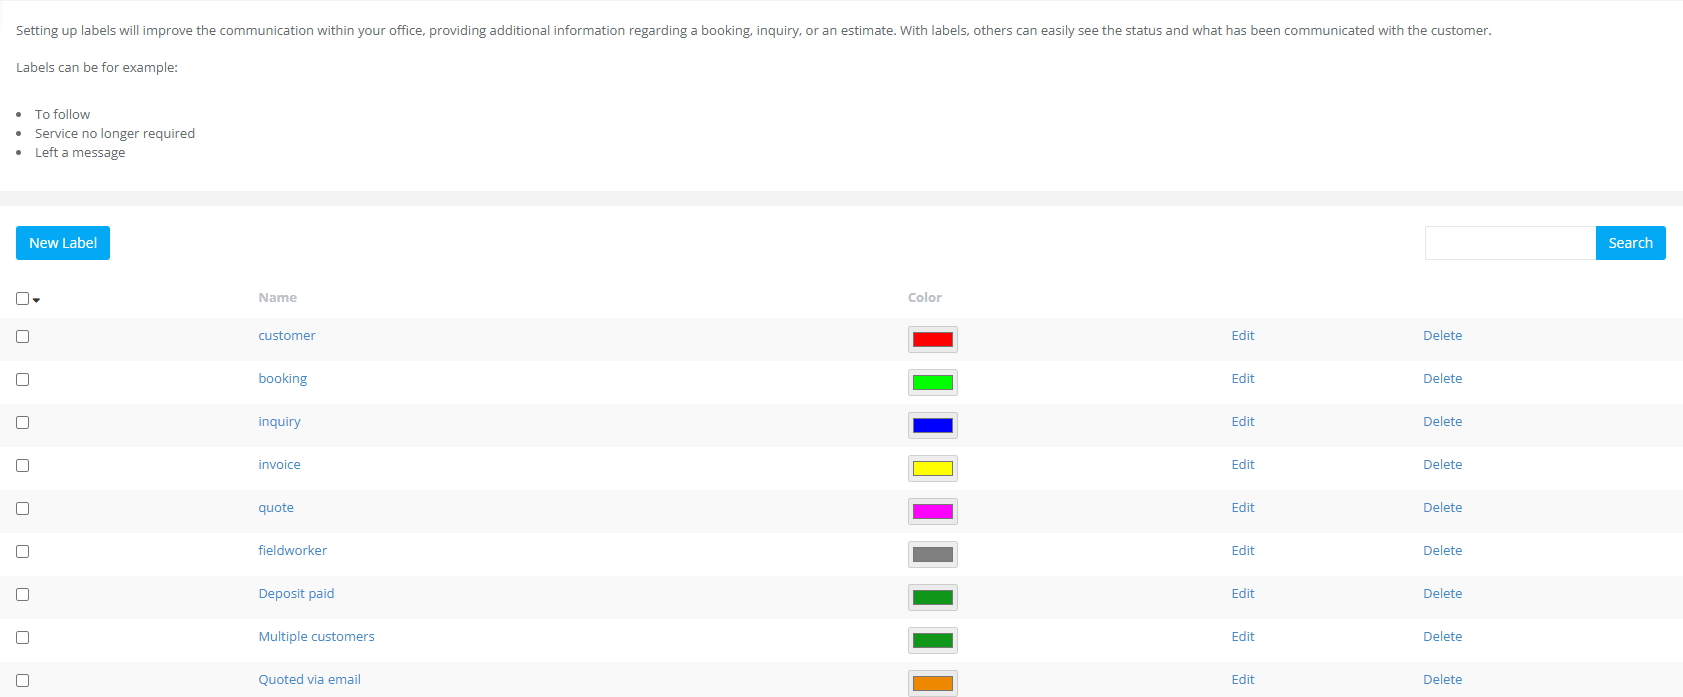
View your labels list
Once saved, your labels appear in the Labels settings list where you can manage them.
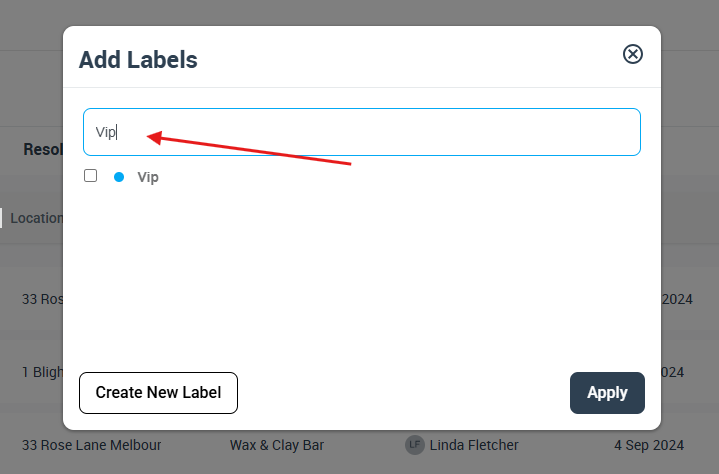
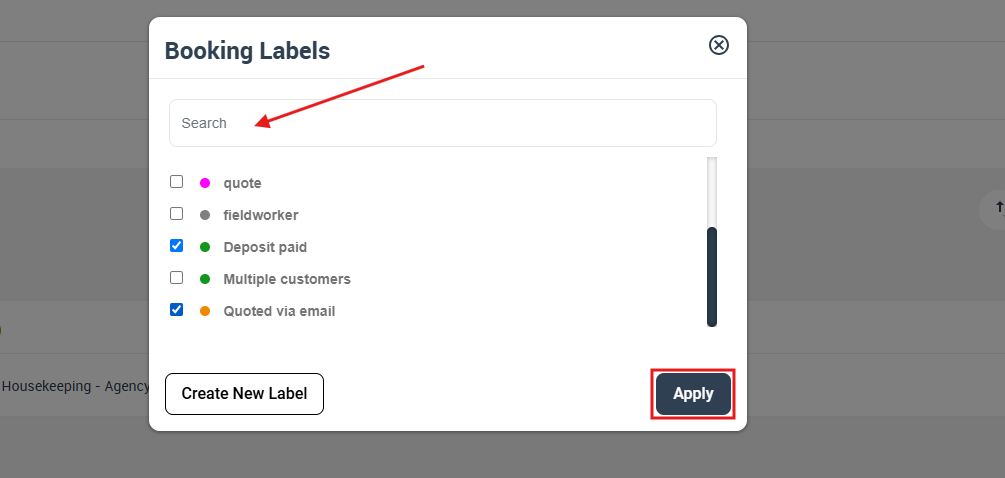
Option 2: Create labels while labeling a record (quick creation)
When applying labels from many lists (e.g., inquiries, bookings, quotes, invoices), you may also see a Create New Label button inside the label picker. This is useful when a new category comes up mid-workflow and you want to create it without leaving the page.
Best practices and naming conventions
- Use consistent prefixes to group labels (e.g., Priority: Urgent, Billing: Deposit Paid, Ops: Special Access).
- Keep labels short so they display neatly across desktop and mobile.
- Use color intentionally (e.g., red/orange for urgent, blue for info, green for confirmed/positive).
- Avoid duplicates (e.g., “Urgent” vs “High Priority”)—pick one standard term and stick to it.
- Use nested labels when you need structure (department/category → specific label).
Using nested labels (parent/child labels)
Nested labels let you build a hierarchy by assigning a Parent Label to a label. This is ideal when your team needs both a broad category and a specific tag.
Examples
- Service Priority (parent) → Critical, High, Medium, Low (children)
- Customer Feedback (parent) → Positive, Neutral, Negative (children)
- Billing (parent) → Deposit Paid, Payment Plan, Manual Payment Required (children)
Tip: Use parent labels for the “main filter bucket,” and child labels for the specific detail your team needs to see.
Apply labels across modules
You can apply one or multiple labels to records to help categorize and manage them. In many areas, you’ll apply labels from the record list using the Actions menu.
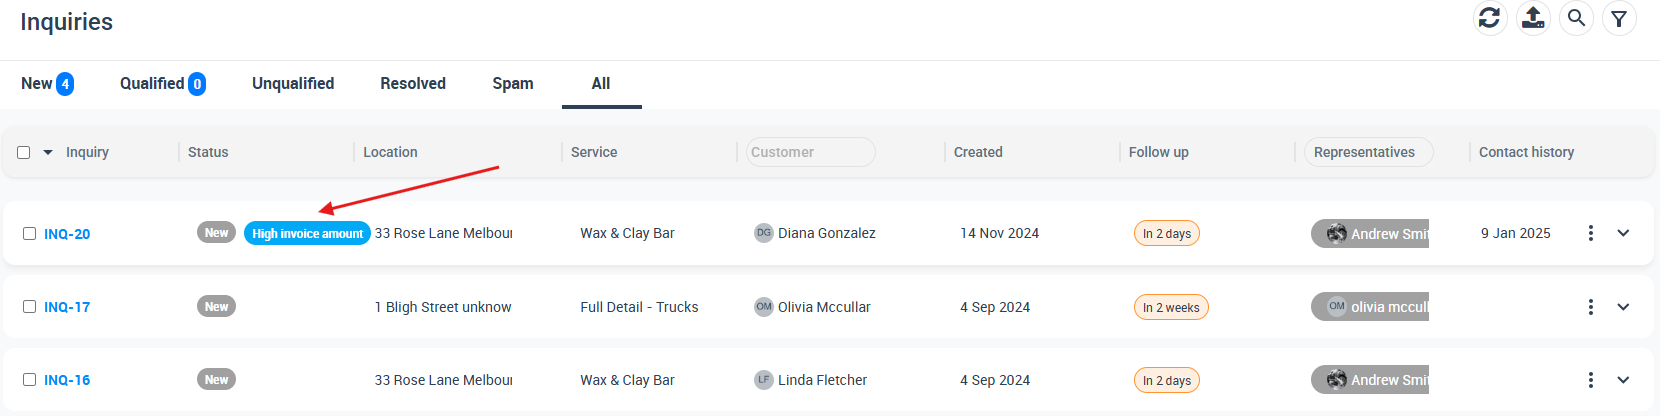
Adding labels to inquiries
- Open your inquiries list (e.g., All Inquiries).
- Click Actions next to an inquiry and select Add label.

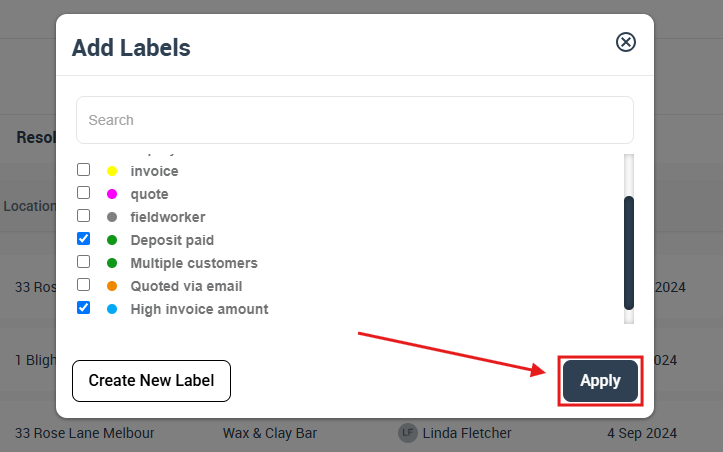
- Search for the label(s) and tick the checkbox(es).
- Click Apply.
The label(s) will display on the inquiry list for quick visibility.
Learn more: Adding Labels to Inquiries
Adding labels to bookings
- Open your bookings list.
- Click Actions next to a booking and choose Add Label.
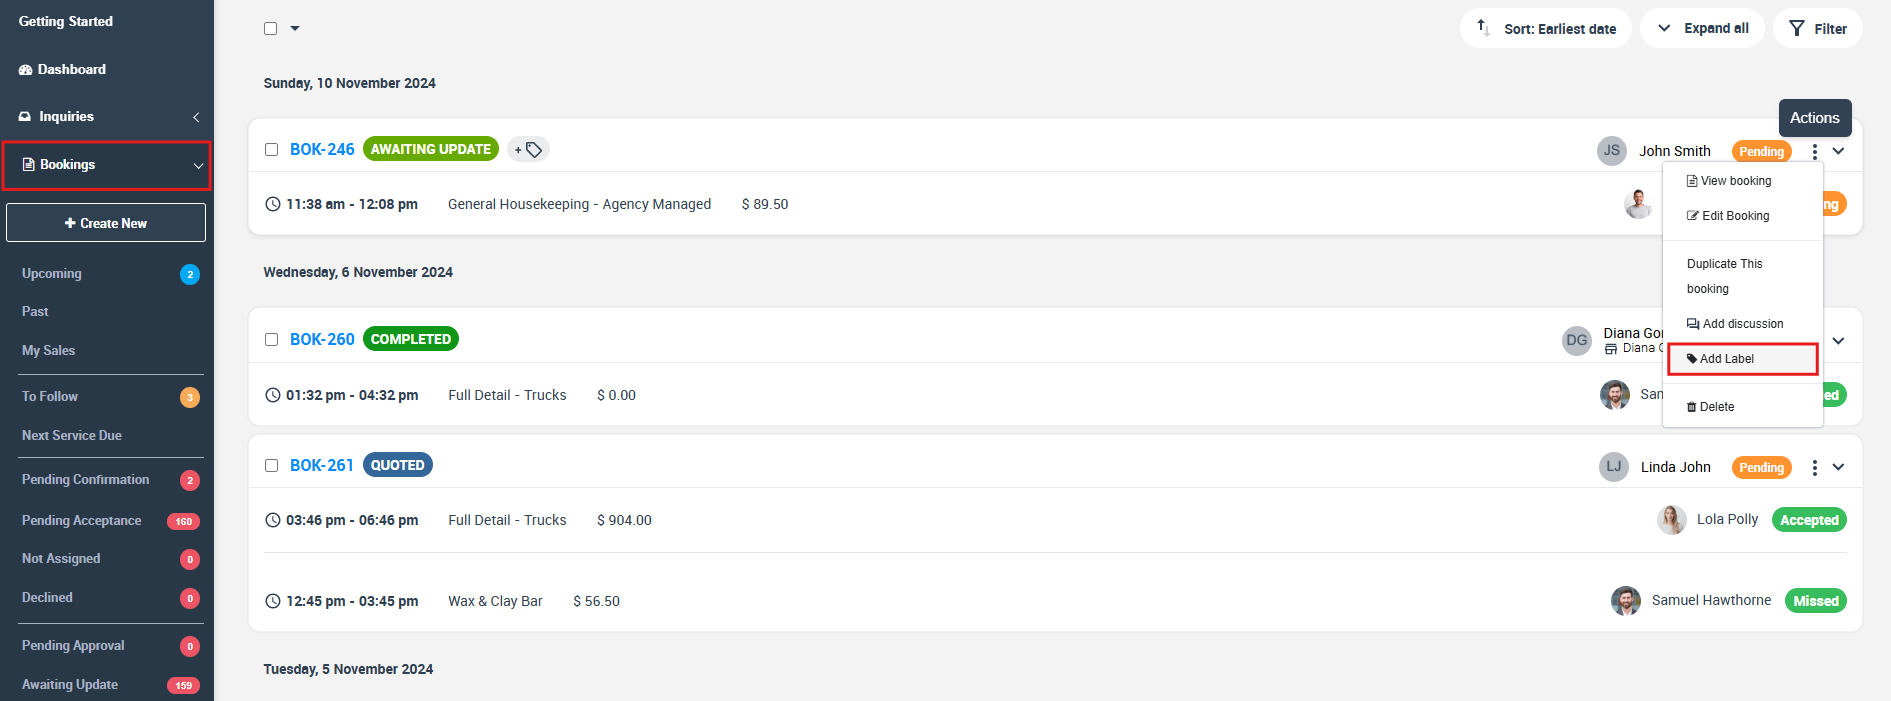
- Search and select the label(s).
- Click Apply.
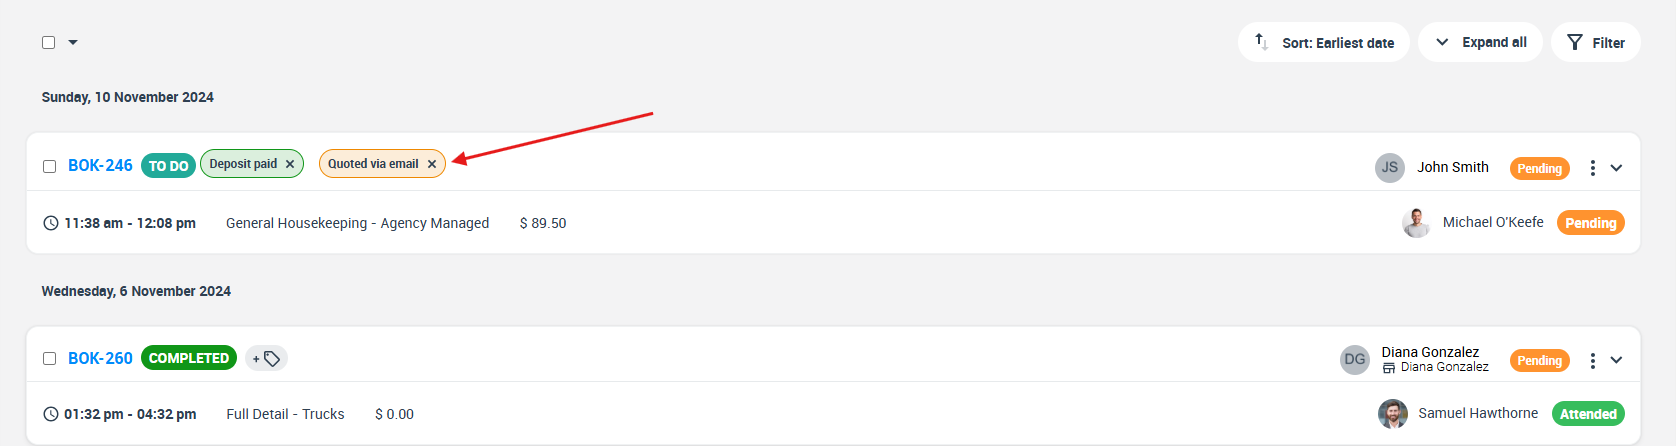
Your selected labels will appear on the booking record in the list.
Learn more: Label / Tag Bookings (and Quotes)
Adding labels to quotes / estimates
- Open your quotes list.
- Click Actions next to a quote and select Add label.
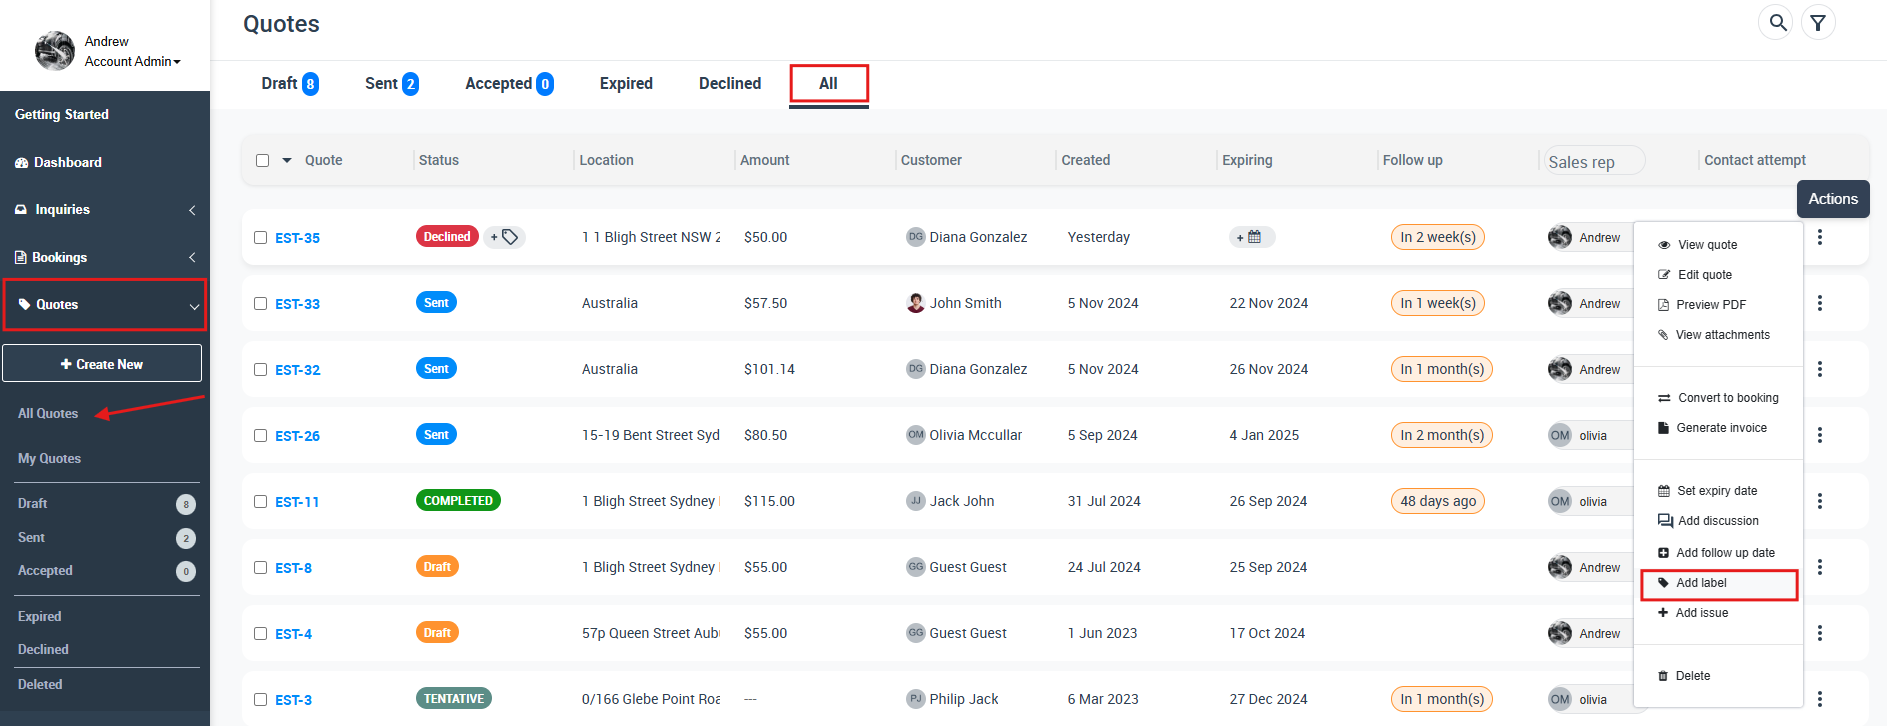
- Search and select one or more labels.
- Click Apply.
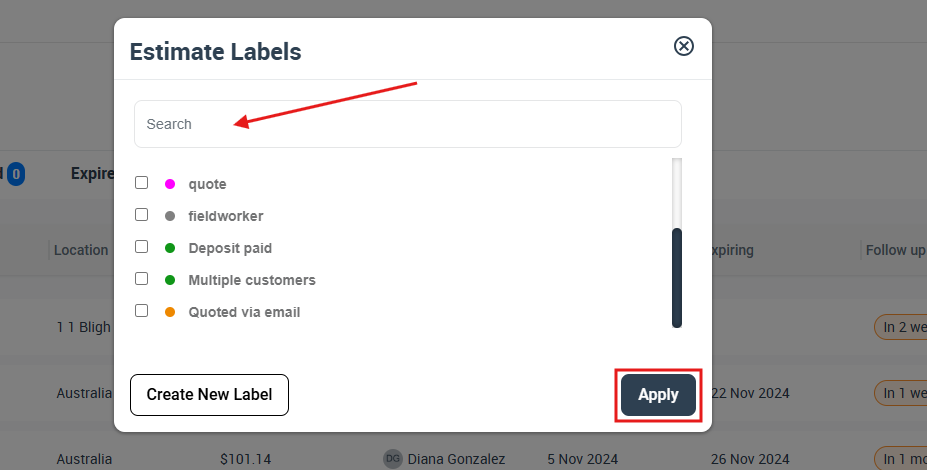
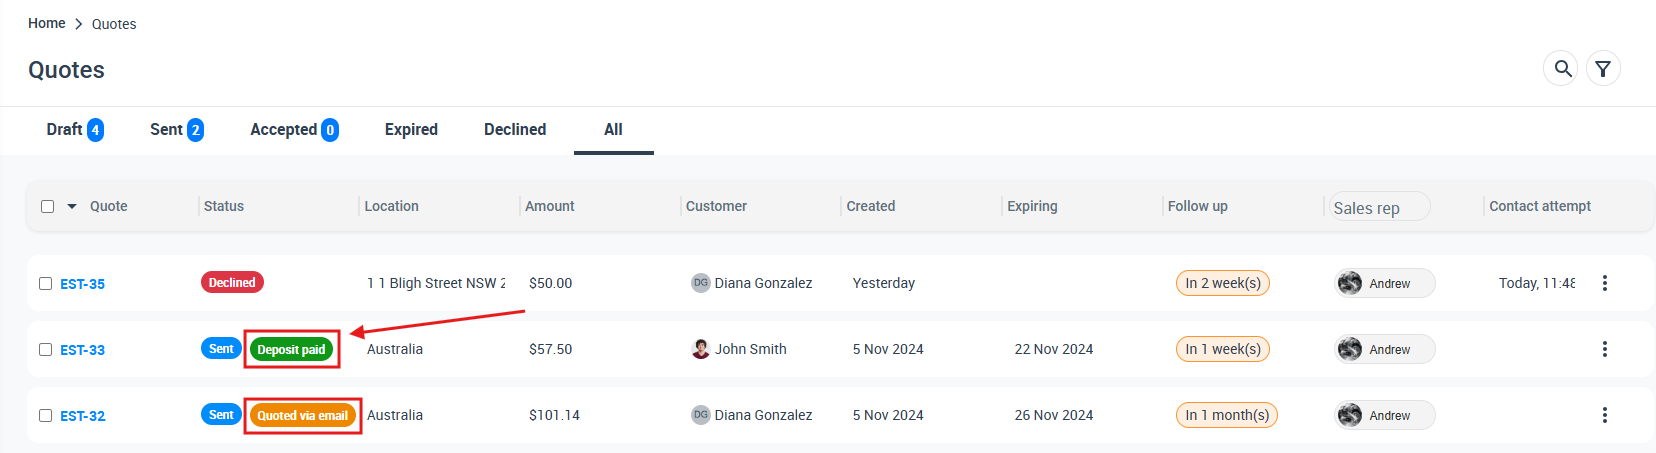
Labels display on the quote record in the list.
Learn more: Label / Tag Quotes (and Bookings)

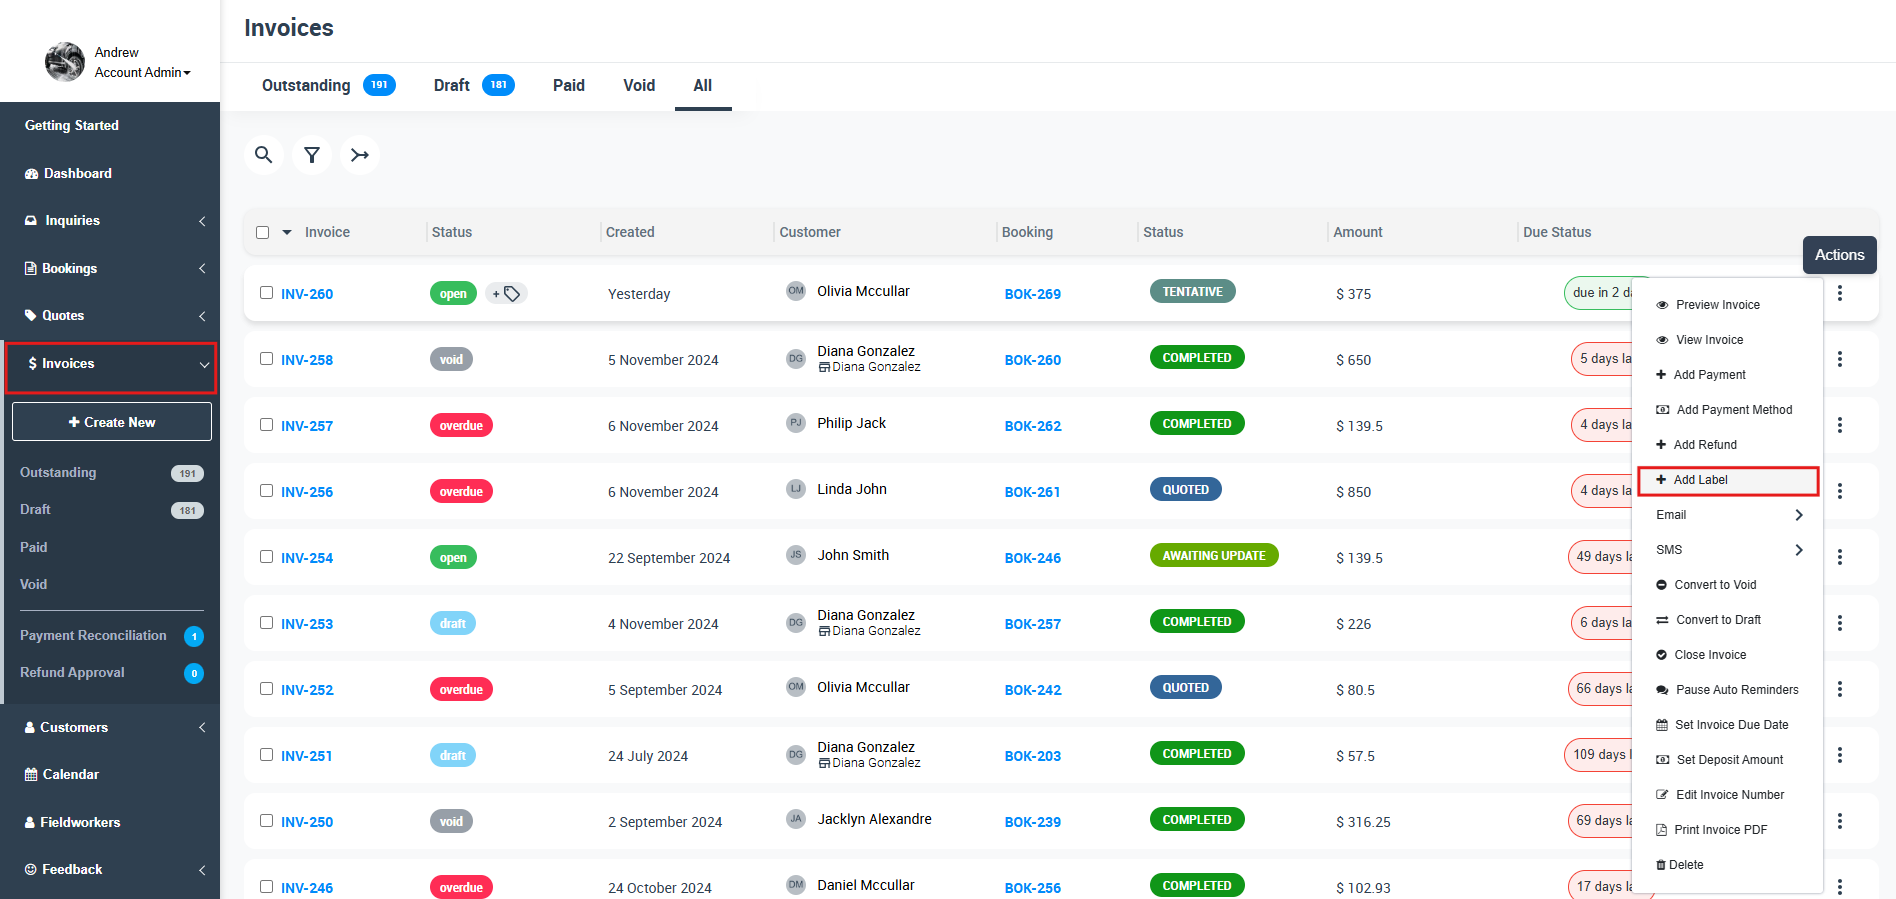
Adding labels to invoices
- Open your invoices list.
- Click Actions next to an invoice and select Add Label.
- Search and select the label(s).
- Click Apply.
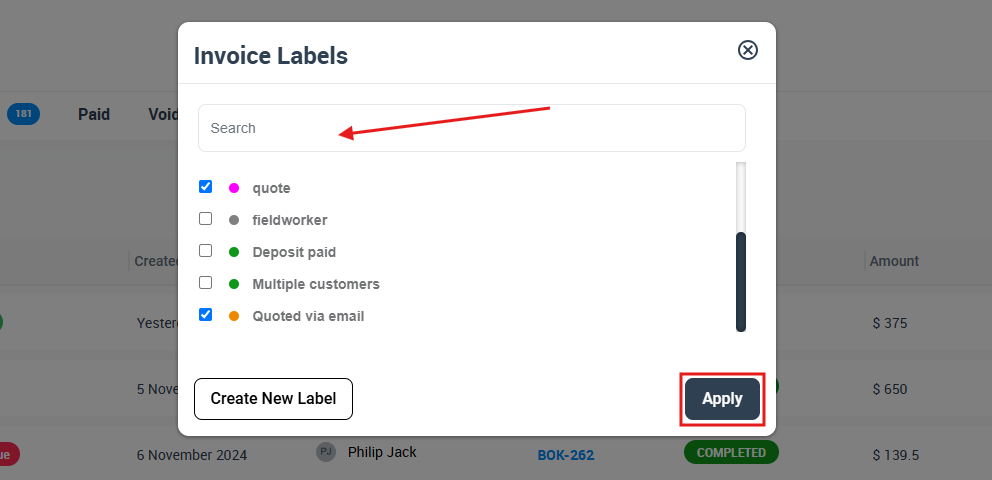
The label(s) will display on the invoice record for easy tracking.

Learn more: Label / Tag Invoices

Adding labels to customers
- Go to Customers and open your All Customers list.
- Click Actions next to a customer and select Add label.
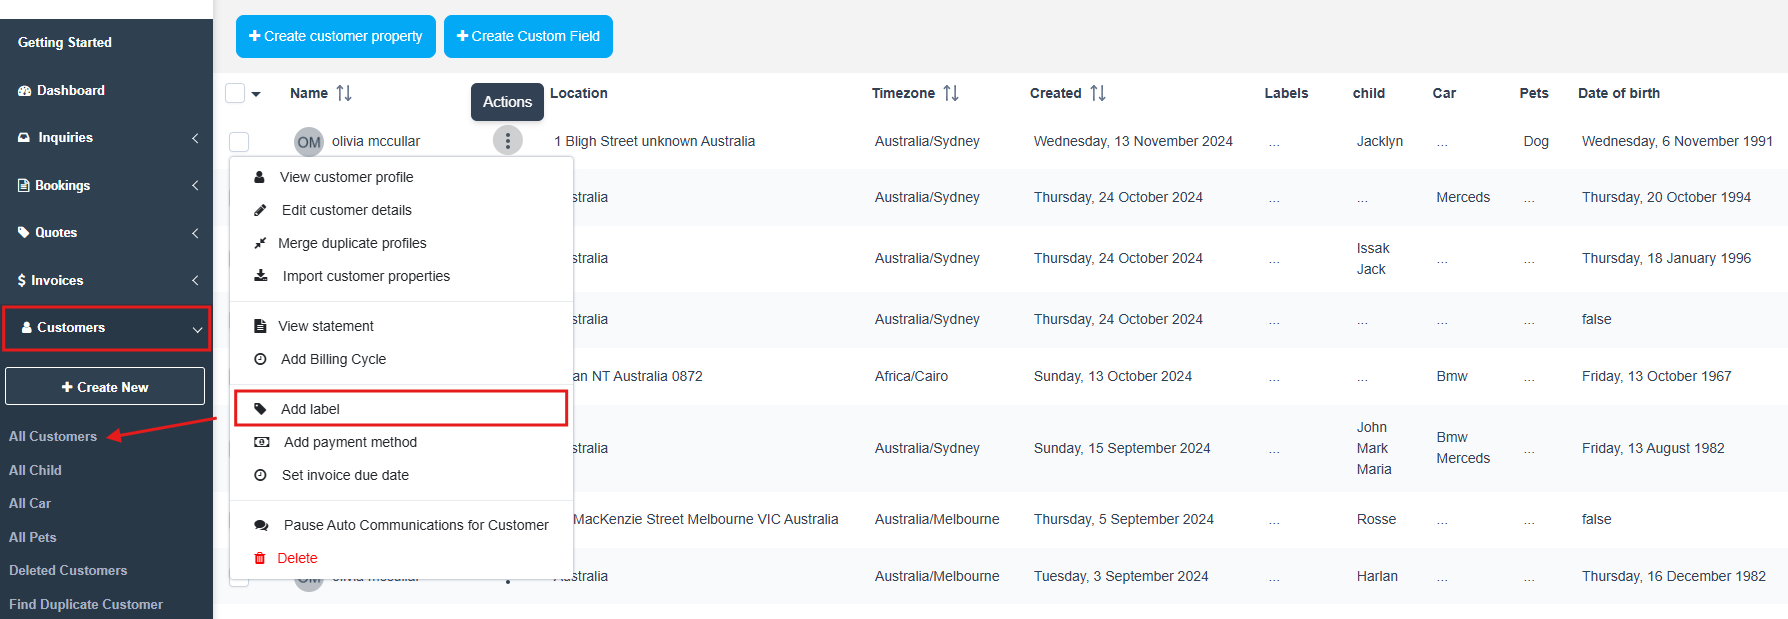
- Search and select the label(s).
- Click Apply.
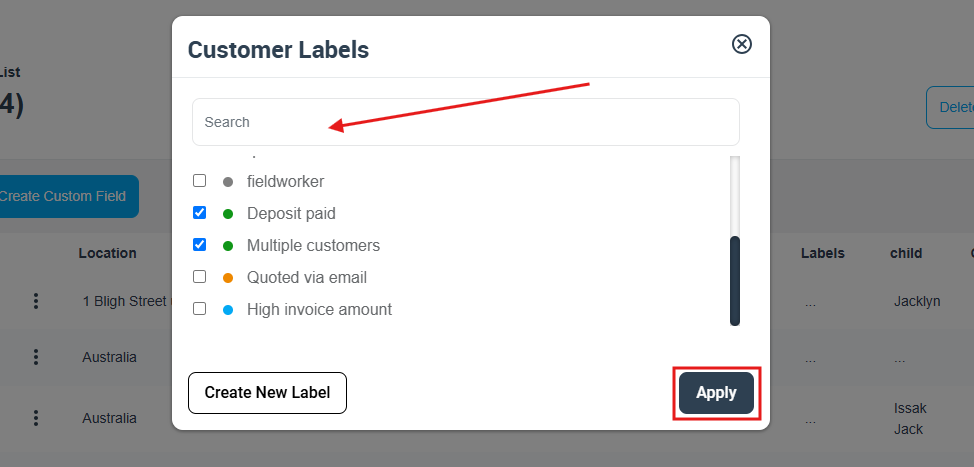
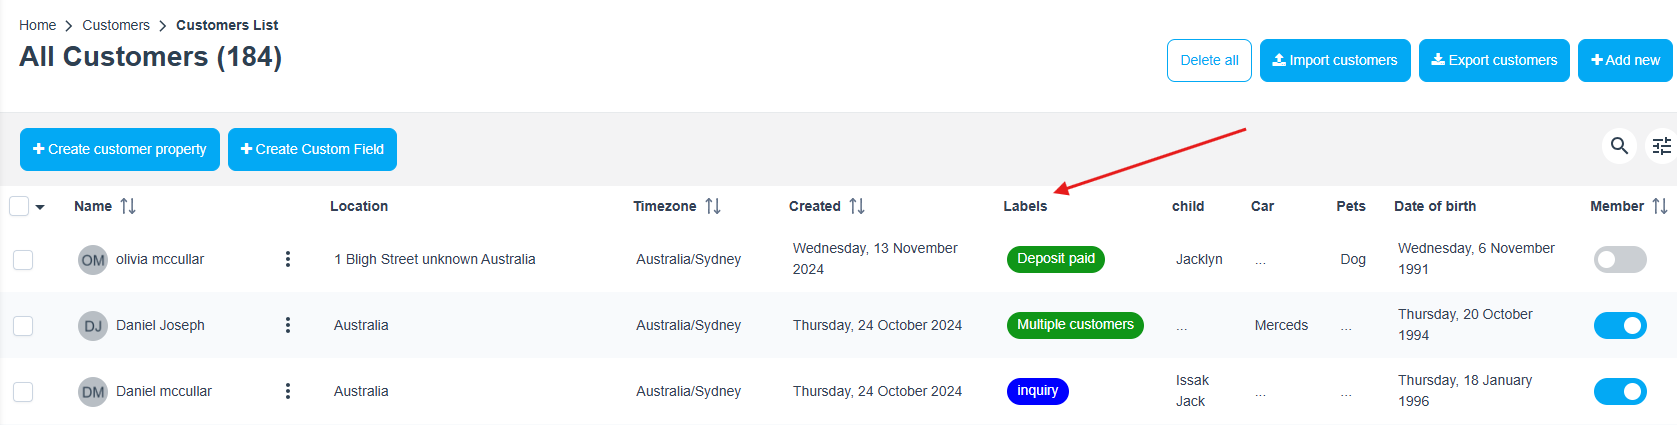
Labels then appear in your customer list, helping your team segment and prioritize customers.
Adding labels to fieldworkers
- Go to Fieldworkers.
- Open the fieldworker’s Actions menu and select Add label.
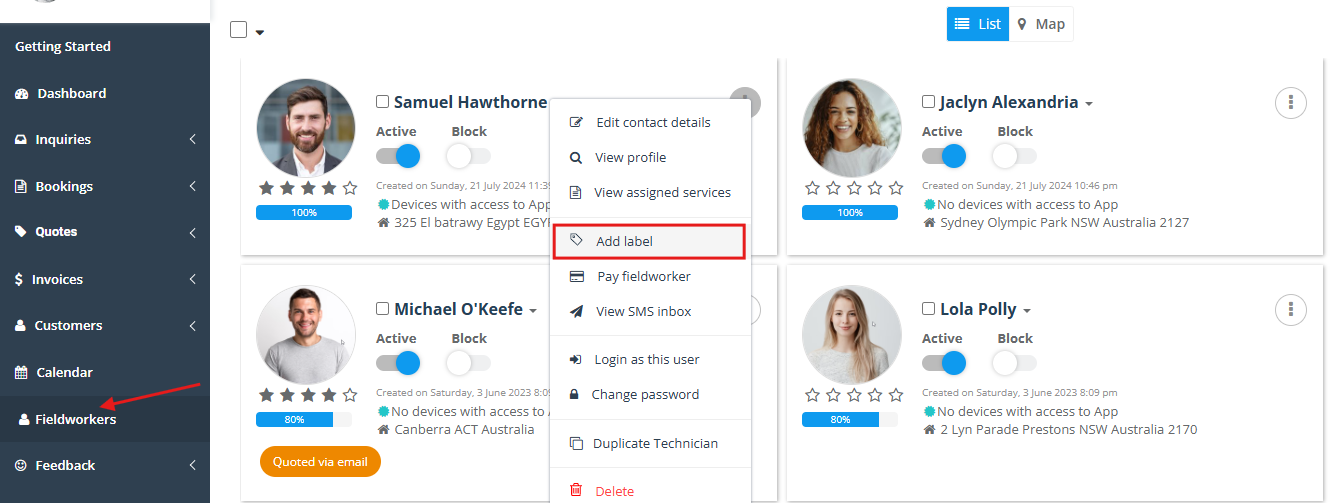
- Search/select the label(s).
- Click Apply.
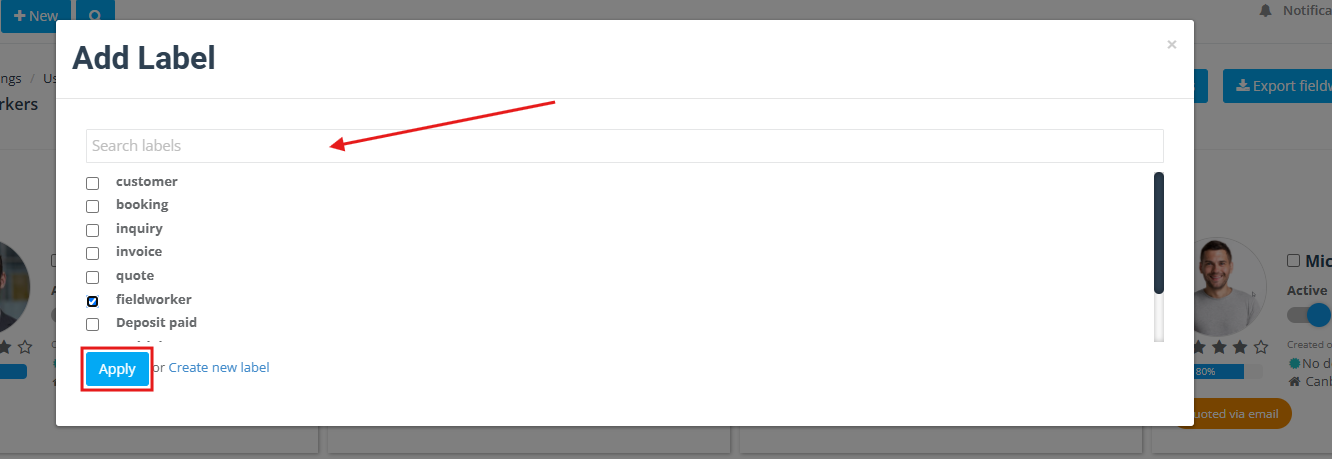
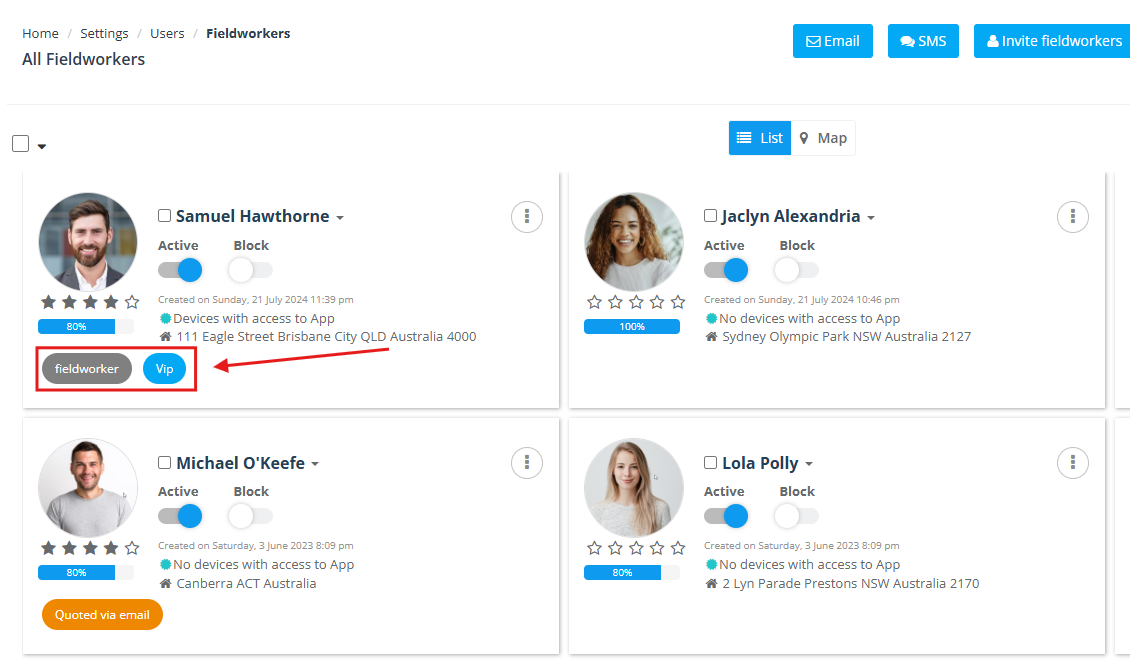
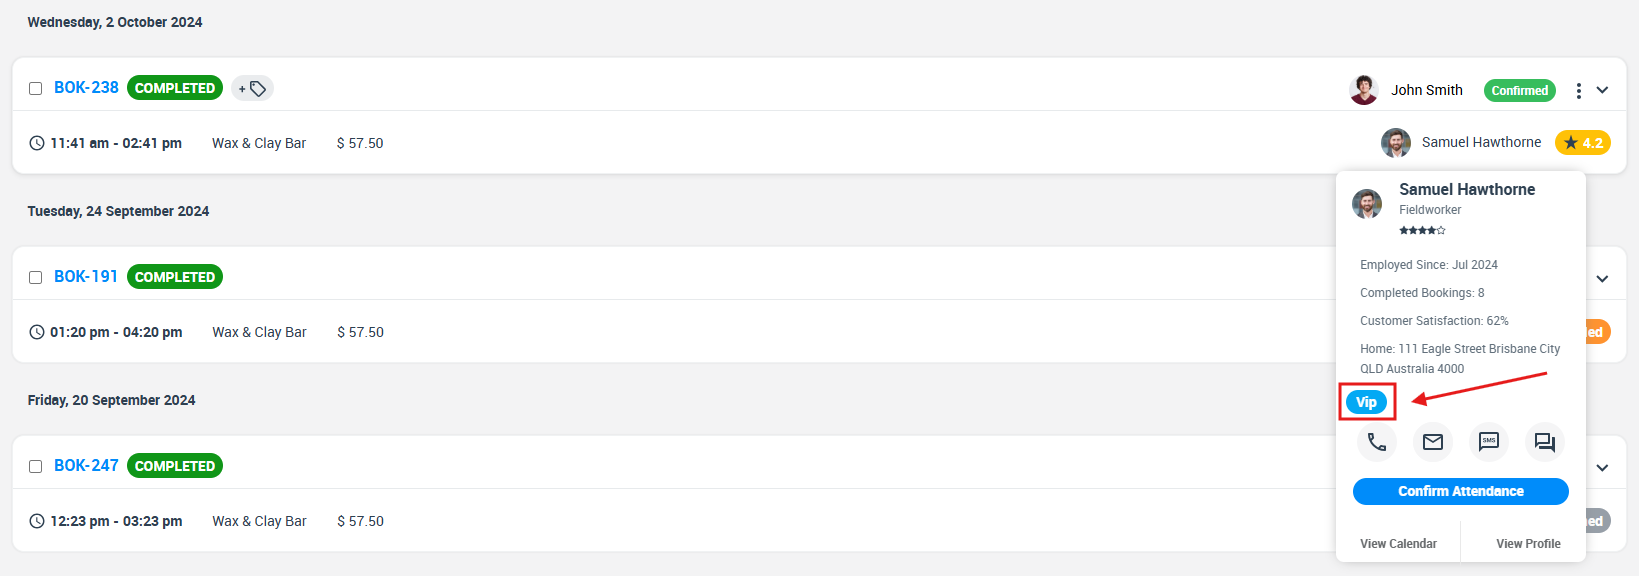
Labels display on the fieldworker card and can also appear in the fieldworker details popup for quick identification.
Edit or delete labels
You can manage existing labels from Settings > General Settings > Labels:
- Edit: Update the label name, color, or parent label to match your latest naming standards.
- Delete: Remove labels you no longer use to keep your system clean and consistent.
Important: Because labels can be used across multiple modules, changing or deleting a label may affect how records are categorized throughout your account. If you’re standardizing labels across a team, update naming conventions carefully.
Related guides
- Adding Labels to Inquiries
- Label / Tag Bookings and Quotes
- Label / Tag Invoices
- Customer Management & CRM
- Fieldworker Management
- Universal Search & Advanced Filters
- Role-Based Access Control (Permissions)
To stay updated, please subscribe to our YouTube channel.