
Use Labels to Track Bookings & Quotes
Custom, colour-coded labels (also known as tags) help your team flag the status, urgency, or special handling of any booking or quote—without changing the official booking/quote status or exposing internal notes to customers.

Labels make work easier by:
- Improving triage – colour chips instantly highlight what needs attention (e.g., Urgent, Waiting on Parts, VIP).
- Improving handovers – office staff and fieldworkers see the same shorthand at a glance.
- Speeding up search & reporting – filter lists and dashboards by label(s), and export for analysis.
- Supporting smarter scheduling – labels are visible in calendar hover cards for dispatch clarity.
In this guide
- What labels are (and when to use them)
- Labels vs statuses vs custom fields
- Create & manage labels (global setup)
- Apply labels to quotes and bookings
- Where labels appear
- Filter by label(s)
- Edit, remove, or delete labels
- Best practices & naming conventions
- Label examples by industry
- Frequently asked questions
- Related guides
What labels are (and when to use them)
Labels are designed for fast internal categorisation. They’re ideal when you need to flag something important about a booking/quote without changing its official workflow stage (e.g., To Do, In Progress, Completed for bookings; Draft, Sent, Accepted for quotes).
Common label use cases:
- Priority: Urgent, High Value, Escalated
- Follow-up: Needs Callback, Waiting on Customer, Reminder Sent
- Operations: After-hours, Special Access, Equipment Required, Multiple Fieldworkers
- Finance: Awaiting Deposit, Deposit Paid, Manual Payment
Note: Labels are internal and are intended to keep your back-office tracking private from customers.
Labels vs statuses vs custom fields
| Feature | What it is | Best for | Editable by | Notes / Examples |
|---|---|---|---|---|
| Status | The official workflow stage of a booking/quote. | Tracking progress through your core process. | Authorised users (per permissions) | Often drives workflows & reporting. Examples: Bookings To Do/In Progress/Completed, Quotes Draft/Sent/Accepted. |
| Label (Tag) | A flexible internal marker you can add/remove anytime. | Fast, changeable internal signals (priority, follow-ups, flags, segmentation). | Any authorised user | Internal-only. Examples: VIP, Urgent, Waiting on Parts, Needs Callback. |
| Custom field | Structured, consistent data captured on the record. | Permanent, reportable operational data. | Admin only | Part of the formal record. Examples: Serial No., Equipment type, Access instructions. |
Tip: Use labels for changeable signals; use custom fields for structured data you’ll reuse and report on.
Create & manage labels (global setup)
Labels are managed from a global library in your settings (admin-level setup).
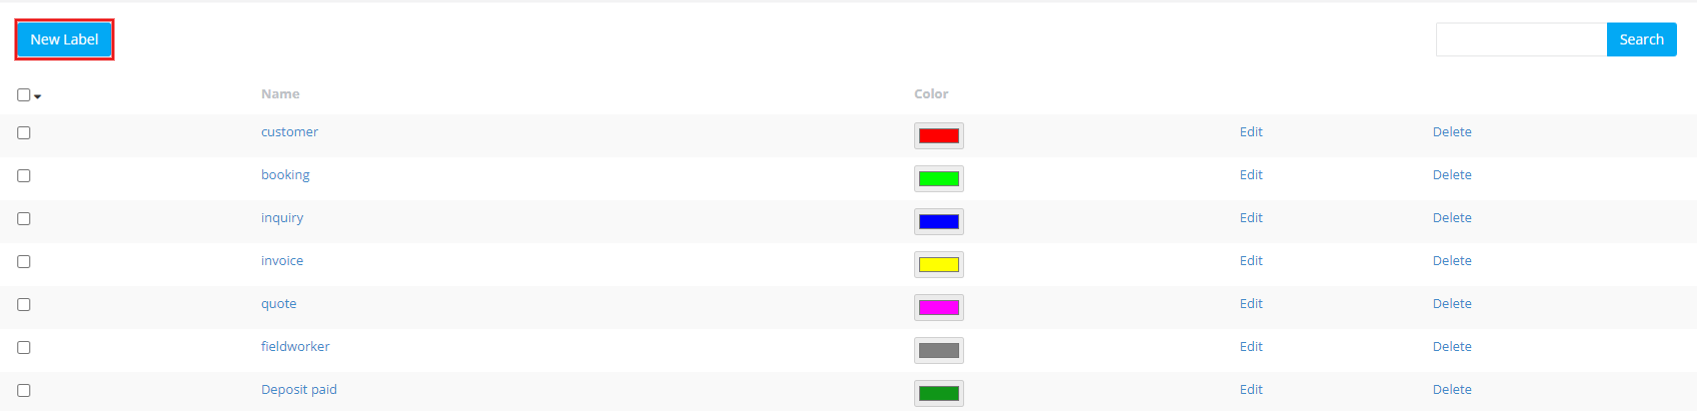
- Go to Settings → General → Labels.
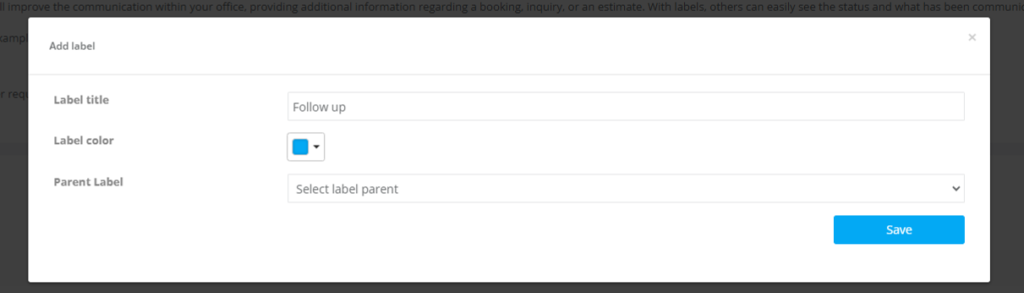
- Click New Label.
- Enter a label title, choose a label colour, and optionally select a parent label (nested labels).
- Click Save.
Helpful tips:
- Keep label names short (recommended: 15 characters max) so they display neatly in list rows.
- Use high-contrast colours (helps readability and colour-blind accessibility).
- Use parent/child labels to keep large label libraries organised (similar to Gmail labels).

For full governance and label structure best practices, see: Label Management (Tags): Create, Color-Code, and Organize Records.
Apply labels to quotes and bookings
The same workflow applies to both quotes and bookings. You can apply multiple labels to a single record (e.g., VIP + Awaiting Deposit).
Option 1: Apply labels from the Quotes/Bookings list
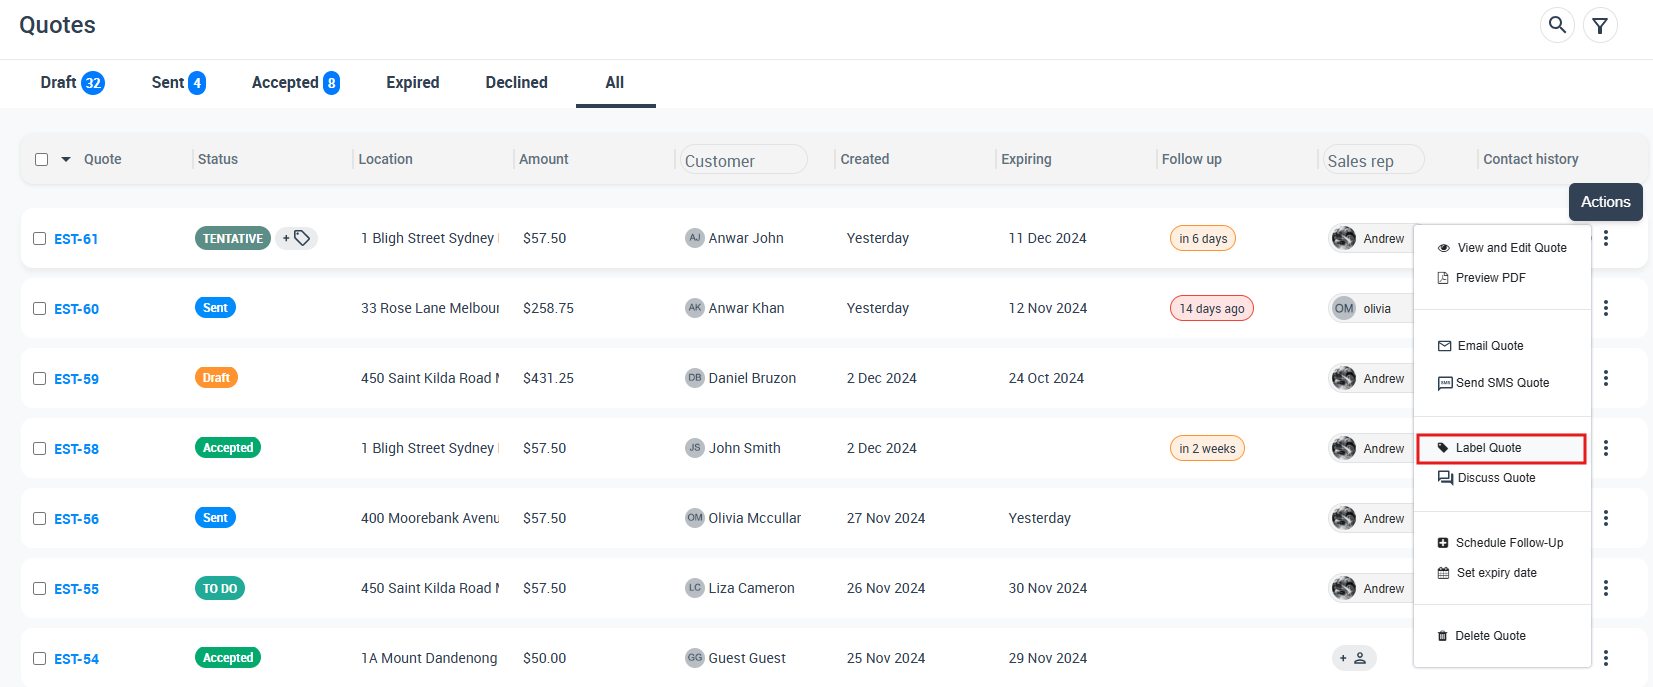
- Open the Quotes list or Bookings list.
- Click the row Actions menu (three dots).
- Select Label Quote / Add Label (wording may vary by screen).
- Select one or more labels, then click Apply.
Option 2: Apply labels from inside a booking/quote
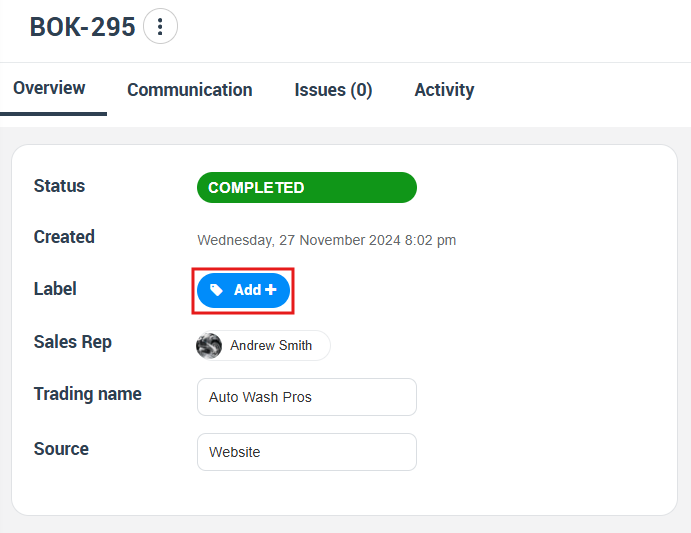
- Open the booking or quote.
- In the overview panel, click Add + next to Label.
- Select the label(s) you want and click Apply.
Tip: Use the search bar in the label popup to quickly find labels when your library grows.

Create a new label while labeling
If the label you need doesn’t exist yet, you can create it without leaving the booking/quote:
- In the Add Labels popup, click Create New Label.
- Enter the label title, choose a colour, and optionally choose a parent label.
- Click Save, then ensure it’s selected and click Apply.
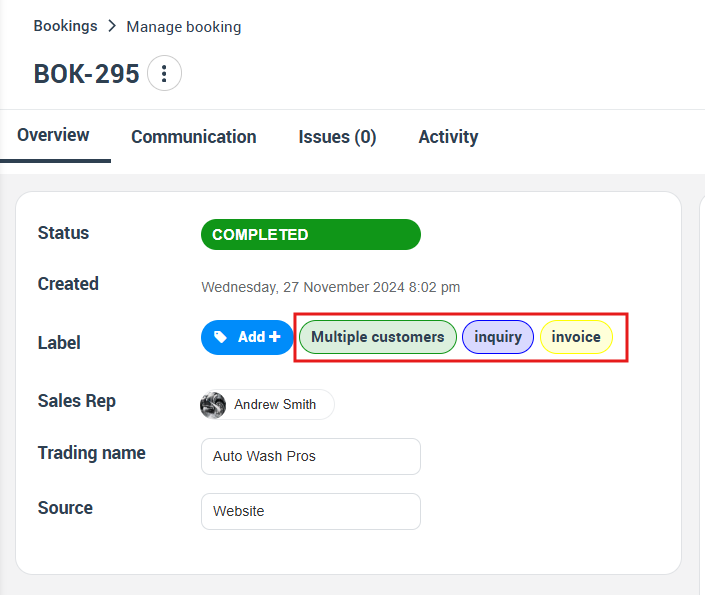
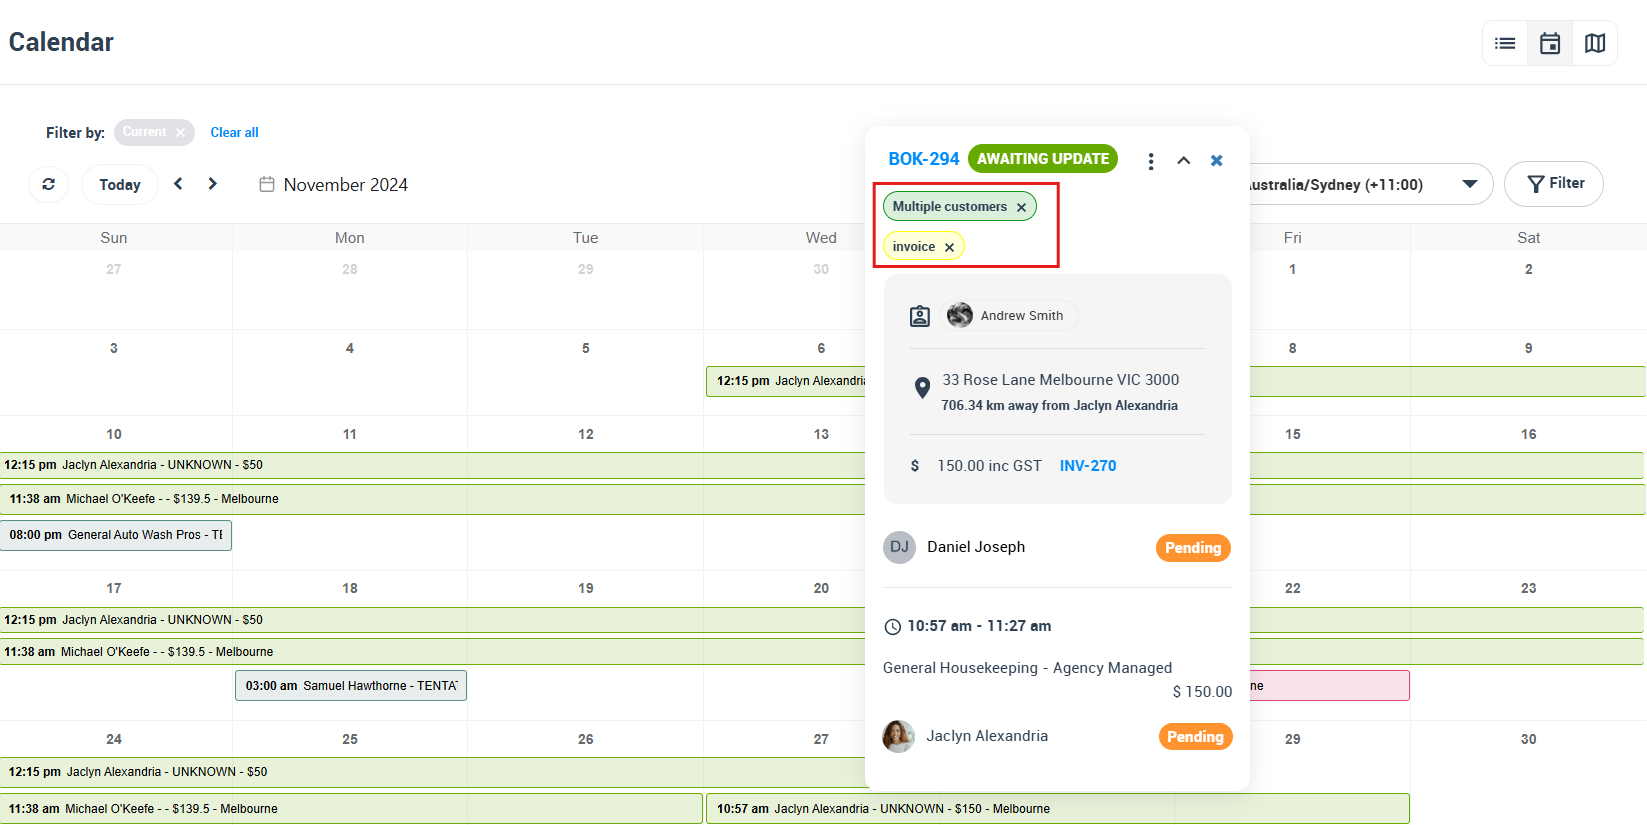
Where labels appear
After applying labels, they display as colour “chips” in key places:
- Booking/Quote page (overview panel)
- List views (Bookings/Quotes lists)
- Calendar hover cards (useful for dispatch and scheduling)

Filter by label(s)
Filtering is one of the biggest advantages of labels. You can filter by label(s) in list search and in dashboard widgets, which reduces manual lookups.
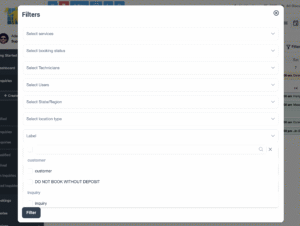
Filter from list pages
- Open the Bookings list or Quotes list.
- Click Filter.
- In the Labels section, select one or more labels.
- Click Filter / Apply to refine your results.
Edit, remove, or delete labels
Remove a label from a single booking/quote
- Open the booking/quote.
- Click Add + next to Label (or click the label chip).
- Untick the label, then click Apply.
Bulk remove labels (multiple records)
- Open the Bookings list or Quotes list.
- Select multiple rows using the checkboxes.
- Open the bulk Actions menu.
- Choose Remove Labels and confirm.
Rename, recolour, or delete a label globally
- Go to Settings → General → Labels.
- Use the available actions to edit or delete labels.
Important: Deleting a label permanently removes it from every historical record it was applied to. Consider auditing and reporting requirements before deleting.
Best practices & naming conventions
- Keep names short so they display well across web and mobile.
- Use consistent prefixes to group labels (optional): OPS:, FIN:, SALES:.
- Use colour meaningfully: reserve red/orange for urgent/risk, green for confirmed/positive, and neutral colours for informational labels.
- Avoid duplicates: choose one standard term (e.g., Urgent OR High Priority).
- Review quarterly: clean up rarely used labels to keep the list manageable.
Label examples by industry
- HVAC & Plumbing: Parts Ordered, Same-Day Priority, Warranty Job
- Cleaning: Deep Clean, Key Pickup, Pet On Site
- Event Services: Awaiting Deposit, VIP Client, Rider Sent
- Professional Services: Draft Quote, Signed LOE, Awaiting Scope
- Logistics/Couriers: Customs Docs Pending, Fragile, Signature Required
Frequently asked questions
Can customers see labels?
No—labels are strictly internal and keep your back-office notes private.
Is there a limit on labels per record?
There’s no hard limit, but usability typically drops if you apply more than 5–6 labels to the same booking/quote.
Do labels sync to the mobile Fieldworker App?
Yes. Fieldworkers can see label chips on assigned jobs for contextual awareness.
Can I report on labels?
Yes—use list filters and exports. When exporting to CSV, labels are included as a list (useful for pivot-table analysis).
Can I filter bookings and quotes by label?
Yes—use the labels filter on the bookings/quotes listing pages to quickly find records with the selected label(s).
Can labels trigger automations?
Yes—through OctopusPro’s Zapier connector or REST API, you can apply business rules when a record gains or loses a specific label.
Related guides
- Label Management (Tags): Create, Color-Code, and Organize Records
- Create a New Booking (Manual, From Inquiry/Quote)
- Create a Quote (Estimate) in OctopusPro
- Universal Search & Advanced Filters
- Calendar Month View
To stay updated, please subscribe to our YouTube channel.