
Customer Portal URL (Username & White-Label Domain Setup)
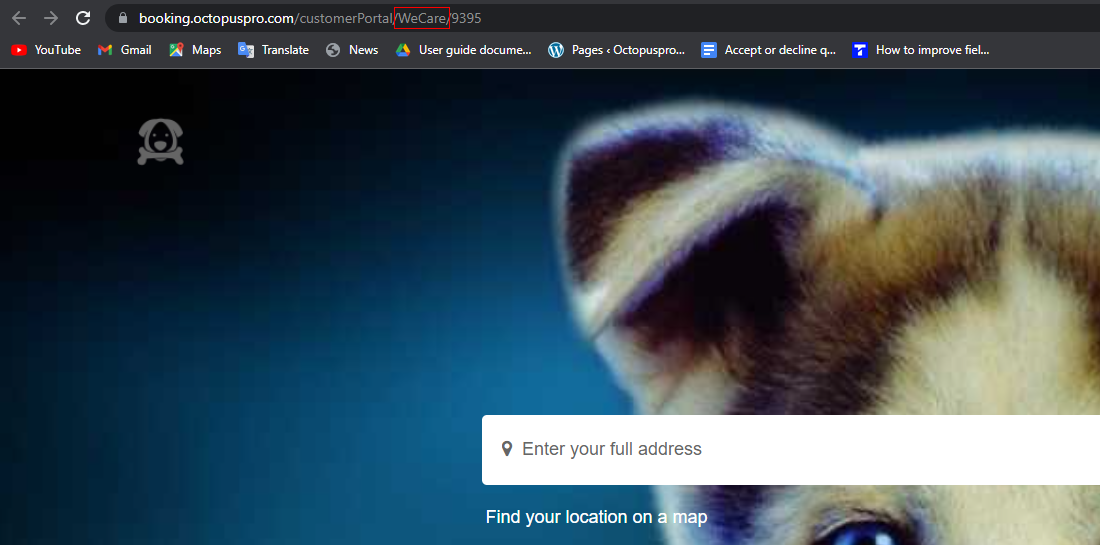
Your Customer Portal URL is the web address customers use to access your OctopusPro portal to browse services, request a quote, book online, pay, and manage their bookings. By default, OctopusPro provides a hosted portal URL (for example: booking.octopuspro.com). You can also:
- Customize the portal username (the “handle” in your hosted URL).
- White-label the portal URL with your own domain/subdomain (recommended for brand consistency), such as booking.yourcompany.com.

Quick navigation
- What this feature is
- Benefits & use cases
- Where to find your portal URL
- View your portal
- Edit portal username (hosted URL)
- White-label domain/subdomain (custom URL)
- DNS setup (CNAME) step-by-step
- Verification & testing checklist
- Troubleshooting
- Where to use your portal link
- SEO metadata suggestions
What this feature is
This feature controls the public URL customers use to reach your booking portal. OctopusPro supports two levels of customization:
- Portal Username (quick branding): updates part of your OctopusPro-hosted portal URL.
- Domain White-Labelling (full branding): lets you use a subdomain on your own domain (e.g., booking.yourcompany.com), so customers stay on your brand.
Benefits & use cases
- Trust & professionalism: customers see your brand in the URL, which improves confidence and reduces drop-offs.
- Brand consistency: use one branded link everywhere (website, QR codes, social bio, ads, emails).
- Cleaner marketing: branded links are easier to remember and share.
- SEO equity (for branded domains): backlinks can point to your branded portal URL, strengthening brand visibility.
Examples:
- Cleaning business: booking.endofleasebondcleaning.com.au
- Massage business: booking.zenin.com.au
Where to find your portal URL in OctopusPro
Go to: Settings > Customer Portal > General Settings, then locate the Portal URL section.

Related guide: Customer Portal General Settings
View your portal
- In the Portal URL section, click your portal link to open it in a new browser tab.
- Review the portal experience as a customer (homepage, services list, booking flow, and checkout).
Edit portal username (OctopusPro-hosted URL)
The portal username is the branded identifier inside your OctopusPro-hosted portal URL. This is useful if you want a cleaner URL quickly (without setting up your own domain).

- Click Edit Portal Username.
- Enter your preferred portal name.
- Click Save.
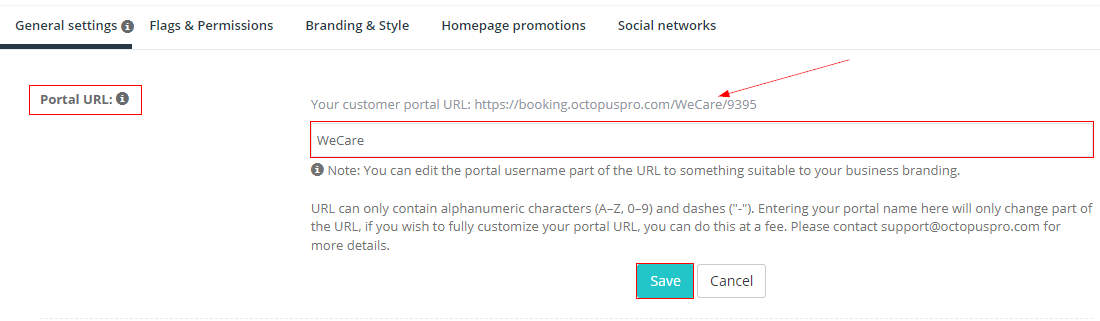
Formatting rules: the username can include letters and numbers and may allow dashes. Avoid spaces and special characters.
White-label domain/subdomain (custom portal URL)
Domain White-Labelling allows you to use your own domain (typically a subdomain) for the customer portal, such as booking.yourcompany.com. This provides the most professional and consistent customer experience.

Before you start
- You must own the domain (e.g., yourcompany.com) and have access to DNS settings (registrar/hosting provider).
- Choose a clear subdomain name (common: booking, portal, schedule, services).
- You will need to add a CNAME record in DNS.
- DNS changes can take time to propagate (often minutes to 24 hours, sometimes up to 48 hours).
DNS setup (CNAME) step-by-step
- In OctopusPro: go to Settings > Customer Portal > General Settings, then under Portal URL click Edit Domain Name in URL.
- Choose your subdomain: for example booking (so your final URL becomes booking.yourcompany.com).
- In your domain host DNS: create a new CNAME record:
- Host / Name / Alias: your chosen subdomain (e.g., booking)
- Target / Points to / Destination: your OctopusPro regional hostname (e.g., us.octopuspro.com, eu.octopuspro.com, or au.octopuspro.com)
- TTL: leave default (commonly 3600 seconds) unless your IT team specifies otherwise
- Save the DNS record.
- Notify OctopusPro: once the DNS record is added, contact support so the domain can be configured and activated on the OctopusPro side.

Tip: If you’re not comfortable editing DNS records, ask your website administrator or domain provider support to add the CNAME record for you.
Verification & testing checklist
After your domain/subdomain is configured and verified:
- Open your branded URL in an incognito/private browser window.
- Confirm the portal loads over HTTPS (secure lock icon in the address bar).
- Test the full flow: Services list → Service details → Booking steps → Checkout → Confirmation.
- If you use tracking scripts (GA4, Google Ads, Meta Pixel), confirm the tracking fires correctly.
Troubleshooting (common issues)
- Domain shows “Not verified”: DNS may still be propagating. Double-check the CNAME host/target values and wait longer.
- Portal doesn’t load or shows a different site: ensure there is no conflicting A or AAAA record on the same subdomain.
- Wrong region target: confirm your CNAME points to the correct regional hostname for your OctopusPro account.
- HTTPS not working: SSL is typically completed after verification/activation. If it persists, contact OctopusPro support.
Where to use your portal link (best practices)
Once your portal URL is set, place it anywhere customers are likely to book:
- Website header button: “Book Online” / “Book Now”
- Contact page: portal link + QR code
- Email signature: “Book online: booking.yourcompany.com”
- Social profiles: Instagram/Facebook “Book Now” link
- Google Business Profile: add the booking link
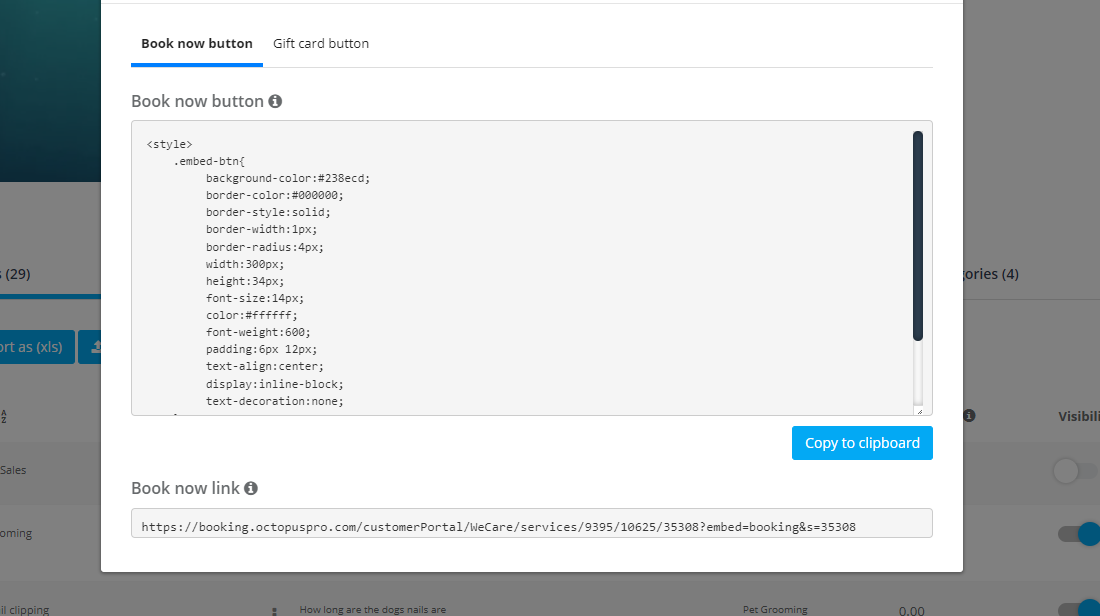
To generate embeddable “Book Now” button HTML or a shareable booking link, see: How to Embed Book Now & Gift Voucher Buttons
Costs & billing
Domain White-Labelling is a paid add-on and may incur additional charges. For the latest details, check the Extra / usage-based fees section on the OctopusPro pricing page: OctopusPro Pricing
Related guides
- Customer Portal Branding & Style
- Customer Portal General Settings
- Customer Portal SEO (Meta Title & Meta Description)
To stay updated, please subscribe to our YouTube channel.