
User & Role Management: Add, Invite, Import & Control User Access

OctopusPro includes built-in User Management and Role-Based Access Control (RBAC) so you can:
- Provision users (admins, office staff, dispatchers, finance users, etc.)
- Invite fieldworkers (employees or subcontractors) to create their own login
- Import users from accounting tools (e.g., QuickBooks / Xero)
- Control permissions using roles (credentials)
- Secure access with status controls (activate/deactivate, block, delete), password resets, and force logout
Best practice: set up your roles/permissions first, then add or invite users so every person starts with the correct access level from day one.
On this page
- Where to manage users
- Add a new user (admin-created)
- Invite fieldworkers to self-register
- Import users from QuickBooks / Xero
- Roles & permissions (RBAC)
- Edit and maintain user profiles
- Security tools: impersonation, force logout, reset password
- User statuses: active, inactive, blocked, deleted
- Audit trail: User Activity Log
- Related guides
Where to manage users
You can manage all internal users from the Users list:
Path: Settings → Company Settings → Users
If you are managing mobile staff, you can also create/invite/manage them from the dedicated Fieldworkers area (recommended for day-to-day dispatching):
Path: Fieldworkers (left menu) → manage profiles, job settings, working hours, and fieldworker access.
Add a new user (admin-created)
Use this method when your office/admin team wants to create the account and assign access immediately (ideal for internal staff such as admin users, dispatchers, reception, finance, or managers).
Steps
- Go to Settings → Company Settings → Users.
- Click Add New.
- Enter the user’s details (name, email, phone, etc.).
- Select the appropriate Role / Credential (this controls what they can access).
- Save the user.
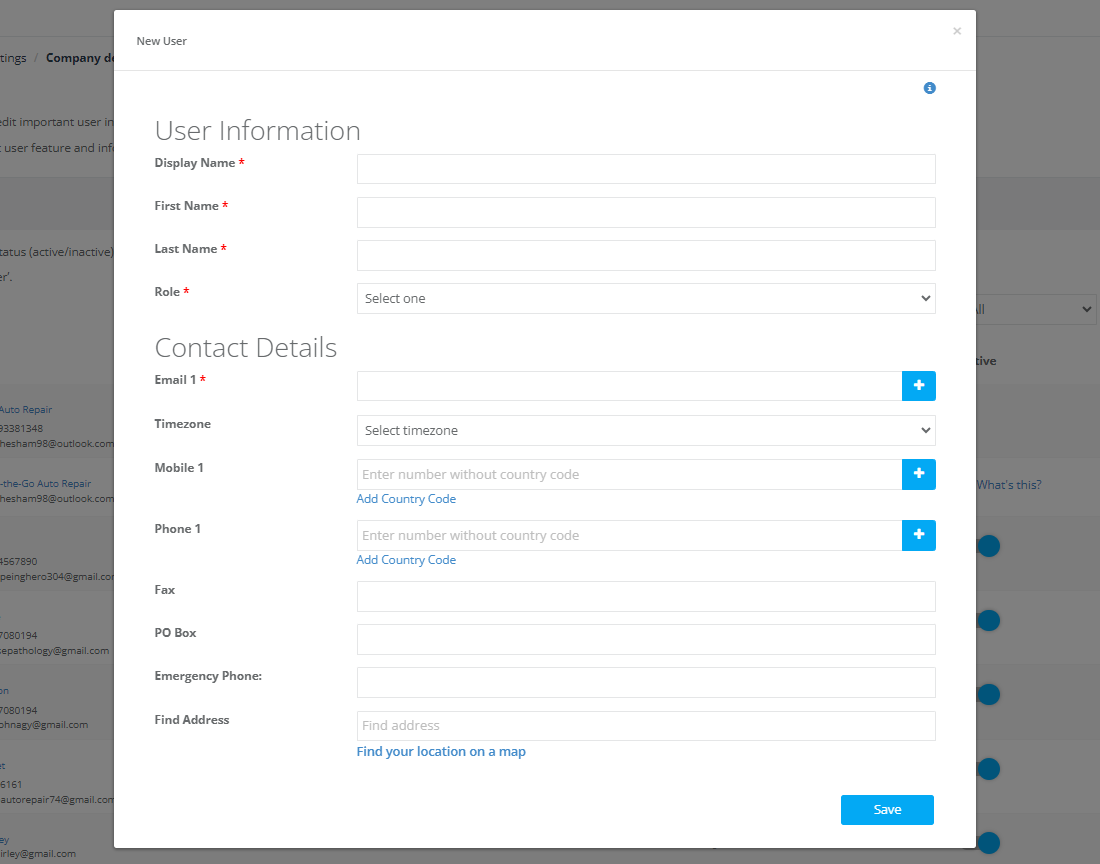
Tip: If your team has multiple job functions, create separate roles (e.g., Dispatcher, Finance, Admin, Read-only) instead of giving everyone full admin access.
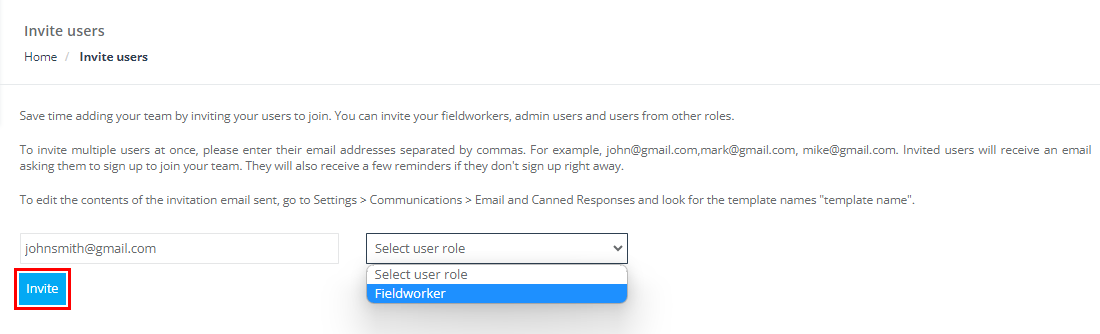
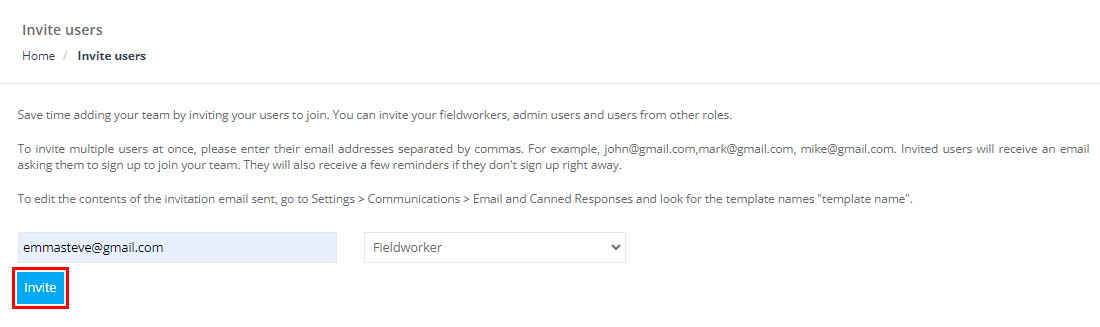
Invite fieldworkers to self-register
Inviting fieldworkers allows them to create their own password and complete their profile details—reducing admin workload and speeding up onboarding. This is ideal for subcontractors, contractors, and distributed teams.
What happens when you invite a fieldworker?
- The fieldworker receives an email invitation.
- They create their login and complete their details.
- You can control what they see/do in the Fieldworker App using Fieldworker Permissions (separate from RBAC).
Method 1: Invite from the Users list
- Go to Settings → Company Settings → Users.
- Click Invite Fieldworker.
- Enter the fieldworker’s details and send the invitation.
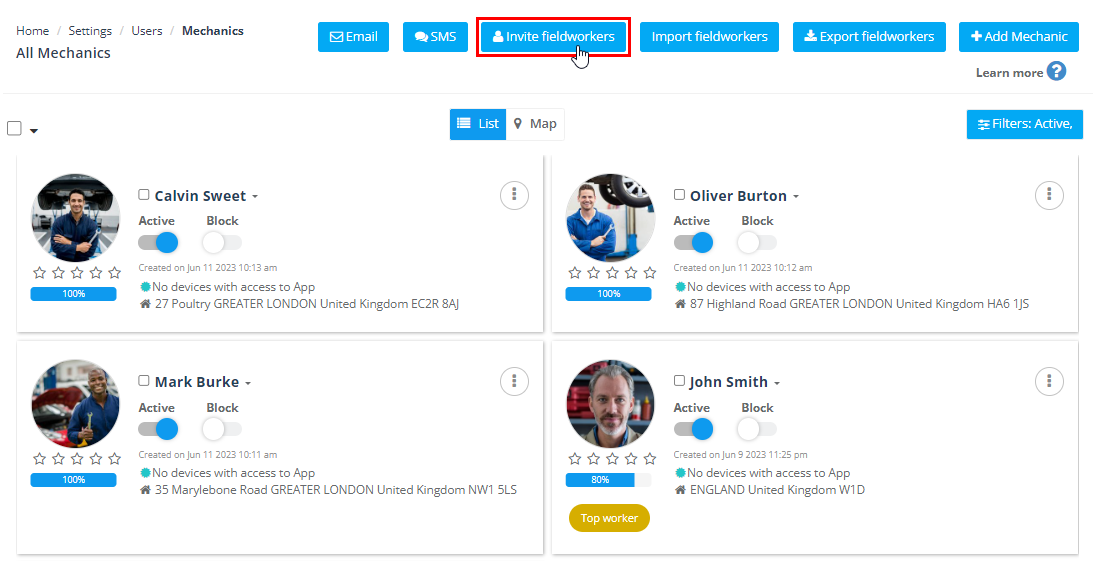
Method 2: Invite from the Fieldworkers page (recommended for dispatch teams)
- Open Fieldworkers from the left menu.
- Click Invite Fieldworker.
- Enter the details, then send the invite.
Method 3: Invite from a specific fieldworker record
- Open Fieldworkers and locate the person.
- Open their profile/record.
- Use the invite option to send the registration email.
Email verification note: If you need the fieldworker to verify their email (or re-send the verification link), see: Fieldworker Email Verification.

Customize the invitation email: you can manage email templates here: Email Templates.
Subworkers (Crew Members) Under a Lead Fieldworker
Subworkers (also called crew members) are assistant/apprentice user accounts that belong to a lead fieldworker. They’re ideal when jobs are delivered by a team (lead + helpers) and you want each person to have their own login, tracked activity, and accountability—without granting full access to sensitive financial or customer data.
Common examples:
- Lead technician + apprentice
- Cleaner + assistant
- Tradesperson + labourer/runner
- Multi-tech crews where a lead manages the team
How it works (high level):
- Enable the Subworkers capability (permission-controlled). Learn more: Allow Fieldworkers to Add Subworkers (Crew Members).

- Add/manage subworkers under a lead fieldworker from the web app (and optionally from the Fieldworker App if allowed). Step-by-step: Manage Subworkers Under Fieldworkers.
- Control what subworkers can access using fieldworker permissions (least-privilege). See: Fieldworker Permissions & Access Control.
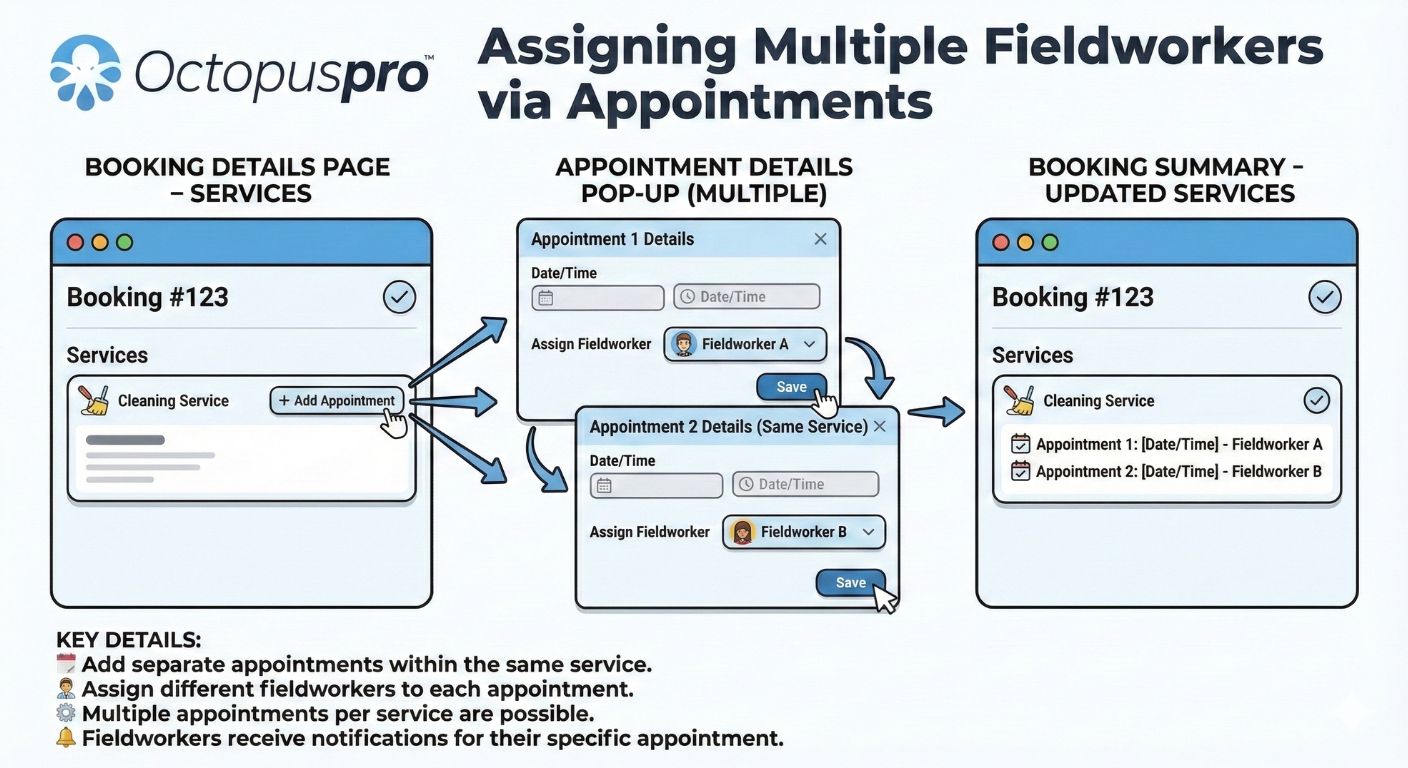
Note: Subworkers are different from assigning multiple independent fieldworkers to one booking. If you simply need multiple techs on a job (not a lead/crew hierarchy), see: Assign Multiple Fieldworkers to a Booking.
Import users from QuickBooks / Xero
If you already maintain contacts/users in your accounting system, OctopusPro can pull users from connected accounting tools (such as QuickBooks or Xero) to avoid manual re-entry.
Steps
- Go to Settings → Financial Settings.
- Open your integration settings (e.g., QuickBooks / Xero).
- Use the option to pull/import users into OctopusPro.
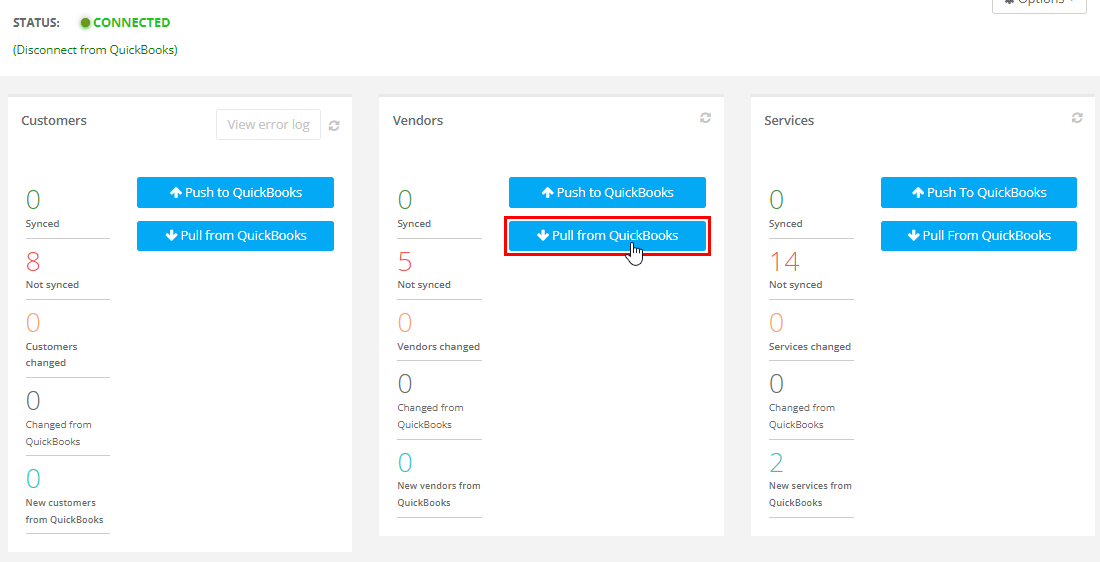
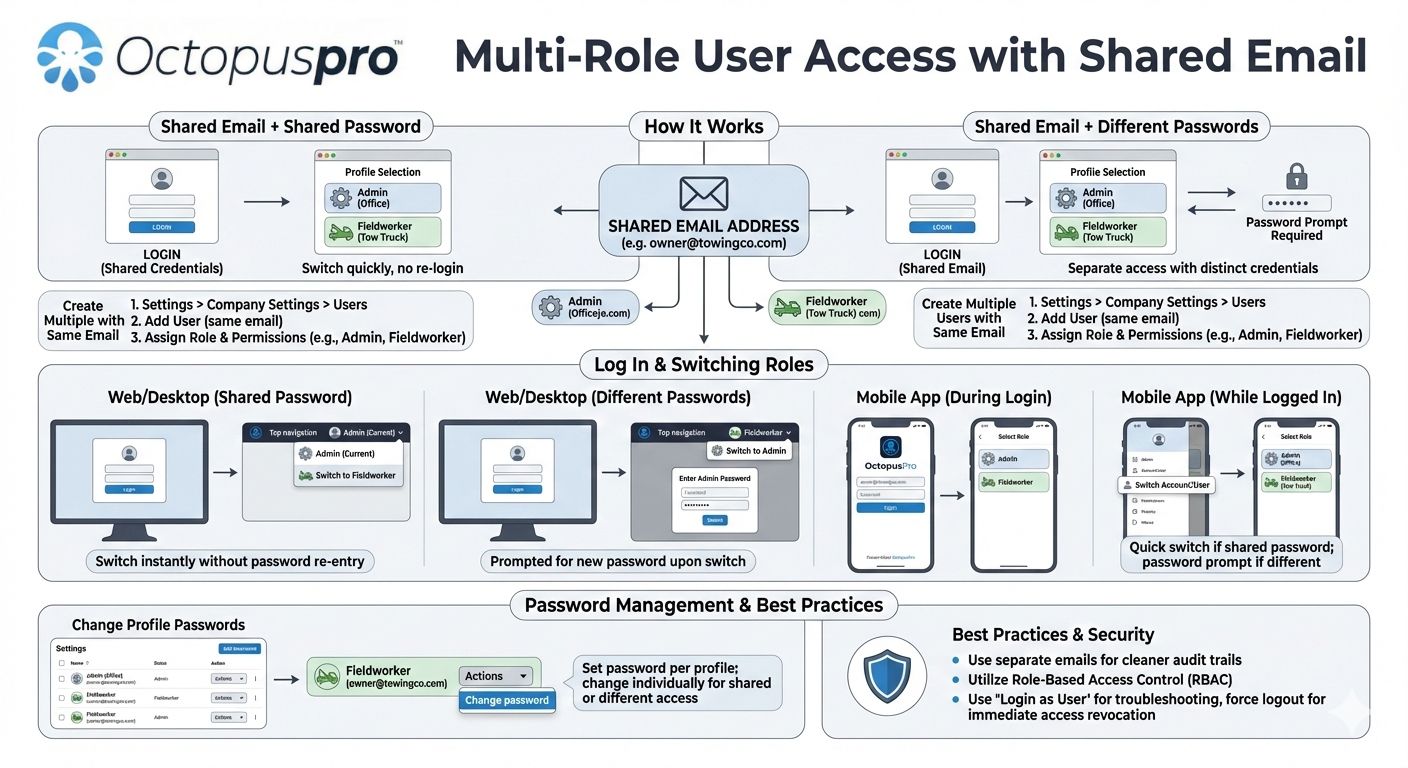
Important: imports typically rely on matching identifiers (most commonly the email). If one person needs multiple accounts/roles using the same email, read: Using the Same Email for Multiple Users.
Roles & permissions (RBAC)
OctopusPro uses Role-Based Access Control (RBAC) (called Roles or Credentials) to control what each user can view and do. This helps you protect sensitive data, prevent mistakes, and keep teams focused on their responsibilities.
Common role examples
- Owner / Super Admin: full access
- Dispatcher / Scheduler: bookings + calendar management only
- Finance: invoices, payments, refunds, and accounting features
- Customer Support: customer profiles, communications, and bookings (limited financial access)
- Read-only / Viewer: reporting visibility without editing rights
Standard Role Framework (Recommended Starting Point)
Use this framework to create clean, task-based roles that follow the least-privilege principle (give each role only the access it needs). You can start here, then fine-tune permissions based on your workflow.
| Category | Typical tasks | Recommended default access |
|---|---|---|
| Admin / Owner | System setup, integrations, pricing rules, financial approvals, user/role oversight, security actions | Full (limit to a small number of trusted users) |
| Sales / Estimator | Create/send quotes, manage leads/inquiries, view customer CRM details, forecast pipeline | Restricted financials (no payment gateways, refunds, payroll, or accounting settings) |
| Office Staff (Support / Dispatch) | Schedule jobs, assign fieldworkers, manage customer communications, update booking details | Module-specific (bookings/customers/comms; invoices read-only or limited) |
| Office Staff (Accounts / Finance) | Issue invoices, record/reconcile payments, manage credit notes/refunds (if allowed), run financial reports | Module-specific (invoices/payments/reports; bookings often read-only) |
| Fieldworker (Lead) | Accept/decline jobs, update status, complete checklists/forms, capture signatures, upload photos, timesheets | Mobile-first (Fieldworker App permissions control what they can do) |
| Subworker (Crew Member) | Assist lead fieldworker, log hours, upload job photos, complete assigned checklists | Limited mobile (separate login under a lead; minimal visibility by design) |
| Manager (Read-only / Approver) | View dashboards/reports, monitor performance, approve key actions (optional), QA oversight | Read-only + approvals (avoid edit/delete unless required) |
Important: There are multiple access layers in OctopusPro:
- Internal Users (Admin/Office): controlled by Roles & Permissions (RBAC). Learn more: Role-Based Access Control (RBAC) & Permissions.
- Fieldworkers + Subworkers: mobile access is controlled by Fieldworker Permissions (job actions, visibility, approvals, etc.): Fieldworker Permissions & Access Control.
- Customers: customers are not part of the internal role tree (even on membership plans). They access the Customer Portal, which is controlled separately via portal flags/permissions: Customer Portal Flags & Permissions.
Subworkers (crew members) – learn more:
Reminder: Customers—even those on membership plans—remain outside this internal role framework; they use the Customer Portal, not the internal workspace.
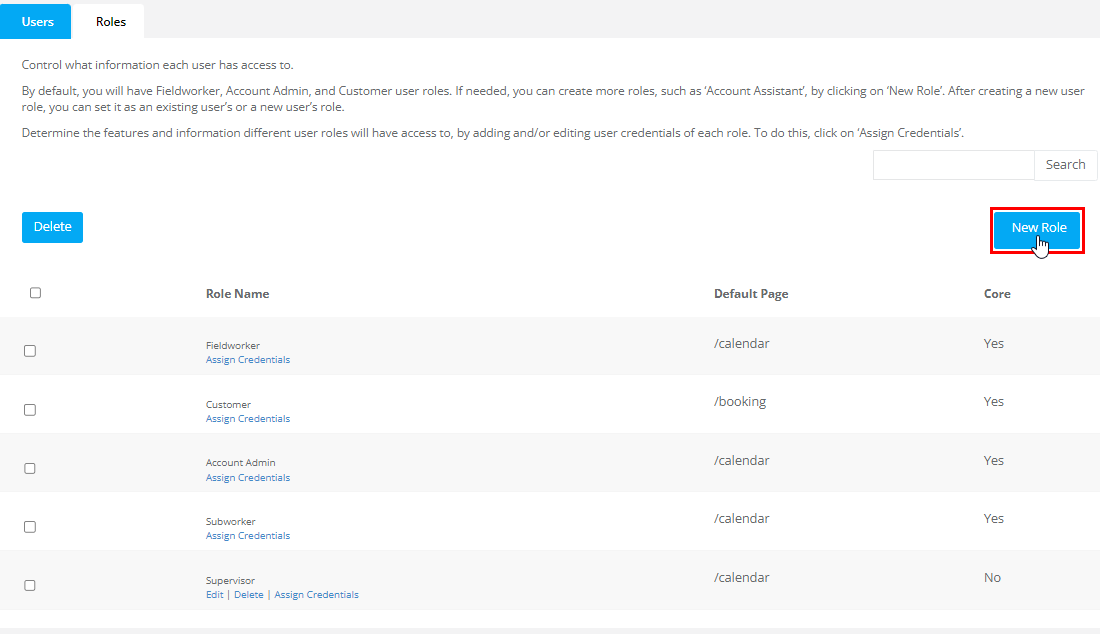
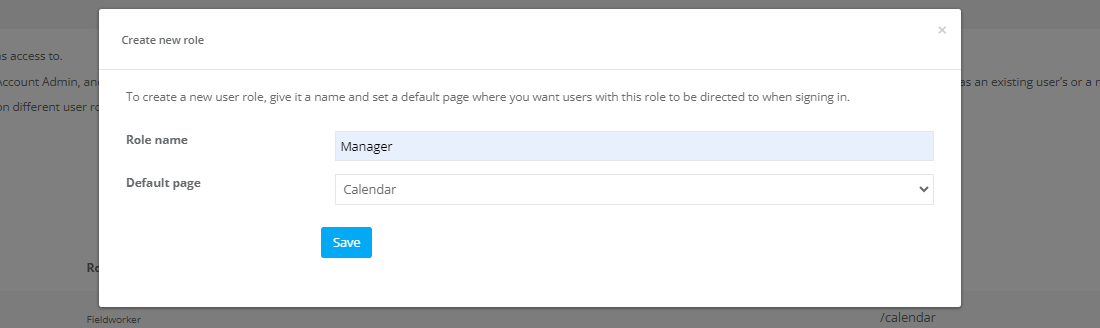
Create a new role
- Go to Settings → Company Settings → Roles / Credentials.
- Click Add New Role.
- Name the role clearly (e.g., “Dispatcher”, “Finance”, “Team Leader”).
- Save the role.
Assign a role to a user
- Go to the Users list.
- Edit the user (or open their profile).
- Select the correct Role / Credential and save.
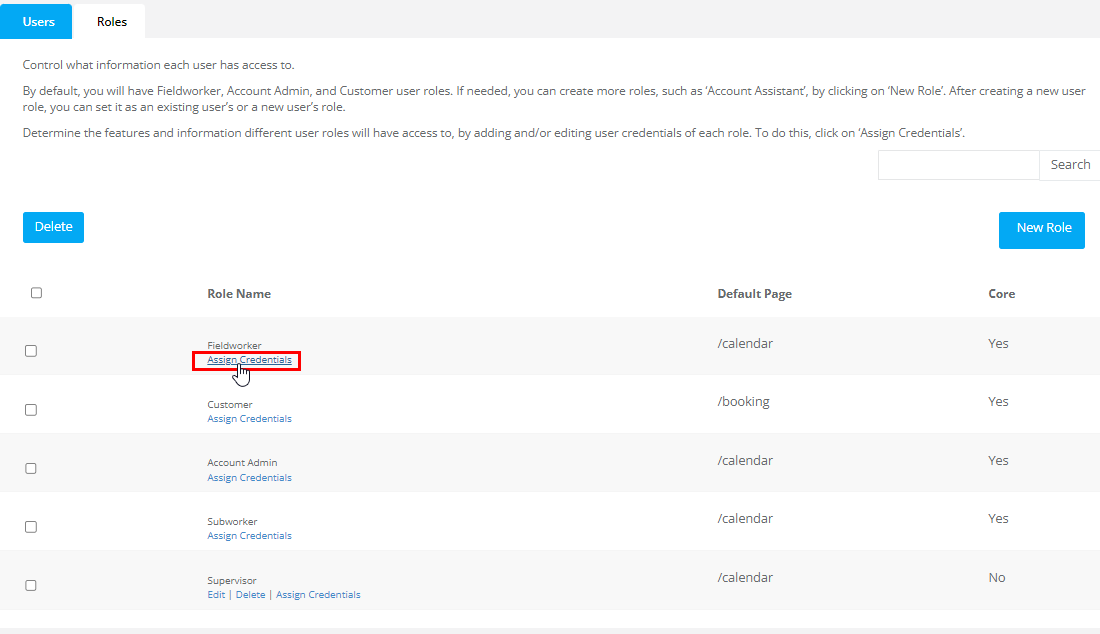
Configure role permissions
Inside the role settings, enable only the permissions the role needs (principle of least privilege). This keeps your system secure and reduces costly errors.
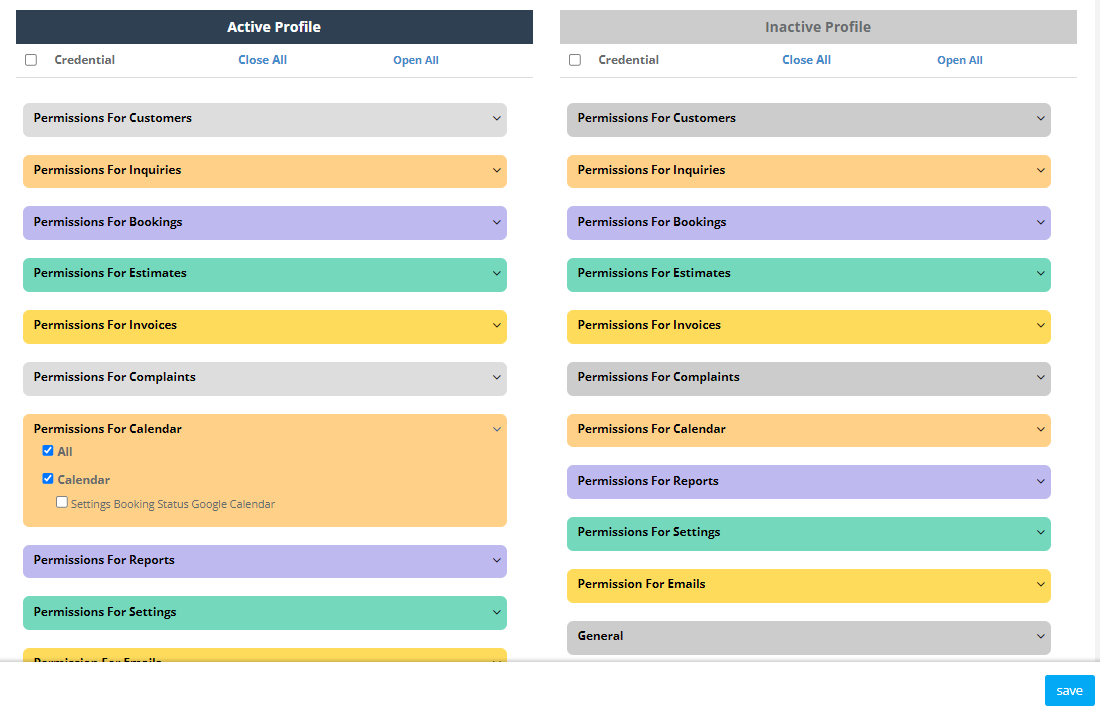
Learn more about RBAC: Role-Based Access Control (RBAC) & User Permissions.

Fieldworker App permissions: RBAC controls admin/office access. Fieldworker access is additionally controlled via Fieldworker Permissions: Fieldworker Permissions & Access Control.

Edit and maintain user profiles
Keeping user profiles accurate improves scheduling, communications, and accountability. Admins can update user details at any time, and some users (like fieldworkers) can also self-update certain information.
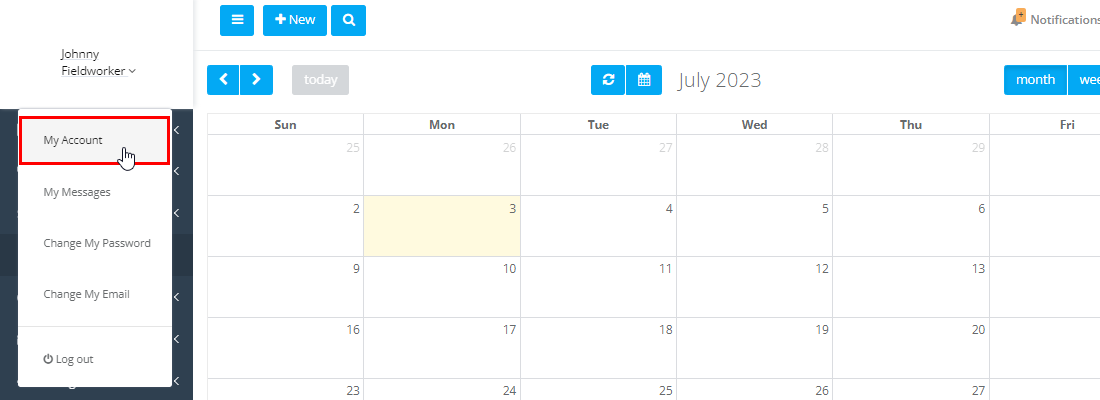
Fieldworker self-service (My Account)
Fieldworkers can update parts of their profile through My Account (depending on your configuration and permissions).
Admin editing (Users list)
- Go to Settings → Company Settings → Users.
- Find the user and open Edit.
- Update the required fields, then save.
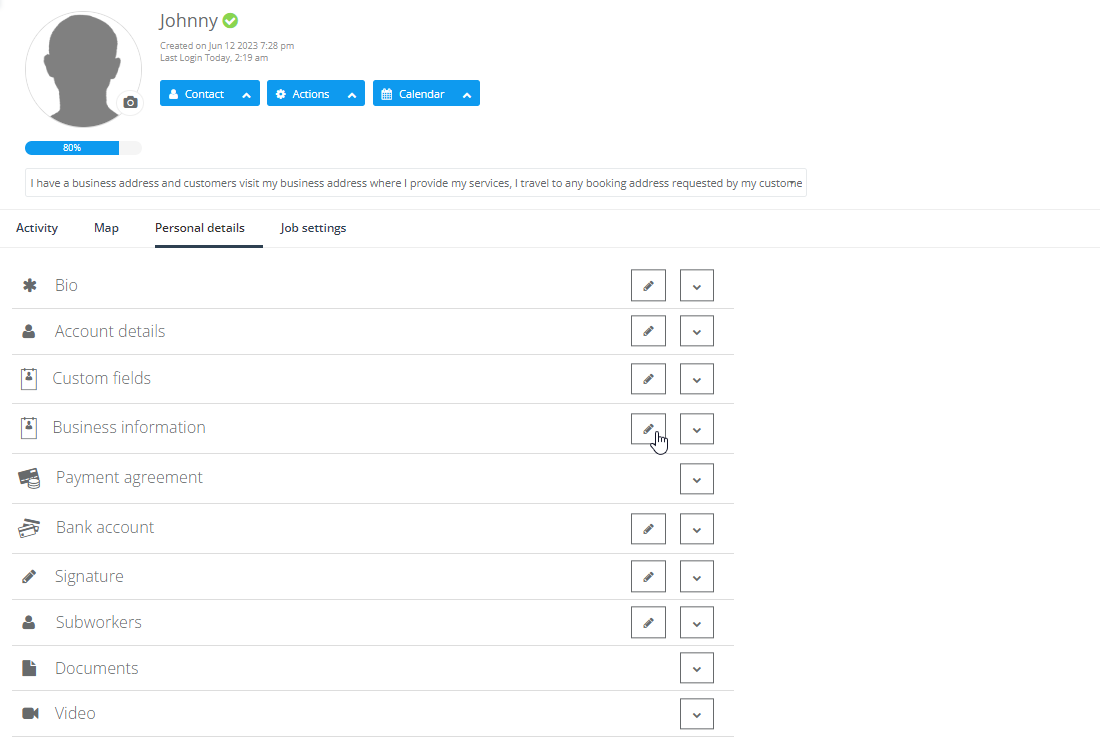
Admin editing (Fieldworker profile)
If you’re managing a fieldworker, it’s often faster to open their profile directly from the Fieldworkers list.
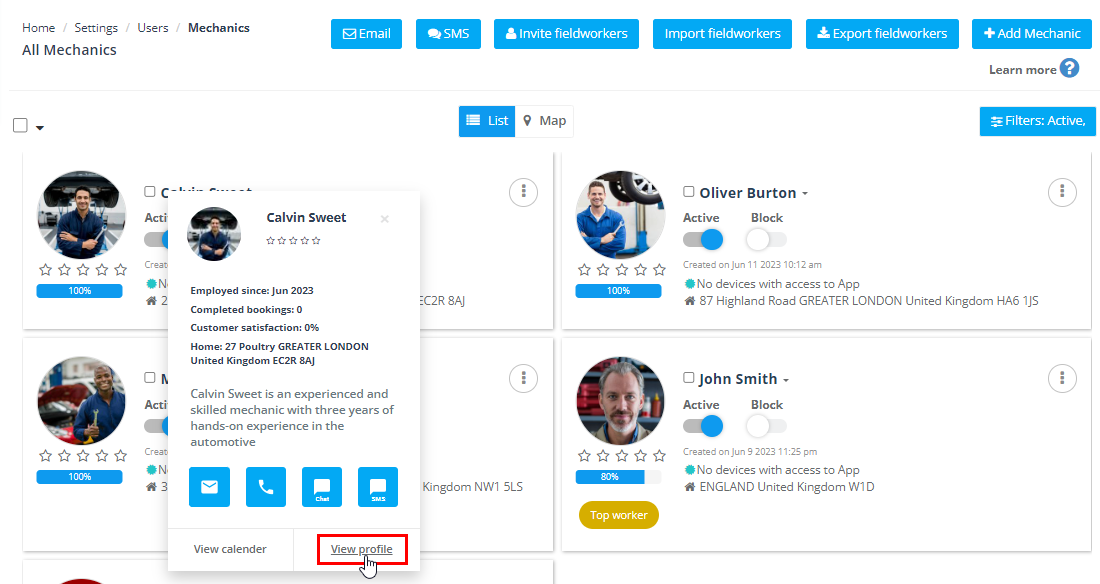
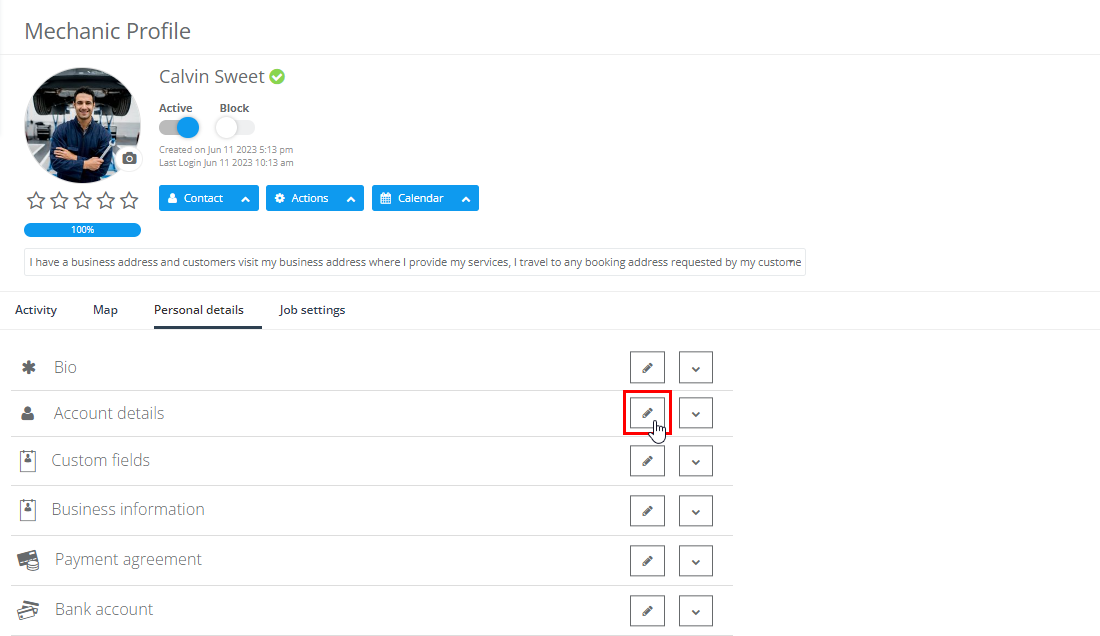
Full guide: Managing and Editing User Information and Viewing a Fieldworker Profile.

Security tools: impersonation, force logout, reset password
Admins can use built-in security tools to troubleshoot issues, end active sessions, and secure accounts if credentials may be compromised.
1) Login as another user (impersonation)
Use impersonation to reproduce a user’s issue exactly as they see it (without needing their password). This is especially useful for troubleshooting permissions, portal access, and UI visibility issues.
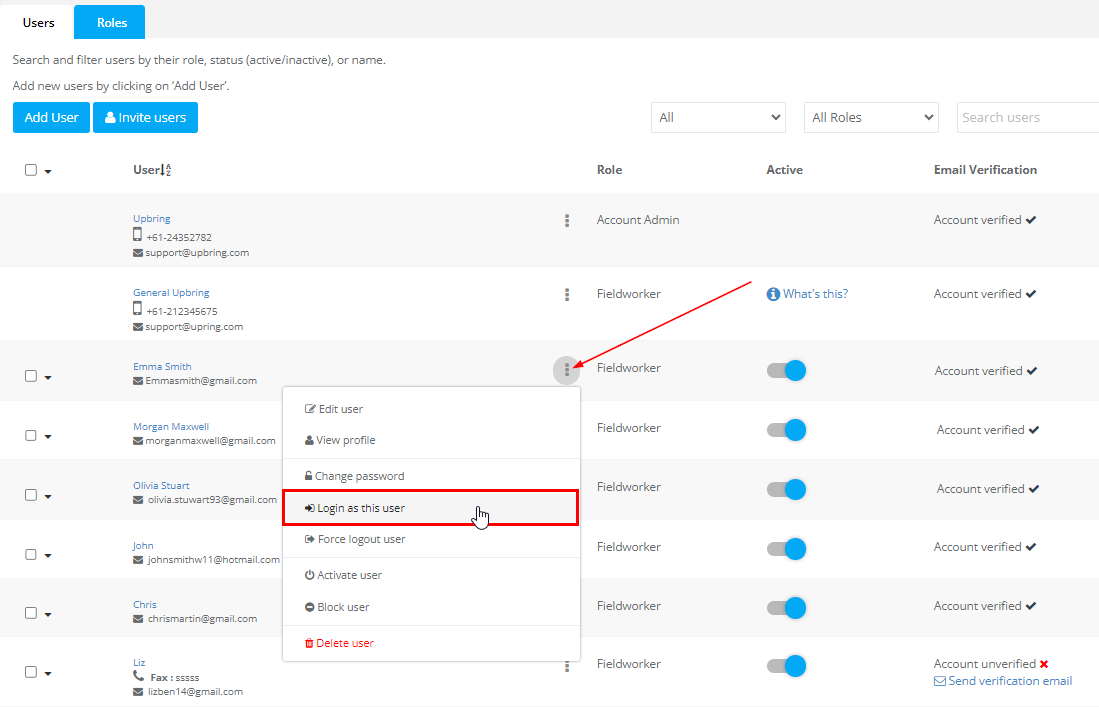
Guide: Login as Another User (Impersonation)
2) Force logout (end active sessions)
Force logout immediately ends a user’s active session (or all users), which is useful after security incidents, offboarding, or when you need changes to take effect immediately.
Guide: Force Logout Users
3) Change or reset a user password
Reset a password if a user is locked out, forgot their password, or if you suspect their credentials are compromised.
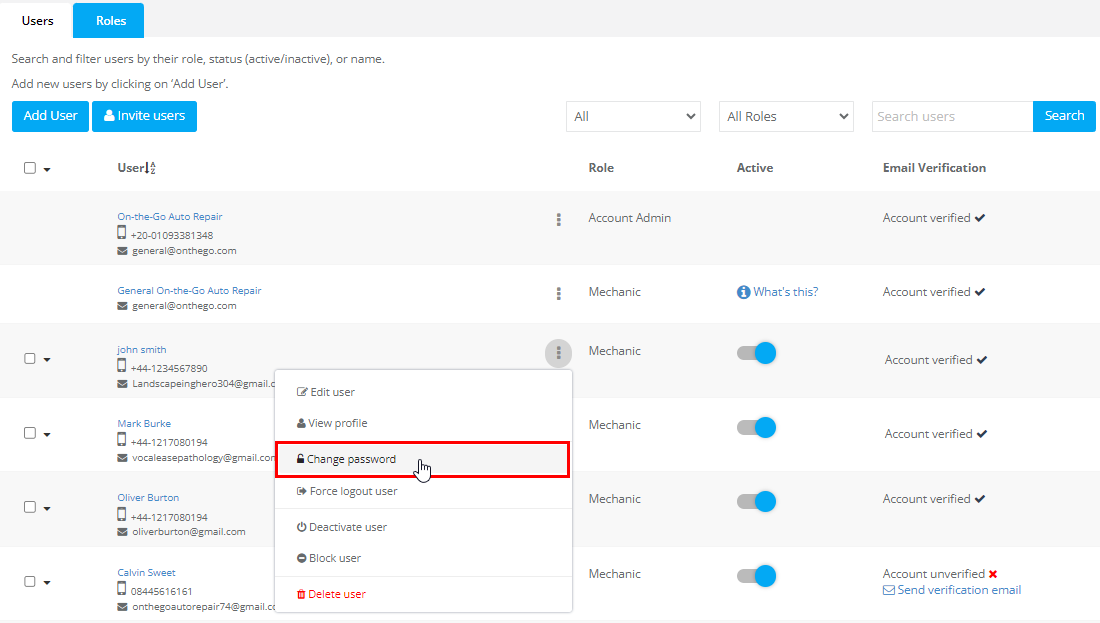
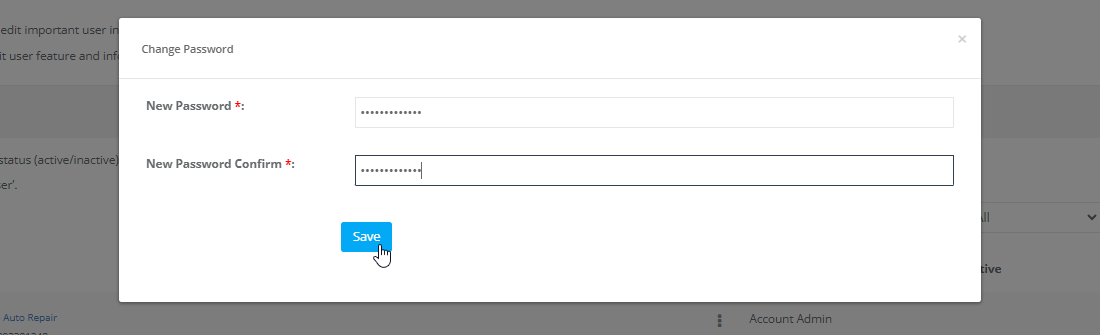
Guide: Change / Reset User Passwords
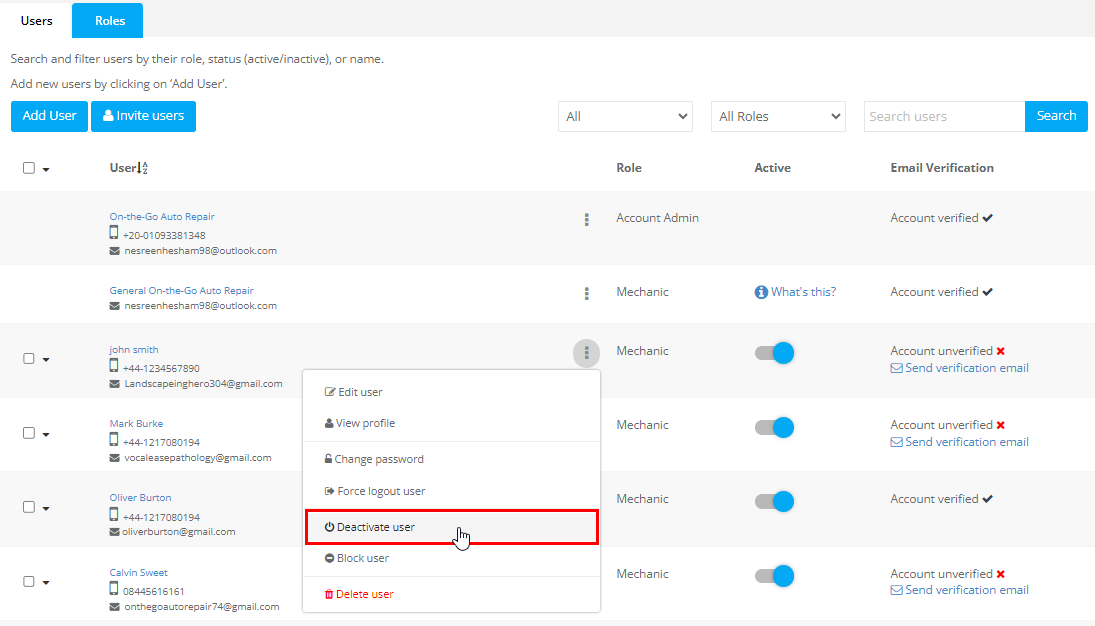
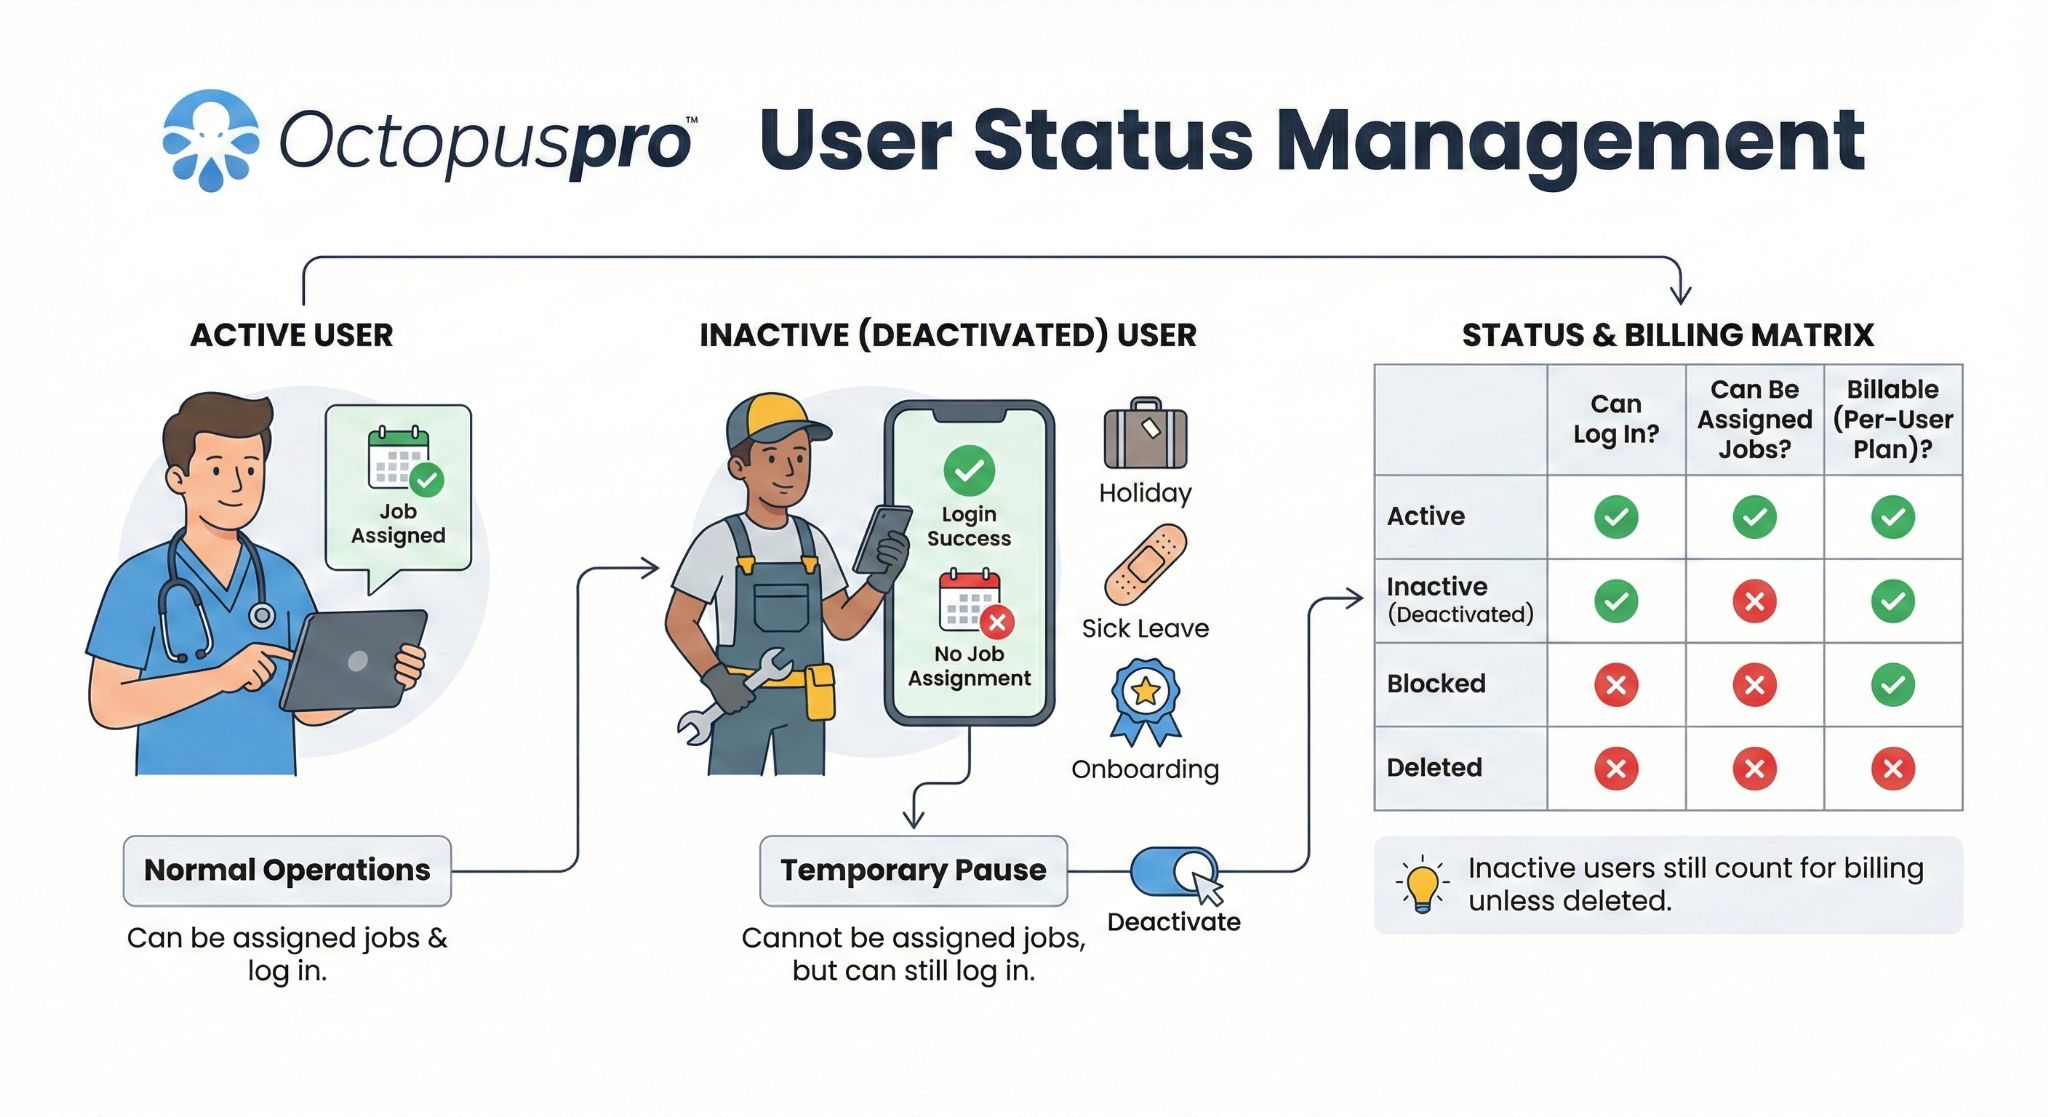
User statuses: active, inactive, blocked, deleted
OctopusPro provides multiple ways to control access. These are often confused, but they do different things:
- Active: user operates normally (based on their role/permissions).
- Inactive (Deactivated): the user cannot be assigned jobs, but they can still log in unless you also block them.
- Blocked: the user cannot log in, but their historical records remain available to admins.
- Deleted: the user account is permanently removed from your Users list (cannot log in; deletion is irreversible).
Billing note (per-user plans): inactive users may still count toward your user count. If you need to reduce user count, consider deleting the user (after completing offboarding checks).
Guides: Activate / Deactivate Users, Block Users, Delete Users (Single & Bulk) + When to Deactivate/Block
Audit trail: User Activity Log
For accountability and security auditing, use the User Activity Log to review actions performed by users inside the system.
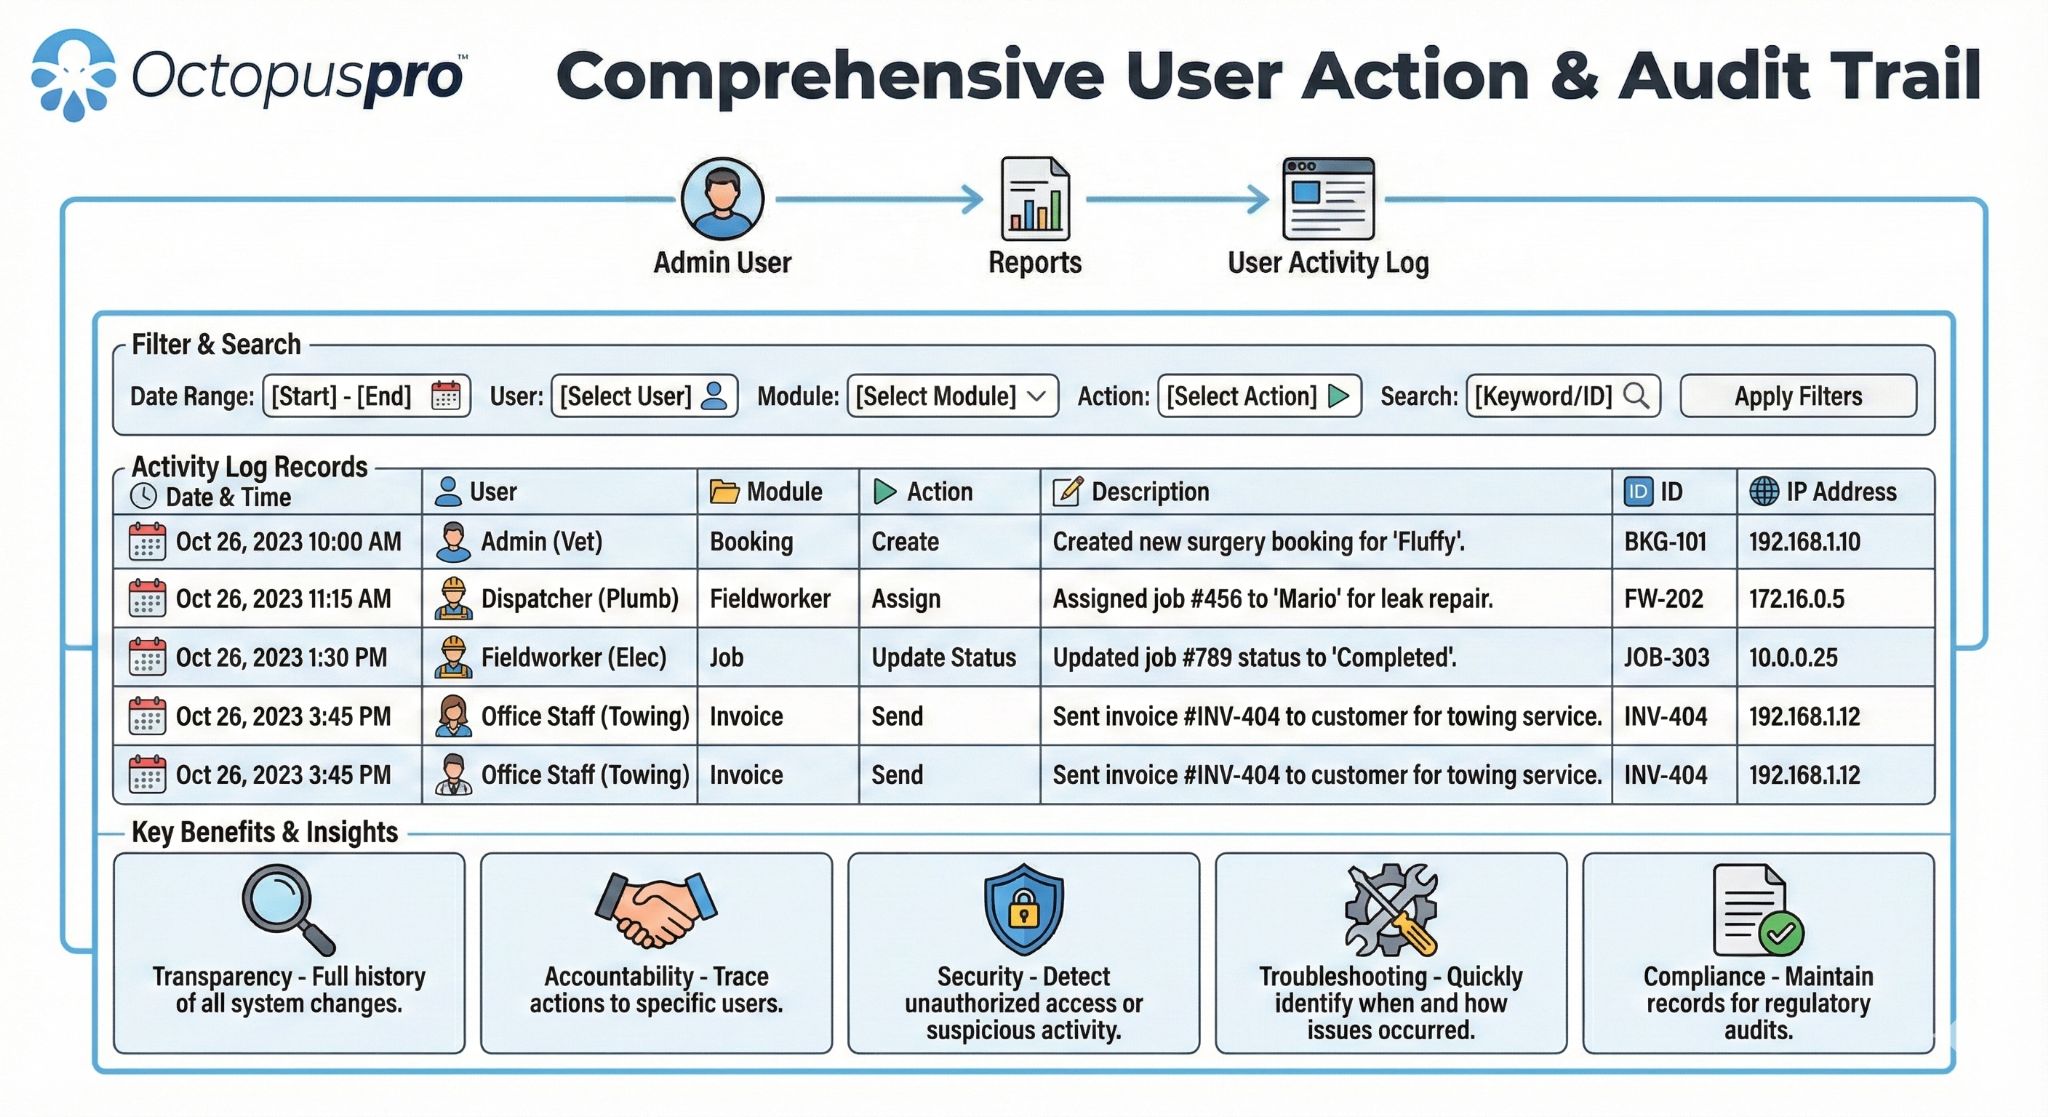
Guide: User Activity Log
Related guides
- Role-Based Access Control (RBAC) & User Permissions
- Fieldworker Permissions & Access Control
- Add Fieldworkers (Manual, Invite, Bulk Import)
- Allow Fieldworkers to Add Subworkers (Crew Members)
- Manage Subworkers Under Fieldworkers
- Managing and Editing User Information
- Viewing a Fieldworker Profile
- Using the Same Email for Multiple Users
- Force Logout Users
- Login as Another User (Impersonation)
- Change / Reset User Passwords
- Delete Users (Single & Bulk)
- Log In to the OctopusPro Apps (Admin & Fieldworker)
To stay updated, please subscribe to our YouTube channel.