
Allow Customers to Select an Exact Booking Start Time (or Time Window)
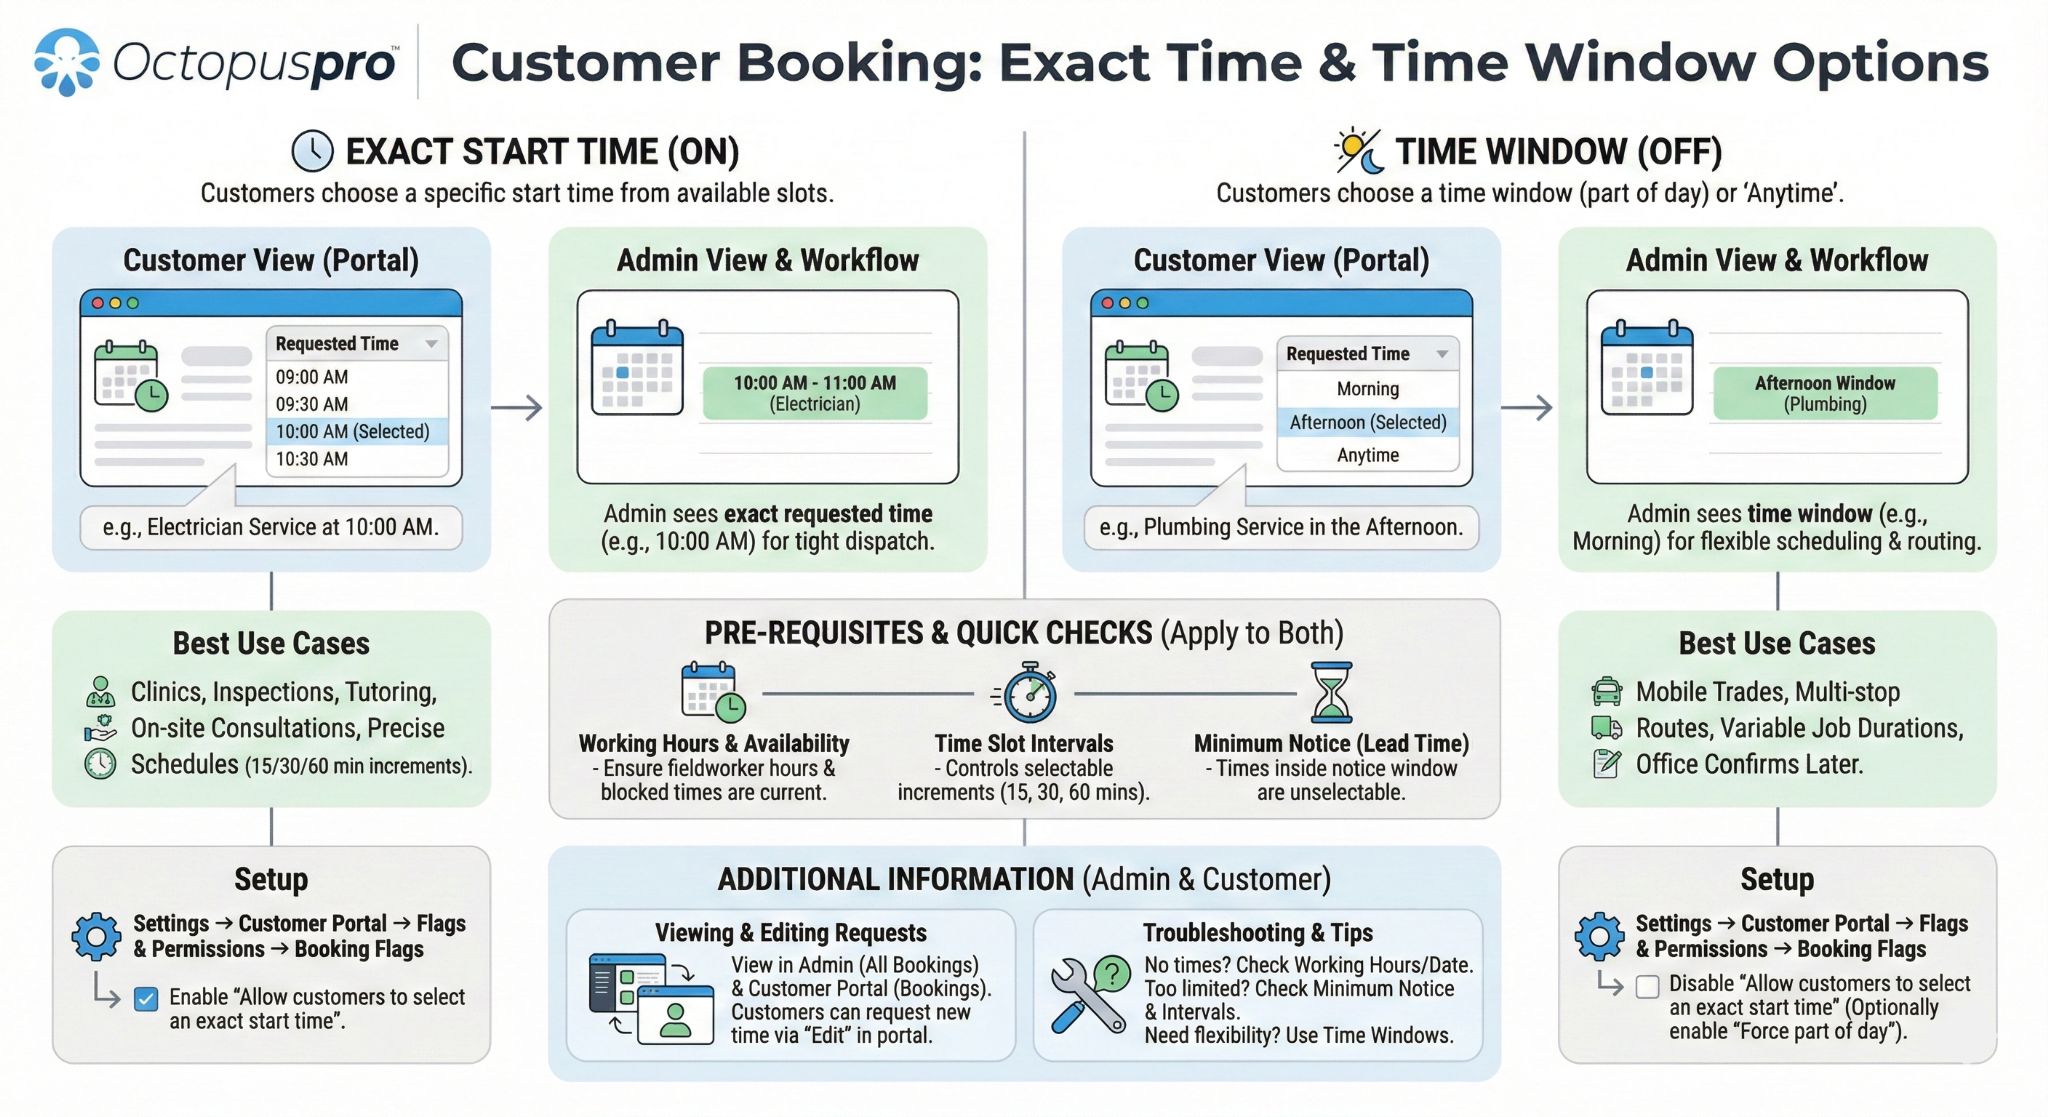
OctopusPro lets you control how customers choose the requested start time when booking through your Customer Portal. You can allow customers to select an exact start time (e.g., 10:00 AM), or (if you prefer flexibility) have them choose a time window such as Morning, Afternoon, or Anytime.
What this setting does
- Exact time ON: customers choose a specific start time from the available time slots.
- Exact time OFF: customers choose a time window (part of day) or “Anytime” (depending on your portal settings).
- Available options are driven by your working hours/availability and your time slot interval configuration.
When should I use “Exact start time” vs “Time window”?
Use exact start times when
- You provide appointments that must start at a precise time (e.g., clinics, inspections, tutoring, on-site consultations).
- You dispatch on tight schedules and want customers aligned to your slot increments (e.g., every 15/30/60 minutes).
- You want fewer “back-and-forth” messages about arrival times.
Use time windows when
- You can’t guarantee a precise arrival time (e.g., mobile trades, multi-stop routes, variable job durations).
- You want customers to choose Morning/Afternoon and let the office confirm the exact time later.
- You want to reduce scheduling friction while keeping flexibility for dispatch and travel time.
Before you start (quick checks)
- Working hours & availability: The portal only shows times that fall inside your configured working hours/availability. Ensure your fieldworkers’ working hours (and any blocked times) are up to date.
- Time slot intervals: Your interval controls the increments customers can choose (e.g., every 15, 30, or 60 minutes).
- Minimum notice (lead time): If you use a minimum notice rule, times inside that notice window won’t be selectable.
Enable exact start times (customers select a specific time)
To let customers choose an exact start time, enable the flag: Allow customers to select an exact start time for their bookings.
- Go to Settings → Customer Portal → Flags & Permissions.
- Scroll to Booking Flags.
- Enable Allow customers to select an exact start time for their bookings.
- Click Save.


What customers see when exact start times are enabled
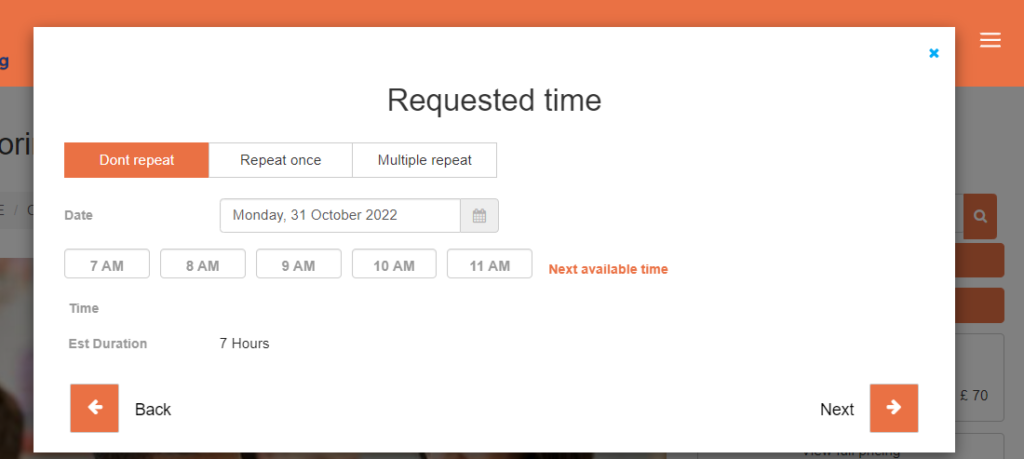
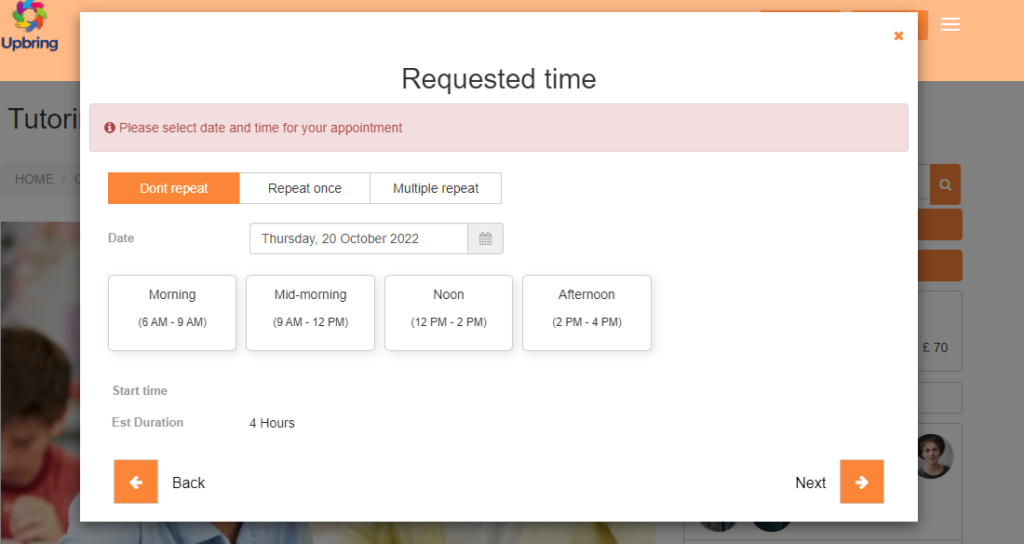
During checkout in the Customer Portal, customers will see the Requested time step and can select an exact time from the available time slots.
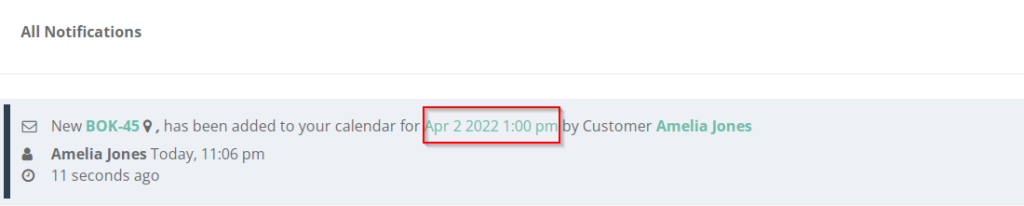
After the booking is submitted, admin users will see a notification and can manage the booking in the calendar and bookings list.
Disable exact start times (customers select a time window)
If your business can’t guarantee an exact arrival time, disable the exact time flag. This changes the portal experience so customers can request a time window (part of day) instead of a precise time.
- Go to Settings → Customer Portal → Flags & Permissions.
- Under Booking Flags, disable Allow customers to select an exact start time for their bookings.
- Optionally enable Force customers to select part of day when placing a booking request (recommended if you want a required window).
- Click Save.

What customers see when time windows are used
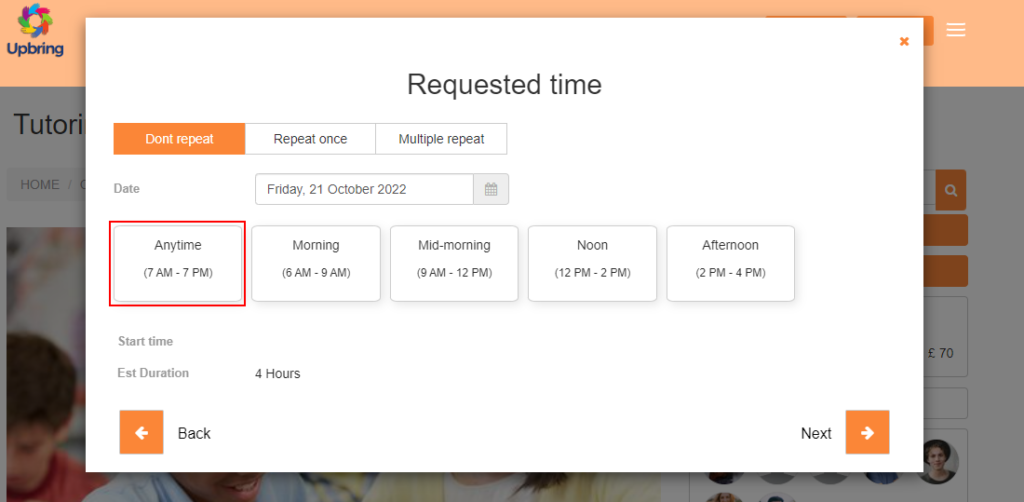
Customers will select a part of the day (e.g., Morning, Mid-morning, Noon, Afternoon) or Anytime—depending on your portal rules. This makes booking easier when your dispatch team needs flexibility to route and schedule efficiently.
Where can the requested booking time be viewed?
Admin portal
- Go to Bookings → All Bookings.
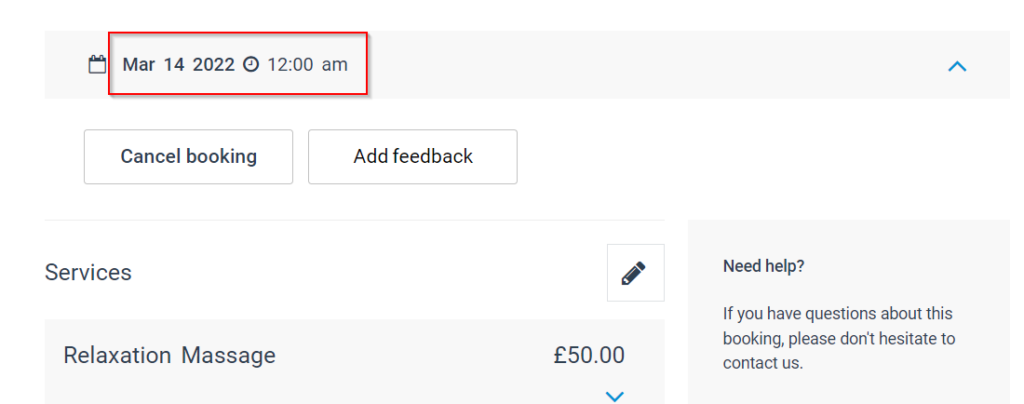
- The requested time (exact time or time window) is displayed with the booking details.


Customer Portal
Customers can view the requested time for their bookings from the Bookings section in the Customer Portal.
Can customers edit the booking time after scheduling?
Yes—customers can request a new time from the Customer Portal by opening the booking and using the Edit option. (This is typically used alongside your portal rescheduling rules, notice windows, and availability settings.)
- In the Customer Portal, go to Bookings.
- Open the booking you want to update.
- Click Edit.
- Select a new requested time and click Save.


Best-practice tips
- Pick the right model: use exact times for true appointments; use time windows for route-based field services.
- Align slot increments to operations: set a time slot interval that matches typical travel and job setup time (e.g., 30–60 mins for mobile services).
- Keep availability accurate: update fieldworker working hours and blocked times so customers only see realistic options.
- Combine with lead time: use a minimum notice (lead time) rule if you need prep time before new bookings.
Troubleshooting
- No times are showing: confirm working hours/availability are configured and the date is within bookable hours.
- Times are too limited: check minimum notice time and time slot interval (large intervals reduce options).
- Customers want flexibility: disable exact time and use part-of-day time windows instead.
Related guides
- Customer Portal Flags & Permissions
- Time Slot Intervals
- Minimum Notice Time (Lead Time)
- Working Hours & Availability
To stay updated, please subscribe to our YouTube channel.