
Enable Customer Self-Scheduling After Quote Approval (Schedule Appointment Button)
OctopusPro’s Customer Self-Scheduling after quote approval lets customers choose and confirm an appointment time in the Customer Portal immediately after they accept a quote. When enabled, customers see a Schedule an appointment button on Accepted quotes—so they can select an available time slot based on your scheduling rules (working hours, blocked times, notice period, time slot intervals, and availability constraints).

This reduces phone tag and follow-ups, helps you convert quotes into confirmed bookings faster, and delivers a smoother self-service customer experience—while keeping you in full control of when the scheduling option appears and which time slots customers can pick.
On this page
- What this is for
- How it works
- How to enable or disable
- What customers see (portal flow)
- What controls the available time slots
- What admins & fieldworkers see
- Real-world examples
- Best-practice setup tips
- Troubleshooting
- FAQs
What this is for
Use this feature when you want customers to move from quote acceptance to a confirmed appointment with minimal effort from your team.
- Best for: businesses that send quotes first and schedule after approval (e.g., cleaning, trades, landscaping, HVAC, pest control, restoration, maintenance, consulting).
- Result: customers schedule their preferred time slot and OctopusPro automatically creates a Booking using the accepted quote details.
- Control: customers only see valid time slots based on your business rules and availability configuration.
How it works
When the self-scheduling toggle is enabled:
- The customer accepts a quote (status becomes Accepted).
- The customer opens the accepted quote in the Customer Portal.
- A Schedule an appointment button appears on the quote.
- The customer selects an available date & time from the picker.
- OctopusPro creates a Booking automatically and can trigger your normal confirmations/reminders (based on your notification settings).
If the toggle is OFF, customers can still view their quotes, but scheduling is handled manually by your office/admin team.
How to enable or disable
To turn customer self-scheduling on (or off):
- Go to Settings > Customer Portal > Flags & Permissions.
Customer Portal Flags & Permissions - Under Booking Flags, enable:
Enable customer self-scheduling after quote approval - Click Save.
Tip: Changes apply immediately and affect customers as soon as a quote reaches Accepted status.
What customers see (portal flow)
Step 1 — Customer accepts the quote
Customers review the quote in the Customer Portal and click Accept.
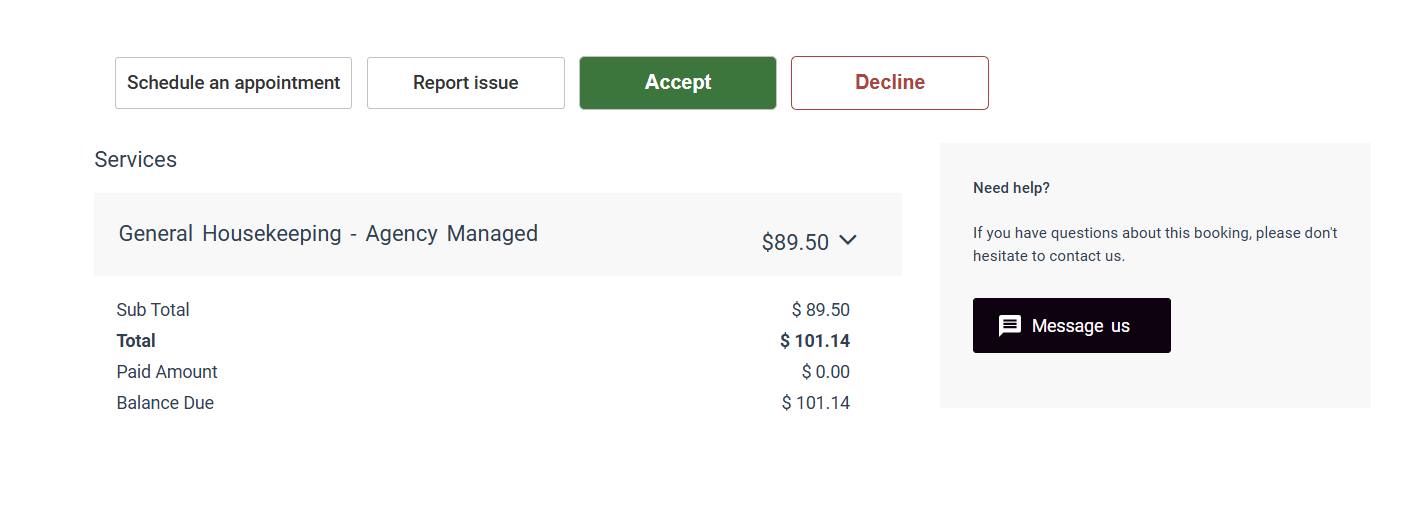
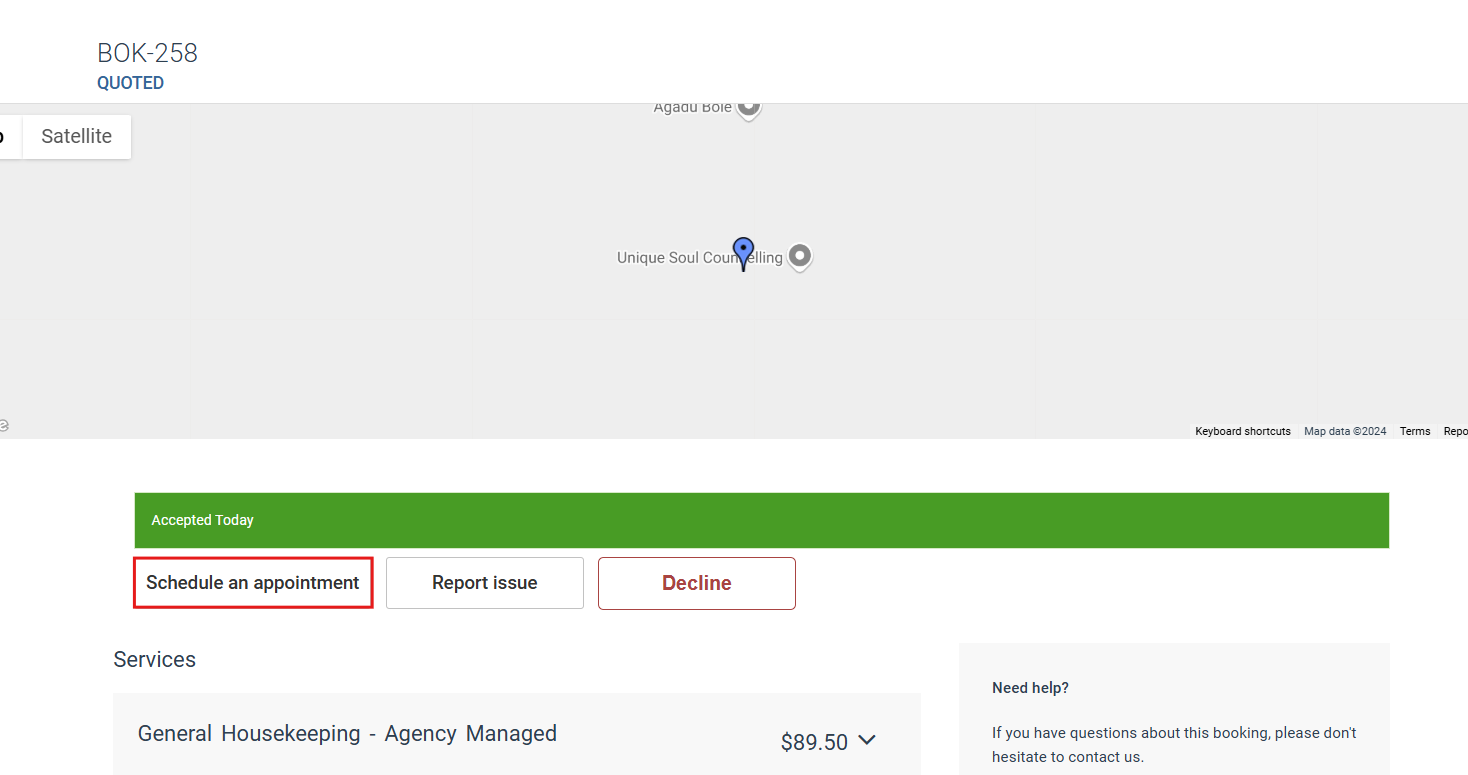
Step 2 — Schedule an appointment button appears
After acceptance, customers see the Schedule an appointment button on the accepted quote page.
Step 3 — Customer selects a requested time
A date/time picker opens and only shows slots that match your scheduling rules and available service hours.

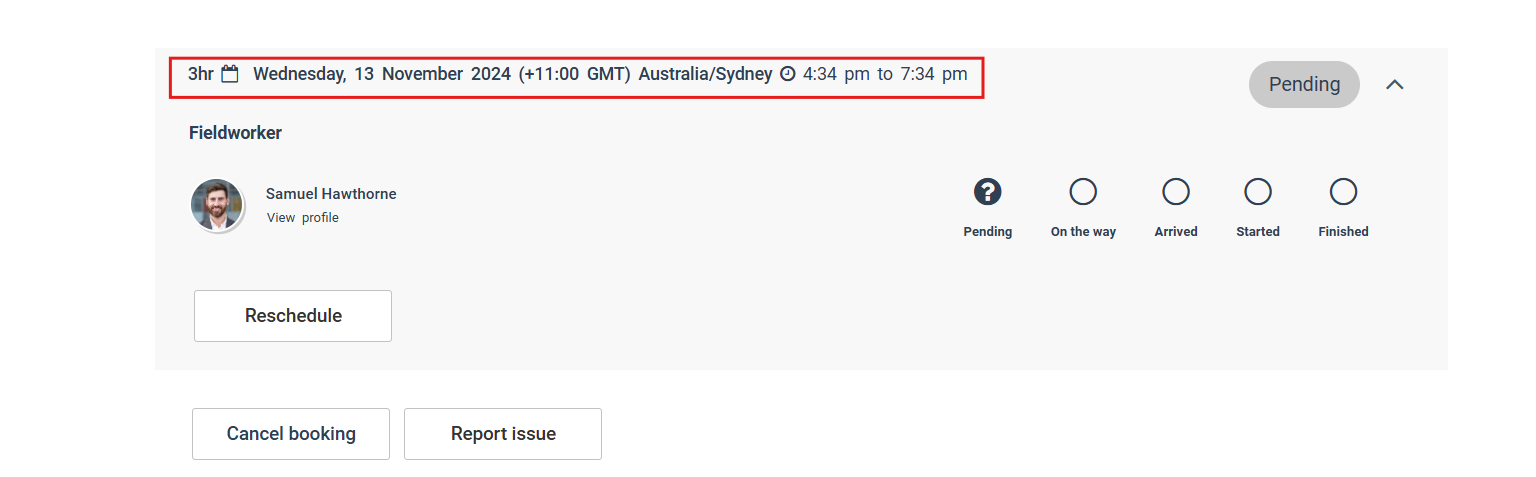
Step 4 — Customer reviews booking details
Once confirmed, OctopusPro creates the booking automatically and the customer can view the booking details in the portal.
What controls the available time slots
The time slots customers can select are controlled by your scheduling configuration. Common controls include:
- Working hours & availability windows: Define when your team (or specific fieldworkers) can take appointments.
Working hours & availability
- Blocked dates & times: Block holidays, shutdown days, and unavailable periods so customers can’t book them.
Block unavailable dates & times

- Minimum notice time (lead time): Prevent last-minute bookings (e.g., require 12/24/48 hours notice).
Minimum notice time - Time slot interval: Controls booking increments (e.g., every 15/30/60 minutes).
Time slot intervals

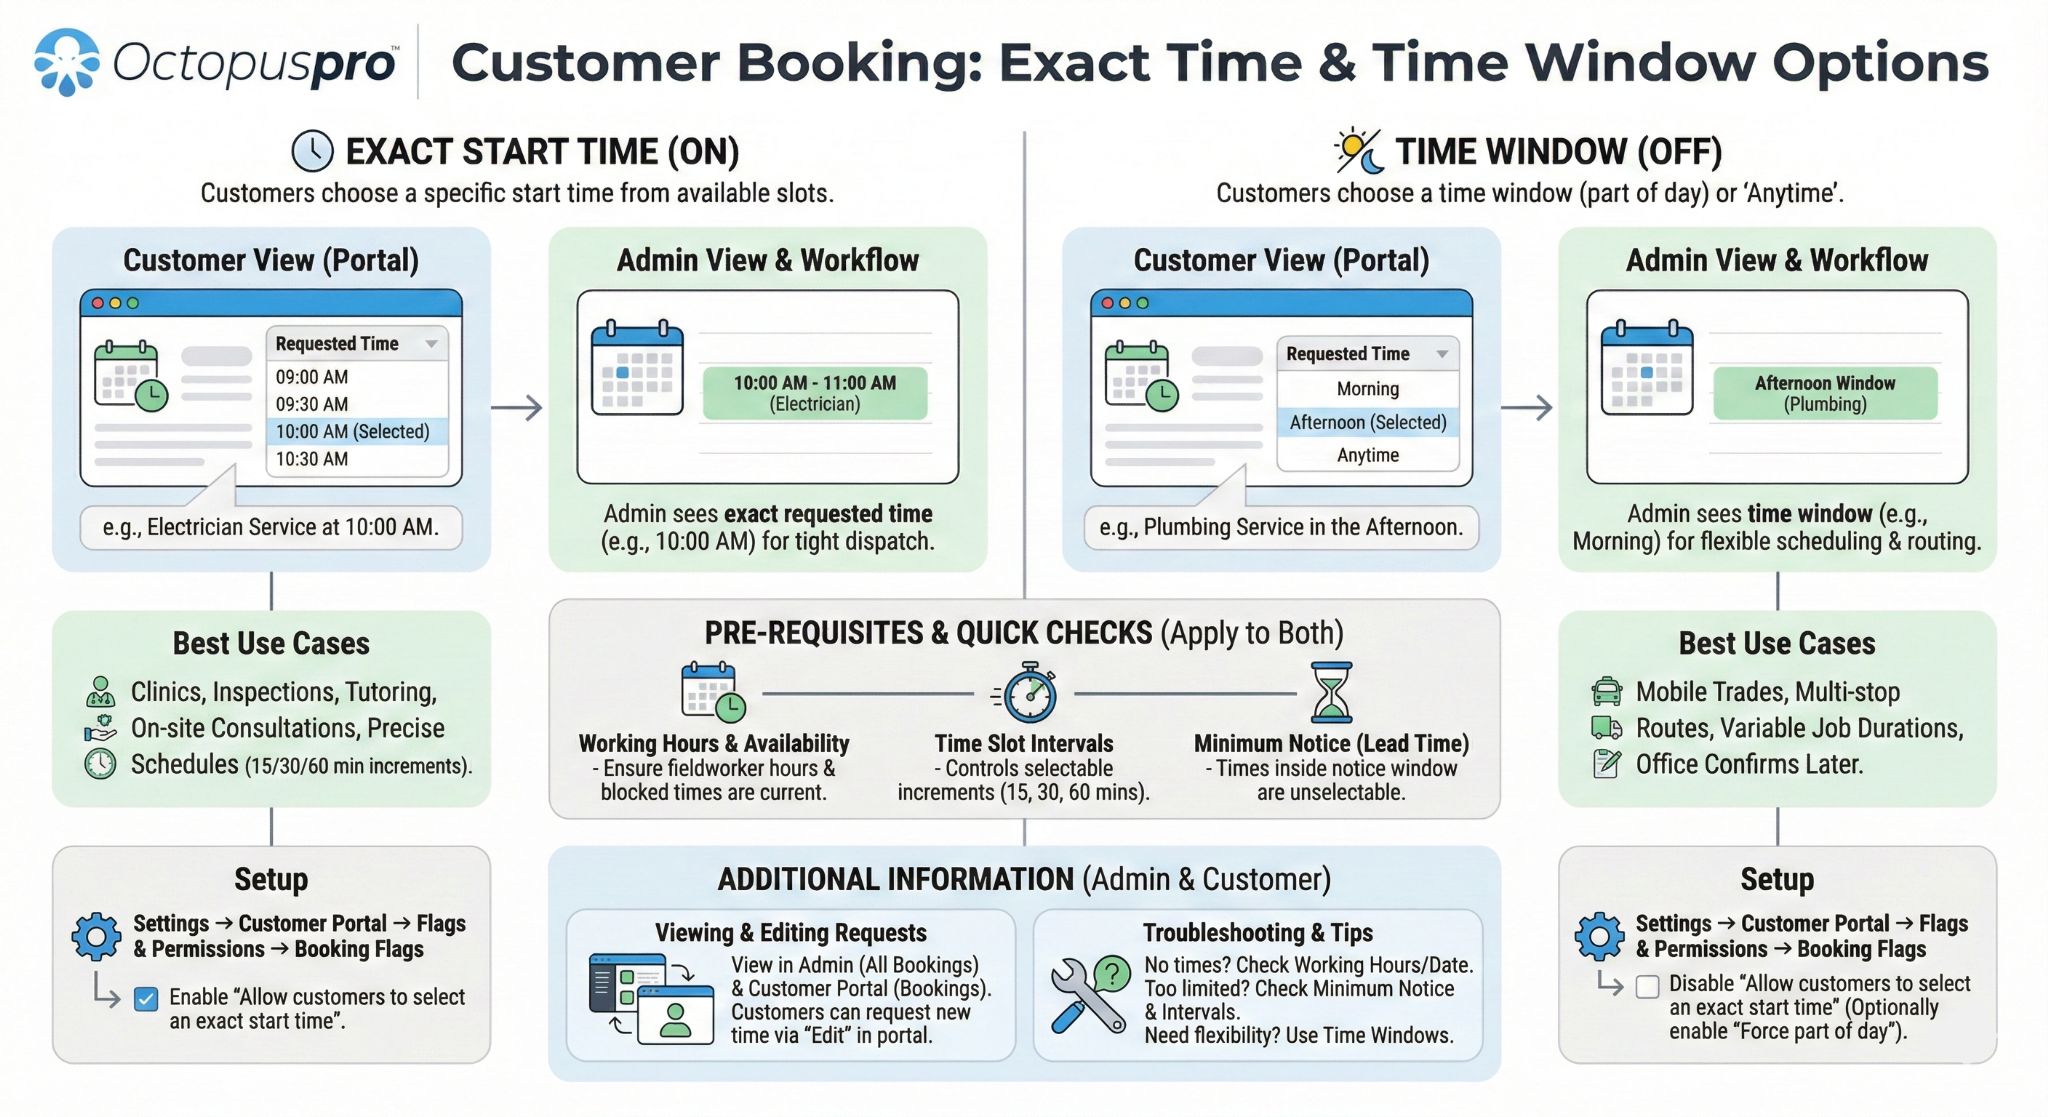
- Start time rules (exact time vs time windows): Let customers choose a precise start time or a broader window, depending on your workflow.
Booking start times & time windows
- Dispatching & assignment method: Your dispatch settings affect how bookings are assigned (manual vs automated workflows).
Job assignment & dispatch

- Dynamic real-time availability (optional): If enabled, customers may only see slots where eligible fieldworkers are available in real time.
Real-time fieldworker availability

- Service delivery type: Configure availability correctly for storefront, mobile/on-site, and remote/virtual services.
Service delivery types | Remote/virtual services

What admins & fieldworkers see
- Booking is created automatically: The new booking inherits the quote details (services, pricing, customer info, notes, and more).
- Calendar visibility: The scheduled appointment appears in your admin calendar and booking lists.
- Still fully manageable: Your team can reschedule, reassign, or edit bookings (based on permissions and workflow).
- Payments/deposits: If your workflow requests deposits or triggers invoices on acceptance/booking creation, those automations continue to apply based on your system configuration.
Real-world examples
| Scenario | Before | After enabling self-scheduling |
|---|---|---|
| Home services (mobile/on-site) | Customer accepts quote; office calls to arrange a date/time. | Customer schedules instantly based on your rules; booking is created automatically. |
| Storefront/branch appointments | Quote accepted; appointment is scheduled later by staff. | Customer picks a slot that matches business hours and capacity. |
| Remote/virtual sessions | Customer approves quote; scheduling happens via email. | Customer books a session time immediately in the portal. |
Best-practice setup tips
- Keep availability accurate: Maintain working hours and block holidays/closed days so customers don’t book unavailable times.
- Use a notice period: Add minimum notice time to prevent bookings you can’t fulfil at short notice.
- Choose the right time slot interval: Match it to your typical service duration and operational workflow.
- Add a CTA in your quote message/email: “After you accept the quote, click Schedule an appointment in the portal to lock in your time.”
- Review dispatch rules: If you use automated assignment or real-time availability, confirm the rules produce the scheduling behaviour you want.
Troubleshooting
The Schedule an appointment button isn’t showing
- Confirm the quote status is Accepted.
- Confirm Enable customer self-scheduling after quote approval is ON and saved in Customer Portal flags.
- Confirm the customer is logged into the correct Customer Portal and viewing the correct quote.
No time slots are available
- Check working hours, blocked dates/times, and notice time settings.
- Review your time slot interval and start-time/time-window rules.
- If using real-time availability, confirm eligible fieldworkers are actually available.
FAQs
Can my staff change the appointment after the customer schedules?
Yes. Admins (and fieldworkers with the right permissions) can manage and reschedule bookings as needed.
Does this replace manual scheduling?
No. It simply adds a self-service option after quote approval. You can still schedule bookings manually whenever required.
Does this work for storefront and remote/virtual services?
Yes. Customers still select an available time slot, and the booking is created using your configured service delivery settings.
Related guides
- Customer Portal Flags & Permissions
- Time Slot Intervals (Customer Portal)
- Minimum Notice Time (Advance Lead Time)
- Booking Start Times (Exact Time vs Time Window)
- Block Unavailable Dates & Times
- Job Assignment & Dispatch (Manual vs Automated)
- Booking Settings, Flags & Permissions
To stay updated, please subscribe to our YouTube channel.