
Forms & Checklists Options (Visibility & Display Rules)
Forms & Checklists help you collect consistent, structured information at the right stage of a booking/job—so your team follows the same process every time. Use them to capture site details, compliance steps, before/after photos, signatures, progress updates, decline/withdrawal reasons, and customer feedback.
In OctopusPro, every form/checklist is controlled by three core settings:
- Visibility (Display to): who can view and complete the form (office/admin users, fieldworkers/sub-fieldworkers, customers in the Customer Portal).
- Display rules (Display at / When to display): when the form appears in the workflow (Always Displayed, Check-In, In Progress, Change Status, Check-Out, Customer Satisfaction, Gift Card).
- Assignments: which services and/or booking statuses the form applies to (so the right form appears for the right work).
On this page
- What this is for
- How Forms & Checklists work (overview)
- Key concepts
- Set up a form
- Control access
- Choose when the form appears
- Assign & manage forms
- Assign a form to a booking status
- Assign forms to services
- Assign services to a job status (for status-triggered forms)
- Multiple forms per job & multiple fieldworkers
- Why “Assign to service” may be unavailable for some forms
- Default forms (Next Service Date Reminder & Your Contact Details)
- Contact Details forms (Customer Portal use cases)
- View completed forms (admin & office)
- Edit, delete, activate/deactivate
- Best practices
- Related guides
What this is for
Use Forms & Checklists to standardize what information gets captured, when it gets captured, and who captures it—across office staff, field teams, and customers.
- Improve job quality: enforce checklists and mandatory steps so jobs are completed consistently.
- Capture photos and evidence: collect before/after images, site conditions, damage reports, and compliance proof.
- Reduce admin back-and-forth: ensure fieldworkers capture required details on-site (notes, measurements, approvals, signatures).
- Trigger quality control at the right moment: show forms at check-in, during progress, at check-out, or on a status change.
- Collect customer satisfaction: request a rating and feedback after completion (CSAT).
- Customer Portal data capture: collect contact/access details and gift card details during portal flows.
How Forms & Checklists work (overview)
Think of Forms & Checklists as a flexible data collection engine that can appear at different workflow events (status changes, check-in/out, customer feedback, gift card purchase) and collect the exact information you need—using field types like photos, signatures, toggles, dropdowns, and more.

You can combine Visibility, Display rules, and Assignments to ensure each form shows up only where it’s relevant—without cluttering the booking or confusing users.

Key concepts
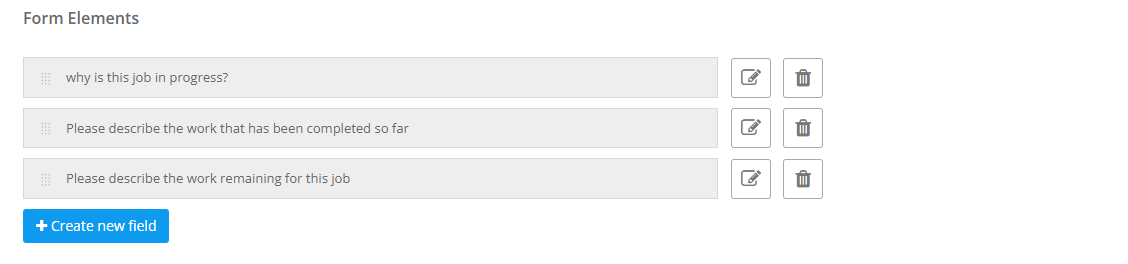
- Form / Checklist: a reusable template containing a group of fields (elements) users complete.
- Form elements (fields): the individual questions/inputs (text, dropdown, button group, checkbox list, date/time, photo upload, signature, etc.).
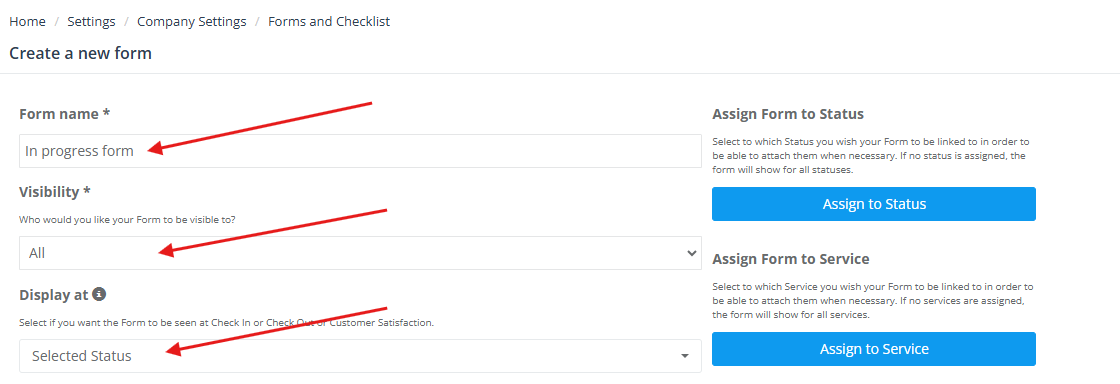
- Visibility (Display to): which roles can view and complete the form (office/admin, fieldworkers/sub-fieldworkers, customers via Customer Portal).
- Display rules (Display at / When to display): when the form appears (Always Displayed, Check-In, In Progress, Change Status, Check-Out, Customer Satisfaction, Gift Card).
- Assign to services: show the form only for specific service types (recommended when different services require different data).
- Assign to booking status: show the form only when the booking is moved into selected statuses (e.g., In Progress, Completed, Failed).
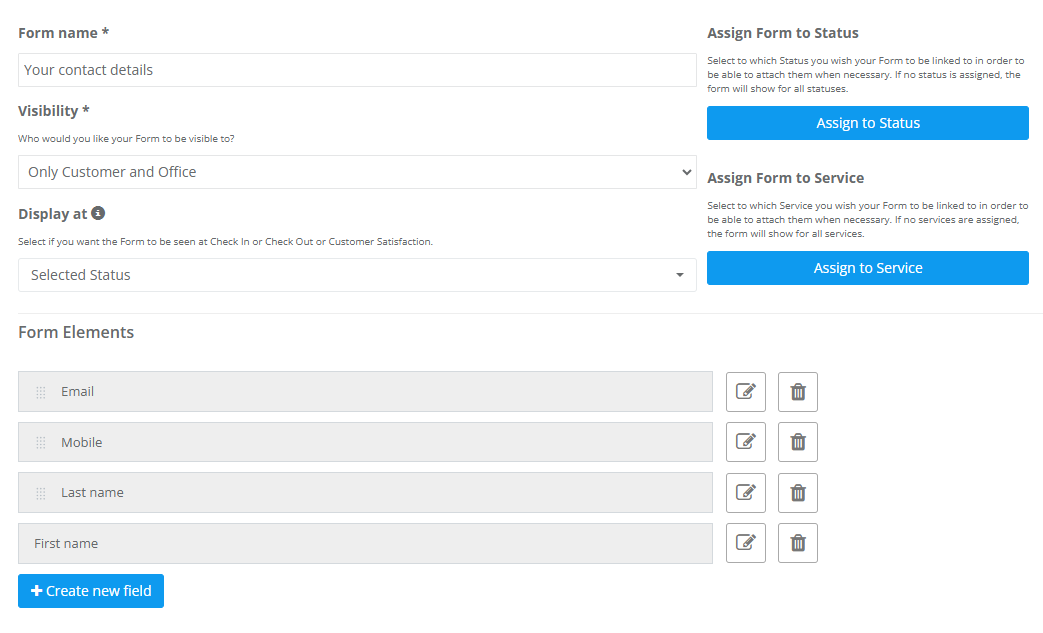
Create a new form or checklist
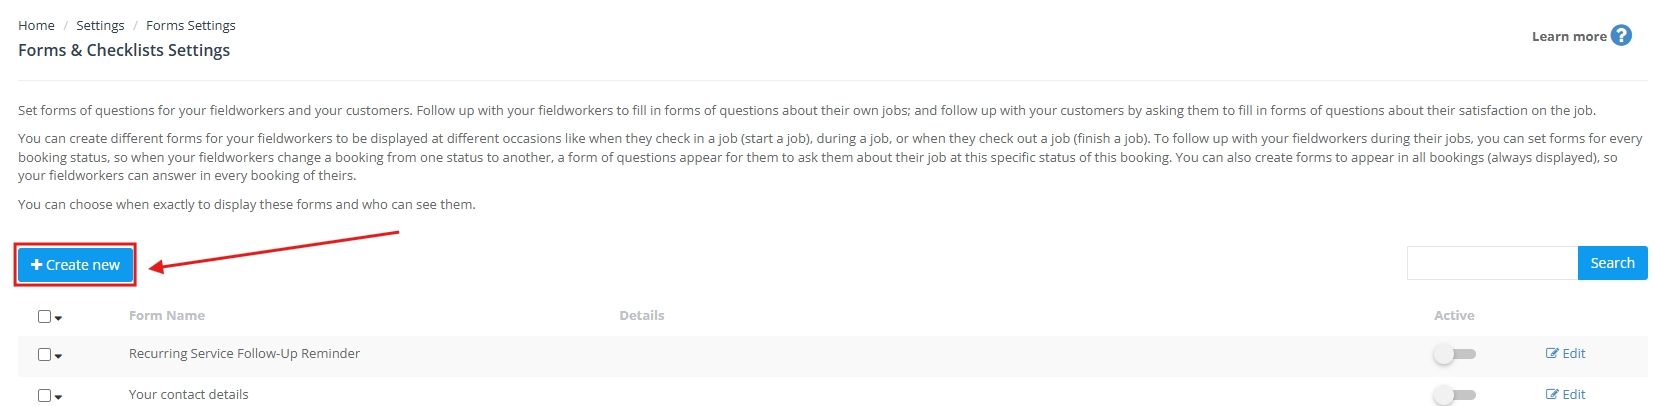
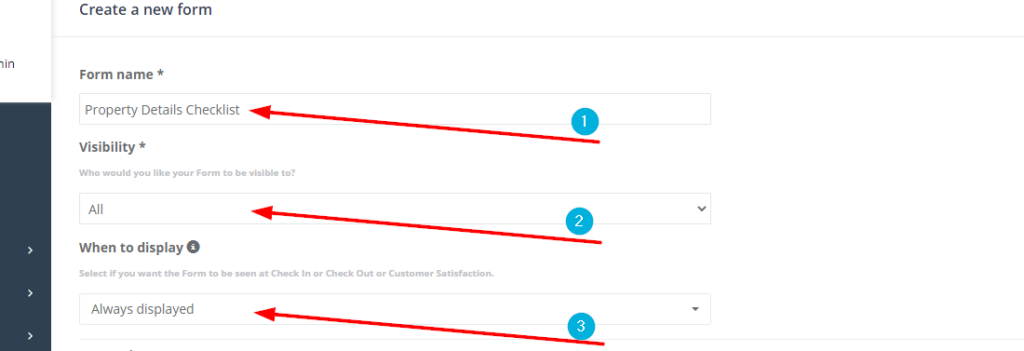
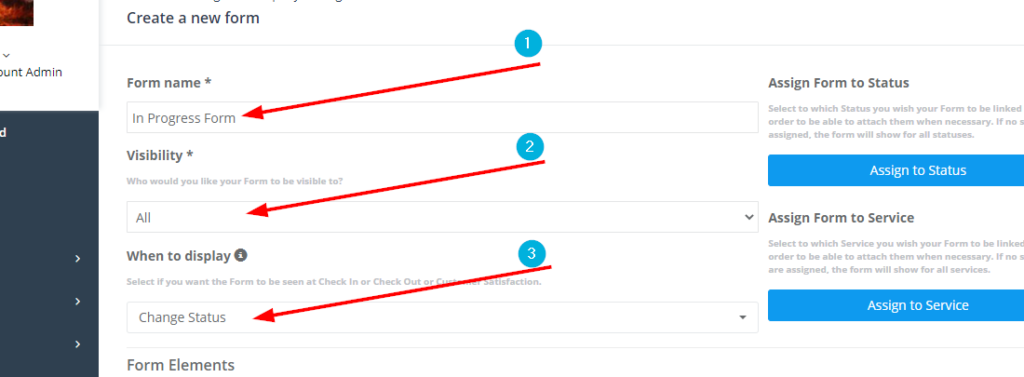
Go to Settings > General Settings > Forms & Checklists, then click Create new.
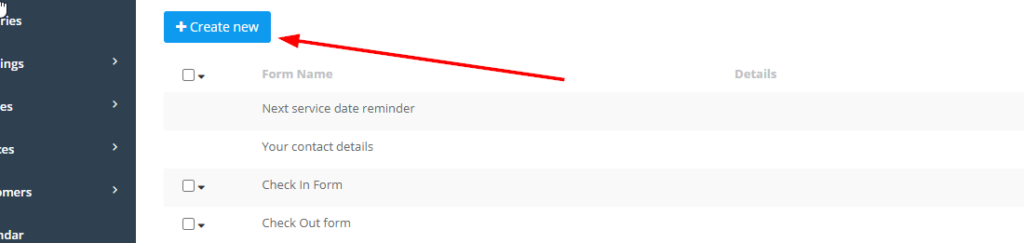
If you’re using a legacy layout, you may see a “Create new” button similar to this:
Enter a clear name so it’s obvious when and why the form is used (e.g., “Check-In – Arrival Photos”, “Change Status – Start Job Evidence”, “Check-Out – Completion QA”, “Customer Satisfaction”).
Recommended naming convention: Trigger + Purpose (e.g., “Check-In – Arrival Photos”, “Check-Out – Completion QA”).
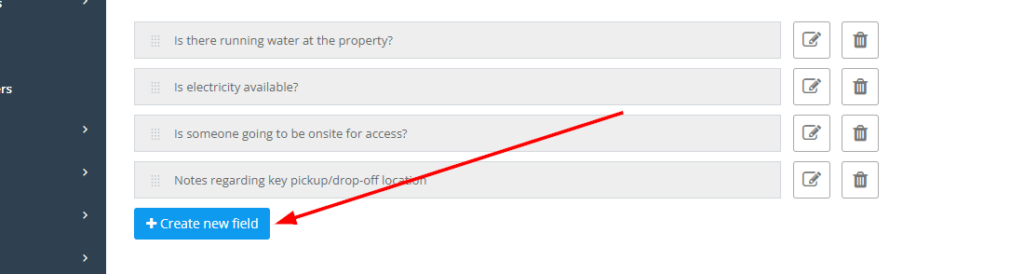
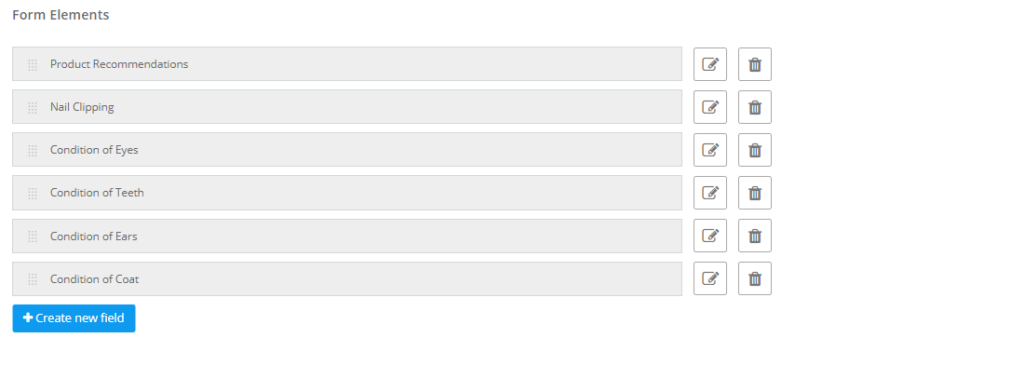
Add fields (form elements)
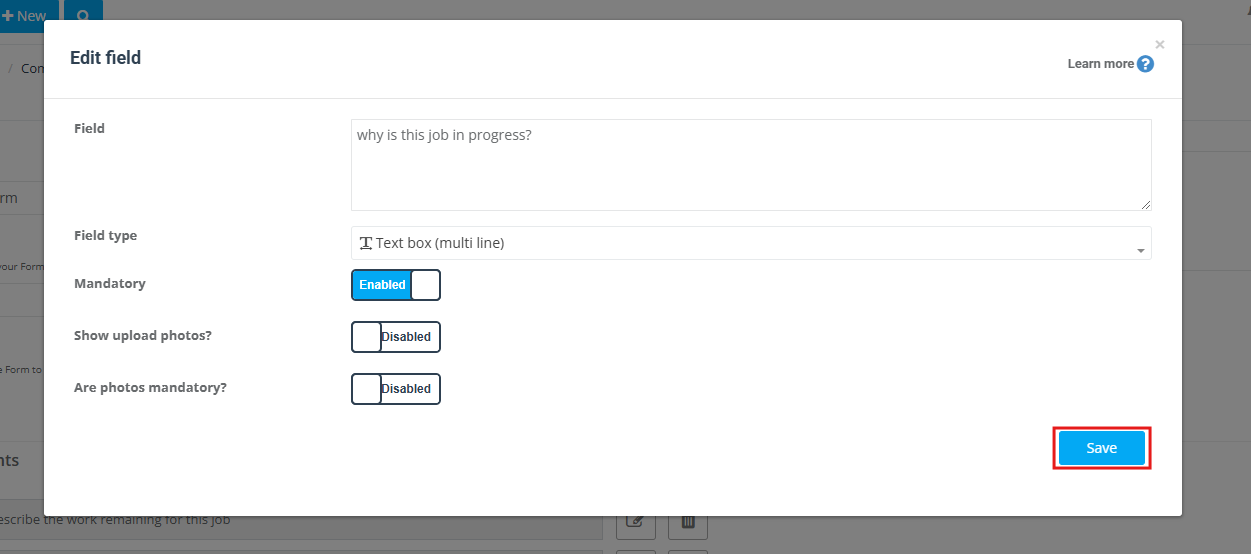
After creating the form, add the fields you want users to complete. For quality control and compliance, mark critical fields as mandatory so users can’t skip them.
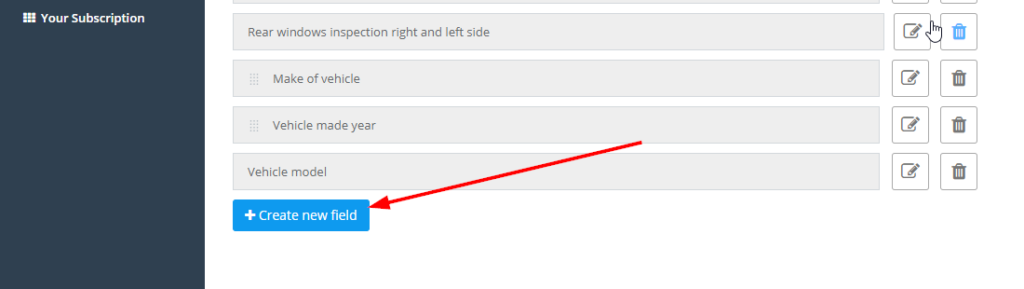
OctopusPro supports a variety of element types. Choose the field type that matches what you need to capture (text input, dropdown, button group for Yes/No, checkboxes, date/time, photo upload, signature, etc.).
Proof-of-work tip: Add a photo upload element and make it mandatory when you need evidence (before/after photos, damage reporting, compliance proof, completion confirmation).
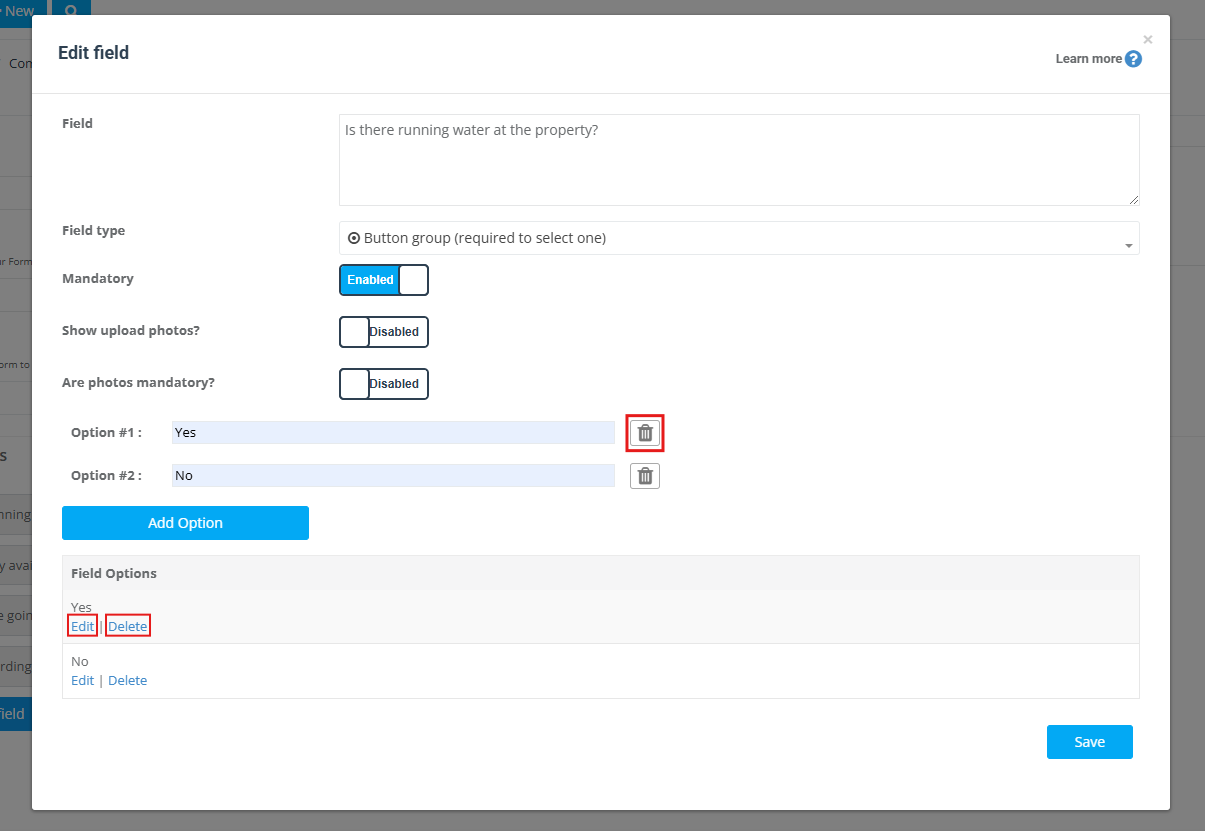
Configure field settings (mandatory, photos, options)
Many field types include additional settings—such as Mandatory, photo upload toggles, or selectable options (for dropdowns, button groups, radio lists, and checkboxes). Use these settings to control what users must submit before they can proceed.
For choice-based fields (like button groups), define clear options (e.g., Yes/No) and keep them short for mobile completion.
Set who can see the form (visibility)
Use Visibility (sometimes labelled “Display to”) to control who can view and complete the form. This reduces confusion, protects sensitive information, and ensures each role sees only what they need.
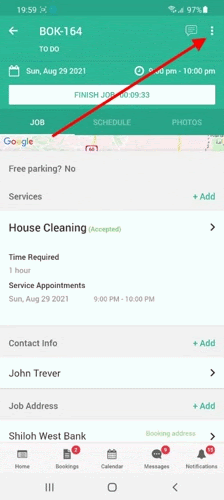
- Office/Admin users: capture or review data while creating or managing bookings, and from booking/job details.
- Fieldworkers/Sub-fieldworkers (mobile app): complete forms on-site at the right step (check-in, change status, check-out, etc.).
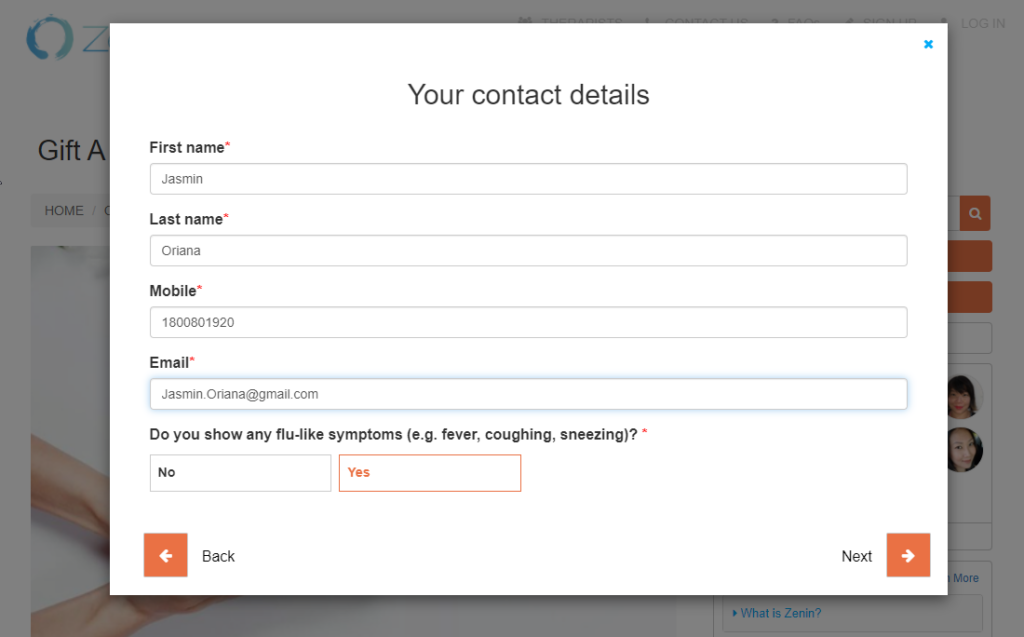
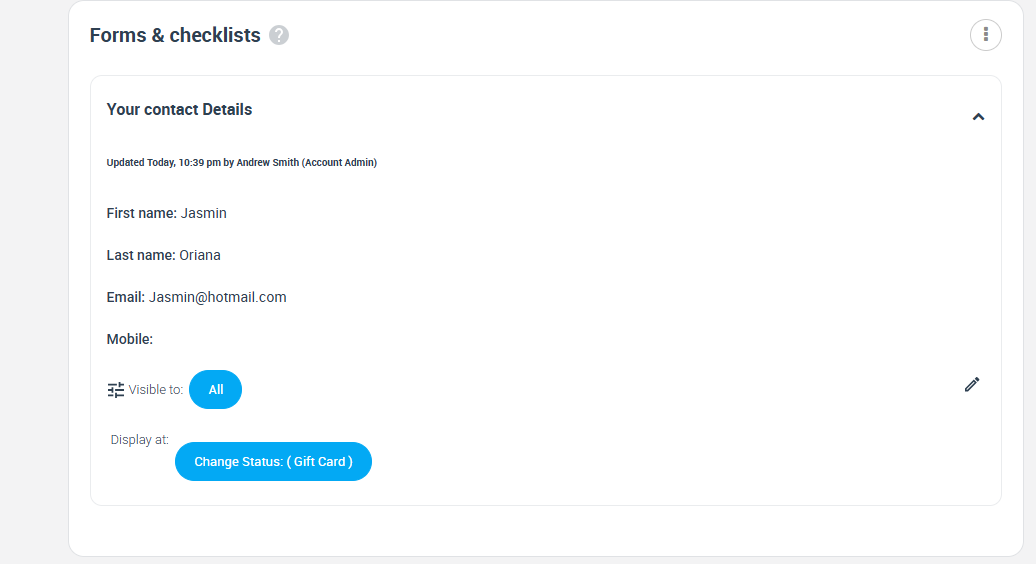
- Customers (Customer Portal): complete forms during portal flows (contact/access details, gift cards, feedback, etc.).
Visibility options explained
- All: office + fieldworkers + customers can view/complete (best for shared job details everyone needs).
- Only Office: office/admin users only (best for internal QA, sensitive notes, internal-only operational fields).
- Only Customer and Office: customers + office (best for Customer Portal data capture that fieldworkers don’t need).
- Fieldworker/Sub-fieldworker and Office: fieldworkers + office (best for on-site operational/compliance data customers shouldn’t access).
Set when the form appears (display rules)
The Display at (or When to display) setting controls exactly when the form appears in the workflow. Choose the option that matches the moment you want the form to be completed.
Always Displayed
Use Always Displayed when the form should be available for the booking whenever it’s relevant (based on your visibility and assignments). This is ideal for always-needed information such as property/site details, access instructions, job notes, or intake questions.
Check-In
Use Check-In when you want the form to appear at the moment the fieldworker checks in / starts the job workflow. This is best for enforcing “start job” requirements such as:
- Arrival confirmation steps
- Safety checks
- Start-job photos (required)
- Site condition evidence (before photos)
Best practice: keep check-in forms short and mobile-friendly (fast completion on-site).
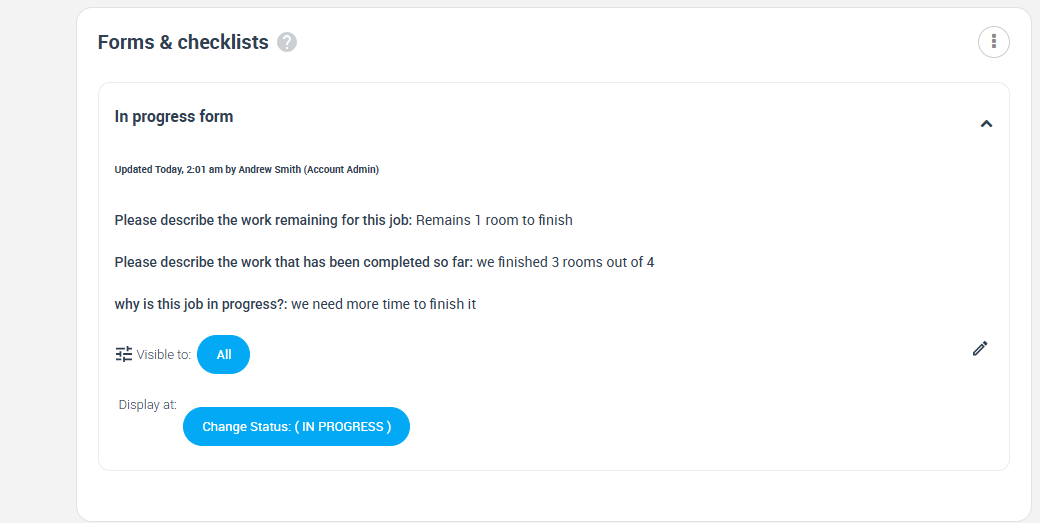
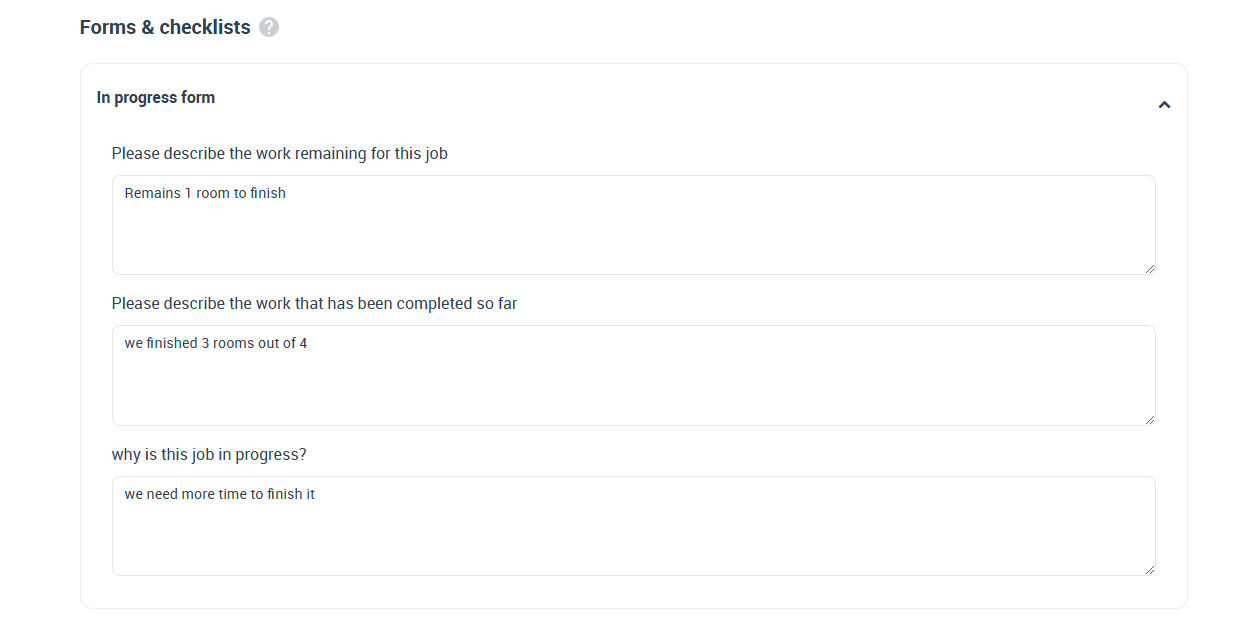
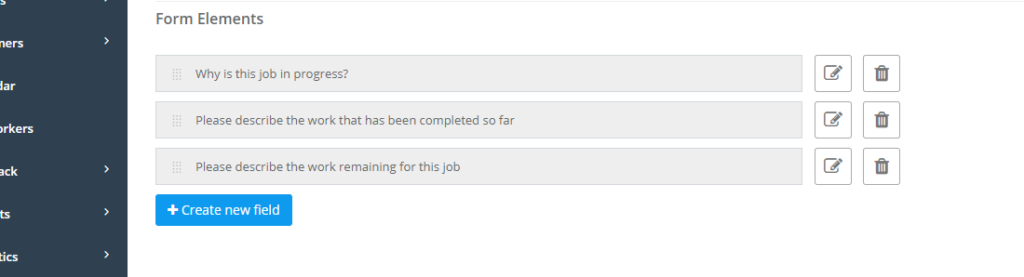
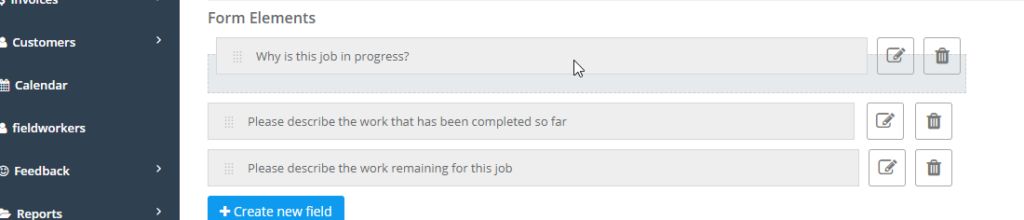
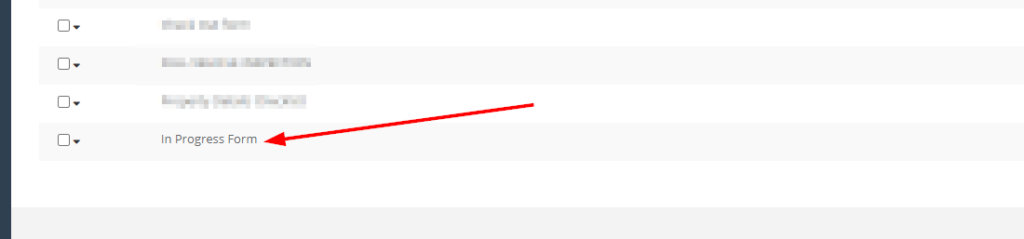
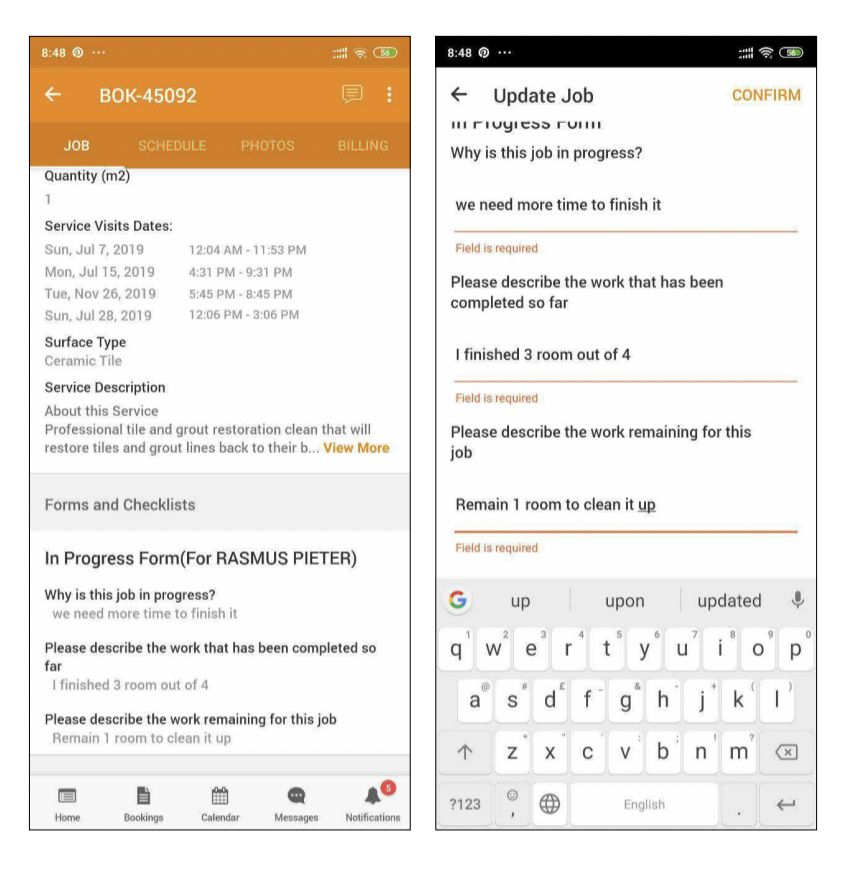
In Progress
Use In Progress forms to capture information while the job is underway (progress notes, interim photos, materials used, approvals, or checkpoints during longer jobs).
Important: If you edit a form while jobs are already in progress, in-progress bookings may retain the earlier version to keep records consistent. Updated versions typically apply to future jobs.
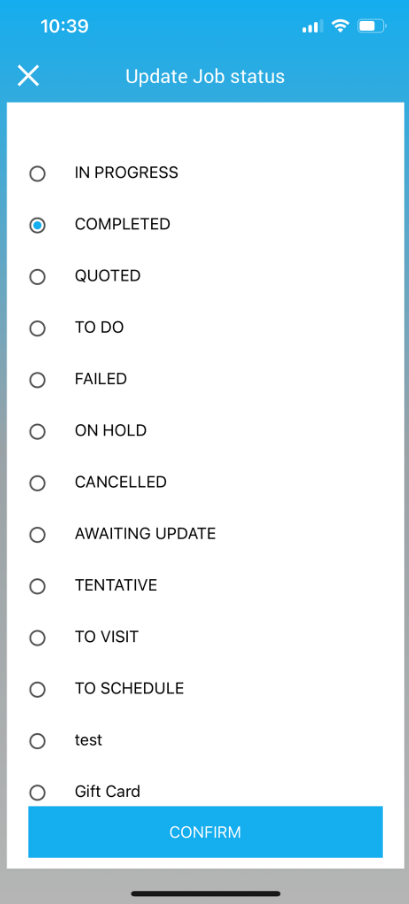
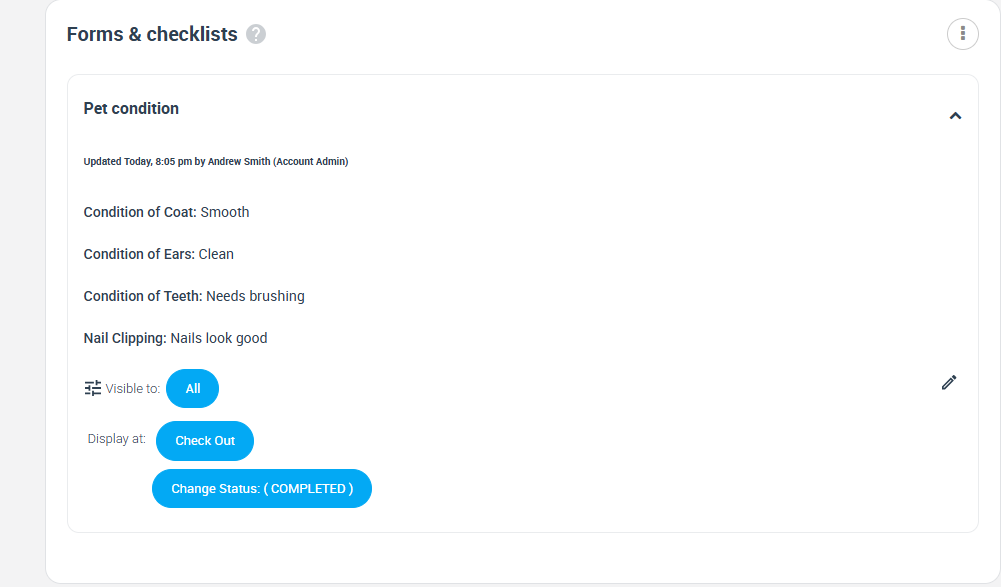
Change Status
Use Change Status forms when you want a form to appear at the moment a booking/job status changes. This is ideal for enforcing steps like “Arrived On Site”, “Start Job Photos”, “On Hold Reason”, “Withdrawn Reason”, “Declined Before Assignment”, or “Completion QA”.
Typical setup steps:
- Configure the relevant job/booking status and ensure it’s available to the right users.
- Assign the correct services to that status (so the status triggers the right forms).
- Create the form, set Display at = Change Status, then add your fields and save.

Fieldworker app:
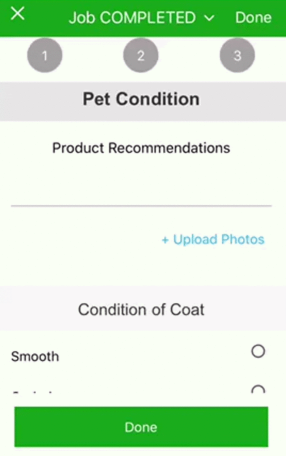
Check-Out
Use Check-Out forms when you want a checklist completed right before finishing the job (after photos, completion notes, parts used, customer sign-off, final QA).
When building a Check-Out form:
- Add the required fields (elements).
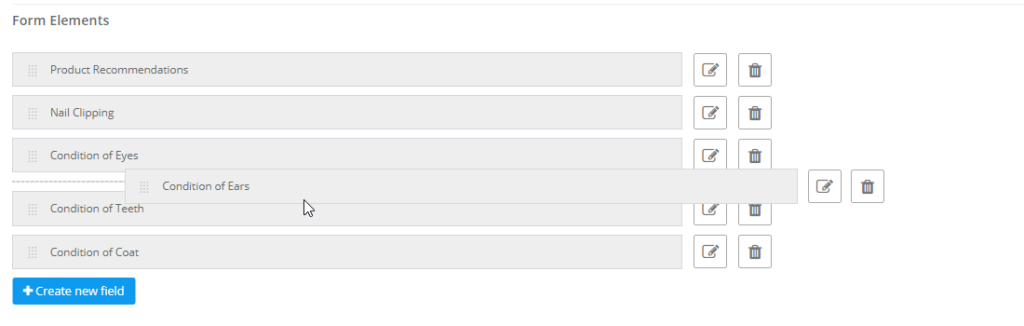
- Order fields in a logical completion sequence (drag & drop).
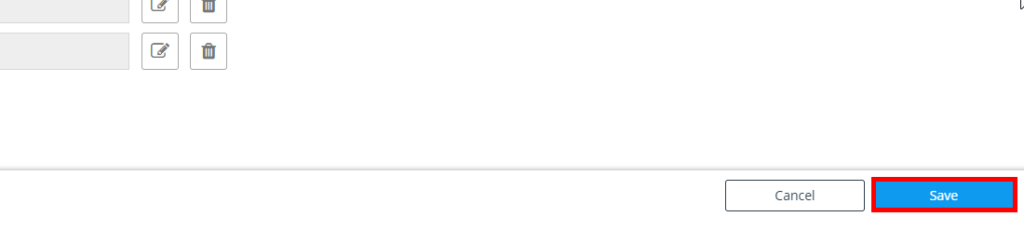
- Save the form, then assign it to the relevant services/statuses as needed.
Fieldworker flow (mobile app):
Customer Satisfaction (CSAT)
Use Customer Satisfaction forms to collect feedback after the job is completed—such as a rating, comments, or NPS-style questions. Depending on your setup, customers may access the feedback form via your Customer Portal, branded customer app, or customer communications.
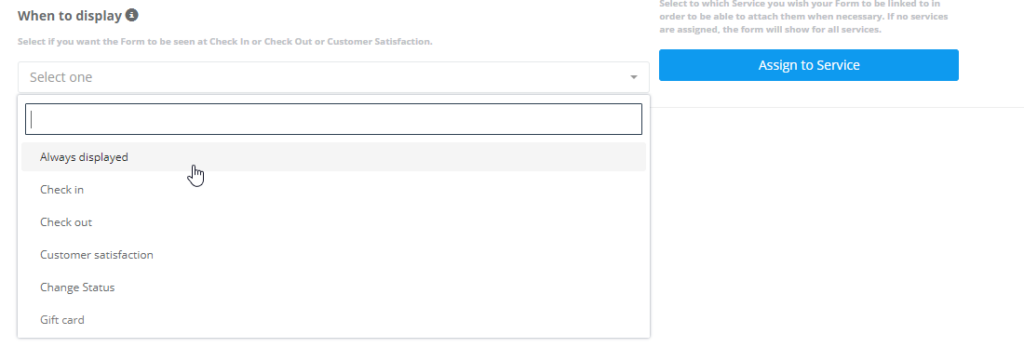
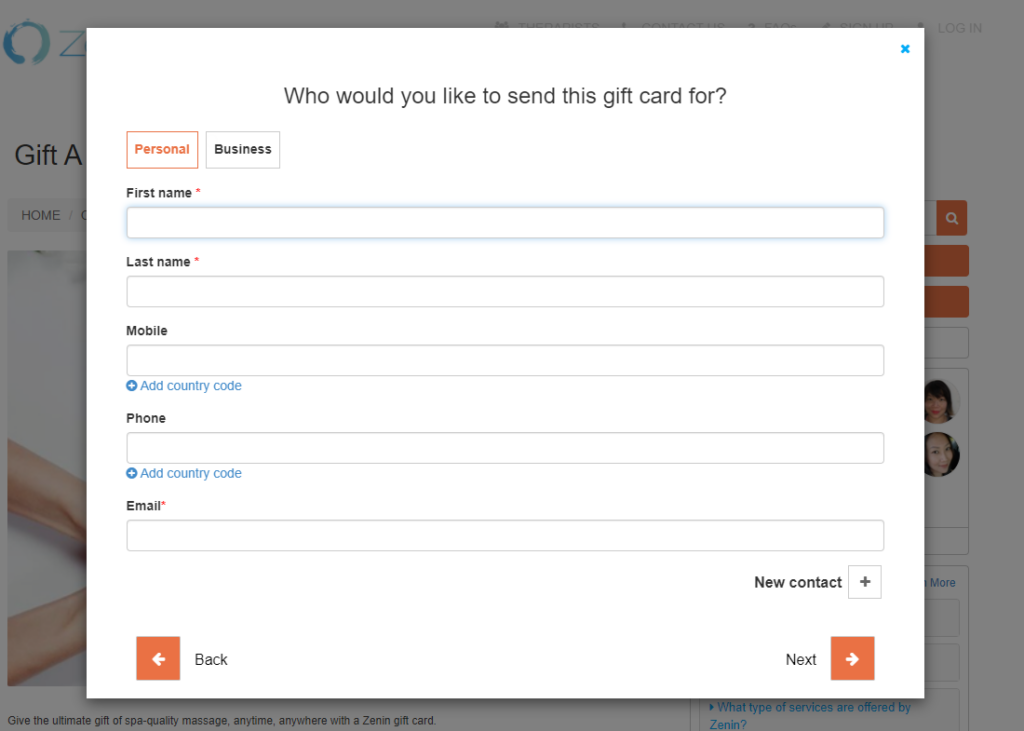
Gift Card
Use Gift Card forms when you need to capture extra details during a gift card / voucher purchase flow—such as recipient name, sender name, delivery details, or custom notes. These forms are typically shown to customers through your Customer Portal or website gift flow (based on your configuration).
Example (customer website flow):

Example (collect contact details):
Example (collect recipient details):
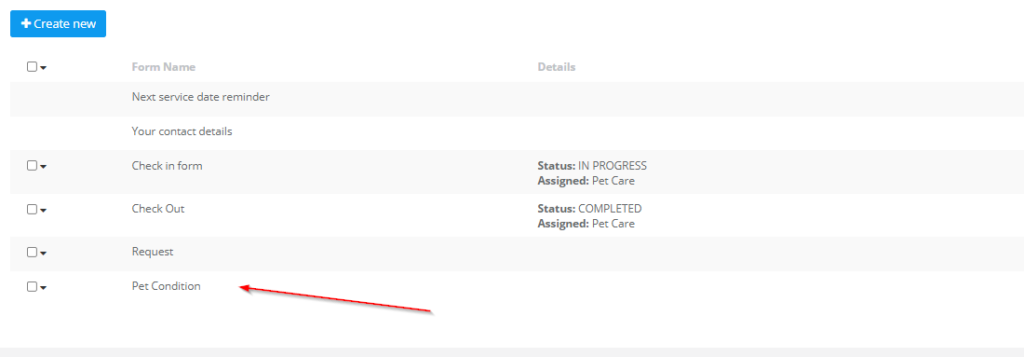
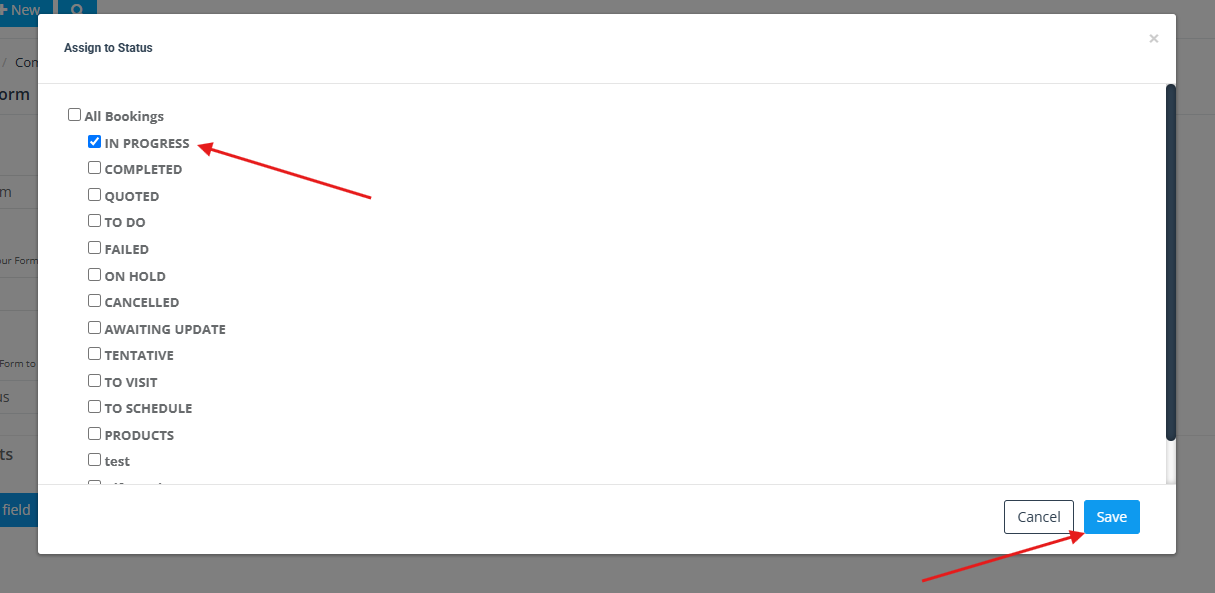
Assign a form to a booking status
Assign a form to one or more booking statuses so it only appears when a booking is moved into those statuses (e.g., In Progress, Completed, Failed, On Hold).
- Use this when: you want the form to be triggered at a specific stage of the booking lifecycle.
- If not assigned: the form may show across statuses (depending on your other rules and assignments).
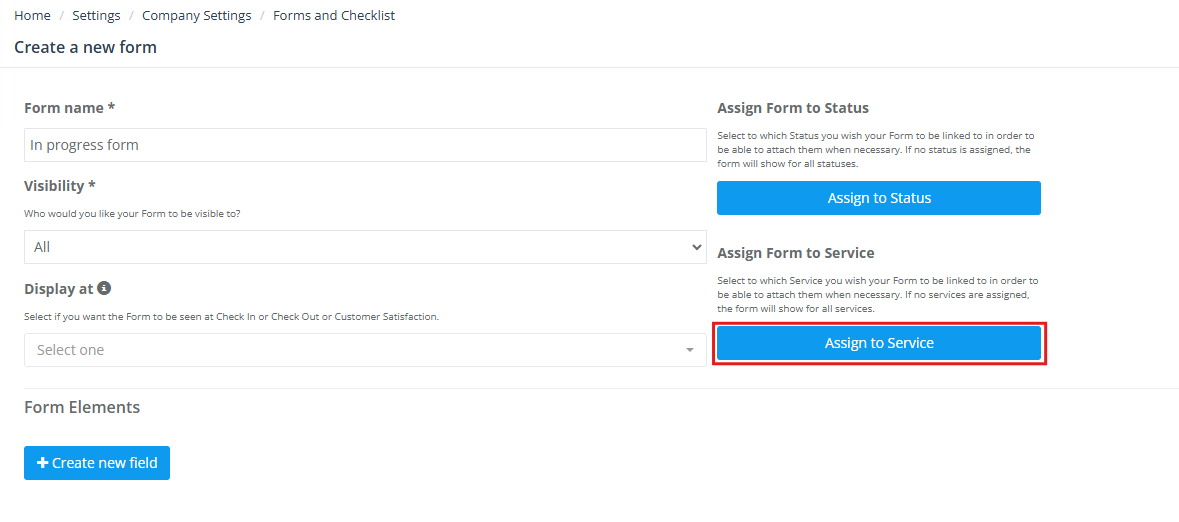
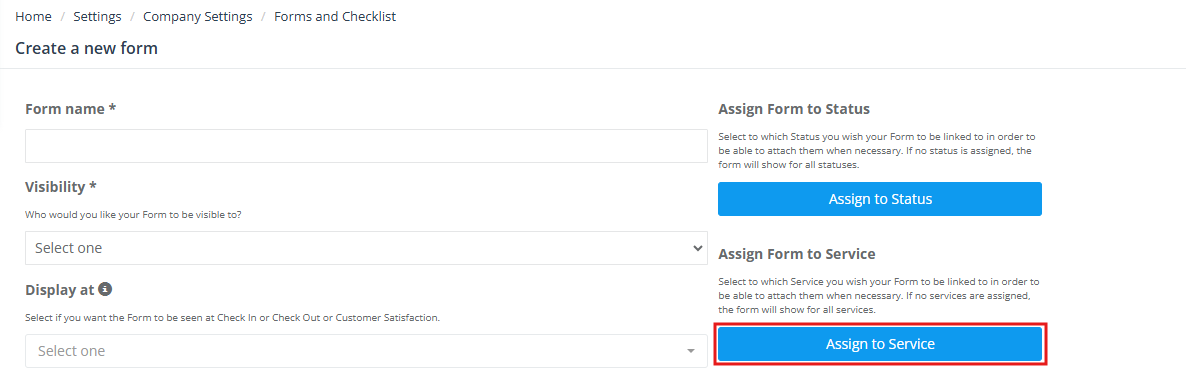
Assign forms to services
Assign the form to one or more services to ensure the right form appears for the right type of job. This is especially important when different services require different checklists or evidence.
Assign services to a job status (for status-triggered forms)
If you’re using status-based display rules (especially Change Status), make sure the correct services are assigned to the relevant job/booking status. This ensures that when the status is selected, the correct forms appear for that service.

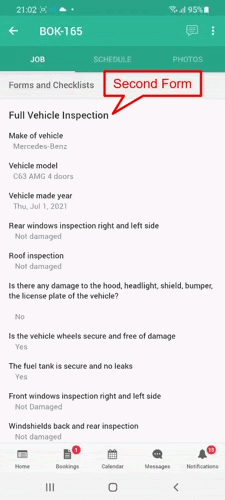
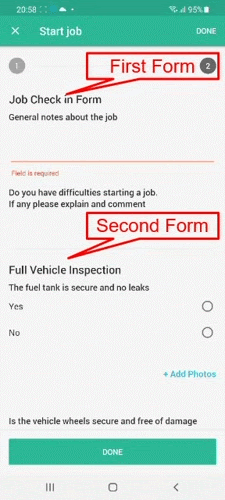
Multiple forms per job & multiple fieldworkers
You can attach multiple forms/checklists to the same booking/job (e.g., separate check-in, progress, and check-out forms), and you can have multiple fieldworkers complete different forms or different parts of the workflow—depending on how you assign and trigger them.
Why “Assign to service” may be unavailable for some forms
Depending on the form type and workflow (including some default forms), assignment options may be limited. If you don’t see “Assign to service” for a particular form, it usually means the form is designed to be global (not tied to a service) or controlled by a different workflow (e.g., certain default portal forms).
Default forms (Next Service Date Reminder & Your Contact Details)
OctopusPro includes some default forms (for example, “Next Service Date Reminder” and “Your Contact Details”). You can edit default forms, but they are commonly designed to work across the platform and may not support assignment to specific services or statuses.
Contact Details forms (Customer Portal use cases)
Portal-visible forms are commonly used to collect customer information at the right moment (booking details, access instructions, gift card flows). A common example is a Contact Details form that customers fill out during a portal flow.

View completed forms (admin & office)
Admin/office users can review submitted forms from the booking/job details screen. This helps with quality control, proof-of-work, compliance, and resolving disputes (photos, signatures, timestamps, and notes are captured consistently).
Portal/contact forms can also be reviewed from within the booking details page:
Edit, delete, activate/deactivate
Edit forms and checklists
Edit a form when you need to adjust wording, add/remove fields, change options, or improve completion flow. Consider how edits affect in-progress jobs (in-progress bookings may retain earlier versions).

Delete forms and checklists
Delete forms only when you’re sure they’re no longer needed. If a form is used in active workflows, deleting it removes it from future jobs and may reduce consistency of records.

Activate / deactivate
Deactivate forms you don’t want used right now without permanently deleting them.

Best practices
- Keep mobile completion fast: aim for under 60–90 seconds for check-in/status/check-out forms.
- Use mandatory fields strategically: enforce compliance/quality steps, but avoid overloading users.
- Use photo uploads where proof matters: before/after photos, damage evidence, completion confirmation.
- Use Check-In or Change Status for enforcement: when a step must happen at a specific moment (arrival/start/reason capture).
- Use Check-Out for completion evidence: final checklist + deliverables + customer sign-off.
- Name forms by trigger + purpose: e.g., “Check-In – Arrival Photos”, “Check-Out – Completion QA”.
- Split long processes into stages: separate check-in, in-progress, and check-out forms instead of one long form.
Related guides
- Forms & Checklists Introduction
- Using Forms & Checklists
- Forms & Checklists Elements (Field Types)
- Forms & Checklists Use Cases
- Collect Customer Signatures
To stay updated, please subscribe to our YouTube channel.