
Calendar Week View (Weekly Scheduling Calendar)
OctopusPro’s Calendar Week View gives you a clear week-by-week schedule of all bookings and availability blocks, making it ideal for dispatching, rescheduling, and managing team capacity at a glance.
Use Week View to:
- See your full weekly schedule across days and time slots.
- Reschedule bookings using drag-and-drop.
- Create a new booking directly from the calendar grid.
- Block unavailable time (hours or full days) to prevent new bookings.
- Add internal calendar notes (reminders) to specific dates/times.
- Filter your calendar by service, booking status, fieldworker, location, labels, and more.
On this page
- How to open the Week View
- Navigate and jump to a specific week
- Reschedule bookings (drag & drop)
- Add a new booking from the calendar
- Mark a time slot as unavailable
- Add notes to calendar dates
- Filter the calendar in Week View
- Tips & troubleshooting
- Related articles
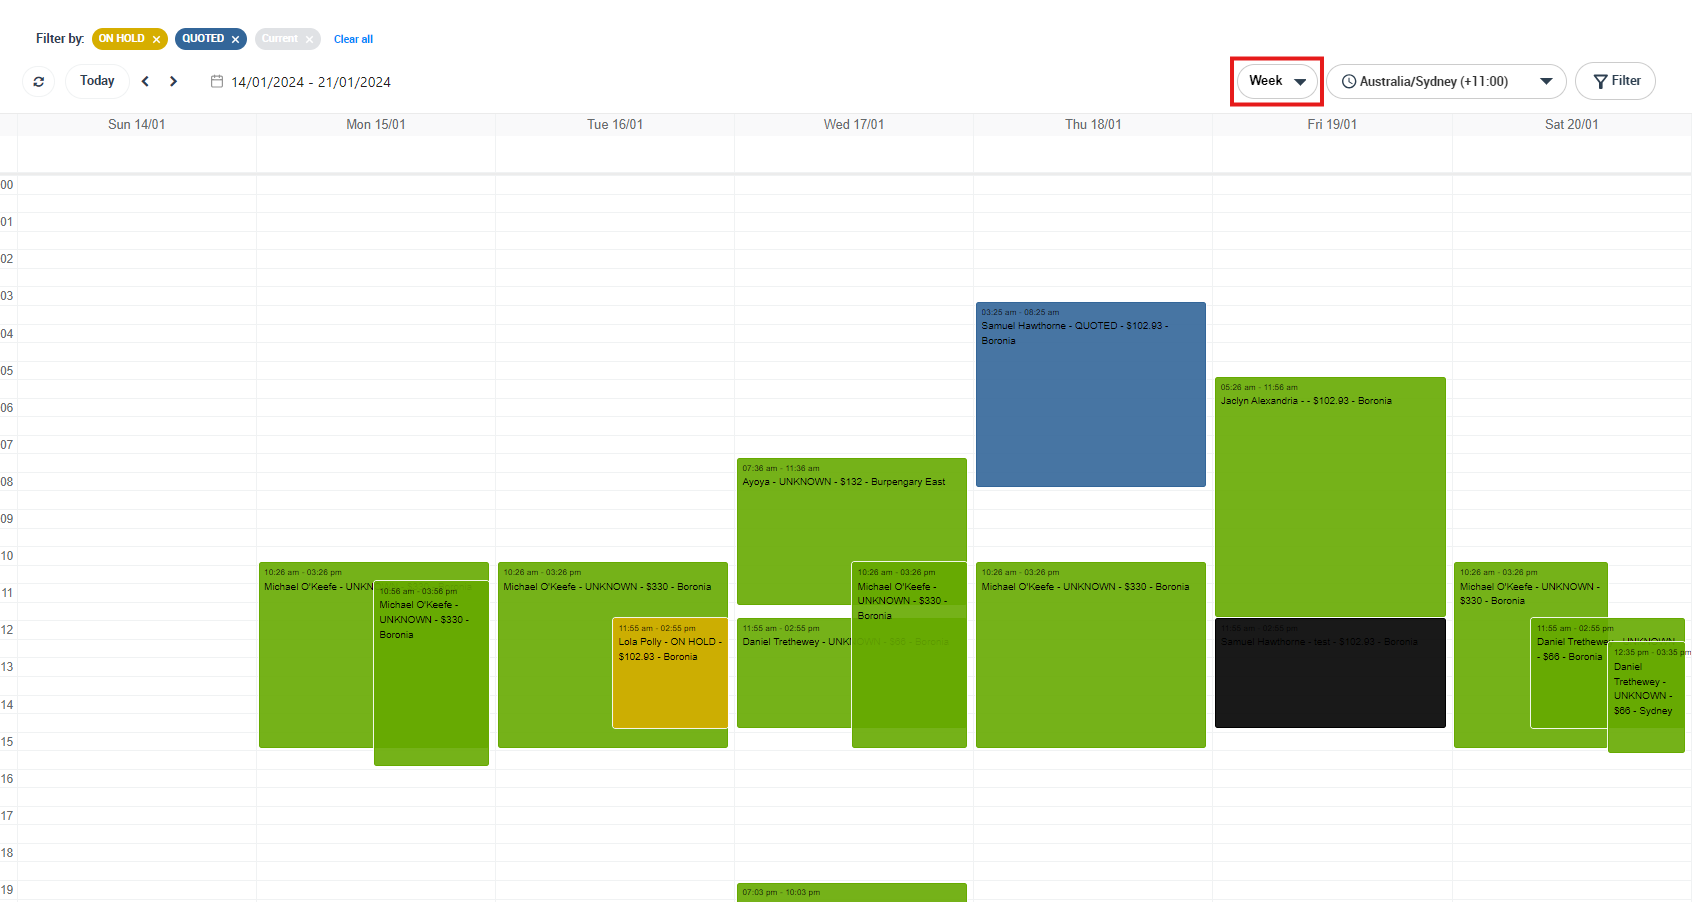
How to open the Week View
- From the main menu, go to Bookings > Calendar.
- Use the view selector to choose Week.
Prefer a different layout? You can also use: Calendar Month View, Calendar Day View, or Calendar List View.
Navigate and jump to a specific week
Week View includes quick navigation tools so you can move between weeks and jump to a specific date range:
- Today: jumps back to the current week.
- Previous / Next: moves backward or forward by one week.
- Date picker: jump directly to a specific date/week.
- Timezone selector: confirm you’re viewing bookings in the correct timezone (important for multi-region teams).
![]()
Reschedule bookings (drag & drop)
Rescheduling a booking to a different hour or day is fast in Week View:
- Click the booking you want to move (it will highlight).
- Drag and drop it into the desired day/time slot.
- The booking updates automatically, and your customer/assigned fieldworker may be notified depending on your notification settings.
Tip: If you can’t drag a booking, check your user permissions and whether the booking is locked by status/workflow rules.
Add a new booking from the calendar
You can create bookings directly from Week View without leaving the calendar:
- Click the time slot where you want to schedule the new booking.
- From the pop-up menu, select Add booking.
- You’ll be redirected to the booking creation form—enter the details and click Save.
- The booking will appear immediately on your weekly calendar.

For a detailed walkthrough, see: Add New Bookings from the Calendar.
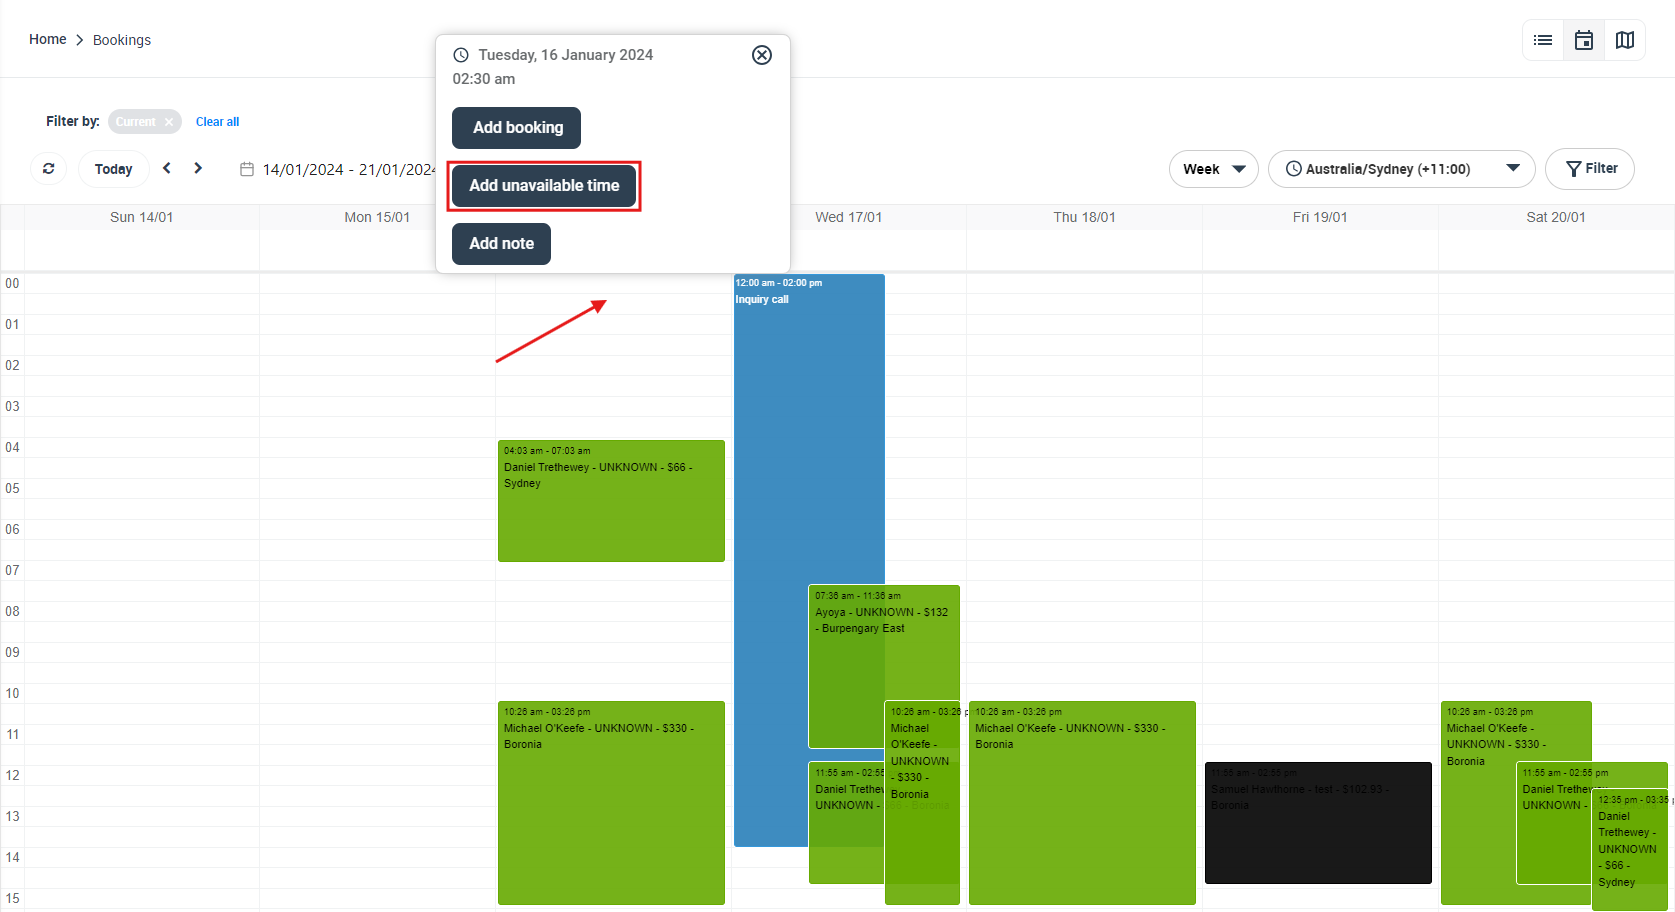
Mark a time slot as unavailable
Blocking unavailable time helps prevent bookings from being scheduled during non-working hours, breaks, holidays, training, meetings, or fully booked periods.
Add unavailable time from Week View
- Click the time slot you want to block.
- Choose Add unavailable time.
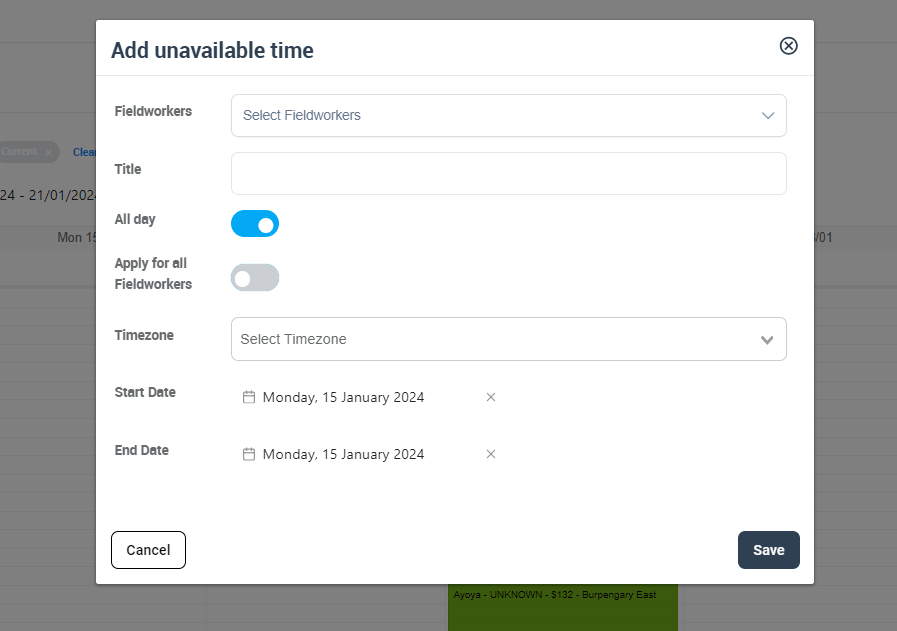
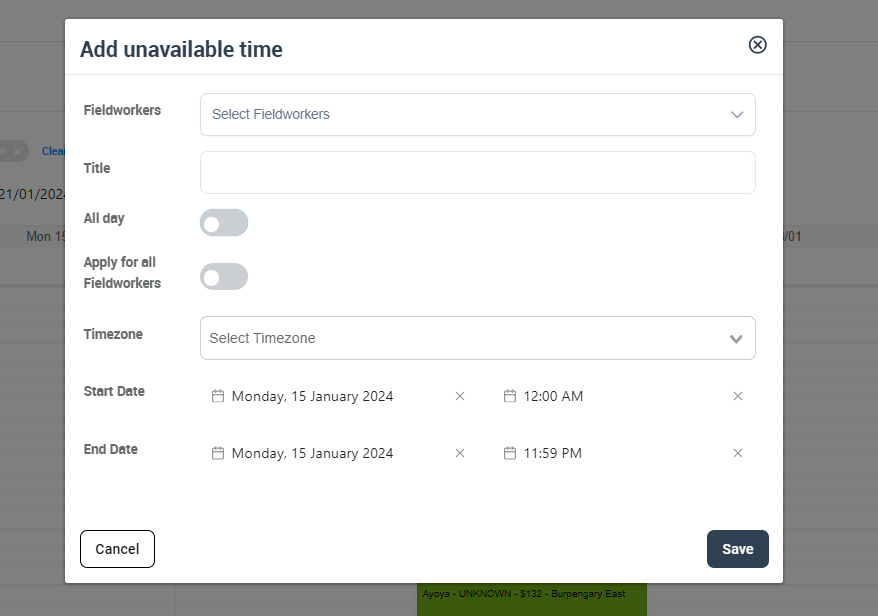
Configure the unavailable time block
- Fieldworkers: choose who the block applies to (or apply broadly if available in your setup).
- All day: enable to block a full day.
- Start/End: choose a specific time range if you only want to block part of the day.
- Timezone: confirm the timezone to avoid scheduling conflicts across regions.
For advanced options (multi-day blocks, recurring patterns, etc.), see: Block Unavailable Dates & Times in Calendar.
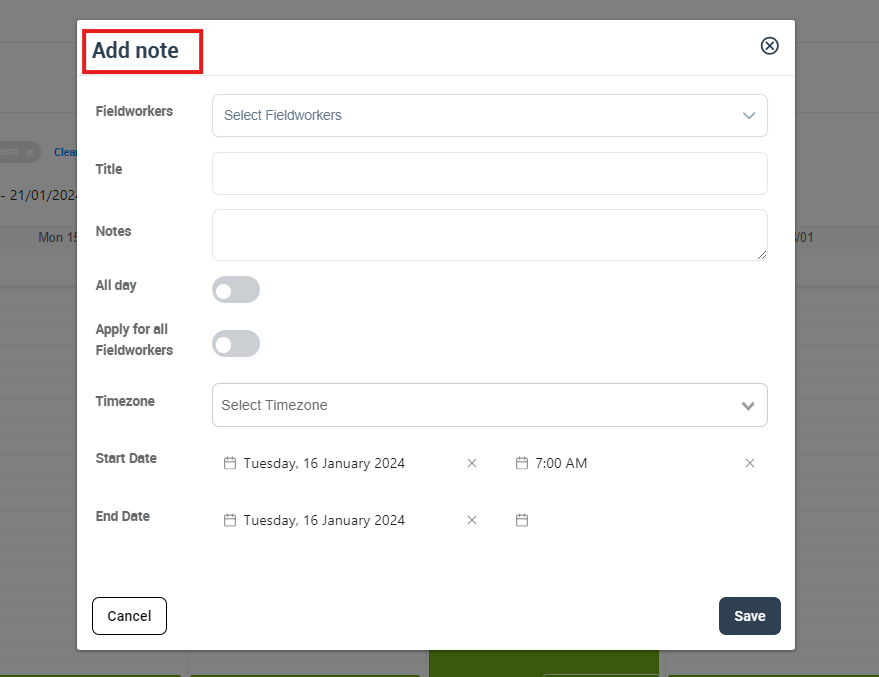
Add notes to calendar dates
Calendar notes are useful for internal reminders such as “Call customer before arrival”, “Equipment maintenance”, or “Team meeting”. Notes can be displayed on your calendar without creating a booking.
- Click the relevant time slot in the calendar.
- Select Add note.
- Enter your note details, then click Save.
Need more options and examples? See: Adding Notes to Calendar Dates.
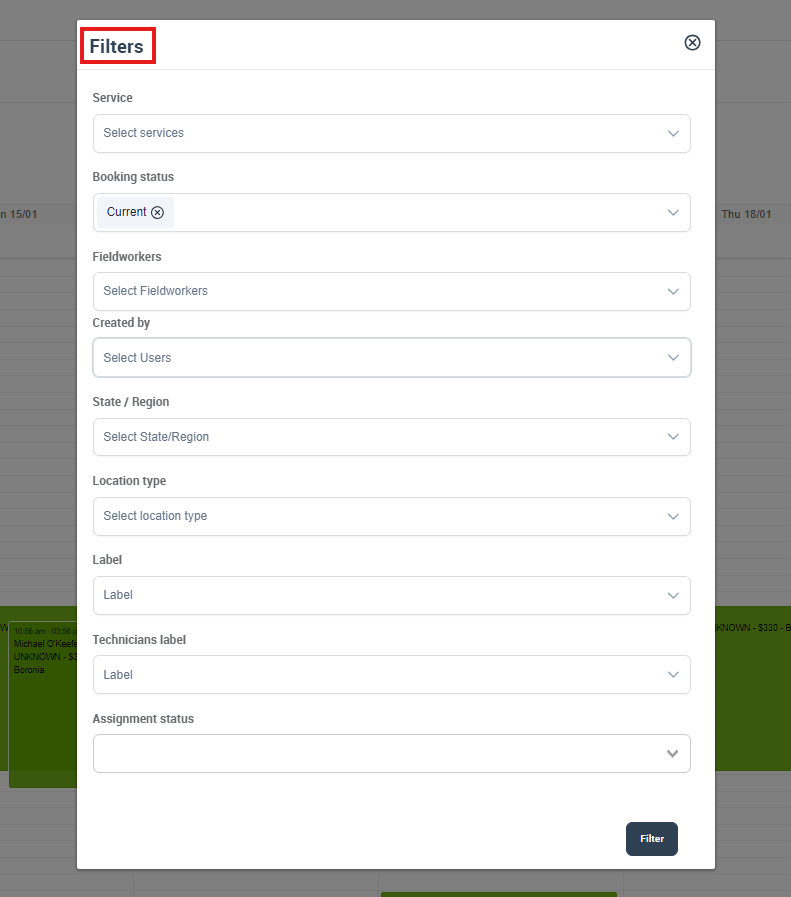
Filter the calendar in Week View
Filters help you focus on exactly what you need—whether you’re dispatching jobs for a specific team, reviewing a service type, or auditing completed work.
You can filter by attributes such as service, booking status, fieldworkers, created by, location (State/Region & Town/City), location type, customer labels, fieldworker labels, assignment status, and payment status.
- In Week View, click Filter.
- Select one or more filter criteria.
- Click Filter to apply.
- Use Clear all to remove filters and return to the full schedule.
Common filtering workflows:
- Dispatching: filter by Active fieldworkers + Assigned/Unassigned status.
- Operations: filter by Service (e.g., Cleaning & Sealing) to manage capacity.
- Progress tracking: filter by Booking Status (e.g., Completed, Upcoming).
- Regional teams: filter by Area / State / Town/City.
More filtering guides: Filter Calendar by Area | Filter Calendar by Booking Status | Filter Calendar by Fieldworker
Tips & troubleshooting
- I can’t move a booking: confirm you have permission to edit/reschedule bookings, and ensure there are no workflow restrictions based on status.
- Bookings are missing: clear filters, confirm the correct week/date range, and verify the selected timezone.
- Need a full dispatch overview: start with the main calendar overview: Calendar – Scheduling and Dispatching.
- Need availability insights: check Dynamic Real-time Fieldworker Availability Scheduling.
Related articles
- Calendar – Scheduling and Dispatching
- Calendar Month View
- Calendar Day View
- Calendar List View
- Add New Bookings from the Calendar
- Block Unavailable Dates & Times
- Adding Notes to Calendar Dates
- View Fieldworker Google Calendar
- Job Assignment & Dispatch (Manual vs Automated)
- Fieldworker Reschedule Assist
- Nearby Bookings (Proximity Scheduling)
To stay updated, please subscribe to our YouTube channel.