
Sending emails for bookings
Users can email their customers or fieldworkers from the booking details page. Sending emails is an effective way to communicate all the booking details required to be delivered effortlessly, as well as to keep in touch with your customers and gain a better understanding of what they’re interested in, as well as to help fieldworkers better understand their tasks, for example, by sending a photo through an email.
Table of contents
- Sending emails from the booking details page
- Sending emails from the booking listing page
- Sending emails from the calendar page
- Sending a new email
- Sending an existing template or canned response
- Sending emails to customers
- Sending booking request confirmation email to the customer
- Sending a booking accepted confirmation email to the customer
- Sending attached booking photos to customers
- Sending a “Next-Booking Reminder” email to the customer
- Sending an invoice by email to the customer
- Sending a deposit request email to the customer
- Sending emails to fieldworkers
Sending emails from the booking details page
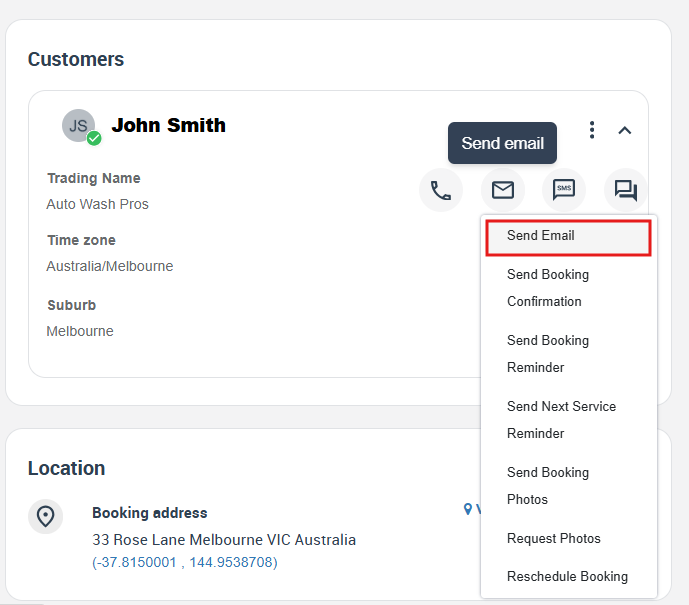
- When you create a new booking, the system will allow you to send an email to your customer or fieldworker from the booking overview page. If you want to send an email to your customer from the customer section, click on “Email.” Icon You can select from the drop-down menu to send an invoice email for payment or request a deposit from the customer. You can also email photos to a customer or send a customized email with attachments. This will be discussed further down the page.
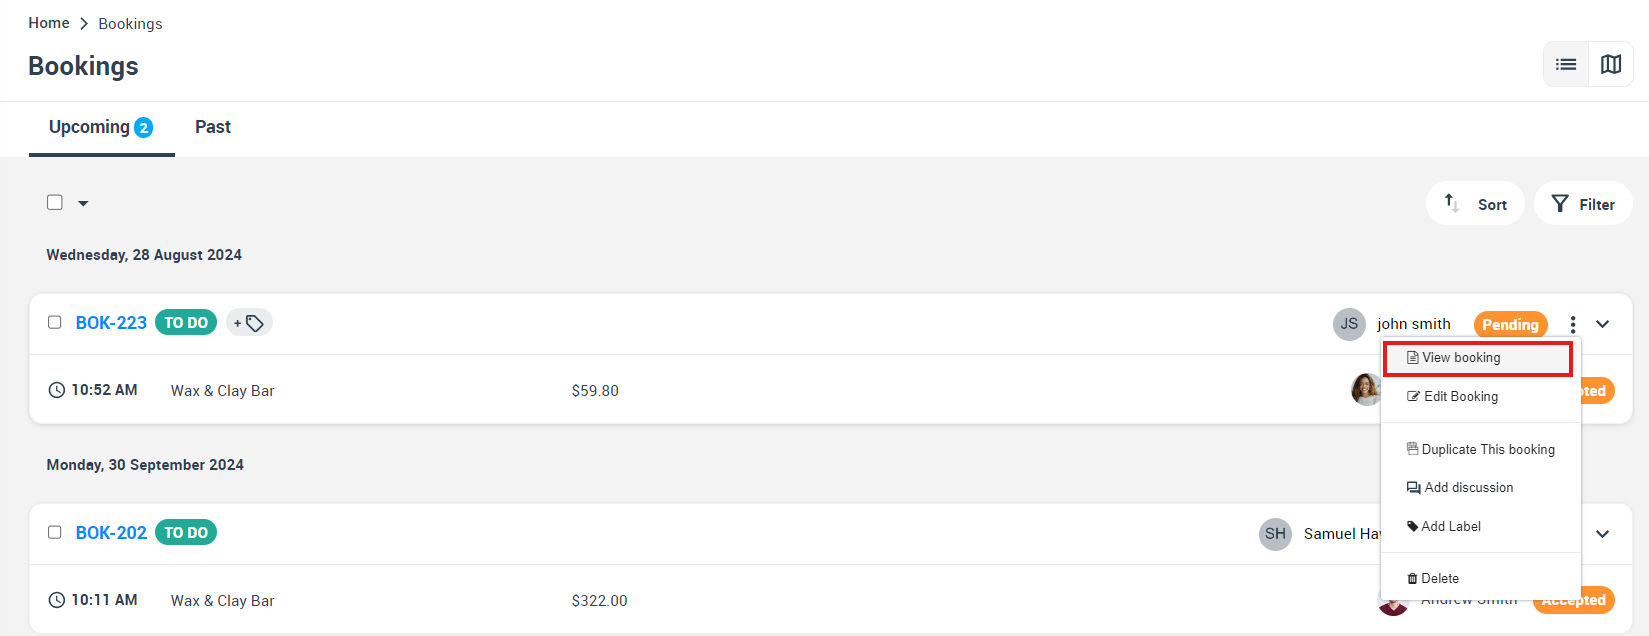
- To contact your customer, go to Bookings > upcoming or past bookings. Select the booking you want, then click on the “Action” button, and then click to view the booking from the drop-down menu.
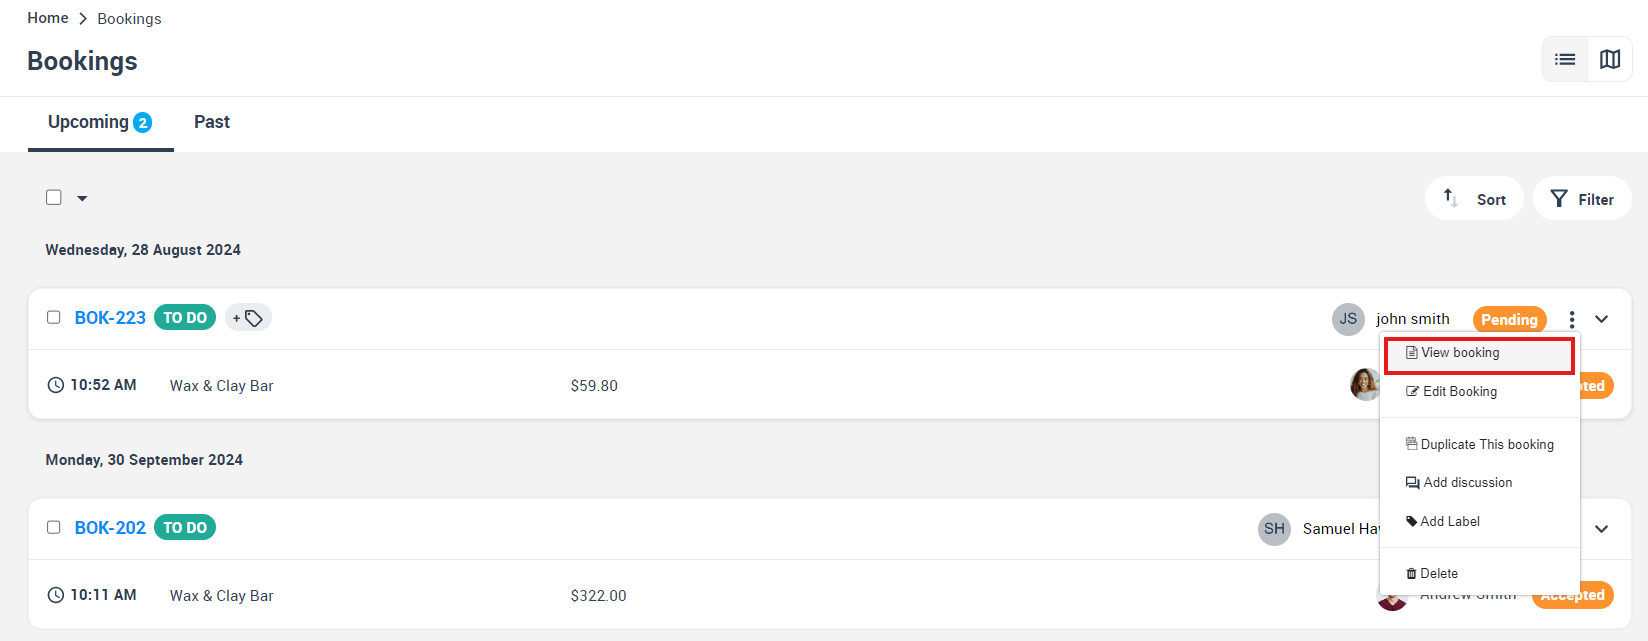
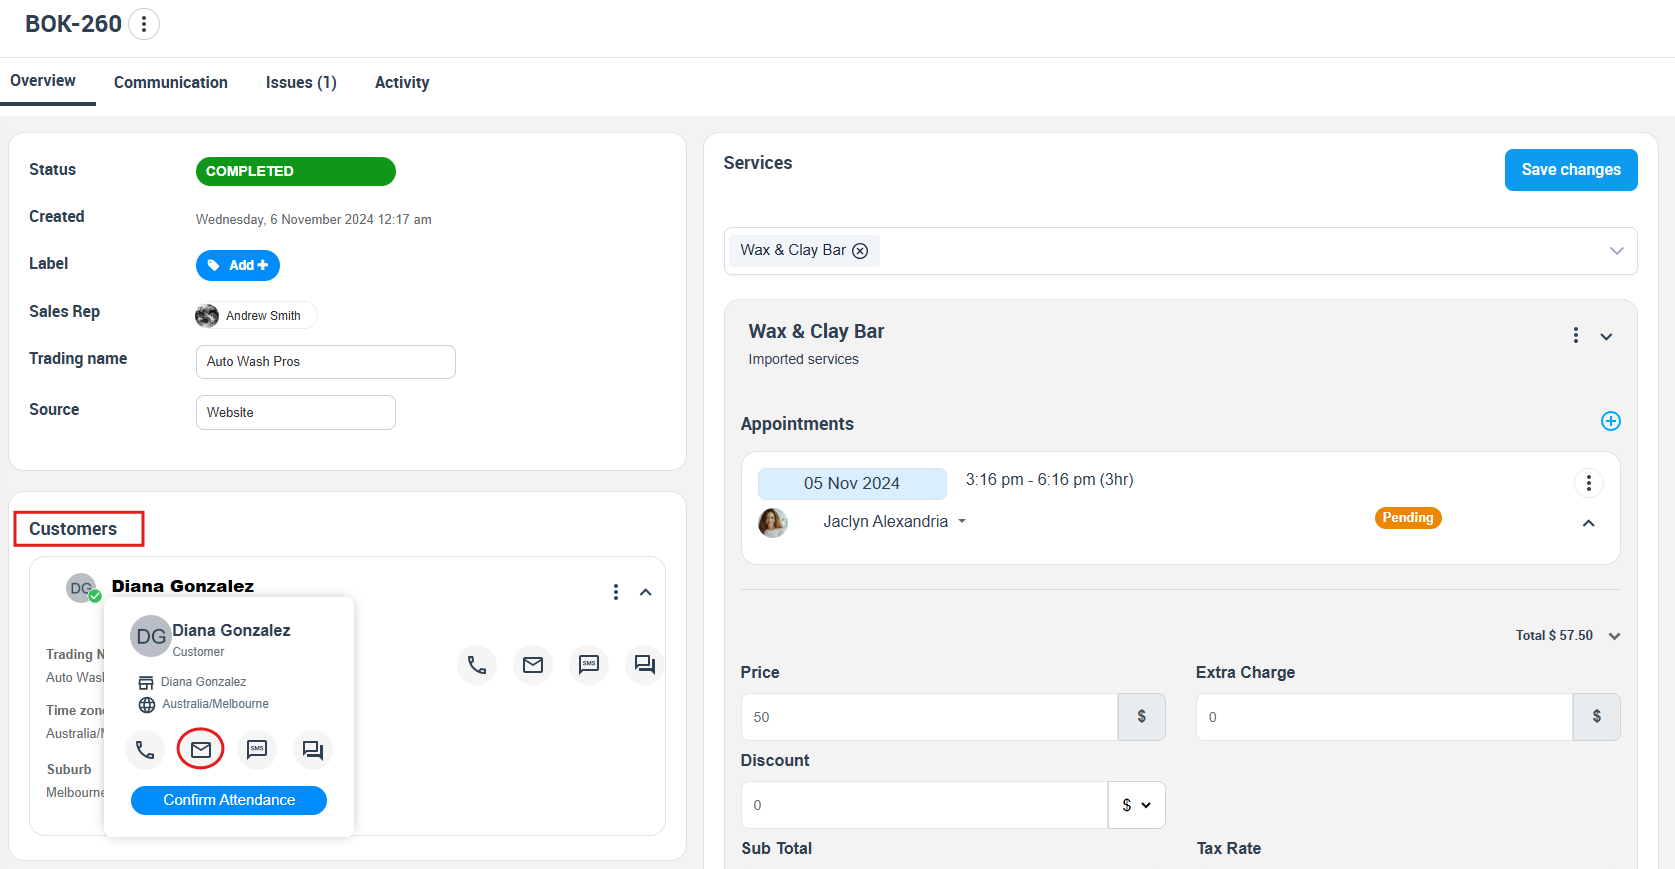
- You will be redirected to the booking overview page, where you can contact your fieldworker and customer. In the customer information section, hover your mouse over the customer‘s name, and a popup window with a menu will appear; click the email icon to send an email to the selected customer.
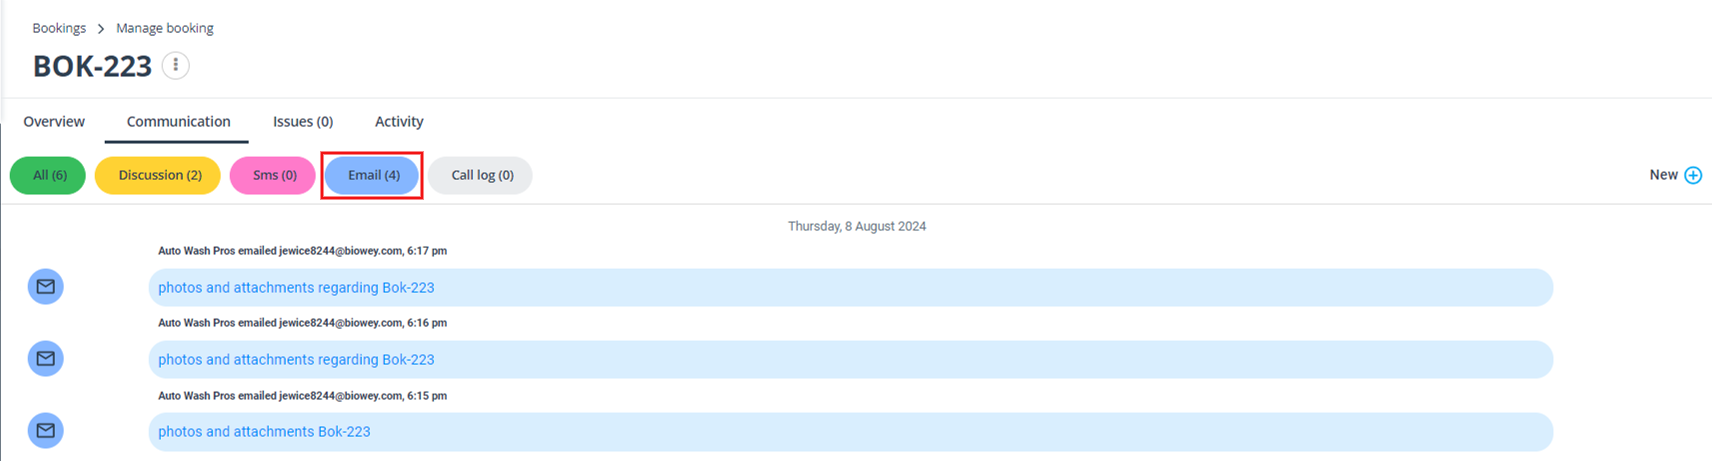
- You can view the history of your booking. To do this, from the Booking details page select “communication” button and click on “Email” section. All the history of the emails will appear with the date, subject, sender, and to whom, and you can click on the clickable link to view the details of the email.
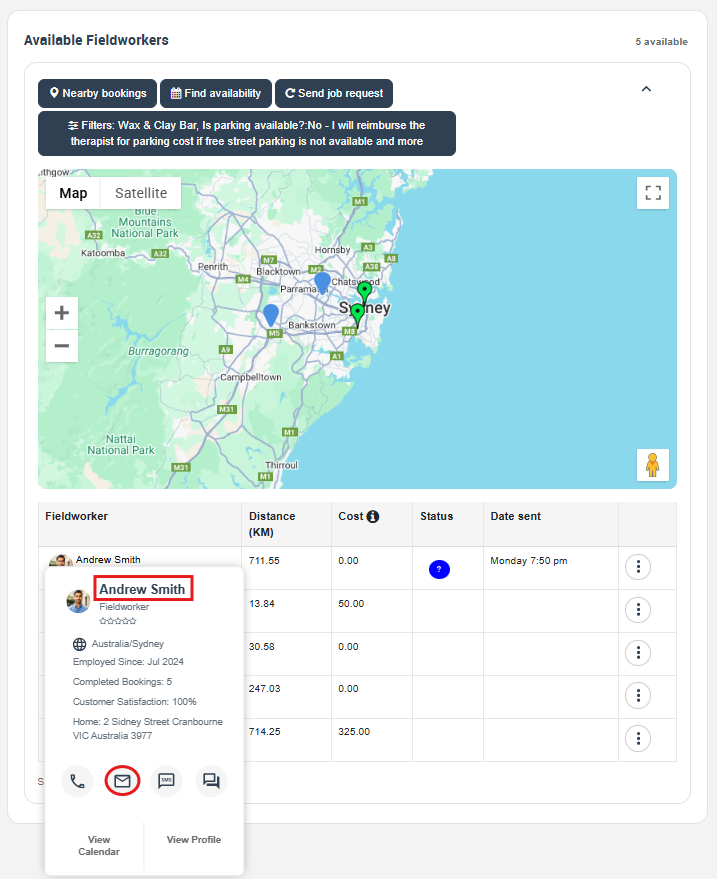
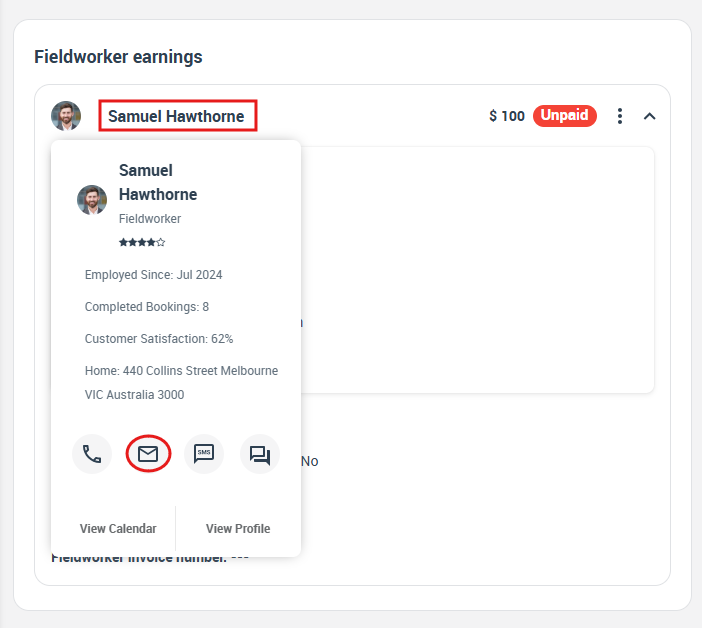
- To contact your fieldworker from the booking overview page, scroll down to the available fieldworker’s section and hover over the fieldworker’s name; a popup window with a menu will appear; click the email icon to send an email to the selected fieldworker.
Or
- You can go to the “services” section to find the scheduled appointments. If you hover over the fieldworker who assigned the booking, a popup window with a menu will appear; click the email icon to send an email to the selected fieldworker.
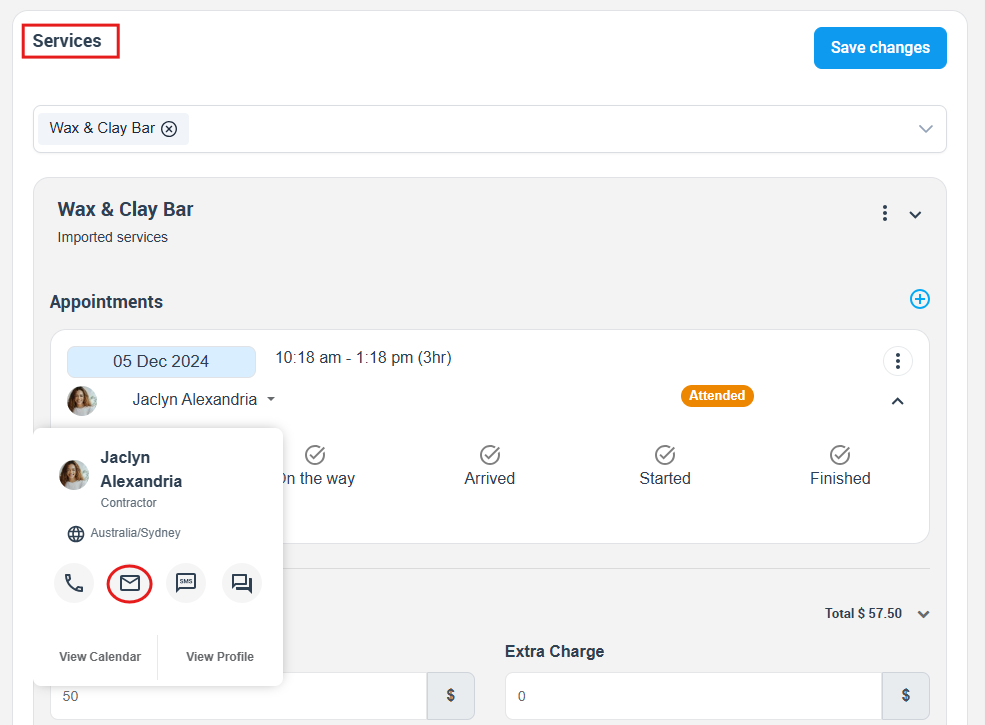
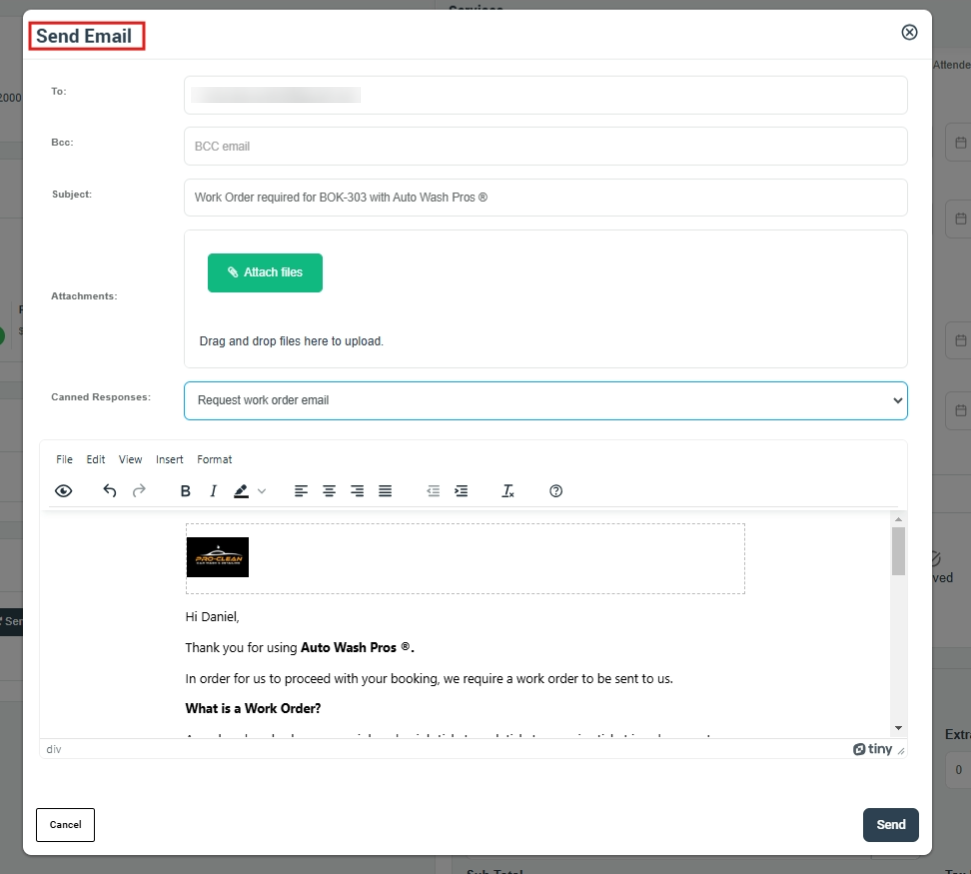
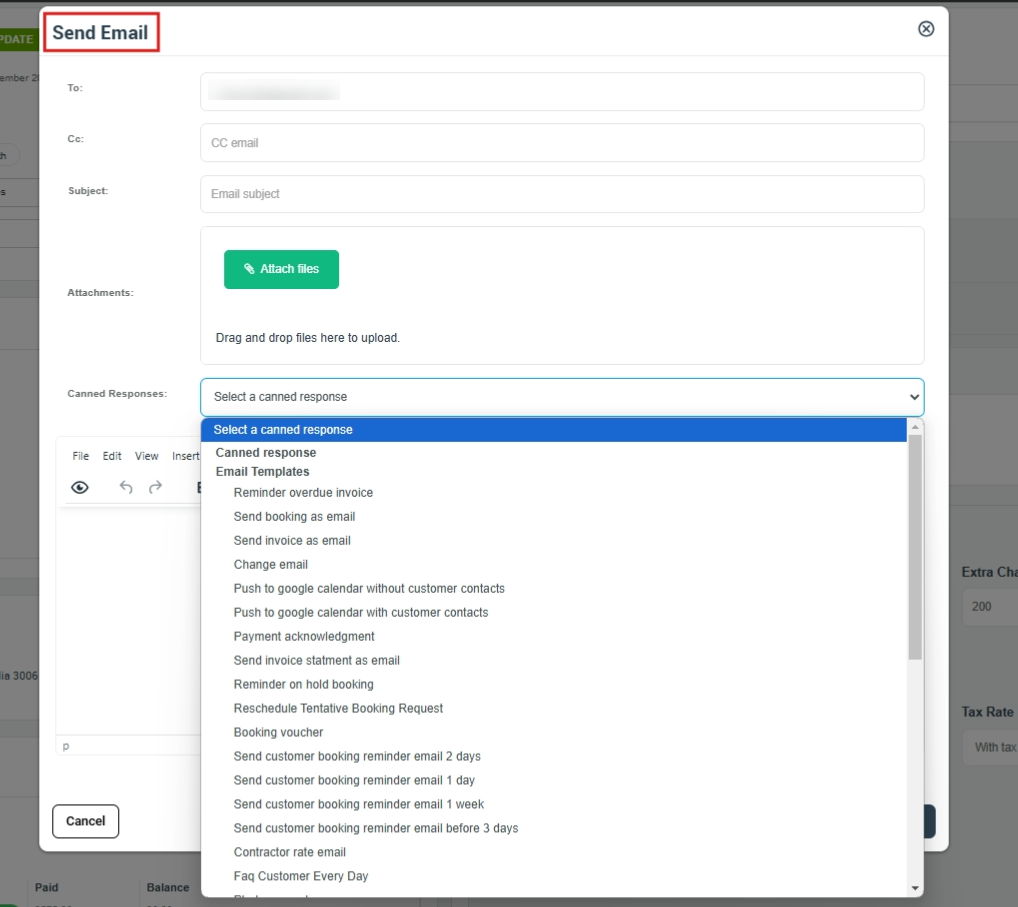
- When you click on the email icon, an email form will appear where you can add Cc, subject, and attachments. You can also select a canned response from the drop-down menu to send an email template easily and to learn more about the feature, click here.
Sending emails from the booking listing page
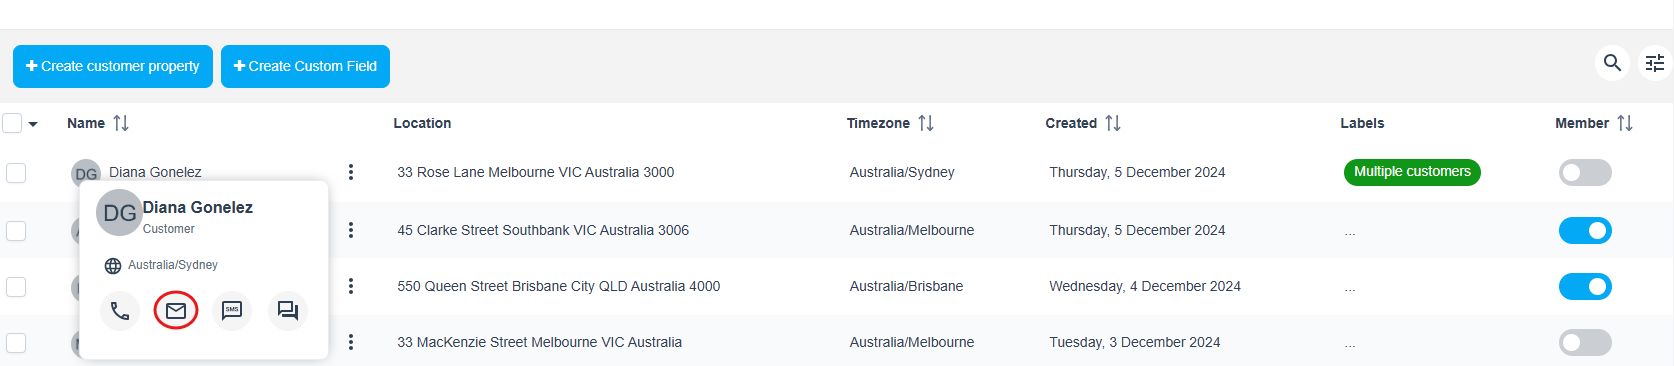
- You can send emails to your customers from the booking list by selecting the booking you want, hovering over the customer’s name a popup window will appear with a brief of his profile, and then selecting the email icon from the menu by hovering over it. a drop-down menu will appear with options to send an email.
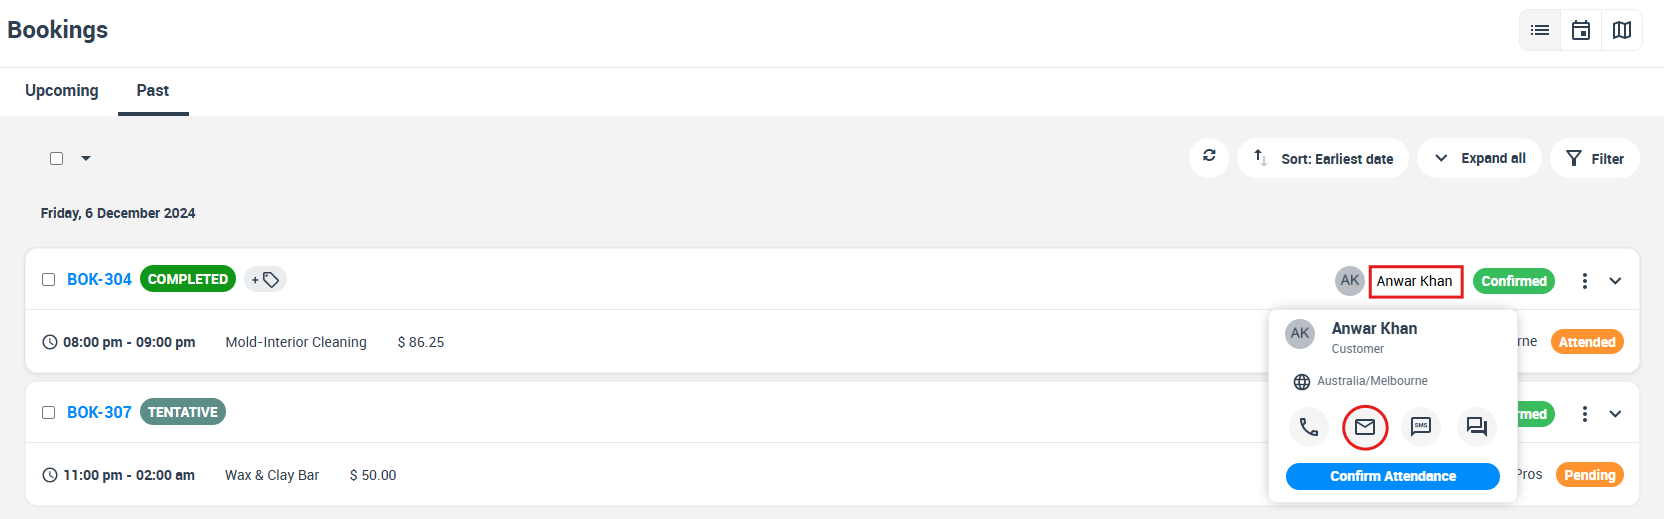
- A pop-up window with the email form will appear, you can select an email booking, or send an email invoice. and you can fill in the blanks. then click on “Send.”
Sending emails from the calendar page
- You can contact your customer or fieldworker using the calendar view page. There is at least one available, matched fieldworker for the booking. The available time slots will always be determined by the business working hours specified in your general fieldworker profile, as well as the availability of your fieldworkers. Visit the “Calendar availability” user guide for more information.
- Go to Calendar, then click on the desired booking; a popup window will appear; move the mouse pointer over the fieldworker’s name to view a menu. You can communicate with the fieldworker via email. Alternatively, you can view the fieldworker’s profile and then follow the steps outlined above.

- To contact your customer, move the mouse pointer over the customer’s name to view a menu. You can communicate with your customers via email.
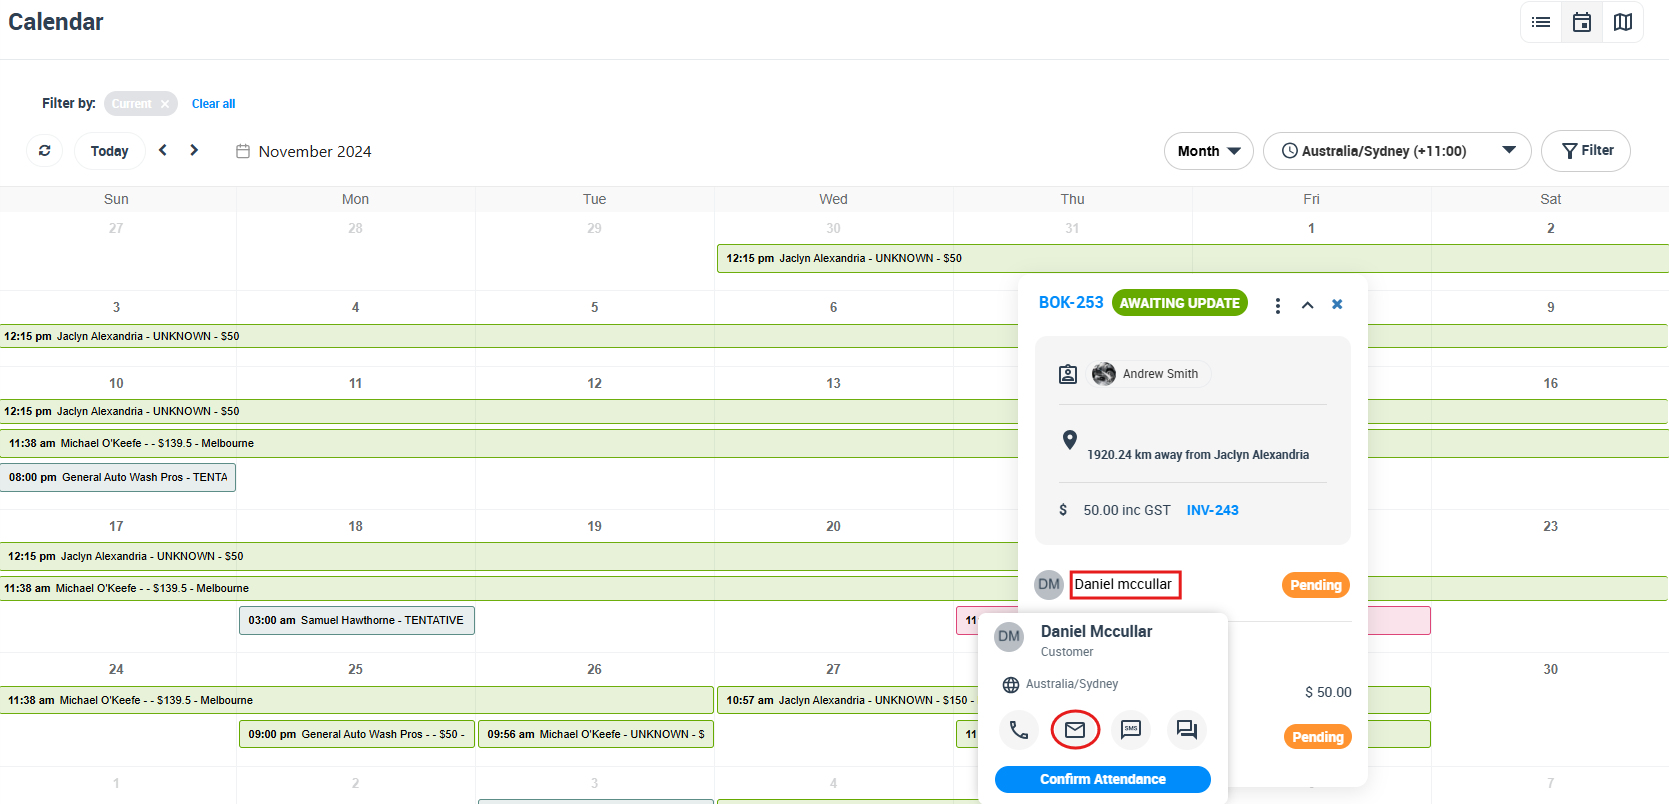
- A pop-up window with the email form will appear, and you can fill in the blanks. You can select a canned response or edit it if necessary, then click on “Send.”
Sending a new email
- You can contact your customers via email by viewing their profiles. Visit the Contacting and Communicating with a Customers user guide for more information.
- Go to Customers > All customers
- Select the customer you want and move the mouse pointer over the customer’s name to view a menu. You can communicate with your customers via email.
- You can contact your fieldworker via email by viewing their profiles. Visit the “Contacting fieldwroker “ user guide page for more information.
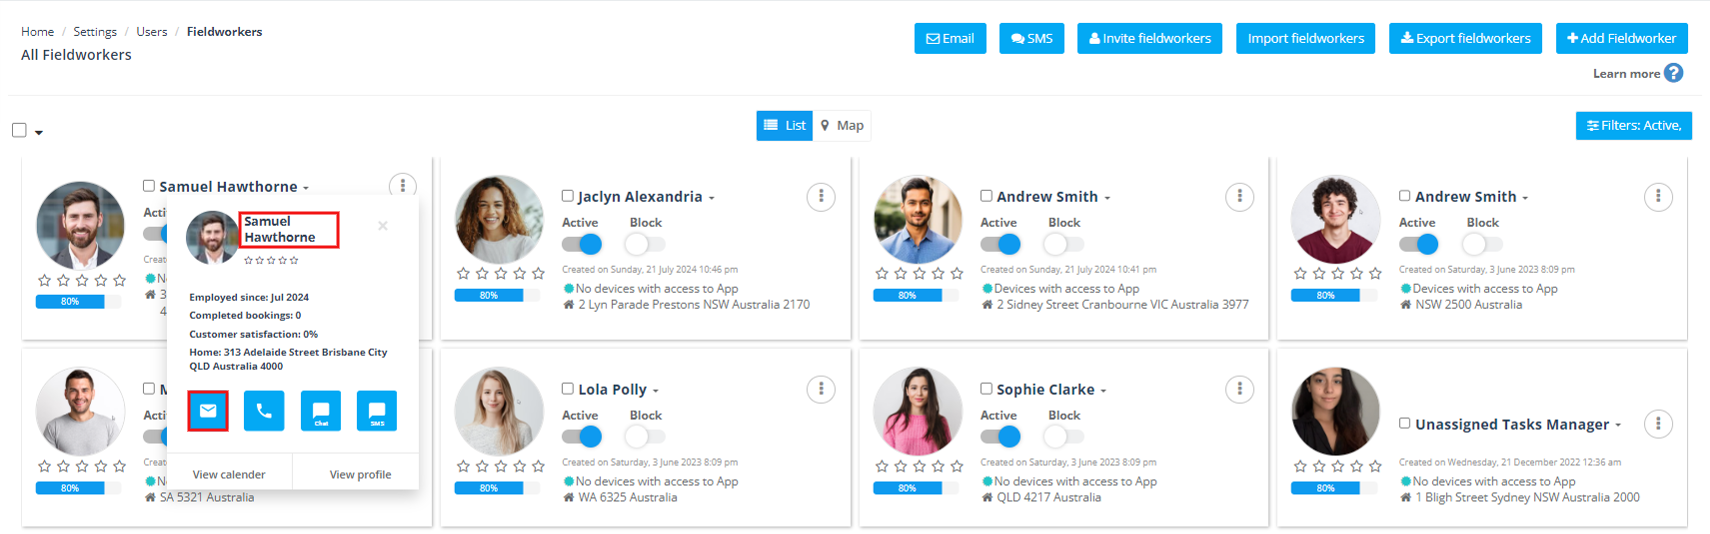
- Go to Fieldworkers > All Fieldworkers
- Select the fieldworker you want and move the mouse pointer over the fieldworker’s name to view a menu.
Sending an existing template or canned response
You can send your customer or fieldworker an email template that already exists in the system so that you can use it, or you can send canned responses, which are pre-written emails and SMS messages you can send to customers and fieldworkers. Unlike email/SMS templates, canned responses are not automated, and after they are set up, they can be edited and personalized. Visit Canned Responses to learn more about the feature.
- Go to Booking > upcoming or past bookings, select the booking you want, and click on the action button. Then select “View Booking” and you will be redirected to the booking overview page. It’s already categorized, so you can send an email to your customer or fieldworker using any email template you want, or you can choose a canned response from the drop-down menu.
- Then on the the right side of the page from “customer” section, click the “Email” icon and select send email to send an email to the selected customer.
- You can also send an email with your chosen canned response from the drop-down menu to all your fieldworkers or specific fieldworkers, which will appear different from the customer’s canned response.
- From “Fieldworker earnings” section hover over the fieldworker’s name; a popup window with a menu will appear; click the email icon to send an email to the selected fieldworker.
Sending emails to customers
- To contact your customer, go to Bookings > upcoming or past bookings. Select the booking you want, then click on the “Action” button, and then click to view the booking from the drop-down menu.
- You will be redirected to the booking overview page. from “customer” section click the “Email” icon and select “Send Email” to send an email to the selected customer.
- An email form will appear where you can add Cc, subject, and attachments. You can also select a canned response from the drop-down menu to send an email template easily.

Sending booking request confirmation email to the customer
- You can send an automated email to the customer; this can be activated by the following steps:
- Go to Settings > Communications > Automations, where you can activate or deactivate the selected automated procedure your business requires, edit the times and frequency at which each procedure is scheduled to run in the background, and edit the templates linked to the automation you activate. Visit the “Automated Procedures” user guide page to learn more about the feature.
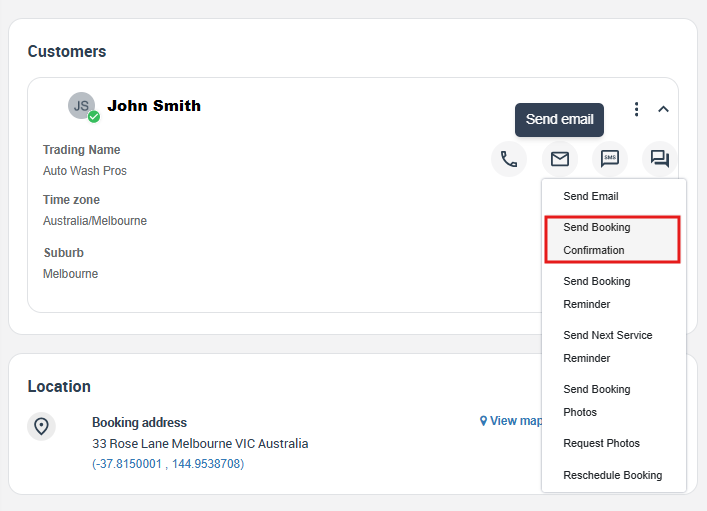
- From the customer section, Click on “Email” icon, Then select “Send Booking confirmation” from the drop-down menu To send it to a customer, Set up booking confirmation templates to send to your customers with all their booking information; visit the “Send a booking confirmation” user guide page for more information.
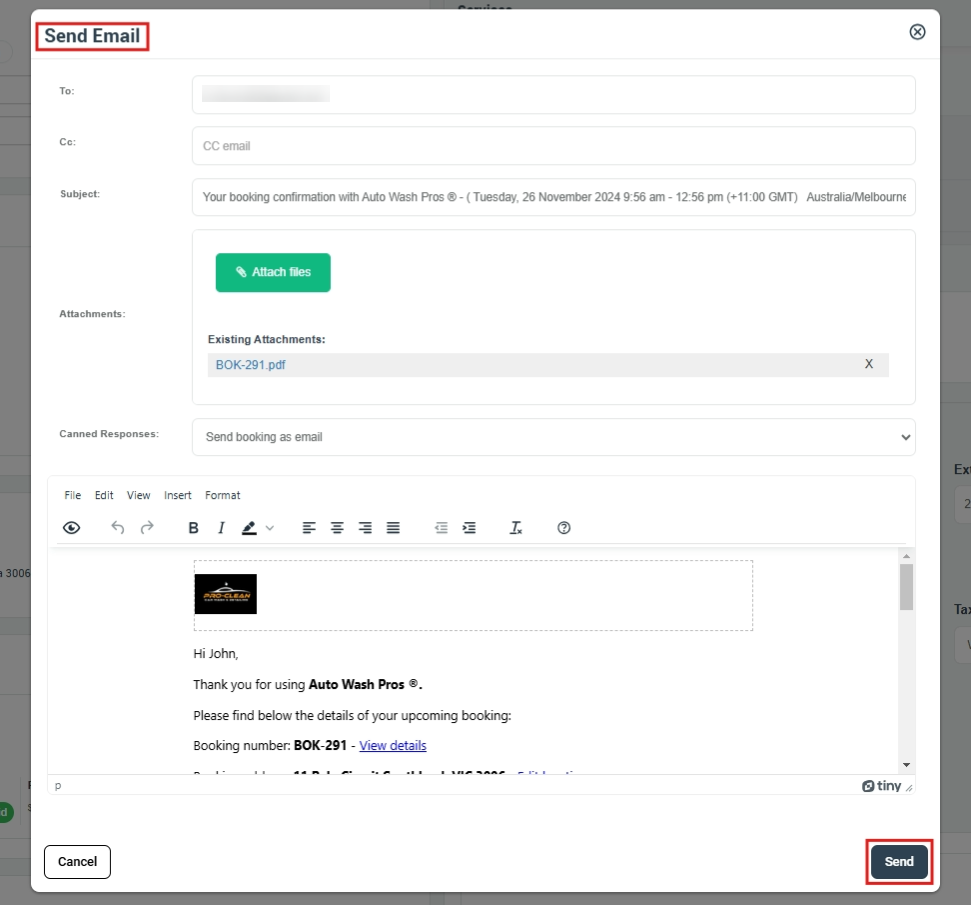
- A pop-up window with the email form will appear. You can fill in the blanks with the following information:
- Enter the customer’s email
- Write or edit your subject line
- Attach additional files, note that the booking details are already attached.
- You can edit the email body; note that the email body is auto-generated.
- Click on “Send”
Sending a booking accepted confirmation email to the customer
- You can send an automated email to the customer; this can be activated by the following steps: go to Settings > Communications > Automations, where you can activate or deactivate the selected automated procedure your business requires, edit the times and frequency at which each procedure is scheduled to run in the background, and edit the templates linked to the automation you activate. Visit the “Automated Procedures” user guide page to learn more about the feature.
- When the fieldworker accepts the booking, if the related flag is active in “Job Assignment Settings” and an automated assignment is enabled, you can select the booking acceptance email from the drop-down menu. Select the email template or canned response you want for the customer.
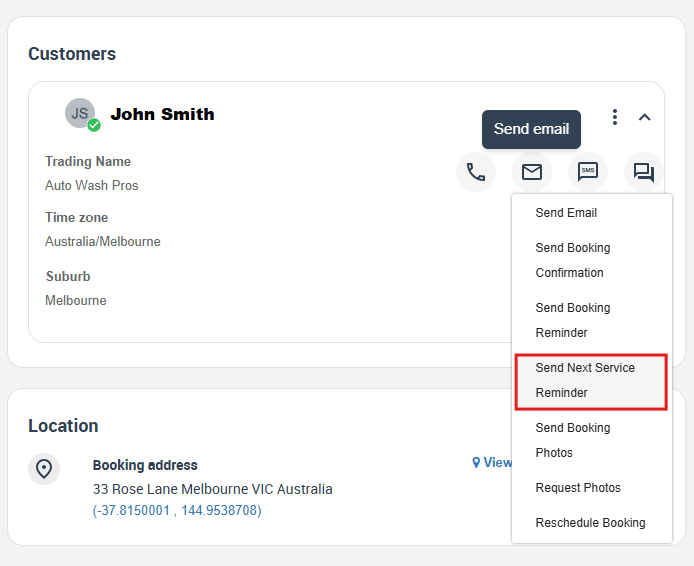
Sending a “Next-Booking Reminder” email to the customer
- You can send an automated email to the customer; this can be activated by the following steps:
- Go to Settings > Communications > Automations, where you can activate or deactivate the selected automated procedure your business requires. You can send an automated email to the customer reminding them of their next booking, and you can edit what you want in the email.
- Last-minute cancellations and no-show clients can cause a lot of problems for your service business, so the next booking reminder emails for the customer appointment are an effective way the system provides you a reminder template that you can use for your emails. Customers who book multiple reservations will be reminded about their next booking or will be able to schedule their new booking appointment. Reminders and confirmations are automatically sent out via email or SMS to all your customers and staff. Visit Manage reminders and confirmations for both customers and staff for more information about the feature.
- From the customer section, Click on “Email” icon, Then select “Send Next Service Reminder” from the drop-down menu.
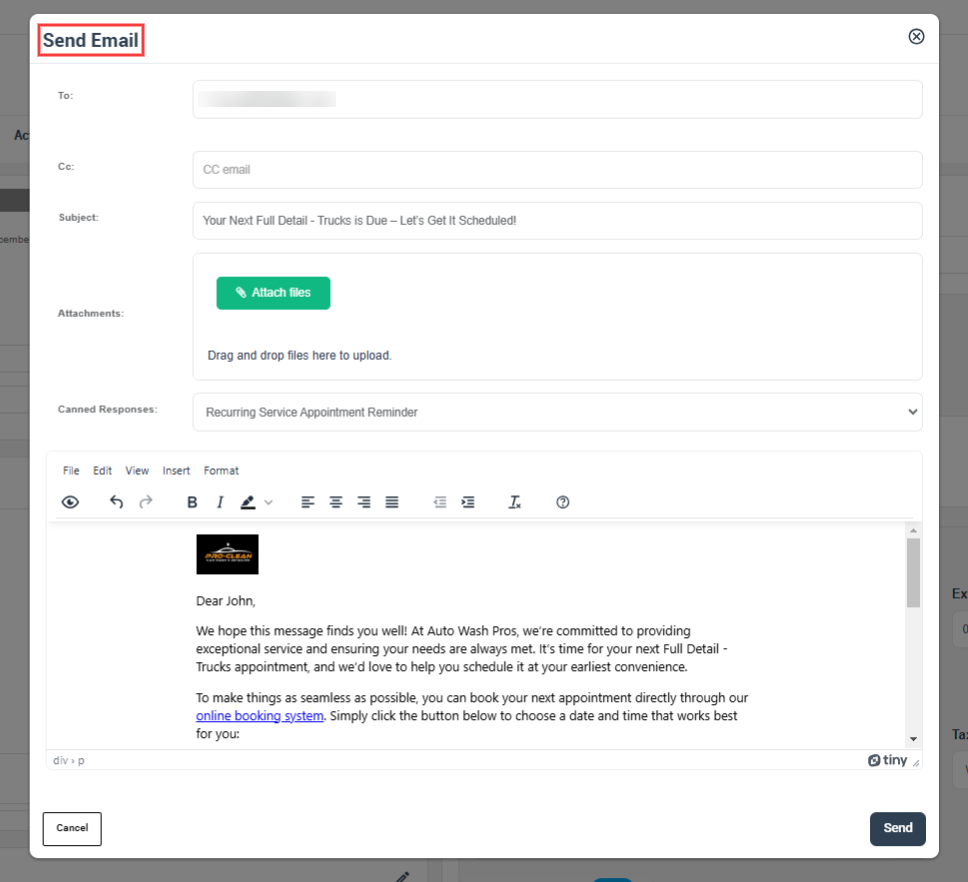
- A pop-up window with the email form will appear then click on the “ Send “ button and you can fill in the blanks as described.
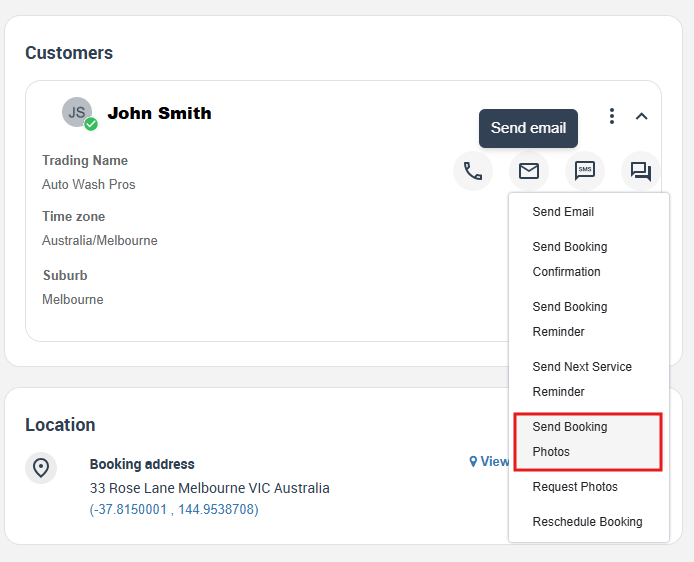
Sending attached booking photos to customers
- You can send photos to the customers through their bookings for more clarification about the job. You can add an image to the booking you want from the booking details page. Visit “Attaching images to a booking” for more information. Customers can also upload photos while they are creating their bookings. Visit “Allowing customers to upload photos when making a booking” for more information about the feature.
- Attachments and photos can assist in clarifying communication and providing more context for a booking. To contact the customer by sending photos, go to Bookings > All Bookings and view the booking overview page.
- On the bottom left side of the page from “Photos & Attachments” section click on “Email photos to customer” from the drop-down menu.

Or
- From “Customer” section click on “Email” icon, then select “Send Booking Photos” from the drop-down menu.
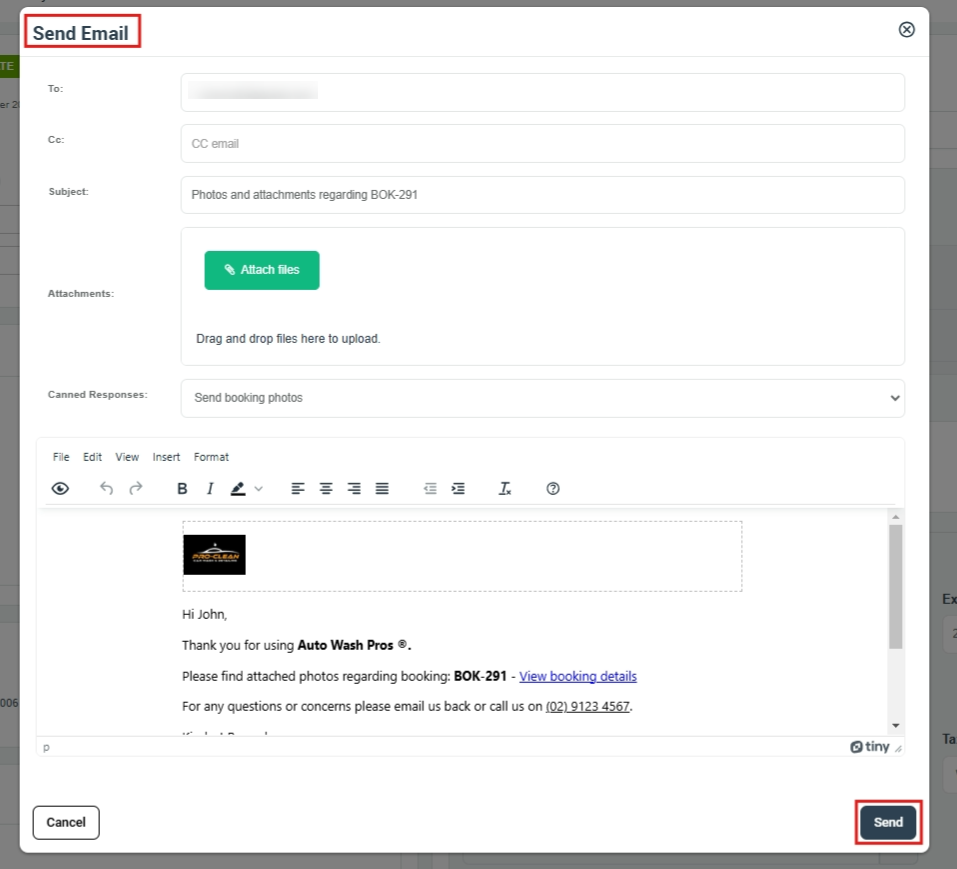
- A pop-up window with the email form will open, and you can fill in the blanks as described above. You should also attach an email attachment for the customer, and the system will add the subject and email form, which you can edit if necessary.
- Then click on “ Send”
Sending an invoice by email to the customer
- You can send an automated email to the customer; this can be activated by the following steps:
- Go to Settings > Communications > Automations, where you can activate or deactivate the selected automated procedure your business requires, edit the times and frequency at which each procedure is scheduled to run in the background, and edit the templates linked to the automation you activate. Visit the “Automated Procedures” user guide page to learn more about the feature.
- You might need to contact your customer via email regarding an invoice. The system facilitates quick and easy communication with customers. Visit Contacting a customer regarding their invoice, for more information about the feature.
- From the Invoice & payment section, Click on “Email” , Then select “Email Invoice” from the drop-down menu.

- A pop-up window with the email form will appear, and you can fill in the blanks as described above. You can select a canned response or edit it if necessary, then click on “Send”.
Sending a deposit request email to the customer
- Go to Settings > Communications > Automations, where you can activate or deactivate the selected automated procedure your business requires, edit the times and frequency at which each procedure is scheduled to run in the background, and edit the templates linked to the automation you activate. Visit the “Automated Procedures” user guide page to learn more about the feature.
- Setting up a deposit is beneficial for both the business and the customer. When customers book your services, there may be an option for them to pay a deposit. You can request a deposit from your customers through an email from the booking details page. The customer will find more details about their upcoming booking, and there is a deposit that needs to be paid in order to confirm the booking. You can visit “Payments and Deposits for Bookings” for more information about the feature.
- From the booking overview page, on the “Invoice & payment” section click on “Email” and select “Request Deposit“ from the drop-down menu.

- A pop-up window with the email form will appear, and you can fill in the blanks as described above. You can select a canned response or edit it if necessary, then click on “Send.”
Sending emails to fieldworkers
- You can send an email to your fieldworker from the booking overview page; go to Bookings > All bookings, and then select the booking for which you wish to send an email. Click on the “ Action“ button then click on “View booking”
- From “Fieldworker earnings” section hover over the fieldworker name who assigned the booking, a popup window with a menu will appear; click the email icon to send an email to the selected fieldworker.
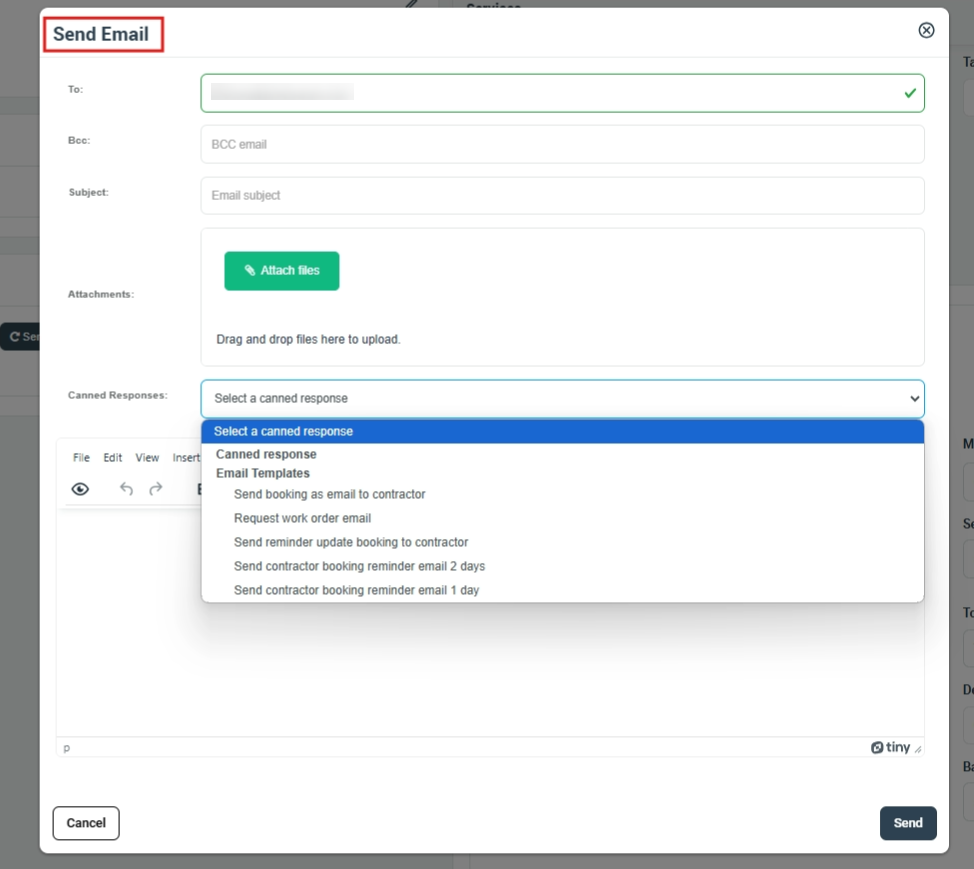
- And a pop-up window will appear to send an email and to fill in the following displayed text boxes:
- Send to: select from the drop-down menu your fieldworker’s.
- Write or edit your subject line
- Attach additional files, note that the booking details are already attached.
- Canned responses: select from the drop-down menu one of your saved SMS templates or canned responses to be sent to your fieldworkers, and it will reflect the message in the text box below. Visit the canned responses page to learn more.
- Then click on the “Send” button.
Sending booking details email to the assigned fieldworker
- Go to Settings > Communications > Automations, where you can activate or deactivate the selected automated procedure your business requires, edit the times and frequency at which each procedure is scheduled to run in the background, and edit the templates linked to the automation you activate. Visit the “Automated Procedures” user guide page to learn more about the feature.
- You can send emails to your fieldworkers; it allows you to effortlessly communicate with them. It’s an efficient way to explain all of the specifics that must be done smoothly, as well as to stay in touch with your fieldworker to obtain a better understanding and help fieldworkers better understand their tasks. Visit “Send an email to fieldworkers” for more information about the feature. To contact your customer, go to Bookings > All Bookings and view the booking overview page.
- Click on fieldworker name from “Fieldworker earnings” section at the right side of the page, Select “Email” icon
- A pop-up window with the email form will appear, and you can fill in the blanks and select “Send booking as email” to send an email to the fieldworker, The fieldworker will receive an email about the required task with details of the new booking and service.

Sending attached booking photos to the fieldworker
- You can send photos to the fieldworker via email. They can also attach images to a booking through the fieldworker app. Visit “Uploading before and after photos as a fieldworker through the app” for more information.
- To contact your fieldworker, send images via email, go to Bookings > All Bookings, and view the booking details page.
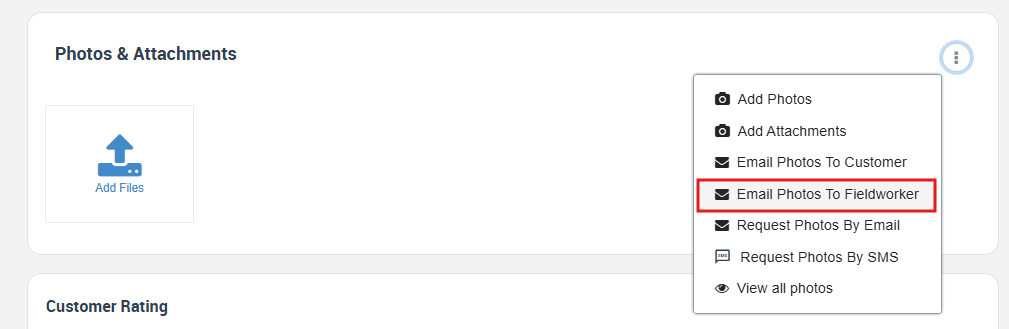
- On the bottom left side of the page from “Photos & Attachments” section click on “Email photos to Fieldworker” from the drop-down menu.
- A pop-up window with the email form will open, and you can fill in the blanks as described above. The system will add an attachment to the email for your fieldworker, and the system will also add the subject and email form, which you can edit if necessary.
- Then click on “ Send”
To stay updated, please subscribe to our YouTube channel.