
Booking Settings, Flags and Permissions
As a vital tool for field service businesses, OctopusPro offers a vast range of features designed to streamline your operations and maximize productivity. This guide will walk you through each setting and permission, providing clear examples of their uses and benefits.
Whether you’re seeking to convert booking statuses, enforce fieldworker job attendance, manage alarms, or send automated emails, this guide covers it all. With the help of these functionalities, you can easily keep track of your bookings, ensure efficient job attendance, and provide better service to your customers.
By fully understanding and effectively leveraging these features, you can take your field service management to the next level, optimizing your operations for success. So, let’s dive in and explore each setting in detail to help you make the most of your OctopusPro platform.
List of Contents:
- Enable Travel-to-Job GPS Odometer-Based Mileage Charges
- Auto-Switch Status to “Awaiting Update” After Scheduled End
- Force Fieldworker Attendance Confirmation (Missed Check-In/Out)
- Booking Tracking Workflow (GPS + ETA)
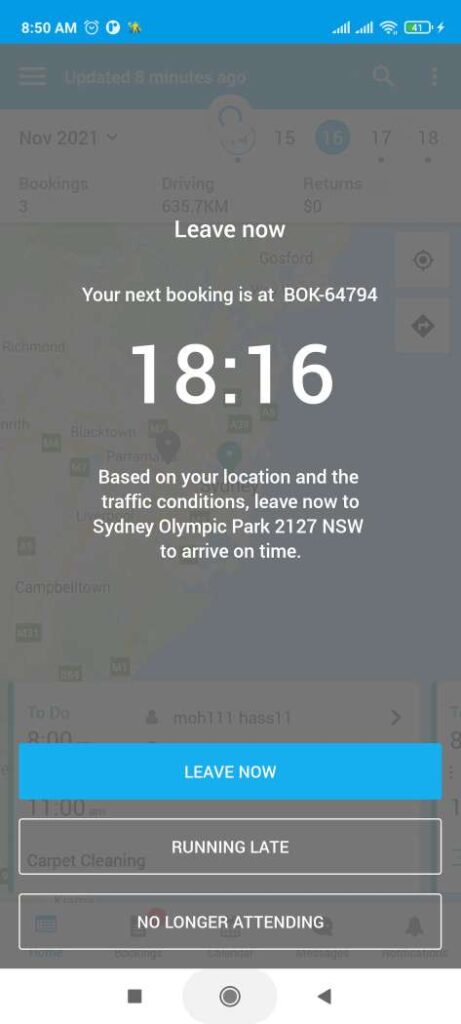
- Fieldworker Running Late Alerts (GPS-Based ETA Monitoring)
- Auto-Checkout Fieldworker via Geofence (500 m Default Radius)
- Pending-Booking Accept / Decline Alarm
- Day-Before Attendance Confirmation Alarm
- Attach PDF Documents to All Automated Emails
- Prompt to Email Booking Request to Assigned Fieldworkers on Save / Edit
- Show Scheduled Appointment Details in Booking PDFs
- Show Scheduled Appointment Details in Invoice PDFs
- Display Purchase Order (PO) Field for Business Customers
- Default follow up period
- Decline booking request form
- Images types
- Property types
General Settings
From the admin web view, go to Settings > General Settings > Booking Settings from the side menu on the left.
Enable Travel-to-Job GPS Odometer-Based Mileage Charges
Automatically apply a distance-based surcharge from your dispatch hub to the customer site; for example, if a pool service fieldworker travels 25 km beyond the 10 km complimentary radius to repair a client’s pump at a lakeside property, the system will calculate a $1.75/km fee, capture the exact mileage in the Fieldworker mobile app from “En Route” to “Arrived,” and post it as a separate invoice line item that syncs seamlessly with Xero and QuickBooks. Administrators can define complimentary zones, set per-kilometer or per-mile rates with optional caps at the corporate or service level, ensuring precise cost recovery for HVAC, appliance repair, pest control, satellite-dish installation, and other mobile field services.
How the feature works end-to-end
| Stage | What happens | Key screens / fields |
|---|---|---|
| Company setup | Enable Travel-to-Job in Settings ▶ Booking Settings ▶ General. Enter: • Free Radius – kilometres or miles included in the call-out. • Rate per Km/Mi – charge beyond the free radius. • Max Billable Distance – cap to avoid runaway fees. |
Admin portal settings |
| Service override | In Service Settings ▶ Services ▶ Edit, scroll to Default Products (Auto-Add). Toggle Enable Travel-to-Job Charges for this Service: • Use account-wide settings (inherits company formula). • Custom for this service (enter different free radius / rate / cap). |
Service form |
| Quote stage | While building a quote, OctopusPro looks at your depot ↔ booking address distance and auto-pre-fills the Travel-to-Job line (still editable). | Quote builder |
| Dispatch & tracking | Fieldworker taps On the Way in the Fieldworker App → GPS odometer starts. When they tap Arrived (or auto-check-in triggers), distance is written to the visit record. |
Fieldworker app; booking timeline |
| Booking view | Each visit shows Tracked Distance, Free Radius, Billable Km/Mi, Total Travel Charge. Admins can expand Travel Charges to edit if needed. | Admin booking screen |
| Invoicing | The travel line appears beneath the service just like a product add-on. You choose one of the package invoice rules: • one invoice per visit • one combined invoice • manual invoicing. |
Invoice / PDF |
| Accounting sync | Because the fee is stored as a line-item product, it flows to Xero / QuickBooks Online exactly like any other product (account code = your Travel Income or Call-out Fee ledger). | Accounting integration settings |
Real-world formulas
| Trade | Example rule | Result |
|---|---|---|
| HVAC diagnostic | Free first 20 km, then $1.50 / km, cap 120 km | Customer 45 km away pays 25 km × $1.50 = $37.50 |
| Mobile tyre service | No free radius; $2 / km, max 50 km | 36 km job = $72 travel line |
| Pest control (rural) | Free first 10 mi, £1 / mi, no cap | 18 mi trip = £8 travel |
| Pool maintenance franchise | Account-wide: free 0 km. Sydney Pool Clean service overrides rate to $3/km because fieldworkers use toll roads. |
Different services, different fees |
Guide for fieldworkers
-
Start navigation: tap On the Way when leaving the depot or previous job.
-
Arrive: tap Arrived (or let auto-check-in trigger).
-
Review: distance and charge are locked; if odometer seems wrong, message dispatch—they can edit before invoicing.
Admin tips
-
Depot location accuracy matters. Set your branch / depot geo-coordinates in Company ▶ Locations.
-
Multiple fieldworkers, multiple visits: OctopusPro logs travel per fieldworker per day, so a two-fieldworker job shows two separate travel lines.
-
Quotes vs. reality: A “quoted” distance remains until the first visit; the tracked value then overwrites the estimate.
-
Reports: Use Reports ▶ Travel Charges to see total billable kilometres by fieldworker, by service, by month.
FAQs
Q : Can I waive travel on certain VIP jobs?
A : Yes—open the booking, expand Travel Charges, set billable distance to 0 or mark the line as non-billable.
Q : We charge travel time instead of distance.
A : Set Rate per Km to your hourly labour rate and instruct fieldworkers to enter the number of kilometres equal to hours travelled (e.g. 1 hour = 1 km). A dedicated “Travel Time” unit will be added in a future release.
Q : Does the travel line affect payroll?
A : It is treated like a product; include it in fieldworker commission rules if you want to reward fieldworkers for long drives.
Auto-Switch Status to “Awaiting Update” After Scheduled End
Enable this option to let OctopusPro automatically flag any booking whose scheduled end time has passed and still shows its pre-service status.
It keeps jobs visible until the fieldworker records the actual outcome, protecting your workflow and data accuracy.
How it works
- Trigger Condition: When a booking’s scheduled end time passes and its status remains as its pre-service status—To Do, To Visit, or any custom status with tracking enabled.
- System Action: The booking status is automatically changed to “Awaiting Update.”
- Fieldworker Prompt: Fieldworkers receive a push notification / app prompt to update the booking status. They can:
- Mark the job as Completed – job finished.
- Set the status to In Progress if a follow-up appointment is needed (creates a new appointment).
- Indicate if the job was Missed or Cancelled, providing a reason if required.
Why it matters
- Timely follow-up – fieldworkers see an immediate reminder to add results, photos, parts used, and next steps.
- Live dashboard – office staff instantly spot jobs that ended but still need a completion report, so nothing slips through the cracks.
- Accurate reporting & invoicing – prevents unresolved bookings from distorting KPIs or delaying invoices.
- Perfect for high-volume mobile trades – HVAC, cleaning, pest-control, pool service, etc., where end-of-day admin depends on fast field updates.
Force Fieldworker Attendance Confirmation (Missed Check-In/Out)
Fieldworkers occasionally forget to clock in or out. This setting guarantees every visit ends with a clear status, protecting payroll accuracy, compliance, and customer service levels.
End-to-End Workflow
| Stage | What Triggers It | System Behaviour | Fieldworker Choices |
|---|---|---|---|
| 1 – Missed Check-In | Scheduled Start Time passes and the booking is still in a pre-service status (To Do, To Visit, or custom “scheduled” status). | App shows “Attendance Update Needed” dialog and blocks further navigation. | • Yes — I’m on site → normal Start Job flow.• No — I did not attend → Missed dialog with reason dropdown/text box. |
| 2 – Check-Out Enforcement | Fieldworker started the job but tries to close the app (or the scheduled End Time passes) without tapping Finish Job. | Same lockout dialog appears until Finish Job is completed or the visit is marked Missed. | As above. |
| 3 – Admin Notification | Any Missed outcome or forced extension. | Booking automatically switches to Awaiting Update, and an email / dashboard alert is sent to dispatch. | Admin can reschedule, reassign, or bill a call-out fee. |
What the Fieldworker Sees
- Dialog title: “Confirm Attendance”
- Message: “Your scheduled start time has passed. Please confirm whether you attended this job.”
- Buttons:
- Yes – I Am On Site → Start Job workflow opens.
- No – Did Not Attend → Missed Appointment form with pre-set reasons (e.g., Customer Not Home, Vehicle Breakdown, Other + free text).
After Finish Job, a single-tap prompt asks “Still on site?”
- No, Work Completed – select final booking status (e.g., Completed, Partially Completed).
- Yes, Need More Time – app extends visit duration (configurable default, e.g., 30 min).
Benefits
- Data integrity – start/finish times are always captured or an audit-trail reason is logged.
- Compliance – meets attendance-record requirements for licensed trades (electrical, gas, healthcare, aged-care, etc.).
- Payroll & invoicing accuracy – labour hours reflect reality, preventing under- or over-billing.
- Operational visibility – dispatchers can instantly see no-shows and reallocate resources before SLA breaches.
Best-Practice Tips
- Provide reason codes that match your KPI reporting (e.g., Customer Cancelled Late, Fieldworker Vehicle Issue).
- Use push notifications so office staff know the moment a visit is flagged Missed.
- Pair with “Auto-Switch to Awaiting Update” for end-of-shift reconciliation.
Where to Enable:
Admin Portal ▶ Settings ▶ Booking Settings ▶ General Settings ▶ Force Attendance Confirmation (Missed Check-In/Out)
Booking Tracking Workflow (GPS + ETA)
The Booking-Tracking Workflow bundles GPS tracking, ETA calculation, late-arrival detection, geofenced check-in, and reason-coded no-show handling—capabilities.
Enabling & configuration
- Enable GPS / Tracking – requires device location permission.
- Toggle Booking-Tracking Workflow.
- Optional thresholds:
- Late-alarm buffer (e.g., fieldworker must tap On My Way ≥ 10 min before start).
- Geofence radius (default = 500 m).
- Decide whether to mask street/lot numbers until On My Way is tapped (improves privacy and forces commitment).
- Activate SMS/email templates for On My Way, Running Late, and Arrived events.
Fieldworker workflow
| Stage | App action | System behaviour | Notifications |
| Pre-trip | On My Way | Full address revealed; GPS starts; ETA projected. | Office & customer receive ETA (SMS/email push). |
| Late-alarm | Triggered if ETA > start or no On My Way in time. | Pop-up with the three buttons above; app locked. | Dashboard row turns red; alert sent. |
| En route | I’m On My Way or Running Late | Booking status becomes En Route or Running Late; ETA updated. | Customer receives revised ETA. |
| No-show | No Longer Attending | Status set to Missed; reason code stored (root-cause library). | Admin alerted to reschedule or reassign. |
| On site | Arrived (within geofence) | Check-in recorded; timesheet updated. | Customer receives “Fieldworker has arrived” notice. |
| Completion | Finish Job | GPS stops; job duration captured for payroll & billing. | Invoice or follow-up workflow triggered. |
Feature details
Address masking
Street and unit numbers remain hidden until the fieldworker confirms travel, protecting client privacy and guaranteeing a location ping before disclosure.
ETA engine
ETA is recalculated continuously from live GPS; if congestion causes the ETA to breach the buffer, the late-alarm dialog re-opens.
Geofenced check-in
The Arrived button activates only when the device is inside the 500 m radius of the job’s coordinates—aligned with industry geofencing norms.
Reason-coded no-shows
Fieldworkers must pick a standardized reason (e.g., Customer No-Show, Vehicle Breakdown, Safety Issue) or enter a custom note; these codes feed KPI and SLA reports.
Admin & customer visibility
- Live map view shows fieldworker locations and ETAs.
- Push & SMS alerts keep customers updated without phone calls.
- Dashboard widgets flag jobs in Running Late or Missed status for rapid rescheduling.
Disabling booking tracking
If you disable the master toggle, fieldworkers bypass On My Way and land directly in the job, which may suit low-risk or short-distance contracts but removes ETA, late-alarm, and geofence controls.
Best-practice tips
- Calibrate the buffer to typical drive-times in your territory.
- Use push templates titled “Fieldworker On The Way” and “Running Late” for consistent messaging.
- Audit missed-visit reasons monthly to spot systemic issues (e.g., traffic corridors, recurring customer cancellations).
- Combine with route-optimization tools to shave arrival windows and lower fuel spend.
With the Booking-Tracking Workflow activated, your operation gains real-time visibility, SLA confidence, and happier customers—hallmarks of best-in-class field-service management.
Fieldworker Running Late Alerts (GPS-Based ETA Monitoring)
Late arrivals damage customer confidence and SLA compliance. The Running-Late Alarm detects a potential delay before it happens, forces the fieldworker to respond, and gives dispatch time to adjust the schedule.
Enabling the Feature
- Toggle Booking-Tracking Workflow (GPS + ETA).
- A secondary toggle—Fieldworker Running Late Alerts—now appears. Turn it on.
End-to-End Workflow
| Stage | System Behaviour | Fieldworker Screen | Office / Customer |
| Job assigned | Street number hidden until On My Way is tapped. | Tile reads “Tap On My Way to view address.” | – |
| On My Way tapped | GPS starts; ETA calculated from fieldworker’s current position. | Full address revealed; ETA banner shown. | Optional “Fieldworker On The Way” SMS/email. |
| ETA OK | ETA ≤ scheduled start minus buffer. | Normal workflow continues. | Dashboard shows green. |
| Running-Late trigger | – On My Way not tapped soon enough or ETA slips past start. | Running-Late Alarm modal with three buttons (table above). | Dashboard row turns red; instant alert to dispatcher (and optionally customer). |
| Fieldworker choice recorded | Booking updated to En-Route, Running Late, or Missed. | App unlocks (except when Missed, which closes booking). | Customer receives new ETA or cancellation notice. |
| Finish Job | GPS stops; actual times captured. | Tap Finish Job. | Data flows to payroll/billing. |
Button Details
- I’m On My Way – Fieldworker confirms they are travelling and enters an ETA; booking status becomes En-Route.
- Running Late – Fieldworker admits delay; selects or types a “will arrive by” time; status becomes Running Late.
- No Longer Attending – Fieldworker flags Missed Visit, selects a predefined reason (Customer No-Show, Vehicle Breakdown, etc.) or types one; booking status switches to Missed and admins are notified.
Benefits
- Proactive rescheduling – Dispatch can reroute another fieldworker before the SLA is breached.
- Customer transparency – Automatic ETA updates reduce “where is my fieldworker?” calls.
- Compliance & payroll accuracy – Actual travel and on-site times are recorded for audits and billing.
- Fits high-volume trades – HVAC, pest control, cleaning, utilities, and any operation where a few minutes’ warning prevents costly knock-on delays.
Best-Practice Tips
- Keep On My Way mandatory by hiding the street number until tapped.
- Align reason codes with KPI reports for clear analytics on lateness causes.
- Pair with SMS / Email templates titled “Running Late” and “Fieldworker On The Way.”
- Review the Running-Late Report weekly to spot recurring issues (traffic corridors, individual fieldworkers, day-of-week patterns).
Where to Enable:
Admin Portal ▶ Settings ▶ General Settings ▶ Booking Settings ▶ General Settings ▶ GPS / Tracking Process ▶ Running-Late Alarm
Auto-Checkout Fieldworker via Geofence (500 m Default Radius)
Auto-checkout is a geofenced status-update that ends the visit when a mobile device crosses a preset perimeter around the job site—commonly 300-500 m in field-service software. It eliminates forgotten check-outs and provides trustworthy timestamps for payroll, compliance, and customer reporting.
Prerequisites & configuration
| Setting | Recommendation | Location |
|---|---|---|
| GPS / Tracking | Must be On (device permissions + admin toggle). | Settings ▸ Booking Settings ▸ General |
| Auto-Checkout radius | 500 m default; set 100-1000 m depending on site size (warehouses may need 800 m). | Same screen |
| Address masking | Keep street # hidden until On My Way to guarantee a first GPS ping, as used by Jobber and OctopusPro. | Fieldworker Permissions |
| Late-alarm | Optional—pair with auto-checkout to catch un-started jobs. | Running-Late Alarm |
End-to-end workflow
- Dispatch assigns the booking.
- Fieldworker sees On My Way ➜ taps to reveal address; ETA is sent to client.
- Geofence active (500 m). Job status = En Route → On-Site.
- Auto-checkout: Device exits boundary → status set to Checked Out. Office dashboard shows ✅ icon.
- Return scenario: Fieldworker re-enters 500 m → prompted to Check In again (new timesheet segment).
Use-case examples
| Vertical | Scenario | Result |
| HVAC | Fieldworker finishes furnace tune-up, drives off without tapping Finish Job. | Auto-checkout logs 15:42, stopping the labour clock. |
| Lawn care | Crew completes mowing but returns for forgotten tool. | Crossing boundary triggers checkout; re-entry forces new check-in (two time blocks). |
| Telecommunications | Large campus job, radius widened to 800 m. | Prevents premature checkout when driving between onsite buildings. |
Benefits
- Payroll accuracy: End-times cannot be forgotten or falsified.
- Compliance: Provides audit-ready GPS proof for union, ISO, or government contracts.
- Customer trust: Clients receive “Fieldworker has left site” SMS/email, aligning with SLAs.
- Dispatch efficiency: Real-time map frees up capacity planning.
Tips & best practices
- Tune the radius—rural properties need bigger fences; city apartments need 200-300 m to avoid multi-story GPS drift.
- Educate fieldworkers—loss of mobile data or GPS can delay auto-checkout; train them to tap Finish Job as a fallback.
- Review timesheet exceptions weekly; flag any auto-checkout that occurs <5 min after check-in (possible mis-tap).
- Integrate with payroll/ERP so labour entries flow straight to cost codes.
Troubleshooting
| Symptom | Possible cause | Fix |
| Fieldworker never auto-checked out | Location permission denied | Ask fieldworker to enable Allow all the time GPS. |
| Early checkout while still on site | Radius too small or GPS drift | Increase radius or enable high-accuracy mode. |
| Duplicate check-outs | Fieldworker re-entered fence repeatedly | Encourage manual Pause status for lunch breaks. |
By turning on Auto-Checkout via Geofence, you modernise attendance tracking, slash admin overhead, and create an indisputable activity log trusted by clients, regulators, and payroll alike.
Pending-Booking Accept / Decline Alarm
The Pending-Booking Accept / Decline Alarm ensures that every new job sent to a fieldworker is either promptly accepted or declined, eliminating unacknowledged “ghost” jobs and keeping your schedule accurate.
How it works:
When a booking is assigned with status Pending, the fieldworker receives a push notification and sees a full-screen alarm listing all pending jobs the next time they open the app. The app is locked until the fieldworker responds:
-
Accept: Confirms the job. The schedule board updates, and (optionally) the customer is notified.
-
Decline: The fieldworker must select or type a reason (e.g., site access issue, schedule conflict). The job is flagged for rescheduling, and dispatch receives an alert to take action.
Reminders are sent every 5 minutes until all pending jobs are addressed. All responses and choices are logged for audit and reporting.
How to enable:
-
Go to Settings ▸ General Settings ▸ Booking Settings and toggle Pending-Booking Accept / Decline Alarm ON.
-
(Optional) Configure decline reasons in Settings ▸ General Settings ▸ Forms & Checklists ▸ Decline Booking Request for more useful reporting.
Best practices:
-
For high-volume teams, consider batching new requests for end-of-day acceptance.
-
Use auto-escalation for unanswered requests to supervisors.
-
Remind fieldworkers to enable app notifications for instant alerts.
-
Track decline reasons in Reports ▸ Booking Exceptions to identify process improvements.
Troubleshooting:
-
If the alarm reappears, new jobs have likely been assigned since the last sync (normal behavior).
-
If dispatch is not notified on declines, check that push notifications are enabled for the dispatcher.
Benefits:
-
No unacknowledged jobs—every booking is either accepted or returned to the board for fast reassignment.
-
Advance visibility for the office—react to changes hours or days in advance.
-
Data-driven optimization—decline reasons provide insights for continuous improvement.
-
Increased professionalism—customers only see confirmed fieldworkers, boosting trust and satisfaction.
By activating the Pending-Booking Accept / Decline Alarm, you align your workflow with industry best practices and ensure every job is handled promptly and transparently.
Day-Before Attendance Confirmation Alarm
The Day-Before Attendance Confirmation Alarm helps prevent costly no-shows by requiring fieldworkers to confirm their next day’s bookings in advance. This ensures your team is fully committed, enables early rescheduling if someone can’t attend, and improves both customer service and operational efficiency.
How it Works
When enabled, a push notification is sent to each fieldworker at your chosen time (e.g., 5pm the day before) listing all jobs scheduled for the following day. The fieldworker must select Attending (to confirm) or Not Attending (to decline and enter a reason) for each job.
-
Attending: The booking is marked as “Attendance Confirmed.”
-
Not Attending: The fieldworker chooses or types a reason. The job is flagged for rescheduling and an alert is sent to dispatch.
-
Jobs left unconfirmed trigger repeat reminders and are highlighted in red on the scheduler, so the office team can take action before the workday begins.
Once confirmed, customers with reminder templates can automatically receive a “Fieldworker confirmed for tomorrow” notification for extra peace of mind.
Enabling the Feature
-
Go to Settings ▸ General Settings ▸ Booking Settings and toggle on Day-Before Attendance Confirmation Alarm.
-
Set your preferred notification time (e.g., 17:00 to align with shift patterns).
-
(Optional) In Settings ▸ General Settings ▸ Forms & Checklists ▸ Decline Booking Request, you can customise the list of reasons for not attending. These reasons are useful for reporting and KPI analysis.
-
(Optional) Add cancellation policy text under Settings ▸ General Settings ▸ Fieldworker Terms to display when a fieldworker declines a booking.
Best Practices
-
Use the alarm for all roles and job types where attendance reliability is critical.
-
Set your notification time to catch fieldworkers before the end of their workday.
-
Review decline reasons regularly to identify trends, training needs, or recurring scheduling issues.
-
If using automatic fieldworker assignment, set up escalation so supervisors and customers are notified early if a booking is declined.
Common Use Cases
-
Seasonal businesses: Quickly spot and reassign absences during busy periods.
-
Union or contract work: Satisfy rules that require 24-hour notice for any shift change or absence.
-
Large teams or franchises: Ensure every fieldworker is reminded and confirms, supporting better route planning and higher first-visit success rates.
Troubleshooting
-
If fieldworkers don’t receive alerts, ask them to check their app notification settings on their device.
-
If the confirmation window keeps popping up, make sure all jobs for the next day have been answered.
-
If a job still shows “Awaiting confirm,” resend the confirmation from the job card—especially if the fieldworker was offline when the alert was sent.
Benefits
-
Prevents last-minute scheduling gaps and missed revenue
-
Boosts customer satisfaction by allowing proactive rescheduling
-
Provides clean attendance data for payroll, utilisation, and SLA reporting
-
Ensures compliance with notice period and HR policies
Enabling the Day-Before Attendance Confirmation Alarm helps your business run smoothly, makes your team more reliable, and builds trust with customers—aligning your operations with field service best practices.
Attach PDF Documents to All Automated Emails
Enable this option to automatically include PDF attachments—such as booking summaries, quotes, invoices, receipts, and job sheets—with all automated emails sent to your customers (and optionally fieldworkers). This helps clients archive, forward, and process key documents easily, while meeting compliance requirements for secure, non-editable records.
Emails that can carry attachments
| Email trigger | Default PDF attached | Typical use case |
|---|---|---|
| Booking confirmation | Booking Summary.pdf | Customer prints job sheet for on-site staff. |
| Booking reminder | Booking Summary.pdf | Facilities manager keeps a hard copy at reception. |
| Quote sent | Quote #12345.pdf | Client forwards to approvals team. |
| Quote accepted | Quote #12345.pdf + T&Cs.pdf (optional) | Signed quote archived for audit. |
| Invoice issued | Invoice #67890.pdf | Required for tax or AP processing. |
| Job forms (internal) | Job Sheet.pdf | Tech keeps signed worksheet for compliance. |
(You can add or remove attachment rules per template under Settings ▸ Communications ▸ Templates & Canned Responses.)
Use the feature to provide clients with secure, portable records for approvals and compliance. All PDFs are also archived in the system for future audit or re-download.
Enable this feature to ensure every key communication includes a professional, compliant PDF document—simplifying your workflow and exceeding client expectations.
Prompt to Email Booking Request to Assigned Fieldworkers on Save / Edit
Fieldworkers need to know when new work is assigned and when crucial booking details change. But multiple back-office edits—price adjustments, internal notes, typo fixes—shouldn’t clog their inbox. The Prompt to Email Booking Request option gives dispatchers a per-booking choice.
2. Enabling the feature
| Step | Path | Comment |
|---|---|---|
| 1 | Settings ▸ General Settings ▸ Booking Settings | Admin portal |
| 2 | Toggle Prompt to Email Booking Request to Assigned Fieldworkers on Save / Edit to ON | Takes effect instantly |
| 3 | (Optional) Edit the Booking Request email template under Settings ▸ Communications ▸ Email Templates | Add merge fields, branding |
3. Workflow in action
| Scenario | Dialog appears? | Typical choice | Result |
| New booking created | ✔ | Send | Fieldworker receives first assignment email. |
| Change service date/time | ✔ | Send | Tech alerted to new schedule. |
| Correct spelling in customer notes | ✔ | Don’t Send | No unnecessary email. |
| Bulk price update (10 bookings) | ✔ (per booking) | Don’t Send | Price fixed silently; you can later resend selected jobs if needed. |
| Toggle OFF | ✘ | n/a | System never asks; no auto-email on edits. |
4. Examples & use cases
-
Cleaning franchise – Dispatcher shifts a cleaner’s morning job from 8 am to 10 am; chooses Send to push new calendar ICS to tech’s phone.
-
HVAC contractor – Administrator adds an internal PO number; selects Don’t Send, avoiding useless messages.
-
Emergency plumbing – Reschedule within 15 min window; Send with SMS enabled so plumber sees instant text.
5. Best-practice tips
-
Train staff – Use Send for any change that affects arrival time, location, or pay; Don’t Send for cosmetic tweaks.
-
Combine with mobile push – Enable push notifications for faster acknowledgement.
-
Audit trail – Each choice (Send/Don’t Send) is logged in the booking history with user ID and timestamp.
-
Bulk edits – Temporarily toggle feature OFF before mass updates to prevent dozens of prompts, then switch back ON.
6. Troubleshooting
| Issue | Likely cause | Resolution |
| Dialog not showing | Toggle is OFF or user lacks permission | Check setting and user role. |
| Fieldworker reports no email | User clicked Don’t Send or email bounced | Verify booking history, confirm email address. |
| Too many prompts during imports | Imports count as edits | Turn feature OFF during import process. |
7. Benefits recap
-
Right-size communication – critical alerts go out, noise stays in.
-
Dispatcher control – choose per update without diving into settings.
-
Accountability – send/skip action logged for audit.
-
Professionalism – techs only receive messages that matter, boosting response rate and reducing confusion.
Activate the Prompt to Email Booking Request feature to streamline fieldworker notifications while keeping your schedule data accurate and your team informed.
Show Scheduled Appointment Times in Customer Booking PDFs
Customers value a single document that captures both the work description and the confirmed visit times. Showing the schedule inside the PDF embeds appointment schedules directly in their job confirmations.
Where to enable
Admin Portal ▸ Settings ▸ Booking Settings ▸ PDF Options ▸ Show Scheduled Appointment Times in Customer Booking PDFs → ON / OFF
Behaviour matrix
| Toggle state | Booking PDF | Email attachment flag (separate setting) | Portal view |
|---|---|---|---|
| ON | “Scheduled Appointments” section visible | Respect existing “Attach PDFs to emails” setting | Portal PDF download also shows times |
| OFF | Section hidden | PDF still generated/attached if that flag is ON | Portal PDF download hides times |
(Other email-body and portal widgets still show appointment times; this flag only affects the PDF content.)
Examples & use cases
| Vertical | Example booking | Value to customer |
| Dog grooming (single visit) | PDF shows “Tue 12 Aug 2025, 10:00 – 11:00” | Owner prints reminder for drop-off. |
| Building maintenance (multi-visit) | Two appointments listed with different dates | Facilities manager pins PDF to notice board; staff know access times. |
| Pest-control (tentative schedule) | Toggle OFF until traps are confirmed | Avoids sending provisional times that may shift. |
Configuration tips
-
Time zone & format – The PDF uses your account locale (e.g., 24-hour vs. 12-hour clock). Change under Company ▸ Profile ▸ Locale.
-
Multi-day projects – All future appointments are listed; cancelled visits are automatically excluded.
-
Custom headings – Edit the section label (“Service Schedule”, “Visit Times”) in Settings ▸ Templates ▸ PDF Layouts.
Best-practice workflow
-
Leave the toggle OFF while a booking is still tentative or “Awaiting Confirmation”.
-
Switch ON once dates are locked—system regenerates the PDF on the next email send.
-
Pair with Attach PDF Documents to All Automated Emails for a complete, printable confirmation.
Troubleshooting
| Issue | Likely cause | Remedy |
| Times not showing even though toggle is ON | Cached older PDF | Regenerate by opening booking → More ▸ Regenerate PDF or resend confirmation email. |
| Wrong time zone in PDF | Account locale mis-configured | Update under Company ▸ Profile ▸ Locale; regenerate PDF. |
| Customer says “No attachment” | Global PDF-attachment flag is OFF | Turn on Attach PDF Documents to All Automated Emails or instruct customer to download from portal. |
Benefits recap
-
Professionalism – Customers receive a single, branded document with all logistics.
-
Fewer support calls – Clear schedule reduces “What time are you arriving?” inquiries.
-
Audit trail – PDF archived in booking history with confirmed appointment windows.
Enable Show Scheduled Appointment Times in Customer Booking PDFs to deliver crystal-clear schedules and keep both customers and field teams aligned.
Show Scheduled Appointment Details in Invoice PDFs
Invoices often get routed to finance teams or head-office portals long after fieldwork is completed. Embedding the service schedule inside the invoice PDF eliminates follow-up emails asking “When did this happen?” and meets audit requirements that a bill be tied to a specific service date. The time window can be shown or hidden to suit corporate policy.
2 — Configuration steps
| Step | Path | Action |
|---|---|---|
| 1 | Settings ▸ Booking Settings ▸ PDF Options | Toggle Show Scheduled Appointment Details in Invoice PDFs ON. |
| 2 | Choose Date & Time or Date Only. | |
| 3 | (Optional) Re-generate an open invoice PDF to preview the change. |
Note This flag operates independently from the Attach PDF Documents to Automated Emails setting. The schedule block appears (or not) in every invoice PDF, whether emailed automatically or downloaded manually.
3 — How it renders
| Option | Example output | Suitable for |
| Date & Time | Scheduled Appointments• Wed 03 Sep 2025, 09:00 – 11:00• Fri 05 Sep 2025, 13:00 – 15:00 | Residential, time-specific services (HVAC, plumbing). |
| Date Only | Service Dates• Wed 03 Sep 2025• Fri 05 Sep 2025 | Long-term projects, facility contracts, or invoices issued after shifts where times are no longer relevant. |
4 — Examples & use cases
-
Commercial cleaning contract
– Finance office needs just the dates to reconcile a monthly consolidated invoice.
– Use Date Only to avoid clutter. -
Emergency electrical call-out
– Insurance claim requires proof the tech was on-site 14:20-15:45.
– Use Date & Time. -
Landscaping project (multi-visit)
– Client PM wants to cross-check each visit with access-control logs.
– Date & Time helps match badge-reader timestamps.
5 — Best-practice tips
-
Match to booking PDFs – If you already show schedules in booking confirmations, keep the same option for invoices to avoid confusion.
-
Bulk invoices – For invoicing cycles with dozens of appointments, Date Only keeps the PDF concise.
-
Custom label – Change “Scheduled Appointments” to “Service Dates” or “Attendance Log” in Settings ▸ Templates ▸ PDF Layouts.
6 — Troubleshooting
| Issue | Cause | Solution |
| Schedule block missing | Toggle is OFF | Turn it ON in PDF Options. |
| Still shows times after switching to Date Only | Cached PDF | Open invoice → More ▸ Regenerate PDF. |
| Wrong time zone | Company locale mis-configured | Update Company ▸ Profile ▸ Locale; regenerate PDF. |
7 — Benefits recap
-
Transparency – Client finance teams instantly see what they’re paying for.
-
Compliance – Meets ISO, SOX, or government contract rules linking service dates to invoices.
-
Reduced queries – Fewer “Please confirm service date/time” emails or calls.
Enable Show Scheduled Appointment Details in Invoice PDFs—and choose between Date & Time or Date Only—to deliver invoices that answer scheduling questions before they’re even asked.
Display Purchase Order (PO) Field for Business Customers
A Purchase Order (PO) number is a unique reference provided by your business clients, used to match your quotes, bookings, and invoices to their internal purchase order system—making reconciliation, approvals, and audits easier and more reliable.
When the PO field feature is enabled, an alphanumeric PO field (up to 128 characters) will appear only for business customers (not individuals) during the creation or editing of quotes, bookings, and invoices. The PO number entered will automatically display on all related PDFs and in the customer portal, supporting accounts-payable accuracy and compliance with business procurement policies.
Why use this feature?
-
Ensures your documents meet client requirements for compliance and audit (many ERPs require PO references).
-
Streamlines payments and approvals by matching your invoice to the client’s internal PO.
-
Supports automated workflows in accounting systems like Oracle, SAP, and Xero.
How to use:
-
Enable the related flag in Settings ▸ General Settings ▸ Booking Settings.
-
For business customers, enter the PO number when creating or editing a quote, booking, or invoice. The field will only appear when the customer type selected is business.
-
The PO number will be shown on all PDFs and in the customer portal for that booking or invoice.
Enabling the PO field helps you deliver professional, compliant, and payment-ready documentation for every business client.
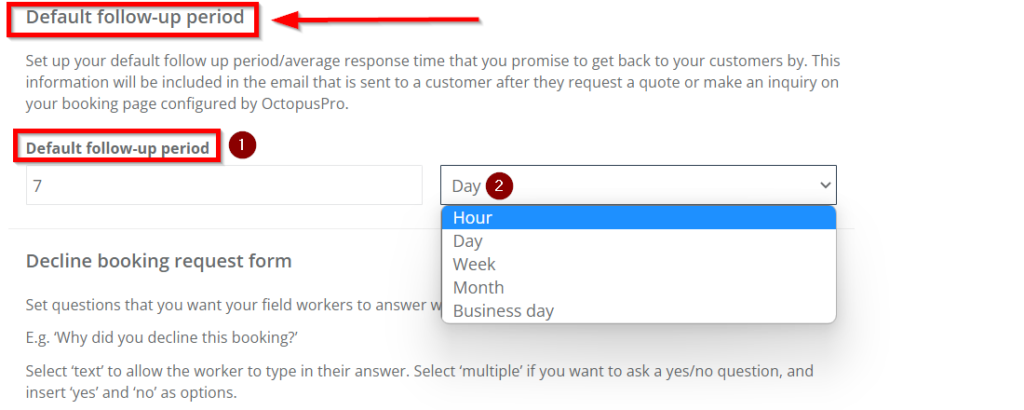
Default follow up period
Following up with your customers about the services that were assigned to fieldworkers when creating a booking will create positive progress in the future, the follow-up is sent to the customer on the email after requesting a quote or an inquiry after making a booking that will be enabled. Note that the follow-up can be added by adding any number in the field of “Default follow-up period” (by default it is 7), and the next field beside it is by identifying (day, week, month, or business day).
Decline booking request form
By setting up follow-up questions about why the fieldworker canceled the booking will facilitate working on issues and make it better for any future concerns. By adding a question then identifying whether you want it to be a text (where the customer will write a text explaining the problem), or multiple (where the customer will add a yes or no question).
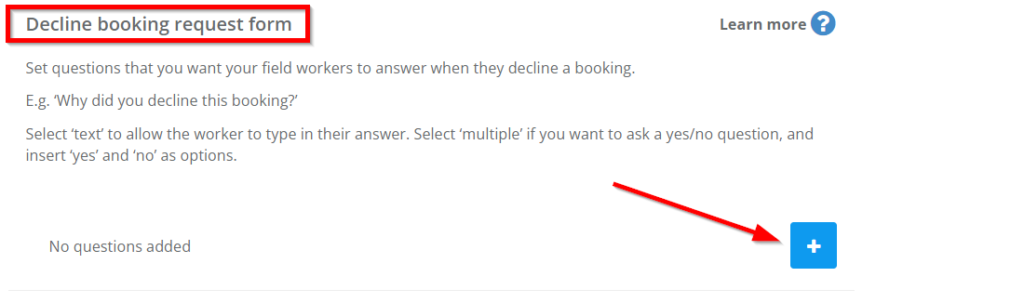
Image Types
Images in an assigned service by the admin to the fieldworker work as follows, by booking a service, the customer has three options for taking images, 2 by default which are: before the start of the job and after completing, whereas for proving full feedback that is added as an addition if the customers prefer to add any of the positive or negative comments. The reason for it is for quality control and to work on any complaints.
Property Types
Property types such as home, apartment, unit, office, commercial, boat and you can more if needed. By enabling the property types button, it will show when creating a booking or a quote. Note that enabling this button, will provide the fieldworkers with a clear identification of the chosen booking and navigate the destination of the property the fieldworker prefers or even feel comfortable with.
For more information make sure that you visit OctopusPro user guide and do not forget to subscribe to our YouTube channel.