
Sync Google Calendar With OctopusPro
Keep your Google Calendar and OctopusPro calendar completely in sync with this real-time, two-way secure integration.
Table of Contents:
- How does the two-way sync work?
- One-way synchronization for events created in OctopusPro
- One-way synchronization for events created in Google Calendar
- Which data do I see in my Google Calendar after syncing with OctopusPro Calendar?
- Adding unavailable time block on the calendar
- Syncing your business Google Calendar with OctopusPro
- Syncing your fieldworkers Google Calendar with OctopusPro
- Connecting a fieldworker’s Google Calendar as an admin user
- How can admin users view synced Google Calendar events in their OctopusPro Calendar?
- Connecting with Google Calendar when logged in as a fieldworker
- Access multiple calendars in one place
- Disconnect Google Calendar syncing with OctopusPro for fieldworkers
- Sync different calendars from Google with OctopusPro
- Integrating with Google Calendar using private Google API
- Sync your Google Calendar with OctopusPro using private Google API
- Syncing fieldworkers Google Calendar as an admin
- What is the difference between using OctopusPro Google API and using private Google API?
OctopusPro allows you to manage both your Google Calendar and OctopusPro Calendar in one place by using the sync feature provided in OctopusPro. Google Calendar sync allows you to synchronize events between Google Calendar and your OctopusPro account, from where you can add, edit and delete events in Google Calendar.
Once connected, your Google Calendar events will appear in your OctopusPro account, and your OctopusPro appointments will appear in your Google Calendar. Each one of your fieldworkers may also sync their OctopusPro account with their own Google Calendar.
How does the two-way sync work?
- The calendar sync is triggered whenever there’s an update on either side. Any appointment booked on OctopusPro will automatically get synced with Google Calendar in real-time. Similarly, when an event is created on Google Calendar, it will automatically get synced with OctopusPro Calendar and block the availability.
- Sync is also triggeredwhen an event is edited or deleted from either side. However, calendar appointments and unavailable events created through OctopusPro will not be affected if edited or deleted from Google Calendar.
One-way synchronization for events created in OctopusPro
Synchronization of appointments created in OctopusPro is only one way: from OctopusPro to Google Calendar. If you change those appointments from your Google Calendar, they will not be updated in OctopusPro.
One-way synchronization for events created in Google Calendar
- Once connected, your Google Calendar events will appear in your OctopusPro account, and events created in Google Calendar will sync with your OctopusPro account. Whenever any of these events are updated or deleted, the same changes will also be reflected in OctopusPro.
- Please remember that events on Google Calendar will not be created as bookings on OctopusPro. They will just be blocked on OctopusPro.
- To limit the amount of data we need to transfer between Google and OctopusPro, we only sync future events between Google and OctopusPro Calendars.
- Once the integration is set up, your appointment data from OctopusPro will be pushed to your Google Calendar.
Which data do I see in my Google Calendar after syncing with OctopusPro Calendar?
When a booking is made using OctopusPro, the booking will appear in the OctopusPro calendar automatically. If the Google sync is on, OctopusPro will create an event on the Google Calendar that includes the following booking details:
- Booking status
- Fieldworker name
- Currency symbol
- Booking amount
- Suburb name
- Scheduled dates start and end times (As the time zone of the customer)
- Customer name
- Business name for business clients
- Customer contact information
- Booking address, up to three addresses
- Service name
- Service description
- Customer properties added to the appointment
- Name of the user that created the appointment
- Date when the appointment was created
- Unavailable events added to your calendar
- Customers will see all of the previously mentioned points in Google calendar when they click on the booking/appointment a popup will appear as follows:
- When creating custom booking statuses, you can decide if you want to sync bookings that have that status with Google Calendar by using the flags in the booking status settings. Admin users can always add/edit booking statuses by navigating to Settings > General Settings > Booking Settings, after clicking on the ‘Booking Statuses’ tab at the top left of the page.

3. Then, scroll down to add a new booking status, by clicking on the + icon. A popup window will appear, where you can add a new booking status, you will insert a status name, status color and status description.
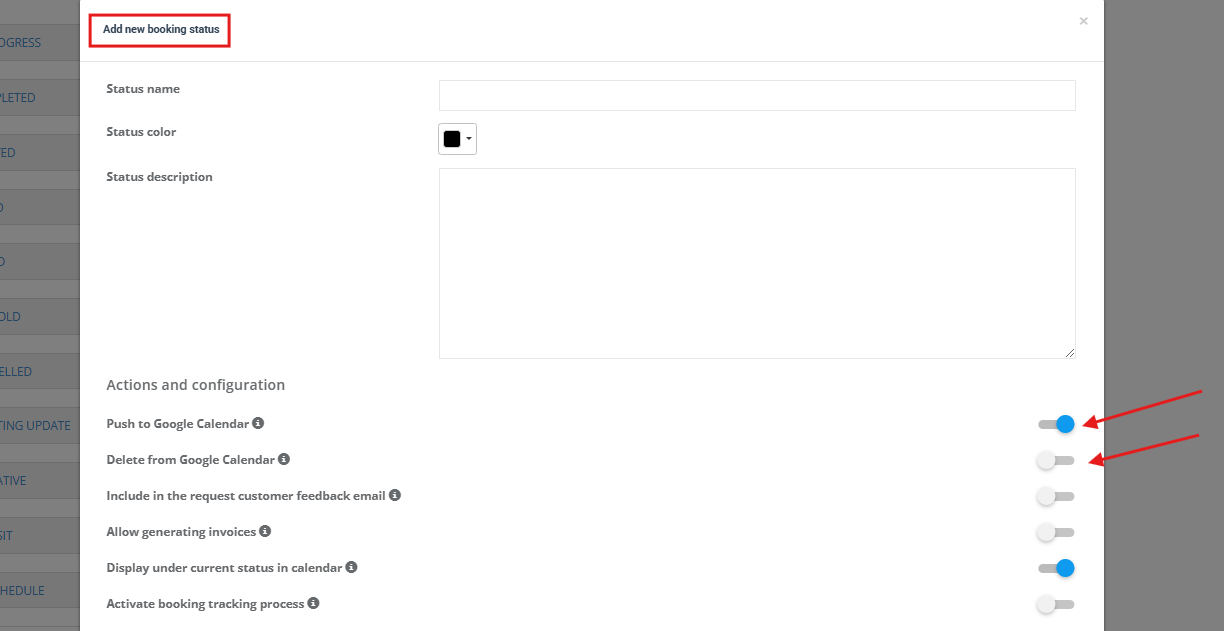
- Activate the Push to Google Calendar flag if you want bookings that have the selected status to be pushed to the Google Calendar of the assigned fieldworkers. This only works if the assigned fieldworkers have authorized you to sync with their Google Calendar.
- Activate the Delete from Google Calendar flag if you want bookings that have the selected status to be deleted from the Google Calendar of the assigned fieldworkers when they are deleted from your OctopusPro account, or when you assign different fieldworkers to these bookings. This only works if the assigned fieldworkers have authorized you to sync with their Google Calendar.
Adding unavailable time block on the calendar
- When you create unavailable time in your OctopusPro Calendar, the unavailable time added will be synced to Google Calendar, as long as the fieldworker selected has connected their Google Calendar with OctopusPro.
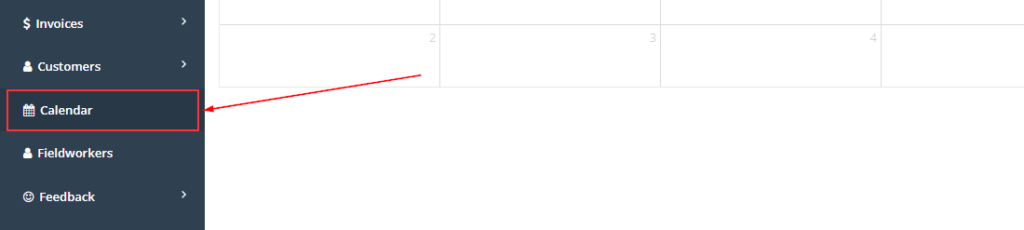
- From the admin user or fieldworker web view, from the side menu go to ‘Calendar’.
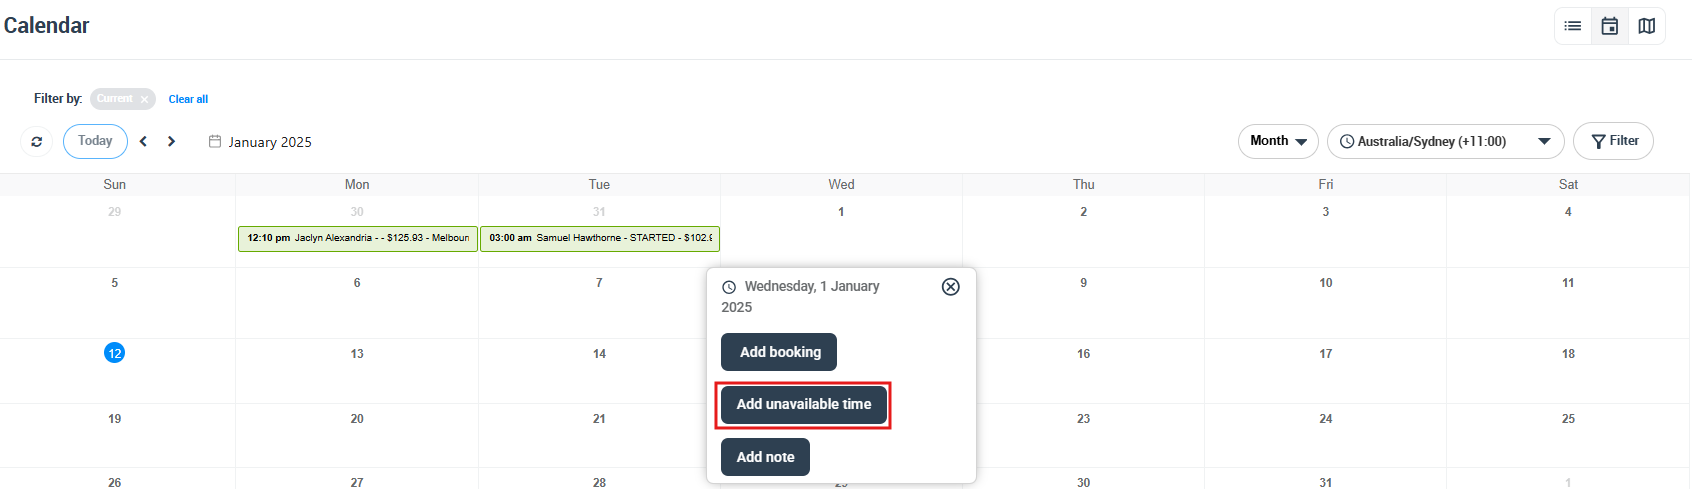
- You will be redirected to the calendar page, in order to add an unavailable time block to the calendar
- Click on any date on the calendar
- A pop-up window will appear, click on ‘Unavailable’.
- Another pop-up window will appear to:
- Select your fieldworker
- Enter the title / reason the fieldworker will be unavailable
- To add an unavailable event all day, switch the toggle button ‘All day’, but to mark specific hours or days, select the preferable date and time
- Then click on ‘Save’.

- The unavailable event will be displayed on your OctopusPro calendar as the following, click on it to view the details.
- It will also be displayed on your Google Calendar as shown below. Click on it to view more details.
Syncing your business Google Calendar with OctopusPro
If your business uses Google Calendar which you would like to sync with your OctopusPro calendar, you can sync them by connecting your business Google Calendar with your general fieldworker profile, which acts as the default calendar for your business. Once connected, you can manage both calendars together with ease and schedule events without having to jump between different calendars.
To connect your business Google Calendar with OctopusPro, follow the steps below:
- First, log into your Admin user OctopusPro account
- Go to your general fieldworker profile
- Press the ‘Actions’ button
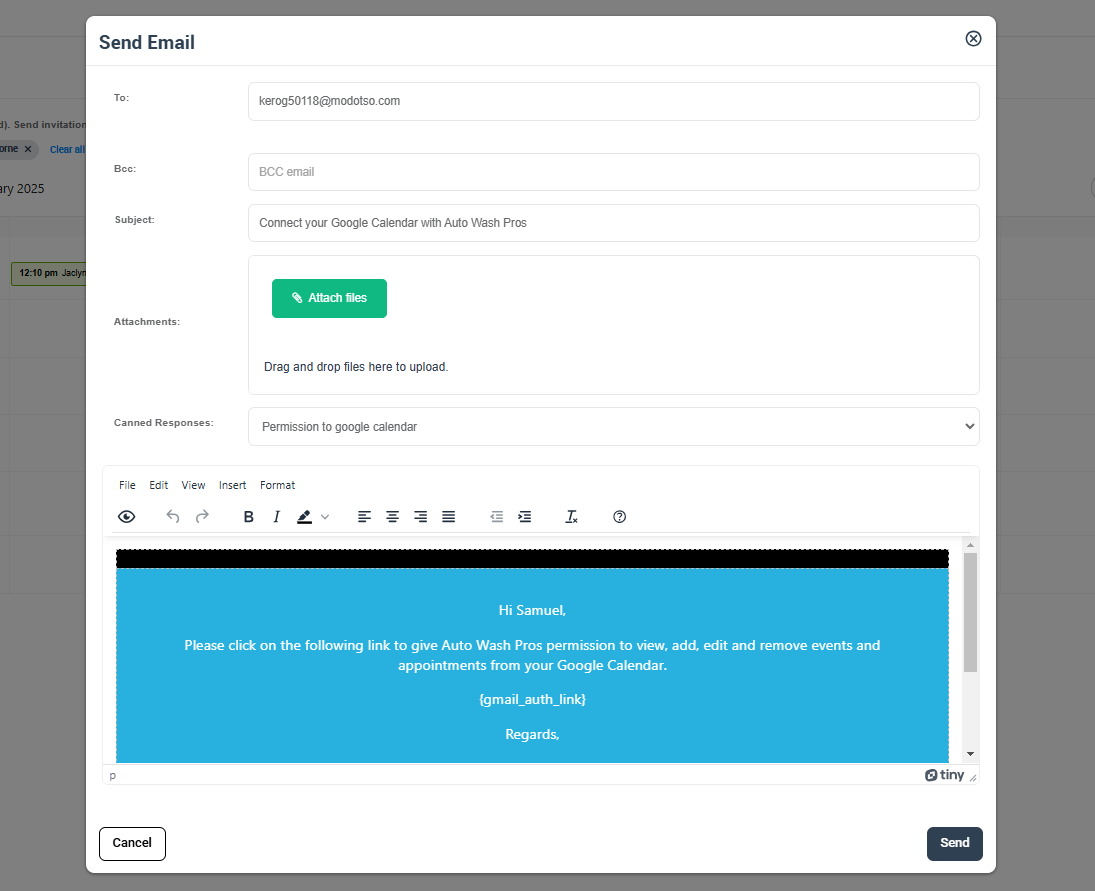
- Then, click on ‘Send Google Calendar authorization email ‘.
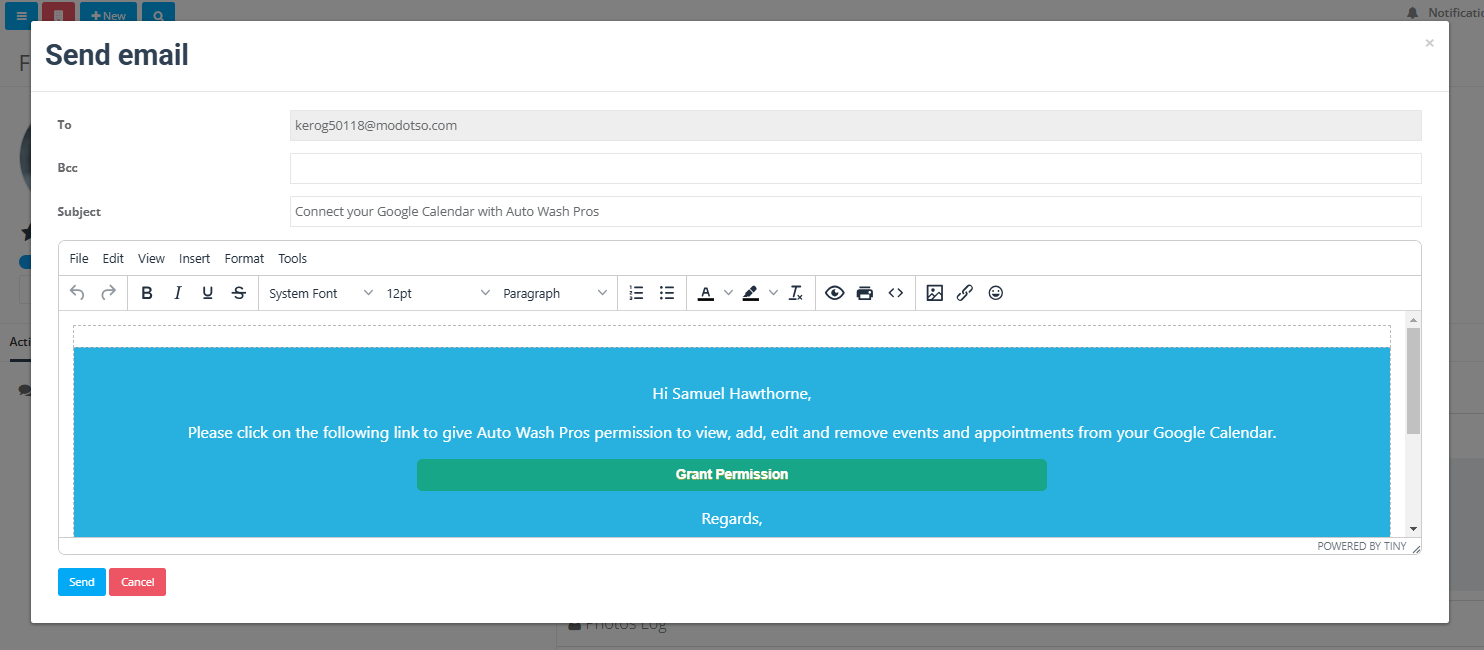
- An email form will appear as a popup, which will be sent to the email related to the fieldworker to grant permission to add reminders to their Google Calendar.
- Click ‘Send’.
You can also connect directly from your OctopusPro calendar
- From the calendar overview, click on ‘Filters’, and select your general fieldworker from the dropdown list
- Then click ‘Filter’
- Press ‘Send invitation to connect Google Calendar to OctopusPro’ which appears at the top of the calendar.
- An email form will appear as a popup, which will be sent to the email related to the general fieldworker to grant permission to add reminders to their Google Calendar.
- Click ‘Send’.
- You will receive an email to connect your Google calendar with your OctopusPro calendar, click on Grant Permission to sync both calendars, and enable accessibility to view, add, edit, remove and access any events all on your OctopusPro calendar. Any events or new bookings added will be seen through both calendars.
Syncing your fieldworkers Google Calendar with OctopusPro
- To help manage your fieldworker’s availability, you can sync your OctopusPro account with their Google Calendar. Connecting your fieldworker’s Google Calendar with their OctopusPro calendars, and vice versa, allows them to check their schedules from either of the platforms.
- This is also helpful for keeping track of your fieldworker’s schedules and commitments outside of work, things like medical appointments or personal events can be viewed easily so you aren’t double booking your team. This is also helpful if your fieldworkers are subcontractors that might have their bookings outside of your organization, and you need to know the times they are unavailable and booked with their private jobs.
- You would want to set this up once you’ve finished setting up your account and have begun scheduling jobs regularly in OctopusPro. Your fieldworkers will need to grant permission to sync their Google Calendar using their Google login details.
- You can only connect a fieldworker to one Google Calendar account. However, you can connect more than one fieldworker to the same Google Calendar account.
Connecting a fieldworker’s Google Calendar as an admin user
- You can connect the OctopusPro calendar of any of your fieldworkers with their Google Calendar from their profile pages by pressing the Send Google Calendar authorization Email button under the Actions button.
- Go to the list of fieldworkers
- Click on the fieldworker’s display name you wish to view, then click ‘View profile’.
- From the actions button, click on ‘Send Google Calendar authorization Email’.
- An email form will appear as a popup, which will be sent to the fieldworker to grant permission to add reminders to their Google Calendar.
- Click ‘Send’.
- After the email is received by your fieldworker, they should press on Grant Permission, and as soon as the permission is granted to your business, the OctopusPro calendar will sync with their google calendar.
You can also connect directly from your OctopusPro calendar
They can also send the Google Calendar authorization email from the calendar page by filtering the fieldworker they want to send the email to, then press the Send Google Calendar authorization email link which appears at the top of the calendar page after the fieldworker has been selected from the list of filters.
- From the calendar page, select the general fieldworker from the list of fieldworkers in the filters popup.
- Then click ‘Filter’
- Press ‘Send invitation to connect Google Calendar to OctopusPro’ which appears at the top of the calendar.
- An email form will appear as a popup, which will be sent to the fieldworker to grant permission to add reminders to their Google Calendar.
- Click ‘Send’.
- After the email is received by your fieldworker, they should press on Grant Permission, and as soon as the permission is granted to your business, the OctopusPro calendar will sync with their google calendar.
How can admin users view synced Google Calendar events in their OctopusPro Calendar?
When fieldworkers modify their OctopusPro calendar to share their events in Google Calendar, admin users can view those events by clicking on the filters on the top-right view of the OctopusPro calendar, then clicking on the fieldworker filter, and selecting a fieldworker, clicking on the filter button will display all of the fieldworker appointment and events from both their Google Calendar and their OctopusPro calendar.
Connecting with Google Calendar when logged in as a fieldworker
- Your fieldworkers should log in to their OctopusPro account through the web portal or app.
- From the web portal, they can go to the calendar page, the sync option will appear at the top of the calendar page, a popup message will appear declaring that the fieldworker is not synchronized with the Google Calendar.
2. After clicking on the Sync calendar link, if your fieldworker isn’t logged in to their Google account, they will be prompted by Google to log into their Google Account
3. Once the fieldworker is logged in, they will be prompted to authorize OctopusPro to access their calendar. Your fieldworker must grant permission to complete the sync process.
- The first permission is for granting OctopusPro access to see the lists of calendars in their Google Calendar account. Your fieldworkers must click Allow to authorize OctopusPro to see their list of calendars.
- The second permission is granting OctopusPro permission to add a secondary Google Calendar, see, create, change, and delete events on them. Your fieldworkers must click Allow to authorize OctopusPro to create a new calendar in their Google Calendar for their appointments.
- The last permission is for allowing OctopusPro to view events on all their Google Calendar. Your fieldworkers must click the Allow button to authorize OctopusPro to view events on their Google Calendar.
4. Your fieldworkers will then be prompted to confirm their selected permissions and must press the allow button.
5. Once this process is complete, your fieldworkers will be redirected to their OctopusPro calendar, they will see if permissions have been granted to OctopusPro. Once permissions have been granted, OctopusPro displays the connected email address at the top of the calendar page.
6. Back in the Google Calendar, your fieldworker will have a new calendar generated, defined with your company name from your OctopusPro account.
7. Your OctopusPro and Google Calendar are now being synchronized for the first time which may take a few minutes to complete.
8. The sync allows you to import any of the calendars listed under the My calendars menu on your Google Calendar account.
Access multiple calendars in one place
- Google allows you to access multiple calendars all in one place. You can create a separate calendar for personal use, work tasks, school assignments, and anything else you’d like to keep track of, then customize the settings for each calendar.
- The same applies to OctopusPro Calendar once the fieldworker grants permission to share their Google Calendar with OctopusPro.
- Note: The print screen displayed above shows an example of a fieldworker’s Google Calendar from a company named “WeCare” which uses OctopusPro, you can see that the fieldworker can view all of their calendars on the left side of the page, including their personal calendar, their calendar from the company “WeCare”, and any other calendars created in their Google Calendar account.
- All bookings assigned to your fieldworkers through your OctopusPro account will appear in their Google Calendar under a separate calendar using your company name. All bookings will appear in your fieldworker’s Google Calendar once they are assigned to them.
- Clicking on bookings will display the name of the fieldworker, the status of the booking, the booking invoice amount, the scheduled date and time for the booking, and the booking address.
Disconnect Google Calendar syncing with OctopusPro for fieldworkers
- Fieldworkers will always see their calendar sync status when they log in from a web browser to their OctopusPro accounts on the top of the calendar page, they can cancel the sync of their account at any time by clicking on the “Disconnect syncing” link which appears at the top of their calendar page.
- A confirmation message will appear in a popup asking the fieldworker to confirm disconnecting their calendars and cancelling the sync.
- Click Confirm to disconnect the synchronization.
Sync different calendars from Google with OctopusPro
- Fieldworkers can have all calendars which they have created in their Google Calendar, displayed in their events and tasks in OctopusPro, they can do this by clicking on the “Click here to modify” link located on the top of the fieldworker’s calendar page, which appears when fieldworkers login to their OctopusPro accounts using a web browser.
- Your fieldworkers can select the calendars in their Google Calendar which they want to sync from the drop-down list, clicking on the Calendar field will display the list of calendars they have in their Google Calendar account, they can select one calendar or multiple calendars to display in your OctopusPro calendar, then press the save button, and the selected calendars will appear in their OctopusPro calendar.
- Note: Admin users will be able to see all the calendars selected from the calendars list in the Customize display calendar pop-up.
Integrating with Google Calendar using private Google API
- If you have a Google Workspace account and prefer to create your own private Google Calendar API account to authorize all calendars under your domain at once.
- This integration allows OctopusPro to sync with your Google Workspace account, by this you will be avoiding overlapping appointments and duplicating calendar entries, so when you add a booking or an appointment in either application, that data will appear in the other calendar automatically.
Advantages of using private Google API in OctopusPro
- The Google Calendar interface is flexible, elegant, and easy to use.
- Many are already familiar with Google Calendar, so staff training can be reduced.
- You will have confidence that your Calendar is always up to date.
- Keep your workflow moving smoothly.
- Save time and money by having all of the appointments synced on one single platform, this becomes pretty useful when having more than one coworker working on the same job.
Sync your Google Calendar with OctopusPro using private Google API
- Admins can sync Google Workspace accounts with OctopusPro calendars, to do that the admin user should go to Settings > Company Settings > Integrations (API) > New Developers Integration (API).
- After that, click on “ New Developer Integrations (API)”
- Select “Google G Suite” from Developer Integrations (API) Name
- Then select “Use private Google API”
- Click on Save
- In order to set up your Google Workspace account follow the instructions below:
- You can click on this to go to your Google API Console.
- On the top left of the page, navigate to select the project list.
- Select a project or create a new project
First thing, start by choosing a project name “Gmail and Calendar API” for example and select the organization that you have a Google Workspace or Cloud Identity account setup in it.
Note: If you don’t have a Google Workspace or Cloud Identity account you can still have a free trial, free trial does not need an Organization selected so leave the Location field having “No organization” input. To learn more information about Creating and Managing organizations Click Here.
- From the navigation menu that appears when clicking on the three white lines at the top right of the page, go to API & Services > Dashboard
- Click on Enable APIS AND SERVICES
- Search for Calendar and Select Gmail API
- Click on Enable
- Again from APIS AND SERVICES Search for Calendar and Select Google Calendar AP
- Click on Enable and you will be directed to Google Calendar API Overview, from the left of the page, click on CREATE CREDENTIALS
- You will be asked to select which API you are using, click on the field and select Google Calendar API
- Then, you will be asked to choose What data will you be accessing, click on User data and press next
- The next step is to define the OAuth constant screen that needs the APP information and the Developer contact information
- App name: Fill that input field with (OctopusPro Google Workspace Application)
- User support email: Choose the email for users to contact you with questions about their consent.
- App logo: Upload an Image that will help users recognize your app. (Not required)
For the Developer contact information
- Email addresses: These email addresses are for Google to notify you about any changes to your project.
- Scopes: The Next step will be adding Scopes. Scopes express the permissions you request users to authorize for your app and allow your project to access specific types of private user data from their Google Account.
- To add scops click on ADD OR REMOVE SCOPES
- From the menu that appears from the left side click on “Enter property name or value” and select “API”
- After that type in “Google Calendar API” select the following scopes by clicking on the white square:
|
API |
Scopes |
User-facing description |
|
Google Calendar API |
…/auth/calendar |
See, edit, share, and permanently delete all the calendars you can access using Google Calendar |
|
Google Calendar API |
…/auth/calendar.readonly |
See and download any calendar you can access using your Google Calendar |
|
Google Calendar API |
…/auth/calendar.events |
View and edit events on all your calendars |
|
Google Calendar API |
…/auth/calendar.events.readonly |
View events on all your calendars |
|
Google Calendar API |
…/auth/calendar.settings.readonly |
View your Calendar settings |
4. Then, click UPDATE
5. And click on SAVE AND CONTINUE
- OAuth Client ID
- A client ID is used to identify a single app to Google’s OAuth servers. If your app runs on multiple platforms, each will need its own client ID
- From “Application type” select “Web application”
- Scroll down and from “Authorized redirect URIs” click on “+ ADD URI”, a field will appear asking you to insert a URI, in that field put https://admin.octopuspro.com/getAuthKey
- After that click on CREATE
- The Client ID will appear, you can download it as a file or you can Copy and paste it in the relevant field in OctopusPro.
- Now from the navigation menu go to APIs & Services > Credentials you can copy “Name”, “Client ID” and download “Client secret” file and fill them in your OctopusPro account.
- In your OctopusPro account go to Settings > Company Settings > Integration (API) then select “Google Workspace” from the drop list, select “Use private Google API”, then fill in the values.
- After saving your API parameters into your account in OctopusPro, automatic emails will be sent to your active fieldworkers to ask them to grant permission to sync their calendars with OctopusPro.
Syncing fieldworkers Google Calendar as an admin
- Admin users can sync their fieldworker Google Calendar accounts with their OctopusPro calendars. To do that, the admin user should go to Settings > Company Settings > Integrations (API) > New Developers Integration (API)
- After that, select the “Google G suite” from Developer Integrations (API) Name
- Click on save after making sure that you are using “OctopusPro Google API”
- An email will be sent to all the active fieldworkers who didn’t sync OctopusPro with Google calendar asking them for Gmail & Google Calendar Permission.
- When the fieldworker clicks on the “Grant Permission” button in the email, they will be redirected to their Google Calendar account to log in, they will then be prompted to authorize OctopusPro to access their Google Calendar. Your fieldworkers must grant permission to complete the sync process.
What is the difference between using OctopusPro Google API and using private Google API?
- Using private Google Calendar API means that you are connecting all of your organization in OctopusPro to your Google Workspace account, asking all users for permission to do so; therefore, your entire organization will be synced with Google Calendar, users like fieldworkers, or any other customized user will be using their Google account to accomplish the sync.
- For example, having a workspace called “Yourname@YourCompanyName.com” all of the accounts having “@YourCompanyName.com” domain will be requested to sync with the Google account.
- But while using OctopusPro Google API, you can set up the sync for each account individually, so if you have a fieldworker that doesn’t use Google Calendar or the admin does not want to see the fieldworkers Google events on OctopusPro calendar, this will be a better option.
- For more information please visit Octopuspro user guide, and subscribe to our youtube channel.