Canned responses
Enhance the efficiency of your communication processes using canned responses and templates that streamline your messaging. Customize your messages to meet your specific needs, ensuring accurate and consistent messaging every time, with a comprehensive set of placeholders that can be automatically populated with information from your database.
Quickly and easily respond to various customer inquiries, quotes, bookings, invoices, customer complaints, and more. Whether you need to send messages via email or SMS, you can save time and focus on other important aspects of your business while still providing high-quality communication to your customers
Don’t let poor communication processes slow down your field service management operations. Take advantage of OctopusPro’s Templates and Canned Responses feature and enhance your communication efficiency today!
Table of contents
- What are the canned responses?
- Reasons for using the canned responses
- How to create a new canned response?
- Where can admin users find the canned responses to send?
- How to add your custom email that your customers/ fieldworkers receive the canned responses from?
- What if you didn’t add a custom email address?
- Activate your phone number through the digital phone system to send SMS.
- The best practices of the canned responses
What are canned responses?
Canned responses are pre-written emails and SMS messages you can send to customers and fieldworkers. Unlike email/SMS templates, canned responses are not automated, and after setting them up, they can be edited and personalized. Using canned responses increases efficiency and promotes a consistent and professional brand.
Reasons for using the canned responses:
- Canned responses help improve your customer satisfaction because they are an excellent technique to reduce response time.
- To provide your customers and fieldworkers with accurate and specific information that meets their inquiries.
- Using pre-written responses will save much time because you will avoid repetitive typing during the communication process.
- You can keep your fieldworkers updated all the time with any changes or new announcements.
How to create a new canned response?
Admin users can set up new canned responses from the admin’s web view as follows:
- Settings > Communications > Templated & Canned responses from the side menu.
- Click on New Response and “All Canned Responses” form will appear.
 Then you are required to fill out the following form to create the canned response successfully:
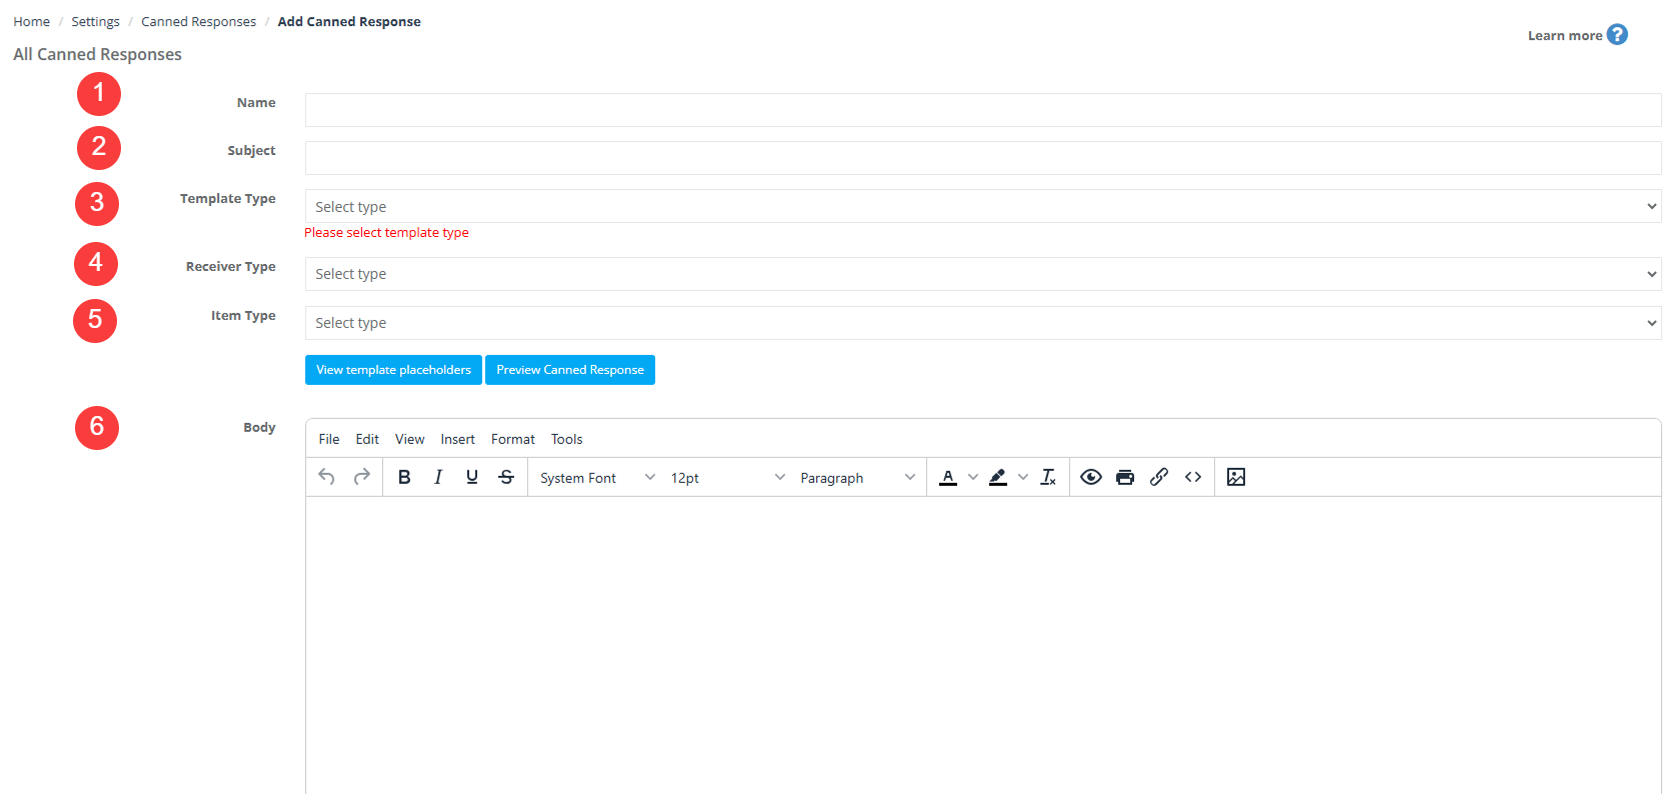
- Name: you can enter the name of the response you are going to create, for example, if a canned response is being created to inform the fieldworkers of the overtime rates, the name can be” Overtime Rates”
- Subject: it’s the title of the email or the SMS that fieldworkers and customers will receive. If your canned response provides details to the customers about their complaints, the subject can be “Complaint submitted”. So, the entered subject will appear to your customers/ fieldworkers as the head of the Email/SMS before opening them.
- Template Type: that’s where you can select whether you want to make the response template as an Email or SMS. And that categorizes the canned responses to appear in ‘Send Email’ action button or ‘Send SMS’ action button.


- Receiver Type: you can select the receiver of the response, to be “Fieldworker” or “Customer”.

- Item Type: there are 6 options to select from, so you can define the type of response you will create:
- Booking: that means your response will be related to a certain booking or will provide details about a booking to a fieldworker or a customer.
- Estimate: this type will be used in case your customers want to receive a quotation clarifying the prices of the services they need.
- Inquiry: your customers can always make inquiries about the services you provide, their prices, and other details.
- Invoice: you can create a canned response to send the customers and fieldworkers the bookings invoices.
- Customer profile: a canned response can be created to allow admin users to share customer profiles with the assigned fieldworkers, so they are aware of the customers’ information and other details related to the booking.
- Fieldworker profile: the response can be a fieldworker profile that the admin user shares with the customers or other fieldworkers.

Please note that the 6 types help organize your canned responses. So, the Item type selection will limit the appearance of your canned responses to the related actions in the system, like the bookings/quotes… etc. For example, when you are about to send an email/SMS related to a certain booking for a fieldworker or a customer, and the item type is booking, the displayed canned responses for you will only be the booking type and this applies to the rest of the types too
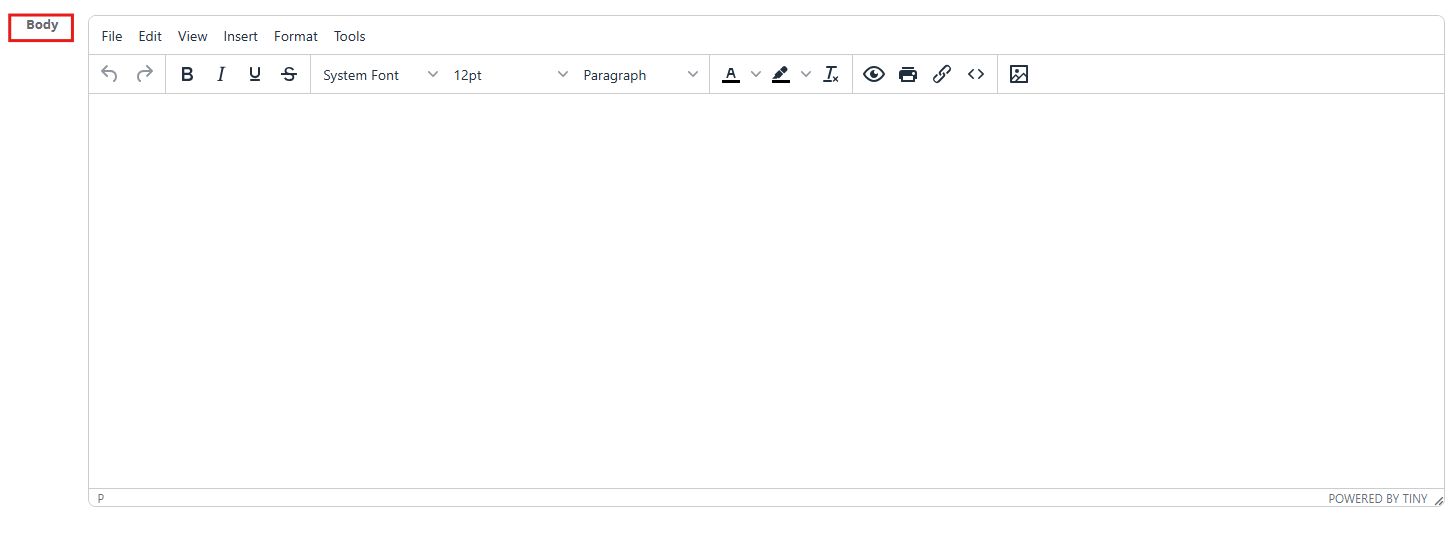
- Body: it is the space where you should write the content of the canned response. And you will have the editing tools that assist you in writing your canned response as planned. for example, the font, the text format, bullet points, and so on.
- General placeholders: under the form of the canned response, you’ll find the “General placeholders” button and to view the available general placeholders you can use, click on General placeholders.

The placeholders are the symbols that occupy the positions of the actual information. For example, if you use a ready-made resume template, you will find on the top of the resume page “Your Name” to allow you to put your name instead of the placeholder “Your Name”. When you create your canned responses, you can add the following general placeholders to the body of the response the way they are written in the below image.

The general placeholders represent your business info:
- Trading name: if you have multiple trading names belonging to your company, the displayed one will be the trading name you set as the default.
- Add photo URL: when you add this placeholder in the body of the canned response, it will be replaced with a link that allows your receivers to attach photos when they click on the link.
- Trading name website: the website link of your trading name will be added.
- Trading name phone: that makes the phone number of your trading name appear in the canned response.
- Company phone: if you don’t have multiple trading names and it’s only one company, the company phone will appear.
After adding the needed placeholders, they are displayed automatically in your email or your SMS. For example, if one of your trading names is “Car detailing” and you want to say “Greetings from Car detailing” in your canned response, you should write “Greetings from {trading_name}” so the default trading name will be replaced with the placeholder you have inserted in the canned response as {trading_name}.

- Press Save.
Where can admin users find the canned responses to send?
Canned responses can be found when you take many actions in the system, but the appearance of your canned responses is ruled by the selection of the item type. So, if the item type of a specific canned response is inquiry, this canned response will appear in inquires only and the same applies to the other canned responses belonging to the rest of the item types.
Canned responses in inquiries:
- When you check any inquiry, you can send an email/SMS to the customer/fieldworker about the inquiry puzzles, and that is done by using saved canned responses. To send a canned response for an inquiry, click on Inquiries from the side menu > Select one of the inquiries tabs
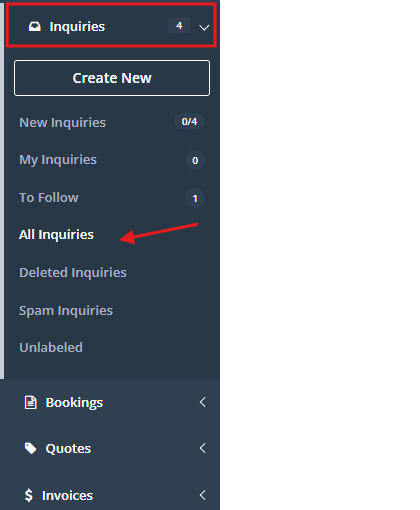
- Click on the ‘inquiry’ you need to view, you will be redirected to the inquire details page.

- Then, scroll down to customer section and click on Email/SMS icons on the inquire details page.
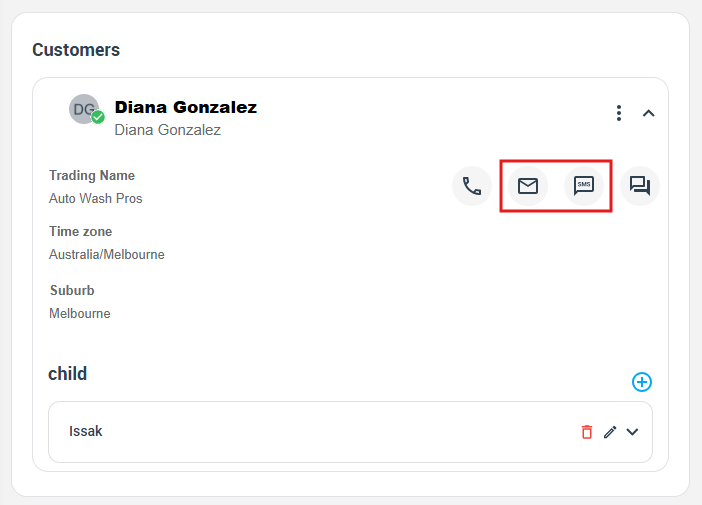
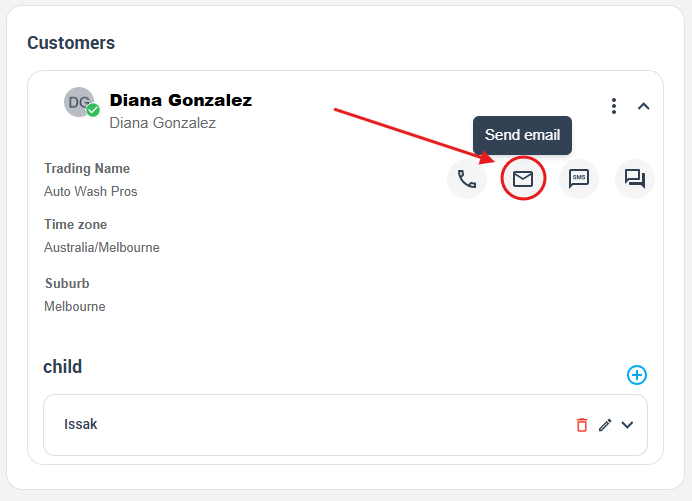
- After that, click on Email icons, and a popup menu will appear select “send email” from the dropdown menu.
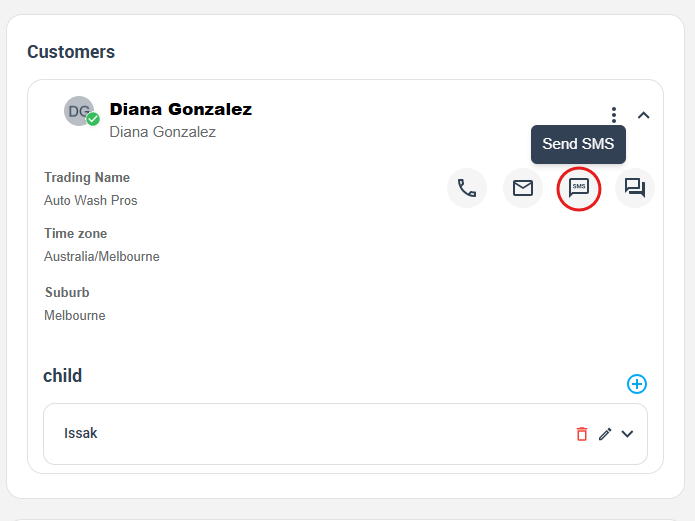
- Or click on “SMS” icon, then select ‘send SMS’ from the dropdown menu.
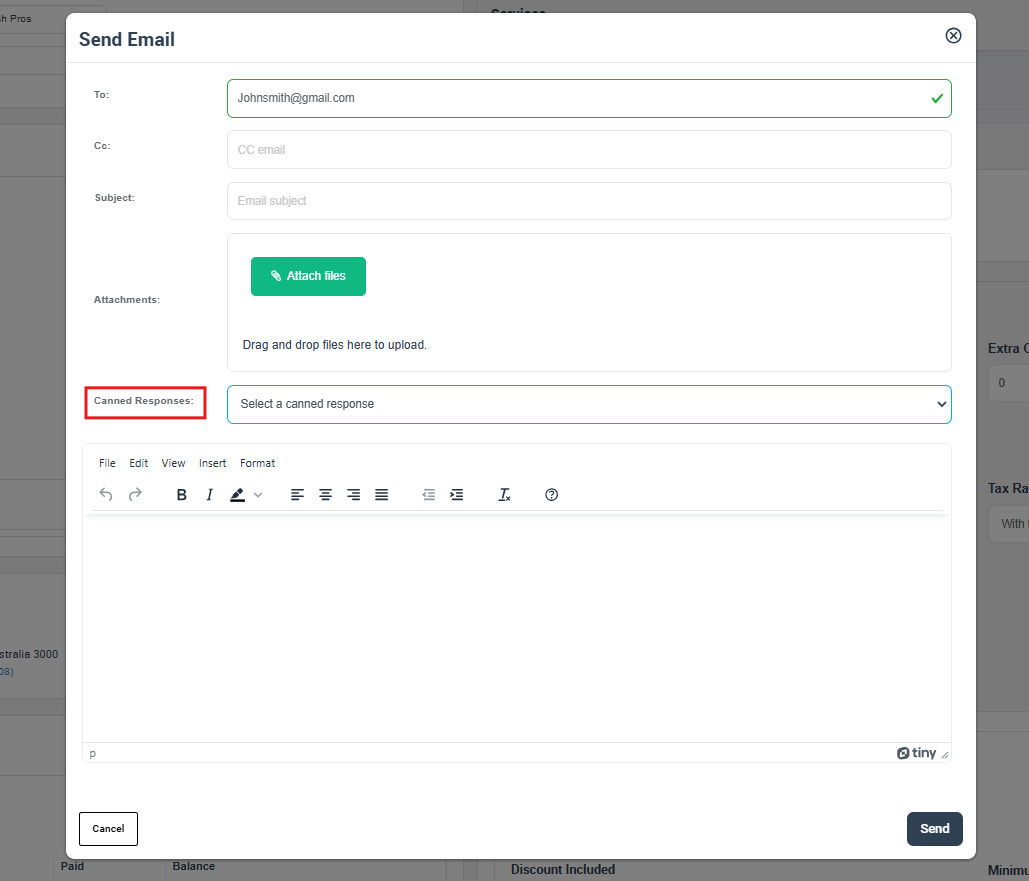
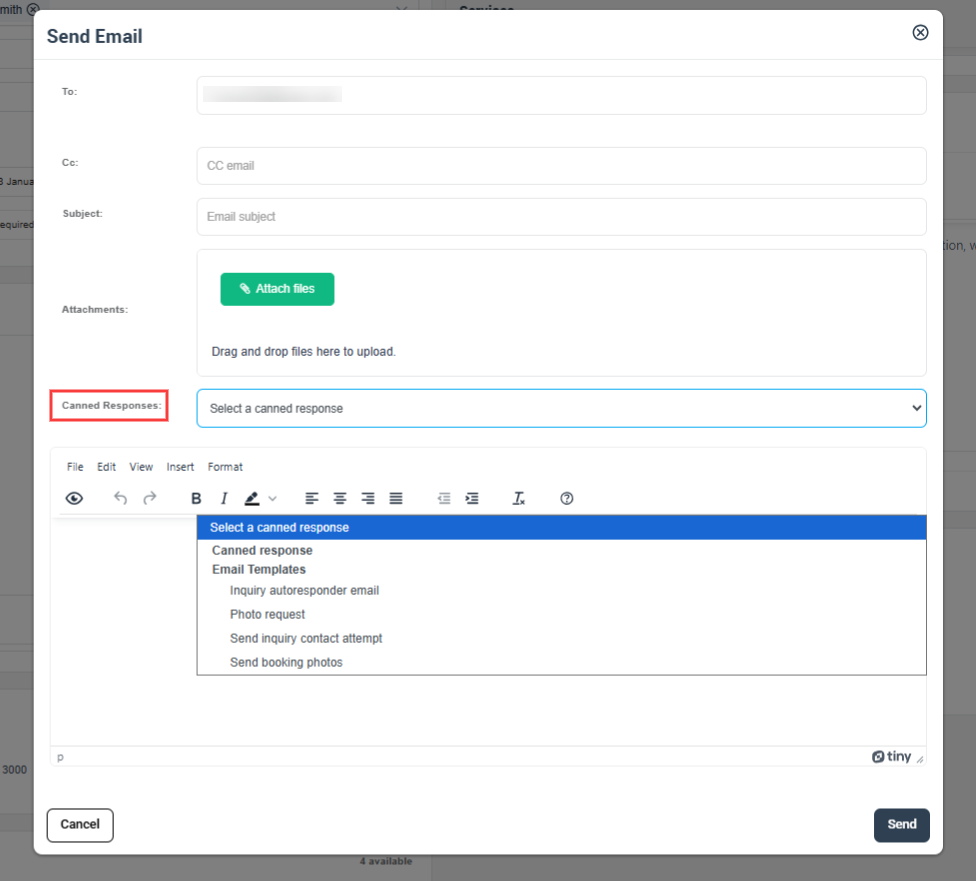
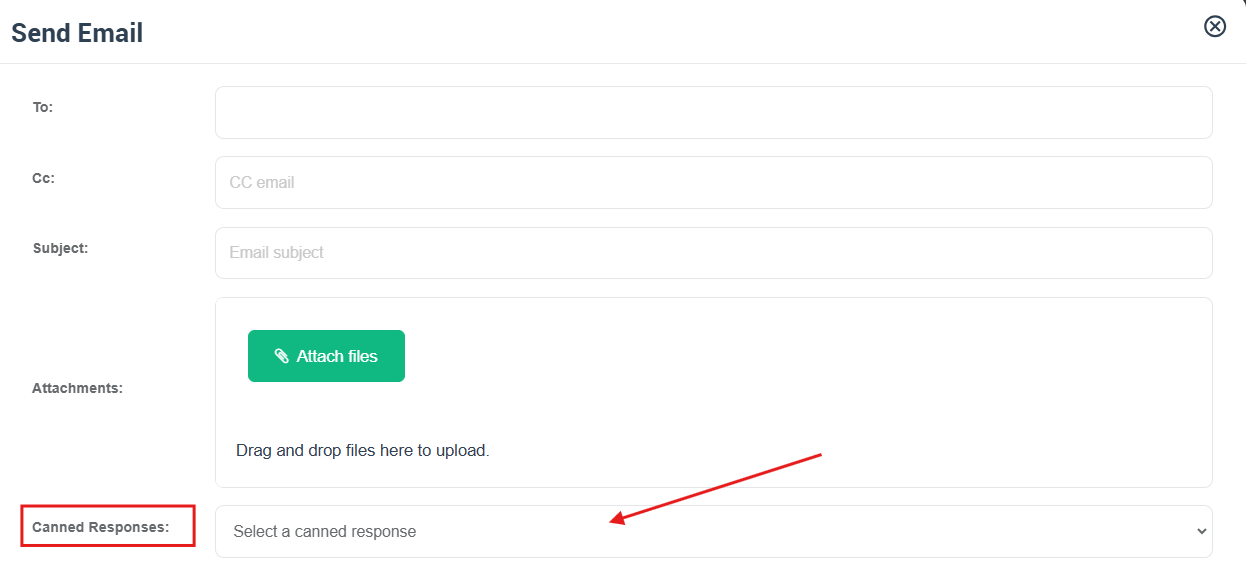
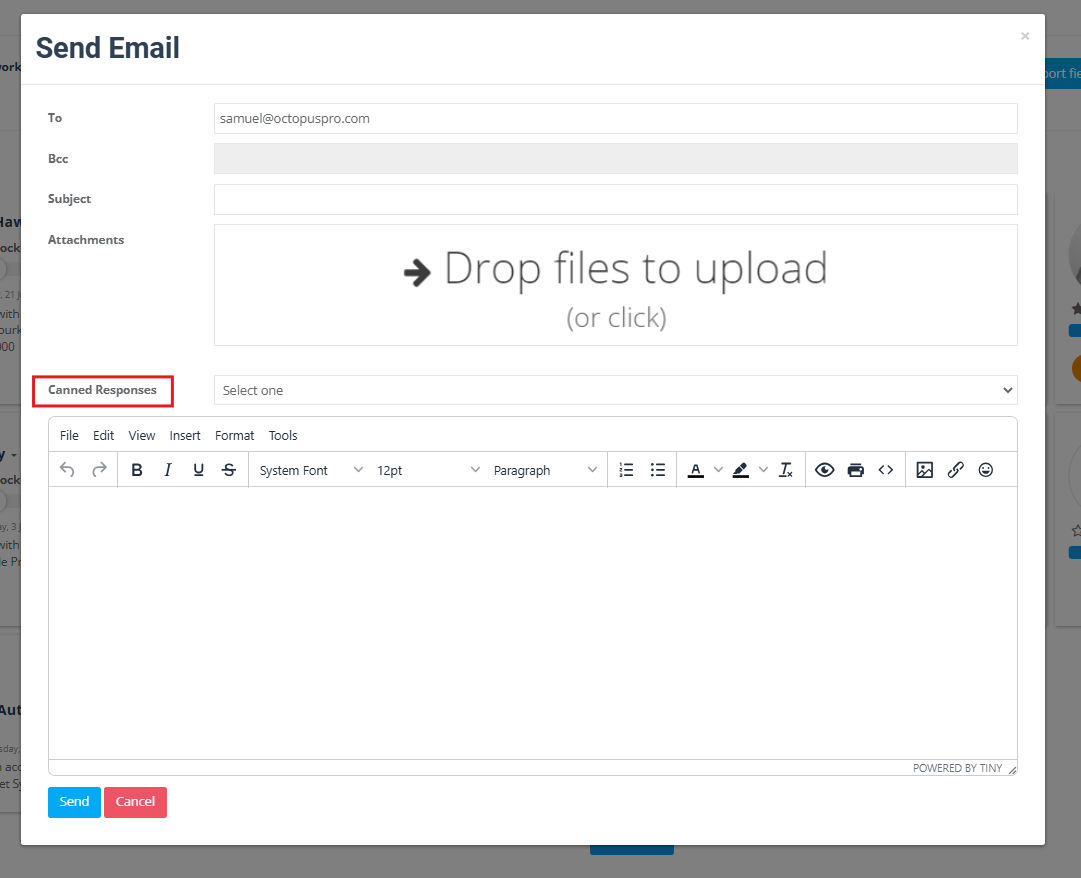
When you click on Send Email, a popup form appears, asking you to fill in the required information related to the email such as, to whom, cc, subject, attachment, and canned responses then you can send the email.
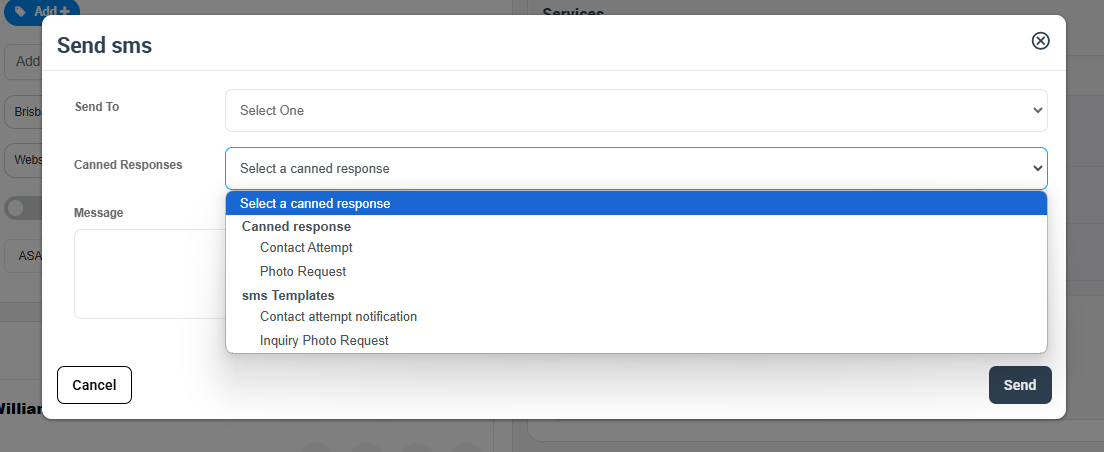
- When you click on Send SMS next to the “Email” button, the “Send SMS” form appears:
- Send To: you either choose “Select one” so the default number of the fieldworker/customer will receive an SMS or “All” so all the numbers receive an SMS. The “Edit” button allows you to add another number or control the current numbers of the customers/fieldworkers.
- Canned responses: select the canned response you want to send.
- Comment: this field will have the body of the SMS automatically once the canned response is selected.
Canned responses in Bookings:
- In order to reach the booking view page, the admin user can navigate to Bookings> Upcoming or past bookings.
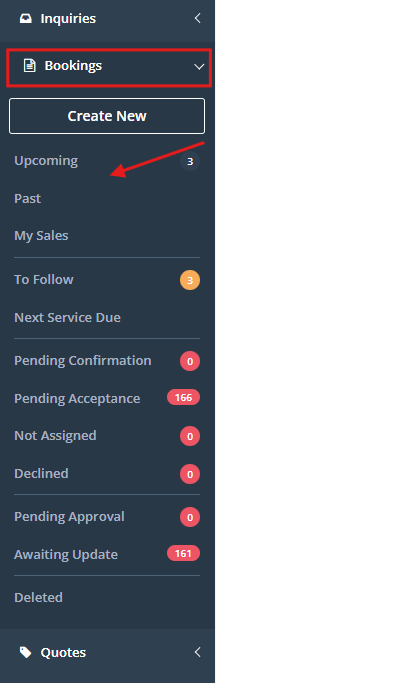
- Click on Actions button and select “View Booking”, it will be redirected to the booking details page.

- Scroll down to “customer section” and click on ‘Email’ icon a popup menu will appear, then select ‘Send Email’ .
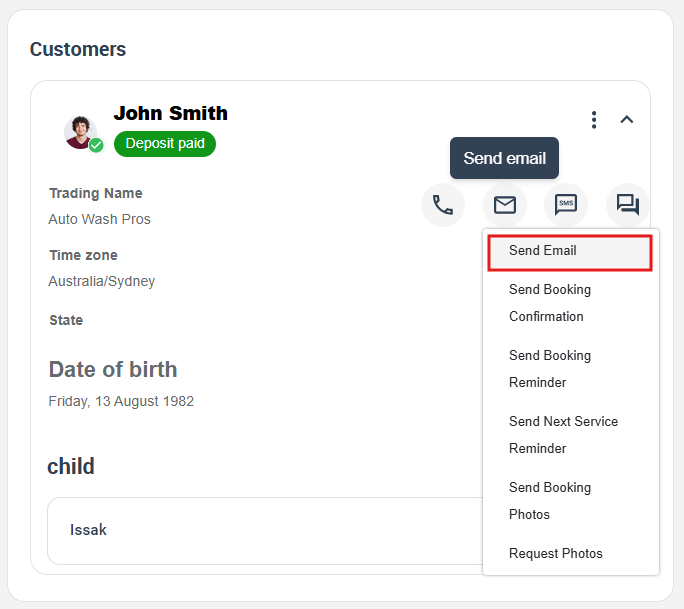
- The email form will pop up to fill in the required elements and the canned response you want to send.
Canned responses in Quotes:
- From the sidebar menu click on “Quotes”, and select the quotes tab you want.
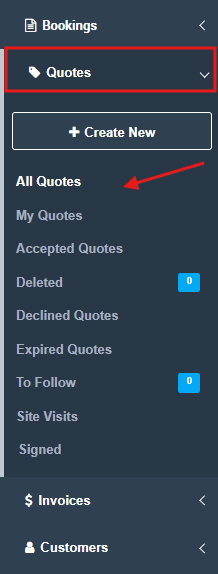
- Click on the quote you wish to view, it will redirect to the quotes details page.

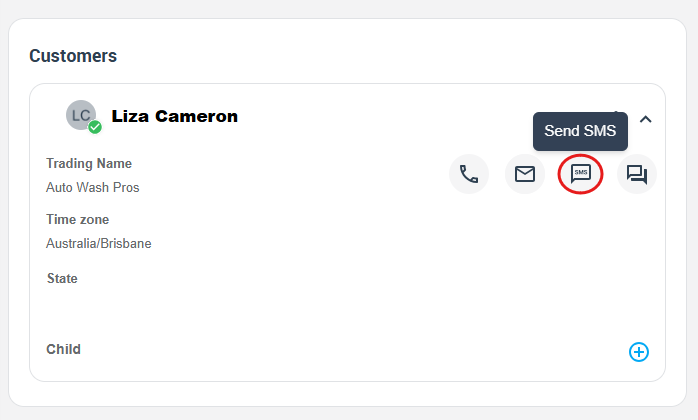
- Then from the customer section, click on SMS icon, then select ‘Send SMS’ from the dropdown menu.
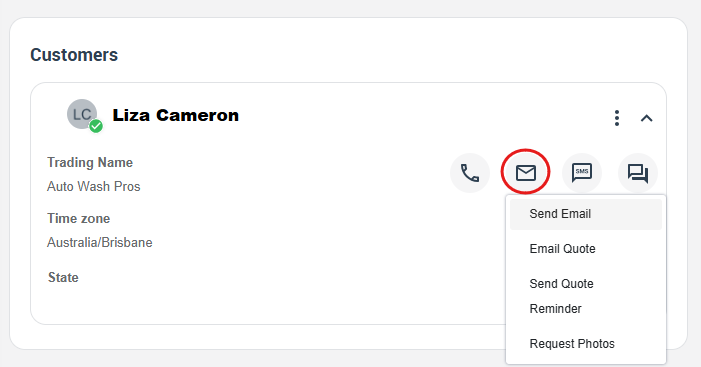
- Or click on the Email icon and select ‘Send Email’ from the dropdown menu.
Canned responses in Invoices:
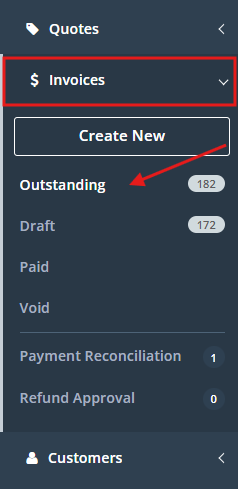
To send canned responses to your customers mentioned in a certain invoice, from Invoices on the side menu, select one of your invoice tabs
Hover the mouse over the name of the customer so you get the option to email or SMS the customer in invoice details page.
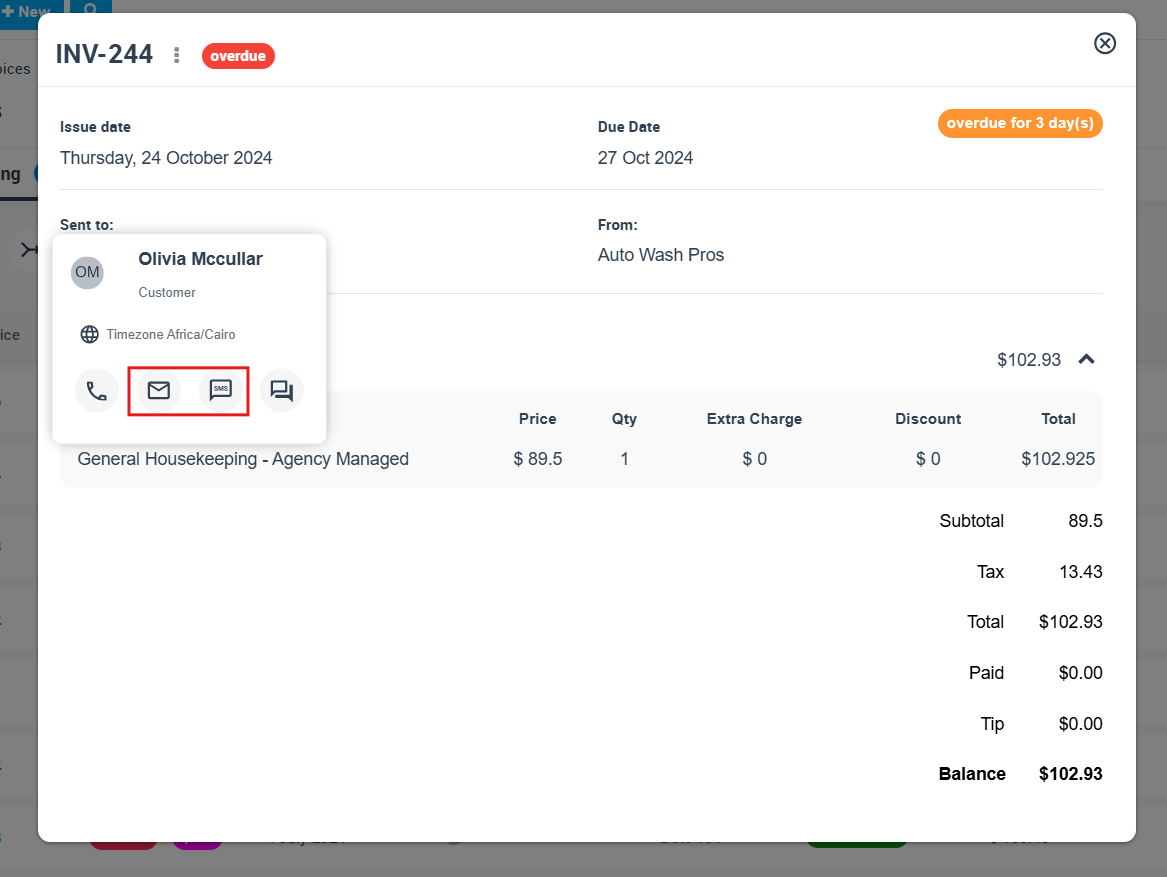
If you click on the ‘Email’ icon, the email form popup will appear to fill in the required elements and the canned response you want to send
And, if you click on the ‘SMS’ icon, the following form will appear:
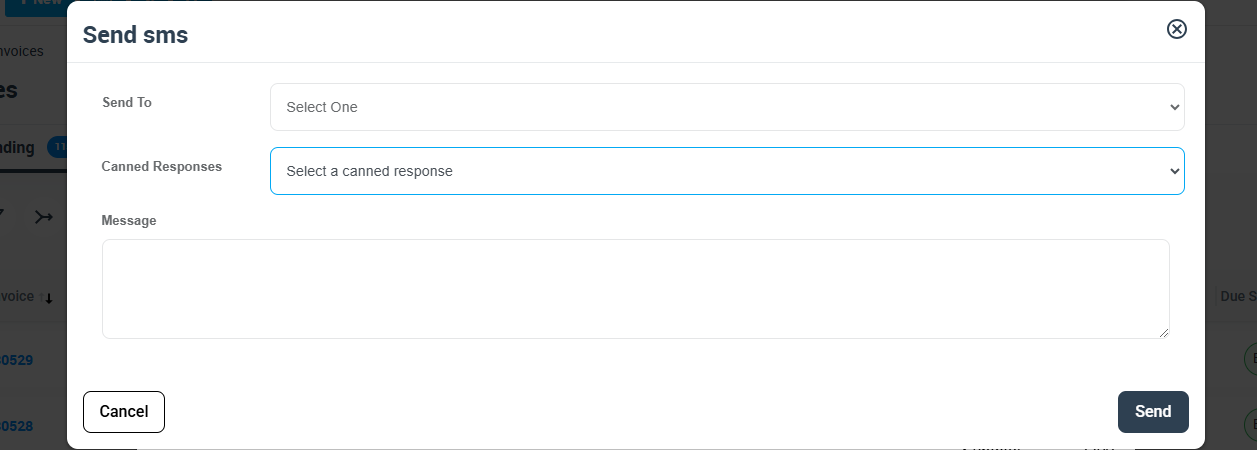
- Send To: you have the option to select whether the SMS will be sent to all the mobile devices or only the main mobile device.
- Canned responses: choose the canned response you want to send.
- Comment: this field will have the body of the SMS automatically inserted once the canned response is selected.
Canned responses in Customers:
Your canned responses can be sent to the customers from the Customers list on the side menu, select “All customers”.
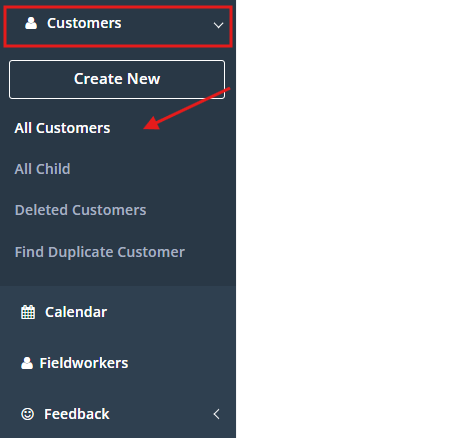
Hover the mouse over the name of the customer you want to send the canned response to, you will get the option to send an email/SMS

Clicking on the ‘Email’ icon will open the “Send Email” Form.
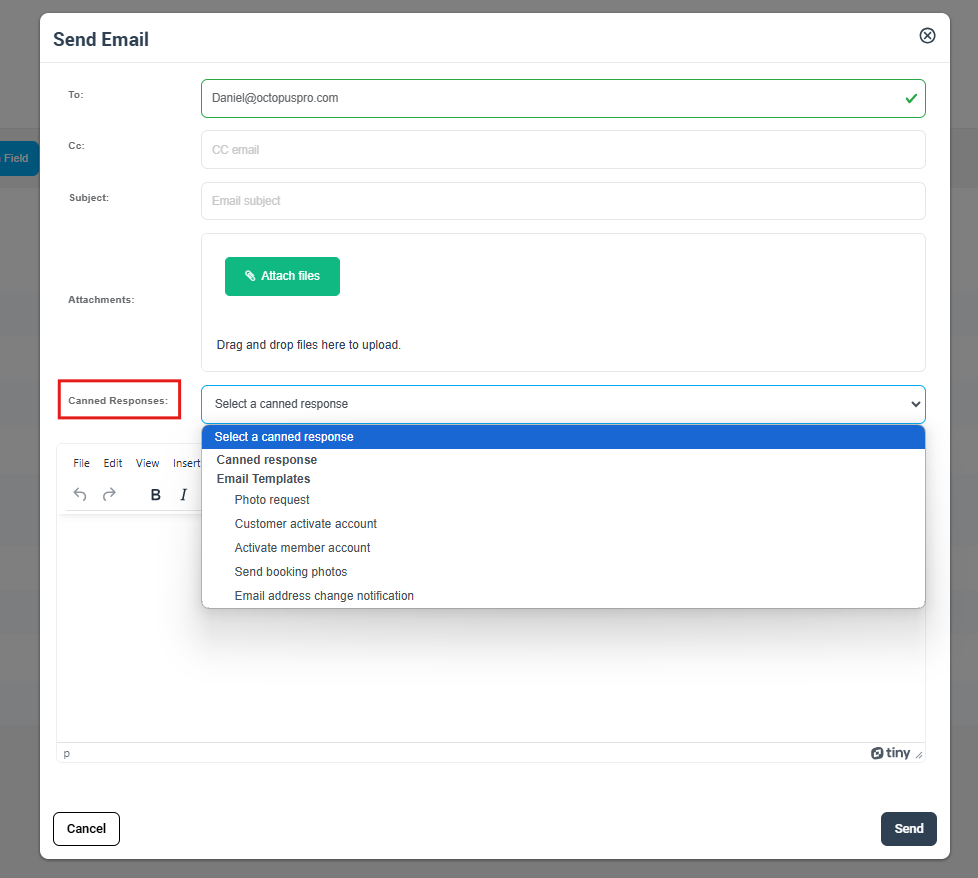
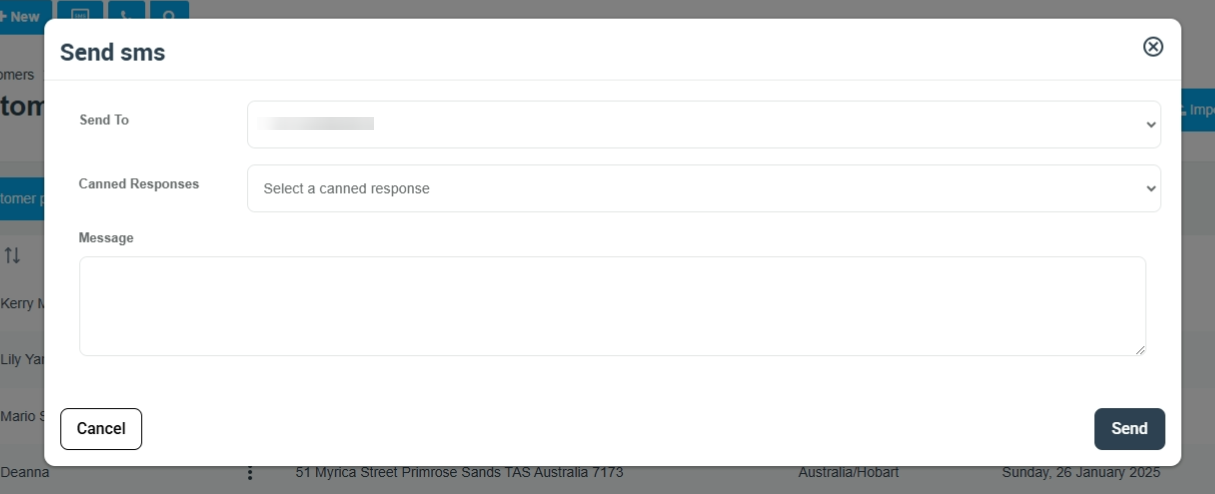
When you click on the ‘SMS’ icon, the “Send SMS” form appears:
- Send To: in this field, the primary phone number of the customer will be automatically added and you have the option to change that number and select “All” so if the customer’s profile has more than one number, the SMS will be sent to all the customers’ numbers. Under the field “Send To” you’ll have the “Edit” button enabling you to edit the info of the customer before sending the SMS.
- Canned responses: choose from the canned responses.
- Comment: this field will have the body of the canned response automatically once the canned response is selected.
Canned responses in the Fieldworkers’ category name:
From the fieldworkers’ category name on the side menu, you can also send your canned responses to all your fieldworkers or specific fieldworkers. To send a canned response via email to all your fieldworkers, click on the fieldworkers’ category name from the side on the top right of the page, click on ‘Email’ or ‘SMS’.

‘Send Email To All’ form will pop up, in the Bcc all your current fieldworkers’ emails will be added automatically, then fill in the rest of the form and press send.
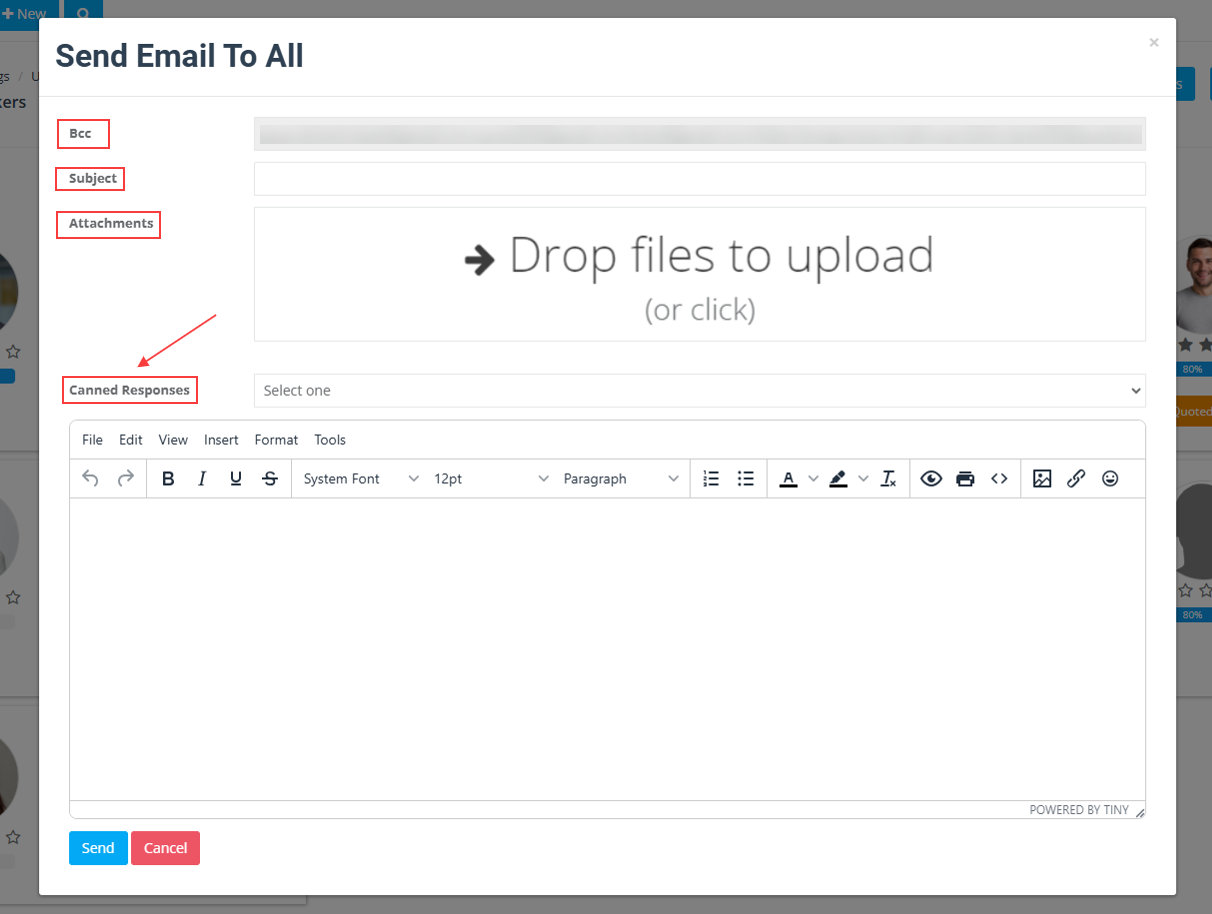
To send a canned response via SMS to your fieldworkers, click on the fieldworkers’ category name from the side menu, on the top right of the page, click on SMS, “Send SMS To” form will pop up:
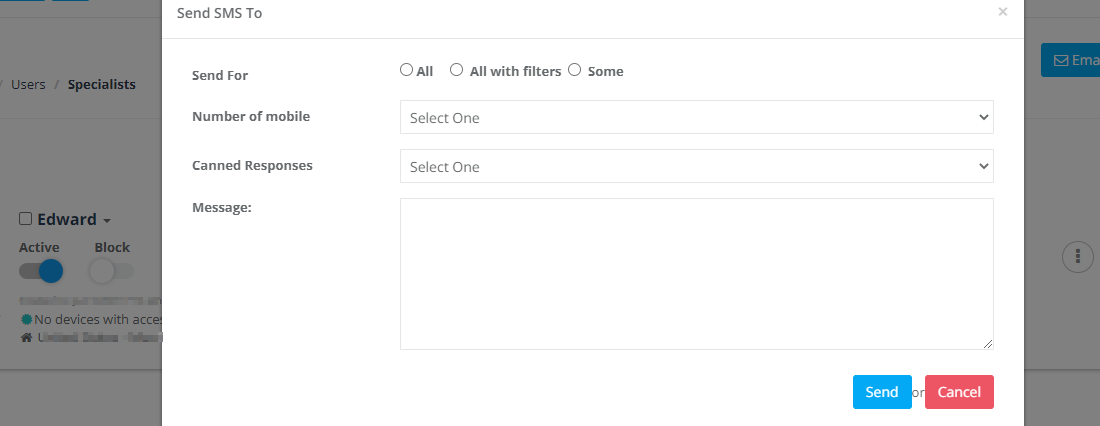
- Send For: You have the option to select “All” which means your SMS will be delivered to all your fieldworkers, “All with filters” will enable you to limit the fieldworkers who receive your SMS based on some filters:

- Activity status: So you can choose if the active, inactive, or both of the active and inactive fieldworkers will get the canned response.
- Service: To select the fieldworkers based on the service they provide.
- Town/City: That enables you to filter the fieldworkers based on the town/city they are residents in.

If you need to send the canned response to certain fieldworkers, you can select “Some”, so the “Select Fieldworkers” field will appear to enter the name of the fieldworkers you will send SMS to*

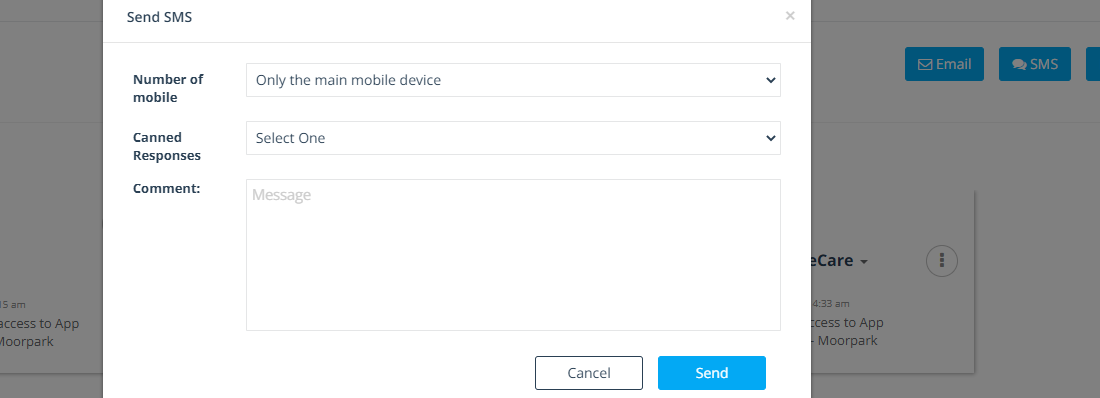
- Number of mobile: You have the option to select that the SMS will be sent to all the mobile devices or only the main mobile device of the fieldworkers.
- Canned responses: To choose the canned response you want to send.
- Message: This field will have the body of the canned response automatically once the canned response is selected.

From the same page, you can send your canned responses to each fieldworker via Email/SMS by hovering the mouse over the name of the fieldworker so you get the option to ‘email‘ or ‘SMS‘ the fieldworker.
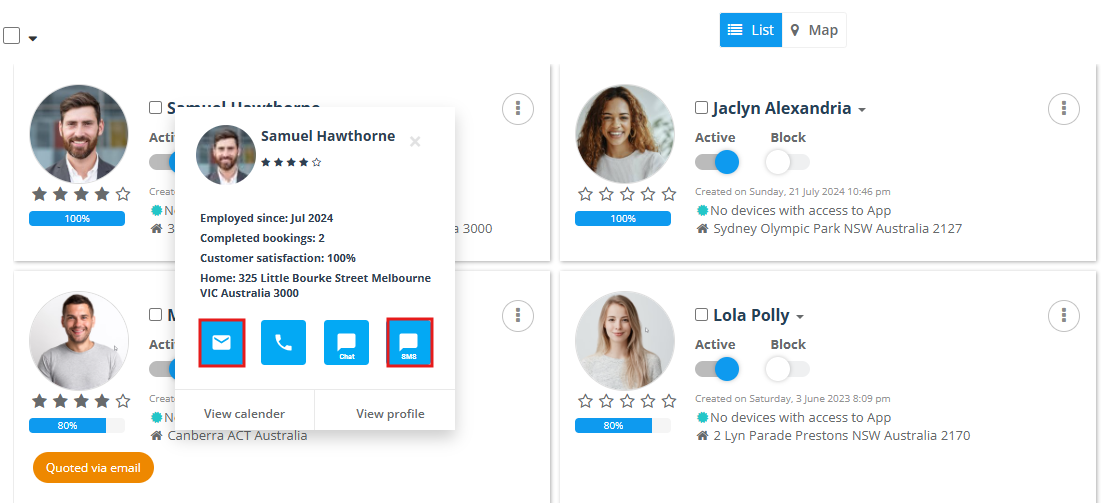
- If you click on the ‘Email’ icon, the email form appears.
- And if you click on the ‘SMS’ icon, the SMS form appears.
Canned responses in Working Hours:
The canned responses are added as well to the general fieldworker’s profile, by navigating to Settings> General settings > Working hours
Then, from the “Contact” button under the name of the profile, the dropdown menu includes “Send SMS” and “Send Email” options.

How to add your official email so your customers/ fieldworkers receive the canned responses from
To increase your brand professionalism, you can add your custom official email so that your customers and fieldworkers will receive your canned responses. Go to Settings > Communications > Custom Email Settings.
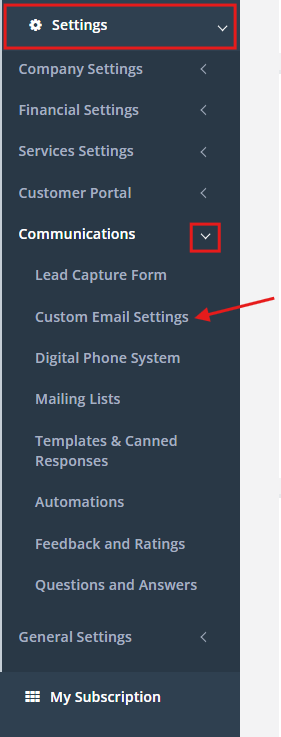
Scroll down to find the “Email address” field. Then, enter the desired email address and click on “Request and start verification”

Please note that you must have access to the email address you want to set up, as a verification email will be sent to that email address to verify*
So, if your official email is “sales@mycompany.com”, the sender email address of the canned responses will be this one.
If you want to send emails from multiple email addresses under your domain name, you can authenticate your entire domain name from the “Domain” field on the same previous page. For example, you can enter your domain name “yourcompany.com” and this allows you to send emails from any email address under that domain name.

What if you didn’t add a custom email address?
OctopusPro uses demo@octopuspro.com as a default email address to send emails from your account to your customers and fieldworkers until you connect a custom email address.
Activate your phone number through the digital phone system to send SMS
OctopusPro integrates with Twilio for SMS and voice communications between your office, fieldworkers, and customers. To connect your Twilio number with your OctopusPro account to be able to send your canned responses via SMS, go to Settings > Communications > Digital Phone System
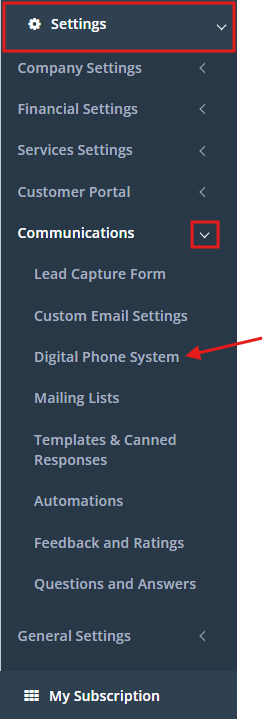
Click on the Connect my Twilio number to OctopusPro button.

You will be required to enter your Twilio Account SID, Auth Token, Twilio Phone Number, and Phone Number SID to connect.
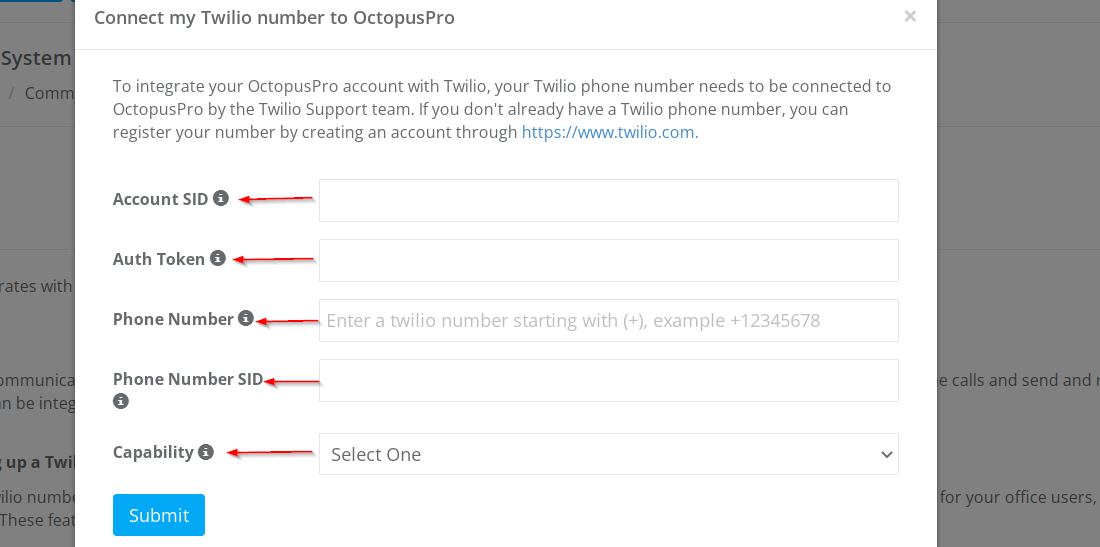
This will keep your Twilio number in your own Twilio account but will allow OctopusPro to integrate with it and use it through your OctopusPro account.
The best practices of the canned responses:
Here are some use cases that highlight how to benefit from the canned responses feature for different situations that need communication with your customers. You will find the best suggestions to get ideas from or even replicate when setting up your own canned responses.
Confirm your customers/fieldworkers inquiries, bookings and invoices
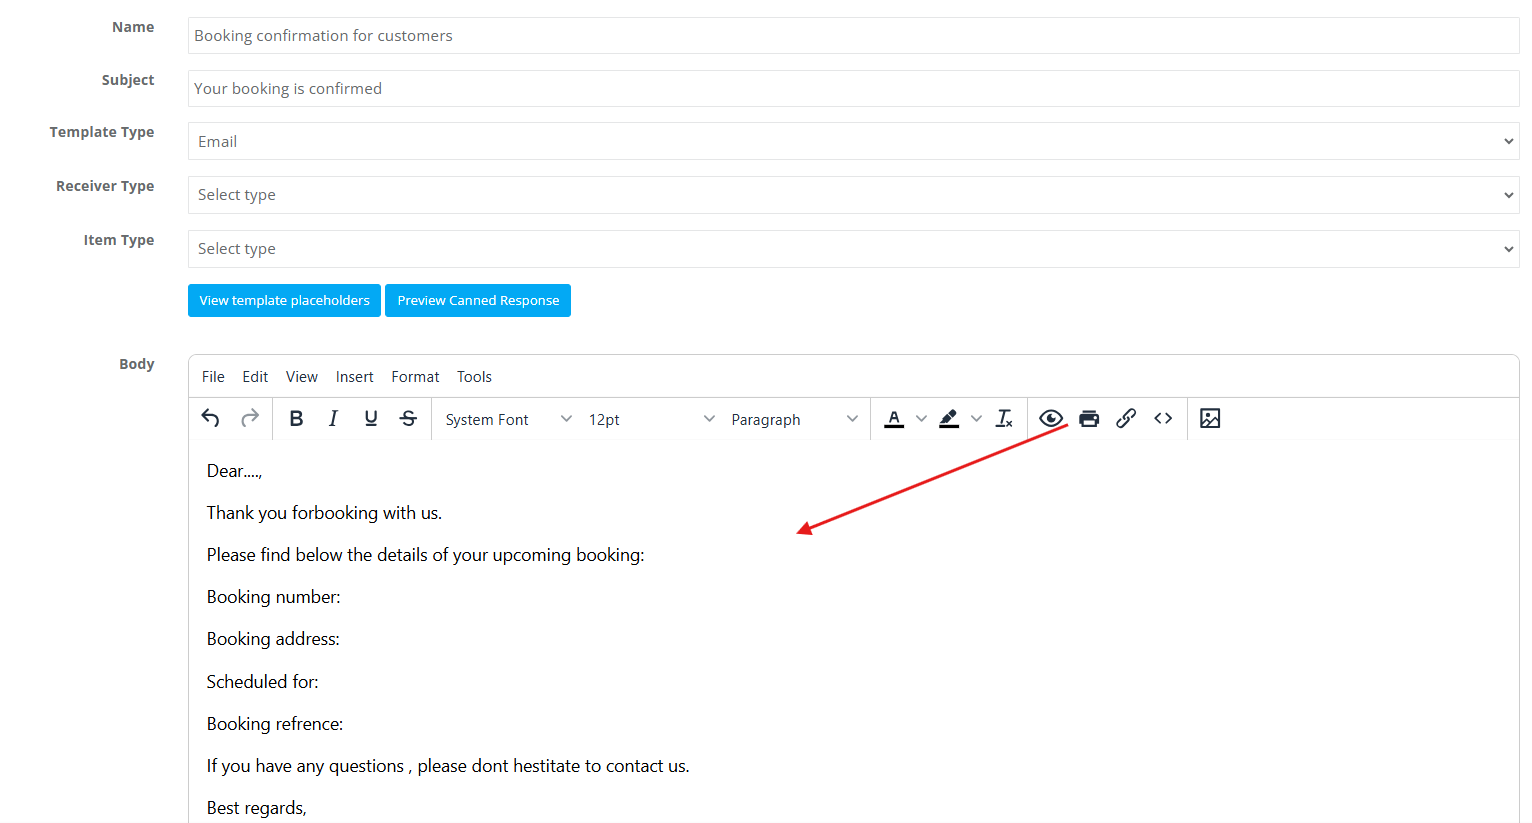
The canned responses can be a great way to let your customers know through an Email/SMS that their inquiries have been received and they are gonna be contacted at the earliest. For bookings, confirmations are needed so the customers who already booked your services can know the full details of their bookings. That also applies to the fieldworkers as they need to be notified about their assigned bookings and confirm. Once your customers pay the required invoices, they will expect to have a confirmation that you successfully received their payments. Here it’s an example of a canned response that you can send to your customers as an Email to confirm a booking.
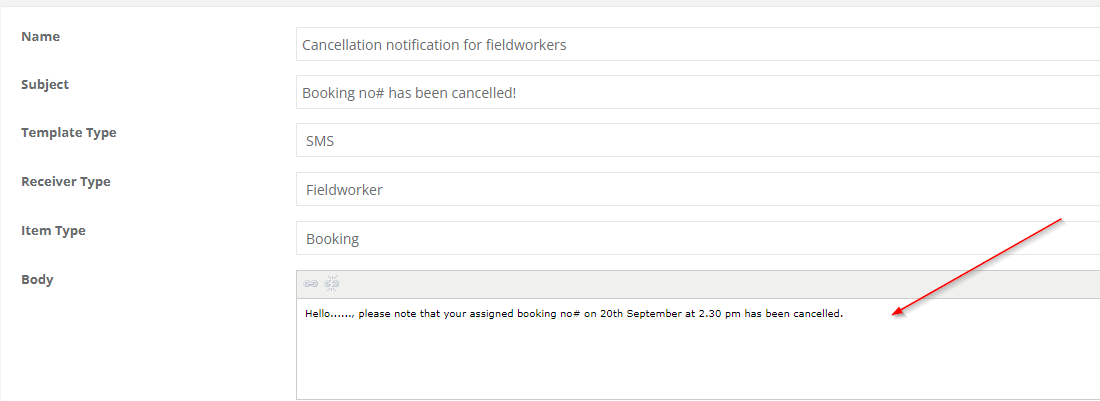
Cancellation notification
You can create a canned response to notify your customers/fieldworkers that a specific booking has been canceled. You can make it as SMS, an Email, or both templates. For example, if you will notify your fieldworker that the booking supposed to take place on 20th September has been canceled, SMS message can be as below
Provide voucher codes to your customers
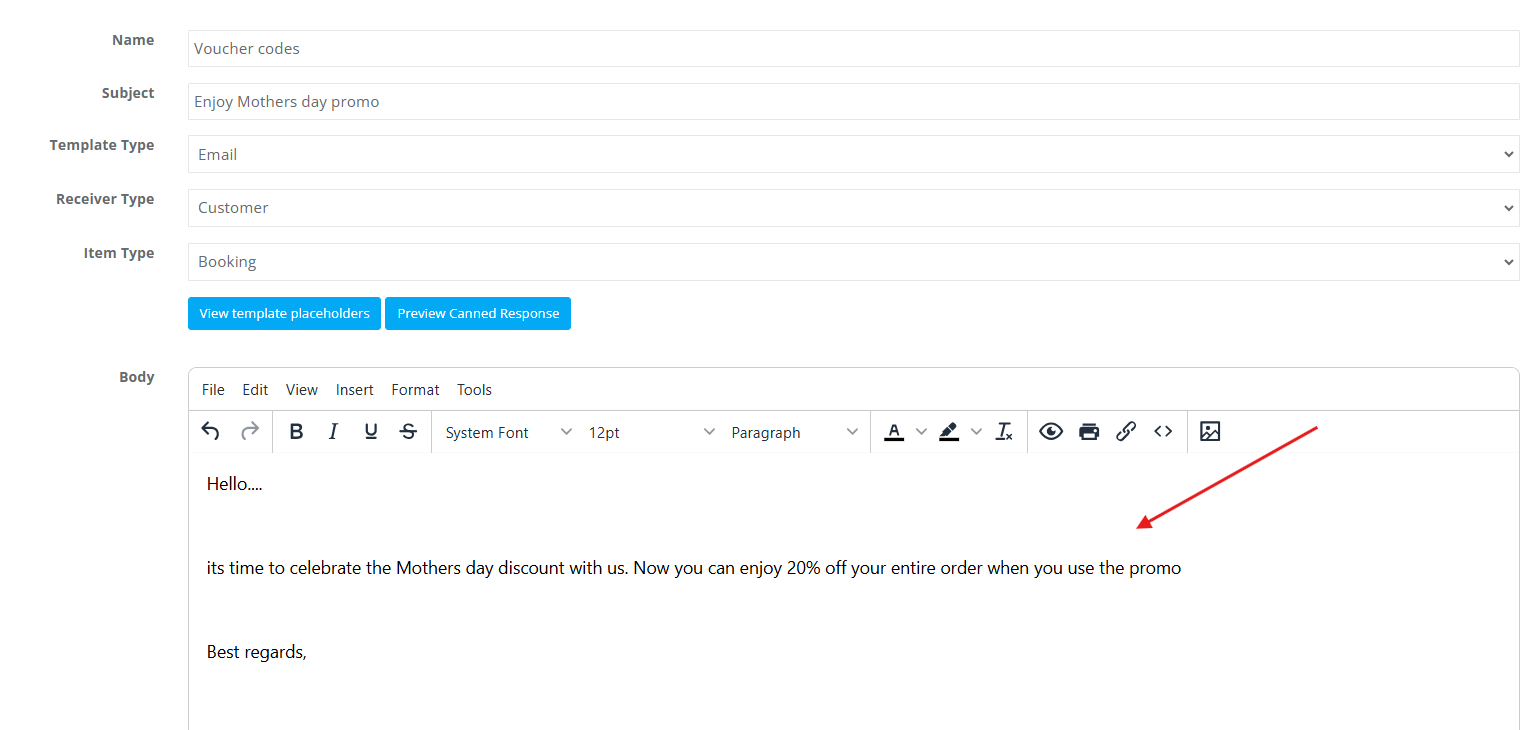
Prepare a catchy Email/SMS informing your customers that they have a discount through a promotional code when they book your services, to celebrate occasions or to just boost your sales. You can generate a canned response for that purpose and adjust it depending on the voucher you are going to send. For example, if you have a massage center and you want to provide your customers with a promo code on mother’s day, the canned response can be similar to the following email.
Inform your fieldworkers with updates
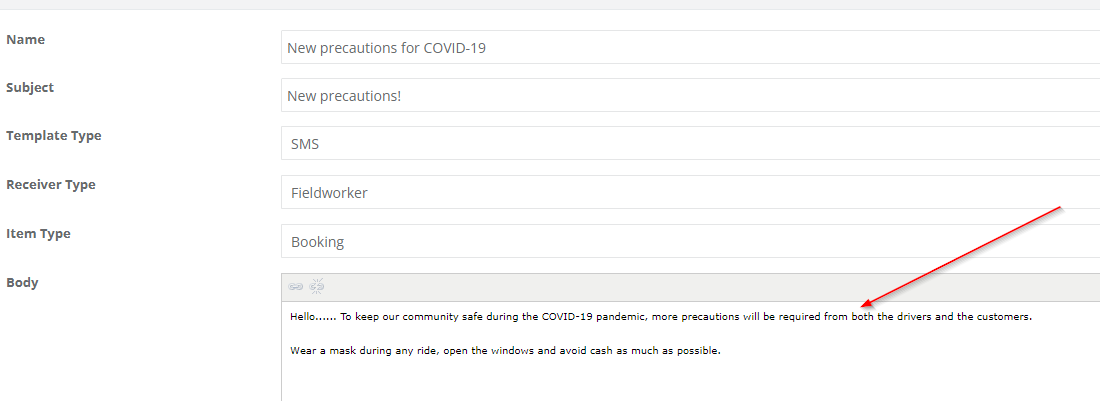
Your fieldworkers need to be aware of every change or addition you make to your business as long as it affects their duties. The canned responses can be a smart way to update your fieldworkers with any announcements regarding working hours, overtime, new policy, or other related work stuff. For example, a car-hailing company notifies the captains that there will be more precautions to keep the community safe. The SMS can be the following template:
For more information please visit Octopuspro user guide, and subscribe to our youtube channel.

