
Allow customers to upload photos when making a booking
OctopusPro allows you to give your customers the option to upload photos when creating a booking on the customer portal, giving your admin users/fieldworkers a better understanding of the service required. Customers are required to upload photos that highlight the areas of concern to help fieldworkers better understand the job requirements and be better prepared for the job of the day.
For example, if you run a tile and grout business, customers can add photos while booking for better understanding, such as the “Porcelain Tiles” customers need to inform the fieldworker that they need specific products to avoid staining.
Table of contents
- How do admin users enable the flag?
- How do customers upload photos when making bookings?
- How do customers upload multiple photos while creating bookings?
- How do customers add comments to the uploaded photos after the booking process?
- How do admin/fieldworkers users view or remove the uploaded photos by the customers?
- What happens if the flag is disabled?
How do admin users enable the flag?
To activate this flag, go to Settings > CustomerPortal > Flags & Permissions. You will be redirected to the customer portal flags and permissions settings page. In the booking flags sections, enable “allow customers to upload photos when making a booking flag.”

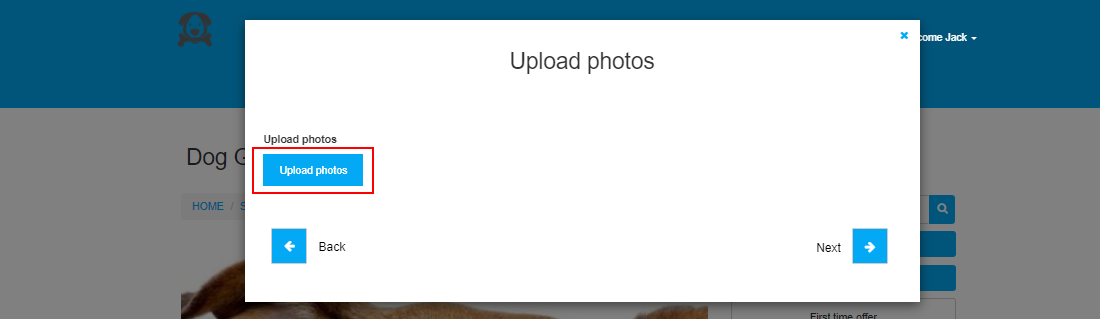
How do customers upload photos when making bookings?
When the flag is enabled, your customers will be able to upload photos when making new bookings. During the booking process, and after selecting the service, an “upload photos” button will be displayed so customers can add their selected photos, then continue with the checkout process.
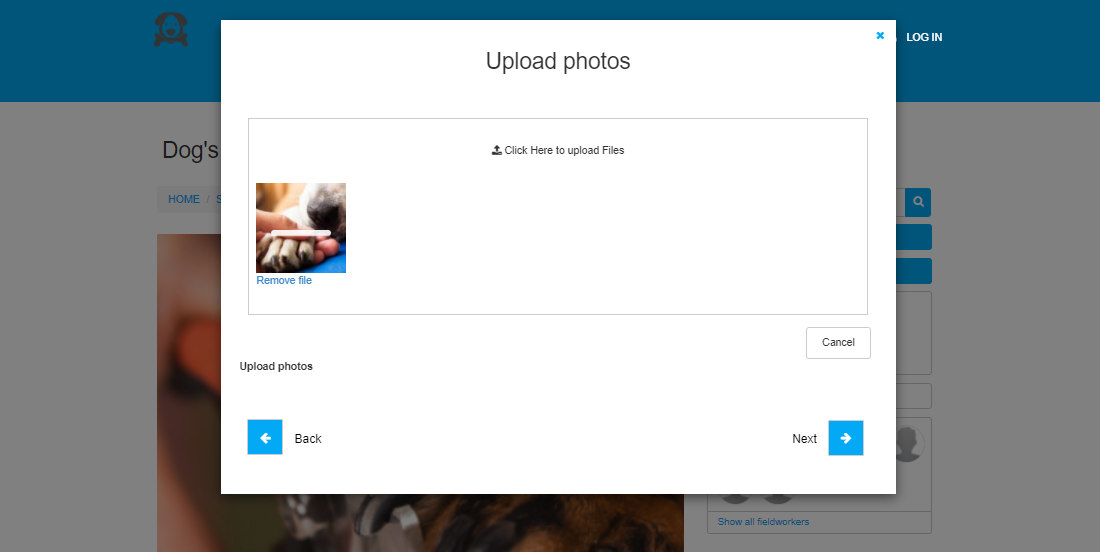
Customers can upload photos while they are creating their bookings by “clicking here to upload files”. Then they select the photo they want, and after that, they click next to proceed with the booking process.
How do customers upload multiple photos while creating bookings?
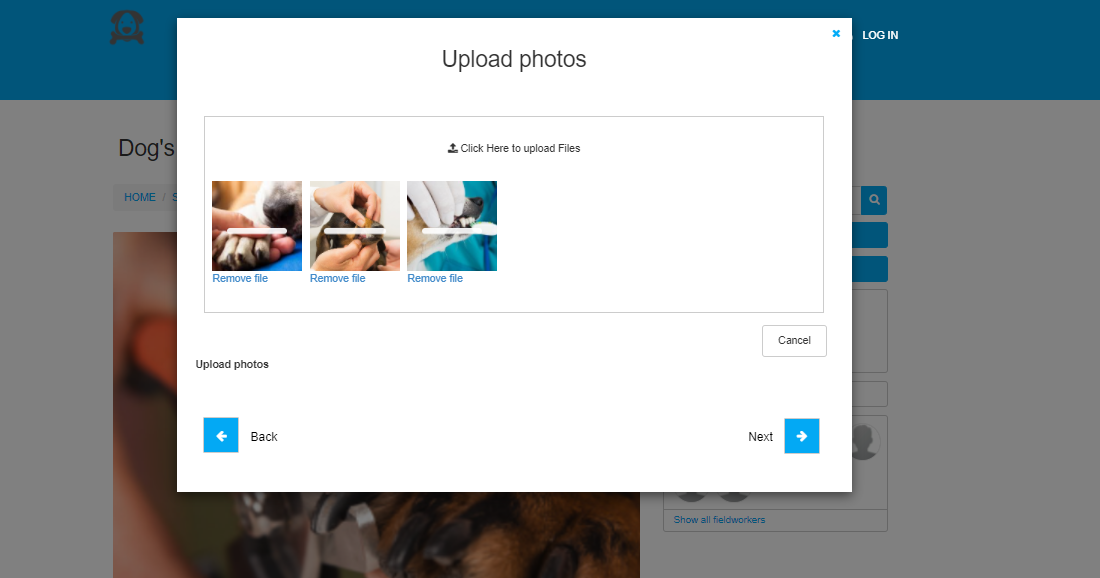
- Your customers can upload multiple photos when they book an appointment by “Clicking Here to upload files“ so they can add them one by one.
- Click on “Next” to proceed with the booking process.
Customers have the option to remove an uploaded photo that has been added by mistake during their booking process by clicking on the “Remove file.”
Customers can click on “Cancel“ if they want to cancel this step and start over.
After the booking process, the customers won’t have access to view the uploaded photos, so they can’t delete or remove them.
How do customers add comments to the uploaded photos after the booking process?
After the booking process, your customers can add photos to their booking by following the below steps:
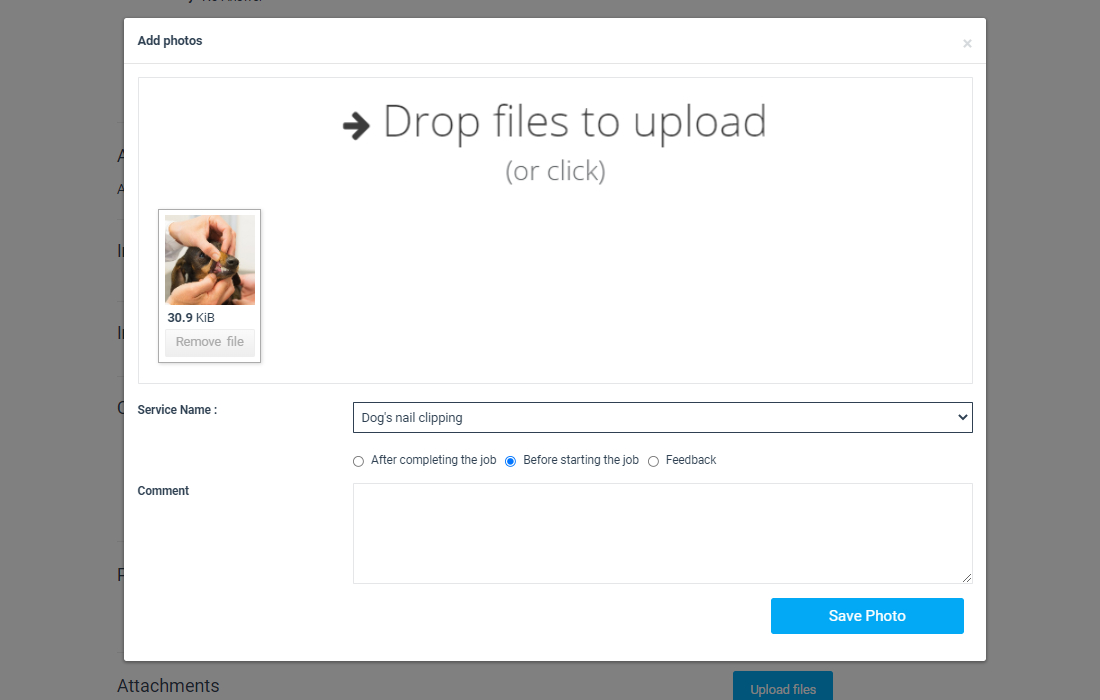
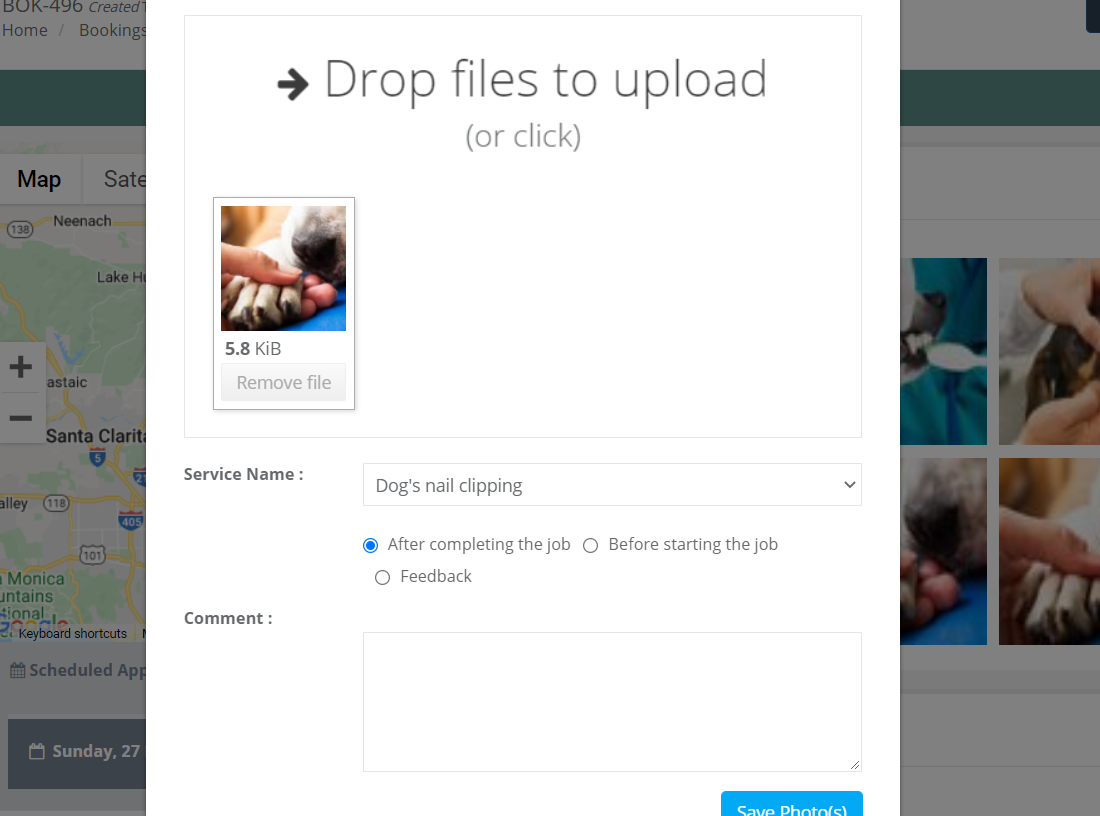
- On the booking view page, scroll down to the images and click on “Add photos.”

- A new window with the “Drop files to upload” option will be displayed.
- Select the photos you want to upload and tap the “Attach” button.
- Select a service name.
- Add your comments in the “Say something about this” area.
- Click on “Save Photo”.
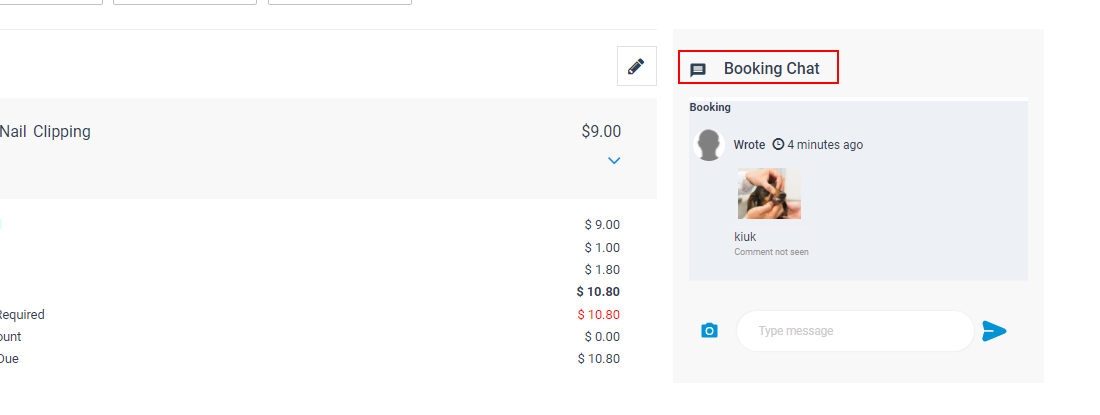
Also, it’s available for customers in the right corner with a “Booking Chat” option, where they can type a message, upload photos, and send it. Customers can later delete the uploaded photos from the booking chat by mouse-hoover on the photo and then clicking on the delete icon.
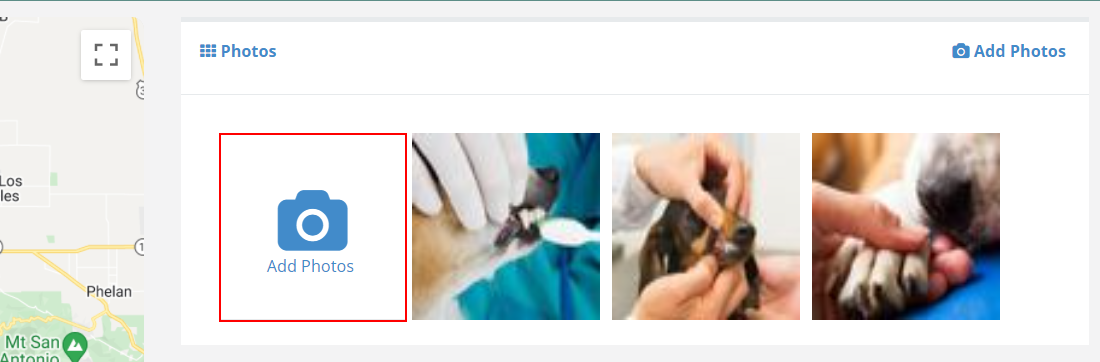
How do admin/fieldworker users view or remove the uploaded photos by the customers?
Admin users /fieldworkers can view the photos uploaded by customers by navigating to bookings, then open the targeted booking and the photos will be displayed in the Photo section.
Admin users can add more photos by clicking on Add photos as displayed below, and then follow the next steps:
- Click on “drop files” to upload a photo, then select the photos you want to add.
- Select the service name.
- Add the comment you want in this area, then click on “Save photos.” So that the customer can view the photo in the booking chat.
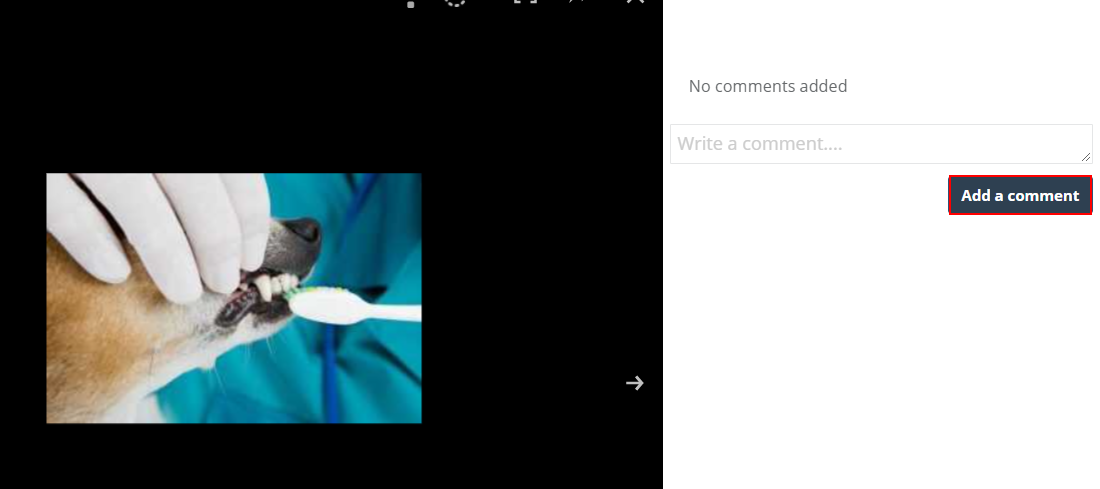
If the customer added a specific photo, the admin user can view it easily from the booking and also can add a comment if needed.
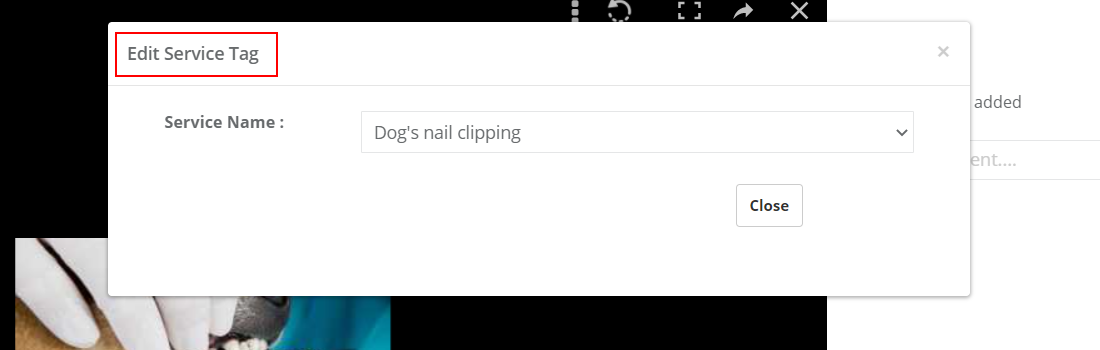
From the action button, the admin can edit the service tag, download an image, or delete the photo from the booking.
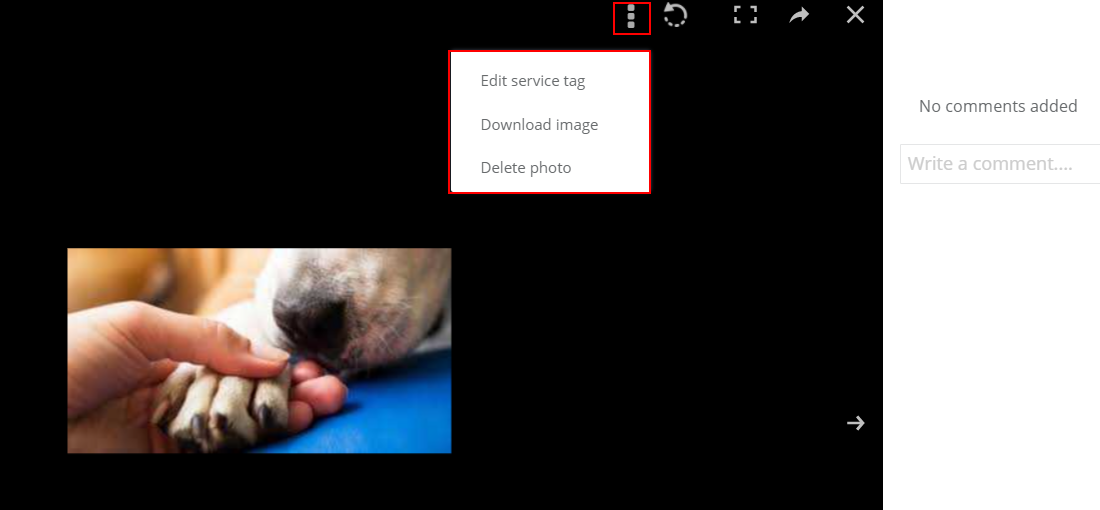
You can select the “edit service tag” button to edit the service to which the photo is uploaded, a pop-up window will appear and you can select your service name from the drop-down menu.
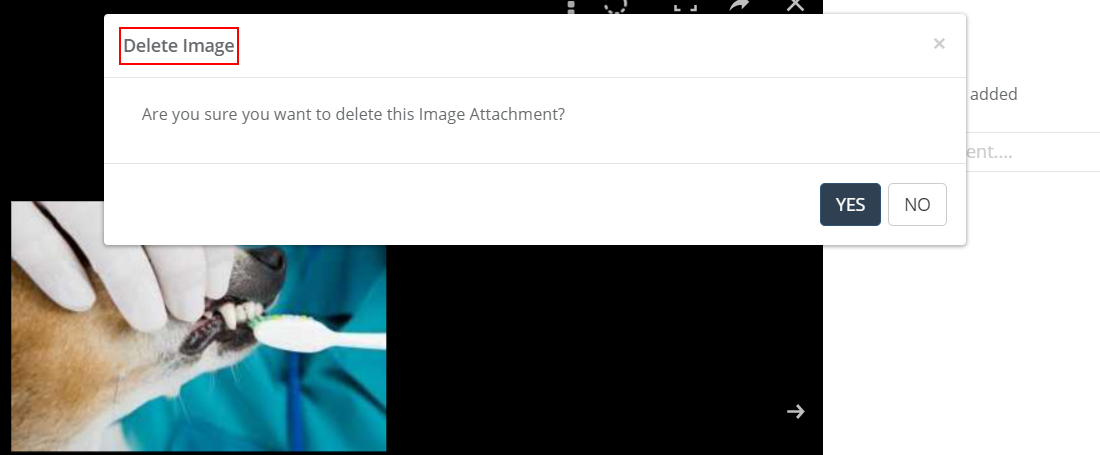
Admin users can easily delete an uploaded image if required by accessing the booking view page. They should then select the targeted photo, click the action button, and select “Delete photo.”
A popup window will appear, then you can select “Yes or No.“
What happens if the flag is disabled?
When admin users disable the flag, the customers won’t have the option to upload photos to their bookings, and the “upload photos” button will disappear.
Customers won’t be able to add photos while creating the booking or after the booking has been completed.

For more information please visit Octopuspro user guide, and subscribe to our youtube channel.