
Enhancing Communication with Inquiry Discussion Management
OctopusPro’s Inquiry Discussion Management tool is designed to revolutionize communication between your administrative users and customers. This centralized discussion hub stimulates engaging dialogues related to each service inquiry, elevating customer engagement and enhancing service efficiency.
This feature empowers you to:
- Foster Customer Engagement: Engage in interactive discussions with your customers to better understand their needs and provide excellent service.
- Collaborate Seamlessly: Admin users can collectively contribute to a discussion, leading to more comprehensive and informed responses.
- Improve Efficiency: Instant notifications about inquiry discussions ensure quick responses, improving service quality and delivery times.
Let’s delve deeper into the Inquiry Discussion Management’s functionalities, starting with the intuitive notification process that prompts you into action.
Notifications and Alerts
Staying updated about discussions is essential for timely responses and maintaining service efficiency. OctopusPro’s comprehensive notification system keeps you informed.
Admin Notifications
Whenever there is an activity in an inquiry discussion, admin users are promptly notified. These alerts, received as push notifications through the OctopusPro app or as web notifications when using a browser, prompt admins to review the discussion and respond if necessary.

Customizing Your Notification Preferences
- Different users have unique notification needs, and OctopusPro addresses this with a highly customizable notification preference system. Here’s how you can set up your preferences:
- Click on “All Discussions” from the top-right corner, it will redirect you to the all discussion page. You will now see a variety of notification preferences.

- To go to “Discussion settings”, select “Settings” from the top right of the all discussion page.
Setting Up Your Notification Preferences
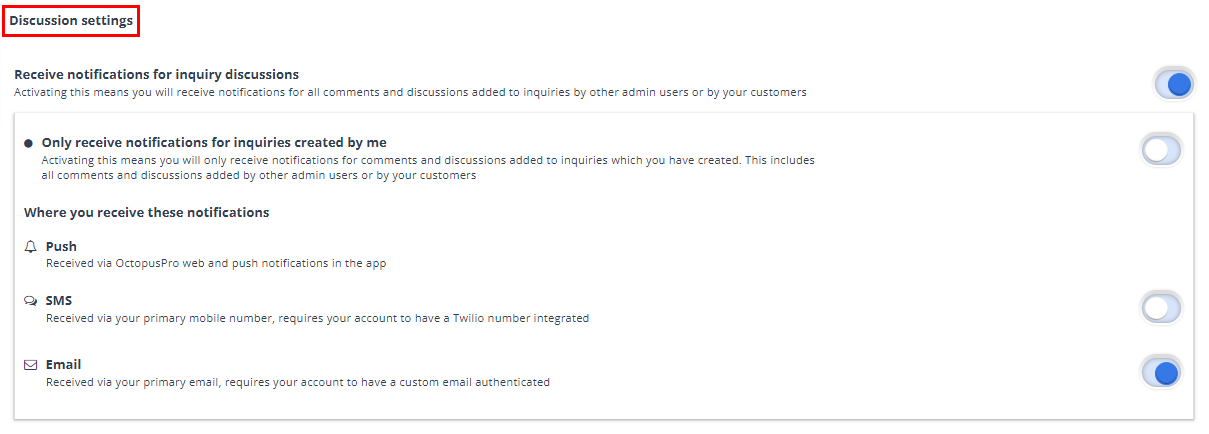
You can choose from two settings to customize the type of notifications you want to receive:
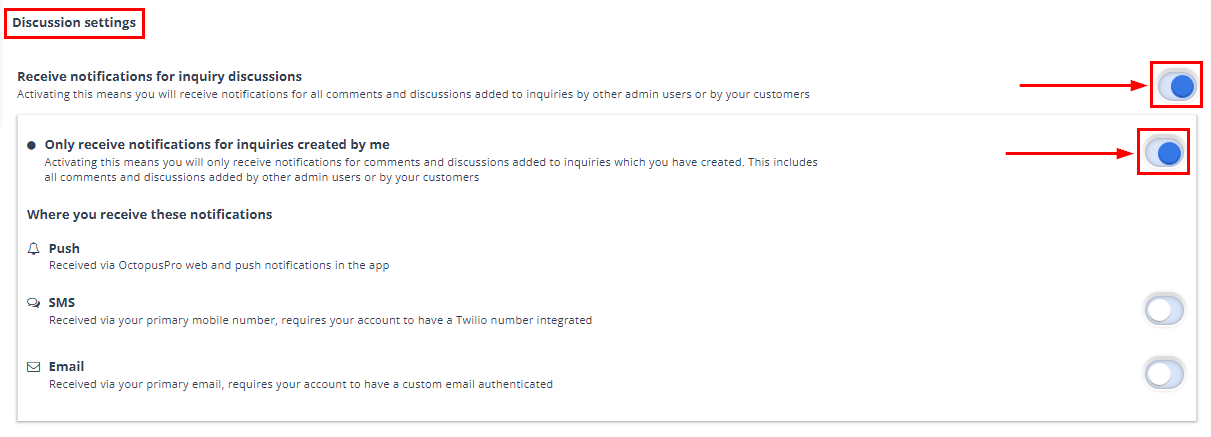
- Receive Notifications for All Inquiry Discussions: Enable this to be notified of all comments and discussions added to inquiries, irrespective of the creator. This ensures you’re updated with every interaction on your platform.
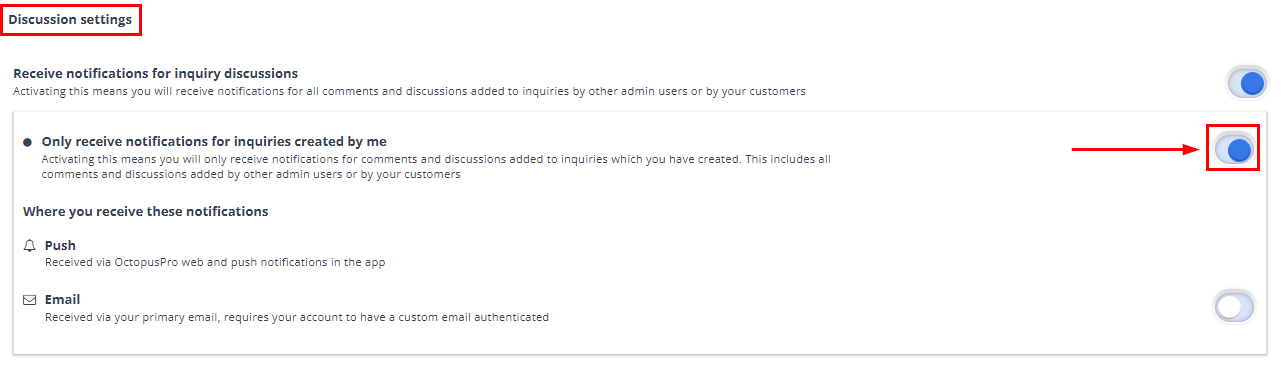
- Only Receive Notifications for Inquiries Created by Me: Enable this to focus on comments and discussions added to the inquiries you’ve created personally. This setting is beneficial if you wish to concentrate on inquiries directly under your management.
Choosing Your Notification Channels
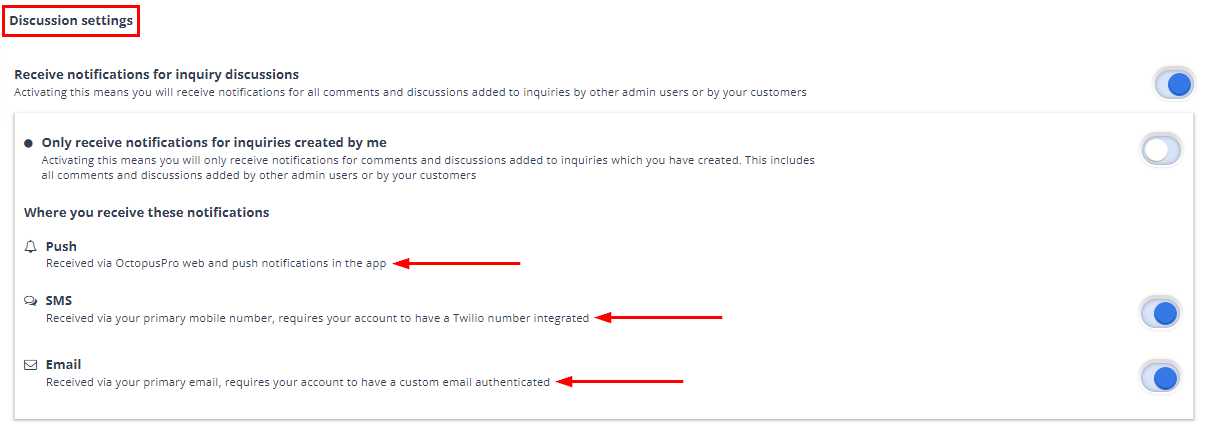
You can select where you want to receive these notifications. Choose the most convenient channels for you:
- Push: These notifications will be delivered via OctopusPro’s web platform and as push notifications on the OctopusPro app. Stay in the loop even when you’re on the move.
- SMS: Receive updates straight to your primary mobile number. Please note that this requires your account to have a Twilio number integrated.
- Email: Get email alerts delivered to your primary email address. This requires your account to have a custom email authenticated.
Customizing Notifications for Discussions You’ve Started
You can further filter notifications based on your discussion engagement. One such additional setting is:
- Only Receive Notifications for Replies to Discussions Posted by Me: Enable this to only receive notifications for replies to discussions you’ve initiated or comments on these discussions. This setting is beneficial if you want to focus on the discussions you’ve personally instigated.
- With such flexible settings, OctopusPro ensures that your notification preferences align with your unique requirements.
Customer Notifications
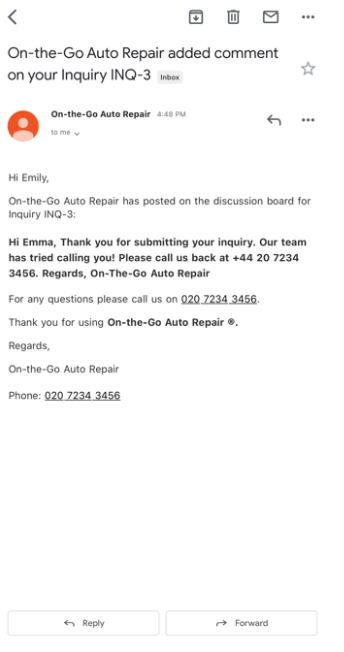
- When an admin user adds a new comment, they can choose to send an SMS or email notification to the customer.
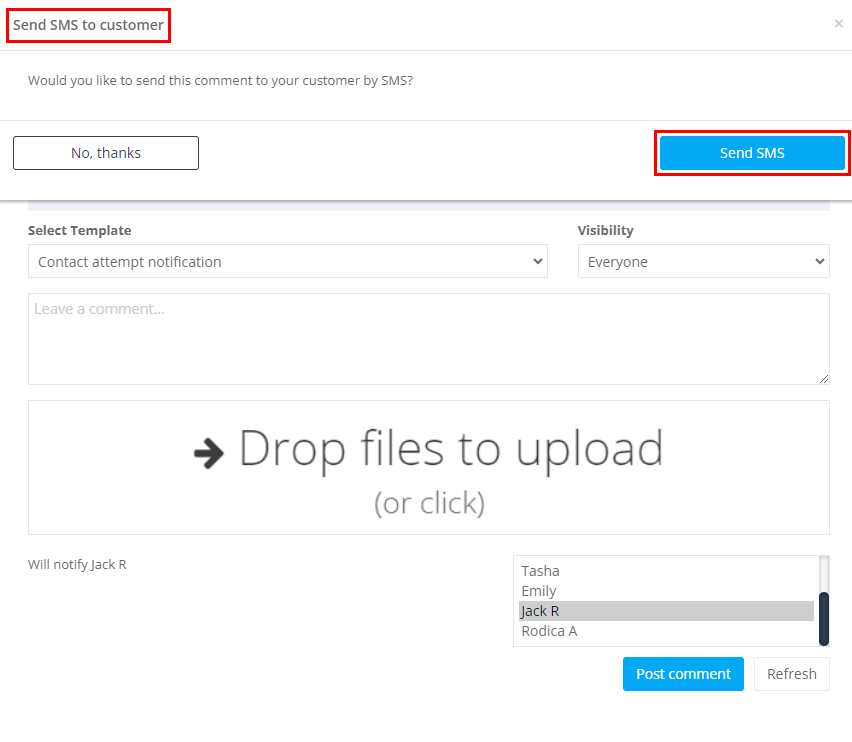
- This ensures customers stay informed about discussions related to their inquiries, promoting prompt responses and quick resolution.
Managing Inquiry Discussions: A Step-by-Step Guide
Viewing and Responding to an Inquiry Discussion
To check out the discussions:
- Navigate to “Inquiries > All Inquiries”
- Select the required inquiry. Use the “Search Bar” for direct access if you have the INQ number.
- Click on the “Actions” and choose “View Inquiry” from the drop-down menu.
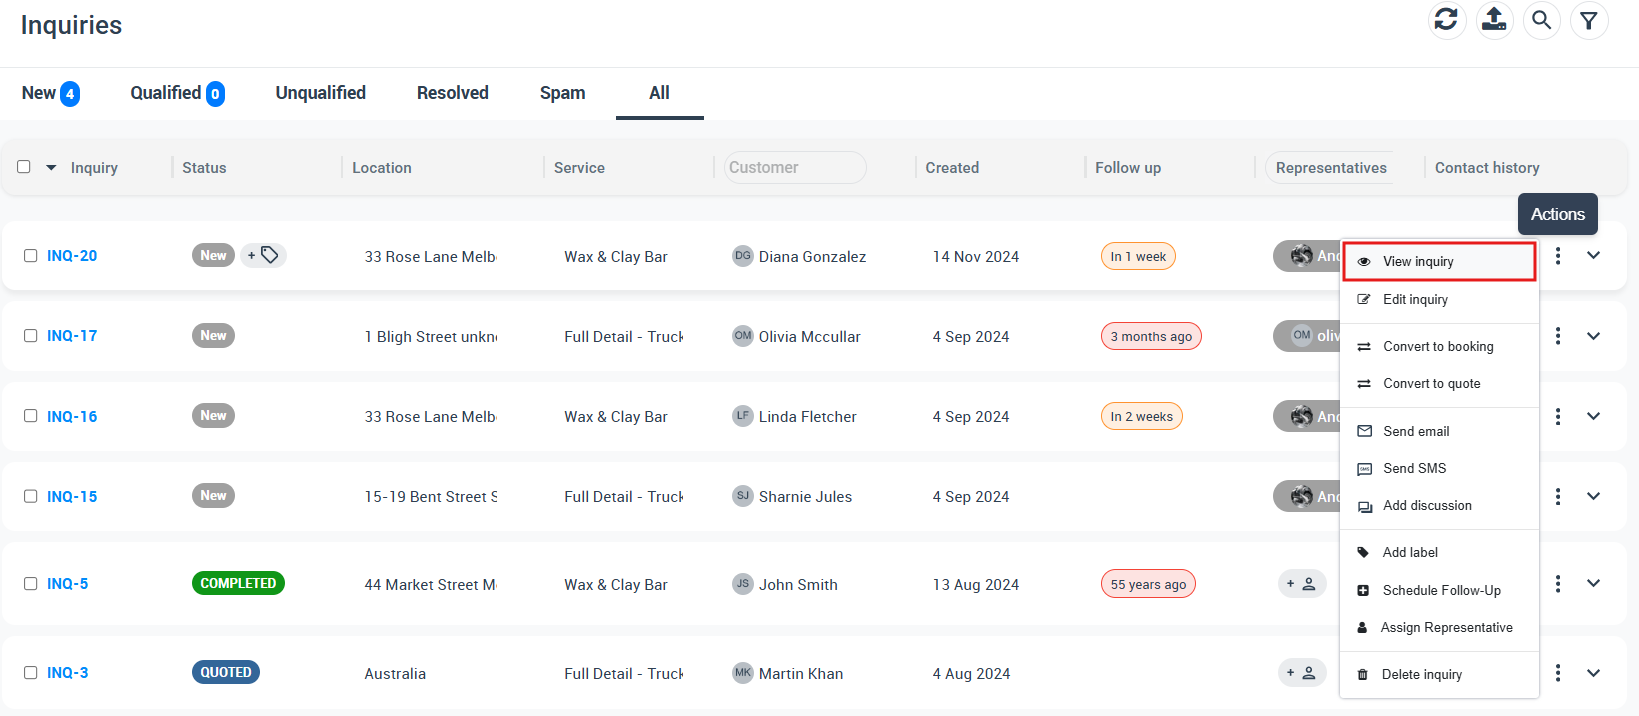
- You’ll be redirected to the inquiry details page. Scroll down to the “Discussion” section to see all the comments.
- To add a new comment, click on “Add Comment”, and a pop-up window will appear for you to input your response.
Adding Comments to an Inquiry Discussion
There are two ways to add a comment to an inquiry discussion:
Method 1: Via the Inquiry Overview Page
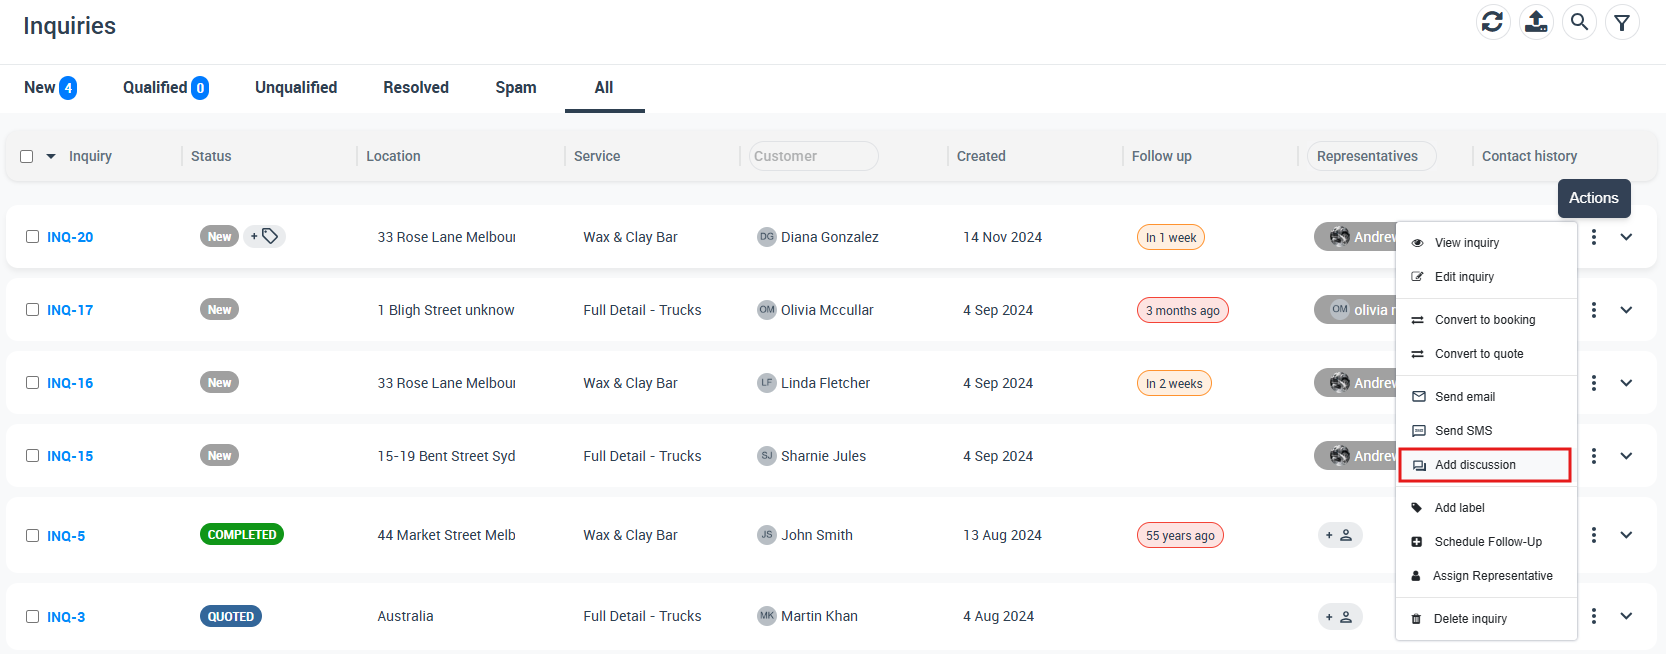
1- Go to “Inquiries > All Inquiries”
2- Select the inquiry you want to comment on, click on the “Actions” button, and select “Add Discussion” from the drop-down menu.
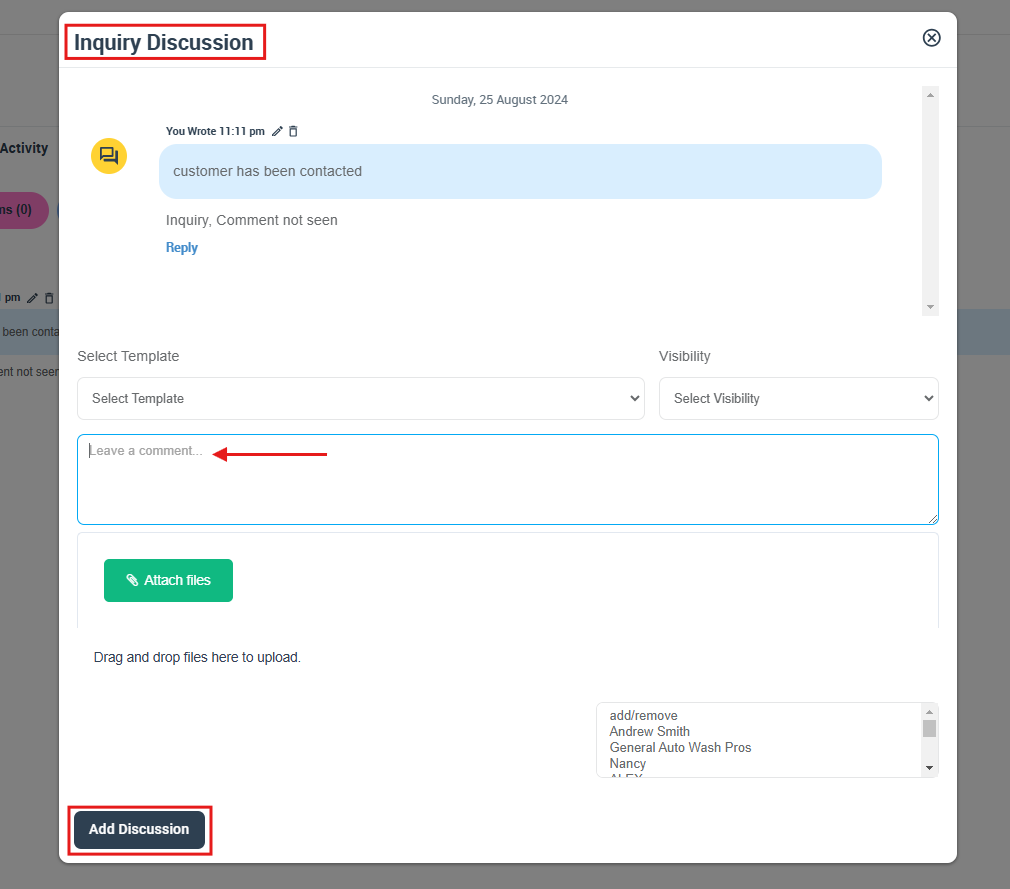
 3- A pop-up window will appear where you can select the visibility setting and type your comment.
4- If you need to attach relevant files, use the “Attach files” section.
5- Click “Add Discussion” to finalize.
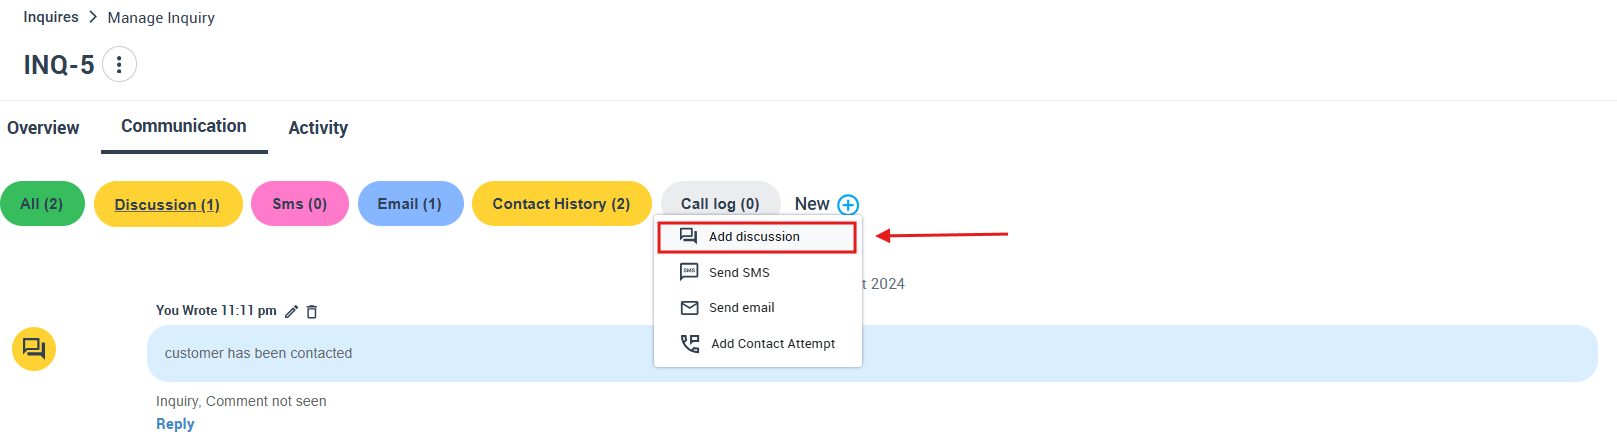
Method 2: Through the Inquiry Details Page
1- Navigate to Inquiries > All Inquiries.
2- Choose the inquiry you wish to comment on, click on the “Actions” button, and select “View Inquiry” from the drop-down menu.
3- Scroll to the “Discussion” section from communication tab and click on “Add discussion”.
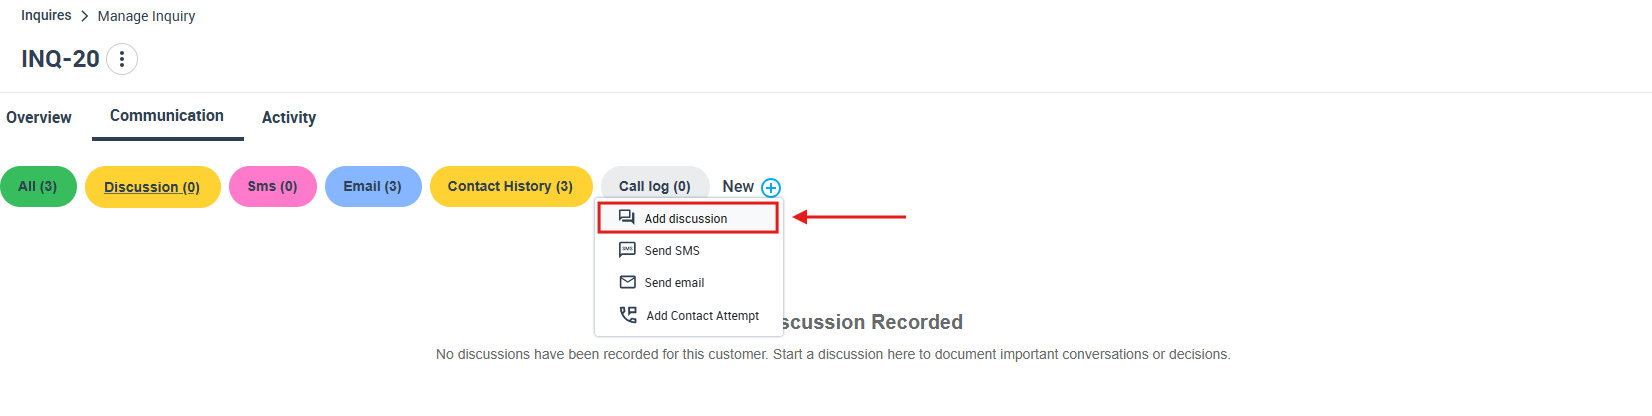
4- A pop-up window will appear where you can select the visibility setting, enter your comment, and attach any files if necessary.
5- Click “Add Discussion” to add your comment to the discussion.
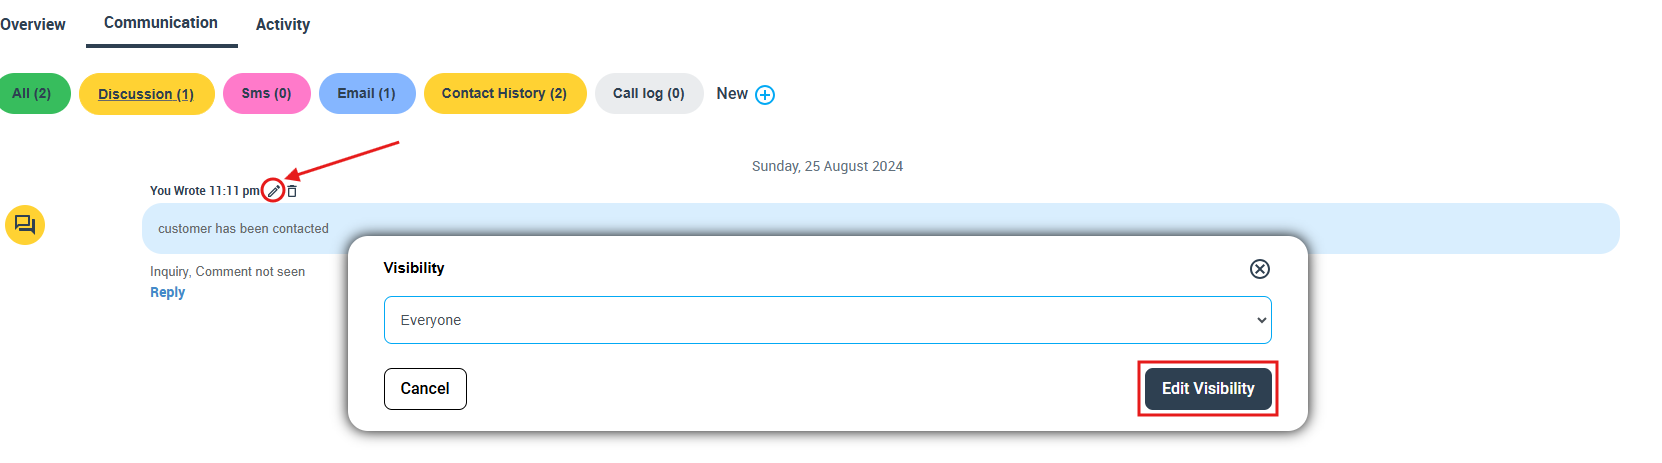
Editing Visibility of a Comment
- Choose the comment whose visibility you wish to change in the discussion.
- Click the “Edit visibility” icon to access the visibility settings.
- Select your desired visibility setting from the drop-down menu and click “Edit Visibility”.
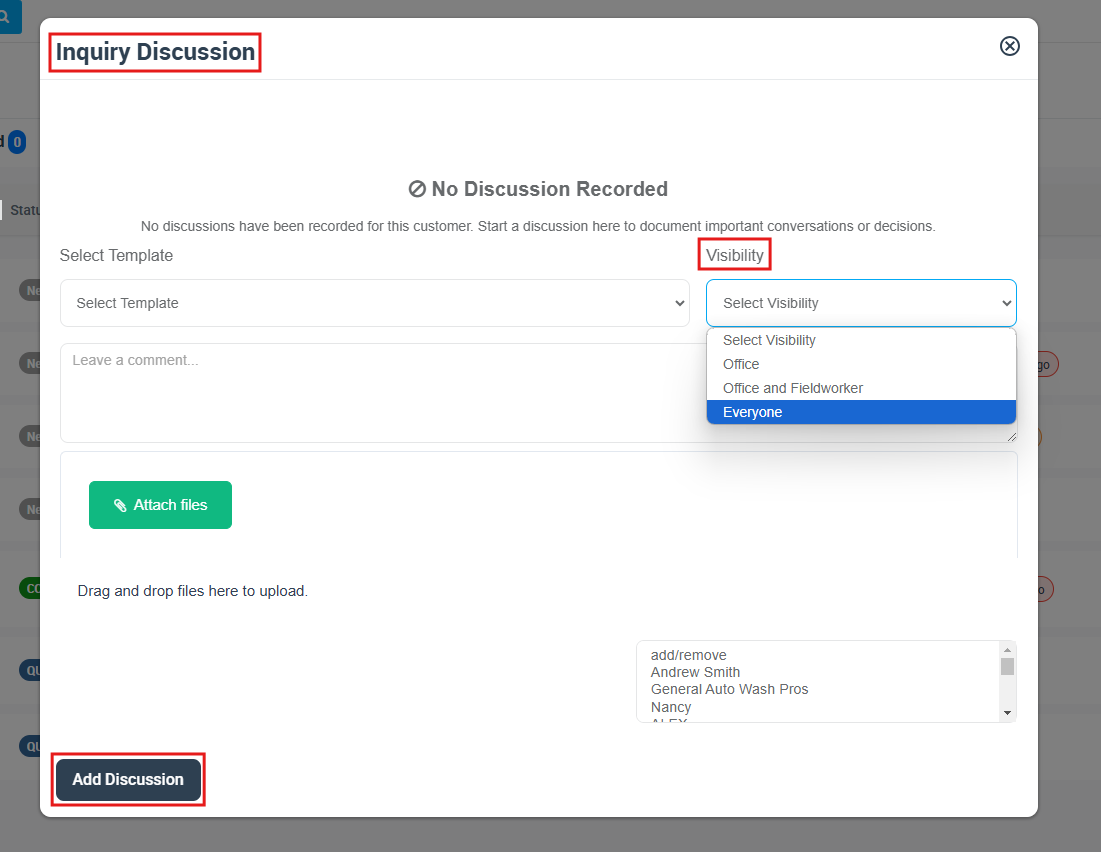
Visibility Settings for New Comments
Each time a new comment is added or a response is given to a comment, the user can set who can see this comment. There are typically three visibility options:
- “Office and fieldworkers”: This setting makes your comment visible to all admin users.
- “Office”: This setting restricts the visibility of your comment to office staff only.
- “Everyone”: Choose this if you want the customer to see your comment. They will receive an SMS or email notification about your comment.
By properly adjusting the visibility settings, you ensure the right parties see your discussions and maintain high-quality internal and external communication.
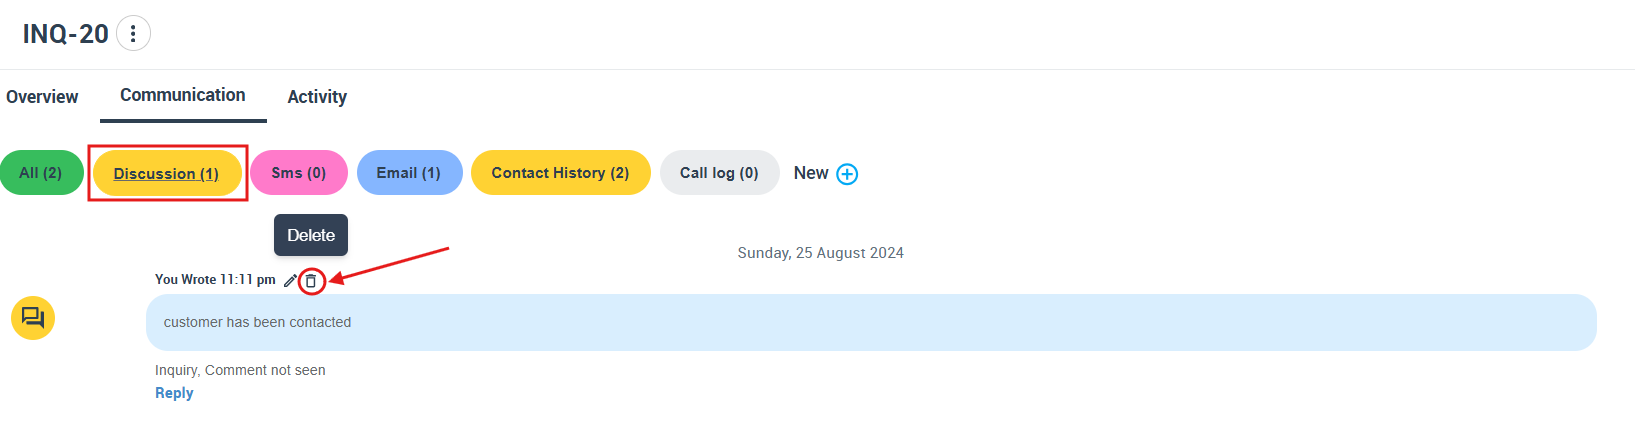
Deleting a Comment
- Choose the comment you want to remove from the discussion.
- Hover over the comment, and click on the “Delete” icon.
- Confirm your action in the pop-up window that appears.
- Inquiry Discussion Management in OctopusPro centralizes communication, ensures that all stakeholders are updated, and allows for collective input into discussions. This collaborative approach enhances efficiency and effectiveness in service delivery. Remember, only admin users can access this feature as it’s related to inquiry management, which isn’t accessible to fieldworkers.
Frequently Asked Questions
- Do customers receive notifications for every new comment? No, customers receive notifications based on the visibility setting chosen when the comment is posted. If “Everyone including the customer” is selected, they will receive an SMS or email notification.
- Can I change the visibility of a comment after it’s been posted? Yes, you can adjust the visibility of a comment after it has been posted by using the “Edit” icon next to the comment.
- What happens if I delete a comment? If you delete a comment, it will be permanently removed from the discussion and cannot be recovered. It’s suggested to use this option cautiously.
- Can fieldworkers participate in inquiry discussions? No, only admin users can access and participate in inquiry discussions. Fieldworkers cannot access this feature as it is related to inquiry management.
- Can I attach files to my comments? Yes, when adding a comment or replying to one, you have the option to attach relevant files. This could include images, documents, or other supporting material.
To stay updated, please subscribe to our YouTube channel.