
Add “Book Online” & Gift Voucher Buttons to Your Website

OctopusPro lets you accept online bookings (and sell gift vouchers) directly from your website. Depending on how you want customers to enter the flow, you can:
- Book Online (Customer Portal link): send customers to your full portal to browse services and book.
- Book Now (service-specific button/link): send customers straight into the booking flow for a specific service (best for service pages and ads).
- Gift Voucher / Gift Card button: send customers directly to the voucher purchase flow (if enabled).
- Booking link (no HTML): share a plain URL in email/SMS/social/QR codes where embed code isn’t supported.
On this page
- What this is for
- How it works (key terms)
- Before you start (requirements)
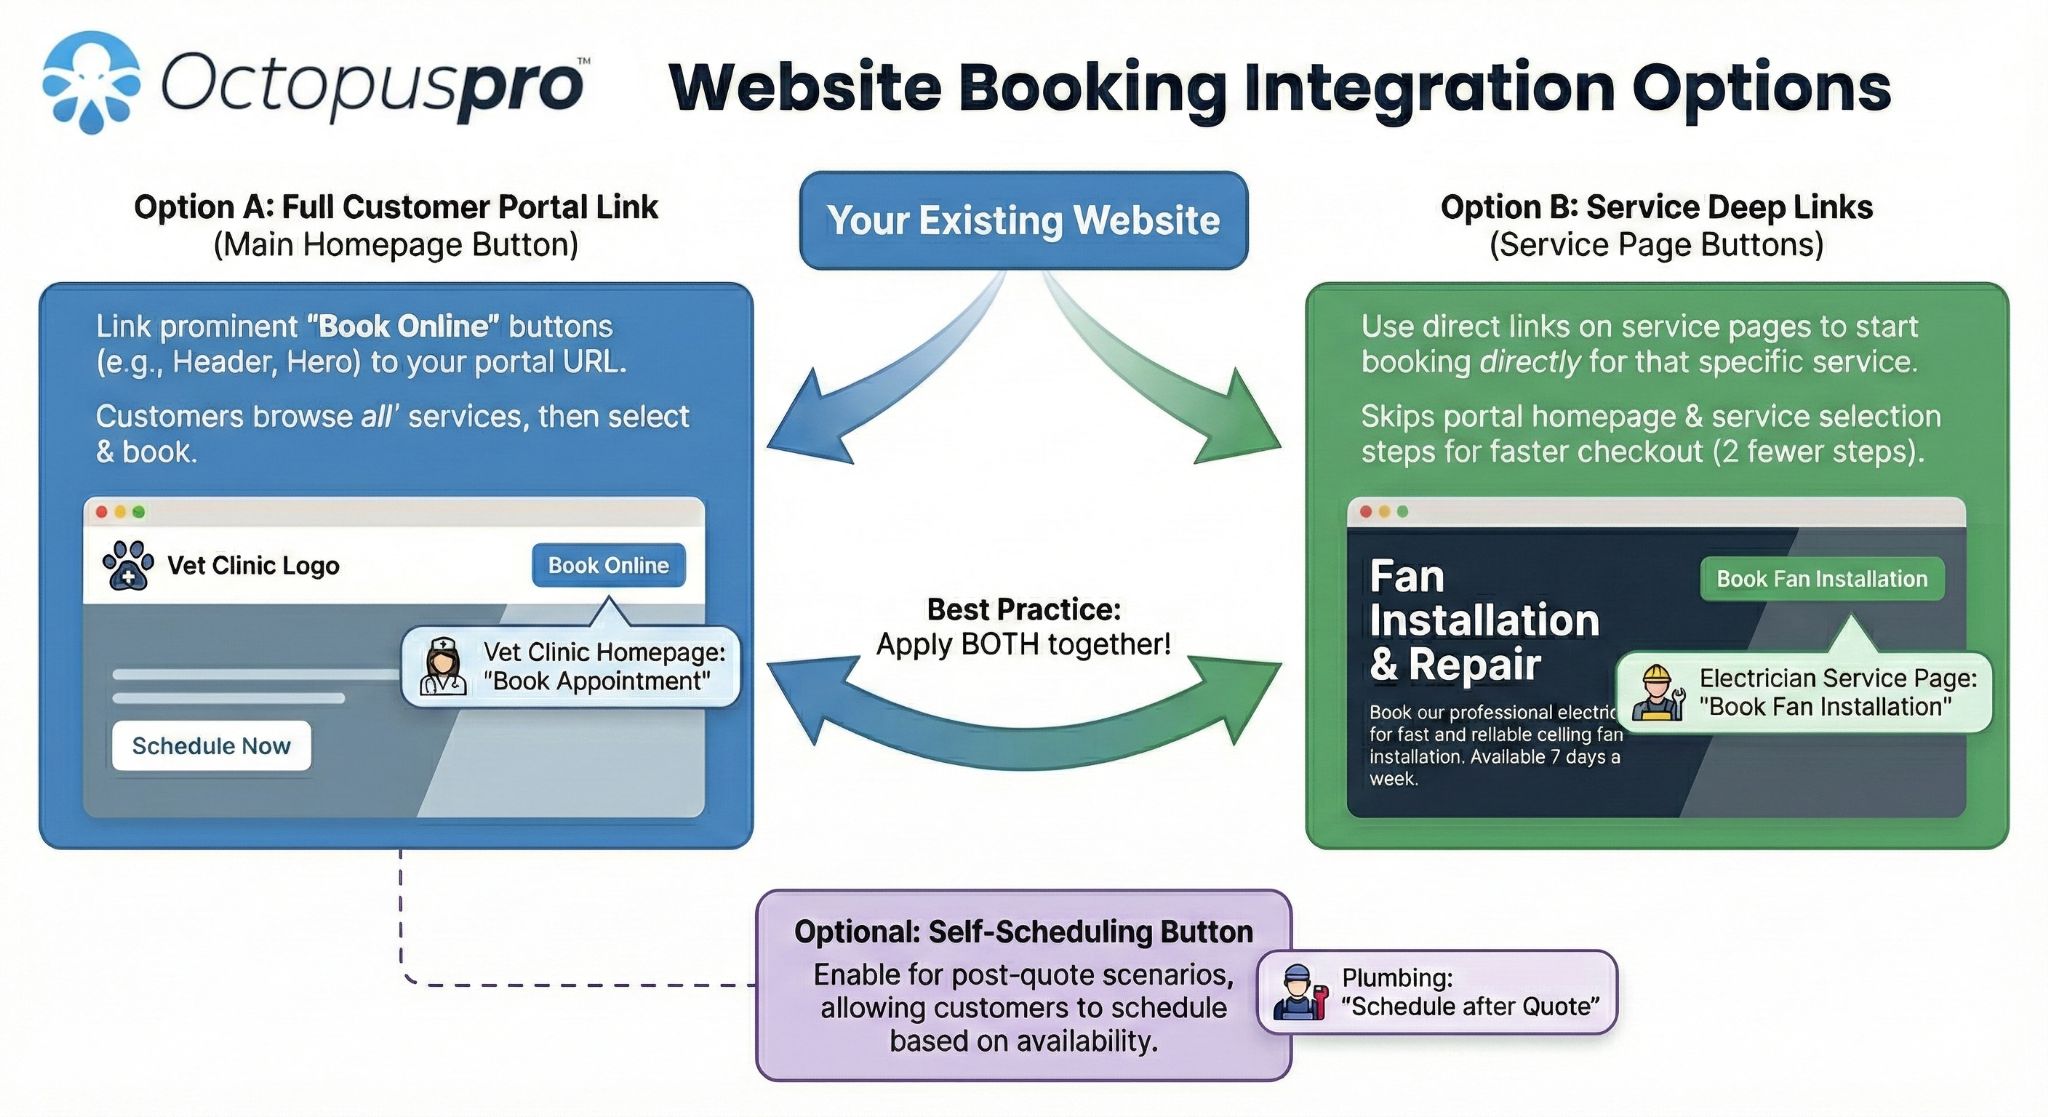
- Option A: Link customers to your full Customer Portal (recommended)
- Option B: Use direct links/buttons (deep links) for services or gift vouchers
- Where to find service “Book Now” buttons & booking links
- 1) Embed a “Book Now” button (HTML)
- 2) Embed a “Gift Voucher / Gift Card” button (HTML)
- 3) Share a booking link (no HTML)
- Add the button to your website (WordPress / Elementor / Wix / etc.)
- Customise button styling (match your brand)
- Use your own domain (white-label portal URL)
- Optional: Enable a “Schedule an appointment” (self-scheduling) button
- Best placements & conversion tips
- Troubleshooting & FAQs
- Quick launch checklist
- Related guides
What this is for
Use these buttons and links to convert website visitors into bookings and voucher sales—without phone calls, emails, or back-and-forth scheduling. This setup works for:
- Mobile services (on-site visits)
- Fixed-site operations (in-store / clinic / studio)
- Virtual/online services (remote sessions)

How it works (key terms)
- Customer Portal URL: your main booking link where customers can browse services and book.
- Book Now button: an embeddable button that opens your booking flow (either a specific service, or All Services if available in your account).
- Gift Voucher / Gift Card button: an embeddable button that sends customers directly to the voucher purchase flow (if enabled).
- Booking link: a plain URL (no HTML) you can share in email, SMS, social, or QR codes.
- Embed code: the HTML snippet you paste into your website/page builder to display the button.
- Deep link: a direct link that starts booking for a specific service (best for ads and service pages).
Important note about email: Most email clients block embedded HTML/CSS. For email campaigns, use the booking link and link it from your email button/image instead.
Before you start (requirements)
Before adding buttons/links to your website, confirm these settings so the booking/voucher flow works end-to-end:
- Online bookings / Customer Portal are enabled (so customers can book online).
- Your Customer Portal settings are configured (portal URL, branding, languages, etc.).
- Portal flags/permissions are set correctly (what customers can see and do in the portal).
- Payment methods are enabled if you want customers to pay online (recommended for vouchers and deposits).
- If selling vouchers: Gift vouchers are enabled and configured.
Service-level requirement (very important): If Allow Online Bookings is turned off for a service, you may not see the Embed “Book Now” Button option (or the embed code/link) for that service.
Option A: Link customers to your full Customer Portal
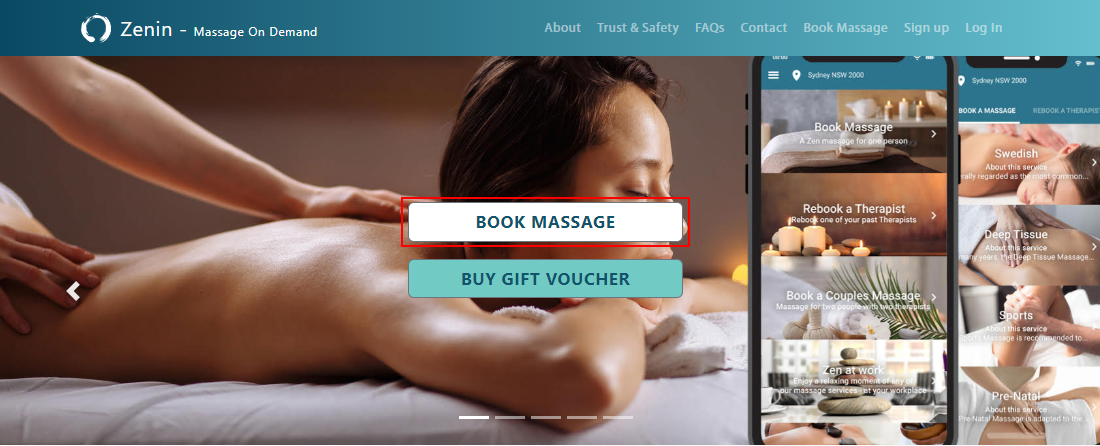
Add a prominent Book Online button (or menu link) that takes customers to your Customer Portal URL. From there, customers can browse your services and complete a booking.
Where to get your Customer Portal URL: Go to Settings > Customer Portal > General Settings, then locate the Portal URL section. For full steps (including white-labelling), see: Customer Portal URL.

Best placements (highest conversion):
- Website header navigation (always visible)
- Homepage hero section (top of the page)
- Service pages (next to pricing/benefits)
- Contact page and website footer
- Google Business Profile website link and/or appointment link
- Email signature and SMS templates
Tip: Use consistent CTA text such as Book Online, Schedule Now, or Get Started across your website and marketing channels.
Option B: Use direct links/buttons (deep links) for services or gift vouchers
If you want customers to start checkout immediately (without browsing your full portal), use direct links or embedded buttons:
- Service-specific booking links/buttons: open the portal straight into the booking flow for a specific service.
- Gift voucher purchase buttons/links: open the voucher purchase flow (if enabled).
Best use cases:
- Individual service landing pages (best UX)
- Google Ads and campaign landing pages (fewer steps = higher conversion)
- Email marketing promotions tied to one service (use the booking link, not embed code)
- A dedicated Gift Vouchers page (e.g., “Buy a Gift Voucher”)
Where to find service “Book Now” buttons & booking links
You can generate a Book Now button and a direct booking link for each service. Depending on your account layout, you may see:
- An Embed icon column next to each service, and/or
- An Embed a “Book Now” Button option inside the service actions menu, and/or
- An embed section inside the service settings (only visible after enabling Allow Online Bookings).
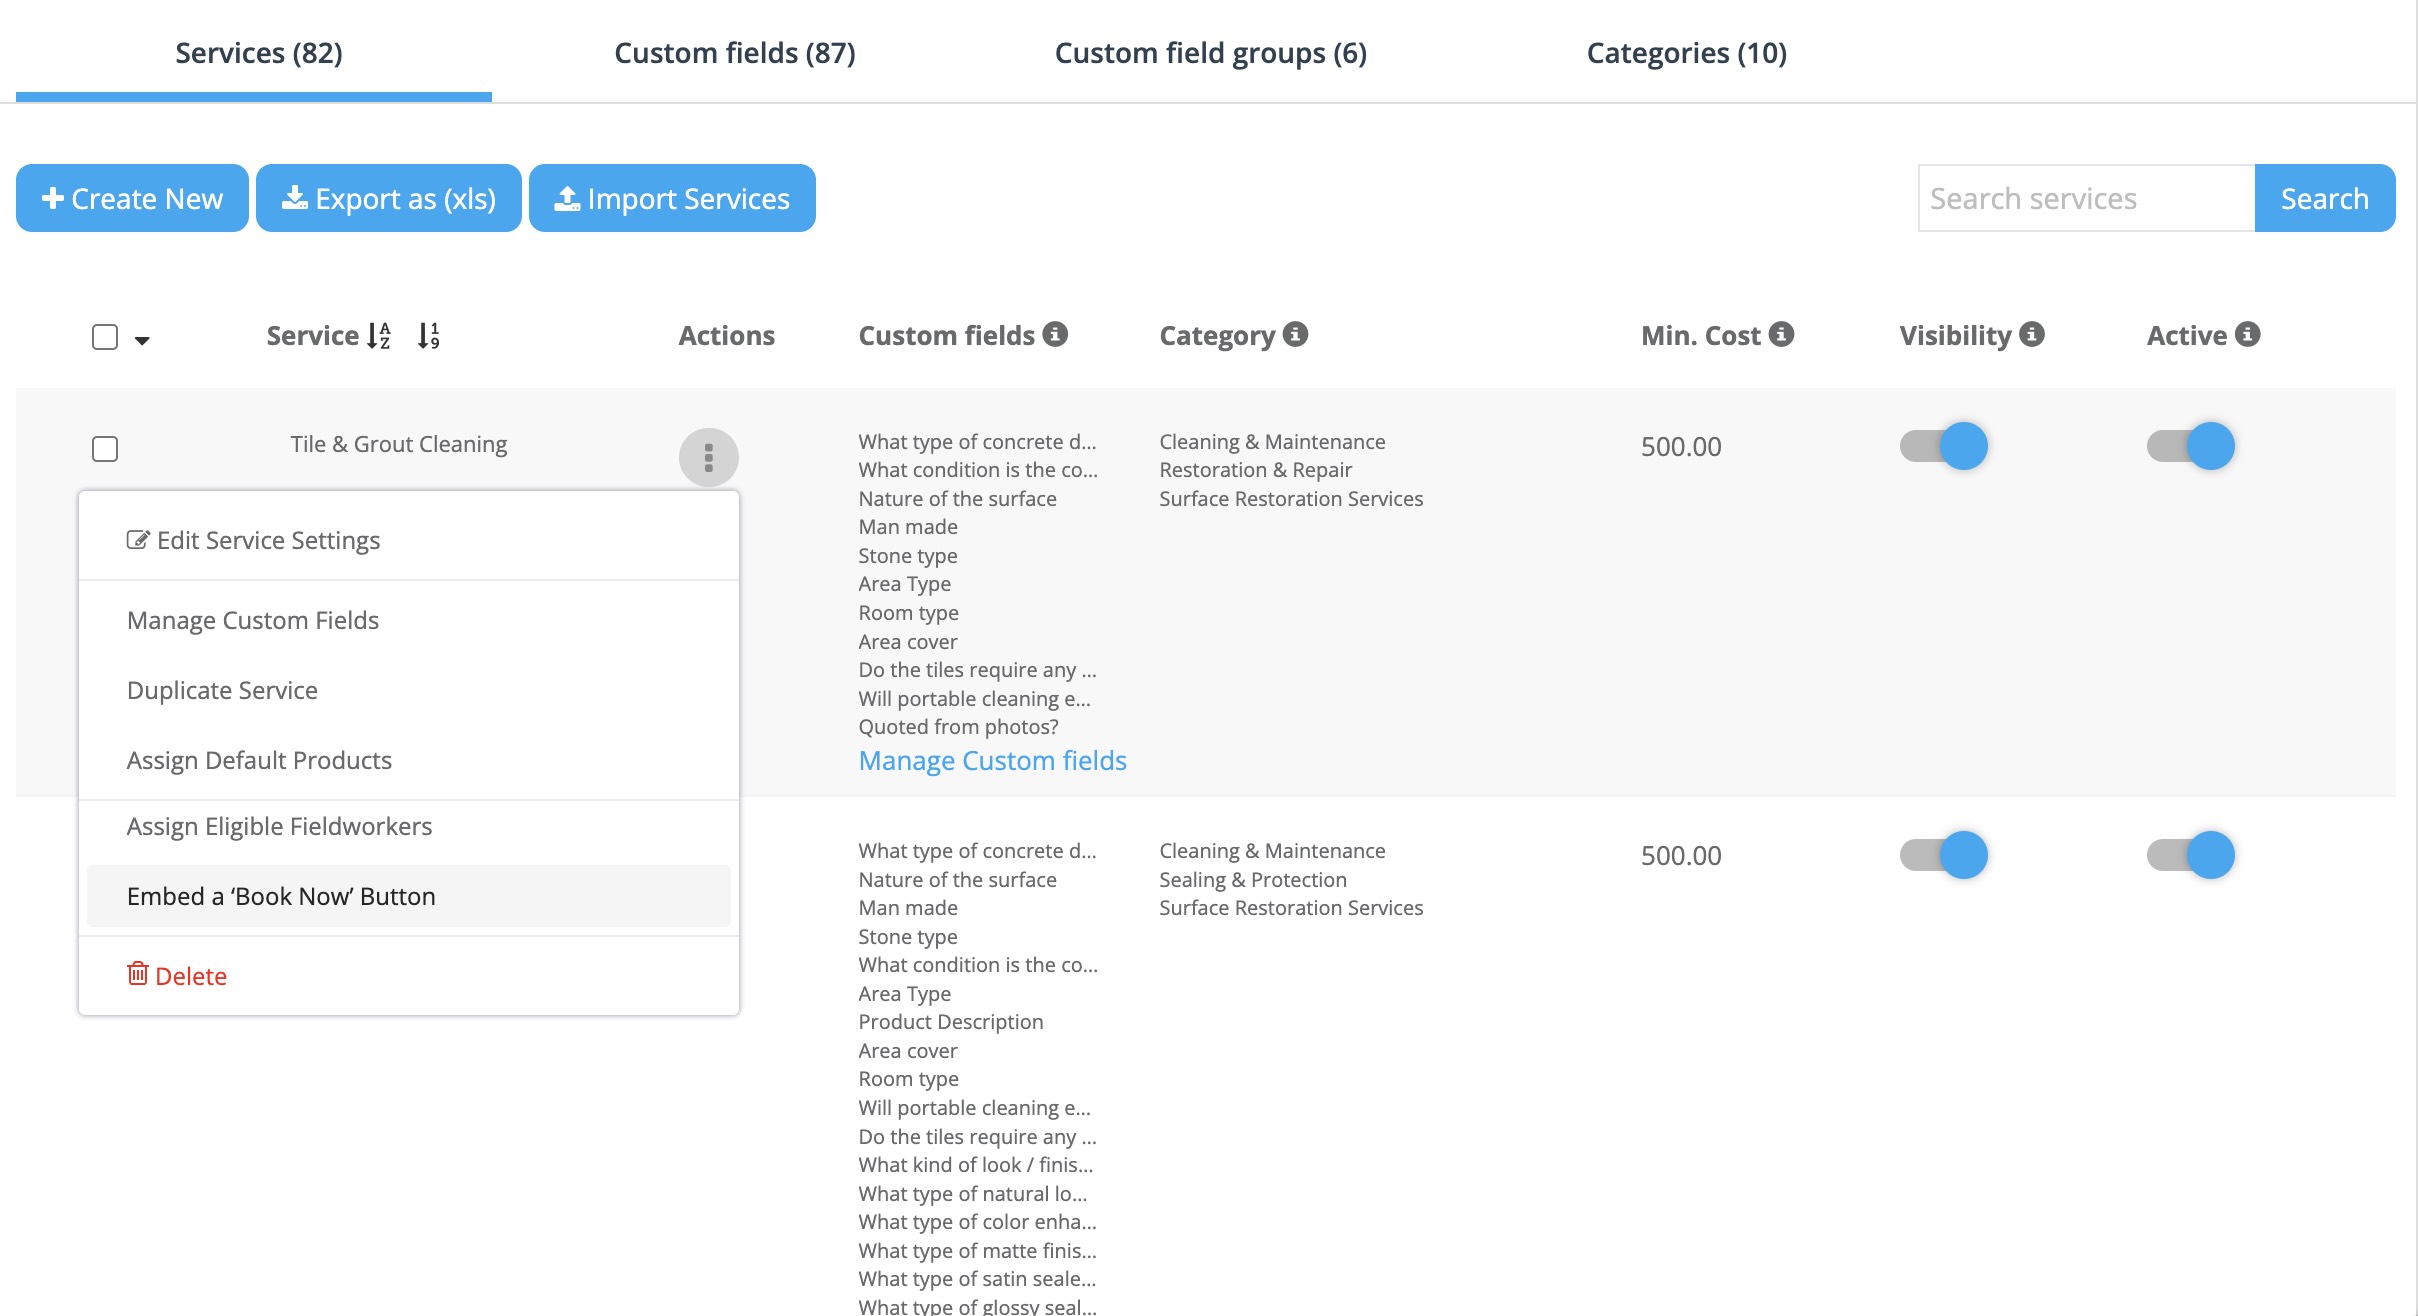
Method 1: From the Services list (quick access)
Go to Settings > Services Settings, then open the Services list. Open the service actions menu and select Embed a “Book Now” Button.
Method 2: From the service settings (most detailed)
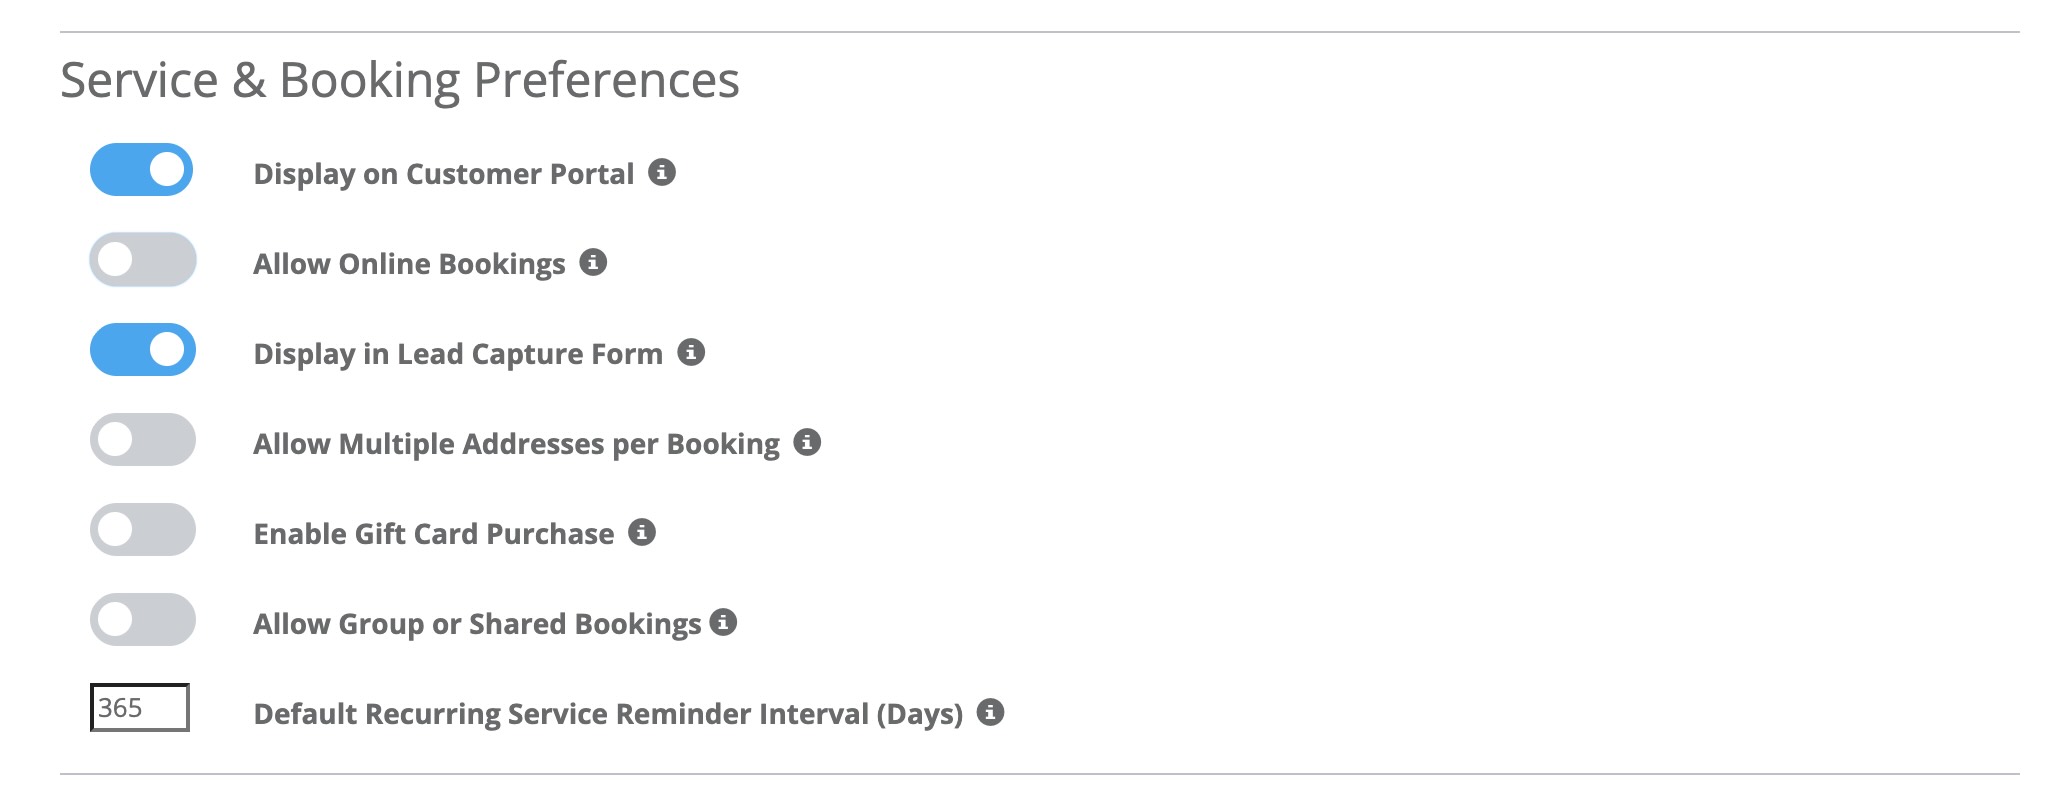
Open the service, then scroll to Service & Booking Preferences and enable:
- Display on Customer Portal
- Allow Online Bookings (required to show the embed code/link and allow customers to checkout online)
Service-level payment rules (optional): In this section, you can also control payment requirements for customer-portal bookings for that service (use your account-wide payment policy or set custom payment terms). These rules apply only to bookings created by customers online. Bookings entered by office staff or fieldworkers follow your internal payment workflow.

Note: This section also includes other portal-related options (for example, lead capture form visibility, multiple addresses per booking, group/shared bookings, gift card purchase, and recurring reminders) depending on your configuration.
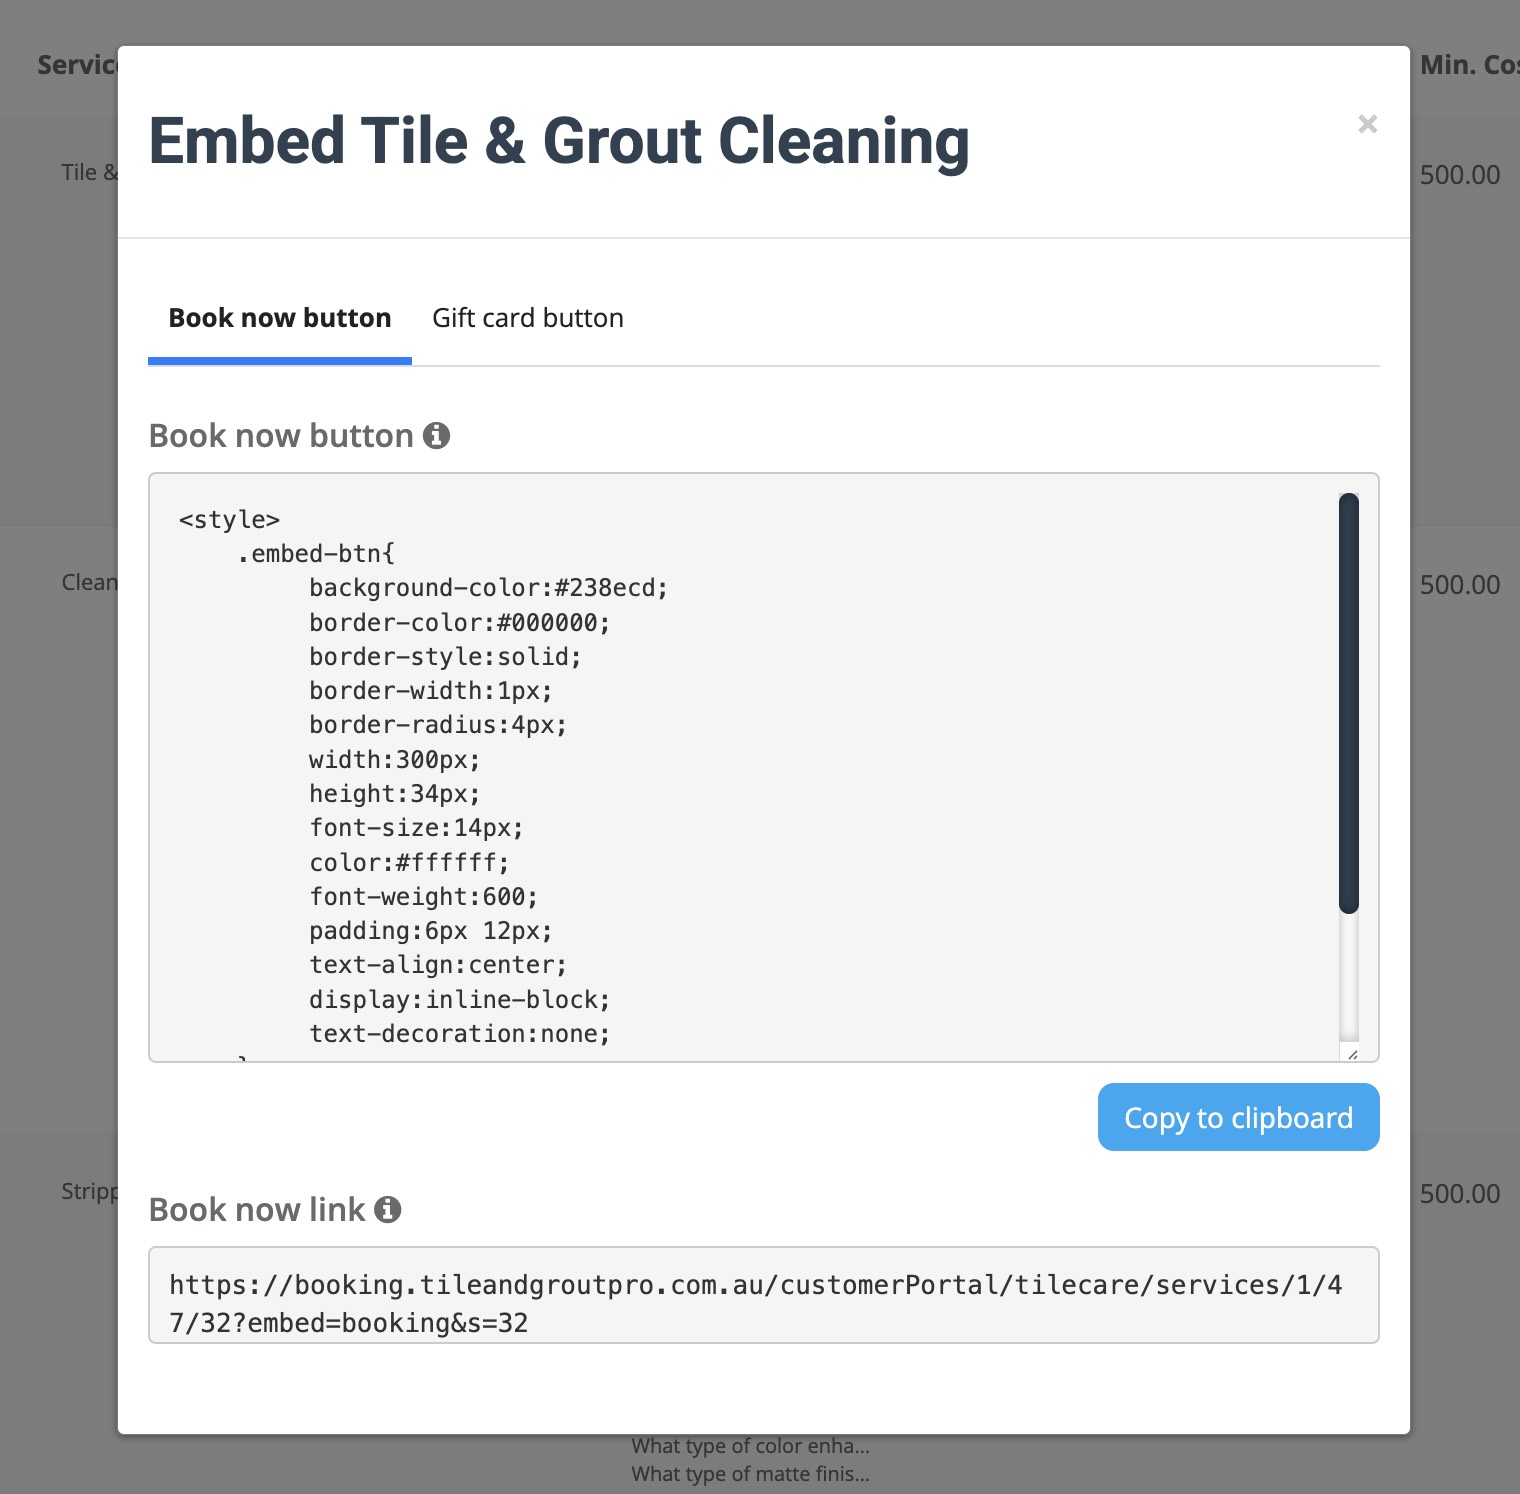
1) Embed a “Book Now” button (HTML)
You can embed a Book Now button for a specific service (or use an All Services option if available in your account):
- Go to Settings > Services Settings > Services.
- Find the service you want customers to book, then open the embed tool (embed icon or Embed a “Book Now” Button in the actions menu).
- In the embed pop-up, stay on the Book now button tab.
- Click Copy to clipboard to copy the HTML embed code.
- Paste the code into your website (see Add the button to your website).
Tip: If the service is not showing up for customers, confirm it is Active, visible on the portal, allowed for online booking, and has valid availability settings (working hours, capacity, and any restrictions).
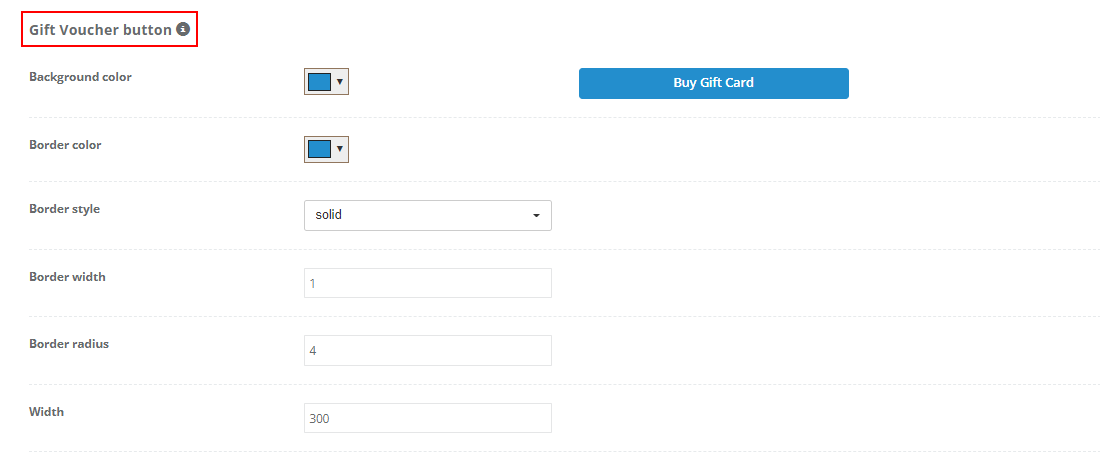
2) Embed a “Gift Voucher / Gift Card” button (HTML)
If gift vouchers are enabled, you can embed a Gift Voucher button (sometimes labelled Gift card button) that sends customers directly to the voucher purchase flow.
Important: Depending on your settings, you may also need to enable Enable Gift Card Purchase in the service’s Service & Booking Preferences before the gift card button/tab becomes available.
- Go to Settings > Services Settings > Services.
- Open the embed tool for the service you want to sell vouchers for.
- Switch to the Gift card button / Gift voucher tab.
- Click Copy to clipboard and paste the code into your website.
Best use case: Add this button to a dedicated “Gift Vouchers / Gift Cards” page, your main menu during holidays, and campaign landing pages.

3) Share a booking link (no HTML)
If you’re adding a CTA to email/SMS/social (or anywhere HTML embeds aren’t supported), use the Book now link instead:
- Open the embed pop-up for a service (or All Services if available).
- Copy the Book now link URL (shown in the embed window).
- Paste it into your channel (email button, SMS, Instagram bio, Linktree, QR code generator, etc.).
Tracking tip: Use a unique link per channel (and optionally add UTM parameters) so you can measure which channel drives the most bookings.
Add the button to your website (WordPress / Elementor / Wix / etc.)
Paste the embed code anywhere your website supports custom HTML. Common options:
- WordPress (Block Editor): use a Custom HTML block.
- WPBakery / Visual Composer: add a Text Block, switch to the Text tab, then paste the code.
- Elementor: use an HTML widget.
- Webflow / Squarespace / Wix: use an Embed / Code element.
After publishing: Click the button to confirm it opens the correct booking/voucher page and completes the flow correctly. Test on mobile + desktop, and (if possible) in an incognito/private window.
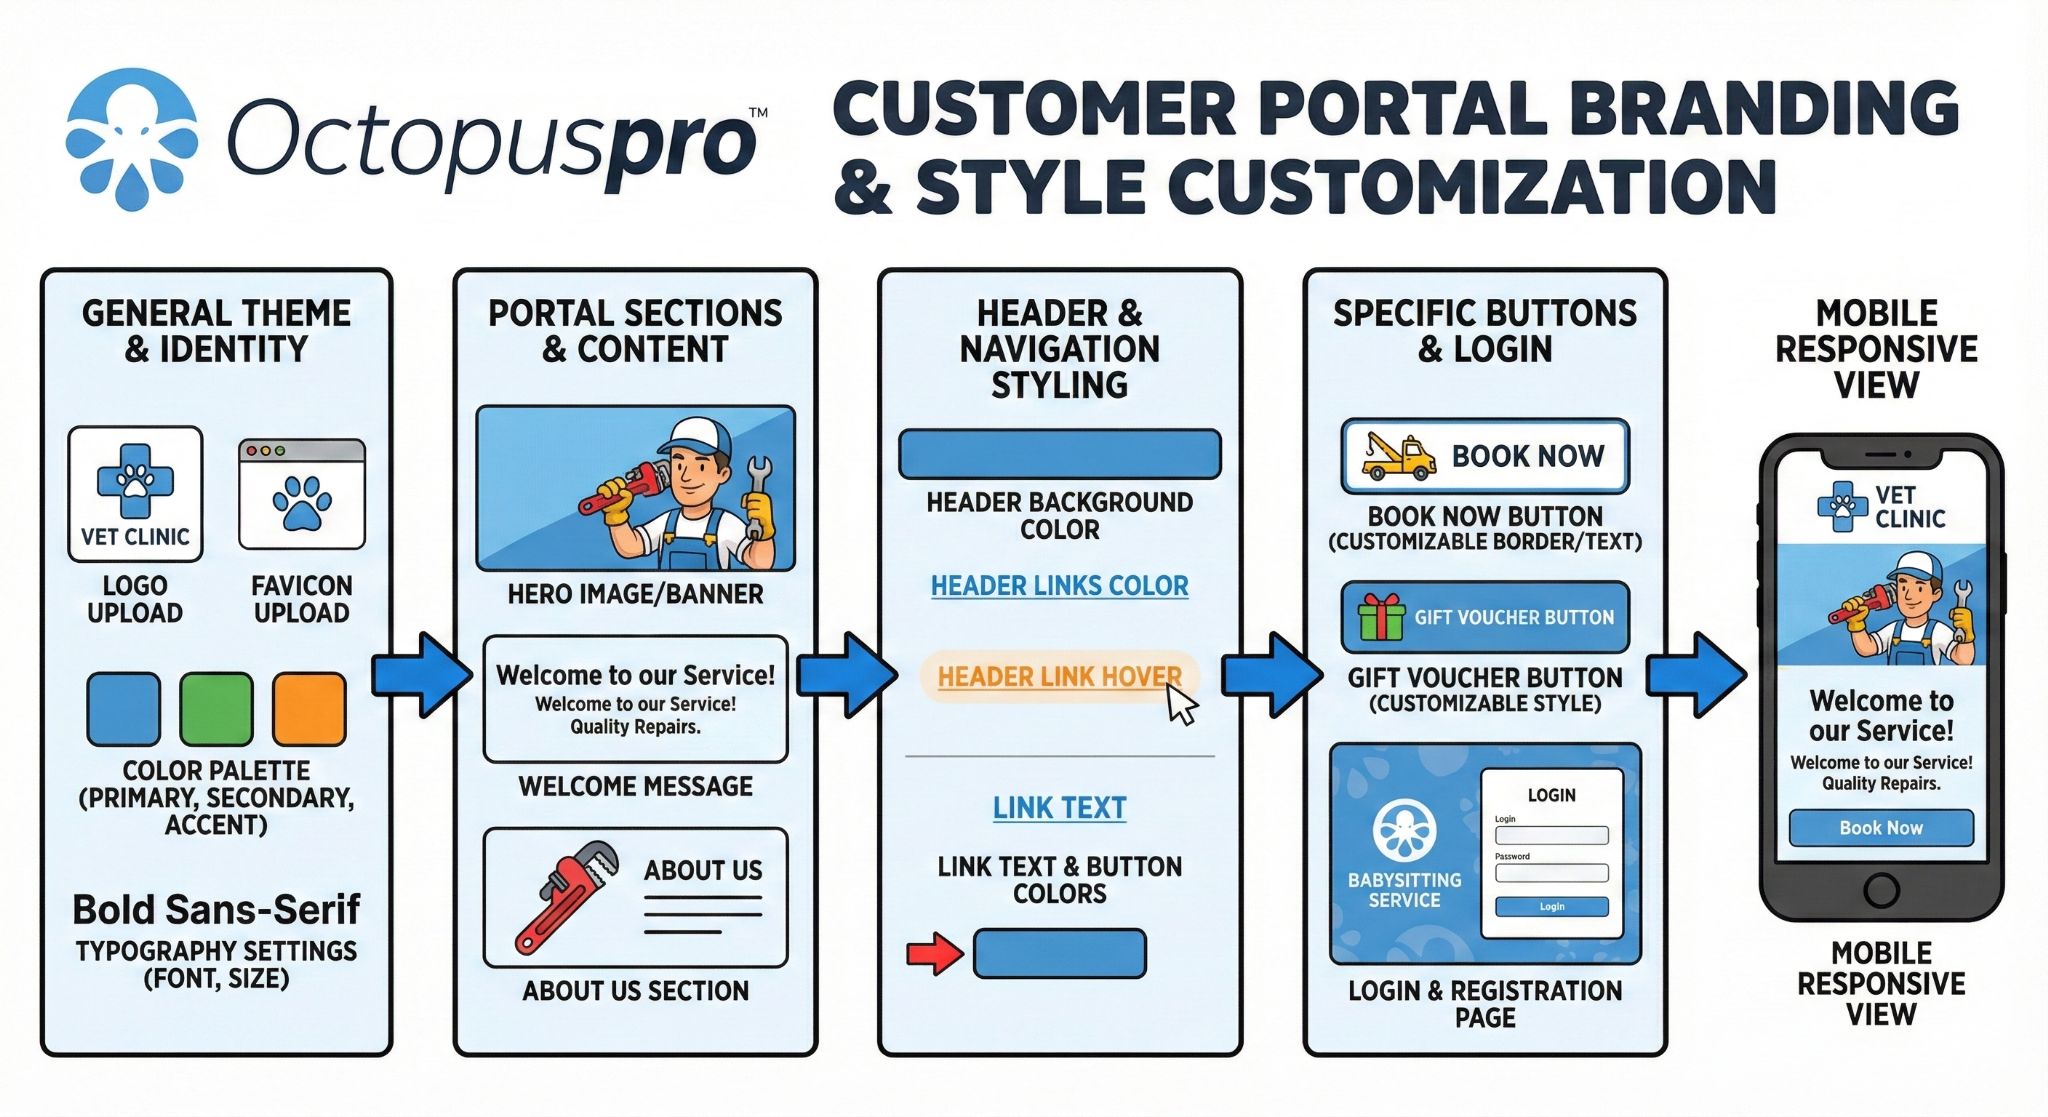
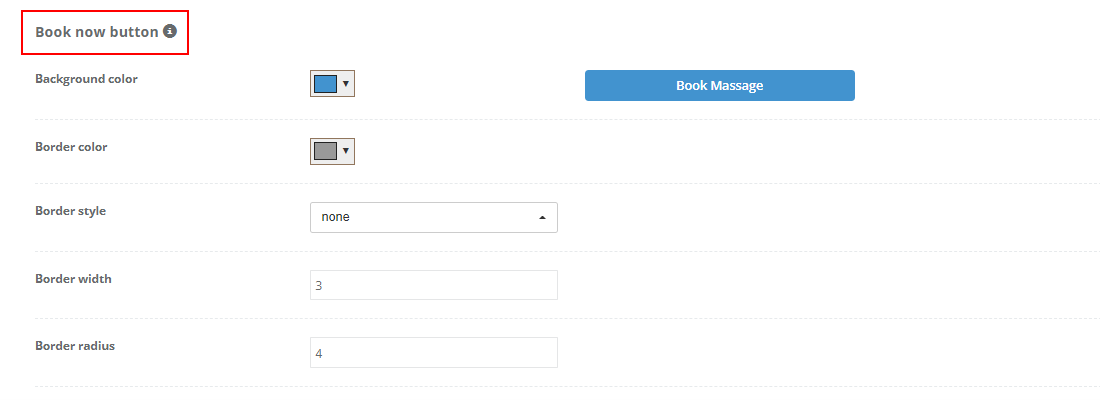
Customise button styling (match your brand)
You can customise the Book Now and Gift Voucher button styling so it matches your brand (colour, border, radius, size, font, and button text):
- Go to Settings > Customer Portal > Branding & Style.
- Scroll to the Book now button and Gift Voucher button sections.
- Update your styling and button labels, then click Save.
Full guide: Customer Portal Branding & Style Customization.
Use your own domain (white-label portal URL)
For a fully branded experience, you can white-label your Customer Portal URL using your own domain/subdomain (for example, book.yourbrand.com). This keeps customers on your domain for higher trust and cleaner marketing attribution.
Step-by-step guide: White-Label Customer Portal URL (Custom Domain & Subdomain).
Important: If you update your portal URL (including white-labelling), regenerate your embed code/booking links and replace the old snippet/URL on your website and campaigns.

Optional: Enable a “Schedule an appointment” (self-scheduling) button
If you provide quotes first (or want customers to choose a time after approval), you can enable a dedicated self-scheduling button that lets customers schedule the appointment themselves—based on your availability rules.

Best placements & conversion tips
- Use both approaches together: keep a global Book Online button in your header (Option A) and add service-specific Book Now buttons on service pages (Option B).
- Use service-specific links for ads: send paid traffic to a landing page with one clear CTA for the exact service being promoted.
- Promote vouchers all year: keep a Gift Voucher button on your menu and add it to seasonal campaigns.
- Use booking links in email/SMS/social: link a normal “button” in your email platform to the booking link (don’t embed HTML).
- Add QR codes offline: print QR codes to booking links on flyers, invoices, signage, business cards, or vehicle wraps.
- Use different links per channel: one for Instagram, one for email, one for ads, etc., so you can measure results.
- Fixed-site operations: add “Book Now” on each location page (e.g., “Sydney CBD Clinic”) to reduce phone calls.
- Virtual/online services: add a Book Now button to consultation/coaching pages so customers can book instantly.
Troubleshooting & FAQs
I can’t see the embed button code (or the embed option is missing)
- Enable Allow Online Bookings for that service.
- Ensure the service is Active and Display on Customer Portal is enabled.
My service doesn’t appear (or the button opens an empty list)
- Confirm the service is Active and allowed for online booking/portal visibility.
- Check that the service has valid availability settings (working hours, capacity, and any restrictions).
- Confirm online bookings are enabled: Accept Online Bookings Through Your Website.
The button works on my website but not in my email
- Most email clients block embedded HTML/CSS. Use the booking link and link it from your email button/image instead.
I updated my portal URL / enabled white-labelling and now the button points to the old domain
- Regenerate the embed code/booking link and replace the old snippet/URL on your website and campaigns.
Customers can open the page but can’t complete checkout
- Ensure payment methods are enabled: Payment Methods for Customer Portal Checkouts.
- If you’re selling vouchers, confirm vouchers are enabled and configured: Sell Gift Vouchers Online.

Quick launch checklist
- Enable Customer Portal / Online Bookings.
- Confirm services are Active, visible on the portal, and have valid availability settings.
- Enable payment methods (recommended for deposits/vouchers).
- Enable Gift Vouchers and (if needed) Enable Gift Card Purchase on the relevant services.
- Embed Book Now buttons on key service pages and landing pages.
- Add a Gift Voucher button to your Gift Cards page and seasonal promos.
- Use booking links in email/SMS/social and create QR codes for offline marketing.
- Test the full flow (mobile + desktop) after publishing.
Related guides
- Customer Portal URL (Share / White-label your portal link)
- Customer Portal General Settings
- Customer Portal Flags & Permissions
- Accept Online Bookings Through Your Website
- Create & Configure Services
- Sell Gift Vouchers Online
- Payment Methods for Customer Portal Checkouts
- Payment Methods Configuration
- Customer Portal Branding & Style Customization
- Enable Self-Scheduling Button in Customer Portal
- Lead Capture Form (Embed Inquiry Form on Your Website)
To stay updated, please subscribe to our YouTube channel.