
Using Multi‑Address Bookings / Quotes & Inquiries
The Allow Multiple Addresses per Booking flag lets a single job record hold two or more service locations—pickup → drop‑off, site A → site B, or any multi‑stop workflow.
How the two flags work together
| Flag | Where it lives | What it controls | Who it affects |
|---|---|---|---|
| Allow Multiple Addresses per Booking | Settings ▷ Services ▷ [Service] | Turns multi‑address on or off for a specific service | Admin & Fieldworker apps and Customer Portal |
| Allow bookings to have a second address | Settings ▷ Customer Portal ▷ Flags & Permissions | Shows the extra address fields on the Customer Portal booking form | Customer Portal only |
- Admin / Office / Fieldworker apps – need only the service‑level flag ON.
- Customer Portal – requires both flags ON; if either is OFF the booking form stays single‑address.
Quick rule of thumb
- Turn ON the service‑level flag for every service that can involve multiple stops.
- Turn ON the portal‑level flag if you want customers to enter those stops themselves.
Typical industries & scenarios
| Industry | Common multi‑address workflow |
|---|---|
| Furniture Removalists | Pickup home ➜ destination home ➜ storage |
| Chauffeur Services | Pickup ➜ multiple drops |
| Shuttle & Airport Transfer Services | Pickup ➜ multiple drops |
| Couriers & last‑mile delivery | Depot ➜ multiple drops ➜ returns |
| Skip‑bin & Waste Services | Customer site ➜ disposal facility |
| Mobile Auto‑repair | Customer home ➜ workshop ➜ return |
| Vet & Pet Transport | Home visit ➜ clinic ➜ return home |
Configuration Steps
- Per‑service switch (mandatory for all users)
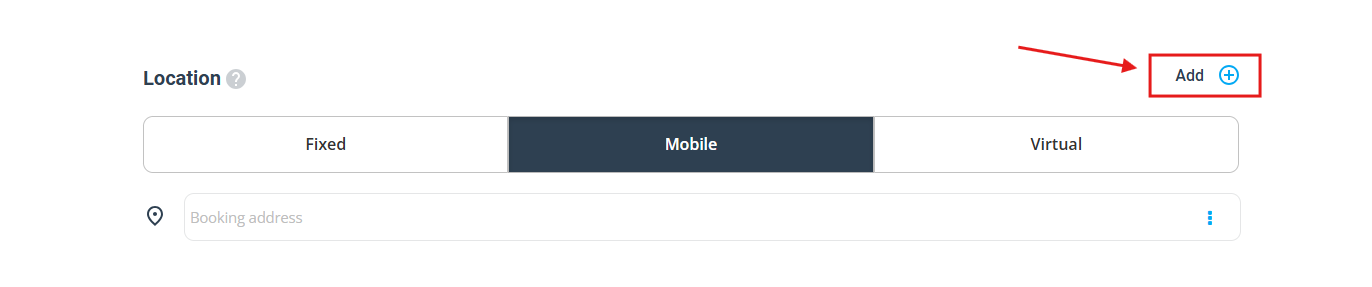
Settings ▷ Services → open each relevant service → enable Allow Multiple Addresses per Booking → save. - Customer‑portal switch (optional, customers only)
Settings ▷ Customer Portal ▷ Flags & Permissions → enable Allow bookings to have a second address → pick default label (e.g. “Drop‑off”).
Creating records with multiple addresses
Admin / office users
| Record | Navigation | Steps |
|---|---|---|
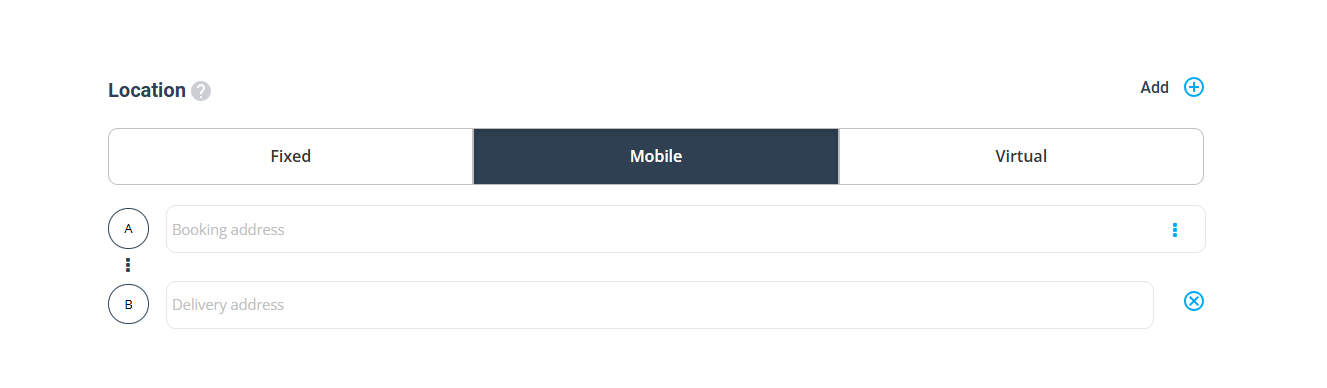
| Booking | Bookings ▸ + Create New | Enter Address 1 ➜ click + Add Address ➜ enter Address 2 and label ➜ repeat (limit = 4) |
| Quote | Quotes ▸ + Create New | Same address workflow |
| Invoice | Invoices ▸ + Create New | Same address workflow |
| Inquiry | Inquiries ▸ + Create New | Same address workflow |
Fieldworkers (App)
- Menu ▸ Create New Booking.
- Select customer & service, set date/time, add Address 1.
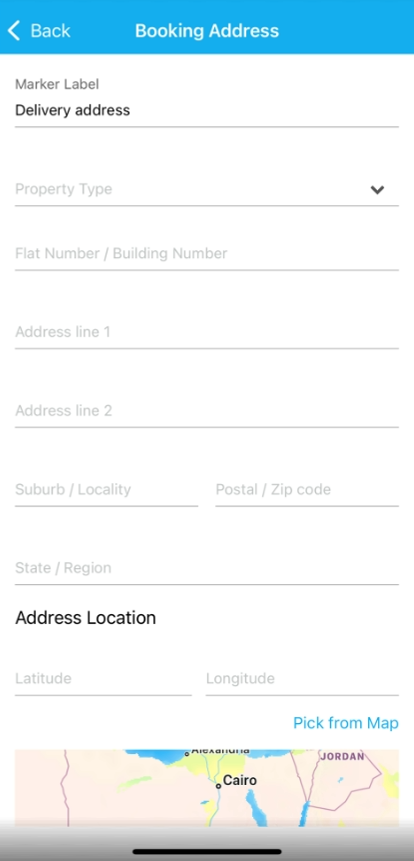
- Tap + Add New Address, label it, enter Address 2.
Customers (Customer Portal)
Visible only when both flags are ON:
- Choose service/date/time.
- Enter Address 1.
- Click + Add Another Address, label it (e.g. “Destination”), enter Address 2.
- Submit booking.
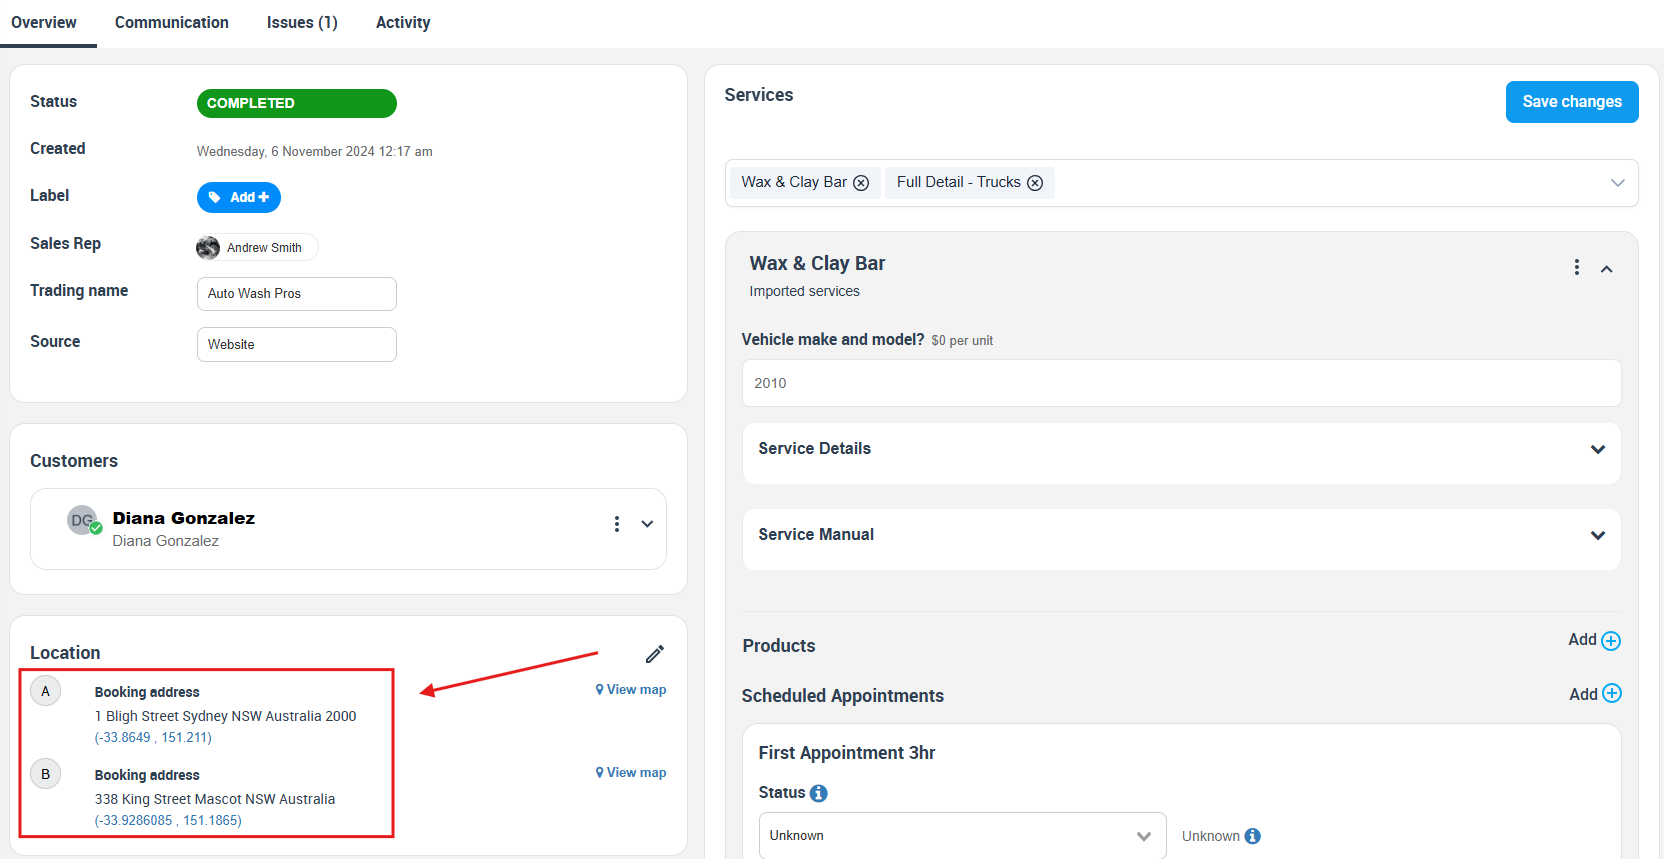
Viewing & Navigating Multi‑Address Jobs
| Role | Where to see stops | Quick nav |
|---|---|---|
| Admin / office | Booking / Quote / Invoice details → Location panel | View Map opens Google Maps |
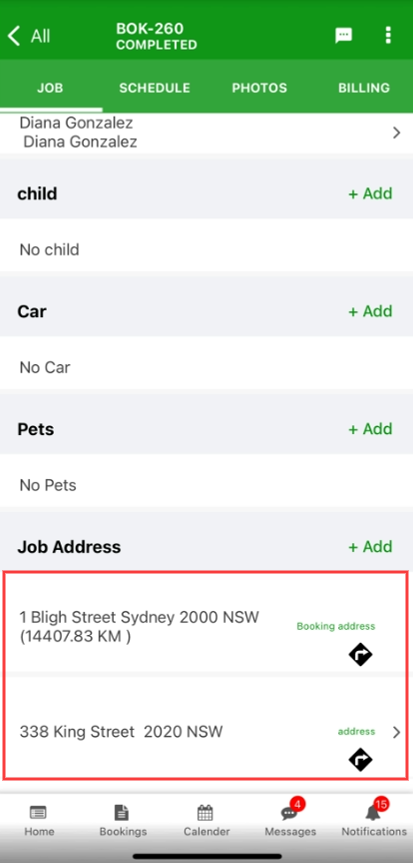
| Fieldworker app | Booking details → Job Address section | Tap pin for turn‑by‑turn |
Best‑Practice Tips
- Logical order – list stops in travel sequence.
- Clear labels – “Pickup”, “Warehouse”, “Disposal” are self‑explanatory.
- Include travel – add transit time when estimating duration.
- Single invoice, many stops – unless split‑billing is enabled.
- Route optimisation – heavy‑drop couriers can integrate routing software via the API.
Summary
Enable Allow Multiple Addresses per Booking on each service that may require more than one location. Turn on the Customer Portal flag if you want customers to supply those extra addresses themselves. With both settings in place, OctopusPro captures every stop—keeping office staff, fieldworkers, and customers perfectly aligned on where the job begins, continues, and ends.
To stay updated, please subscribe to our YouTube channel.