
Using Labels to Organize, Filter, and Manage Records
OctopusPro’s labels are customizable tags that help you organize, filter, and manage your records—such as inquiries, bookings, quotes, invoices, customers, and fieldworkers—efficiently. Labels enable you to quickly identify key statuses, priorities, or internal notes, while nested labels allow you to group related tags under broader categories for even more granular organization.
Creating and Managing Labels
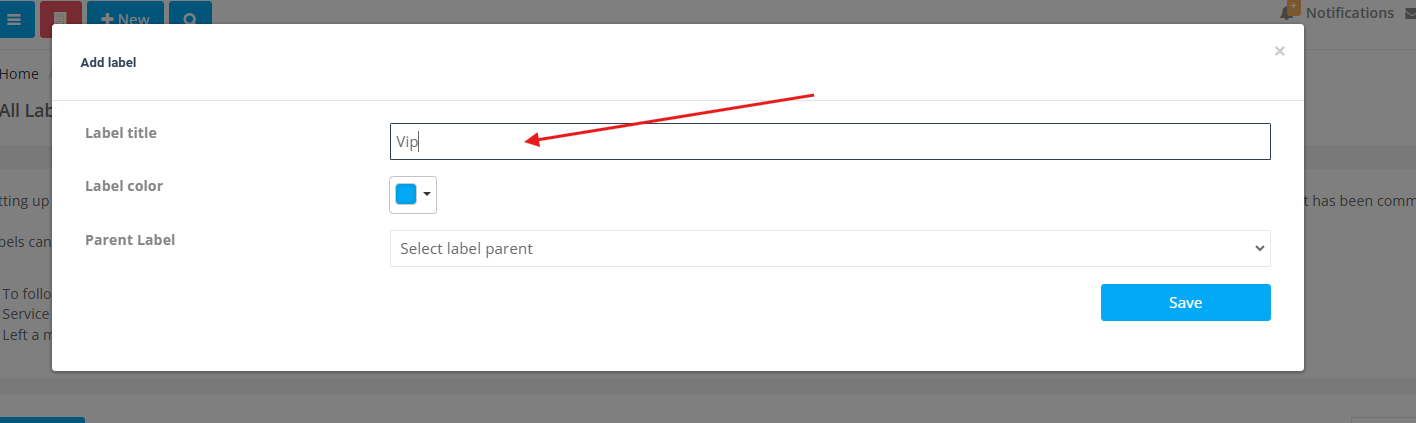
To create a new label, navigate to Settings > General Settings > Labels and click the New Label button. In the popup:
- Label Name: Enter a descriptive name that reflects the purpose or status (e.g., “Urgent Follow-Up” or “Completed”).
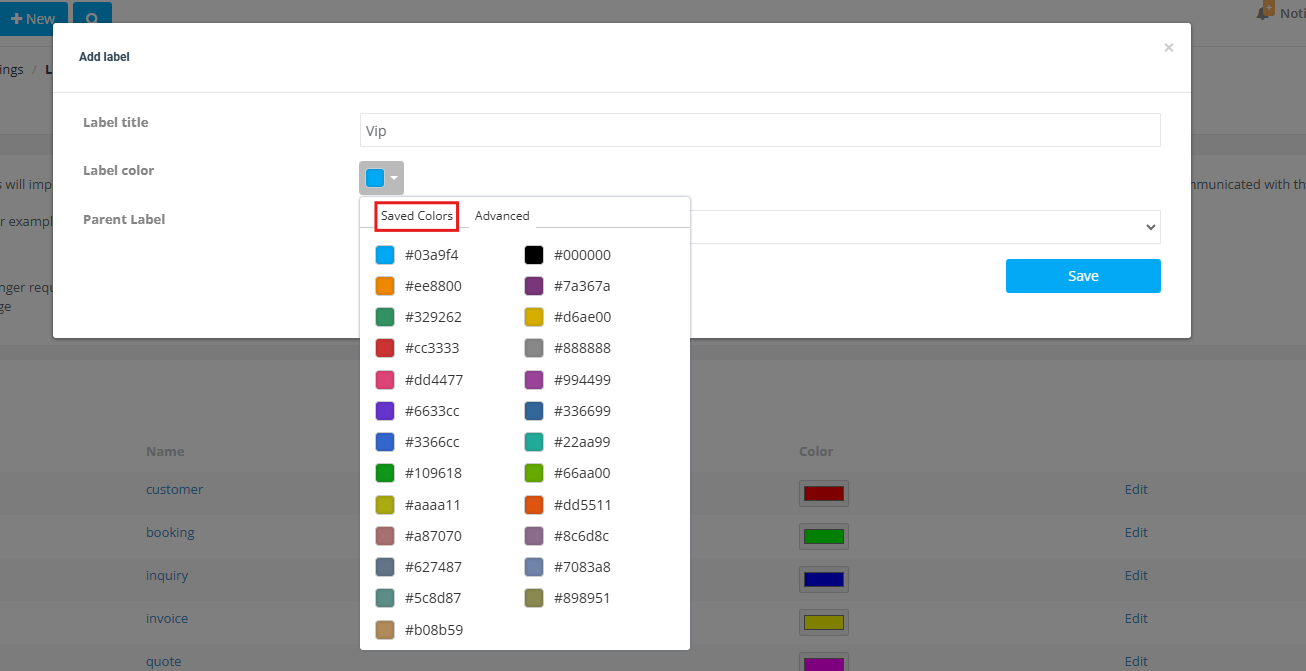
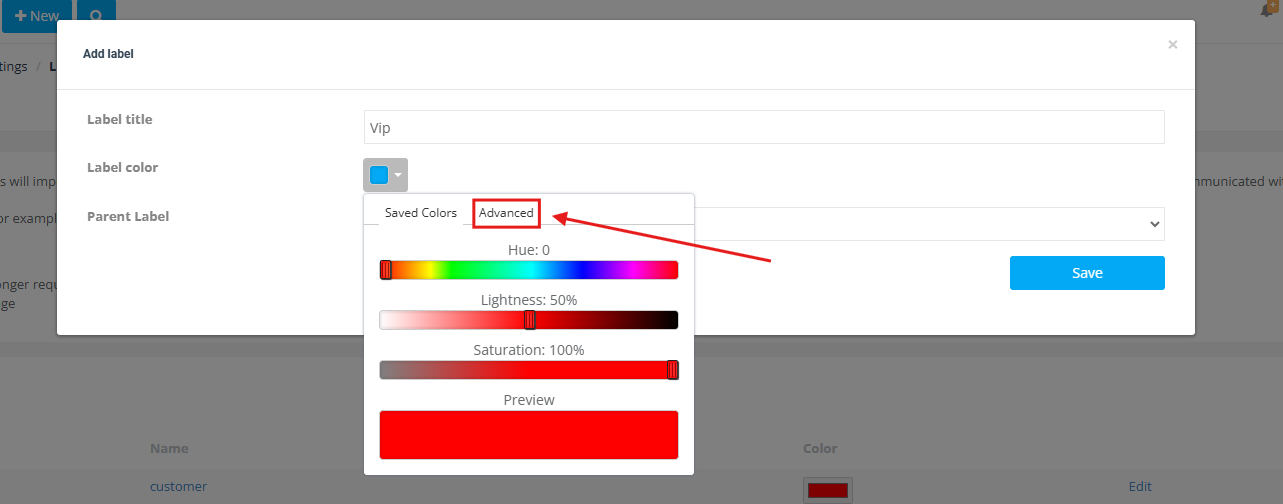
- Label Color: Choose a color from the preset palette or customize one via the advanced option by adjusting hue, brightness, and saturation. The chosen color will help you visually identify the label quickly.
- Parent Label: Optionally, assign a parent label to nest your new label under a broader category.
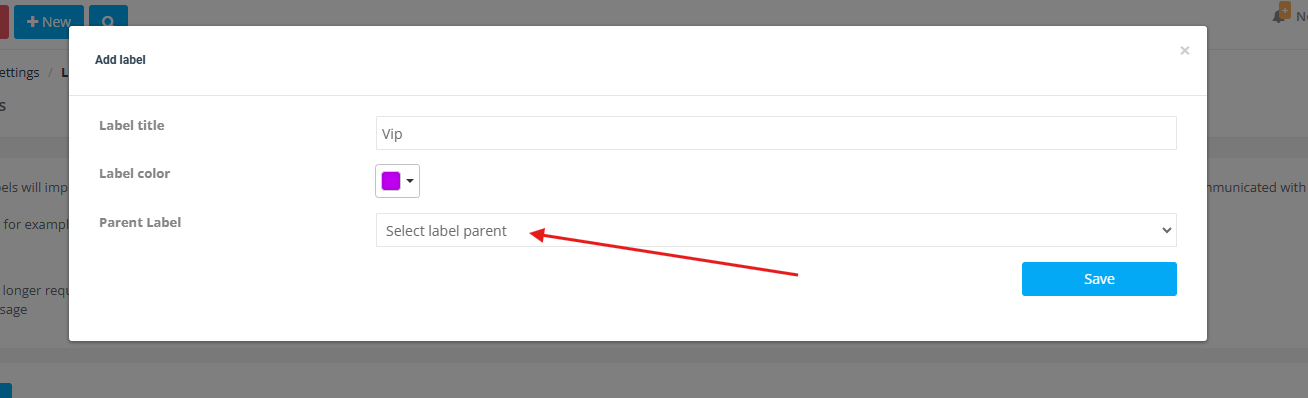
- Click Save to add the label to your system.
Once created, your labels are listed on the Labels settings page with their names and colors. These labels can then be applied across various modules in OctopusPro.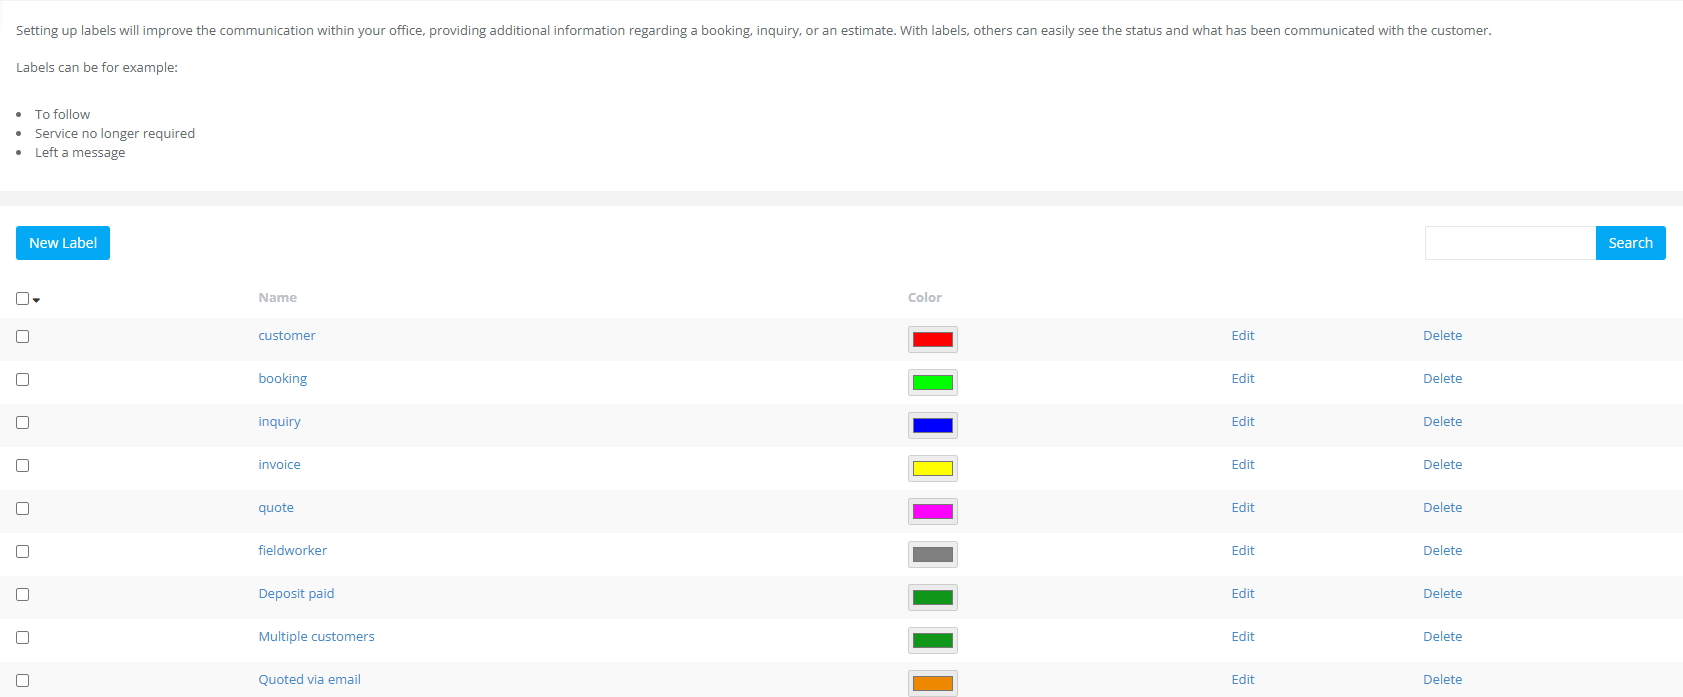
Using Nested Labels
Using nested labels allows you to organize related tags under a broader category, creating a clear hierarchy that improves filtering and tracking. For example, a property maintenance company might create a parent label called “Service Priority” with child labels like “Critical (Emergency Repairs),” “High (Urgent Maintenance),” “Medium (Standard Service),” and “Low (Routine Check).” Similarly, a cleaning service could establish a parent label “Customer Feedback” with children such as “Positive,” “Neutral,” and “Negative” to quickly categorize responses. Nested labels simplify internal communication and data analysis by clearly distinguishing between various levels of urgency, customer sentiment, or service type.
Applying Labels Across Modules
You can assign labels to a wide range of records to streamline categorization and enhance searchability:
Adding Labels to Inquiries
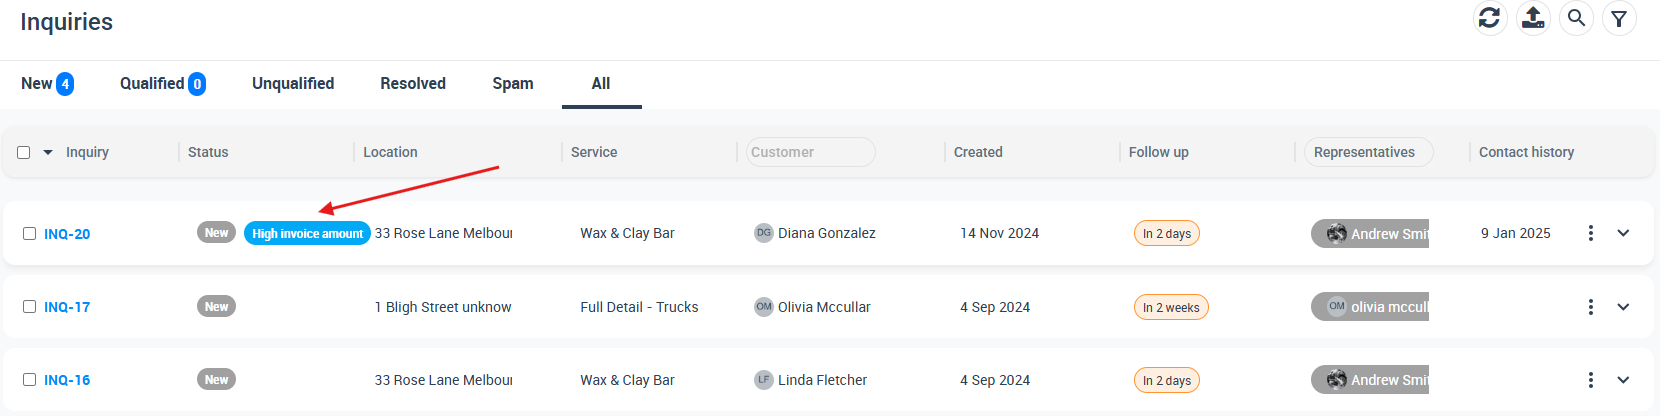
- Purpose: Use labels to flag inquiries by urgency or follow-up status (e.g., “Urgent,” “Needs Detailed Quote”).
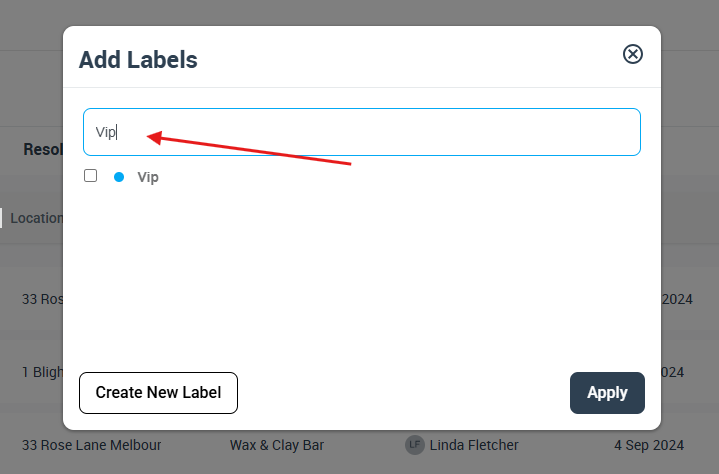
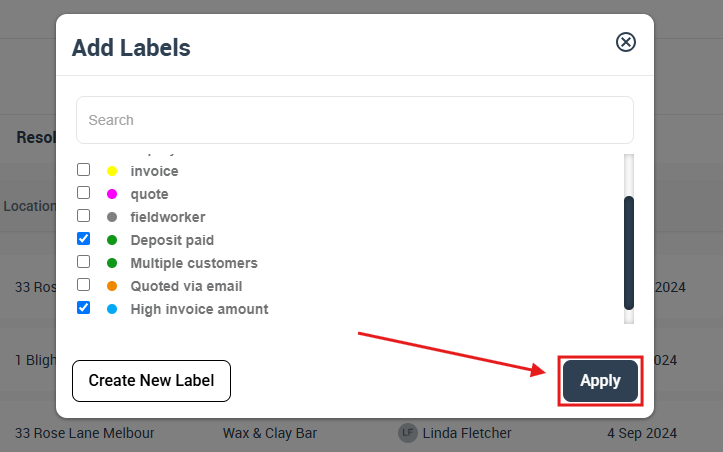
- How to Apply: Open any inquiries list (e.g., New Inquiries, My Inquiries, or All Inquiries), click the Actions button, and select Add Label.

- Search for and select one or more desired labels using the provided search functionality, then click Apply.
For more details, see our Inquiry Labels Guide.
Adding Labels to Bookings
Labels on bookings help you quickly identify and prioritize service appointments based on specific requirements—such as “Customer in a Rush” or “Standard Service.”
- To assign a label, access your bookings list and click the Actions button next to the desired booking. Then, select Add Label from the dropdown menu.
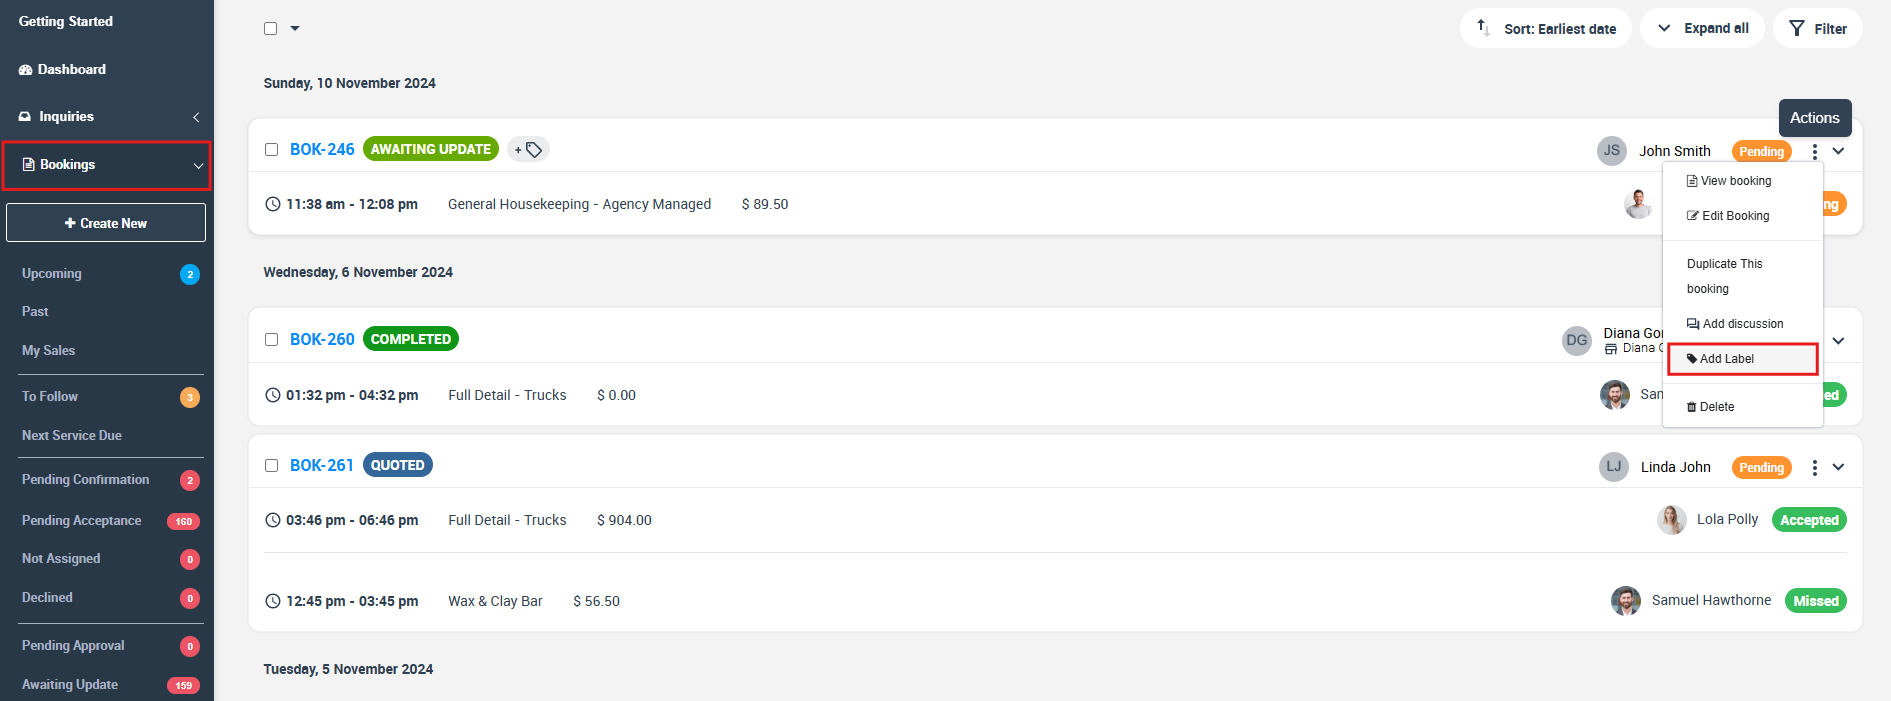
- Use the search function to find and select one or more labels, and click Apply.
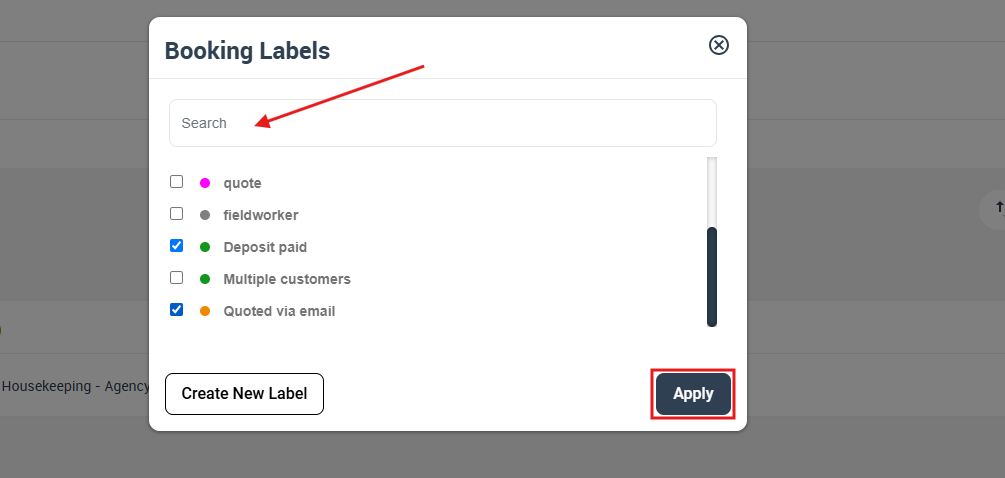
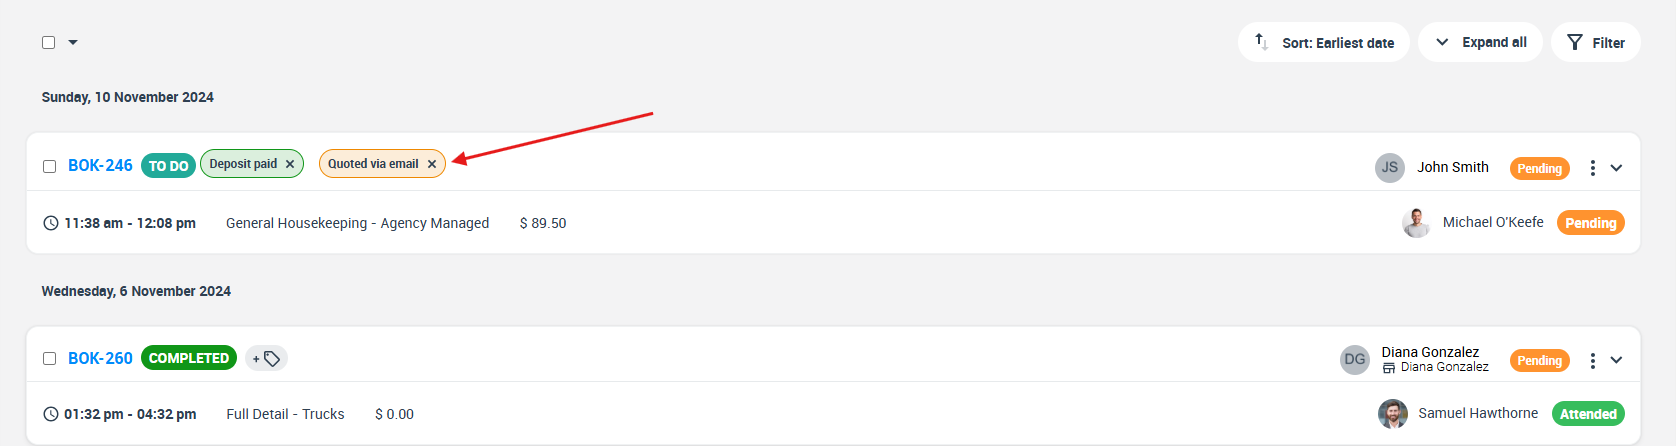
- The selected labels will appear on the booking, making it easier for your team to filter and manage appointments. Learn more in our Booking Labels Guide.
Adding Labels to Quotes/Estimates
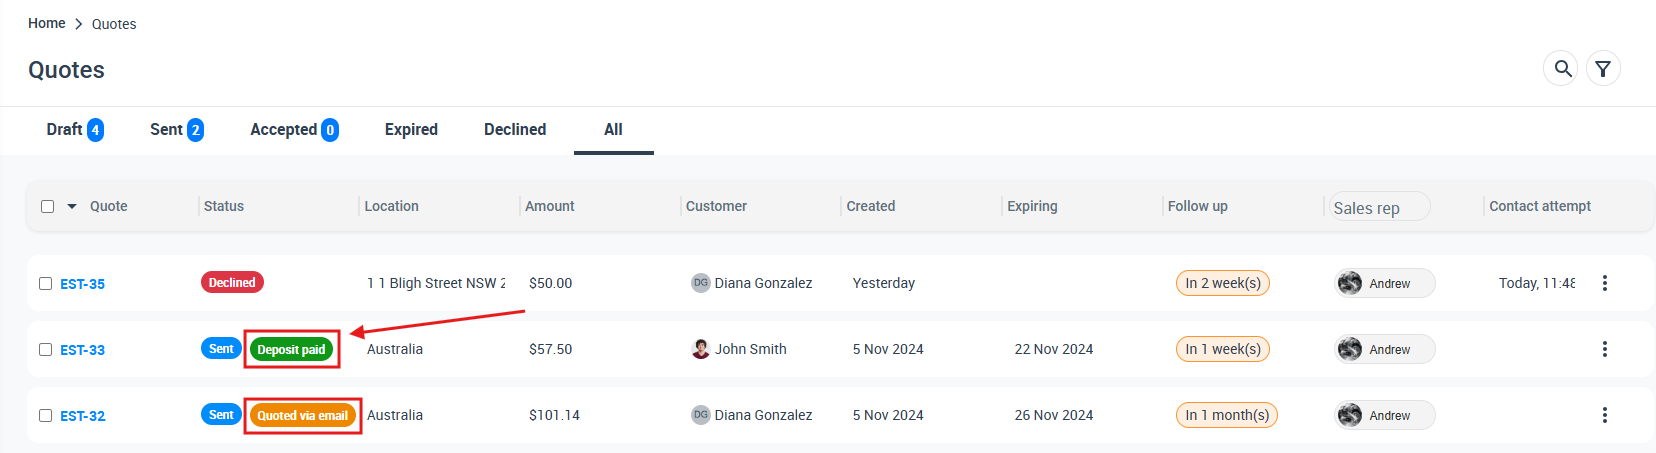
Quote labels help you highlight special pricing conditions, urgency, or other important aspects of a quote, such as “High Priority,” or “Discount Offered,”.
- To assign labels to a quote, open your quotes list and click the Actions button next to the desired quote. Then, select “Add Label” from the dropdown menu.
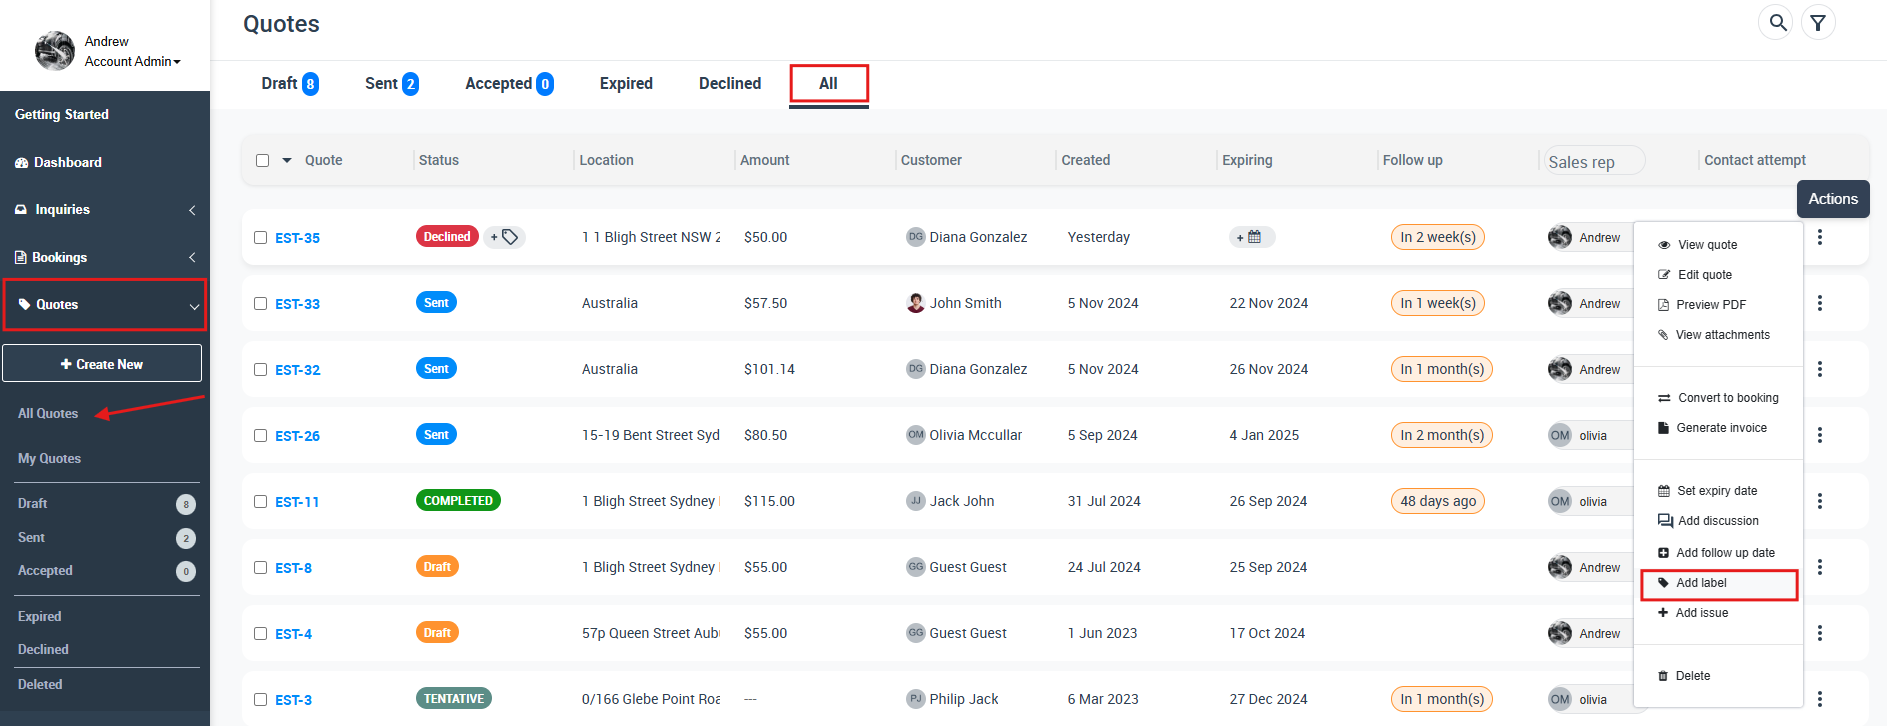
- In the popup window, use the search functionality to locate and select one or more labels, and click “Apply.”
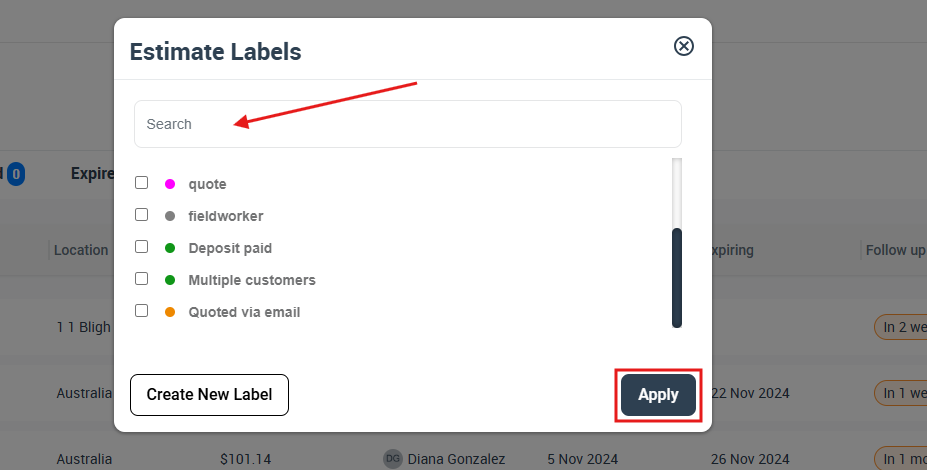
- The selected labels will appear on the quote, making it easier to filter and manage quotes by their status or special conditions. For more details, please refer to our Estimate Labels Guide.
Adding Labels to Invoices
Invoice labels help you track and manage special conditions or statuses beyond the standard payment process. For instance, you might use labels such as “Invoice Under Review,” “Dispute Initiated,” or “Manual Payment Required” to indicate that an invoice needs further action.
- To add a label, navigate to your Invoices list and click the Actions button next to the desired invoice.
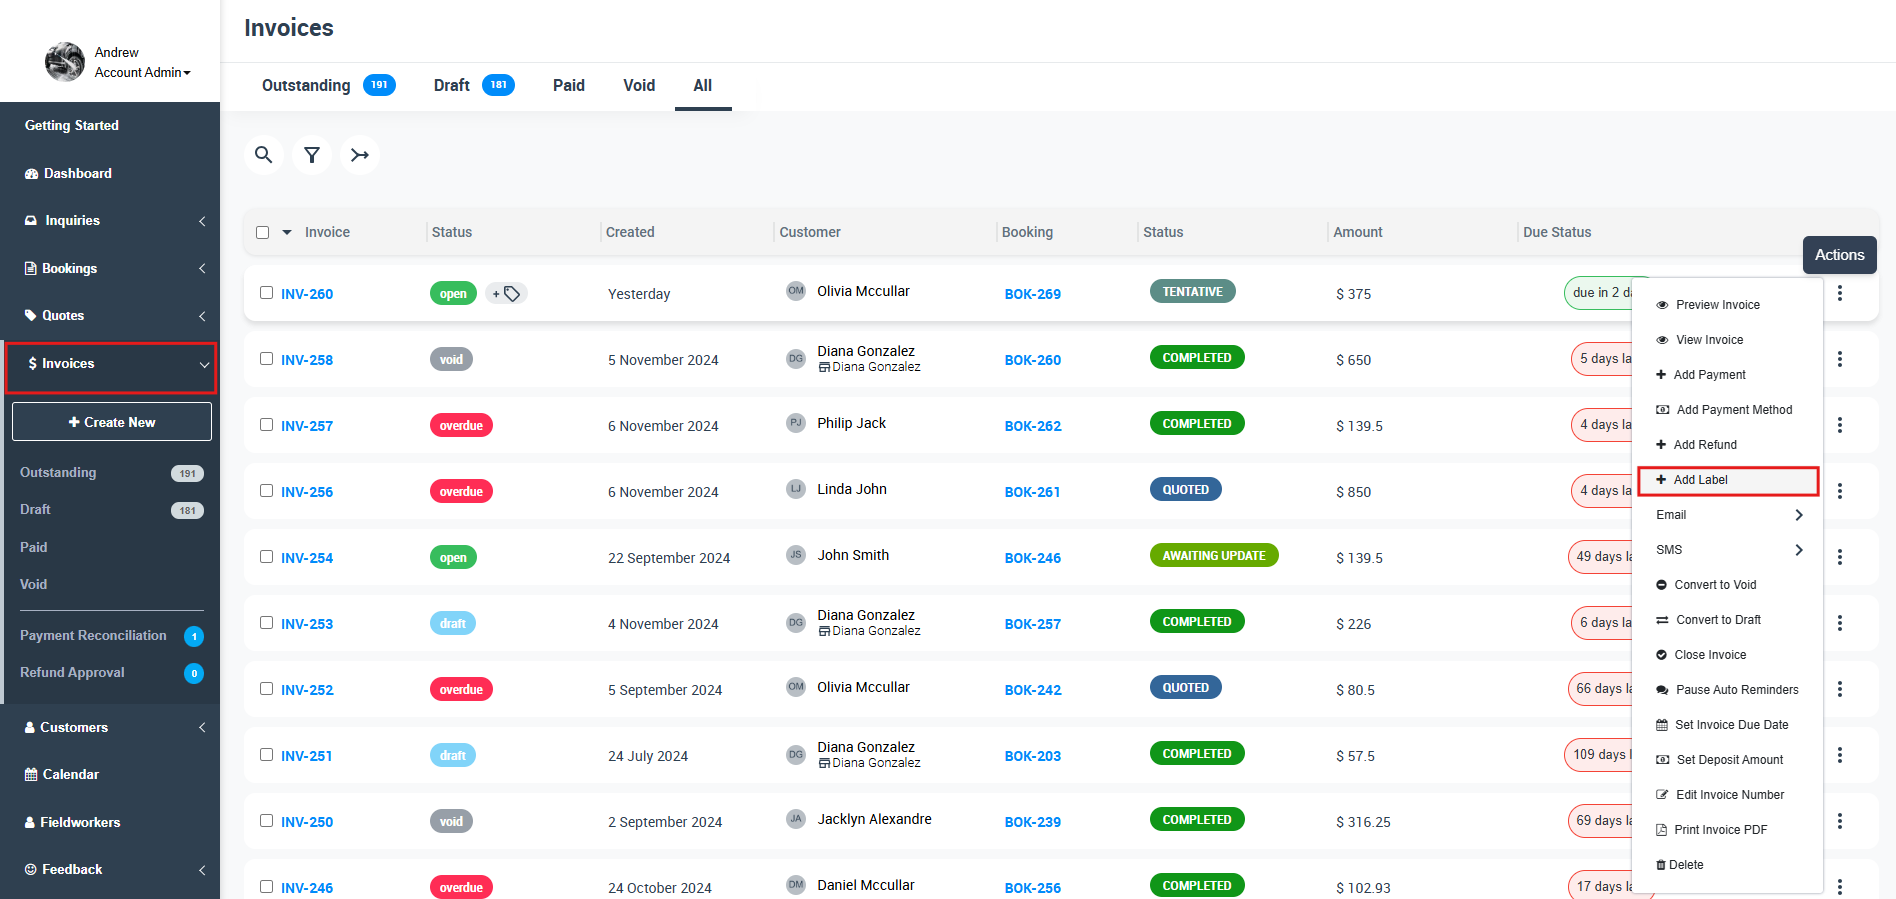
- From the dropdown menu, select “Add Label.” In the popup, use the search function to locate and select one or more labels, then click “Apply.”
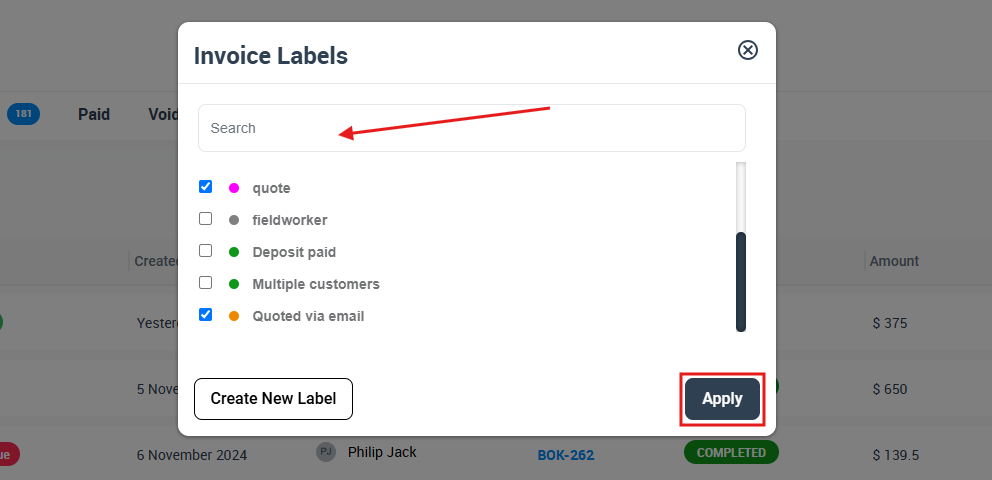
- The selected labels will appear on the invoice, making it easier to filter and manage those that require special attention. For more details, see our Invoice Labels Guide.

Adding Labels to Customers
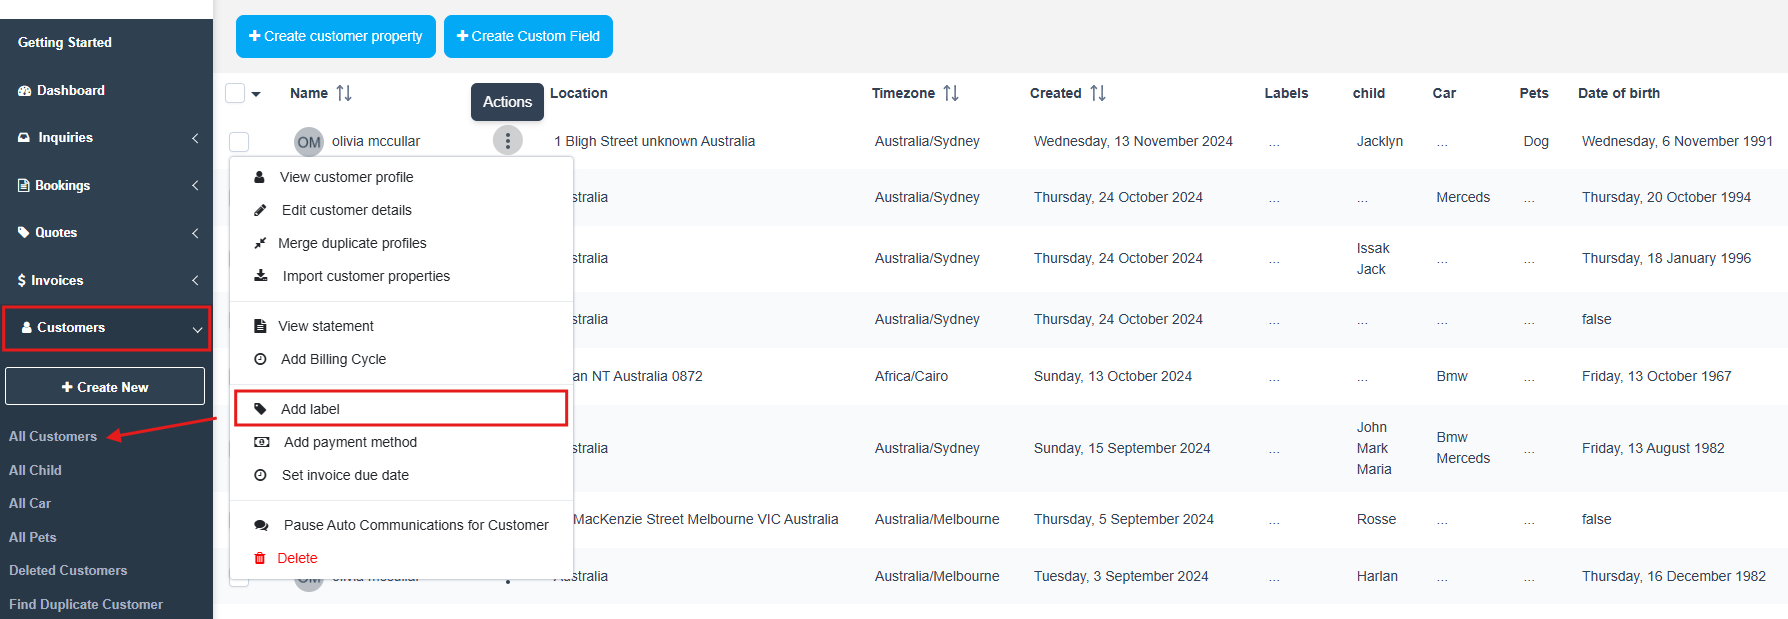
Customer labels help you segment your clientele by type or priority—such as “VIP,” “New Client,” or “High Value.” To assign labels to a customer, navigate to the All Customers list and click the Actions button next to the desired customer.
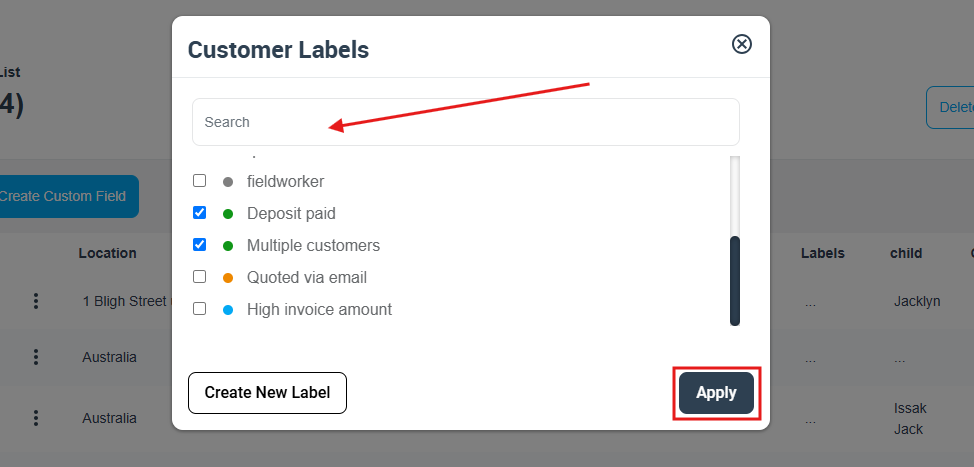
- From the dropdown menu, select “Add Label.” In the Add Label popup, use the search feature to locate and select one or more labels.
- Once you’ve made your selections (as indicated by checked boxes), click “Apply.”
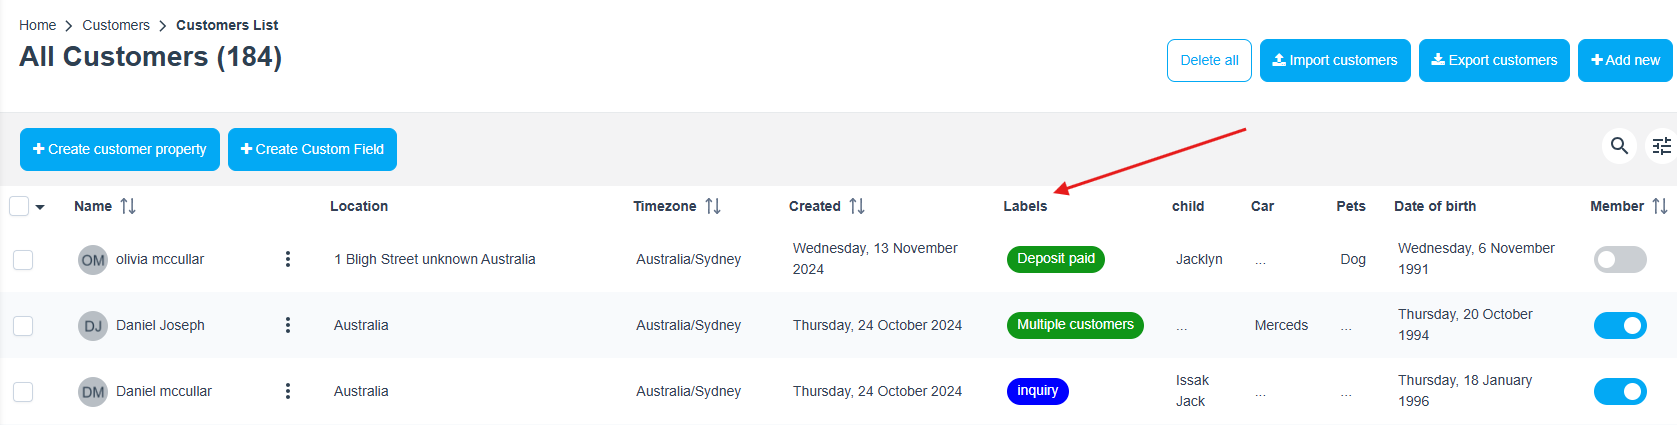
- The selected labels will then appear on the customer’s profile, making it easier to filter and manage your customer records.
Adding Labels to Fieldworkers
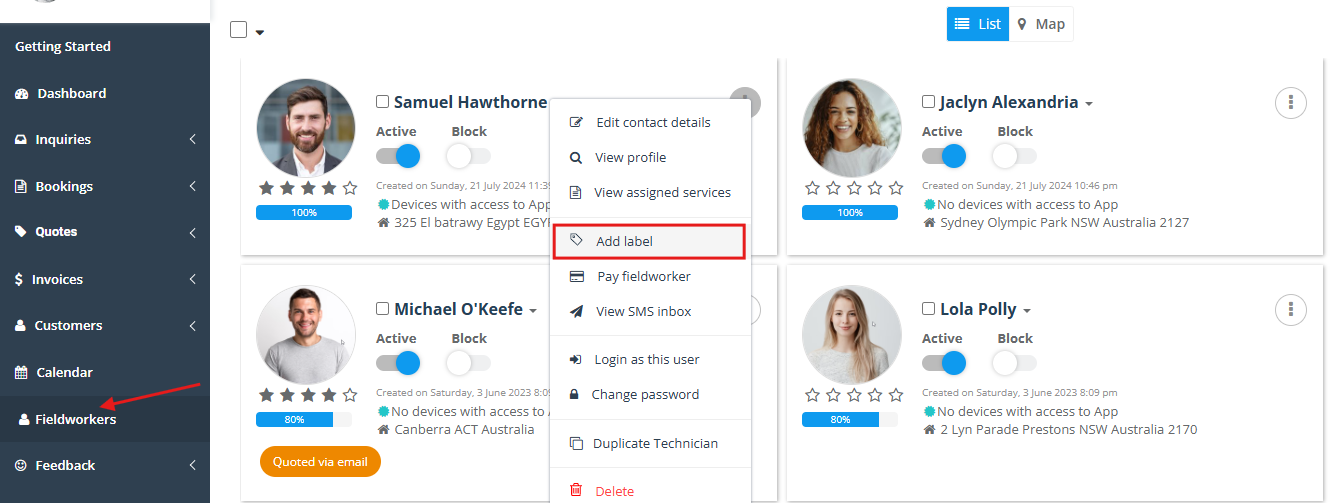
You can use labels to categorize fieldworkers by expertise, performance, or other key criteria (e.g., “Top Performer” or “Specialist”). To assign a label to a fieldworker, navigate to the Fieldworkers section and click the Actions button next to the desired fieldworker.
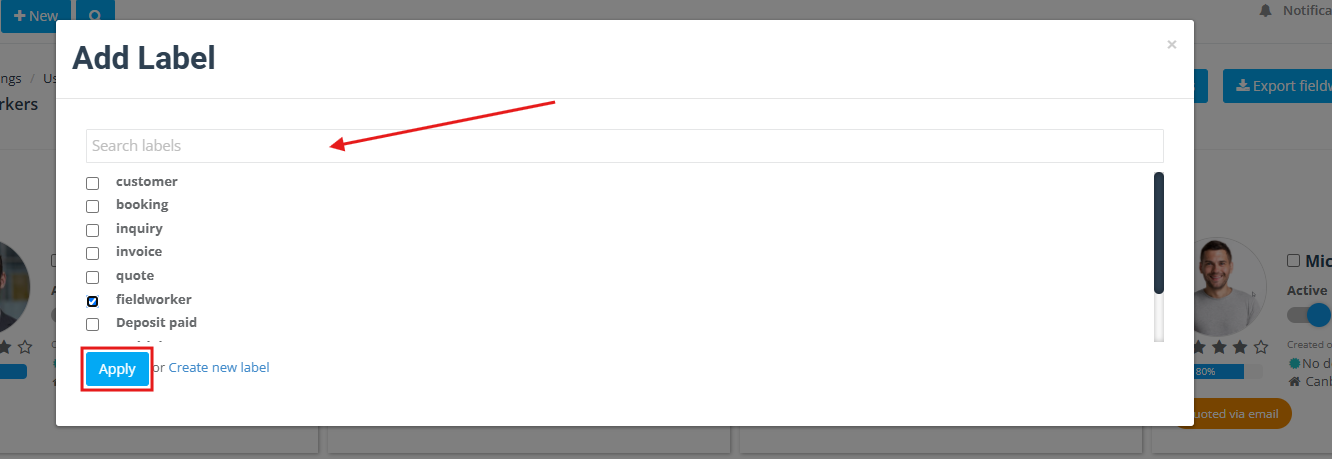
- From the dropdown menu, select “Add Label.” In the Add Label popup, use the search functionality to quickly find and select one or more labels from the list.
- Once you have chosen the desired labels (the checkboxes will indicate your selections), click “Apply.”
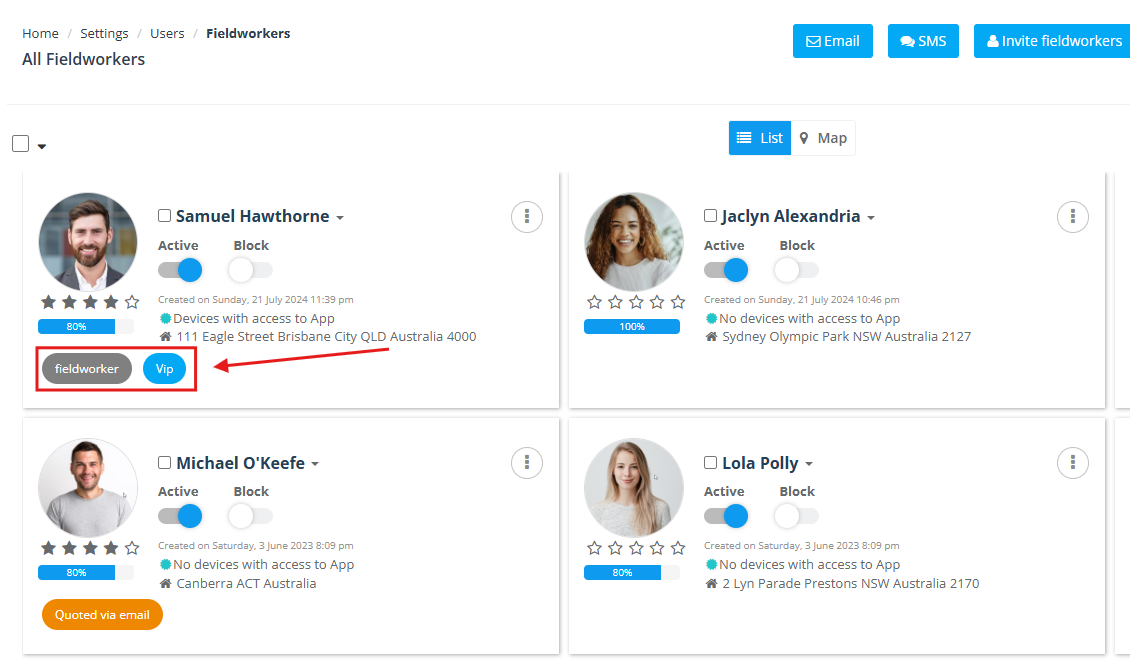
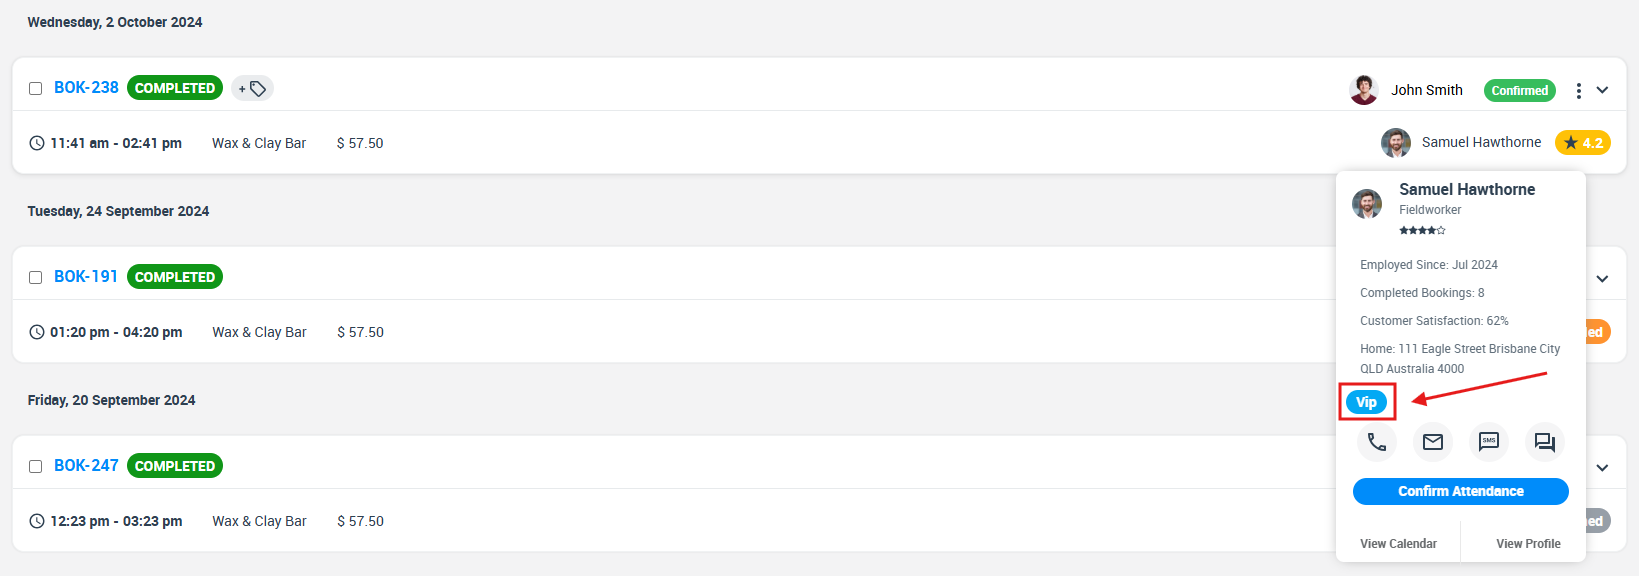
- The selected labels will then appear on the fieldworker’s profile as well as within the fieldworker details popup.
Benefits of Using Labels
- Enhanced Organization: Quickly filter and sort records by status, priority, or custom criteria, ensuring a highly organized database.
- Improved Communication: Visual cues from labels streamline internal communication and decision-making.
- Streamlined Workflow: Efficient categorization reduces time spent searching for records, boosting productivity.
- Customizability: Create and manage labels tailored to your business processes—including nested labels for granular organization.
- Consistent Record Management: Maintain uniformity across inquiries, bookings, quotes, invoices, and customer profiles to improve overall operational efficiency.
- Enhanced Reporting & Analytics: Enable targeted follow-ups and gain strategic insights through organized data.
- Scalability: Easily adjust and expand your labeling system to support growing business needs.
Conclusion
By leveraging the flexibility of labels and nested labels in OctopusPro, you can maintain a well-organized, efficient system for managing all aspects of your operations. Use labels to mark priorities, track status, and categorize records, ensuring that every inquiry, booking, quote, invoice, customer, and fieldworker is easy to identify and manage. For more detailed guidance on applying labels to specific types of records, please refer to the respective guides linked above.
For more information please visit OctopusPro user guide, and subscribe to our YouTube channel.