Adding Custom Image Types to Classify Images
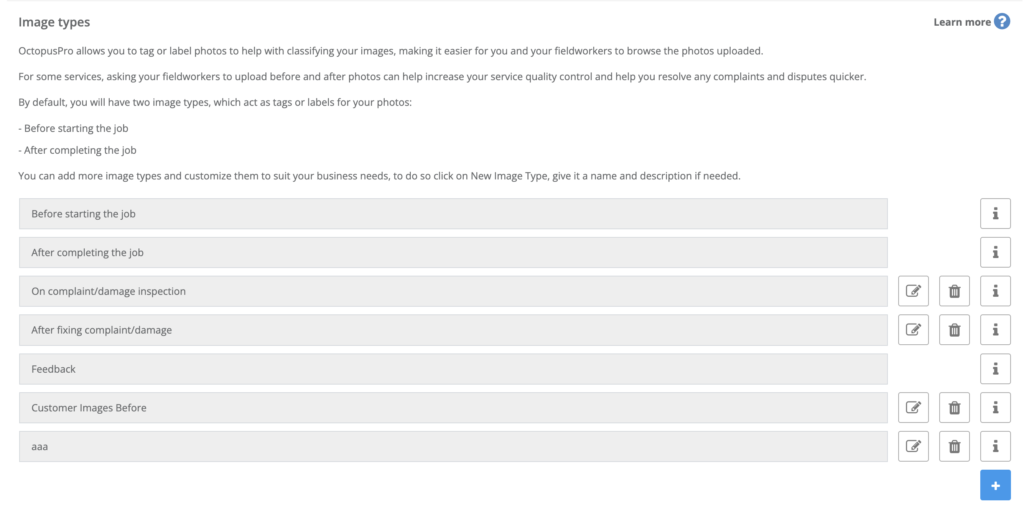
OctopusPro provides a robust and practical feature that empowers users to categorize their uploaded images efficiently. By default, the system offers two key image types: ‘Before Job Initiation’ and ‘After Job Completion’. This facility is instrumental in lending significance to the uploaded images, making them more searchable, and effectively useful in the course of service provision and monitoring. For example, a lawn care service could upload a ‘Before Job Initiation’ image showing the initial state of a yard, followed by an ‘After Job Completion’ image displaying the freshly manicured lawn. These visuals provide valuable context and serve as a solid reference point for both service providers and customers.
Suppose you manage a home renovation service; you could create an image type labeled ‘Design Inspiration’ for customers to upload images representing their vision for the project. Likewise, a cleaning service could benefit from ‘Mid-Service Progress’ images, demonstrating the ongoing efforts to the client.
This guide delves deeper into the process of adding a new image type, demonstrating its benefits and providing a detailed step-by-step walkthrough to ensure a seamless user experience.
Table of Contents
- Benefits
- Step-by-Step Instructions
- Selecting an Image Type during Image Upload
- Filtering Images and Attachments Log by Image Type
Benefits
- Improved Quality Control: Encouraging fieldworkers to upload ‘before’ and ‘after’ job images bolsters service quality control by providing tangible proof of work accomplished.
- Streamlined Dispute Resolution: These images can help settle any potential disagreements or complaints, serving as visual evidence of the condition before and after the job.
- Enhanced Customer Engagement: Customers have the capability to upload images to their bookings, adding additional context and expectations about the service requested.
- Customization: Beyond the default settings, the flexibility to add other image types tailored to specific needs makes the platform more user-centric and versatile.
Instructions
- From the left menu, go to Settings > General Settings, find and click on the Booking Settings. This is where you manage all the settings related to bookings.
- In Booking Settings, locate and select the Images Types page. This is where you handle image classifications for the platform.
Creating a New Image Type
- On the Image Types page, click on the ‘Create New’ button to open up the form for a new image type.

Inputting the Image Type
- Now, enter the name or the category of the new image type you want to add.

- After you’ve entered the new image type, hit the ‘Save’ button to secure the changes.
- Once this is done, the new image type is ready and available for users to choose from when uploading images to the platform. Now your system is even better equipped to handle various visual documentation needs, further improving the overall service quality and user experience.
- Remember, adding more image types not only enriches the system’s image documentation capabilities but also enhances the overall efficiency and usability of your platform.
Selecting an Image Type during Image Upload
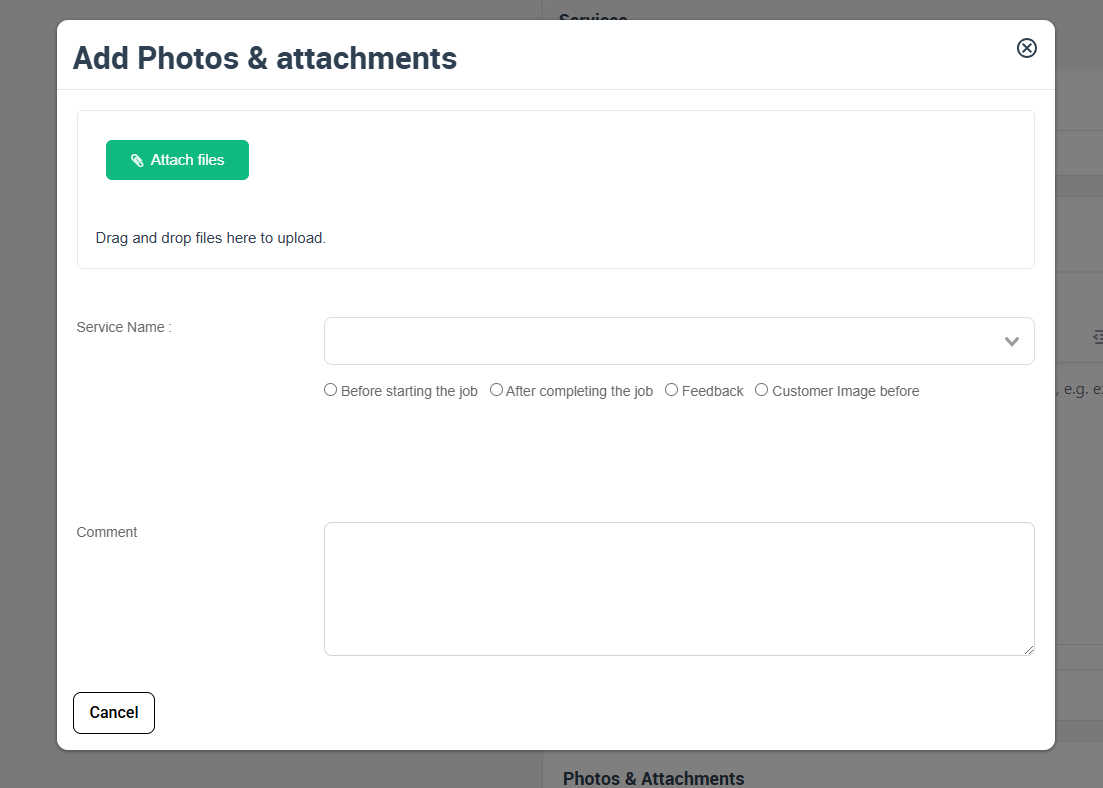
As an admin user or a fieldworker, whenever you are uploading an image to a booking or a quote, you will be asked to select the image type.
- After choosing the image to upload, you will see a drop-down menu labeled “Image Type”.
- Click on the drop-down menu and you will see all available image types, including any new ones you have added.
- Select the image type that best describes the image you are uploading.
- Complete the upload process.
 Remember, classifying the image correctly will enhance the service documentation and facilitate efficient communication.
Filtering Images and Attachments Log by Image Type
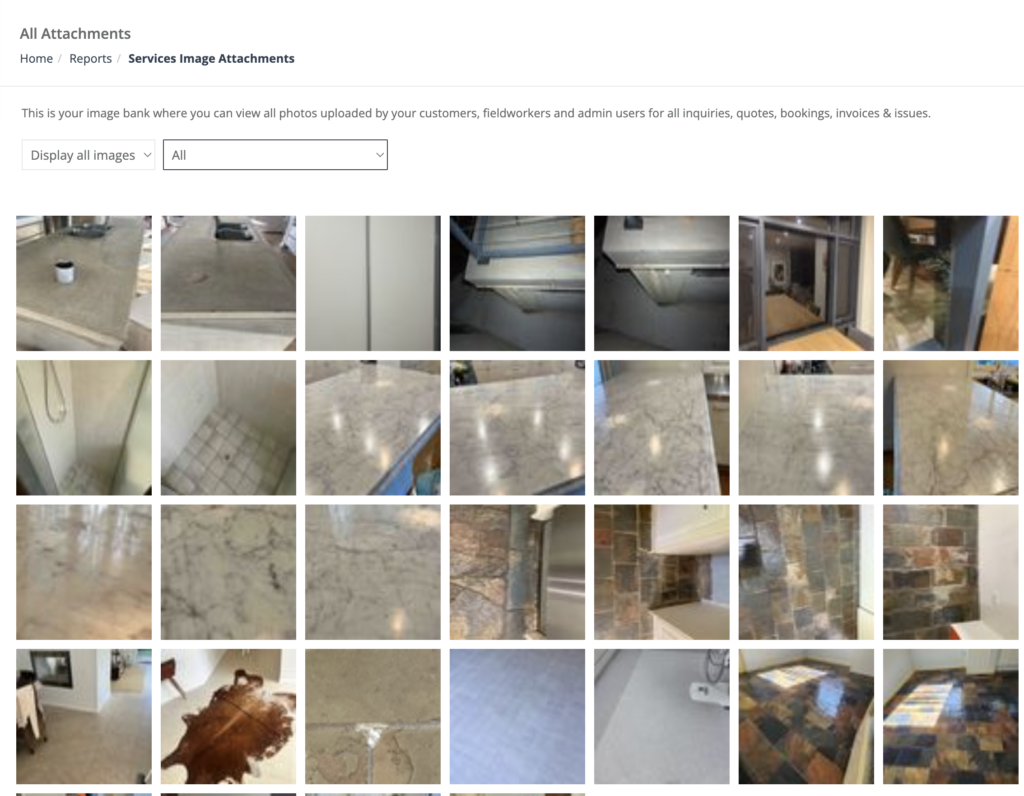
As an admin user, you can filter images and attachments based on their type. This can be particularly helpful when you are looking for specific images or documents. Here are the steps to do so:
- Navigate to the “Reports” section on your dashboard menu.
- In the Reports section, select “History Log”.
- Within History Log, find and select “Attachments Log”.
- On the Attachments Log page, you will see a “Filter” button or icon.
- Click on it, and you will see a drop-down menu with various filtering options, one of which will be “Image Type”.
- Select “Image Type”, and choose the specific image type you wish to view.
- Apply the filter, and you will see only the images and attachments of the selected type.

The ability to filter images and attachments by their type allows for efficient document management and quicker access to needed information, thereby improving service delivery and customer satisfaction.
To stay updated, please subscribe to our YouTube channel.
