Adding labels to bookings
Enhancing Your Booking Management with Labels
Labels are an effective way to categorize, identify, and bookmark your bookings. They provide a way to streamline communication within your office by offering additional information about each booking. By using labels, you can quickly convey the status of a booking, such as whether the company has communicated with a customer about a booking, quote, or any other related item.
OctopusPro allows you to personalize your labels by choosing names and colors, as well as adding as many labels as needed. Color-coded labels help you identify them faster and improve visual organization.
To quickly find specific bookings, you can utilize the labels filter on the booking list page. This feature eliminates the need for manual searching. Labels are also visible on quotes and invoices. To learn more, visit the labels page.
Please note that labels are only visible to your office staff, including admins and fieldworkers. Customers will not be able to view them.
Table of contents
- Adding a new label from your settings
- Adding a new label from the booking page
- Adding one or multiple labels to a booking
- Viewing added labels
- Remove labels from a booking
Adding a new label from your settings
You can create labels directly from the settings. Go to Settings > General Settings > Labels, and click on “New Label” or edit or delete existing labels. For more information, visit the “Add a New Label” page.

Adding a new label from the booking page
To add a label to a specific booking, go to Bookings > upcoming or past bookings, and view the booking you want to add a label to, from the top right of the booking overview page, click on “Add+”.
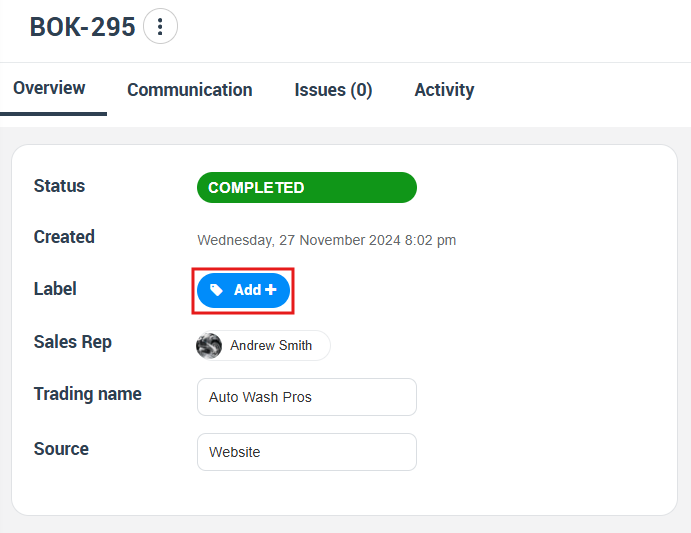
A pop-up window will display existing labels. Click on “Create New Label” to create a new one. Enter a label title, select a color, and click “Save.”
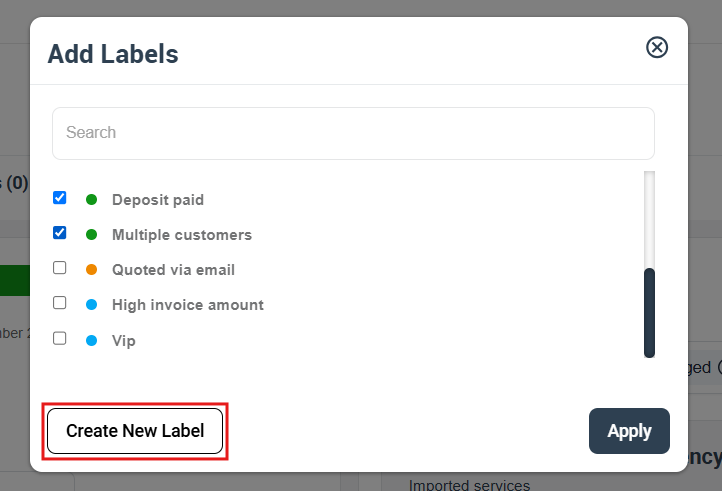
To edit or delete the label, navigate to Settings > General Settings > Labels.

Adding one or multiple labels to a booking
To add one or more labels to a booking, go to Bookings > Upcoming or past bookings, view the desired booking, and click on “Add +” in the top right of the booking overview page.

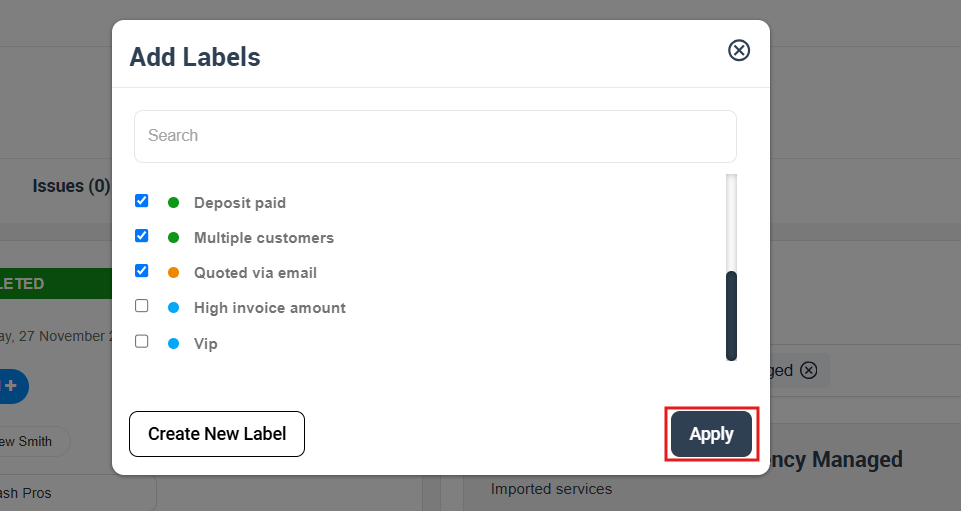
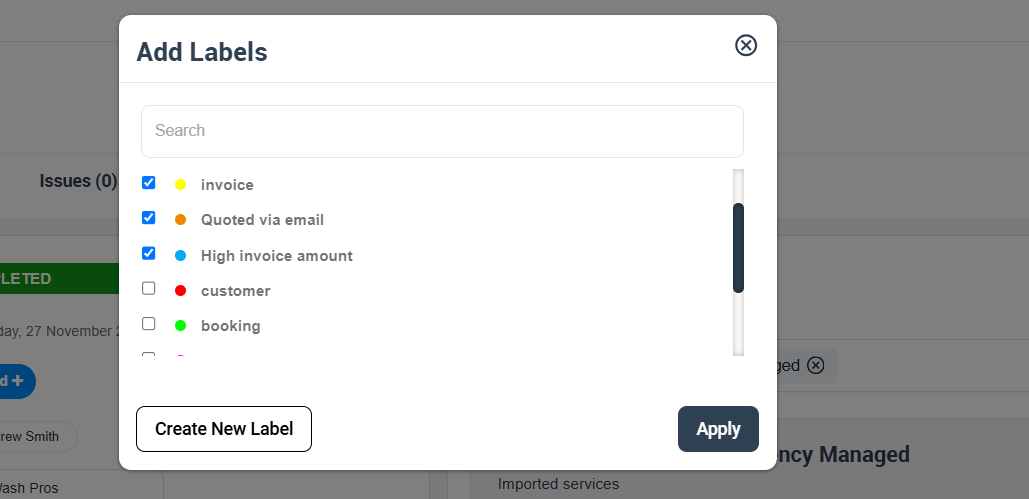
A pop-up window will appear, allowing you to select or search for the desired label(s). Click “Apply” to add the label(s) to the booking.
Viewing added labels
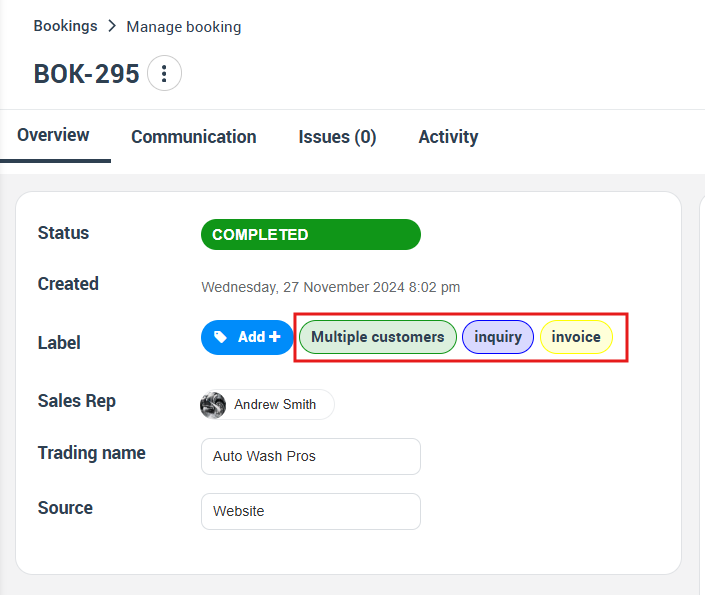
To view labels added to a booking, go to Bookings > Upcoming or past bookings. The labels will be displayed under the booking information on the booking list page.

Alternatively, view labels from the booking view page in the “Labels” section.
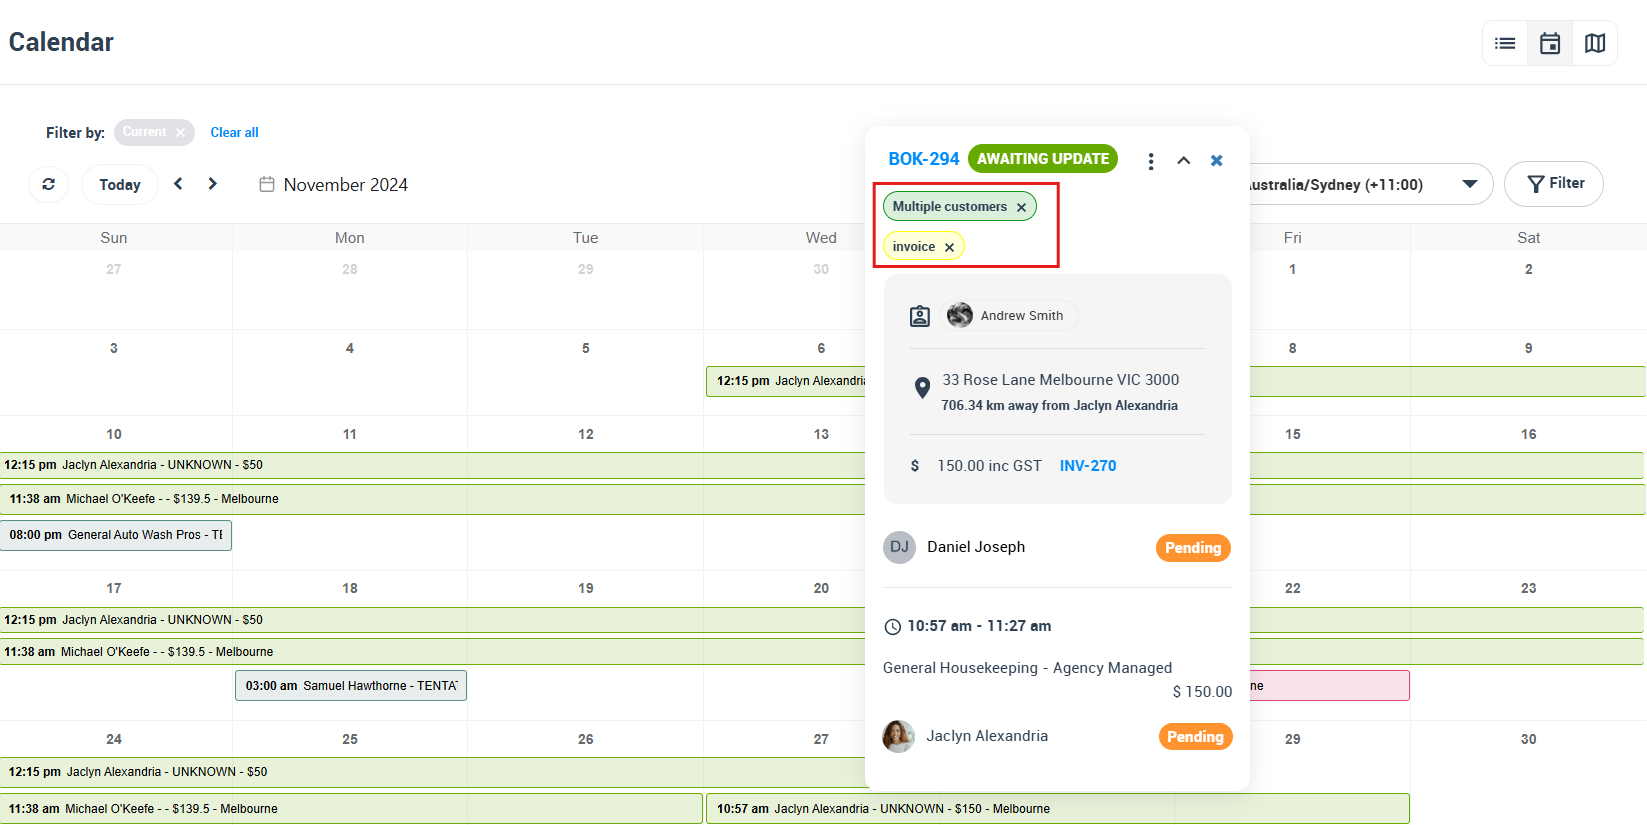
Labels can also be seen when viewing bookings in the Calendar. Click on the booking to view its details and check if any labels have been added.
Remove labels from a booking
To remove a label from a booking, click on “Label”, deselect the checkboxes for the unwanted labels, and click “Apply”. To delete a label permanently, go to Settings > General Settings > Labels.
Frequently Asked Questions (FAQs)
What is the purpose of using labels in OctopusPro?
Labels help you categorize, identify, and bookmark your bookings. They streamline communication within your office by providing additional information about each booking. Labels also improve organization and allow you to easily convey the status of a booking, such as whether the company has communicated with a customer about a booking, quote, or any other related item.
Can customers see the labels I add to bookings?
No, labels are only visible to your office staff, including admins and fieldworkers. Customers will not be able to view them.
How many labels can I add to a booking?
You can add as many labels as you need to a booking. There is no limit on the number of labels you can create and apply to bookings.
How do I create a new label?
You can create a new label from either the settings (Settings > General Settings > Labels)
or the booking page (Bookings > All Bookings > view the desired booking > click on “Add+” in the top right of the booking overview page then click “Create New Label”
Can I edit or delete labels?
Yes, you can edit or delete labels by going to Settings > General Settings > Labels. From there, you can modify or remove existing labels as needed.
How do I add labels to a booking?
To add one or more labels to a booking, go to Bookings > Upcoming or past bookings, view the desired booking, and click on “Add” in the top right of the booking overview page.
A pop-up window will appear, allowing you to select or search for the desired label(s). Click “Apply” to add the label(s) to the booking.
How can I view the labels added to a booking?
You can view the labels added to a booking by:
1- Go to Bookings > Upcoming or past bookings. The labels will be displayed under the booking information on the booking list page. Alternatively, view labels from the booking view page in the “Labels” section.
2- Labels can also be seen when viewing bookings in the “Calendar”.
Can I remove labels from a booking?
Yes, to remove a label from a booking, click on “Label”, deselect the checkboxes for the unwanted labels, and click “Apply”.
Can I permanently delete a label?
Yes, to delete a label permanently, go to Settings > General Settings > Labels.
Can I filter bookings based on labels?
Yes, you can utilize the labels filter on the booking list page to quickly find specific bookings with the desired label(s). This feature eliminates the need for manual searching.
Are labels visible in quotes and invoices?
Yes, labels are visible on quotes and invoices, which helps maintain consistency and organization across your booking management system.
For more information please visit Octopuspro user guide, and subscribe to our YouTube channel.
