
Managing Booking Statuses | Automate & Customize Your Workflow
What Are Booking Statuses?
Booking statuses in OctopusPro help you track and manage each booking throughout its entire life cycle, from the moment a quote is generated, to when a booking is scheduled, and ultimately to its completion.
Why Booking Statuses Matter
- Organized Workflow – Keep a clear overview of your bookings and easily see which ones are pending, confirmed, in progress, or completed.
- Improved Collaboration – Admins, fieldworkers, and even customers can stay informed about the progress and situation of each booking.
- Automated Behaviors – Many OctopusPro features (e.g., Automated Emails, Forms & Checklists, and the Customer Portal) depend on a booking’s status to trigger the right reminders and notifications.
How Booking Statuses Work
Each booking in OctopusPro has a particular status at any given time. Throughout its lifetime, a booking may transition through several statuses:
- Manually Updated – Some statuses require you or your team to change them when the booking moves to a new phase (e.g., from “Pending” to “In Progress”).
- System-Assigned – Others are automatically updated by OctopusPro based on events, such as a scheduled date passing or payment being received.
This page list of contents:
- Default booking statuses
- Booking status colors
- Actions that follow adding a new booking status
- How are booking statuses used in the customer portal?
- Adding a new booking status
- Edit booking status
- Delete booking status
- Disabling and enabling booking statuses
Customizing Booking Statuses
By default, OctopusPro provides a set of common statuses (e.g., “Quoted,” “In Progress,” “Completed”). If you need more tailored statuses for your workflow, you can:
- Add a New Status – Give it a unique name that reflects a specific stage in your booking process.
- Select a Color Code – Choose a color to visually differentiate this status from others in your calendar and dashboard.
- Configure Additional Options – For example, decide whether the status should:
- Appear in the booking calendar,
- Trigger automated emails or customer feedback requests,
- Allow generating invoices,
- Integrate with external services (e.g., push or remove events from Google Calendar),
- Be visible only to certain user roles (e.g., Admins, Fieldworkers).
Default booking statuses
The following list explains the general statuses created by default for your account which cover most of the general booking cycles.
TO DO: This status signifies that the customer has approved the quote and booking terms, and has scheduled the booking to take place on the designated dates. However, work has not yet commenced. This status is set as the default for all bookings scheduled by admin users and fieldworkers.
TENTATIVE: The Tentative booking status functions as a temporary reservation for customers who have shown interest but have not yet confirmed their booking with the necessary details or payment. This status is also the default for bookings made through the customer portal, and it changes to “TO DO” once approved by admin users or fieldworkers. Additionally, the Tentative status holds the booking until a fieldworker accepts it, enabling businesses to manage bookings efficiently and avoid overbooking.
Once the customer provides the required information and payment, the status changes to “TO DO,” confirming the service or appointment. Conversely, if the customer decides not to proceed, the status can be changed to “CANCELED,” freeing up the slot for other customers to book.
TO VISIT: This status, similar to “Tentative,” signifies that an initial onsite visit is needed before scheduling the work. It is employed when a fieldworker has to evaluate the job site in order to offer an on-site quote or verify their capability to perform the necessary tasks.
TO SCHEDULE: This status is used when admin users and fieldworkers collaborate on sales and support tasks. It applies to leads and inquiries assigned to fieldworkers, who then directly engage with the client to arrange a quote or schedule a TO VISIT, TENTATIVE, or TO DO booking. This status indicates that a fieldworker must directly interact with the client to progress the task. The TO SCHEDULE status emphasizes that fieldworkers need to proactively connect with clients and move tasks forward, whether it’s following up on inquiries, organizing quotes or bookings, or performing services. This status suggests that ongoing activities, such as client communication or admin reviews, may be present, and tasks won’t be considered complete until clients’ needs are fully met and resolved.
IN PROGRESS: This status denotes that a fieldworker has attended at least one appointment but has not yet finished the tasks associated with the job. At least one more appointment is required before the job can be marked as complete.
COMPLETED: This status signifies that all services within a booking have been successfully executed, marking the end of your booking workflow. “Completed” bookings are displayed in your reports under this status.
QUOTED: This status applies to all created quotes and estimates, which can be found in the Quotes section. It covers quotes generated by admins, fieldworkers, and customers through the customer portal. Once a quote has been converted to a booking, it will no longer be classified as a quote and will not appear in the open quotes list, but will retain its quote number for future reference. Converted quotes can still be accessed through their related bookings.
CANCELED: This status is applied to jobs or quotes that have been canceled before any work has started. It differs from the FAILED status, which is used when a fieldworker has attempted to begin the job and the booking was canceled afterward, essentially indicating that the fieldworker has attended the appointment. In contrast, CANCELED is used for bookings that are terminated before any attendance occurs. A cancellation fee can still apply to canceled bookings which can be determined when the booking is canceled. You can set the default cancellation fee in your financial settings.
FAILED: This status indicates that a fieldworker has attended to the booking and attempted to complete the job during one or more scheduled appointments but was unable to due to various obstacles, or the customer decided not to proceed. A call-out fee may be charged for failed bookings, particularly for mobile or customer address-based appointments. You can set the default call-out fee in your financial settings.
ON HOLD: This status signifies that a booking is temporarily on hold and may face an indefinite delay. You can set a follow-up date for bookings on hold to remind admins to check on them and send automated reminders to customers. “On Hold” bookings can be viewed from the All Bookings listing page using the booking status filter and in the Future Bookings dashboard under the Statistics tab.
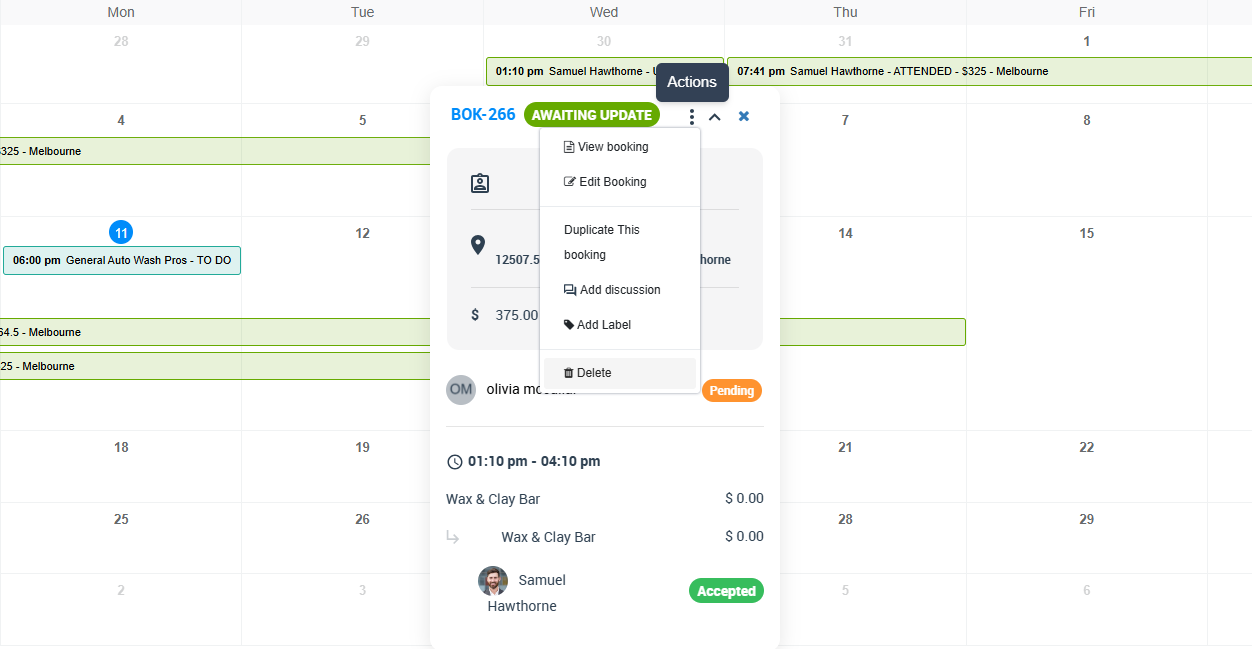
AWAITING UPDATE: This status implies that a job status update is needed from one or more assigned fieldworkers. It is used when the system automatically changes the booking status to “Awaiting Update” after the scheduled finish time for any appointment has passed, this includes bookings with the status To Do, In Progress, To Visit, and any custom status that has the booking tracking process active in its settings. This status continuously reminds fieldworkers to update their booking statuses and aids admins in tracking current bookings. Automatic booking status conversion can be disabled in your booking settings.
PRODUCTS: This status is used for selling and invoicing products sold separately from services, which can be helpful if your business sells items to customers or fieldworkers and needs to manage the sale, invoicing, and payments of these products (without associated services).
GIFT VOUCHER: This status is applied to gift vouchers purchased through the customer portal or sold by admin users or fieldworkers. When the voucher is redeemed, the status changes accordingly.
Booking status colors
Having a unique color for each booking status makes it easier for you to manage your appointments, as this helps you categorize your bookings visually and quickly identify at which stage in your workflow your bookings are in when viewing your calendar. All the default statuses in your account have unique colors added for them which you can’t change, but you can set unique colors for each custom status you create in your account.
Actions that follow adding a new booking status
Push to Google Calendar: Activate this flag if you want bookings which have the selected status to be pushed to the Google calendars of the assigned fieldworkers. This only works if the assigned fieldworkers have authorized you to sync with their Google calendars.
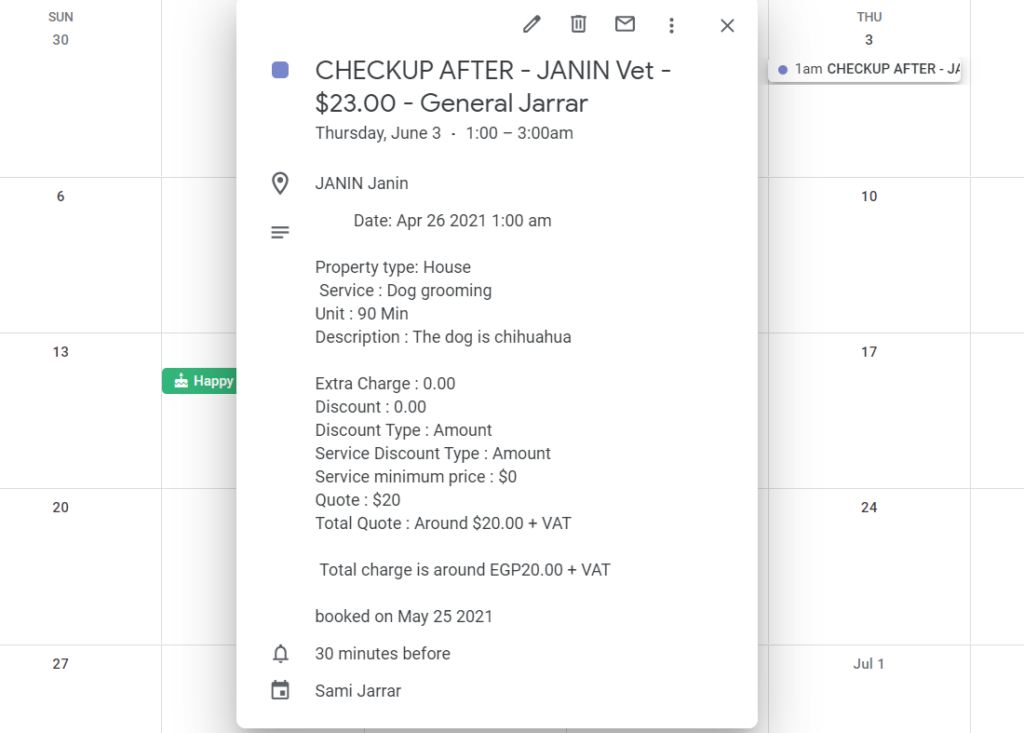
Delete from Google Calendar: Activate this flag if you want bookings that have the selected status to be deleted from the Google calendars of the assigned fieldworkers when they are deleted from your OctopusPro account, or when you assign different fieldworkers to these bookings. This only works if the assigned fieldworkers have authorized you to sync with their Google calendars.
Allow generating invoices: Activate this flag if you want to be able to generate invoices for bookings with this status. By default, you can generate invoices for the following booking statuses: In Progress, Completed, Failed, To Do, Canceled, and On Hold. Once an invoice has been generated for a booking, you can only convert its booking status to statuses that can have invoices.
As follows you can see how admin users can generate an invoice from the booking details page, if the “Allow generating invoices” was enabled the invoice will be generated, if not, the system won’t give the admin user the permission to generate an invoice.

Display under current status in the calendar: If you want bookings that have the selected status to display under the default Current status in your calendar then you should enable this flag. You will still be able to filter bookings by this status alone as well as see them under the Current status.

Activate booking tracking process: Activate this flag if you want the booking tracking process to include the selected booking status. The booking tracking process is a group of actions and reminders that appear to fieldworkers using the app on the days they have visits scheduled at your customer locations. This feature uses GPS tracking through the app to help ensure your fieldworkers arrive at their scheduled bookings on time, keeping your admin users informed about your fieldworkers’ locations from the moment they start heading to their bookings until they finish and leave their booking location. This process also keeps your admin users and customers informed when their fieldworkers are running late or when there are changes to their expected arrival times.
You must ensure that the booking tracking process is active for your account for this to function. This can be activated from under your general settings tab in your booking settings.
Admin users can monitor the booking tracking process from the view booking page when the fieldworker takes the first action of the process, a second map will appear on the view booking page and the process will appear as a checklist with live tracking on the second map, all of that can happen if the “Activate booking tracking process” flag is activated for the booking status.
![]()
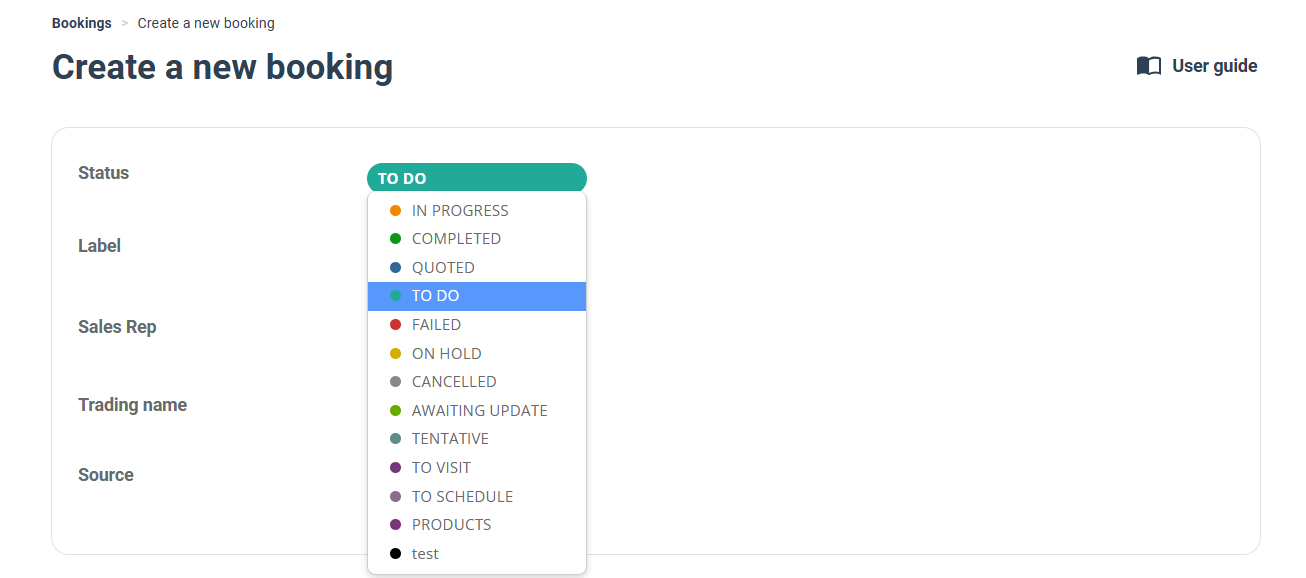
User roles that can see the selected status in their status list when creating bookings or updating booking status: When your admin users and fieldworkers update their booking status they are presented with a list of available statuses to select from, you can control which type of users can see the selected status in the booking status list by enabling/disabling the user role from the list below.
As follows is how admin users can see the status that has the previously mentioned action activated, admins can select the booking status when creating a new booking, or they can change the booking status for an existed booking by making the edit action
Creating forms and checklists for different statuses OctopusPro allows you to create forms & checklists for your admin users, fieldworkers and customers, and connect them with your bookings. You can create different forms to be displayed for different types of users on different occasions, you can also set up different forms and checklists for different booking statuses.
If you connect a form or checklists with a specific booking status, your form will be displayed to your specified users with the set of questions or checklists for them to complete when the booking status is converted to that connected booking status, this allows you to collect required information at this specific stage of your booking workflow.
You can create your forms and checklists and connect them with your booking statuses and user roles from Settings > General Settings > Forms & Checklists.
Click here for more information about creating forms and checklists.
How are bookings statuses used in the customer portal?
- When your customers book your services through your customer portal, the default booking status will always be set as Tentative, but once these bookings are accepted by your admin users or fieldworkers then the status will be converted to To Do.
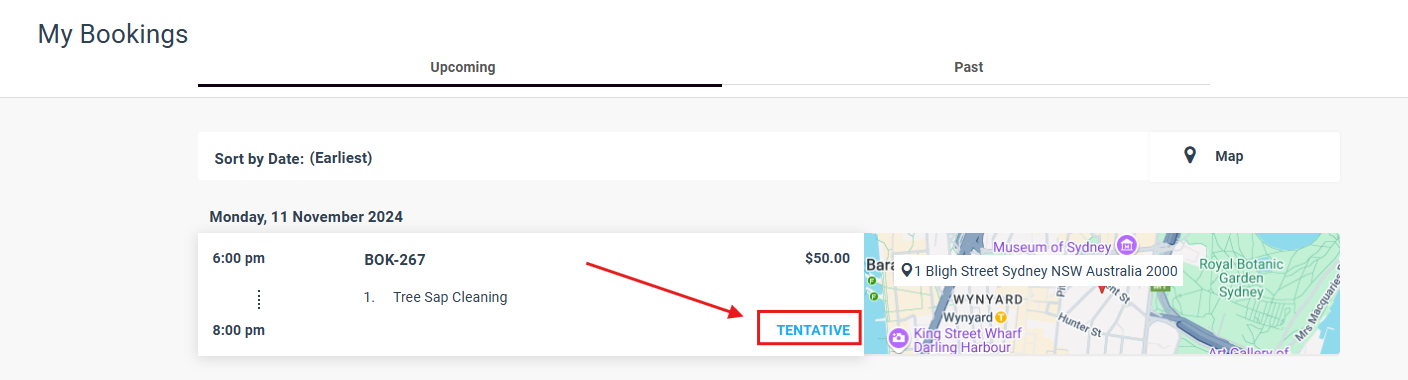
- Your customers can see the current status of their bookings from the view booking and booking listing pages in your customer portal. Your customers can’t change the status of their bookings, but they can cancel their bookings if granted permission, with some restrictions which you can set in your customer portal settings.
- If you don’t want your customers to be able to view the status of their bookings, you can edit their credentials from your user roles settings under Settings > Company Settings > Users.

Adding a new booking status
If you need to create custom statuses to help you better manage your bookings, you can add new booking statuses by following the steps below:
- From the left menu, click on Settings > General Settings > Booking Settings

- Go to the ‘Booking Statuses’ tab
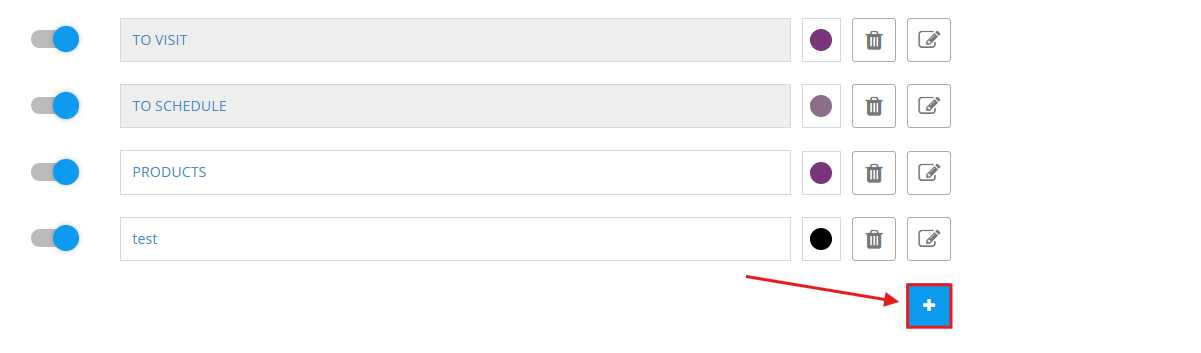
- Scroll down the page and click on the ‘plus’ sign, the add a new status popup will appear
- Insert the name of the booking status
- Set the color of the booking status
- Describe your new status in the description box to help your users understand its purpose

- Activate the actions and configuration required for your new booking status so you can control the way it integrates into your workflow.

- Select which user roles can change the status, you can add a new user role from Settings > Company Settings > Users > Roles > Add User.

- Finally, press the ‘save’ button

How to Add or Edit a Booking Status
- Go to Settings > General Settings > Booking Settings in your OctopusPro account.
- Go to the ‘Booking Statuses’ tab
- Click Add New Status (or Edit next to an existing one).
- Enter the Status Name, pick a Status Color, and add a Status Description.
- Configure Actions and Configuration options (e.g., pushing to Google Calendar, allowing invoice generation).
- Choose which User Roles can view or apply this status.
- Click Save to finalize your new or updated status.

Note: You can’t edit the description or the Actions of the default booking statuses, you only can choose the users that are allowed to change the booking status.
Deleting a booking status
If you have added custom booking statuses and later decide that they are no longer required, you can delete them by following the steps below:
- In the left menu, click on Settings > General Settings > Booking Settings
- Press on the ‘Delete’ bin for the status that you want to delete

Note: You can’t delete booking statuses that have already been used, but you can disable them so they no longer appear in the booking status list. You also can’t delete any of the default statuses added to your account, but you can disable the non-core statuses if they are not required, like the Failed, On Hold, To Visit, To Schedule and Gift Card statuses.
Disabling and enabling booking statuses
There are some booking statuses that might not be required for all types of businesses, like the Failed, On Hold, To Visit, To Schedule or Gift Card statuses, you can disable those statuses if not needed, you can also disable any of the custom statuses which you have created in your account.

Please note that there are core system statuses that cannot be disabled or deleted as they are required as part of the general booking workflow.
Best Practices & Tips
- Keep It Simple – Too many statuses can cause confusion. Use only as many as needed to reflect your actual workflow.
- Use Clear Labels – Names like “Awaiting Customer Confirmation” or “Parts on Order” can help your team see what’s happening at a glance.
- Assign Colors – Distinct colors for each status make it easier to spot them in your calendar or list view.
- Automations – Remember that each status can tie into automated notifications, so ensure your statuses align with your communication strategy.
- Review Periodically – As your business evolves, update or retire statuses to keep your workflow streamlined.
Summary
Booking statuses form the backbone of your workflow in OctopusPro. They give real-time visibility into each job’s progress, automate key tasks like notifications, and allow for deep customization to match your specific processes. Whether you use the default statuses or create your own, maintaining an organized, consistent status flow ensures you and your team stay on top of every booking—from initial quote to final completion.
For more information please visit Octopuspro user guide, and subscribe to our YouTube channel.