
Display Schedule an Appointment Button
OctopusPro allows you to make your customers set an inquiry about the services they need, instead of scheduling an appointment directly. After your customers submit their inquiries and they are accepted, you have the option to identify the next step of the booking process by controlling the appearance of the display schedule an appointment button.
The list of contents:
- Enabling the “Display Schedule an Appointment” flag
- The effect of enabling the “Display Schedule an Appointment” flag
- Where to find the “Schedule an Appointment” button on the customer portal?
- Disabling the “Display Schedule an Appointment” flag
- Use cases
Enabling the “Display Schedule an Appointment” flag
To do that, navigate to Settings> Customer Portal> Flags & Permissions
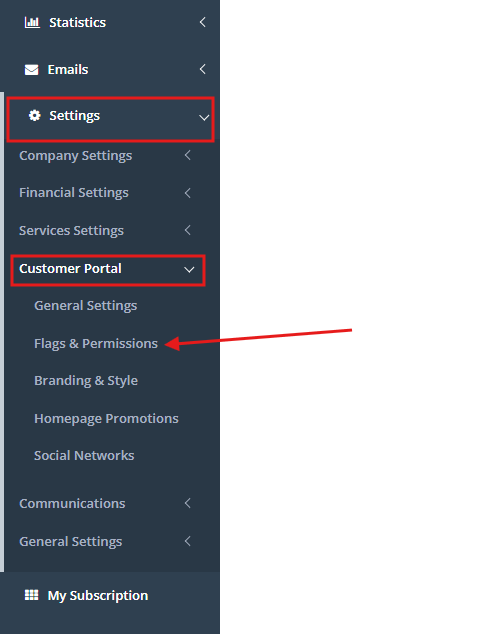
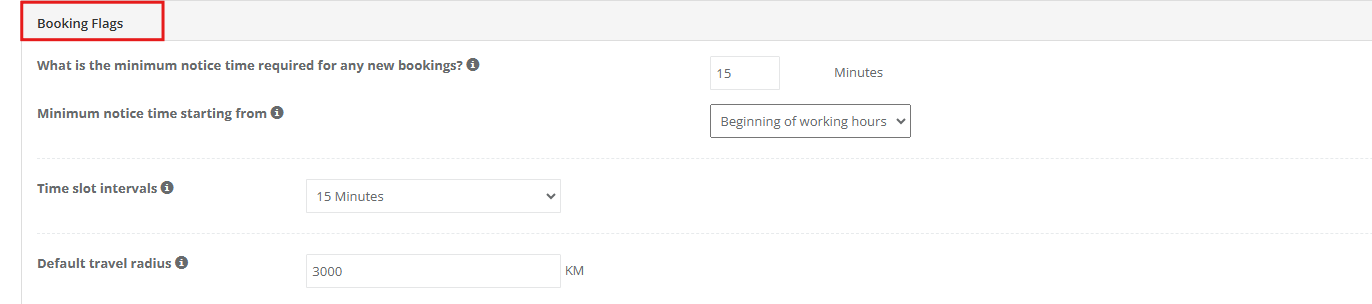
This toggle will be found under “Booking Flags”
The effect of enabling the “Display Schedule an Appointment” flag
Enabling this flag will display the “Schedule an appointment” button on the customer portal.

So the customers can select the booking date and the time they desire after their inquiries are accepted by admin users.
Where to find the “Schedule an Appointment” button on the customer portal?
The customers can find this button when they login into your customer portal, clicking on the right top of the page

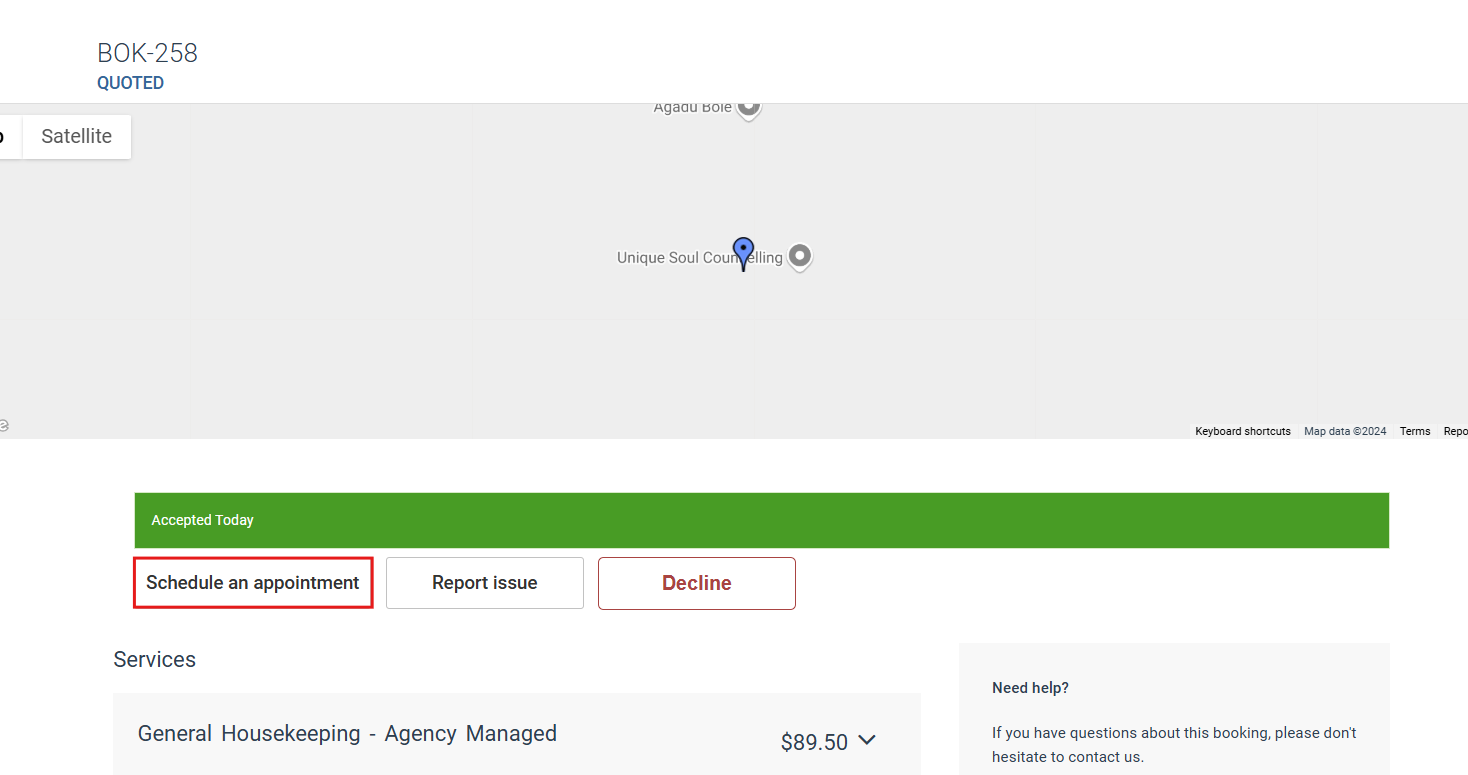
Click on Bookings, select the booking you need to edit then click on “Accept” as that means the quote of the booking is accepted and confirmed by the customer.
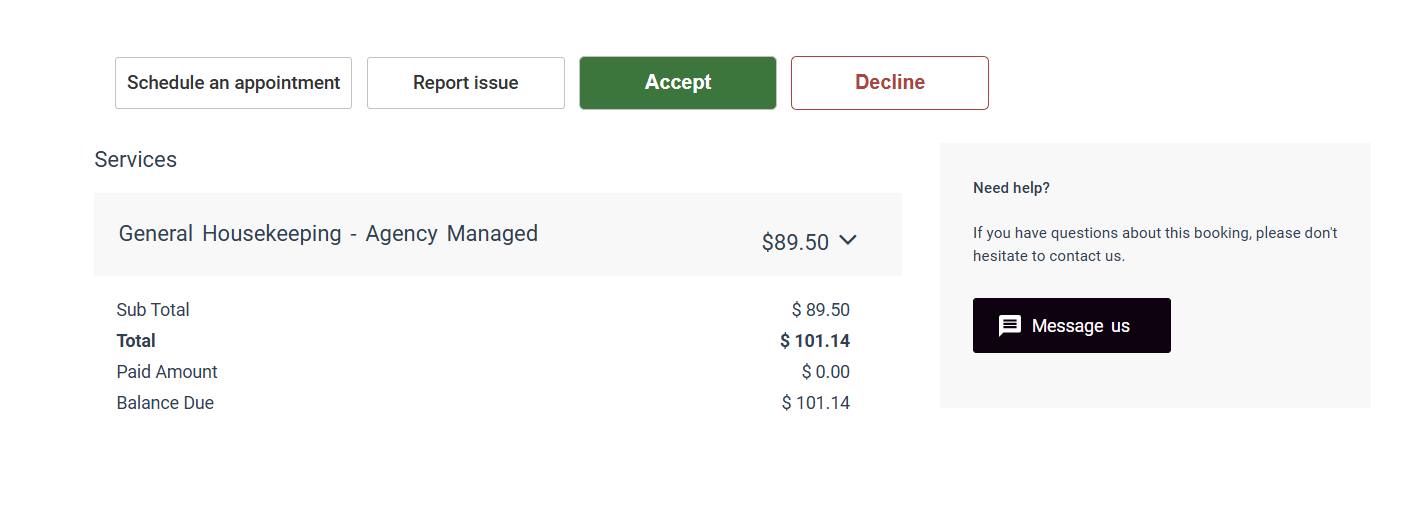
After your customer accepts the quote, the “Schedule an appointment” button appears on the booking page.

When this button is pressed, your customer will be redirected to a pop-up form to fill in the appointment details.

By clicking “Next” after selecting the appointment’s date and time, your customer will be able to complete the booking.
Disabling the “Display Schedule an Appointment” flag
In case of disabling the “Schedule an appointment button” flag

You’ll deny access to your customers so they can’t schedule bookings directly from the customer portal after their inquiries are accepted and as displayed in the following print screen, the available actions for the customer won’t include scheduling the date and the time of the appointment.

Use cases
If a massage business provides services like “Cupping Therapy” that require specific conditions when they are served, for example, the sessions can be held only in the center and the price varies depending on the parts that will be treated during the session. In that case, when your customers try to book the service from the customer portal, they will send an inquiry instead of booking directly. To allow the customers to schedule their appointments after sending the inquiries and they are accepted, your admin users need to enable the “Display schedule an appointment” flag on their customer portal settings. So, your customers can view the “Schedule an appointment” button on the booking page on the customer portal.

When the inquiries are accepted by the admin users, the customers can schedule the appointment they need through the “Schedule an appointment” button that appears on the customer portal.

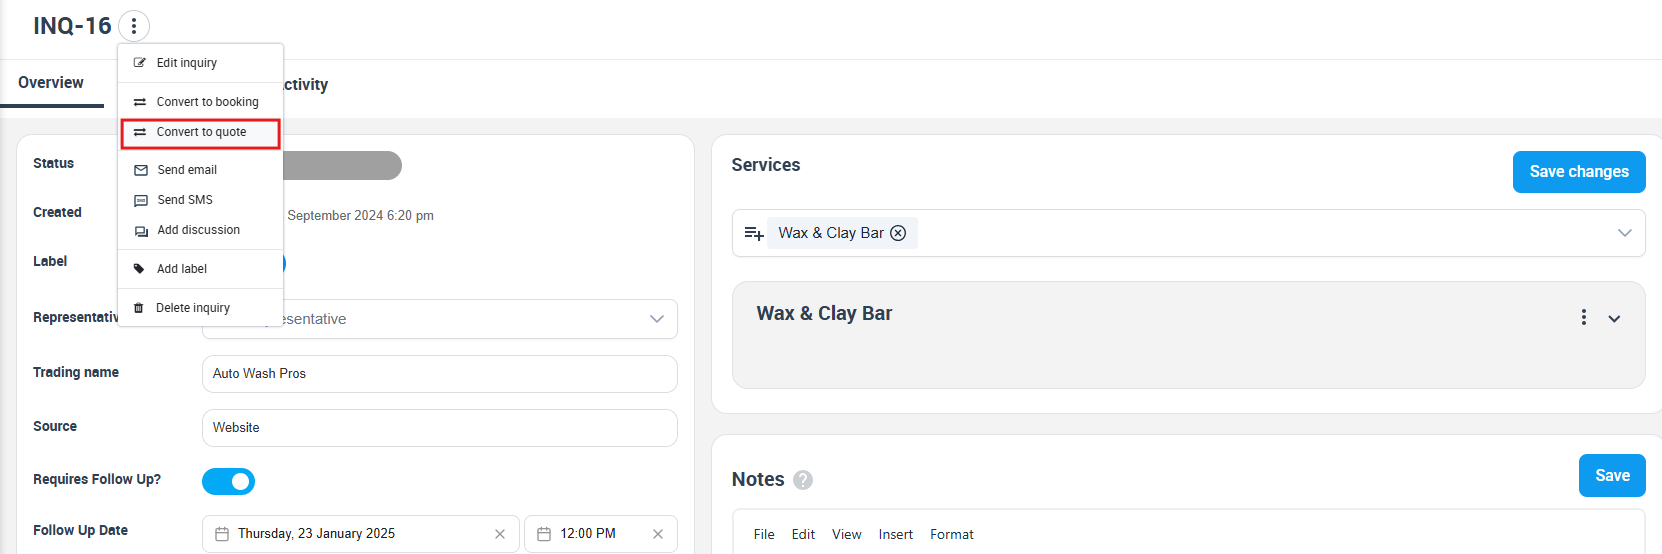
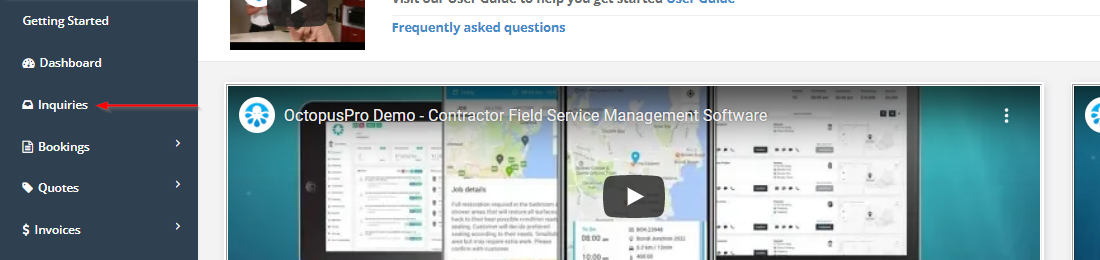
And if the admin users need to schedule the available date and time of the appointment for the customer after accepting the quote, the flag should be disabled so the customers won’t have the option to select the booking date and time and will only view the booking details. To do that, the admin users will navigate to “Inquiries”
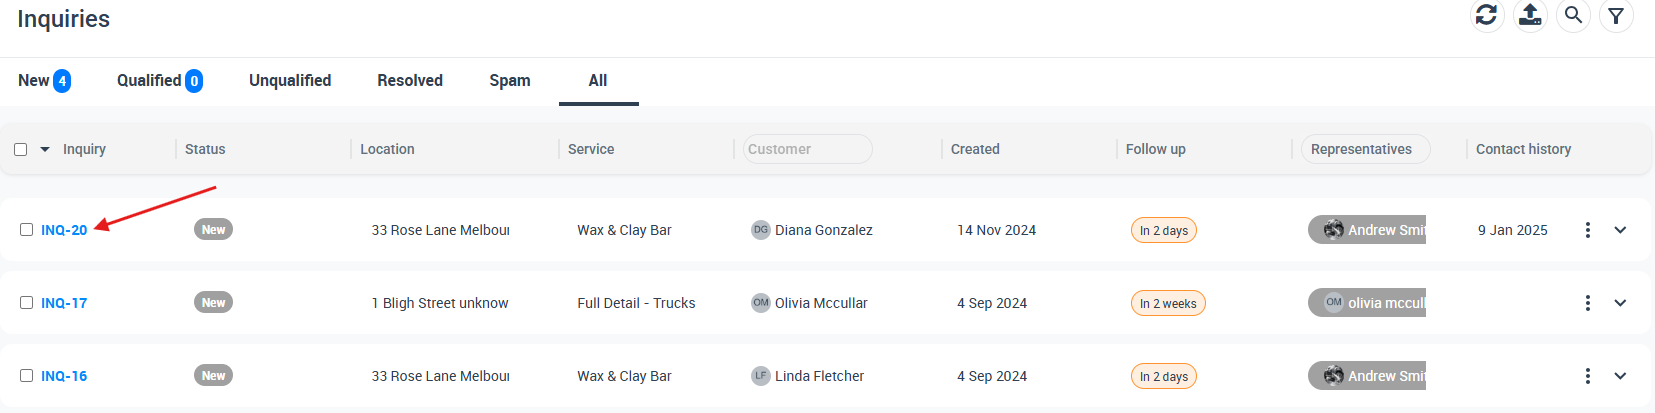
After selecting the needed inquiry
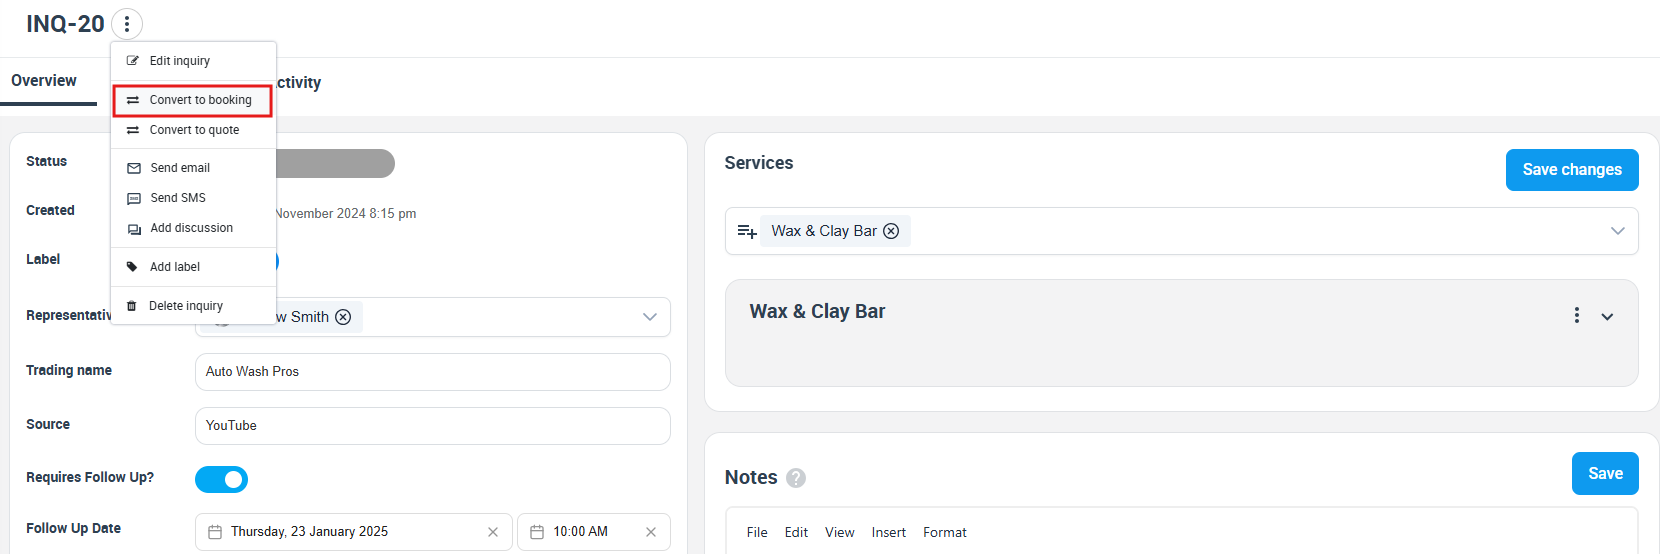
Convert the inquiry to a booking from the “Actions” button
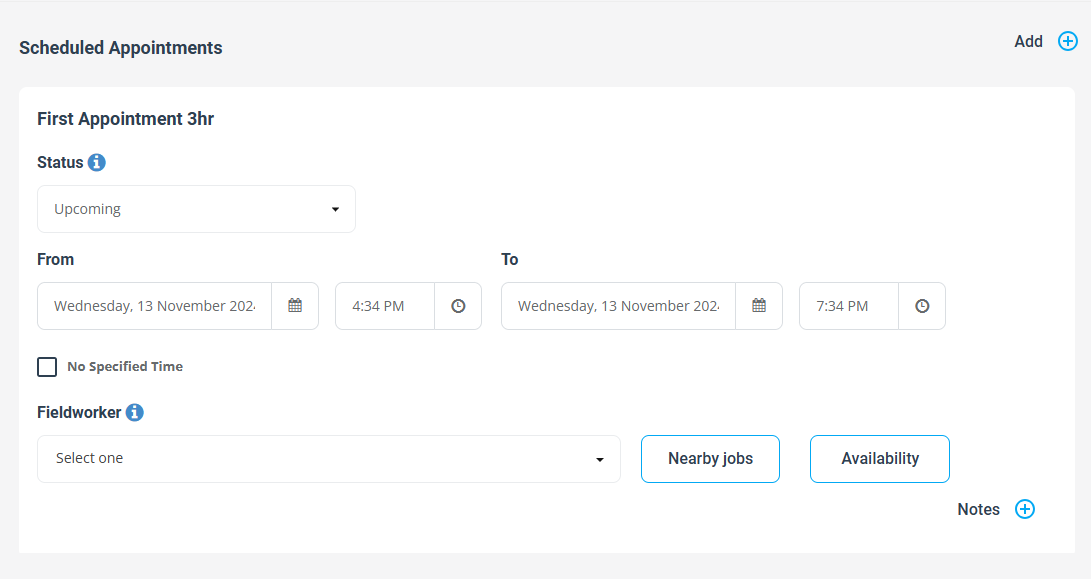
When the inquiry is converted to a booking, the admin users can set the date and the time of the appointment from the “Scheduled Appointments” section of the booking page.
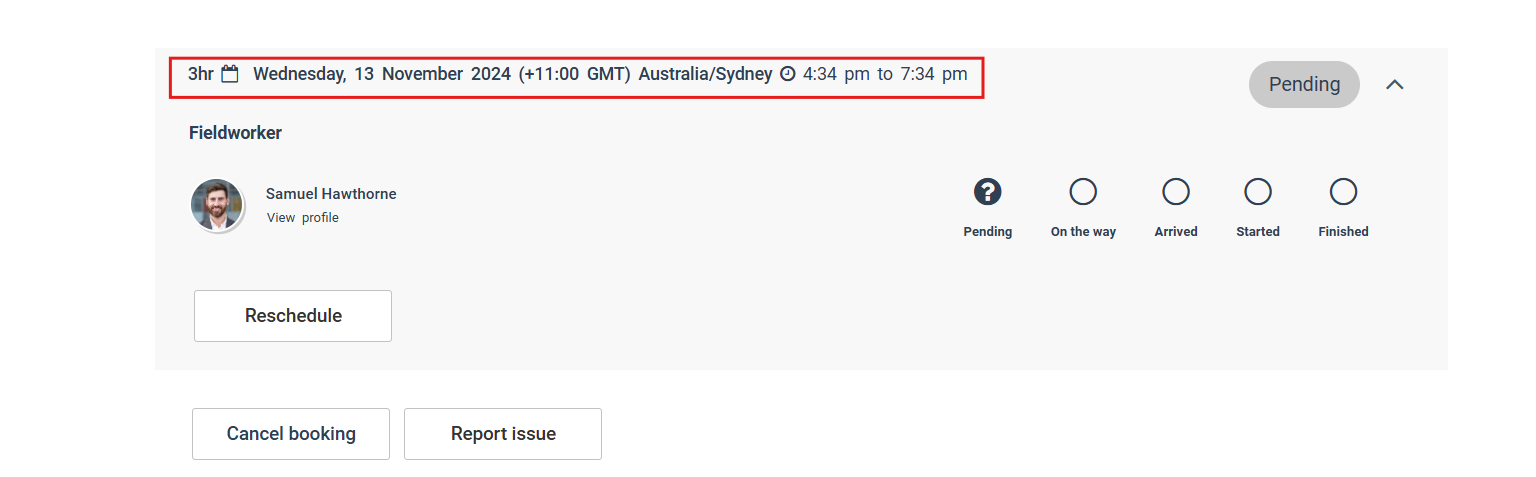
Then the customer will be able to check the booking details on the customer portal as displayed below.
For more information please visit Octopuspro user guide, and subscribe to our YouTube channel.