
Social Login with Google and Facebook in OctopusPro
OctopusPro supports social login for the Customer Portal, allowing customers to sign in using their existing Google or Facebook accounts instead of creating and remembering another password. This helps reduce login friction, improves the customer experience on mobile and desktop, and can reduce password reset requests for your team.
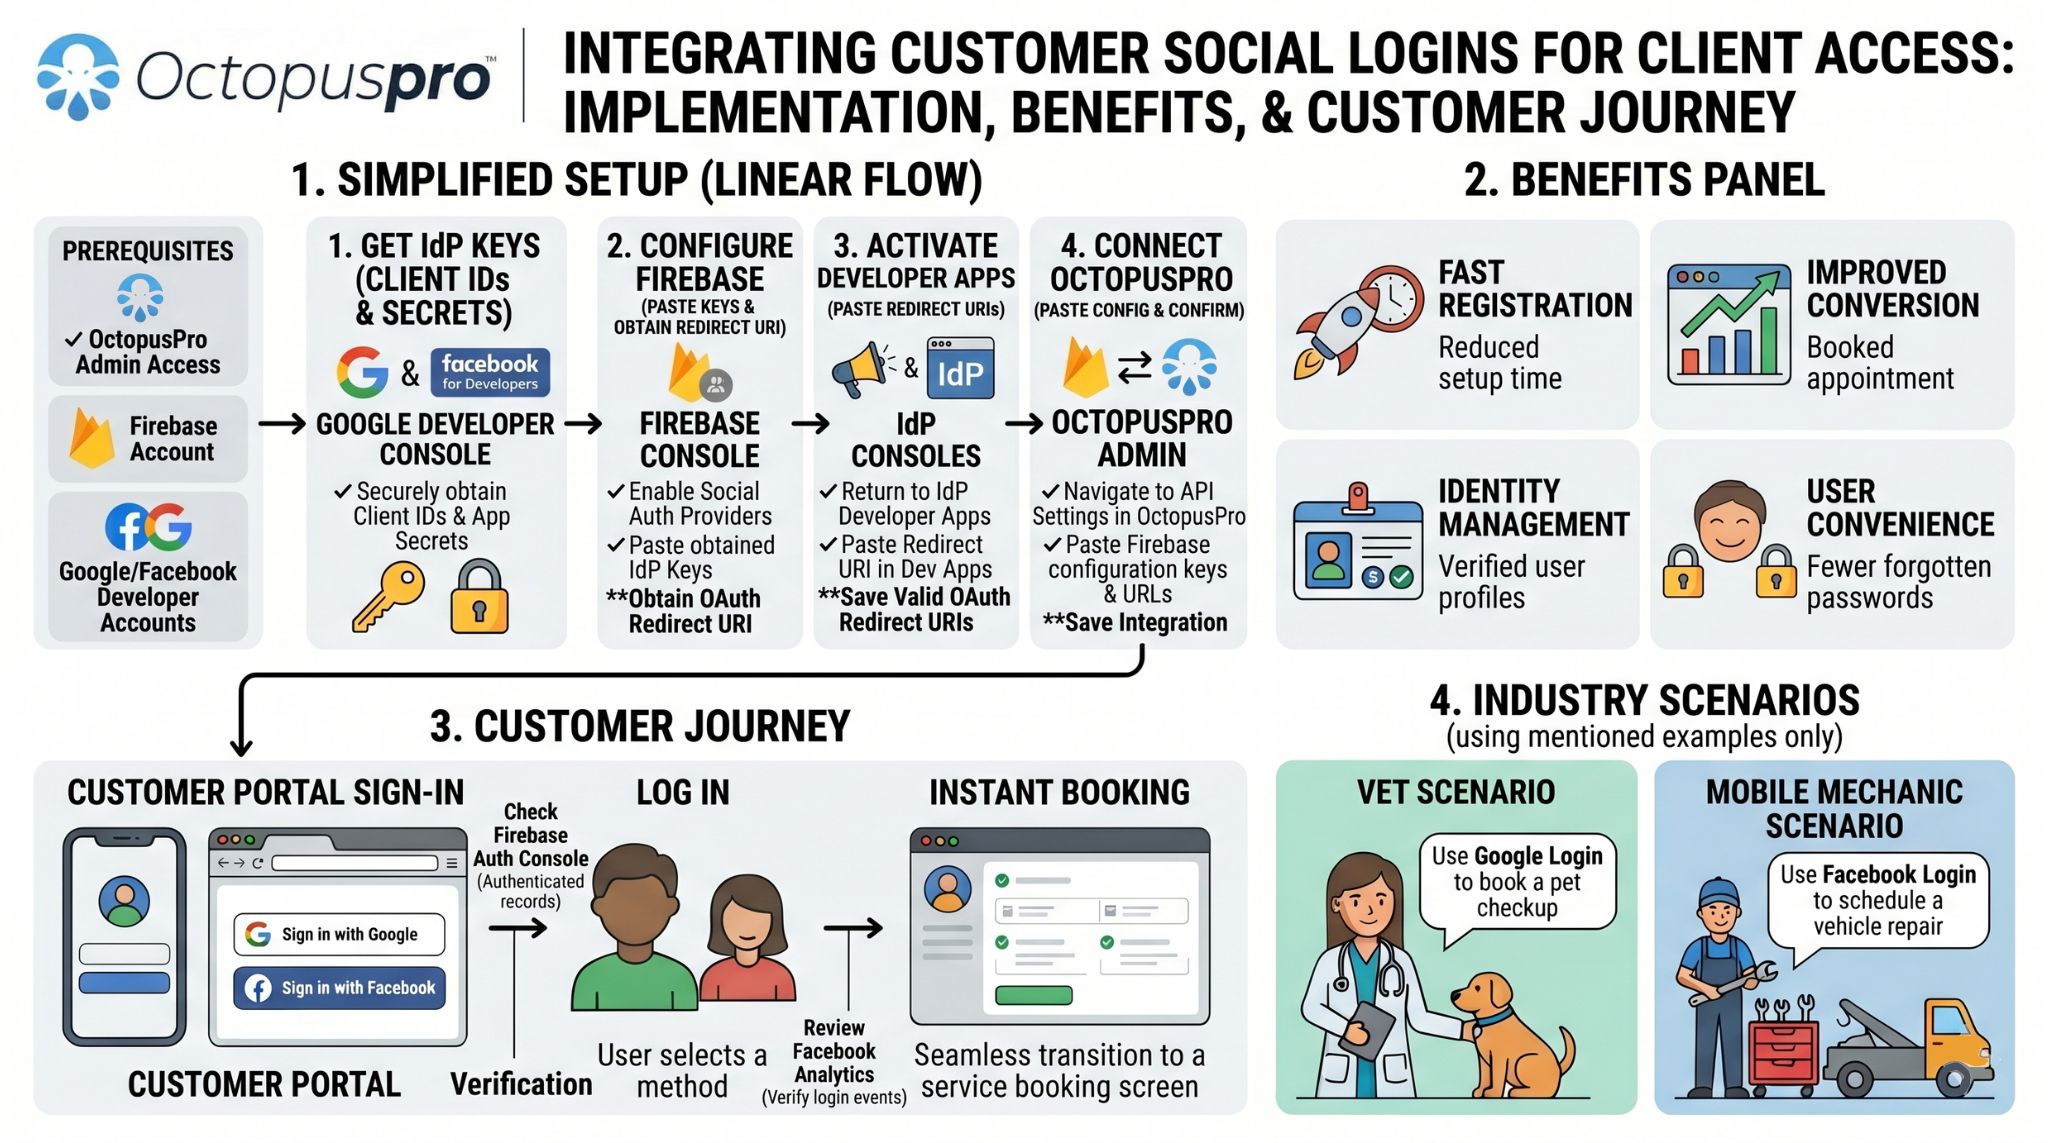
In OctopusPro, social login is configured through Firebase. Firebase acts as the authentication layer between OctopusPro and the social provider, such as Google or Facebook. Once connected, customers will see the relevant social sign-in buttons on your Customer Portal login screen.
This guide explains how to set up social login properly, how it works, what it is used for, and how to enable either or both providers in your OctopusPro account.
Important: This setup is for customer login to the Customer Portal. It is not the same as admin or fieldworker login.
You may also find these related guides helpful:
- Customer Portal Profile Management
- Accept Online Bookings on Your Website (Customer Portal)
- Third-Party Integrations, Open API & Webhooks
On this page
- What social login is
- Benefits of social login
- Before you start
- Step 1: Create or access your Firebase project
- Step 2: Add your portal domain to Firebase
- Step 3: Enable Google sign-in in Firebase
- Step 4: Enable Facebook login in Firebase
- Step 5: Connect Firebase to OctopusPro and enable providers
- Step 6: Test the customer login experience
- Troubleshooting and best practices
- Summary
What social login is
Social login, also called social sign-in or federated sign-in, lets customers log in using an existing Google or Facebook account. Instead of filling out a full registration form and remembering a separate password, they can choose the provider they already use and sign in faster.
In OctopusPro, social login is most useful for businesses that want to make customer access easier in the Customer Portal, especially for repeat bookings, recurring services, account management, saved payment methods, saved addresses, and other self-service actions.
Typical examples include:
- Repeat customers who want a faster way to log back in and rebook
- Busy mobile users who prefer one-tap sign-in
- Businesses that want to reduce password reset and login support requests
- Portals where customers manage bookings, invoices, payment methods, properties, dependents, or saved locations
Benefits of social login
- Faster sign-up and login: Customers can sign in with fewer steps.
- Better conversion: Reducing friction can help more customers complete sign-up or login.
- Improved customer experience: Many customers already trust Google and Facebook login flows.
- Fewer password issues: Your team may receive fewer forgotten-password requests.
- Better for repeat business: Returning customers can log in quickly to book again or manage existing jobs.
- Flexible setup: You can enable Google only, Facebook only, or both.
Before you start
Before configuring social login, make sure you have the following:
- OctopusPro admin access so you can update your integration settings
- A Firebase project to manage the authentication providers and connection details
- A Facebook Developer / Meta Developer account if you want to enable Facebook login
- Your Customer Portal domain, such as booking.octopuspro.com or the domain customers will use to access your portal
Good to know: Google sign-in is enabled directly inside Firebase. Facebook login requires both Firebase setup and a Facebook / Meta app with an App ID and App Secret.
Step 1: Create or access your Firebase project
- Go to Firebase and click Get started.
- Create a new Firebase project, or open an existing one if you already use Firebase for this account.
- Register a Web App inside Firebase.
- Copy and save your Firebase configuration details. You will need these values later in OctopusPro.
- Create a Realtime Database if you do not already have one, because the OctopusPro integration screen requires the databaseURL.
- If you already have an existing Firebase project and just need the saved configuration again, open Project settings.


Tip: Keep the following Firebase values handy because OctopusPro will ask for them: databaseURL, apiKey, authDomain, projectId, storageBucket, and messagingSenderId.
Step 2: Add your portal domain to Firebase
Firebase must trust the domain your customers will use to sign in. In most cases this is booking.octopuspro.com, unless you are using another Customer Portal domain.
- Open Firebase > Authentication.
- Go to the Settings or Authorized domains section.
- Add your Customer Portal domain.
Example screens:


Important: If the correct domain is not added to Firebase, Google or Facebook login may fail even if the provider itself is enabled correctly.
Step 3: Enable Google sign-in in Firebase
Google sign-in is usually the fastest social login option to enable because it is configured directly inside Firebase.
- Open Firebase > Authentication.
- Go to the Sign-in method tab.
- Select Google from the provider list.
- Enable the provider.
- If prompted, set the project details such as the public-facing project name and support email.
- Click Save.
- Confirm the Google provider shows as Enabled.


Why enable Google login? It gives customers a quick, familiar sign-in option and is especially useful for mobile users and repeat customers who want faster access to your Customer Portal.
Step 4: Enable Facebook login in Firebase
Facebook login requires two connected parts:
- A Facebook / Meta developer app with Facebook Login enabled
- The Facebook provider enabled in Firebase using the App ID and App Secret
Create your Facebook / Meta app
- Go to Meta for Developers and sign in.
- Create a new app and choose the app type that best matches the available Facebook Login setup in your Meta account.
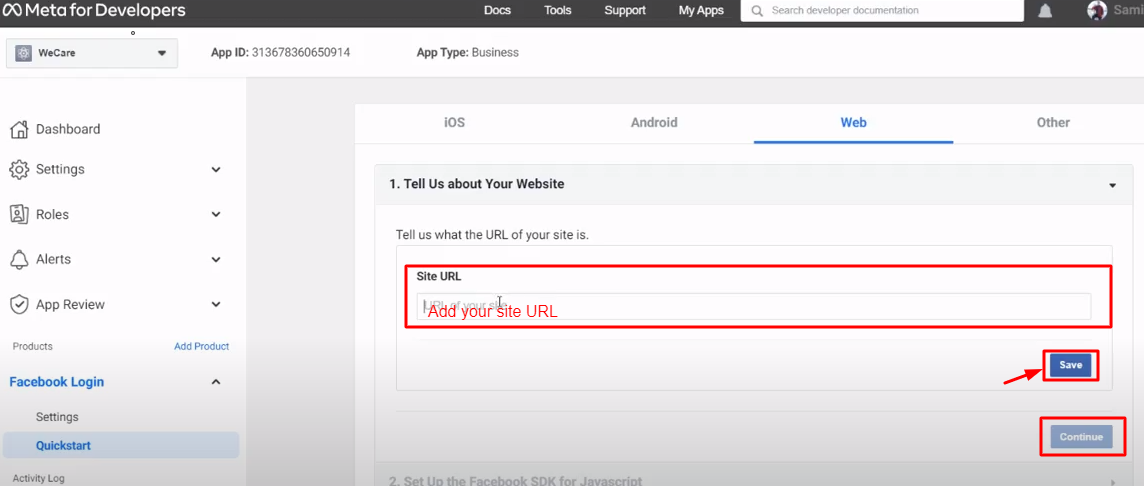
- Add the Facebook Login product to your app.
- Select the Web platform and enter your site URL.
- Open Settings > Basic and copy your App ID and App Secret.


Enable the Facebook provider in Firebase
- Open Firebase > Authentication.
- Go to the Sign-in method tab and select Facebook.
- Paste the App ID and App Secret from Meta into Firebase, then copy the OAuth Redirect URI that Firebase generates.
- Return to Meta / Facebook Login settings and add that exact Firebase redirect URI to your valid OAuth redirect URIs.
- Save your changes and verify that Facebook now shows as enabled in Firebase.


Important: The Facebook redirect URI must match exactly. Even a small mismatch can stop Facebook login from working.
Step 5: Connect Firebase to OctopusPro and enable providers
Once Firebase is ready, connect it to OctopusPro so the Customer Portal can use the social providers you configured.
- Log in to your OctopusPro Admin account.
- Go to Settings > Company Settings > Third-Party API Integrations.
- Create a new integration and choose Social sign-in as the third-party API type.
- Paste in the Firebase values you collected earlier:
- databaseURL
- apiKey
- authDomain
- projectId
- storageBucket
- messagingSenderId
- Enable Facebook login and/or Google sign-in depending on which providers you want to offer.
- Click Save.

Step 6: Test the customer login experience
After saving the integration, open your Customer Portal login page and verify that the enabled social login buttons are visible.
- Open your Customer Portal.
- Go to the login screen.
- Confirm the Login with Google and/or Login with Facebook buttons are displayed.
- Test each enabled provider with a real customer account or a test account.

When the setup is complete, customers will be able to use the social buttons to sign in faster instead of entering a separate portal password.
Troubleshooting and best practices
- Check the correct portal domain is authorised in Firebase. This is one of the most common causes of failed social login.
- Enable the provider in both places. For example, Google or Facebook must be enabled in Firebase and also enabled in OctopusPro.
- Copy the Facebook redirect URI exactly. Facebook login often fails when the redirect URI is incomplete or slightly different.
- Keep your credentials secure. Store the Facebook App Secret and Firebase settings safely and only share them with authorised team members.
- Test in a private/incognito browser. This helps rule out cached sessions and confirms what customers will actually see.
- Use clear project naming. This makes it easier to manage the correct Firebase project if you have multiple environments or brands.
- Keep a fallback login method. Many businesses choose to keep email/password login available alongside social login for flexibility.
Common reasons the buttons do not appear
- The provider is not enabled in Firebase
- The provider toggle is disabled in OctopusPro
- The wrong Firebase credentials were pasted into OctopusPro
- The Customer Portal domain is not authorised in Firebase
- Facebook redirect settings were not saved correctly
Summary
Social login in OctopusPro helps customers sign in to your Customer Portal using Google and Facebook, creating a faster and more convenient login experience. Firebase handles the authentication layer, while OctopusPro uses your Firebase project details to display and process the enabled sign-in options.
To set it up successfully:
- Create or open your Firebase project
- Copy the required Firebase configuration values
- Add your Customer Portal domain to Firebase authorised domains
- Enable Google sign-in in Firebase
- Create and configure a Facebook / Meta app, then connect it to Firebase
- Paste the Firebase details into OctopusPro and enable the providers you want to offer
- Test the login screen in your Customer Portal
Once configured correctly, social login can make customer access smoother, reduce login friction, and improve the overall self-service experience in your Customer Portal.
To stay updated, please subscribe to our YouTube channel.