Time Picker Custom Field – Touch-Friendly Clock Input for Bookings & Forms
The Time Picker custom field lets any user choose an exact time with a touch-friendly clock or spinner, eliminating error-prone text entry like “9:30am”. Modern time pickers respect locale, keyboard navigation, and screen-reader announcements, making them faster and more accessible than free-text boxes. In OctopusPro you can drop the same field onto bookings, inquiry widgets, CRM profiles, or checklists; the chosen value never affects price or duration, but it does drive automations (e.g., reminder emails) and improves schedule accuracy.
Where you can add a Time Picker
- Services → Inquiries / Quotes / Bookings – “Preferred arrival time (HH:MM)”
- Embedded Inquiry Widget – “Best callback time”
- Customer Profile – “Regular contact window (e.g., 18:00–21:00)”
- Fieldworker Profile – “Licence test time slot”
- Forms & Checklists – “Inspection completed at” (these instances never change price/time)
What is a Time Picker field?
A time picker is rendered as an HTML <input type=”time”>, optionally polyfilled with a Material dial or spinner; users pick hours and minutes without typing. Highlights:
- Locale-aware: 24-h vs 12-h format auto-detected
- Keyboard & ARIA: arrow keys adjust; screen readers announce “time spin-box”
- Validation: min/max stop impossible times (e.g., before 08:00)
Pricing note: time pickers are informational; they never add cost or labour minutes. Use Number Stepper or Button Groups for pricing logic.
Step-by-step setup
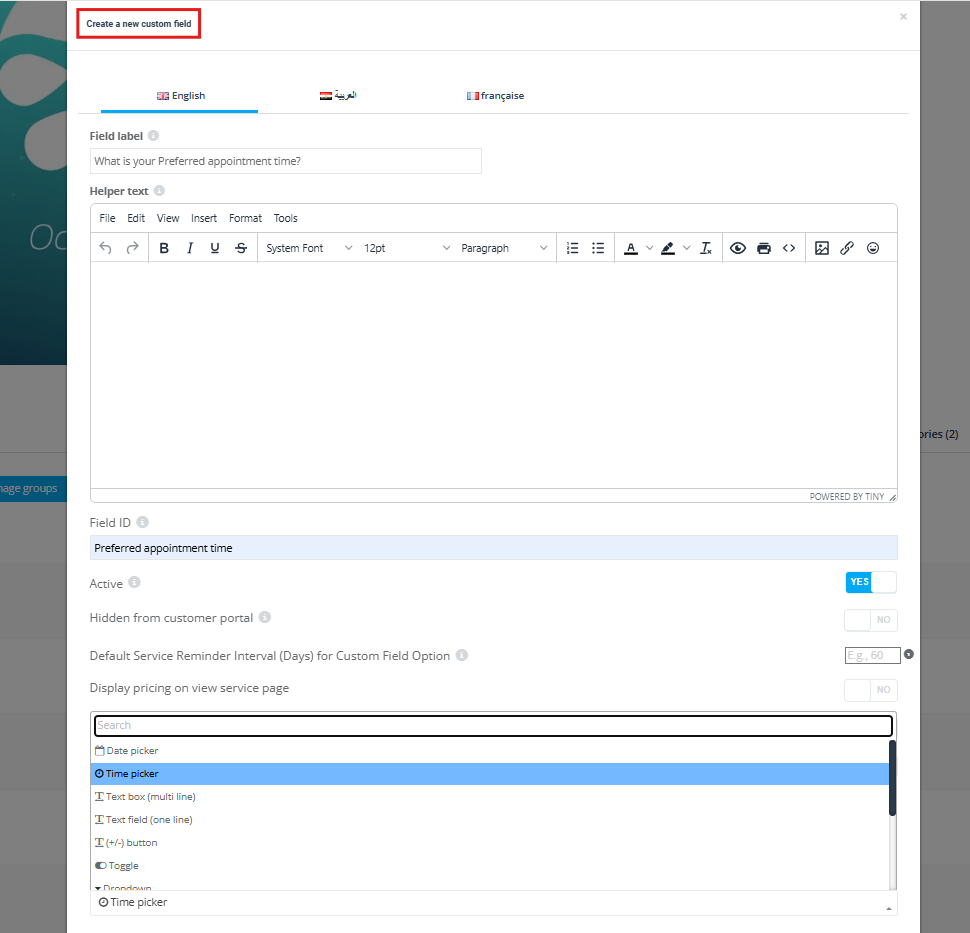
- Settings ▸ Service Settings ▸ Custom Fields ▸ Create New
- Label → Preferred start time
- Internal ID → start_time_pref
- Field Type → Time Picker
- Optional Min / Max (e.g., 08:00–18:00)
- Helper text → “24-hour format; choose any slot to the nearest 15 min”
- Toggle visibility flags (portal, lead form, invoice, search)
- Save and attach to services or profiles.
For the Inquiry Widget, Customer/Fieldworker Profiles, or Forms & Checklists, start in the relevant settings section; the remaining steps are identical.
How each role interacts
| Role | Create / edit | View |
|---|---|---|
| Admin (web) | Click clock icon, pick time; stored in ISO 8601 HH:MM.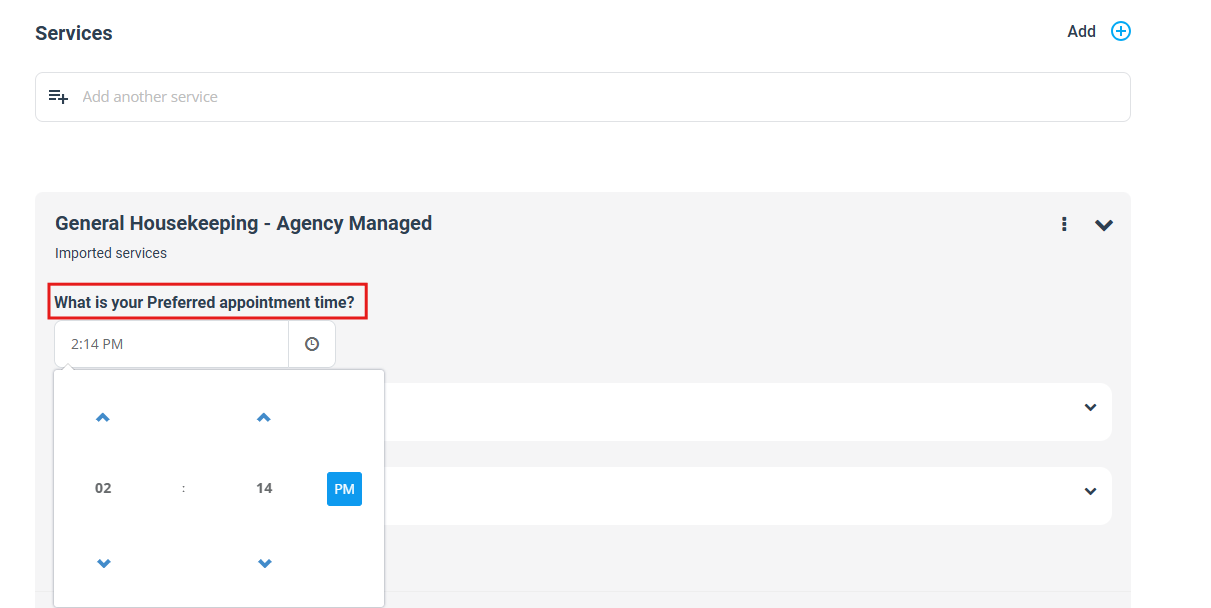 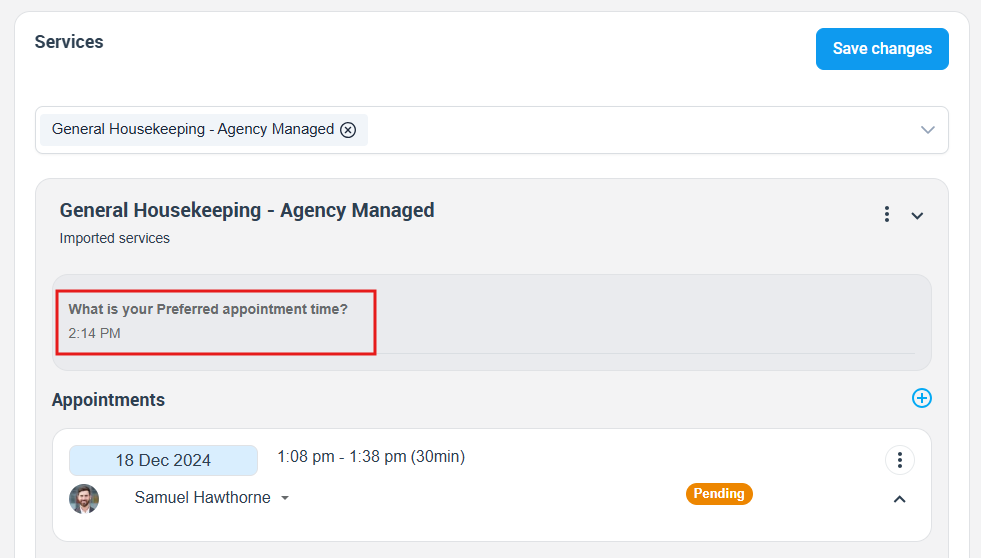 |
Seen in booking details & exports. |
| Fieldworker (app) | Swipe dial or type; updates instantly.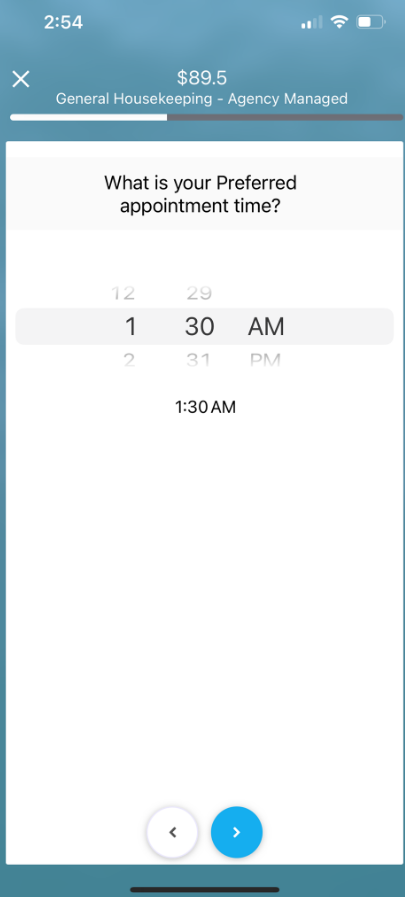 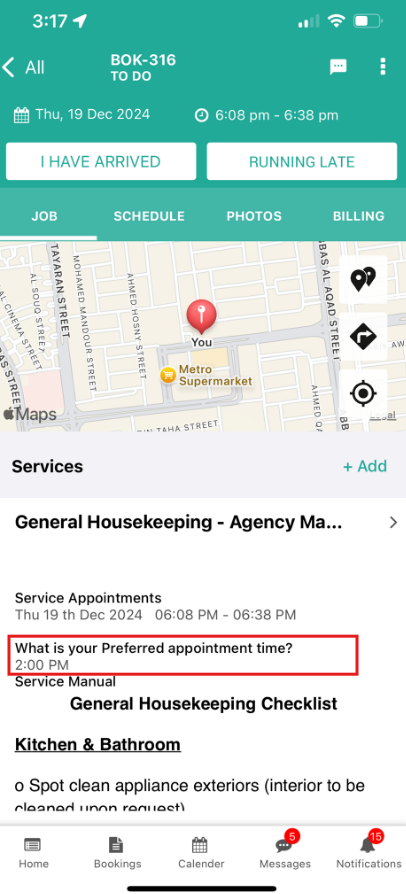 |
Displays in Job Detail. |
| Customer (portal/widget) | Mobile time-picker slides up; tapping saves.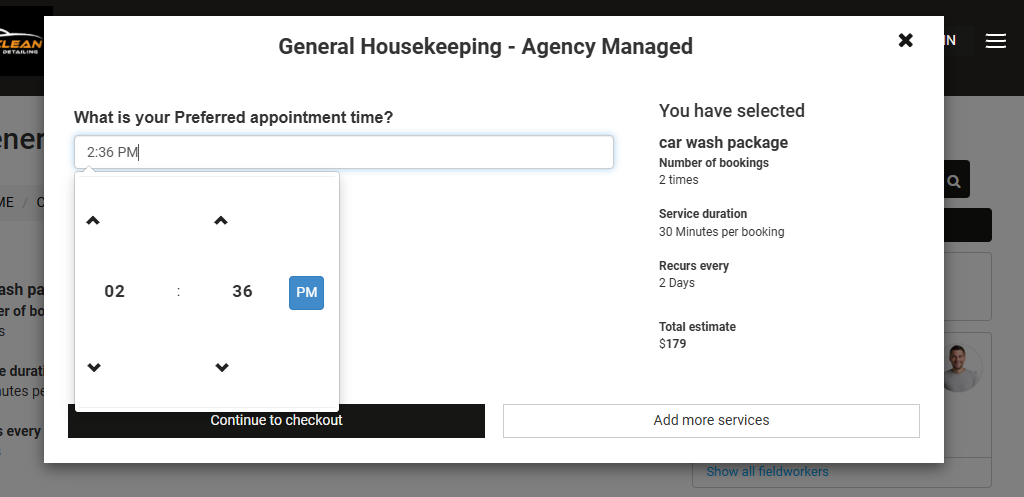 |
Shows in confirmation & My Bookings. |
Example use-cases & benefits
| Industry | Label | Why it helps |
| Cleaning | Earliest access time | Crew won’t arrive before customer is home. |
| Catering | Serve appetisers at | Kitchen prep schedule auto-generated. |
| Transportation | Preferred pickup time | Dispatch sees precise customer window. |
| Healthcare | Medication reminder time | Triggers automated SMS at chosen hour. |
Accurate time capture reduces reschedules and supports “send technician reminder 30 min before start” automations.
Reporting & automations
- Advanced Search: filter bookings by selected time range (e.g., all jobs after 17:00).
- CSV export: aggregate average preferred start time by service.
- Automations: trigger notifications relative to the stored time—e.g., send SMS one hour before Lab test time.
For more information please visit Octopuspro user guide, and subscribe to our youtube channel.
