
Attaching Files & Photos to Inquiries (Lead Attachments)

OctopusPro lets you attach files (PDFs, documents, etc.) and photos to an Inquiry (Lead) so your team can understand the request faster, reduce back-and-forth, and scope work accurately before converting the inquiry into a Booking or Quote/Estimate.
This is especially useful for industries that rely on visuals or paperwork upfront—such as cleaning, trades, HVAC, repairs, inspections, restoration, events, and any service where customers need to share site photos, damage images, compliance documents, or reference files.
On this page
- What this is for
- Who can upload & who can access inquiry attachments
- Attach a file to an inquiry (Admin/Office)
- Download an attached file (Admin/Office)
- Upload photos to an inquiry (Admin/Office)
- Upload multiple photos to an inquiry
- Customers: attach photos/files to an inquiry (Customer Portal)
- Download photos from an inquiry
- Delete an uploaded photo
- Edit the service tag (service name) on a photo
- Add a comment on a photo
- Best practices (recommended)
- Related guides
What this is for
- Faster quoting and scheduling: Your office can see exactly what’s needed before calling the customer.
- Better job preparation: When an inquiry is converted to a booking/quote, attachments help the assigned fieldworker arrive prepared (tools, parts, materials, access needs).
- Clear audit trail: Keep all files/photos linked to the lead so nothing gets lost in emails or chat threads.
- Fewer misunderstandings: Visuals + documents reduce wrong assumptions and rework.
Example use cases: “Upload photos of the damaged tile,” “Attach the floor plan,” “Share the insurance report,” “Send the model/spec sheet,” “Upload compliance certificates,” “Add reference images for the desired finish.”
Who can upload & who can access inquiry attachments
- Admin/Office users: Can upload and manage files/photos from the Inquiry details page (Photos & Attachments section).
- Customers: Can upload photos/files after submitting an inquiry through your Customer Portal (when presented with the upload option).
- Fieldworkers: Do not access inquiries directly. They can view inquiry attachments only after the inquiry is converted into a Booking or Quote/Estimate and is assigned to them.
Tip: If you need customers to upload documents to a booking (not an inquiry), you can also enable PDF uploads in the portal for bookings (see related guides below).
Attach a file to an inquiry (Admin/Office)
- Go to Inquiries > All Inquiries.
- Open the relevant inquiry (use search if needed), then click Actions > View Inquiry.
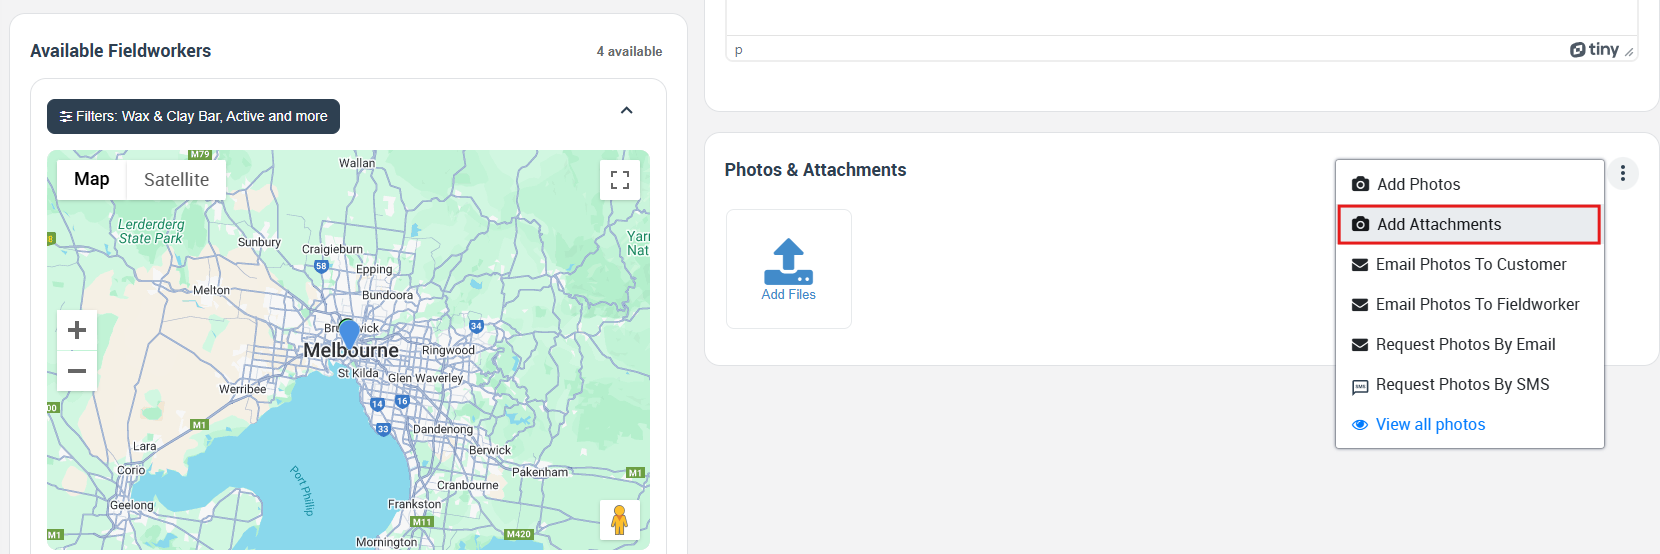
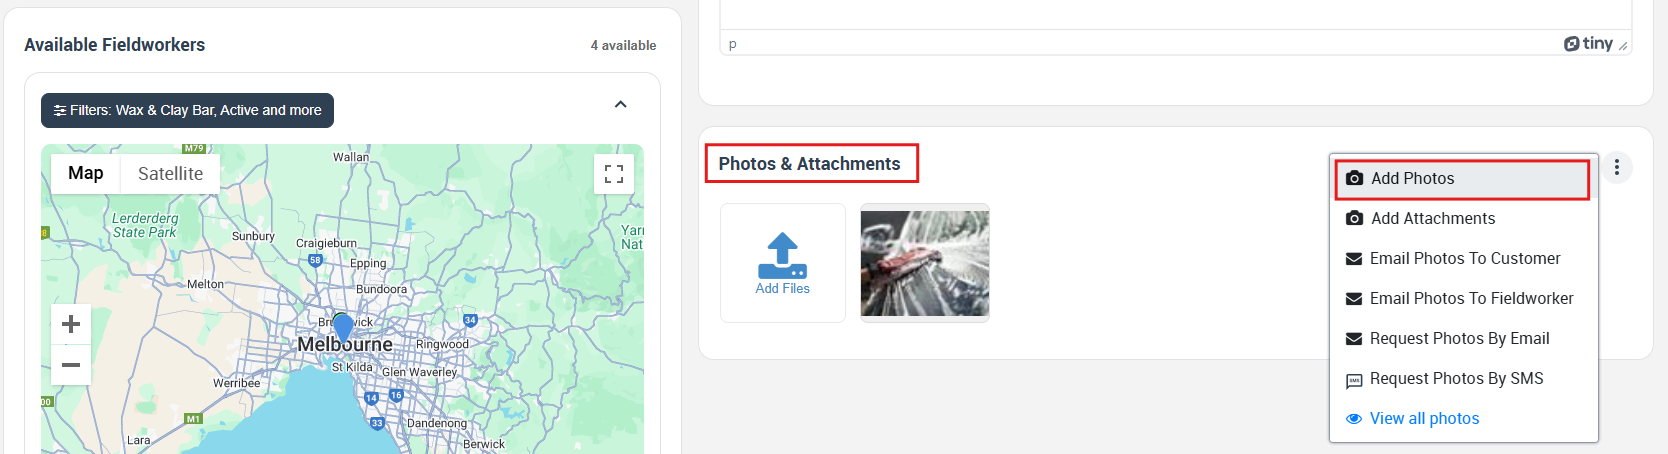
- Scroll to the Photos & Attachments section.
- Click the Actions menu in that section, then choose Add Attachments.
- Upload the file (you can drag-and-drop or browse).
- Add a clear description (recommended), then click Save.
Recommended file types: PDFs, DOC/DOCX, XLS/XLSX, images, and other common document formats used by your business.
Download an attached file (Admin/Office)
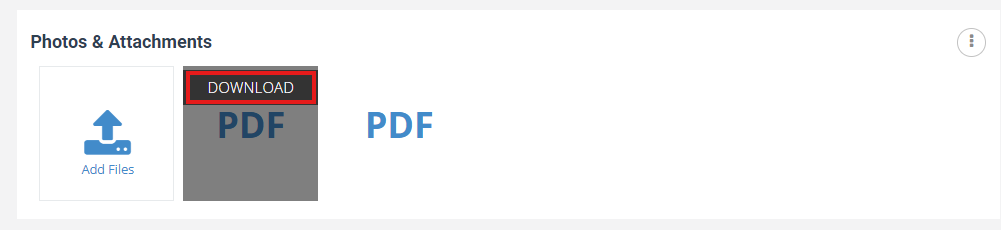
- Go to Inquiries > All Inquiries and open the inquiry.
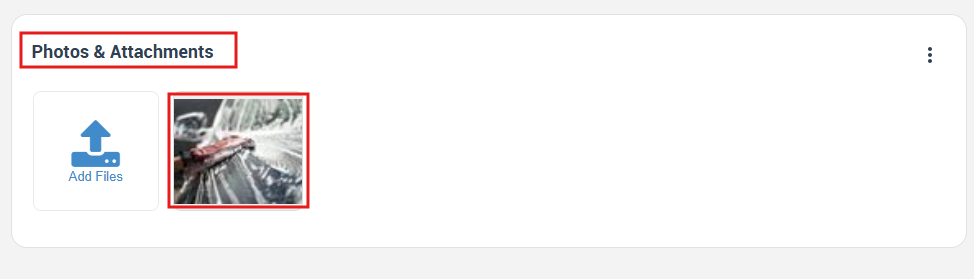
- In Photos & Attachments, locate the file.
- Hover over the file/thumbnail and click Download.
Upload photos to an inquiry (Admin/Office)
- Open the inquiry (Inquiries > All Inquiries > View Inquiry).
- In Photos & Attachments, click Add Photos.
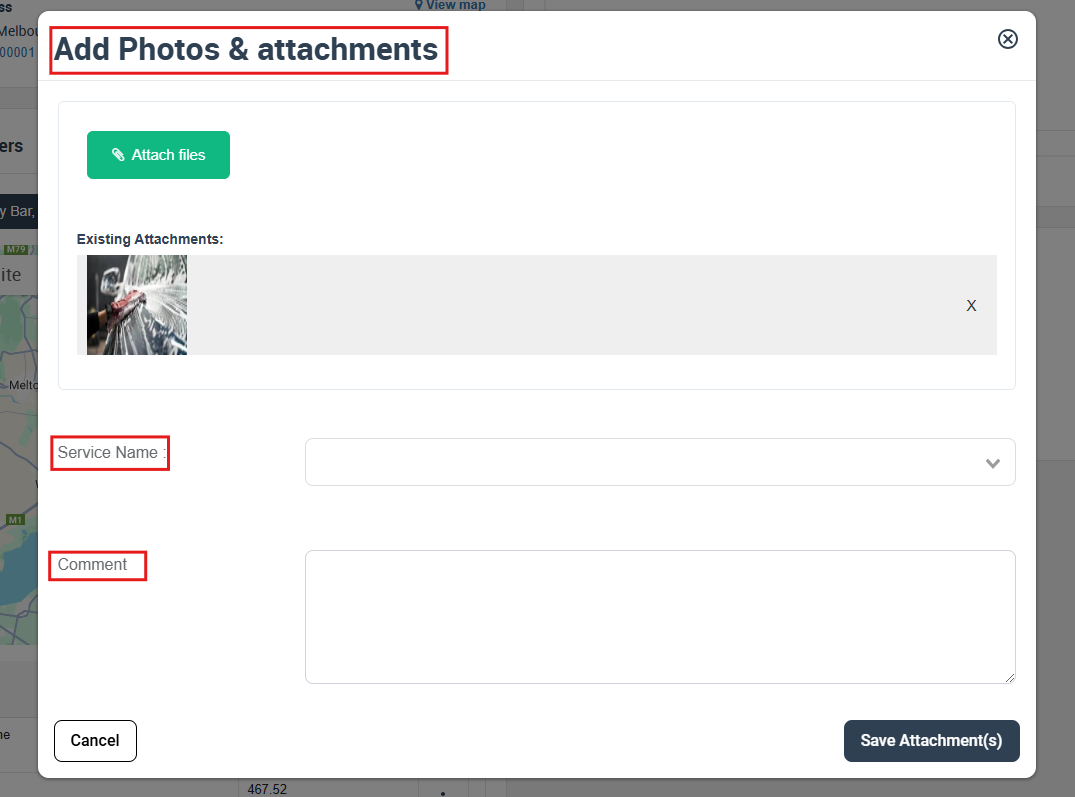
- Upload the image(s) (drag-and-drop or browse).
- Select the relevant Service Name (this acts like a service tag for reporting/filtering).
- Add an optional comment (recommended for context).
- Click Save Attachment(s).
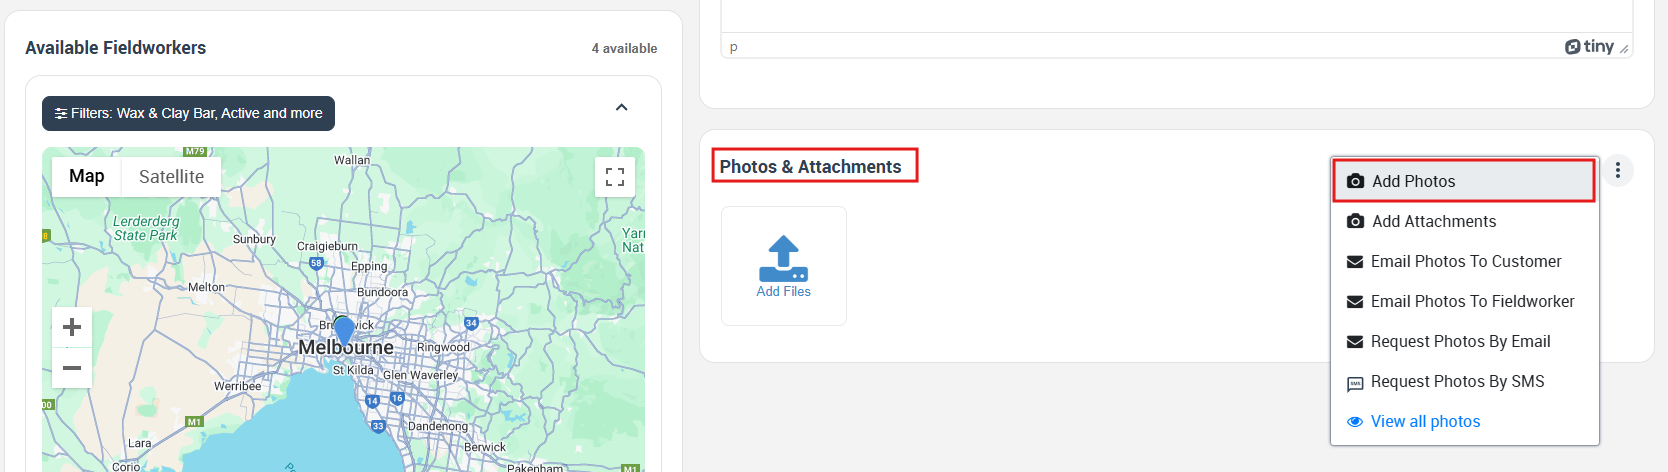
Note: The Photos & Attachments menu may also include options such as emailing photos to customers/fieldworkers, or requesting photos by email/SMS. Use these options when you want to collect more visuals quickly or share attachments with the right people.
Upload multiple photos to an inquiry
You can add multiple photos using the same upload flow. Depending on your device/browser, you can multi-select files when browsing, or repeat the upload step as needed.
Customers: attach photos/files to an inquiry (Customer Portal)
Customers can upload photos and files to support their inquiry—typically right after they submit the inquiry (depending on your portal/form setup).
- The customer submits an inquiry through your Customer Portal / inquiry form.
- After submission, they click Add Photos (or a similar prompt).
- They upload one or more files/photos, choose the relevant Service Name, and add a comment if needed.
- They click Save Attachment(s).
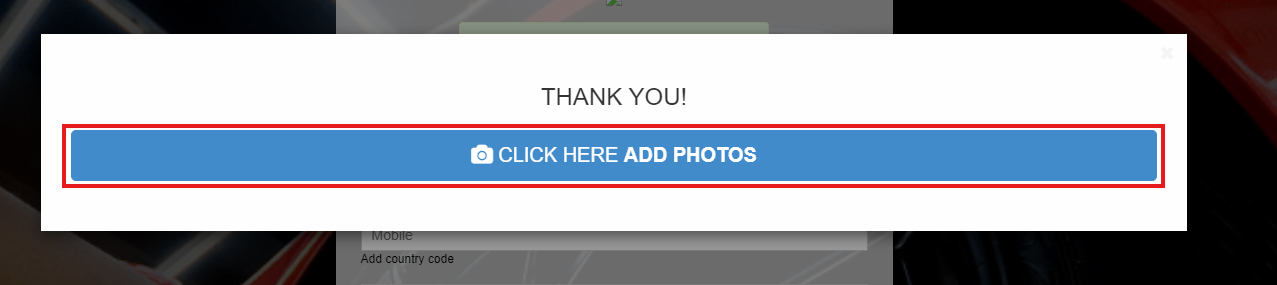
After upload: The customer typically receives an inquiry confirmation email, and your admin/office team can view the customer-uploaded files from the inquiry’s Photos & Attachments section.
Download photos from an inquiry
- Open the inquiry and go to Photos & Attachments.
- Click the photo thumbnail to open it in the gallery/viewer.
- In the viewer, click Action (or the menu icon), then select Download image.
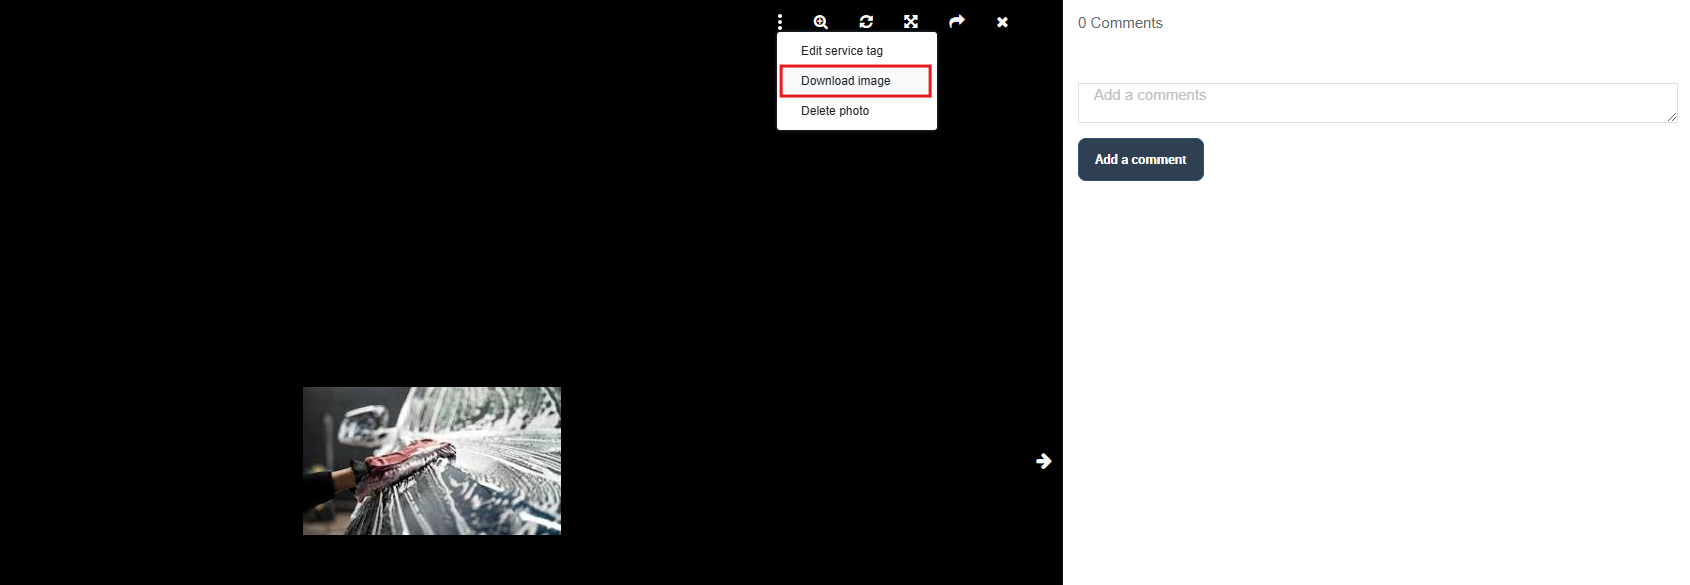
In the same viewer, you can typically zoom in/out, rotate, view the image full-screen, review upload details, and (where available) share the image to supported platforms.
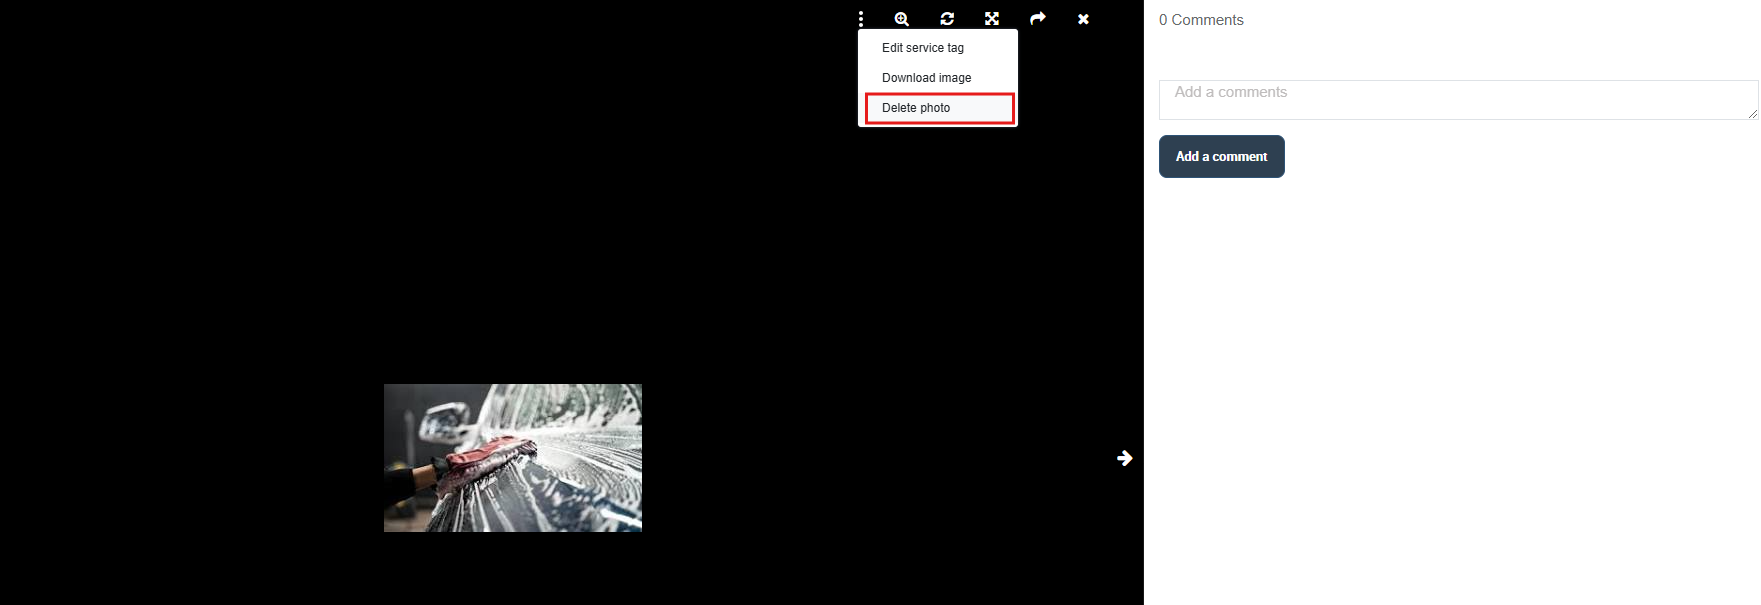
Delete an uploaded photo
- Open the photo in the viewer (click the photo thumbnail from the inquiry).
- Click Action and select Delete photo.
- Confirm the deletion when prompted.
Edit the service tag (service name) on a photo
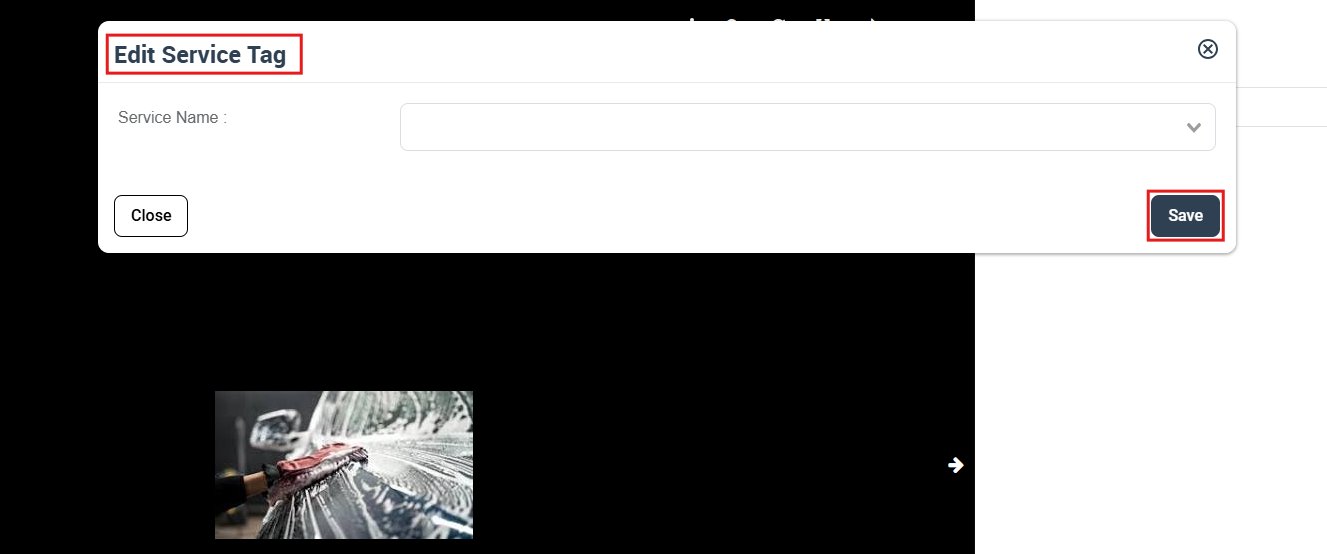
Service tagging helps you keep photos organized by the service type (useful when an inquiry includes multiple services).
- Open the photo in the viewer.
- Click Action > Edit service tag.
- Select the correct Service Name, then click Save.
Add a comment on a photo
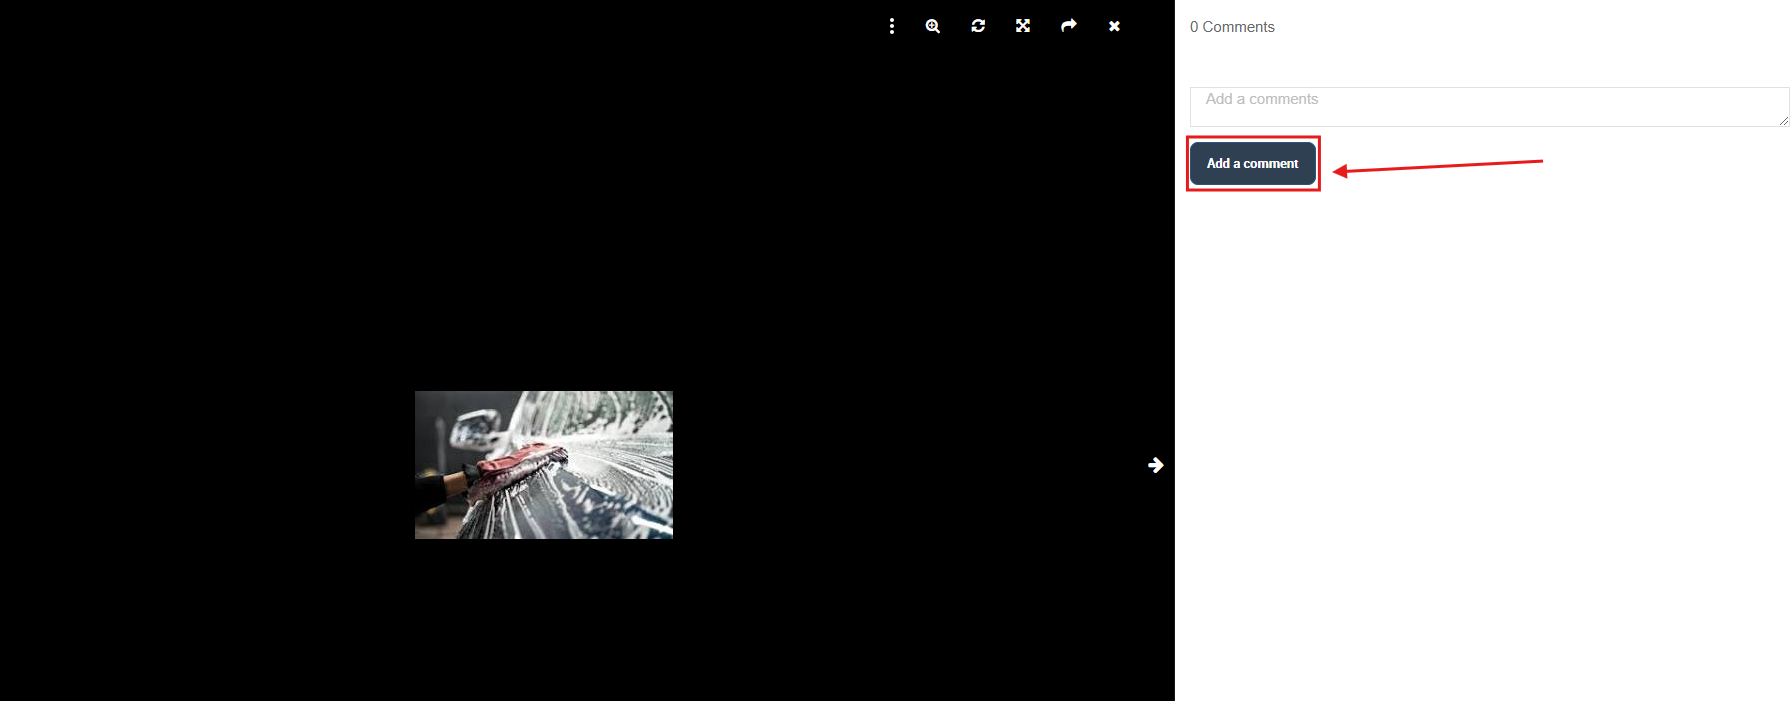
Comments are perfect for instructions like: “focus on this corner,” “before/after,” “customer says leak is here,” or “use this finish.”
- Open the photo in the viewer.
- Type your comment in the comment field.
- Click Add a comment.
Best practices (recommended)
- Always tag photos by service: makes filtering/reporting easier when a lead includes multiple services.
- Use clear comments: add measurements, room names, materials, or the customer’s exact request.
- Upload the right proof early: site photos, access constraints, compliance docs, and reference images reduce delays.
- Prepare fieldworkers properly: Remember fieldworkers see inquiry attachments only after conversion to a booking/quote and assignment—so attach key files before converting where possible.
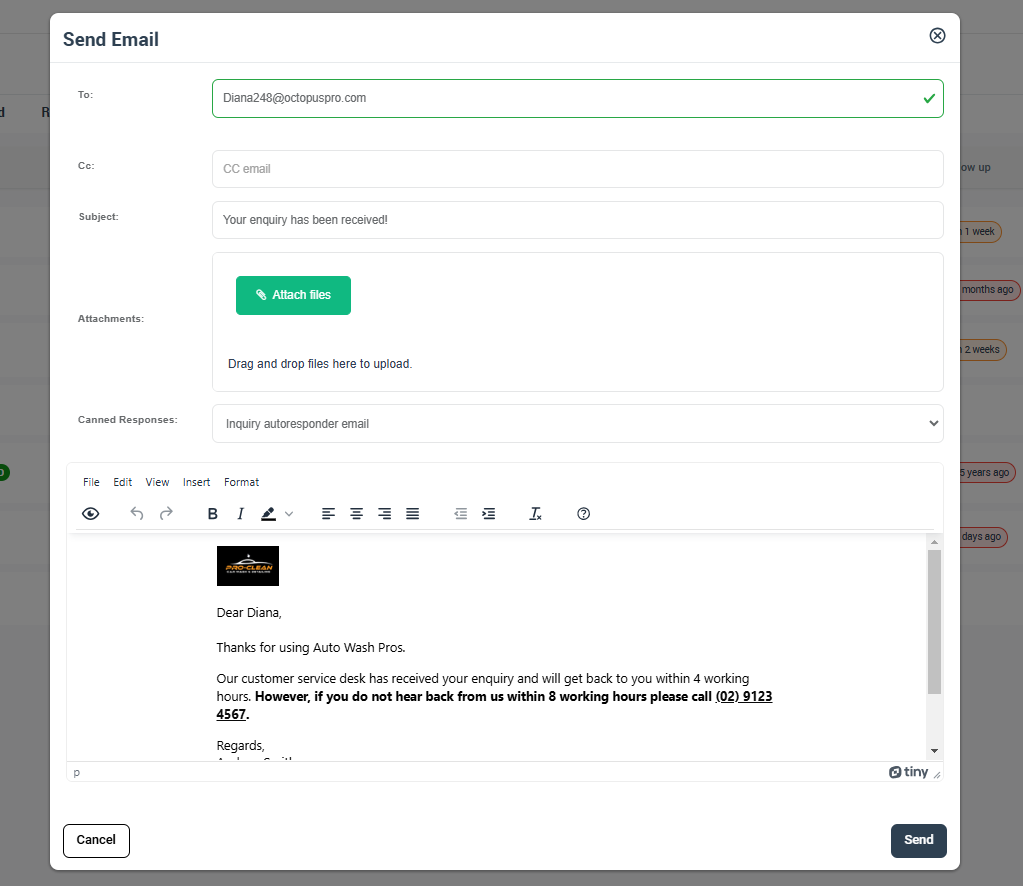
Optional: Email the customer and include attachments
If you communicate with a lead by email from inside OctopusPro, you can attach files to that email (useful for sending confirmations, requirements, checklists, or documents to sign).
Related guides
- View Inquiry Details
- Inquiry Contact Management (Email/SMS/Calls)
- Inquiry Discussion Management
- Convert Inquiry to Booking
- Convert Inquiry to Quote / Estimate
- Inquiry Labels (Tags) for Lead Management
- Upload Images, PDFs & Docs to Bookings, Quotes & Inquiries
- Lead Capture Form (Embed Inquiry Form on Your Website)
- Customer Portal Contact Us Form & Lead Capture
- Customer Portal Flags & Permissions
- Allow Customers to Upload PDFs (Customer Portal)
To stay updated, please subscribe to our YouTube channel.