
Adding / Processing a Refund for an Invoice
In the demanding landscape of the service industry, maintaining precise financial records and upholding customer trust, particularly regarding refunds, is paramount. There may be instances where due to unforeseen circumstances, a refund becomes essential. Whether a customer seeks reimbursement for a booking or a deposit they’ve placed, OctopusPro has refined the procedure to ensure a seamless experience for both businesses and their clients.
This guide elucidates the nuances of both recording a refund for any external payment and actively processing one within the system. This dual approach ensures meticulous financial accuracy and fortifies trust in your customer dealings. Moreover, it empowers you to monitor all refunds through the invoice system, ensuring a transparent trail of all financial transactions. Delve deeper to unearth the manifold benefits and methodical steps tailored for both office personnel and on-ground fieldworkers.
For refunds executed externally, such as through bank transfers or in cash, mark them in the system by associating the refund amount with a specific booking. Conversely, for online credit card transactions, initiate the refund right from the action options within the invoice.
Distinction between Adding and Processing Refunds
What’s the Difference? Understanding “Adding” vs “Processing” Refunds:
When managing refunds in OctopusPro, it’s crucial to understand the clear distinction between “adding” a refund and “processing” one. These two actions cater to different scenarios, and understanding each will ensure your business’s financial activities are recorded and executed accurately.
1. Adding a Refund to an Invoice:
When you “add” a refund to an invoice, you’re essentially recording a refund that was made externally – perhaps through a manual cash return or an outside payment platform. This action does not initiate any money transfer but rather logs the refund in your system for tracking and record-keeping purposes. It’s a way to keep your records updated and acknowledge that a refund took place outside of the OctopusPro platform.
2. Processing a Refund:
In contrast, “processing” a refund in OctopusPro is an active step that returns money to the customer. When you process a refund, it triggers a financial transaction that returns the paid amount back to the customer’s account. This action is for payments that were originally made within the OctopusPro system.
OctopusPro’s refund feature enhances your financial management:
- Easily track past transactions.
- Facilitate quick and accurate refunds.
- Eliminate manual searches across systems or physical paperwork.
- All transactions are secure and easily retrievable.
- Handle customer payments and card data with confidence.
Overview of the Add Refund Process
Adding a refund to an invoice
- Navigate to Invoices > All Invoices.
- Select the desired paid invoice.
- Scroll to the payment received section, and hit payments.

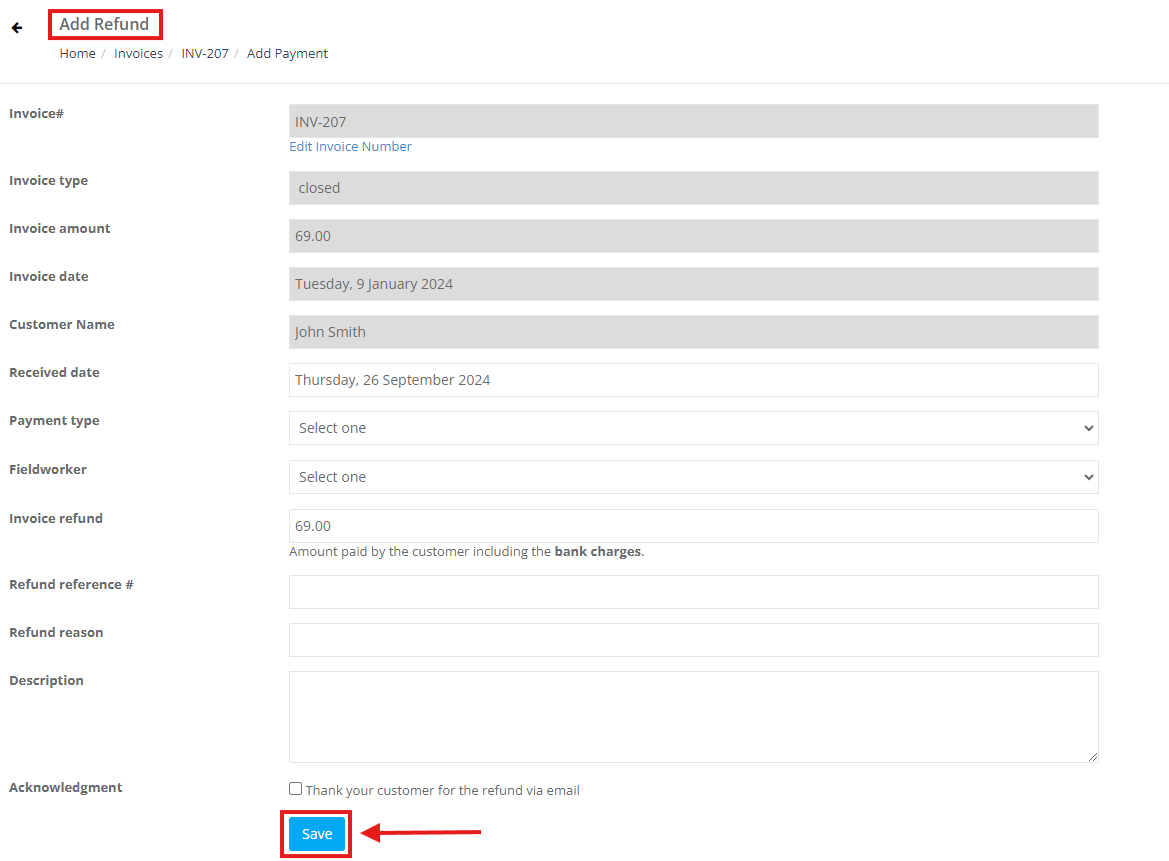
4. A pop-up-menu-will appear about payment details, Click on “Add Refund”

On the Add Refund page:
-
- Choose the invoice type.
- Input a unique Refund reference.
- Provide the Refund reason.
- Describe any additional details in the refund Description.
- Optionally, tick to thank your customer via email
- Finally, “save” your changes.
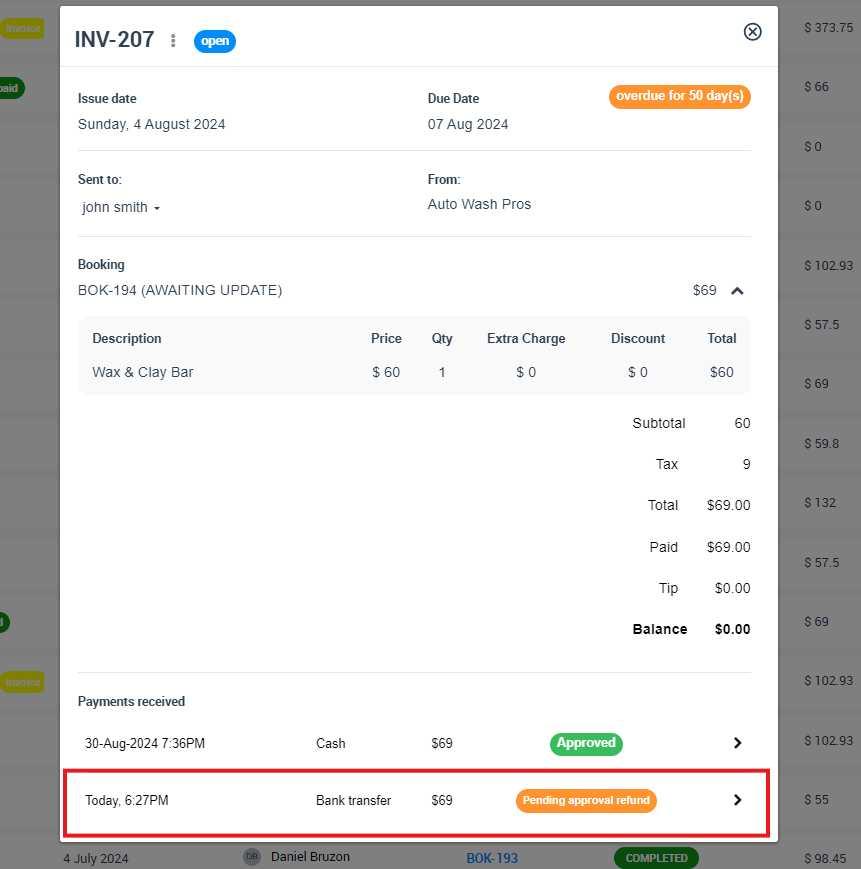
Viewing an added refund to an invoice
- Go to Invoices > All Invoices.
- Access the target paid invoice.
- Under the payment received section, there is a refund details view.
- hit Refunds to modify or remove the refund.
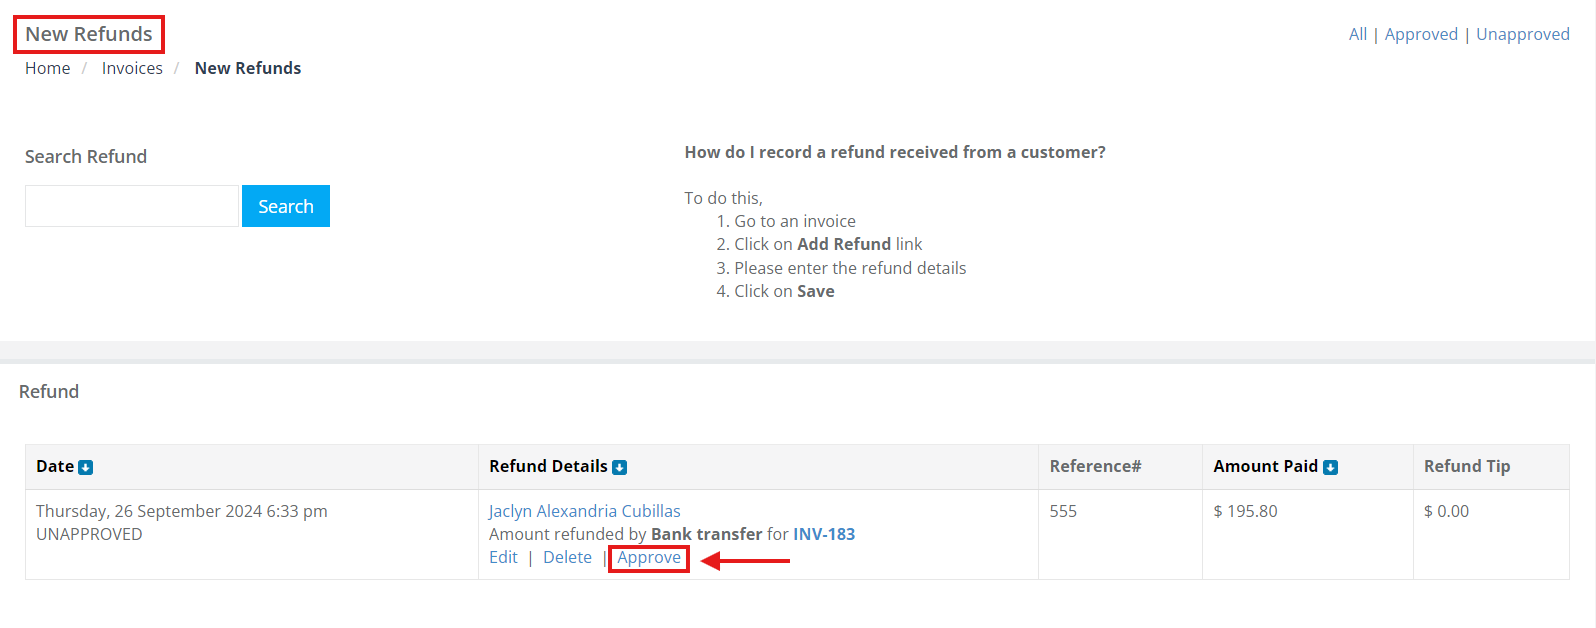
Approving an added refund
- From the sidebar menu, choose Invoices > Refunds Approval.
- Locate the refund to approve and click Approve.
Unapproving an added refund
- Navigate to Invoices > Refunds Approval from the sidebar.
- Search and select the refund you wish to unapprove.
- Click “Unapproved”.
 Deleting an added refund to an invoice
- First, unapprove the refund, from Invoices > Refunds Approval > Unapprove.
- Access the paid invoice details page.
- In the payment received section, hit Refunds.
- A pop-up menu will appear, Click on “Delete” to remove the refund.

Fieldworker Refund Requests via the Fieldworker App
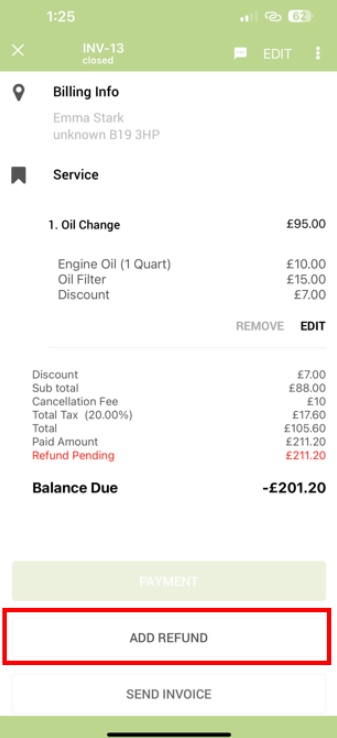
Adding a refund as a fieldworker
- Log into the app.
- Navigate to Invoices > All Invoices.
- Choose the paid invoice for the refund.
- Scroll down and click “Add Refund”.
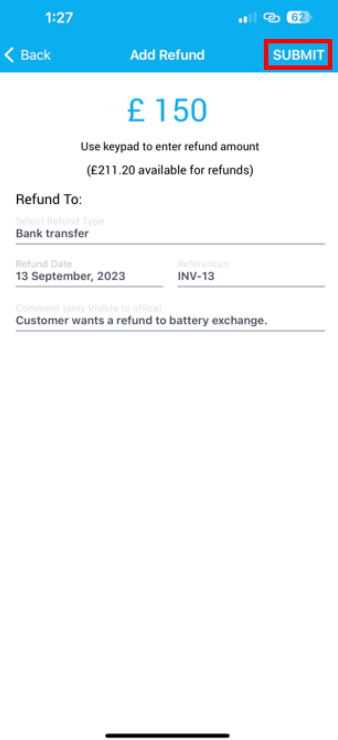
- Click on the number atop to input the refund amount.
- Select the refund type.
- Adjust the refund date, if required.
- Append any necessary comments.
- Confirm by clicking Submit.
Refund Processing
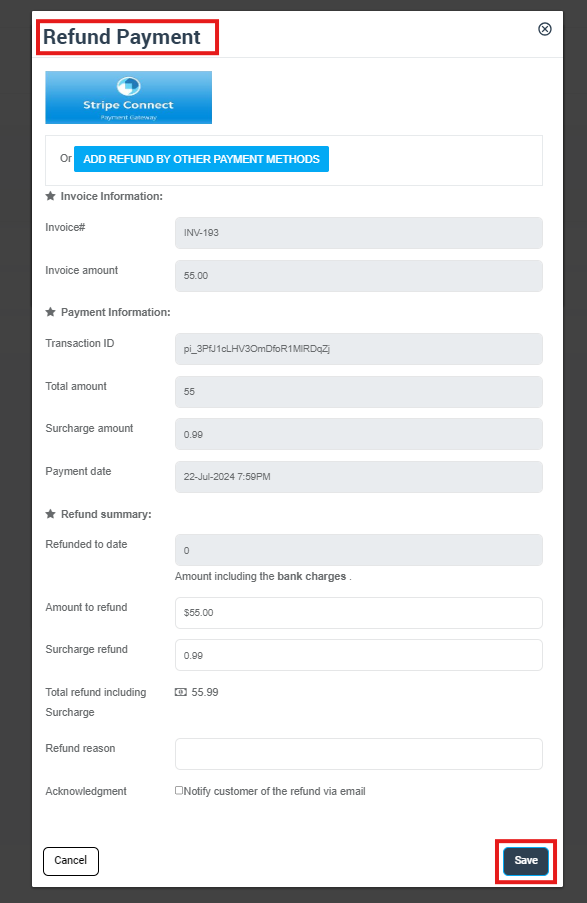
Processing Credit Card Refunds
- Go to Invoices > All Invoices.
- Open the relevant invoice

- Scroll to the payment received section and hit payments.
- A pop-up menu will appear about payment details, click on “Refund payment”.

- Verify payment details on the following page.
- Provide the Refund reason.
- Optionally, tick to notify the customer of the refund via email.
- Confirm by clicking on “save”.
Processing Refunds for External Payments
For methods like bank transfers or cash, record the refund by adding it to the invoice:
- Navigate to Invoices > All Invoices.
- Open the concerned paid invoice.
- In the payment received area, tap payments.
- A pop-up menu will appear, then “Add Refund”.
5. Follow the same steps as detailed in the “Adding a refund to an invoice” section.
Approval Workflows for Office Users
Post the addition or submission of a refund (by either an admin or a fieldworker), admin users should:
- Head to Invoices > Refund Approval.
- Search for the pending refund.
- Click “Approve”.

To stay updated, please subscribe to our YouTube channel.